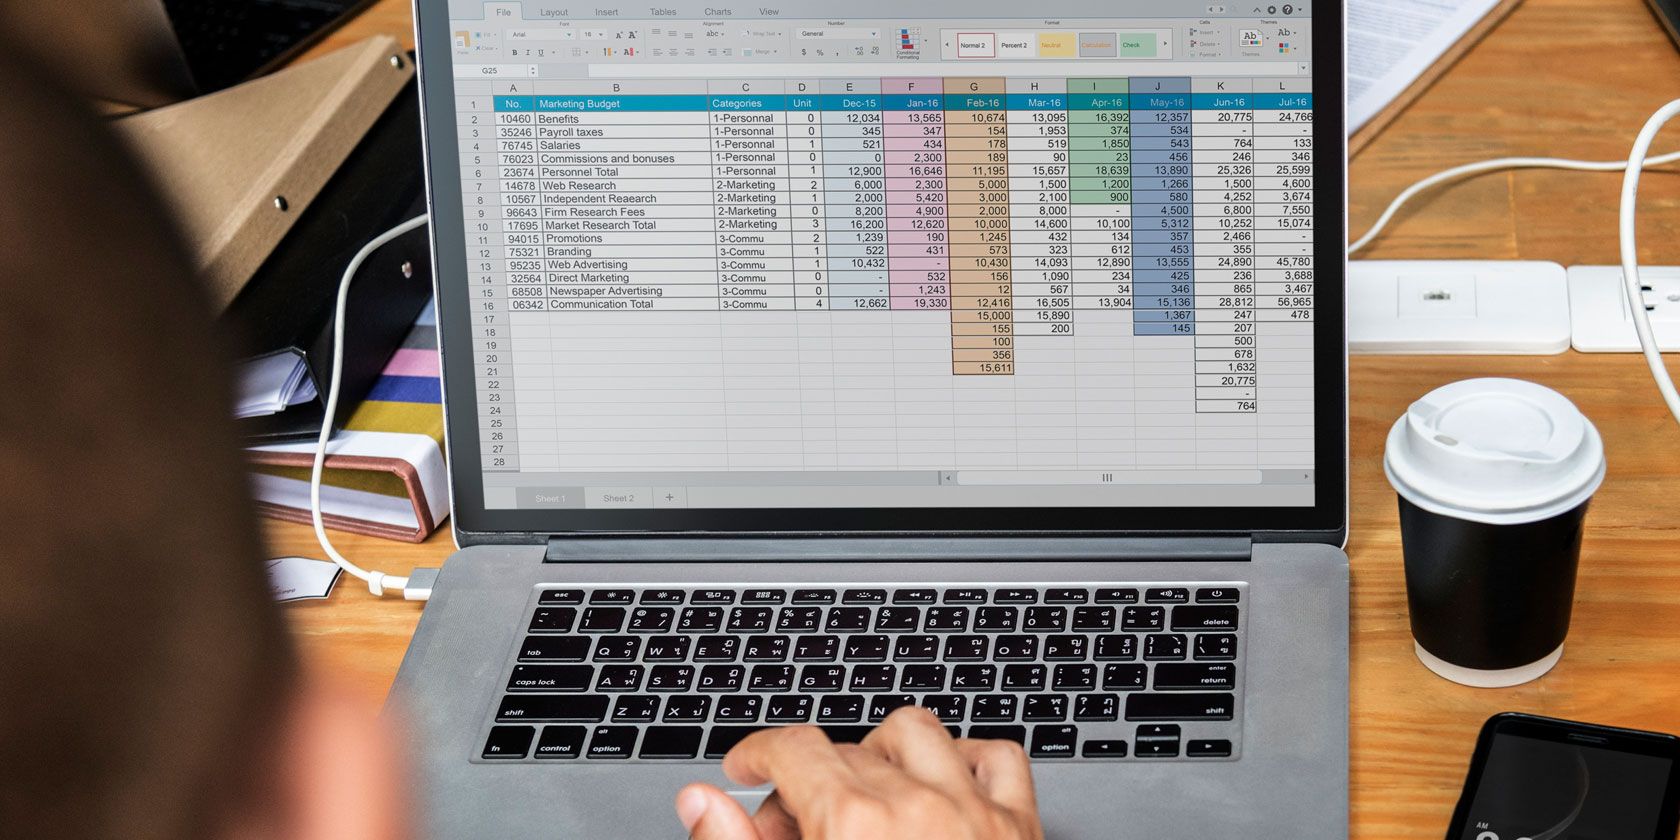
Excel Macros can save you a ton of time by automating Excel processes that you use often. But macros are actually quite limited. It’s easy to make a mistake with the recording tool, and the recording process is awkward.
Using VBA to create macros gives you a great deal more power. You can tell Excel exactly what to do and how to do it. You also get access to a lot more functions and capabilities. If you use Excel regularly, it’s worth learning how to create VBA macros.
We’ll start with the basics.
What Is VBA?
VBA is Visual Basic for Applications, a programming language that you can use in many Microsoft apps. Visual Basic is a programming language, and VBA is the application-specific version of it. (Microsoft discontinued Visual Basic back in 2008, but VBA is still going strong).
Fortunately for non-programmers, VBA is very simple, and the interface that you use to edit it offers a lot of assistance. Many of the commands you’ll use pop up suggestions and automatic completions, helping you get your script working quickly.
Still, VBA takes a while to get used to.
The Advantages of VBA Macros in Excel
If VBA is more difficult than recording a macro, why would you use it? The short answer is that you get a lot more power out of VBA macros.
Instead of clicking around your spreadsheet and recording those clicks, you can access Excel’s full range of functions and capabilities. You just need to know how to use them.
And once you’re more comfortable with VBA, you can do all the things you might do in a regular macro in a lot less time. The results will also be more predictable, as you’re telling Excel exactly what to do. There’s no ambiguity at all.
Once you’ve created your VBA macro, it’s easy to save and share it so anyone else can take advantage of it. This is especially useful when you’re working with a lot of people who need to do the same things in Excel.
Let’s look at a simple VBA macro to see how it works.
An Example of a VBA Macro in Excel
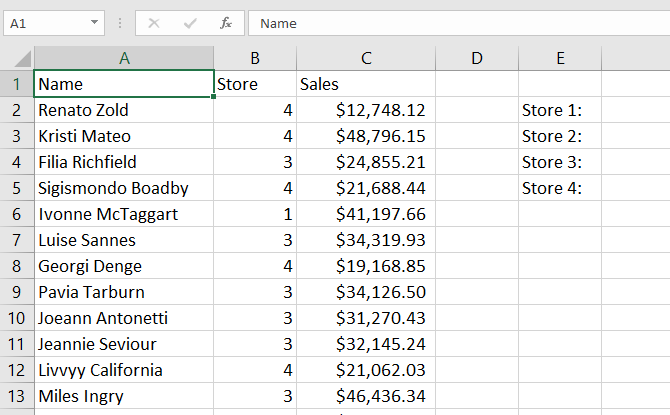
Let’s look at a simple macro. Our spreadsheet contains names of employees, the store number where the employees work, and their quarterly sales.
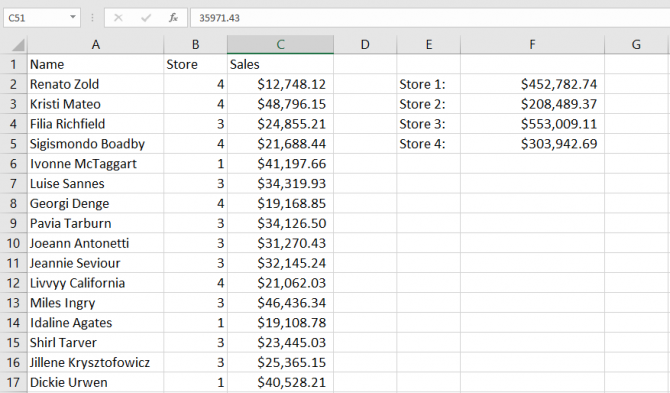
This macro will add the quarterly sales from each store and write those totals to cells in the spreadsheet (if you’re not sure how to access the VBA dialog, check out our VBA walkthrough here):
Sub StoreSales()

Dim Sum1 As Currency
Dim Sum2 As Currency
Dim Sum3 As Currency
Dim Sum4 As Currency

For Each Cell In Range("C2:C51")
  Cell.Activate
  If IsEmpty(Cell) Then Exit For
  If ActiveCell.Offset(0, -1) = 1 Then
    Sum1 = Sum1 + Cell.Value
  ElseIf ActiveCell.Offset(0, -1) = 2 Then
    Sum2 = Sum2 + Cell.Value
  ElseIf ActiveCell.Offset(0, -1) = 3 Then
    Sum3 = Sum3 + Cell.Value
  ElseIf ActiveCell.Offset(0, -1) = 4 Then
    Sum4 = Sum4 + Cell.Value
End If
Next Cell

Range("F2").Value = Sum1
Range("F3").Value = Sum2
Range("F4").Value = Sum3
Range("F5").Value = Sum4

End Sub
This might look long and complicated, but we’ll break it down so you can see the individual elements and learn a bit about the basics of VBA.
Declaring the Sub
At the beginning of the module, we have “Sub StoreSales()”. This defines a new sub called StoreSales.
You can also define functions—the difference is that functions can return values, and subs can’t (if you’re familiar with other programming languages, subs are the equivalent of methods). In this case, we don’t need to return a value, so we’re using a sub.
At the end of the module, we have “End Sub,” which tells Excel that we’re done with this VBA macro.
Declaring Variables
The first lines of code in our script all start with “Dim.” Dim is VBA’s command for declaring a variable.
So “Dim Sum1” creates a new variable called “Sum1.” However, we need to tell Excel what kind of variable this is. We need to choose a data type. There are many different data types in VBA—you can find the full list in Microsoft’s help documents.
Because our VBA macro is going to be dealing with currencies, we’re using the Currency data type.
The statement “Dim Sum1 As Currency” tells Excel to create a new Currency variable called Sum1. Every variable that you declare needs to have an “As” statement to tell Excel its type.
Starting a For Loop
Loops are some of the most powerful things you can create in any programming language. If you’re not familiar with loops, check out this explanation of Do-While loops. In this example, we’re using a For loop, which is also covered in the article.
Here’s what the loop looks like:
For Each Cell in Range("C2:C51")
[a bunch of stuff]
Next Cell
This tells Excel to iterate through the cells in the range we specified. We’ve used a Range object, which is a specific type of object in VBA. When we use it this way—Range(“C2:C51”)—it tells Excel that we’re interested in those 50 cells.
“For Each” tells Excel that we’re going to do something with each cell in the range. “Next Cell” comes after everything we want to do, and tells Excel to start the loop from the beginning (starting with the next cell).
We also have this statement: “If IsEmpty(Cell) Then Exit For.”
Can you guess what it does?
Note: Strictly speaking, using a While loop may have been a better choice. However, for the sake of teaching, I decided to use a For loop with an Exit.
If-Then-Else Statements
The core of this particular macro is in the If-Then-Else statements. Here’s our sequence of conditional statements:
If ActiveCell.Offset(0, -1) = 1 Then
  Sum1 = Sum1 + Cell.Value
  ElseIf ActiveCell.Offset(0, -1) = 2 Then
  Sum2 = Sum2 + Cell.Value
  ElseIf ActiveCell.Offset(0, -1) = 3 Then
  Sum3 = Sum3 + Cell.Value
  ElseIf ActiveCell.Offset(0, -1) = 4 Then
  Sum4 = Sum4 + Cell.Value
End If
For the most part, you can probably guess what these statements do. You might not be familiar with ActiveCell.Offset, though. “ActiveCell.Offset(0, -1)” tells Excel to look at the cell that’s one column to the left of the active cell.
In our case, that’s telling Excel to consult the store number column. If Excel finds a 1 in this column, then it takes the contents of the active cell and adds it to Sum1. If it finds a 2, it adds the contents of the active cell to Sum2. And so on.
Excel goes through all of these statements in order. If the conditional statement is satisfied, it completes the Then statement. If not, it moves into the next ElseIf. If it gets all the way to the end and none of the conditions have been satisfied, it won’t take any action.
The combination of the loop and the conditionals is what drives this macro. The loop tells Excel to go through each cell in the selection, and the conditionals tell it what to do with that cell.
Writing Cell Values
Finally, we get to write the results of our calculations to cells. Here are the lines we use to do that:
Range("F2").Value = Sum1
Range("F3").Value = Sum2
Range("F4").Value = Sum3
Range("F5").Value = Sum4
With “.Value” and an equals sign, we set each of those cells to the value of one of our variables.
And that’s it! We tell Excel that we’re done writing this Sub with “End Sub,” and the VBA macro is complete.
When we run the macro with the Macros button in the Developer tab, we get our sums:
Putting Together the Building Blocks of VBA in Excel
When you first look at the VBA macro above, it looks quite complex. But after breaking it down into its constituent parts, the logic becomes clear. Like any scripting language, it takes time to get used to the syntax of VBA.
But with practice, you’ll build up your VBA vocabulary and be able to write macros faster, more accurately, and with much more power than you could ever record them.
When you get stuck, running a Google search is a quick way to get your VBA questions answered. And Microsoft’s Excel VBA reference can be helpful if you’re willing to dig through it for a technical answer.
Once you’re comfortable with the basics, you can start using VBA for things like sending emails from Excel, exporting Outlook tasks, and displaying your PC information.
Read the full article: A Beginner’s Tutorial on Writing VBA Macros in Excel (And Why You Should Learn)
Read Full Article
No comments:
Post a Comment