19 February 2019

YouTube Simplifies Its Channel Strike System


YouTube is updating its Community Guidelines to make the strike system for channels clearer and more consistent. This should help YouTubers know what to expect when they breach YouTube’s rules, and help more creators stay on the right side of the line.

YouTube has taken a lot of grief of late. Creators have become increasingly annoyed at the way YouTube works, with frustrations boiling over with YouTube Rewind 2019. However, YouTube appears to be listening, and taking steps to get YouTubers back on side.

YouTube Simplifies Strike System

On the YouTube Creator Blog, YouTube details the latest changes to its Community Guidelines. These changes are designed to simplify the strike system, making it easier to understand and more consistent across the board. Or at least that’s the plan.

Until now, YouTube has employed a three-strikes-and-you’re-out policy. However, different strikes would result in different penalties. Which was confusing for YouTubers. From February 25, 2019, YouTube is instituting a new strike system for channels.

From now, the first strike will land you a one-week ban on uploading new content. The second strike will land you a two-week ban. And the third strike will result in termination. Strikes expire after 90 days. This is regardless of what guideline has been broken.

However, YouTube is offering everyone the chance to learn from their first mistake. So even before the first strike kicks in, channels will receive a one-time warning which results in no penalties other than the offending content being removed.

Most YouTubers Behave Themselves

YouTube is keen to point out that the majority of channels never break its Community Guidelines, with 98 percent keeping their nose clean. And of those who do receive a first strike, 94 percent never receive a second one. Suggesting the system works well.

Still, nothing is perfect, so kudos to YouTube for trying to improve the strike system for channels. These changes follow on from YouTube introducing new ways for YouTubers to make money, so regardless of their shortcomings, the people in charge are listening.

Read the full article: YouTube Simplifies Its Channel Strike System


Read Full Article

The Best Computer Security and Antivirus Tools


best-antivirus-security

Malware is on the rise. And phishing attacks. And ransomware, identify theft, data breaches, and much more. Not only are cybersecurity attacks and vulnerabilities on the rise, but their impact also costs more, takes longer to recover from, and can be extremely damaging.

It’s high time for you to consider your system security. There are so many anti-this and anti-that programs out there, it can be difficult separating the security wheat from the cyber chaff.

Confused about computer security? Don’t know how to protect your computer? In this guide, we’ll show you the software and tools we use to secure our own computers. Here are the best security software and tools.

Jump Ahead: Antivirus | Anti-Malware | Anti-Ransomware | Firewall | Backup Tools | Browser Security | Disk Encryption | Password Managers | Security Utilities | VPNs

The Best Antivirus Software

Every Windows device should have an antivirus suite installed. Windows Defender Security Center is the default Windows 10 antivirus. To be fair to Microsoft, Windows Defender is more effective than ever. It isn’t the best, but it’ll certainly do in a pinch. Otherwise, you need to check out one of the paid or free antivirus options below.

Bitdefender Antivirus Plus 2019

bitdefender 2019 home panel

Bitdefender products constantly feature at the top of “best of” antivirus and security application lists. And for a good reason. Bitdefender Antivirus Plus 2019 builds on 2018’s excellent offering and offers some of the most comprehensive protection.

The comprehensive protection keeps you safe from a huge range of vulnerabilities and attack vectors. The 2019 iteration introduces updates to ransomware protection, placing a “remediation layer” over your videos, pictures, and documents that stop ransomware attacks destroying your data.

Another useful addition is the updated Network Threat Prevention which uses a network-based layer of protection to stop attackers exploiting vulnerabilities in your system before they even get started.

Bitdefender Antivirus Plus 2019 retails for $49.99 for a single year’s license.

Kaspersky Total Security

Kaspersky total security home screen 2019

Kaspersky Total Security is an excellent security product for home users. Like Bitdefender, Kaspersky Total Security consistently features at the top of “best of” lists. In fact, the Cryptomalware Protection system is one of the best consumer ransomware protection products (as part of a suite).

Better still, Kaspersky registers fewer false positives than almost every other antivirus suite.

Kaspersky Total Security is also a great choice for those looking for parental control. You can control and manage your children’s device profiles all through your Kaspersky Total Security suite, blocking and controlling access to websites in 14 different categories as well as setting device online time limits.

Kaspersky Total Security retails for $99.99 for a single year’s license.

Webroot Antivirus Security

best computer security and antivirus tools and apps

Webroot Antivirus is one of the smallest antivirus programs, faster than its competition and consistently clocking in ahead of Trend Micro, Norton, Kaspersky, and the rest. Also, it’s tiny. The Webroot installation directory takes up just 15MB, compared to an average of 500MB for its competitors.

Size doesn’t matter, though. It is what you scan with it. And Webroot continues to pack a serious amount of system protection into its tiny package. Webroot Antivirus Security is the basic package, offering additional identity theft protection, webcam protection, banking, and phishing protection, as well as excellent customer support.

Another plus for Webroot Antivirus Security is how nicely it plays with older systems with limited resources. If you’re running an older machine but still want comprehensive protection, give Webroot a try.

Webroot Antivirus Security retails for $39.99 for a single year’s license for a single device.

The Best Anti-Malware Software

Do you need a third-party firewall? Honestly, I don’t think you do. Windows Firewall is an excellent choice, as you’ll see below, but if you want some additional functionality, then we’ve offered some other options you can check out.

Malwarebytes

malwarebytes premium update 2019

There is one program that you’ll find on almost every single anti-malware list: Malwarebytes. Malwarebytes for Windows (formerly Malwarebytes Anti-Malware) is one of the grandfathers of modern system security. It is well respected, constantly updated, and has excellent detection and removal rates.

Malwarebytes comes in two flavors: Free or Premium. The major difference between the two is live system scanning. Malwarebytes Premium actively scans and protects your system, while the Free version is for remediation only. If you’re looking to build a robust defense barrier, Malwarebytes Premium is an excellent choice.

Malwarebytes Premium currently retails for $39.99 for single year’s license.

Zemana AntiMalware

best computer security and antivirus tools and apps

If you don’t like Malwarebytes, I would advise giving Zemana AntiMalware a try. Like Malwarebytes, Zemana comes in Free and Premium flavors. The Free version features a pretty fast system scan (system dependent, of course, but it seems to be consistently speedy), the choice of either Smart or Deep scanning, and will attack advanced threats like bootkits and rootkits.

If you want full system real-time protection, you’ll need the Premium version. Zemana Premium features additional protection modules for ransomware, zero-day exploits, and more. If you find a particularly difficult to remove malware variant, Zemana engineers are on call 24/7 to offer advice. In fact, they have been known to remote connect to a compromised system to manually remove an infection.

Zemana Premium currently retails for $29.95 for a single year’s license.

HitmanPro.Alert

best computer security and antivirus tools and apps

Your final anti-malware program for consideration is HitmanPro.Alert.

HitmanPro is a “secondary antivirus scanner.” That means it works alongside your existing antivirus to catch and remove anything that slips through the net. And HitmanPro is really good at doing just that.

I use HitmanPro every time someone gives me an infected laptop. After scanning with an antivirus program, then an antimalware program, HitmanPro catches anything lurking in the dark corners of the system.

It is powerful, has an extremely easy-to-use interface, and is lightweight. HitmanPro.Alert is the premium version. As well as offering real-time protection, ransomware protection, and banking protection, HitmanPro.Alert has a particularly good success rate regarding bootkits and rootkits when compared to its competitors. These represent some of the nastier infections in the current malware landscape and HitmanPro.Alert is one of the best preventative tools available.

HitmanPro.Alert currently retails for $34.95 for a single year’s license.

The Best Anti-Ransomware Software

Along with antivirus and anti-malware programs, specialized anti-ransomware programs play an increasingly important role in system protection. The majority of antivirus and anti-malware suites now feature some form of integrated anti-ransomware protection.

However, specialized anti-ransomware tools update faster, cover broader ransomware definitions, and offer another layer of protection in a multi-layer security solution that doesn’t interfere with your existing programs.

CyberSight RansomStopper

cybersight ransomstopper anti-ransomware software tool

CyberSight RansomStopper is a new addition to this list. It is well worth your time, effectively stopping some of the worst ransomware variants, such as the notorious Petya, WannaCry, Locky, and Cerber amongst others.

RansomStopper keeps track on ransomware by placing a series of “smart traps” throughout your system. The traps are honeypots that sucker the ransomware in before RansomStopper alerts the rest of the system as to what is going on. The anti-ransomware tool uses a machine learning algorithm to ensure “automated and continuous learning” about the latest threats.

One slight downside is that the free version of CyberSight RansomStopper doesn’t protect your Master Boot Record (MBR), which some ransomware variants target specifically. However, there’s a chance your antivirus and antimalware cover that gap—but double check with your programs rather than assuming.

Malwarebytes Anti-Ransomware BETA

best computer security and antivirus tools and apps

The Malwarebytes name is synonymous with security. Many of the extensive list of Malwarebytes for Windows (linked to earlier in the guide) features start life as beta testing products—anti-ransomware is just the latest step. Malwarebytes Anti-Ransomware specifically monitors your system for known ransomware activity, blocking infections and quarantining infected files before system files are encrypted.

Note: Malwarebytes Anti-Ransomware BETA is not designed to run alongside Malwarebytes free 3.x and onwards. You should not run the tools alongside one another because they use similar resources, causing a clash. The anti-ransomware tool is fully integrated into Malwarebytes Premium 3.x and onwards, offering the best all-round protection.

Kaspersky Anti-Ransomware Tool

Kaspersky also has a vested interest in stopping ransomware. The Kaspersky antivirus suite is excellent. But their Anti-Ransomware tool adds a layer of security that puts many other options to shame. Kaspersky Lab is well known for its active approach to ransomware. Along with this free anti-ransomware tool, Kaspersky also develops and release ransomware decryption tools where possible.

As with Malwarebytes, you don’t need the main security suite to secure your system against ransomware better.

The Best Firewall Software

Consumer firewalls have become somewhat unfashionable. They don’t have the same cutting-edge, search and obliterate characteristics of antivirus and antimalware programs. They do, however, perform an incredibly important role in computer security. And it is usually one that you are not aware of—until your firewall fails, and you’re scrambling for a security solution.

Windows Firewall

best computer security and antivirus tools and apps

You don’t need anything but the integrated Windows Firewall. A firewall essentially opens and closes ports. The Windows Firewall does exactly this, lets you create rules, control which ports are in use and, best of all, leaks very little information to the outside world.

Windows security products took a bit of a bashing throughout the late 90s and 2000s. But the integrated Windows Firewall is consistent, uses very few resources, and is extremely easy to configure. Plus, there are numerous tutorials on configurations for almost any program. If you have a problem, there is a strong chance someone else has already encountered it, solved it, and posted their results on the internet.

ZoneAlarm Free

zonealarm firewall free 2019

ZoneAlarm remains one of the best free alternatives to Windows Firewall. There is a premium ZoneAlarm version that features numerous additional options, but the free edition is sufficient for the majority of people.

The latest version of ZoneAlarm Free adds a few new features. For instance, you can now use “Full Stealth Mode” to completely hide your device from other computer networks. Another handy feature is ZoneAlarm’s Identity Protection Services which guards your personal data against attackers. (US readers can also use ZoneAlarm’s victim recovery assistance.)

Also handy is the “Auto-Learn” or “Max Security” modes, letting the firewall learn how you use your applications and the internet or configure everything yourself.

GlassWire

best computer security and antivirus tools and apps

GlassWire is a cool firewall and system monitoring tool. For a long time, internet and computer security was green text on black backgrounds and other poorly considered UIs. GlassWire didn’t change this, but the UI and overall resource display are delightful, making spotting and shutting down incoming issues a visual pleasure.

GlassWire is a mixture of both worlds. You probably don’t interact with your existing firewall. That’s good—it means it is doing its job. But GlassWire gives you the opportunity to spot a sudden surge in system activity, identify what’s causing it, and close the process, port, or internet connection before it escalates.

The Best Backup Software and Tools

Along with preventative and protective software, you need to take regular system backups. Windows 10 has an integrated but basic backup service. Also, it is easy to confuse system backup with system imaging, and again with system restore points.

  • System Image: An exact copy of an entire drive. A system image can be used to restore the computer to the moment the image was taken. System images are generally stored on the same system, ready for use, but can also export to removable media.
  • System Restore Point: Your system periodically creates System Restore points. If you encounter a major issue and can remember the last good working configuration, rolling back to a restore point is a good option.
  • Full Backup: A full backup is usually a compressed offline copy of an entire system or select parts of a system.

With that in mind, let’s look at some of the best backup software and tools.

Cobian Backup

best computer security and antivirus tools and apps

Cobian Backup is one of the best free backup tools on offer. If you want local or FTP backups, Cobian offers a range of advanced features that are largely easy to use. You can create a full backup, incremental backup, or differential backup, as well as setting the level of compression. Furthermore, you can create regular backup schedules and define the number of backups to keep before deleting old ones.

The Cobian Backup interface is relatively simple, and the program is full of helpful tooltips if you get lost along the way.

EaseUS Todo Backup Free

easeus todo backup free version 2019

A new addition to the list, EaseUS Todo Backup Free covers a huge range of backup types. For instance, you can backup individual files and folders, whole drives, specific partitions, or the classic full system backup. There’s also an option to backup your files to a cloud storage solution, too.

A handy tool for many users is the “smart” backup option. You can use the smart option to backup files and folders you use frequently and couldn’t cope without losing. You can set the smart feature to detect changes every half an hour and make a backup if so.

Backblaze

best computer security and antivirus tools and apps

If you prefer a cloud backup option, consider Backblaze. Backblaze consistently rates among the best cloud backup solutions. And since direct competitor CrashPlan closed its doors, Backblaze represents the best value cloud backup solution.

Backblaze is lightweight and features a minimalist UI that helps users find their way around. For most users, continuous backup is the best option. This means your backup is updated every time you make a change to or add a file to your system. While this sounds like it will drain system resources, it doesn’t. Creating your initial backup should be the only time you notice Backblaze whirring up. Otherwise, it silently lurks in the background, taking care of business.

Backblaze currently retails for $50 for a single year’s license for a single device. This includes unlimited data.

The Best Browser Security Tools

Web browsers are vulnerable. Browsers have issues, are exploited by hackers and, as the portal to a vast amount of private data, are under near-constant attack. Phishing and other fraudulent attacks—like malvertising and cryptojacking—rose throughout 2018, just as they did in 2017, 2016, and before.

The following software and tools help to keep you safe as you use your browser while surfing the web.

uBlock Origin

best computer security and antivirus tools and apps

uBlock Origin remains one of the best and most popular blockers out there. It features numerous inbuilt lists that block known malicious ad servers, malicious scripts, trackers, and much more. It is easy to add and remove lists as you see fit, while the blocking lists regularly update with new targets.

Download: uBlock Origin for Chrome | Firefox | Opera | Microsoft Edge | Safari

uMatrix

uMatrix is similar to uBlock Origin but allows for granular blocking of specific types of content on individual domains. For instance, you can block cookies from a site while still accessing media content—certainly a boost for privacy. uMatrix also features integrated user agent control and referral types.

Download: uMatrix for Chrome | Firefox | Opera

Disconnect

Disconnect gives users a visual representation of exactly who and what is attempting to connect to their browser. By routing all of the user’s traffic through an encrypted tunnel, Disconnect allows you to pick and choose the advertising, analytics, social, and content requests that arrive in our browser.

Disconnect acts as a VPN. That means it won’t work with your regular VPN, so you might want to choose an alternative.

Download: Disconnect for Chrome | Firefox | Opera | Safari

NoScript and ScriptSafe

NoScript is a pre-emptive malicious script-blocking app, available for Firefox.

Download: NoScript for Firefox

ScriptSafe performs a similar role for Google Chrome. However, it isn’t quite the same as Chrome’s development style doesn’t allow the same functionality as NoScript. It is still a handy tool, nonetheless.

Download: ScriptSafe for Chrome

HTTPS Everywhere

HTTPS is slowly becoming the de facto internet security standard. In 2018, the number of the top one million visited websites actively redirecting to HTTPS rose to 51.8 percent. But there are still a huge number of sites that don’t use it.

The Electronic Frontier Foundation’s HTTPS Everywhere forces websites to use HTTPS protocol at all times, protecting your data wherever you go.

Download: HTTPS Everywhere for Chrome | Firefox | Opera

Safari users should try and use DuckDuckGo, which redirects users to the HTTPS version of a site. Alternatively, try SSL Always, via the Mack Kung Fu blog. A Microsoft Edge HTTPS Everywhere port is underway, though as Microsoft is switching the Edge Browser development to the open source Chromium platform, you are more likely to see a native HTTPS Everywhere Microsoft Edge extension in the future.

The Best Disk Encryption Software

More and more “regular” users are realizing their data needs serious protection and now understand that full disk encryption is an excellent way to go. Getting to grips with encryption? Here are essential encryption basic terms for you to sink your teeth into.

Bitlocker

best computer security and antivirus tools and apps

One of the best full disk encryption options is BitLocker. If you have Windows 10 Pro, Enterprise, or Education, you have BitLocker installed. It is just a matter of firing it up and learning how to use it. Unfortunately, Windows 10 Home users must use one of the (also excellent) alternatives below.

BitLocker is great for a couple of reasons. One, it is fully integrated with your existing operating system. This alleviates issues regarding third-party software vulnerabilities. Second, it uses powerful encryption to keep your files completely secure, and you can select from a range unlock options too.

VeraCrypt

best computer security and antivirus tools and apps

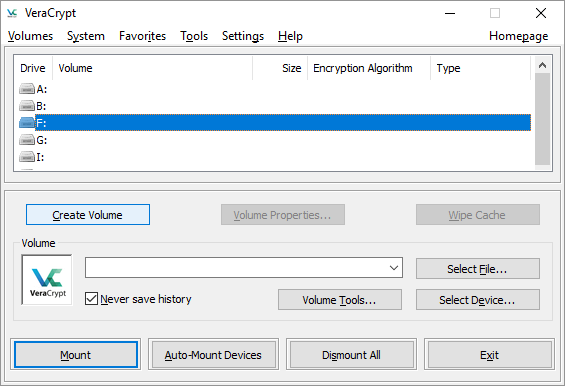
There are several free alternatives to BitLocker. Perhaps the best known is VeraCrypt, built from the ashes of depreciated encryption tool, TrueCrypt. VeraCrypt is full of handy tools. These include virtual encrypted disk creation and mounting, full drive or partition encryption, and pre-boot authentication.

VeraCrypt gives users a wider range of encryption options than BitLocker. It has a choice of hashing algorithms too. If you’re not upgrading to Windows 10 Pro, VeraCrypt is absolutely the way to go. In fact, even if you do have BitLocker, still consider VeraCrypt’s advanced options. After all, it’s free!

Jetico BestCrypt Volume Encryption

best computer security and antivirus tools and apps

Jetico is one of the best paid full disk encryption options on the market. It encrypts a huge range of volume types, including RAID drives, as well as offering pre-boot authentication (with awesome customizable text, too). Another useful option is only to boot selected encrypted volumes within a trusted network. That keeps your drive locked down unless connected to a predefined safe network.

Jetico BestCrypt Volume Encryption currently retails for $119.40 for a single year’s license.

The Best Password Managers

I’m only dedicating a small segment to password managers. Why? My colleagues have covered password managers extensively, like this article on password manager features you’re not using! However, I’ll give you the best three password managers to consider.

LastPass

best computer security and antivirus tools and apps

LastPass remains one of the best password management options for many users. It is easy to use, offers a secure vault for password storage, and is priced extremely competitively. Better still, you don’t even have to drop the $24 a year for a premium subscription. The free version features almost as many features.

Dashlane

best computer security and antivirus tools and apps

Dashlane is LastPass’s biggest competitor, offering some of the best password management security available. This is achieved by way of its internally developed and patented security system. Dashlane also features a great UI that is extremely easy to manage. But Dashlane’s best feature is the bulk password changer. You can easily reset hundreds of passwords at once in a post-breach situation.

Dashlane currently retails for $39.96.

KeePass

best computer security and antivirus tools and apps

KeePass is an open-source password management solution. Rather than a multi-device, cloud storage approach, KeePass stores and encrypts your data locally. On the one hand, this is great. You don’t have to trust your internet connection to access your password vault, and so on. Conversely, you need to install KeePass on whichever device you’re using, making it a slightly slower process than its competitors.

There are also heaps of plugins to extend the functionality of KeePass.

The Best VPN Software

A virtual private network (VPN) is an affordable and easy to use way to increase your security and privacy. A VPN encrypts your internet traffic between your computer and the secure VPN server, making sure no one can snoop on your data in transit. People also use VPNs to skirt censorship and other geo-restricted content.

ExpressVPN

Download Express VPN for Mac

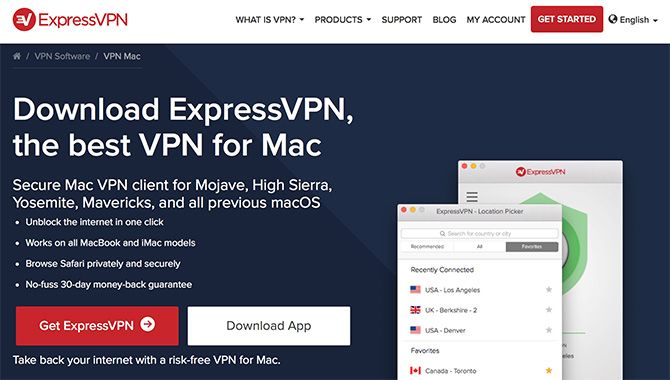
ExpressVPN remains one of the best VPN services around, with over 3,000 servers in 160 physical locations across 94 countries. ExpressVPN supports the PTP, L2TP, and OpenVPN protocols, meaning you can have excellent privacy as well as blazing fast connections. (What are VPN protocols?)

ExpressVPN doesn’t keep data logs, has Tor support, and is great for accessing a wide range of online video streaming services, like Netflix.

For MakeUseOf readers: Get an extra 3 months of ExpressVPN for free when you sign up for an annual subscription using this link!

Private Internet Access

private internet access settings panel

Private Internet Access is another VPN provider with a strong history of security and privacy. Private Internet Access is one of two VPNs I use regularly and have held a subscription for many years.

Private Internet Access is always a hit because it usually comes in several dollars lower than its competitors while offering an excellent service. PIA increased their servers to over 3,000 across 33 countries in January 2019, and released a company transparency report to assure users as to the direction of the VPN provider. PIA also turned their browser extension and iOS app open source so people can scrutinize their code.

Furthermore, you can use P2P connections, they do not log your data, and there are no bandwidth limits.

For MakeUseOf readers: Save 58% off when you purchase two years of PIA, or save 52% off when you purchase one year of PIA, using this link!

NordVPN

NordVPN stock image

Our final paid-for option is NordVPN. NordVPN consistently ranks in the higher echelons of VPN providers due to its dedication to privacy, security, and speed. NordVPN now operates over 5,100 servers across 61 countries.

There is a strong chance you will find a server in the country you need, and that you’ll have a seamless experience. Also, the NordVPN server spread means you stand an excellent chance of logging into your video streaming accounts from wherever you want; even those tricky services like BBC iPlayer!

You can use NordVPN over Tor, as well as for torrenting, and there are no bandwidth or download restrictions.

The Best Security Utilities

You have seen the best in antivirus, antimalware, firewalls, and much more. But there are still more security programs to cover. This last section contains those programs every user should know about but aren’t always necessary to install. Knowing of their existence, however, could save your bacon further down the line.

Unchecky

best computer security and antivirus tools and apps

Unchecky is an absolute system-saver in a time where many software installations come bundled with third-party extras that you neither want or need. And in some cases, the third-party extras are downright malicious. Install Unchecky, and it’ll make sure each potentially nefarious extra box remains unchecked unless you specifically select it.

This tiny program has stopped more than a few unwanted extras over the years for me.

Malwarebytes Anti-Exploit BETA

Premium Malwarebytes for Windows users already have this integrated Anti-Exploit tool—but those without, don’t. Malwarebytes Anti-Exploit Beta is still available for download for everyone else, offering much of the same premium functionality offered to paying subscribers.

Parted Magic Disk Eraser

best computer security and antivirus tools and apps

Parted Magic with GParted is a bootable Linux environment featuring one of the best secure wipe and erase tools around. Unlike many similar products, Parted uses the BIOS-only accessible Secure Erase function. You’ve never noticed this function because many manufacturers turn it off and hide the option because it simply obliterates your system.

(Seriously, it writes zeroes to your entire drive making data essentially irretrievable.) Parted Magic currently retails for $11.

Gpg4win

best computer security and antivirus tools and apps

Gpg4win brings one of the best secure communication tools to Windows. GnuPG is an implementation of the OpenPGP standard primarily used to encrypt electronic communications. (What are email security standards?) Once you install Gpg4win, you’ll spot an option to encrypt your messages within your email client. The above image is how it appears in Outlook, for instance.

Have I Been Pwned?

Troy Hunt’s account compromise database continues to grow in size, adding billions of records every year as the biggest data breaches hit the news. Check if your email address and password combination are out there on the internet waiting for someone to use. Set an alert for your email address so that in the event it does appear in a breach, you’ll be the first to know.

What Are Your Favorite Security Software?

We are at the end of the line. Hopefully you have constructed a multi-layered security wall for your system. The important thing is not to panic. Yes, there are a huge amount of threats out there. Yes, they are getting worse as our dependence on computers grows. No, you shouldn’t disconnect from everything ever and live in a cave.

Before you go, learn more about the different types of computer viruses and how to stay safe!

Image Credit: alphaspirit/Depositphotos

Read the full article: The Best Computer Security and Antivirus Tools


Read Full Article

How to Solve the “Read Only” External Hard Drive Problem on Mac


mac-ntfs-drive

Sometimes when you connect an external hard drive to your Mac, you’ll find that it’s set to read-only. This happens because the drive is formatted with Microsoft’s NTFS filesystem, which macOS doesn’t support by default. Fortunately, it’s easy to fix.

There are a number of ways to unlock an external hard drive on a Mac, from reformatting the drive to installing software that allows you to write to NTFS volumes. For more advanced users, there are also riskier, more experimental solutions. Let’s get started.

1. If Your Drive Is Blank

If your drive is blank, you’re in luck. You can easily format it to whatever you need and move on.

To begin, mount the disk on your Mac, then open Disk Utility. Now select the drive in the sidebar and click Erase.

format read only drive mac

The format option you should choose depends on how you intend to use the drive:

  • Time Machine backup: If you plan to use the drive to back up your Mac with Time Machine, you’ll want to format the drive to HFS+. In Disk Utility, this shows up as Mac OS Extended.
  • Portable drive: If you’re looking to create a portable drive to use with your Mac and other operating systems like Windows, choose exFAT. If you are only working with Macs, you can format your drive to either HFS with the Mac OS Extended option or with the newer APFS file system.
  • Working with older devices: This is rare, but if you will use the disk with an old device that does not support exFAT, you may have to choose the older FAT option. In most cases, you shouldn’t use this as it limits drive sizes to less than 32GB.

2. If You Need a One-Time Fix

Warning! The following describes a method of enabling the experimental NTFS support in macOS. There is a very real chance that something could go wrong, resulting in a loss of data on the target drive. We recommend you do not rely on this method for writing to important volumes or as a long-term solution.

Sometimes you may need to write some files to a locked drive only once, and you can do this with built-in Mac tools. But while macOS can read NTFS drives by default, its write capability hides behind a Terminal hack. You need to follow these instructions for each drive you want to write to.

Open Terminal and type:

nano etc/fstab

Then copy this line into the file, replacing DRIVENAME with the actual name of the drive you want to access:

LABEL=DRIVENAME none ntfs rw,auto,nobrowse

Hit Ctrl + O to save the file, then Ctrl + X to quit Nano. Now disconnect and reconnect your drive. Once it has remounted, it will be available in /Volumes.

You can only get there in Finder; click Go in the menu bar and select Go to Folder. Enter /Volumes and click Go. You’ll see your drive listed here, and you can now copy files onto it.

mount ntfs drive mac

3. A Free Open-Source Solution

Even if you’re okay using Terminal, no one wants to edit a preference file every time they deal with a new drive. If you’re in IT and deal with Windows drives regularly, you may need a better option. One of the most popular solutions is an open-source product: FUSE for macOS.

Download FUSE to get started. The program is a handler; it does not contain anything to mount and read the files themselves. You’ll need a couple of extra tools to complete the job, available in a Homebrew package called NTFS-3G.

First install Homebrew by pasting this line into the Terminal:

/usr/bin/ruby -e "$(curl -fsSL https://raw.githubusercontent.com/Homebrew/install/master/install)"

Once you run the commands to install Homebrew, and you get confirmation in Terminal, you need to install the NTFS-3G package. That is another single command:

brew install ntfs-3g

Sometimes Terminal doesn’t recognize that you have already installed the FUSE package. If that happens, run this command as well:

brew cask install osxfuse

You’ll then be prompted to reboot your Mac. Once you’ve done that, try re-running the NTFS-3G command.

Write to an NTFS Drive With NTFS-3G

NTFS-3G enables your Mac to write to NTFS drives, but it is not automatic. You need to run a few extra commands to get it working.

First, find the address of your mounted read-only drive. You can get this in the Terminal using the command:

diskutil list

You need to run the following commands each time that you want to mount a drive with write permissions. Replace /dev/disk1s1 with the drive address that you found above:

sudo mkdir /Volumes/NTFS

sudo /usr/local/bin/ntfs-3g /dev/disk1s1 /Volumes/NTFS -olocal -oallow_other

If you don’t want to run these commands each time, there’s a fix. You can boot your Mac into single-user mode, and replace the built-in Mac NTFS tools with NTFS-3G. There are some warnings about security on the project site; you can check out the steps to enable it on the developer’s GitHub page.

The devs make it clear that this opens up your Mac to potential exploitation, so this step is not for the faint of heart.

4. A Simple, Paid Option

The solutions we’ve described above are pretty technical. If you’d rather just click your mouse a few times to get this working, you can use a paid third-party app to simplify the entire process.

There are some different choices, but the longtime favorite is Paragon Software’s NTFS for Mac. It is $19.95 per Mac license, though you get a discount for buying three or five licenses at a time. You can test drive the software with a 10-day trial too.

paragon ntfs mac

It’s a simple install, which then provides a menu bar item that shows your NTFS drives. Better still, your NTFS drives now show up in Finder normally, and you can treat them like any other drive.

Tuxera NTFS for Mac is another program. It’s built on top of the open standard we used above, NTFS-3G. The licensing is a bit simpler, as you pay $25 to use it on all your Macs.

mount drive mac with tuxera

With a 15-day free trial, you can put the program through its paces before shelling out. Rather than a menu bar item, Tuxera installs as a preference pane. You can format drives from here, but not much else. Like Paragon, you can use Finder to work with the drive.

Solve Other Mac External Drive Problems

Both paid options offer a painless way to mount a read-only drive on your Mac and make it writable. The open source and Terminal options are more work, and you shouldn’t rely on experimental support full-time. You can also write as much data as you need to and from your drives while trialing both paid options.

But having a read-only drive is not the only external disk problem you can face on a Mac. Sometimes you can mount an external drive and it isn’t even recognized. Take a look at our guide on how to get your external drive to show up on a Mac for tips on how to solve that issue.

Read the full article: How to Solve the “Read Only” External Hard Drive Problem on Mac


Read Full Article

20 Hidden Facebook Messenger Tricks You Might Need One Day


messenger-hidden-tricks

Even though you probably use Facebook Messenger every day, we guarantee there are still some Facebook Messenger features you don’t know about. With that in mind, here are some hidden Facebook Messenger tricks you should try right now.

1. Make Voice and Video Calls

Facebook Messenger isn’t just for text messages. It’s very simple to start a voice or video call by using the buttons at the top of your chat window.

You can also leave a voice message whenever you like. If the person you want to talk to isn’t around, just leave them a message they can listen to later.

2. Share Your Location

If you ever need to let your friends know exactly where you are, jump into a chat with them, hit the three dots and choose Location. Your friend will instantly get a map showing your precise position.

Of course, there’s a strong privacy argument against revealing your location to Mark Zuckerberg. But rest assured you can delete your location data from Facebook if you wish.

3. Add Nicknames

You’ve probably got a few friends who go by a nickname that’s completely unrelated to their proper name on Facebook. You possibly also have friends that have changed surnames over the years, yet you only seem to recall their old names.

Spare yourself the confusion and use Messenger’s nickname feature to help remind you who all of these people are. Just click on their name and you should see the option to add their nickname.

4. Use Stickers, GIFs, and Thumbs-Ups

Facebook has integrated a whole bunch of stickers for you to use in messages, with different styles available, and you can choose your favorites to keep them readily available.

If stickers aren’t your thing, Facebook has integrated Giphy into Messenger, so you can find just about any GIF you like and insert it in a few clicks. It’s all very easy.

There’s also a quick thumbs-up button you can use for a simple reaction to a message. Most people don’t realize you can also resize it by holding the thumb before you post.

You should also make yourself aware of what the circles mean in Facebook Messenger.

5. Use Facebook Messenger as a Boarding Pass

Some airlines give passengers the option to receive their flight updates and check in notifications through Facebook Messenger. And when you arrive at the airport, you can actually use Facebook Messenger as your boarding pass.

Better still, if you need to re-book your flight you can do it all via Messenger.

6. Send Money Through Facebook Messenger

Do you need to pay a friend back for something? Then just dive into Messenger and pay them directly.

Click the three dots and choose Payments. The first time you do this you’ll need to connect a debit card to your account. Swiping left while you’re making a transaction will let you choose a theme, such as wine bottles or cupcakes.

7. Start a Group Chat

Instead of relaying your conversations between friends, start a group chat with all the relevant parties so you can sort things out at once. Everyone gets all the updates and no-one misses anything important.

You can also name your groups and pin them to the top, so if you’ve got a long-term group chat going with your family members or your bowling friends you can keep it organized and easy to find.

8. Mute Messenger Notifications

If you’ve ever been in an active group chat, you’ve probably noticed it can be a special form of torture. Notifications for every single message can really start to get on your nerves.

So fix the problem by muting the whole group chat. You can mute conversations for a set length of time—15 minutes, one hour, eight hours, 24 hours—or you can choose Until I turn it back on for an indefinite period of time.

9. Change Conversation Color

Facebook Messenger Color

Sick of Smurfy blue? Click on a contact and choose Change Color. This will change the conversation color for everyone in the chat, even if it’s a group chat.

10. Check Messages From Non-Friends

By default, you only see messages from your contacts, even though occasionally you may be sent a message from a stranger. If you want to check these messages, head to Settings > People > Message Requests.

11. Send Some Random Cuteness

Facebook Messenger DailyCute

If you know someone who could use a dose of cuteness, open up a chat with them and type @dailycute. It’ll instantly grab a cute image for you and post it.

12. Remove Previews

If you’ve got your notifications showing up on your lockscreen, it’s a really good idea to stop Messenger from displaying the content of your messages in those notifications. You don’t really want your friends being able to see private chats while your phone is on the table in front of them.

To remove previews, just head into the settings and uncheck the Show Previews option.

13. Take Photos in Messenger

Instead of taking a photo with your phone’s camera app, then uploading it to Messenger, you can actually just click on the camera icon to get the job done. Take a quick selfie or a photo of something you need to share and it will send instantly.

You can also hold the button to record a video with the same tool, which has options to use the rear camera, expand your view and more.

14. Draw on Your Pictures

Not everyone is content with a simple photo. Sometimes you need to draw on it or write a bit of information to make it clear what the receiver is supposed to learn from the image. So, click Edit while viewing your image and add whatever modifications are required.

15. Send Spotify Tracks in Messenger

If you have the Spotify app installed on your device, you can send Spotify tracks to friends via Messenger. Your friend will need to have Spotify installed to play the track, but they’ll be prompted to install it if they don’t have it installed.

Just click on the three dots in your Messenger chat, choose Spotify and navigate in the Spotify app to find the track you want. Select the track and press send. Done!

16. Install Compatible Apps

There are dozens of apps compatible with Messenger that can be used to enhance your experience.

You’ll find emoji keyboards, Bitmoji, GIF keyboards, meme apps, and weather apps. To integrate a new app, hit the three dots from any conversation and scroll down the list of compatible apps currently on your device. Click Install when you’ve found one you want to use.

17. Play Basketball on Messenger

If you want a quick game of basketball with a friend—and who doesn’t?—all you need to do is send a basketball emoji to them, then tap on the message. From there you just swipe to get it in the hoop, which will gain you a point. When you eventually miss the hoop, your game will end and your score is tallied and sent to your friend so they can try to beat it.

18. Use Your Phone Number

Not everyone has a Facebook account, as unbelievable as that may seem. If you want to use Facebook Messenger without a Facebook account, just install the Messenger app on your smartphone and it will identify you by your phone number.

19. Hail an Uber or Lyft in Messenger

Uber and Lyft are integrated into Facebook, but they need to be installed on your device and you do need to set things up the first time you use them through Messenger. Just hit the three dots and choose Transportation.

The first time you’ll be talked through the setup process. From then on you’ll be able to see Uber/Lyft as another one of your contacts and chat to it to get yourself a ride. Payment is made using your details in the Uber or Lyft app.

20. Create Shortcuts for Contacts (Android Only)

Android users can set up a shortcut for their favorite contacts. Just select the contact you want in Messenger, hold your finger on it briefly, and a menu will come up. Choose Create Shortcut and you’re done. You can organize this in the same way as any other Android app icon.

Even More Facebook Messenger Tips

We haven’t even gotten close to listing all of the various Facebook Messenger tips and tricks, so make sure you let us know about any you think we missed.

And if you’d like to learn more about using Facebook’s messaging app, check out our articles on how to move conversations between your Messenger inboxes and Facebook Messenger privacy concerns.

Read the full article: 20 Hidden Facebook Messenger Tricks You Might Need One Day


Read Full Article

How to Download Periscope Videos


download-periscope-videos

Periscope is one of the most widely adopted live streaming services. Whether you use it for broadcasting events or something more personal, the Twitter-owned platform is a solid option.

Unfortunately, Periscope is far from perfect. It can be unreliable during streams and, more importantly, there’s no obvious way to download Periscope videos for offline viewing.

However, there are some third-party alternatives available to help you download Periscope broadcasts. And in this article we’ll show you the best ways to download Periscope videos.

How to Download Your Own Periscope Streams

Download your own Periscope videos

If the broadcast you’re looking to download is your own, there is an official method to do it. Once your stream has ended, all your videos are saved to your account’s Analytics dashboard.

To download them, head over to the page by tapping your profile picture on the Periscope website. There, hover over the video entry you’d like to grab and click the blue icon for requesting the file. Periscope will take a few minutes to process the request, and once done, you should be able to download the broadcast by clicking the green button.

Unfortunately, this doesn’t work on Periscope’s mobile apps. What you can do, however, is enable the Autosave setting on the Android and iOS app. This will automatically store your broadcasts locally on your phone as soon as they end. You can find the option under Account > Settings > Autosave Broadcast.

Periscope also lets you download a bunch of other data from your account. This includes information such as your chat history, viewing history, and more. You can request it by visiting your Periscope data page and signing in.

How to Download Other People’s Periscope Videos

Download others' periscope videos

For downloading Periscope videos recorded by other users, you will have to employ third-party tools.

The first step towards downloading someone else’s broadcast is to grab the link to the video. You can do this by playing the video on the Periscope website and copying the URL from the address bar at the top.

Next, on computers, you can visit GetVideo and simply paste the video’s address in the search field where it says Enter a Video link. Hit the blue Search button and if successful, the app will show the clip’s length, name, and a Download link for transferring its MP4 file. Just click that button and you’re all set.

You can, of course, perform the same steps on a mobile browser for downloading Periscope broadcasts on your phone. But there’s also an app if you don’t want to go through the hassle of navigating around the website.

It’s called Scopedown and it functions in a similar way to GetVideo. You paste the link, hit the Download Video button, and the Periscope broadcast will soon be saved on your phone. Unlike the GetVideo website, though, Scopedown stores these videos in the .ts format instead of .mp4. This means they will be slightly larger in size.

Unfortunately, Scopedown doesn’t have an iOS client yet and there are no alternatives available for iOS. Therefore, iOS users will have to depend on the website or try this technique…

Save Periscope Broadcasts Using Screen-Recording

Download live Periscope videos

The third, and perhaps clumsiest, way of grabbing a Periscope broadcast for offline use is by screen-recording them as they play out.

The process involves playing the entire broadcast and employing a screencasting tool to record your device’s screen. That being said, if you want to record live broadcasts, this is the only way.

On macOS, you need to launch QuickTime Player, and under the File menu, click New Screen Recording. Now, open the Periscope broadcast in your browser and hit the red record button on the QuickTime Player popup. Drag your mouse over the video frame you’d like to record or you can go full-screen and get the whole clip in landscape mode. Once it’s over, you can stop the recording from QuickTime Player’s menu bar options.

Windows also has an inbuilt utility for recording your computer’s screen. However, unlike macOS, you cannot select a specific portion. You will have to record it in full-screen landscape orientation. To reveal the screencasting menu, press the Windows key + G and hit record.

If none of those native features work for you, you can try one of these screencasting apps for Windows, Mac, and Linux.

In addition, you can download Chrome extensions like Nimbus, which can record tabs. However, you will lose a significant amount of quality and face stuttering playback issues.

Similarly, iOS users can utilize the native screen recording option. To add it to the control center for quick access, go to Settings > Control Center > Customize Controls, and under More Controls, locate Screen Recording tap the green plus button. Now, fire up the broadcast you’d like to download on the Periscope app. Pull up the control center, touch the screen recording button, and off you go.

Android users, on the other hand, will have to download a dedicated third-party app from the Play Store. We recommend AZ Screen Recorder. It’s free, can record HD videos, and has a host of other settings you can tweak. To use it, simply launch the app, and tap the record button once you’ve got the Periscope stream running.

Master the Art of Streaming in Periscope

Live streaming is a growing sector, hence the demand for more ways to download videos. Utilizing the tools here, you should be able to save all of the Periscope videos you want.

However, there’s more to live streaming than just watching. So if you’re keen to start broadcasting for yourself, here are some essential Periscope tips and tricks.

Read the full article: How to Download Periscope Videos


Read Full Article

How to Create an Email Group and Distribution List in Outlook


group-emails-outlook

Sending emails to a group is more common in both our business and personal lives. You may use groups for your project team at work and your immediate family members at home. Creating an email group for a distribution list in Microsoft Outlook can save you a lot of time.

Once the group is set up, you can just pop it into the email and contact several people with a single message. If you’ve never done this before, we’re here to help. Here’s how to create a group in Outlook for both Windows and Mac.

Differences Between Contact Group, Contact List, Email Group, and Distribution Lists

There really is no difference between a contact group, contact list, email group, or distribution list when talking about Microsoft Outlook. The terms are used interchangeably.

As a matter of fact, the Microsoft Office support site now offers up the term “Contact Group” as opposed to “Distribution List”:

Use a contact group (formerly called a “distribution list”) to send an email to multiple people…

The Outlook application itself uses the terms Contact Group (Windows) and Contact List (Mac) on its ribbon, in its menus, and in its support documents. So, as we move through the steps below, those are the phrases you’ll see most often.

And before you move onto the steps, if you need help exporting your Outlook contacts at some point, check out our guide.

How to Create a Contact Group in Outlook on Windows

Open Outlook on your Windows computer and prepare to create your contact group.

  1. Select People from the bottom left of the Outlook window.
  2. Click New Contact Group from the ribbon.
  3. Give your group a name.

You can also select New Items > More Items > Contact Group from Home tab menu.

To add contacts to your group, click Add Members from the ribbon. You can add members from your Outlook contacts or address book, or you can create new contacts.

New Outlook contact group Windows

To add members from your Outlook contacts or address book, just double-click their name in the popup window and it will be added to the Members area at the bottom. When you finish, click OK.

For new contacts, enter the name you’d like to display for them in the window, insert in their email address, and click OK.

New contact for Outlook contact group Windows

When you’re done adding members to the group, click Save & Close from the ribbon.

Not seeing these buttons or interested in customizing your ribbon? Here’s how to make the most of the ribbon and menu in Office 2016.

Compose an Outlook Group Email on Windows

After you create your email group in Outlook, you have a couple of methods for sending the members a message.

Compose an Email from the Mail Section

In the Mail section of Outlook, you can send an email to that contact group you created by doing the following.

  1. Click New Email.
  2. In the To field, begin typing the name you gave to the contact group. Or, you can click the To button and search for the group or select the group name from the list.
  3. When you see the group, select it and click OK.

Suggestions for Outlook group email Windows

Compose an Email from the People Section

If you are in the People section of Outlook, click the contact group in your list. Then, select the Email icon and a new email will open with the group populated in the To field for you.

New Outlook email from People section Windows

How to Create a Contact List in Outlook on Mac

Open Outlook on your Mac and get ready to create your contact list.

  1. Select People from the bottom left of the Outlook window.
  2. Click New Contact List from the ribbon.
  3. Give your list a name.

You can also select File > New > Contact List from the menu bar.

To add contacts to your list, just begin typing in the Name and E-mail fields in the popup window. If you add a name that’s recognized as an existing contact, you’ll see the suggestion for that contact display. Then you can just select it to add that contact to the list.

Contact suggestions for Outlook contact list Mac

If you are adding new contacts, just enter their names and email addresses. Before you exit, you can also assign a Category to the group from the ribbon. You’ll see options like family, friends, and team.

When you finish adding members to the list, click Save & Close from the ribbon.

New Outlook contact list Mac

New Contact List Button Grayed Out on Mac?

If you are unable to click the New Contact List button in the ribbon of the People section, this is a simple fix.

  1. Click Outlook > Preferences from the menu bar.
  2. Select General.
  3. Uncheck the box next to Hide On My Computer

Uncheck hide computer folders for Outlook Mac

Compose an Outlook Group Email on Mac

After you create your email group in Outlook, you have a couple of ways to send a message to them.

Compose an Email from the Mail Section

You’ll probably be in the Mail section of Outlook most often, so to send an email to that distribution list you created, follow these steps.

  1. Click New Email.
  2. In the To field, begin typing the name you assigned to the contact list. Alternatively, you can click the Search button on the right side of the field. Search for the list in the box at the top.
  3. When the list displays, select it and it will pop right in.

Group suggestion for new Outlook email Mac

Compose an Email from the People Section

If you happen to be in the People section of Outlook, simply mouse over the contact list and when you see the Email icon display, click it.

A new email will open with that contact list in the To line, ready for you to compose your message.

New email from Outlook people section Mac

Speed Things Up With Outlook Groups

It’s so easy to create a group in Outlook that if you email the exact same people on a regular basis, it can really speed up your process.

For doing even more with your emails and inbox, check out these 10 tips for getting better at Outlook.

Read the full article: How to Create an Email Group and Distribution List in Outlook


Read Full Article