29 April 2020

The 12 Best Linux Desktop Environments


You can tell whether a screenshot is Windows or Mac from a mile away, and that’s because both commercial operating systems only have one desktop environment. Windows has the Start Menu and the Taskbar, while macOS has its iconic Dock and Menu Bar.

But search for Linux and you’ll see images that look strikingly different from one another:

Unlock the "Essential Linux Commands" cheat sheet now!

This will sign you up to our newsletter

Enter your Email

Linux desktop screenshots

This diversity stems from the fact that Linux offers far more than one desktop environment. This is part of what makes Linux exciting to use, but the breadth of choice can make it difficult to pick the one that’s right for you. That’s why we’ve compiled this list of the best Linux desktop environments.

1. GNOME

GNOME Linux desktop environment

GNOME is currently the most popular Linux desktop environment. It’s the default in several major Linux-based operating systems such as Ubuntu and Fedora.

GNOME has a design that simultaneously suits both touch-based devices and traditional PCs. A single panel sits at the top of the screen much like on a mobile device. Rather than a dock or window list, users interact with windows by opening an Activities Overview that displays apps, open software, and virtual desktops.

GNOME’s developers use the GIMP Toolkit (GTK+), which may come up when you’re deciding which apps to install.

Want a good look at GNOME? Check out Fedora.

2. KDE Plasma

KDE Plasma Linux desktop environment

KDE Plasma is the arguably the best Linux desktop environment for people who like to tinker with their computer’s interface. Every on-screen component is a widget that you can move, resize, or delete. With enough tinkering, you can configure the Plasma desktop to look and feel like any other desktop interface.

Software designed for KDE tends to come with an abundance of options. These apps are among the most powerful the Linux desktop has to offer. Side note: KDE developers use Qt, rather than GTK+.

Want a good look at KDE Neon? Head to neon.kde.org.

3. Cinnamon

Cinnamon Linux desktop environment

Cinnamon is the default interface for Linux Mint, one of the most widely-used versions of Linux out there. It began as a fork of GNOME at a time when that interface was undergoing drastic changes.

Cinnamon preserves a more traditional experience that will make long-time Windows users feel at home.

Many love Cinnamon for its combination of familiarity and ease-of-use. This Linux desktop strikes a blend between adopting new ideas and preserving the old way of doing things.

Want a good look at Cinnamon? Check out Linux Mint.

4. MATE

MATE Linux desktop environment

At a time when the Cinnamon project was forking GNOME, the MATE community formed to preserve what already existed. If you didn’t want to transition to GNOME 3.0, MATE offered a way to continue using 2.x.

The MATE developers have invested time and effort into updating the background code, but on the whole, this still feels like what many people felt was the best Linux desktop environment over decade ago.

The lack of change hasn’t curtailed adoption either. Newcomers often approach MATE as a more lightweight and traditional alternative to the likes of GNOME, a role also occupied by the next desktop on this list.

Want a good look at MATE? Check out Ubuntu MATE.

5. Xfce

Try the Xfce desktop on Linux

Xfce, whose mascot is a mouse, has long existed as a speedy interface for Linux-powered computers. It isn’t based on GNOME, but it does use the same toolkit.

These days Xfce feels like a comparable alternative to MATE. Its developers continue to place an emphasis on keeping the interface light, even if that means foregoing the latest bells and whistles.

With a relatively small development team, a lot of time often passes between updates. The result is that Xfce, like MATE, hasn’t changed all that much over the years. But many people like the desktop environment as a proven reliable choice.

Want a good look at Xfce? Check out Xubuntu.

6. Pantheon

Pantheon Linux desktop environment

Pantheon is the desktop environment of elementary OS, and it’s one of the few Linux interfaces so explicitly tied to one Linux-based OS.

At first glance, Pantheon may resemble macOS. There’s a panel at the top and a dock at the bottom, with apps offering a stylish and unified design. But much of Pantheon’s design language actually comes from its founder’s original experience developing for GNOME.

With the elementary project’s innovative pay-what-you-want payment scheme, Pantheon has become a hotbed for new Linux apps. These apps, like the desktop itself, are a departure from the traditional Linux way of doing things. Pantheon is not very customizable or extensible. That is arguably its biggest strength and its greatest weakness.

Want a good look at Pantheon? Check out elementary OS.

7. Budgie

Budgie Linux desktop environment

Budgie is a relatively young desktop environment born out of the Solus project. It offers a pared down interface that, perhaps in contrast to MATE and Xfce, still manages to feel modern. The design language goes more for the new, even as some of the old desktop paradigms remain in place.

Much of the early inspiration for Budgie came from Chrome OS and mobile apps. Yet while Budgie feels simpler than some of the other options, there are still many ways to tweak this Linux desktop to make it feel your own.

Want a good look at Budgie? Check out Solus.

8. Unity

Unity 8 Linux desktop environment
Image Credit: UBports

Unity is the former default interface for Ubuntu, the most popular version of desktop Linux. With Ubuntu 17.10, Canonical ceased development of Unity and started providing the GNOME desktop instead.

There remain many Unity fans out there and many machines still running the aging interface. And while Canonical may longer support the project, the code still exists for others to adopt and use as they wish.

Want a good look at Unity? Check out older versions of Ubuntu.

9. LXDE

LXDE is a Linux desktop environment
Image credit: Lubuntu

LXDE exists to be a fast, lightweight, energy efficient desktop environment. Based on GTK+, it’s an option to consider if even Xfce runs slowly on your machine, or alternatives simply feel too bloated for your tastes.

LXDE is modular, meaning it isn’t all or nothing. You can swap out the default window manager, which is OpenBox, for an alternative. Whether it’s the session manager, the network manager, or the sound server, it’s free to go in exchange for something else.

Want a good look at LXDE? Check out Lubuntu up to version 18.04.

10. LXQt

LXQt Linux desktop environment
Image Credit: LXQt

There are a handful of desktop interfaces based on GTK+. Fewer are built with Qt apps in mind. If you find KDE Plasma to be a bit much, LXQt might be more your speed.

LXQt was born from the merger between the Qt port of LXDE and Razor-Qt. The latter no longer exists, and LXQt has become the successor to LXDE. As a result, this desktop may feel a tad more modern while still running on older machines.

Want a good look at LXQt? Check out versions of Lubuntu since 18.10.

11. Enlightenment

Enlightenment Linux desktop environment
Image Credit: Enlightenment

Enlightenment began over a decade ago as an interface for desktop computers. It hasn’t gained much adoption among Linux users, but it remains available and functional. The art style is more skeuomorphic than the cartoony images often seen in other free desktops.

Today Enlightenment has expanded to mobile devices, wearables, and televisions. Enlightenment is the window manager and compositor used in Tizen.

Want a good look at Enlightenment? Check out Elive.

12.Sugar

The Sugar desktop environment
Image Credit: Sugar on a Stick

Sugar is a desktop environment designed to help children learn. It is decidedly simple, not in the minimalist sense, but in terms of complexity. As a result, it’s one of the best Linux desktops to install for kids.

Sugar comes from Sugar Labs, a non-profit run by volunteers. The project not only provides a desktop environment but simple apps to go with it. These tools are in place so that educators can acclimatize children to computers even in areas with few economic resources.

Want a good look at Sugar? Check out Sugar on a Stick.

Have Fun With Your Linux Desktop Environment

While I’ve suggested different ways to try out each desktop, these are hardly the only methods. Most Linux-based operating systems allow you to swap out the default desktop for another. Many offer variants that provide a different interface out of the box.

The options don’t end here either. To learn more on changing the way apps appear onscreen, check out the difference between GTK+ and Qt.

Read the full article: The 12 Best Linux Desktop Environments


Twitter launches a COVID-19 data set of tweets for approved developers and researchers


Twitter is making it possible for developers and researchers to study the public conversation around COVID-19 in real time with an update to its API platform. The company is introducing a new COVID-19 stream endpoint to those participating in Twitter Developer Labs — a program that offers access to new API endpoints and other features ahead of their public release. The new COVID-19 endpoint will allow approved developers to access COVID-19 and coronavirus-related tweets across languages, resulting in a data set that will include tens of millions of tweets daily, Twitter says.

The data can be used to research a range of topics related to the coronavirus pandemic, including things like the spread of the disease, the spread of misinformation, crisis management within communities and more.

Developers may also use the new data set to build machine learning and data tools to help the scientific community answer key questions about COVID-19, Twitter notes.

The company itself will determine which tweets qualify for inclusion in this data set based on which words are used in the tweets — like “COVID-19” or “coronavirus,” for example. It also will pull tweets that use common coronavirus hashtags, which tend to be language-agnostic. These, by the way, are the same keywords that Twitter uses for its existing COVID-19 topic, which is powered by a Tweet annotation.

Twitter will also filter this data stream to exclude spammy and low-quality content.

While access to the endpoint will be free, Twitter will be hand-selecting which developers and researchers will be granted permission to use it. Developers will also have to inform Twitter of their project plan, detail their experience in working with big data and detail the available resources they have to process such a data set.

“Given the expertise and computational resources necessary to handle this data, and recognizing the sensitivity of it, we’ve created a dedicated application to access this endpoint and plan to carefully review access requests to ensure they support the public good,” notes Twitter in an announcement. “We also encourage applicants to describe in detail the safeguards they intend to implement to protect the privacy and safety of people represented in these data, including applicable institutional reviews and ethics screenings,” it says.

Twitter says it will prioritize processing applications from researchers and developers with established expertise and resources.

The application and endpoint are launching today. No developers or researchers had early access.

In addition to the application requirement to access the new endpoint, developers will also need to already have an approved developer account and adhere to the terms of Twitter’s Developer Agreement and Policy, which provides guidance about restricted use cases relevant to projects analyzing health-related topics. To ensure the data is kept in compliance, approved developers will also gain access to a new compliance stream endpoint, as well.

The new endpoint is one of several efforts Twitter has made since the coronavirus outbreak began, focused on connecting people with information about the pandemic. Across its platform, it introduced changes to make COVID-19 facts and reliable health information more accessible. It also updated its ads policy, partnered with relief organizations and matched fundraising donations, among other things.

“Public conversation can help the world learn faster, solve problems better and realize we’re all in this together,” said Twitter CEO Jack Dorsey, in a statement released today. “Facing a devastating global pandemic really brings that, and Twitter’s role, to light,” he added.


Read Full Article

9 Essential Amazon Kindle Tips: Key Benefits to Take Advantage Of


kindle-tips

Despite what fans of physical books may say, the Amazon Kindle has modernized the reading experience. It has offered people new ways to read books, and being able to carry hundreds of novels on a device you can keep in your bag is a Godsend.

However, most people don’t realize that there are benefits to owning a Kindle beyond the ability to buy an ebook on Amazon. So, in this article, we list some of the many Kindle benefits that let you take full advantage of your Amazon ereader.

1. The Benefits of Kindle Unlimited

Benefits of Kindle Unlimited

While Kindle Unlimited can have its ups and down in terms of quantity over quality, this program is a heavyweight in terms of reading options. It’s also one of the overwhelming benefits of owning a Kindle device.

For a nominal subscription fee, you’re granted access to Amazon’s massive digital library, which contains over 1 million ebooks. Its cheap price and huge library put it on a par with streaming services like Netflix, and Kindle Unlimited is basically a Netflix for ebooks.

So long as you’re subscribed, you can read as many novels as you want every month.

Still think that Kindle Unlimited is too expensive? Consider the fact that most bestselling ebooks sell for $10 a pop. This means that Kindle Unlimited is a steal even if you only enjoy one book per month.

When it comes to Kindle advantages and disadvantages, this is definitely the former.

2. Join the Amazon First Reads Program

Advantages of Kindle First Reads

Most people subscribe to Amazon Prime for the free two-day shipping and access to Prime Video. However, there are other Amazon Prime benefits you’ve probably overlooked.

One of those benefits is the Amazon First Reads program (formerly known as Kindle First).

With Amazon First Reads, Prime members get early access to one free Kindle book each month. You can pick a book of your choice from a pre-selected showcase of soon-to-be-released novels. In other words, you get one-month early access to one book every month of the year!

While most people can be picky over what they read, each month’s offerings are spread across multiple genres and categories. As such, there’s a good chance that something will catch your eye.

As an added bonus, you can also buy one of six pre-selected hardcover novels for a discounted price. Specific details can be found on the Amazon Prime benefits page.

Overall, Amazon First Reads is definitely one of the benefits of owning a Kindle.

3. Use the Kindle Owners Lending Library

Kindle Owners Lending Library KOLL

The Kindle Owners Lending Library (KOLL) is another one of the benefits of owning an Amazon Kindle. It’s accessible to anyone who has a full Amazon Prime membership connected to Amazon.com, Amazon.co.uk, Amazon.de, Amazon.fr, or an Amazon.co.jp account.

With KOLL, you can borrow one book per month from Amazon’s vast library. You must return that book in order to borrow a new one the month after that. Once you borrow a book, however, you can read a particular book as many times as you’d like before returning it. Think of it like a modified library.

Note: KOLL is different from the Lending for Kindle feature, which we will detail next.

4. Lend Books With the Lending for Kindle Feature

Lend Your Kindle Ebook

Did you know that you can also lend books you’ve bought to family and friends?

The ability to lend books through Kindle was a feature that was advertised when Amazon released the first device. However, the Kindle Book Lending feature has seemingly been forgotten.

While this program does have its benefits, there are some major limitations. The biggest being that you can only lend a book once.

Once your ebook is loaned, the borrower has 14 days to read the ebook before it must be returned. While loaned, the ebook cannot be read by the lender.

Note: This feature is only available to Kindle books purchased directly from Amazon.com.

5. Use the Kindle Public Library

Benefits of a Kindle Public Library

You may be asking yourself, “Why should I get a Kindle when I have access to the library?”

Because you can use your Kindle as a literal library, too.

One of our favorite Kindle features is the ability to check out eligible ebooks from public libraries. This lending service becomes invaluable if you’re too busy to go into a library to grab a new book.

How does this Kindle Public Library service work?

  • This feature is only available in the US. Everyone else is out of luck.
  • The ebooks are offered through a service called OverDrive.
  • Through OverDrive, you can search for your library to see if it’s part of the program.
  • If it is, all you have to do is get a free library membership card at your library to start borrowing ebooks.

Specific instructions on how to borrow a library book can be found on the Kindle Public Library page.

Note: Not all public libraries participate in the Kindle Public Library program. For those that do, every library will have its own unique selection of books to offer. Once borrowed, you will need to return those books within a specific time period.

6. Read Kindle Newspapers and Magazines

Kindle Newsstand

If you like monthly nonfiction updates, Amazon Kindle also offers a unique service where you can subscribe to periodicals like newspapers and magazines.

This feature, called Kindle Newsstand, is somewhat niche but surprisingly convenient. Essentially, you can subscribe to individual newspapers through Amazon. Each periodical will have its own price tag attached, and each issue will be delivered to your Kindle when made available to the public.

7. Add Your Device to a Kindle Family Library

How to Share Books Amazon Household

One of the lesser-known advantages of Kindle is the fact that Kindle users can benefit from a Kindle Family Library.

Basically—when two Amazon accounts are linked—they can share their media using a feature called Amazon Household. Each account can designate whether they want to share all of their media, or only select items.

So what can be shared through the Kindle Family Library?

  • Audiobooks.
  • Kindle books with Amazon First Reads.
  • Kindle books with Prime Reading.

And what can’t be shared through the Family Library?

  • Kindle newspapers.
  • Kindle magazines.

If you have a close-knit family and you share the same tastes in books, then this might be a good option for you.

8. Try a Kindle Book Sample Before You Buy It

Kindle Book Samples

One of the best built-in features found in Kindle devices is the ability to download and read “samples” of ebooks prior to buying them.

There is no deadline for reading this sample, nor any payment up front. The samples are 100 percent free and can be easily deleted from your Kindle once you have read them. This allows you to dramatically decrease the risk of buying something that you don’t like.

How does it work?

  • When you browse the Kindle store through your device and click on a book’s info page, you should see a button beneath the book cover and price that says Try a Sample.
  • When you click on that button, the sample will be downloaded to your device, free of charge.

Samples are typically very short, usually no more than the first chapter (or two) of a book. Essentially, they’re long enough that you can decide whether the writing style within the book will be something that you’ll enjoy.

If you buy the book directly through your Kindle device, the sample will automatically convert itself into the full version of the novel.

9. Use Tools to Keep Your Kindle Books Organized

Create a Book Collection on Kindle

Lastly, one of the best ways that you can take advantage of your Kindle is not through some lending service, but through the organizational tools located on your Kindle itself.

While it’s great that each individual Kindle can carry tons of books, this collection can become unmanageable once you buy your first hundred or so novels.

To make it easier to browse through your books, you can organize your Kindle downloads into custom folders, which Amazon calls Collections. These folders can be named according to your personal tastes.

For example: I have two folders on my Kindle called “Complete” and “Currently Reading.” I use these two folders to sort through the books I’ve paid for and read, versus those books I’ve paid for but haven’t finished.

Additionally, you can organize the way that your Kindle Library displays these collections by clicking on Your Library > Filter through the Kindle homepage.

Basically, if you manually adjust how your Kindle organizes your files, it will make buying, finding, and reading those books a breeze.

Take Full Advantage of Your Amazon Kindle

All of these features are a great way to take advantage of your Kindle, even if you prefer printed books over digital ebooks. If you don’t have a Kindle, we also think these are great reasons to buy a Kindle, too.

And if you’ve already decided to buy a Kindle, be sure to check out our guide detailing how to choose the right Kindle for you.

Read the full article: 9 Essential Amazon Kindle Tips: Key Benefits to Take Advantage Of


Read Full Article

What to Do With an Old Nintendo Wii: 12 Fun DIY Ideas and Projects


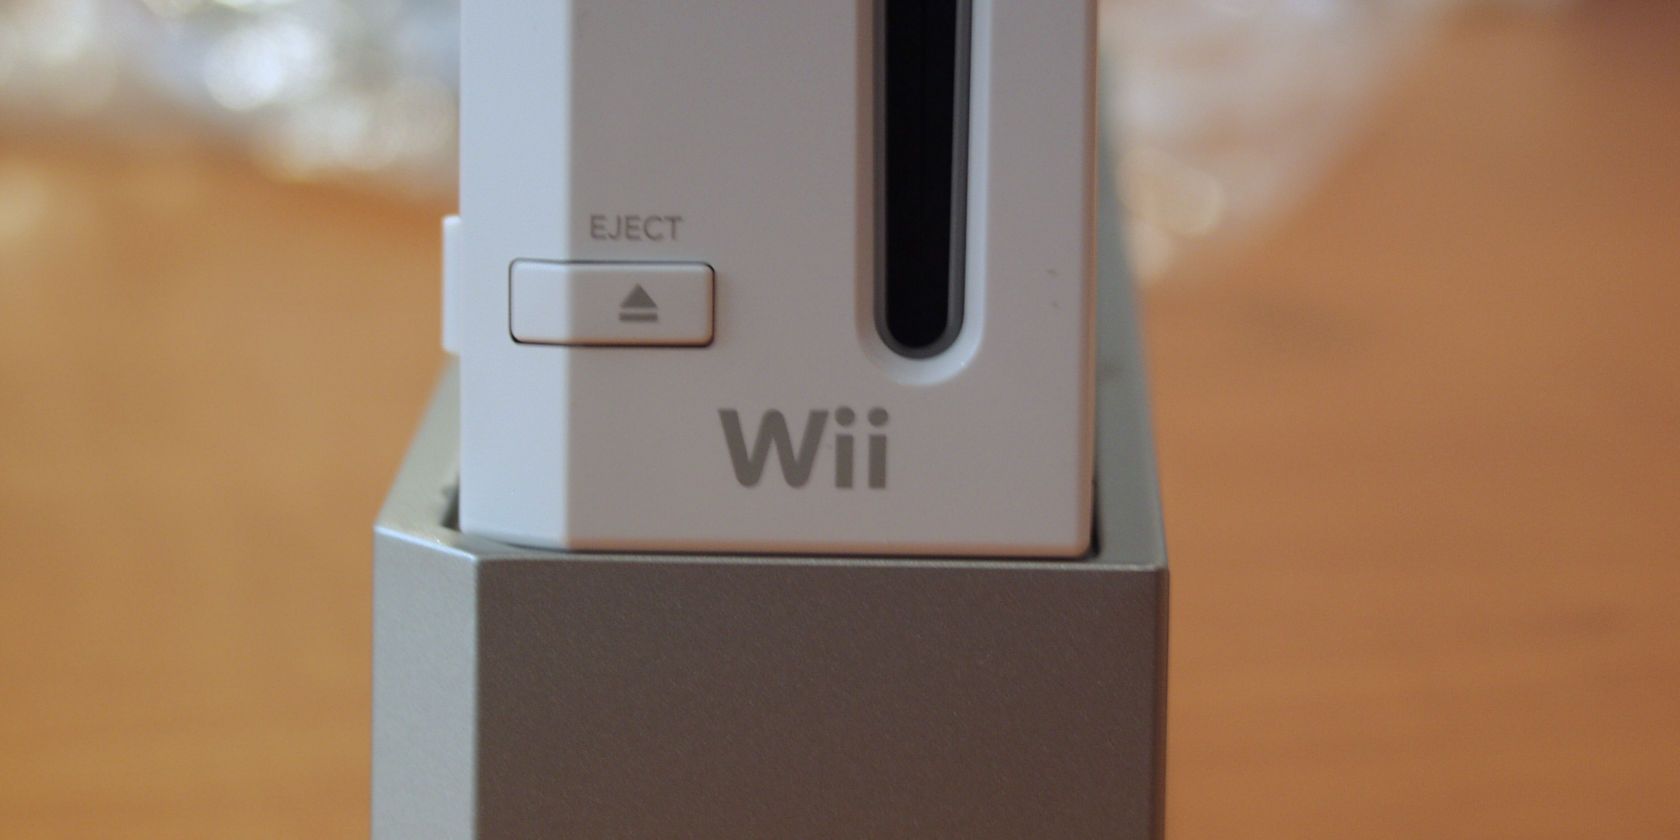
Over 100 million Nintendo Wii consoles were bought between 2006 and 2013. As such, there’s a good chance you own one. Your old Nintendo Wii is probably stuck at the back of a cupboard or acting as a particularly expensive doorstop.

After all, so many new consoles have come along to replace it. But does your old Wii console really have to sit unused? No!

If you’ve been wondering what to do with your old Nintendo Wii, here’s a list of ways to repurpose it.

Install Homebrew on Your Old Nintendo Wii Console

Incredibly it’s not difficult to find new uses for your Nintendo Wii. After all, like any game console, it’s basically a computer hooked up to your TV. While this doesn’t mean much in normal circumstances—you’re locked to Nintendo-approved activities—jailbreaking the Wii extends the possibilities considerably.

Jailbreaking is remarkably simple. Our guide to installing the Homebrew Channel on the Wii with the LetterBomb hack shows you how. Once you’re done with that, head back here to find some new uses for your old Wii. Anything that can run on the Homebrew Channel can be installed from its repository of software, or downloaded to PC and copied to your Wii’s SD card.

Before you start, make sure you have a USB keyboard attached. This will help you to make the most of these new Nintendo Wii projects.

1. Install Homebrew Wii Games and Apps

One of the main reasons to use Homebrew is to install additional software. Among the list of titles available is a host of games. Some of these are original creations, while others are ports of open source games from other platforms.

Simply browse the list in the Homebrew Channel (HBC) and install the software. Moments later, it will be ready to use.

2. Develop Your Own Homebrew Games

You don’t have to rely on software already created by the community—you can make your own. A vast collection of homebrew games is available in HBC, and anyone can develop their own to share.

For details, check the list of Wii development tools available to download and install. These typically run on Windows or Linux PCs, with a few supporting Macs. When you’re done, upload games (or other software) to the HBC community for others to use.

3. Turn Your Old Wii Console Into a Children’s Media Center

Your Wii is permanently hooked up to your television; your computer probably isn’t. So why not use your Wii to play videos on your TV? These days media center apps (such as YouTube and Netflix) aren’t available for the Wii—but you can use WiiMC.

A media center suite for the Wii, WiiMC is easily set up via the Homebrew Browser. WiiMC can browse media shared over a network or stored on a SD card or USB hard drive. Note that WiiMC has limitations, however.

High definition (HD) video won’t play on the Nintendo Wii due to hardware shortcomings. Other drawbacks include a lack of 5.1 surround sound. This makes a Nintendo Wii running WiiMC more suitable for children than adults.

4. Use Your Wii to Play DVDs

With WiiMC installed you can also play DVDs on your Nintendo Wii. This will not work on newer Wiis, but if you bought an early model you’ve got yourself a DVD player.

This is significant because by default the Nintendo Wii doesn’t play DVDs. Despite using DVD data discs and having all of the necessary hardware to read DVD videos, the feature was disabled.

Resolutions of up to 1280×720 will play on the Wii, depending on video format. Note that while DVDs can play, CDs won’t.

5. Turn Your Wii Into a PC With Wii-Linux

Another amazing way to take advantage of the HBC on your Wii is to turn the console into a PC.

Wii-Linux can be installed via the Homebrew Channel, allowing PowerPC-compatible Linux applications to run. Many distributions for the Wii are available, including ones based on Debian, Gentoo, and Arch Linux.

For the best results (including Wi-Fi and USB support) Wii-Linux should be installed using the BootMii exploit.

Wii-Linux is also known as GC-Linux and as such can run on a Nintendo GameCube.

Not keen on Linux? The Wii can also run FreeBSD.

6. Install Minecraft Server on Your Old Wii

Not only can your old Wii run Linux, it can also host a Minecraft server. Want to play Minecraft network games? You’ve already got the hardware to do it!

This video outlines how the Minecraft server Java edition can be installed on the Nintendo Wii. Surprisingly, the result is a smooth hosting experience, although we expect that multiplayer would be limited to under 10 players.

It’s not a massive surprise that Minecraft server can run on the Wii. The modest Raspberry Pi can also host Minecraft network games.

Own multiple Wiis? You can also install a dedicated version of Minecraft, called WiiCraft.

7. Control Your PC with WiiVNC

VNC is one of the easiest ways to control one computer with another.

It’s not just limited to computers, however. You can install VNC on tablets and phones, for example. You can also stick it on your Wii if you’ve installed the Homebrew Channel.

Think WiiMC is too limited as a media player? Simply run content on a PC, VNC to it, and stream the content to your TV through the Wii. This project uses WiiVNC, available to install from HBC.

8. Use Your Wii as an Alarm Clock

An old Nintendo Wii can even get you up in the morning. The Strobe Alarm Clock is a homebrew project that lets you run a clock in full screen view.

Just remember to leave the Wii and your display switched on at bedtime!

9. Keep Time With a Wii Metronome

If you’re a musician, having a metronome to hand might be useful. While you can get metronome mobile apps, one running on your Wii is easier to control thanks to the Wiimote.

Metronome lets you specify a custom beat, from 30 to 300BPM. Simple and easy to use, this is a great idea that is effectively implemented.

10. Explore the World With WiiEarth

Love exploring the world using software like Google Earth? With WiiEarth you can do the same thing from your couch, using only your WiiMote.

This service uses map data from both Google Maps and Bing. Cycle between the options using the 2 button on your WiiMote to if something isn’t working. It’s a great way to quickly show someone directions or explore what your town looks like from the sky.

11. Install Emulators to Play Classic Games

Via the Virtual Console, Wii users already have access to a vast library of classic console and arcade games. Want more titles? With a little work you can emulate classic consoles including the NES and Game Boy Advanced.

MAME arcade emulators, PlayStation 1, and all Sega consoles can also be emulated on a Nintendo Wii running Homebrew.

Check our list of the best emulators you can run on the Nintendo Wii for full details.

12. Run DOS Software on Your Wii

It isn’t just retro console games you can run on a Nintendo Wii with the HBC. A version of DOSBox has been released for the Wii, which means hundreds of classic PC games will run.

So long as you have a keyboard and mouse connected to your Wii, these games should work with little issue. You’ll mostly be limited to mouse-driven adventures and strategy games—first person shooters don’t run too well in DOSBox on the Wii. Fortunately, most of the ones you want to play will run straight from HBC.

Check the DOSBox Wii compatibility list for full details about which games you should take the time to install.

12 Awesome Things You Can Do With an Old Wii

This is only a sample of what your Wii can do, of course: there is a lot more quality homebrew software out there, and if you know what you’re doing as a programmer you could probably make more. The only real limit is imagination.

  1. Install independent homebrew community games
  2. Develop your own indie projects
  3. Turn your Wii into a media center
  4. Play DVDs on the Wii
  5. Install Linux and use the Wii as a PC
  6. Host Minecraft network games
  7. Remotely control your PC over VNC
  8. Use the Wii as an alarm clock
  9. Install a metronome for music practice
  10. Explore with WiiEarth
  11. Play classic console games
  12. Run old PC games

It’s a good idea to regularly visit the WiiBrew wiki page for the latest homebrew releases for the Nintendo Wii. Meanwhile, if you also have the Wii’s successor, find out how to make the Wii U useful with homebrew.

Image Credit: Carlos Gutierrez/Flickr

Read the full article: What to Do With an Old Nintendo Wii: 12 Fun DIY Ideas and Projects


Read Full Article

10 Must-Know Photoshop Skills for Beginner Photographers


Photoshop is one of the most essential tools for photographers of all levels of ability. However, it can be pretty overwhelming when you first start using it.

Photoshop is so crammed with buttons, sliders, and other assorted tools, that it’s hard to know where to begin.

So, in this guide, we’ll walk you through some of the most useful photo-editing features in Photoshop. You’ll be able to use them right away, even if you’re a beginner who’s new to the app.

1. Non-Destructive Editing in Photoshop

Where possible, you should always edit your photos non-destructively. This means that you can edit your image as much as you like, but can always undo any change you make.

Programs like Lightroom and Google Photos are non-destructive editors. Photoshop isn’t.

The way to do non-destructive editing in Photoshop is to use layers. Layers are like a series of transparent sheets stacked on top of your image, and you edit each one separately without touching the original picture.

Using Layers

Ideally, you should make every single edit—or group of similar edits—on a separate layer. This enables you to adjust the edits later, make them more or less visible, or remove them entirely by hiding or deleting the layer.

Photoshop layers

Things like text, or objects pasted from another image, will go on their own layer automatically. If you’re using something like the paint brush tool you’ll need to create a new layer manually (click the New Layer button in the Layers panel to do that).

Photoshop non-destructive editing

For a couple of other common tools you need a few tricks to use them with layers:

  • Spot Healing Brush: To use the Spot Healing Brush (which we’ll look at in detail later), along with a few other tools including the Magic Wand and the Blur tool, you must manually create a new layer. Pick your tool from the toolbar and make sure you’ve ticked Sample All Layers in the options bar. Now make your edits on the new empty layer.
  • Healing Brush or Clone Stamp: To use the healing brush or clone stamp on their own layer, create a new layer manually. Pick the tool, and in the options bar at the top of the screen set Sample to Current & Below. Make your edits in the empty layer.
  • Dodge and burn with layers: The dodge and burn tools are used to add local contrast to parts of your image. To use them on their own layer go to Layer > New > Layer, then in the dialog box that opens set Mode to Overlay. Tick the box labeled Fill with Overlay-neutral color. Now use dodge and burn on that layer.

You can also make adjustments to things like contrast, saturation, and exposure on a separate layer. Photoshop has its own special tool for this, which we’ll deal with next.

2. Discover Adjustment Layers

Adjustment Layers allow you to make changes to your image’s tone and color in a non-destructive way. You can stack as many adjustment layers onto your image as you need.

To get started, click the Adjustment Layers icon in the Layers panel and choose the type of edit you want to make.

Photoshop adjustment layers

A Properties box will open corresponding to the tool you’ve selected, and you just need to move the sliders to make your changes.

Photoshop properties panel

The benefits to adjustment layers are that they can be edited at any time. Just double-click the layer to do this. You can also use the Opacity slider to fine-tune the effect of the layer—lower the opacity to reduce the impact of the changes—or hide or delete any if you don’t need them.

3. Instant Automatic Photo Fixes

Photoshop offers various automatic options for simple tweaks like removing shadows from your photos.

The most basic can be found in the Image menu: Auto Tone, Auto Contrast, and Auto Color.

After you’ve applied one you can fine-tune it a little by going to the Edit menu, where you’ll see a Fade option (such as Fade Auto Tone). It’s set to 100 percent by default, so reduce it if you want to lessen the effect of the color or tonal change.

Photoshop auto fade

Many of the other adjustment options have Auto settings as well. Create an adjustment layer for Levels, for example, then click the Auto button. You can use this as a starting point, before manually tweaking the sliders yourself. To fade the effect use the Opacity slider in the Layers panel.

4. Make Your Photos Pop With Levels

It’s quite common for your photos to look a bit flat when you open them in Photoshop. In most cases simply adding some contrast will help them to pop.

The Brightness/Contrast feature might seem the obvious way to do this. But you can get better results by using either the Levels or Curves tools.

Curves is a little more advanced, whereas you can dive straight into Levels and get great results. To open the Levels tool hit Cmd+L on Mac, or Ctrl+L on Windows.

Photoshop levels tool

Or, better still, open it on an adjustment layer by clicking the adjustment layers icon in the Layers panel and selecting Levels.

The Histogram

What you’ll see now is a histogram. The histogram is a graph that shows the tonal range of your image. The X-axis indicates brightness, from 100 percent black on the left edge to 100 percent white on the right, and all the shades of gray in between. The Y-axis shows the number of pixels for each of the tones.

Photoshop histogram

You can use the histogram to judge the exposure of your image. If the pixels are weighted to the left of the graph then the image may be underexposed. If they’re weighted to the right it may be overexposed.

When the pixels are clumped together in the middle, it shows the image lacks contrast, which is why it looks flat.

As a rule of thumb, you want your photos to cover the entire tonal range, from black to white. You can do this by dragging the tabs below the histogram.

The left tab adjusts the shadows in the image, and the right tab the highlights. Grab both in turn and drag them inwards until they’re in line with the first clump of pixels in the histogram.

Photoshop levels adjustment

You’ll see the shadows get darker and the highlights get lighter respectively, and then you can adjust it to taste. The middle tab adjusts the midtones—drag it to the left to brighten your image.

Dealing with a set of blurry pictures? No problem—you can sharpen photos using Photoshop.

5. Clean Up Shots With the Spot Healing Brush

No matter how much care you take over your photography, there’s always likely to be something in the shot that you wish wasn’t there. It might be a speck of dust on your camera’s sensor, a skin blemish, or a power line blighting a beautiful landscape.

Fortunately, you can remove simple things like this very easily in Photoshop using the Spot Healing Brush.

Select the Spot Healing Brush from the toolbar, or press J on your keyboard. Adjust the size of the brush using the square brackets keys—set it to about the same size as the object you’re removing.

Photoshop spot healing

Check that the Content-aware is selected in the options bar at the top. Now click on the spot you’re removing, or draw over it if it’s a larger object. It should now disappear. If any edges are left behind from the removed object, run the brush over those edges to get rid of them.

The Spot Healing Brush works best on small areas. It can be used to fix larger problems, but there are other tools for those areas.

6. Remove Unwanted Objects From Your Photos

How easy it is to remove an object from an image depends on the image itself. Removing something from a plain or non-uniform textured background is something that all Photoshop beginners can do. You have a choice of tools with which to do it.

Spot Healing Brush Tool

Photoshop spot heal remove

This brush paints over an object using texture and tone automatically sampled from the surrounding pixels. As we’ve already seen, it’s best used for smaller fixes, like dust and other specs.

Healing Brush Tool

Photoshop healing brush remove

The Healing Brush tool paints over an object with a texture sampled from a different part of the same image, while blending the color and tone with its new surrounding.

Hold the Alt key then click to select the part of the image you want to sample from. Next, paint over the object you want to remove. The brush gives you a preview of what you will be painting, enabling you to match any patterns easily.

Patch Tool

Photoshop patch tool remove

This replaces an object by copying a texture selected from another part of the image, and blends the color and tone.

To try it out, select the object you want to remove by drawing round it, then click and hold in the selected area and drag your mouse to the part of the image you want to sample. The selected area shows a realtime preview of what the final result will look like.

Clone Stamp Tool

Photoshop clone stamp tool

This works just like the Healing Brush Tool, but it copies the color as well as texture. Users often apply it for more advanced edits, like when they need to recreate parts of a photo that are missing. Discover more ways to use the Photoshop clone stamp tool.

You might need to experiment with each tool to see which is best for the job you’re doing. Sometimes you might need more than one tool.

7. Make Your Shots Black and White

There are many ways to convert color photos to black and white in Photoshop. Some are very advanced, but there’s at least one simple method that can produce great results for newcomers.

We’ll use an adjustment layer again, so click the icon in the Layers panel and select Black & White.

Photoshop black and white photos

Straight away you get a grayscale version of your photo. But it needn’t stop there. You can experiment with the Presets, which replicate the effect of using colored filters on your camera.

Next, you can play around with the sliders. Each slider corresponds to a color in the original image. Reducing it makes areas containing that color darker, and increasing it makes them lighter. So, if you wanted a striking dark sky, you might reduce the Blue and Cyan sliders, for example.

Additionally, try out the Tint option. Tick the box and Photoshop will place a colored overlay on your image. By default, Photoshop makes it sepia, but you can click through and create colors of your own.

8. Crop Your Photos

There are numerous reasons why you might need to crop your photos. To prepare it for printing, tighten up the composition, or even to straighten the horizon. The crop tool in Photoshop is fairly self-explanatory. To crop freely, grab one of the handlebars at the corners or edges of the image and drag inwards.

To crop to a specific format, click Ratio in the options bar. Choose Original Ratio, Square etc. to keep a fixed ratio, or choose W x H x Resolution to specify your own.

Whenever you’re cropping, make sure the Delete Cropped Pixels box is not checked. This enables you to crop non-destructively. You’ll only see the image as you’ve cropped it, but the extra pixels will not be discarded. If you want to change the crop later, you can.

Photoshop straighten button

The crop tool also enables you to straighten up the horizon in your shots. Click the Straighten button in the options bar and draw a straight line along the horizon in your image. Straighten works by rotating the image and cropping out the corners, so make sure Delete Cropped Pixels isn’t checked if you think you might ever need to undo it.

For more interesting effects, you can also crop images using shapes in Photoshop.

9. Add a Photo Frame in Photoshop

One popular way to put the finishing touch to an image is to add a frame. This is very simple to do in Photoshop.

add a Photoshop frame

Go to Image > Canvas Size. Under Canvas Extension Color select White (or whatever color you want—this will be the color of your frame). Then in the New Size section change the units to Pixels and enter the amount a size for how thick you want the frame to be. Enter the same value in both the Width and Height boxes.

Photoshop frame

You’ll need to experiment until you find a result you’re happy with. A good starting point is around 2-3 percent of the width of your image.

10. Save Your Photos in the Right File Format

Finally, what’s the best way to save your photos?

Standard image file types like JPEG, TIFF, or PNG do not support Photoshop layers. As soon as you save a file in any of these formats, the app will flatten your image into a single layer.

save an image as a PSD

To preserve the layers, and to enable you to continue editing the layers, either now or in future, you must save your image in the PSD format.

However, if you want to use your edited image on the web, or to print it, then you will need to save another copy in a standard image format such as JPEG or TIFF.

In short, the PSD file is the working copy, and the JPEG is the finished version.

Your Photoshop Journey Has Begun!

For all of its complexities, it’s pretty easy to get impressive results from Photoshop as soon as you start using it. Then, as you become more confident and more ambitious, you’ll find that Photoshop opens up a whole load of new features to help you along the way.

Your Photoshop journey has now begun, and your next step should be to learn how to change the background of a photo in Photoshop.

Image Credit: structuresxx/Shutterstock

Read the full article: 10 Must-Know Photoshop Skills for Beginner Photographers


Read Full Article

How to Use 2FA on Facebook Without a Phone Number


At one point in time, Facebook forced you to hand over your phone number in order to set up 2FA (two-factor authentication). However, since 2018, Facebook has no longer required you to provide a phone number, meaning anyone can now use 2FA on Facebook.

For the uninitiated, two-factor authentication offers an extra layer of security for your online accounts. As well as typing in a password, you need to provide a secondary code to access your account. And this is sent via SMS or through an authentication app.

Secure Your Facebook Without a Phone Number

Facebook has offered 2FA for some time now. However, the social network formerly required you to provide your phone number during the set up process. This was necessary for Facebook to send authentication codes via SMS text messages.

However, the need to provide a phone number clearly put some people off setting up 2FA. And those who did give Facebook their phone number were annoyed when a bug in Facebook’s 2FA system meant Facebook started sending other notifications via SMS.

So, as detailed in a Facebook Security note, in 2018, Facebook simplified the two-factor authentication set-up procedure. And the social network added support for third-party authentication apps such as Google Authenticator and Duo Security.

How to Set Up 2FA on Facebook

To use 2FA on Facebook without giving the social network your phone number, you’ll need an account with a third-party authentication app. Done? Then all that’s left to do now is set up 2FA on Facebook using the authentication app. Here’s how…

On Facebook.com:

  1. Go to Facebook.com/settings.
  2. Click “Security and Login”.
  3. Scroll down to “Use two-factor authentication” and click “Edit”.
  4. Click “Use authentication app” and follow the instructions.

On the Facebook app:

  1. Click the three lines in the top-right of the app.
  2. Click “Settings and Privacy”.
  3. Click “Settings”.
  4. Click “Security and Login”.
  5. Click “Use two-factor authentication”.
  6. Select “Authentication app” and follow the instructions.

Two-Factor Authentication Is Annoying But Necessary

To be perfectly frank, using two factor authentication is a bit of a chore. However, once you have set it up, it’s a pretty painless endeavor, and the extra layer of security it provides definitely makes it worth doing. So do it. Now. On Facebook and everywhere else.

Image Credit: Jean-Etienne Minh-Duy Poirrier/Flickr

Read the full article: How to Use 2FA on Facebook Without a Phone Number


Read Full Article

The 12 Best Linux Desktop Environments


You can tell whether a screenshot is Windows or Mac from a mile away, and that’s because both commercial operating systems only have one desktop environment. Windows has the Start Menu and the Taskbar, while macOS has its iconic Dock and Menu Bar.

But search for Linux and you’ll see images that look strikingly different from one another:

Unlock the "Essential Linux Commands" cheat sheet now!

This will sign you up to our newsletter

Enter your Email

Linux desktop screenshots

This diversity stems from the fact that Linux offers far more than one desktop environment. This is part of what makes Linux exciting to use, but the breadth of choice can make it difficult to pick the one that’s right for you. That’s why we’ve compiled this list of the best Linux desktop environments.

1. GNOME

GNOME Linux desktop environment

GNOME is currently the most popular Linux desktop environment. It’s the default in several major Linux-based operating systems such as Ubuntu and Fedora.

GNOME has a design that simultaneously suits both touch-based devices and traditional PCs. A single panel sits at the top of the screen much like on a mobile device. Rather than a dock or window list, users interact with windows by opening an Activities Overview that displays apps, open software, and virtual desktops.

GNOME’s developers use the GIMP Toolkit (GTK+), which may come up when you’re deciding which apps to install.

Want a good look at GNOME? Check out Fedora.

2. KDE Plasma

KDE Plasma Linux desktop environment

KDE Plasma is the arguably the best Linux desktop environment for people who like to tinker with their computer’s interface. Every on-screen component is a widget that you can move, resize, or delete. With enough tinkering, you can configure the Plasma desktop to look and feel like any other desktop interface.

Software designed for KDE tends to come with an abundance of options. These apps are among the most powerful the Linux desktop has to offer. Side note: KDE developers use Qt, rather than GTK+.

Want a good look at KDE Neon? Head to neon.kde.org.

3. Cinnamon

Cinnamon Linux desktop environment

Cinnamon is the default interface for Linux Mint, one of the most widely-used versions of Linux out there. It began as a fork of GNOME at a time when that interface was undergoing drastic changes.

Cinnamon preserves a more traditional experience that will make long-time Windows users feel at home.

Many love Cinnamon for its combination of familiarity and ease-of-use. This Linux desktop strikes a blend between adopting new ideas and preserving the old way of doing things.

Want a good look at Cinnamon? Check out Linux Mint.

4. MATE

MATE Linux desktop environment

At a time when the Cinnamon project was forking GNOME, the MATE community formed to preserve what already existed. If you didn’t want to transition to GNOME 3.0, MATE offered a way to continue using 2.x.

The MATE developers have invested time and effort into updating the background code, but on the whole, this still feels like what many people felt was the best Linux desktop environment over decade ago.

The lack of change hasn’t curtailed adoption either. Newcomers often approach MATE as a more lightweight and traditional alternative to the likes of GNOME, a role also occupied by the next desktop on this list.

Want a good look at MATE? Check out Ubuntu MATE.

5. Xfce

Try the Xfce desktop on Linux

Xfce, whose mascot is a mouse, has long existed as a speedy interface for Linux-powered computers. It isn’t based on GNOME, but it does use the same toolkit.

These days Xfce feels like a comparable alternative to MATE. Its developers continue to place an emphasis on keeping the interface light, even if that means foregoing the latest bells and whistles.

With a relatively small development team, a lot of time often passes between updates. The result is that Xfce, like MATE, hasn’t changed all that much over the years. But many people like the desktop environment as a proven reliable choice.

Want a good look at Xfce? Check out Xubuntu.

6. Pantheon

Pantheon Linux desktop environment

Pantheon is the desktop environment of elementary OS, and it’s one of the few Linux interfaces so explicitly tied to one Linux-based OS.

At first glance, Pantheon may resemble macOS. There’s a panel at the top and a dock at the bottom, with apps offering a stylish and unified design. But much of Pantheon’s design language actually comes from its founder’s original experience developing for GNOME.

With the elementary project’s innovative pay-what-you-want payment scheme, Pantheon has become a hotbed for new Linux apps. These apps, like the desktop itself, are a departure from the traditional Linux way of doing things. Pantheon is not very customizable or extensible. That is arguably its biggest strength and its greatest weakness.

Want a good look at Pantheon? Check out elementary OS.

7. Budgie

Budgie Linux desktop environment

Budgie is a relatively young desktop environment born out of the Solus project. It offers a pared down interface that, perhaps in contrast to MATE and Xfce, still manages to feel modern. The design language goes more for the new, even as some of the old desktop paradigms remain in place.

Much of the early inspiration for Budgie came from Chrome OS and mobile apps. Yet while Budgie feels simpler than some of the other options, there are still many ways to tweak this Linux desktop to make it feel your own.

Want a good look at Budgie? Check out Solus.

8. Unity

Unity 8 Linux desktop environment
Image Credit: UBports

Unity is the former default interface for Ubuntu, the most popular version of desktop Linux. With Ubuntu 17.10, Canonical ceased development of Unity and started providing the GNOME desktop instead.

There remain many Unity fans out there and many machines still running the aging interface. And while Canonical may longer support the project, the code still exists for others to adopt and use as they wish.

Want a good look at Unity? Check out older versions of Ubuntu.

9. LXDE

LXDE is a Linux desktop environment
Image credit: Lubuntu

LXDE exists to be a fast, lightweight, energy efficient desktop environment. Based on GTK+, it’s an option to consider if even Xfce runs slowly on your machine, or alternatives simply feel too bloated for your tastes.

LXDE is modular, meaning it isn’t all or nothing. You can swap out the default window manager, which is OpenBox, for an alternative. Whether it’s the session manager, the network manager, or the sound server, it’s free to go in exchange for something else.

Want a good look at LXDE? Check out Lubuntu up to version 18.04.

10. LXQt

LXQt Linux desktop environment
Image Credit: LXQt

There are a handful of desktop interfaces based on GTK+. Fewer are built with Qt apps in mind. If you find KDE Plasma to be a bit much, LXQt might be more your speed.

LXQt was born from the merger between the Qt port of LXDE and Razor-Qt. The latter no longer exists, and LXQt has become the successor to LXDE. As a result, this desktop may feel a tad more modern while still running on older machines.

Want a good look at LXQt? Check out versions of Lubuntu since 18.10.

11. Enlightenment

Enlightenment Linux desktop environment
Image Credit: Enlightenment

Enlightenment began over a decade ago as an interface for desktop computers. It hasn’t gained much adoption among Linux users, but it remains available and functional. The art style is more skeuomorphic than the cartoony images often seen in other free desktops.

Today Enlightenment has expanded to mobile devices, wearables, and televisions. Enlightenment is the window manager and compositor used in Tizen.

Want a good look at Enlightenment? Check out Elive.

12.Sugar

The Sugar desktop environment
Image Credit: Sugar on a Stick

Sugar is a desktop environment designed to help children learn. It is decidedly simple, not in the minimalist sense, but in terms of complexity. As a result, it’s one of the best Linux desktops to install for kids.

Sugar comes from Sugar Labs, a non-profit run by volunteers. The project not only provides a desktop environment but simple apps to go with it. These tools are in place so that educators can acclimatize children to computers even in areas with few economic resources.

Want a good look at Sugar? Check out Sugar on a Stick.

Have Fun With Your Linux Desktop Environment

While I’ve suggested different ways to try out each desktop, these are hardly the only methods. Most Linux-based operating systems allow you to swap out the default desktop for another. Many offer variants that provide a different interface out of the box.

The options don’t end here either. To learn more on changing the way apps appear onscreen, check out the difference between GTK+ and Qt.

Read the full article: The 12 Best Linux Desktop Environments


Read Full Article