Backing up the data on your computer is crucial. If you’re using a Mac, you’ll be glad to know there’s a built-in backup tool called Time Machine that makes backing up your computer easy.
Today we’ll show you how to set up a drive for use with Time Machine, how to set up and use Time Machine, and how to restore from a Time Machine backup.
Setting Up a Drive for Time Machine
For Time Machine backups, you can use an external hard drive connected to a USB, FireWire, or Thunderbolt port on your Mac. Backing up to a network drive also works.
For this overview, we’re going to use an external hard drive. You can dedicate the entire external hard drive to your backups. Or you can partition an external hard drive so you use part of it for Time Machine backups, and the rest of the drive for file storage.
Adding Time Machine to the Menu Bar
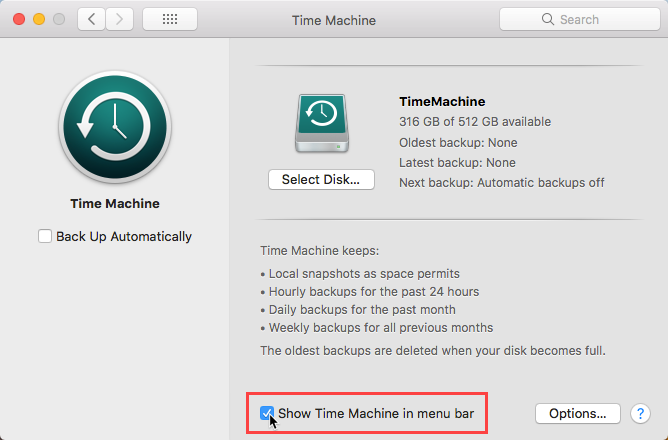
For easy access to Time Machine, add it to the menu bar on the desktop.
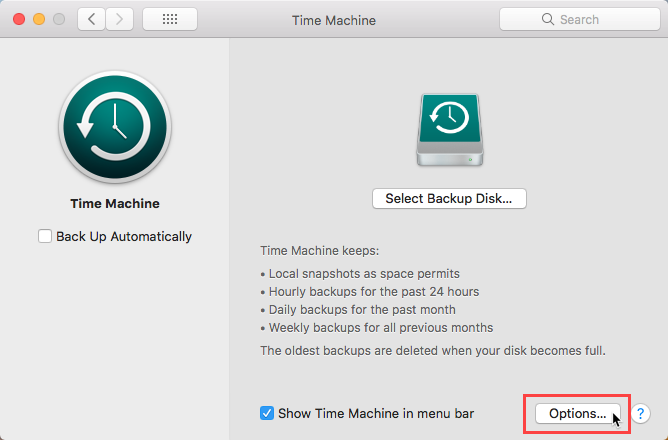
Go to Apple Menu > System Preferences > Time Machine. Then check the Show Time Machine in menu bar box.
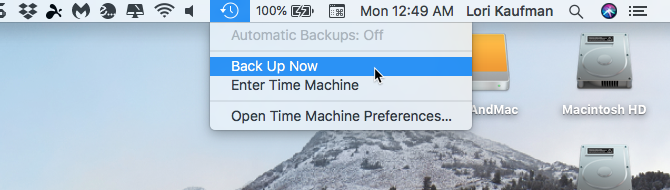
Choose Back Up Now to manually start a backup.
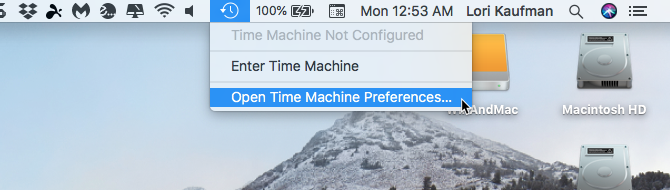
If you haven’t done a backup yet with Time Machine, the menu says Time Machine Not Configured. Select Open Time Machine Preferences to begin setting up your first backup.
Excluding Files/Folders From Time Machine Backups
Before starting your first backup, you should specify which files and folders should not be included in your backups. For example, you might have some large files or unimportant files and folders you don’t need to back up.
Select Open Time Machine Preferences from the Time Machine menu or by going to Apple Menu > System Preferences > Time Machine. Then click Options.
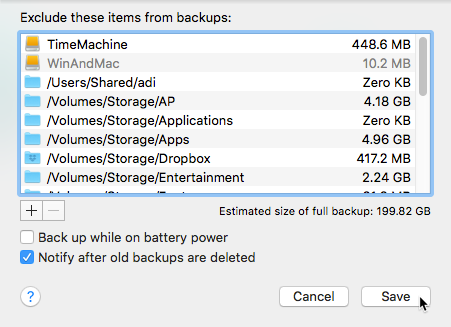
Click the Plus sign to add a drive, file, or folder to the Exclude these items from backups list.
The backup disk itself is automatically excluded, as well as any other external drives. The list of excluded items applies to all backup disks added to Time Machine (we discuss setting up multiple backup disks in the next section).
When you’re done adding items, click Save.
Backing Up Your Mac Using Time Machine
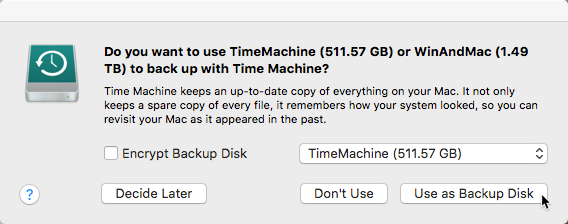
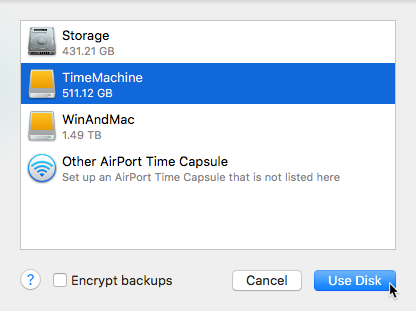
Once you’ve set up your drive, or when you connect a drive you’ve already set up, you might see a prompt asking if you want to use the connected disk to back up with Time Machine. If you partitioned the disk, select the partition you want to use from the dropdown list.
If your backup will contain sensitive data, you should encrypt the backup. To do this, check the Encrypt Backup Disk box. Encrypting the initial backup can take quite a long time. It could be hours or maybe a few days, depending on how many files you have.
Click Use as Backup Disk. The Time Machine Preferences dialog box opens and the backup process automatically starts.
If Time Machine doesn’t ask you to choose a backup disk when you connect the drive to your Mac, select Open Time Machine Preferences from the Time Machine menu on the menu bar. Or go to Apple Menu > System Preferences > Time Machine.
Click Select Backup Disk.
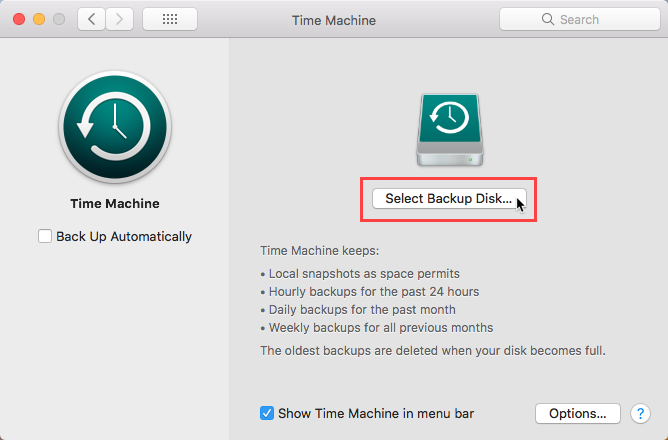
Time Machine lists all available connected disks that have enough free space. Click the disk you want to use.
You can choose to encrypt your backup here, if you didn’t see the dialog box mentioned above. Check the Encrypt backups box. Then click Use Disk.
Backing Up to Multiple Disks and Encrypting
Time Machine allows you to back up data to multiple disks. For example, if you keep one backup disk at home and another at work, you can add both to Time Machine. Simply click Select Backup Disk again in the Time Machine Preferences and select another disk.
Time Machine rotates the backup schedule among your disks and keeps track of the status of the backup on each separate disk. The next time you connect each disk, Time Machine backs up everything that changed since the last time you used that specific one.
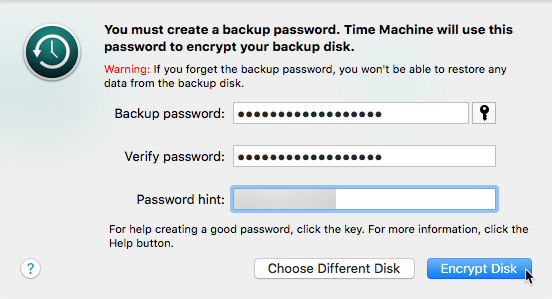
If you chose to encrypt your backups, you’re next asked for a backup password. Enter your password in the Backup password box and again in the Verify password box.
You can also enter a hint to help you remember your password in the Password hint box. Click Encrypt Disk to proceed.
Running Time Machine Backups
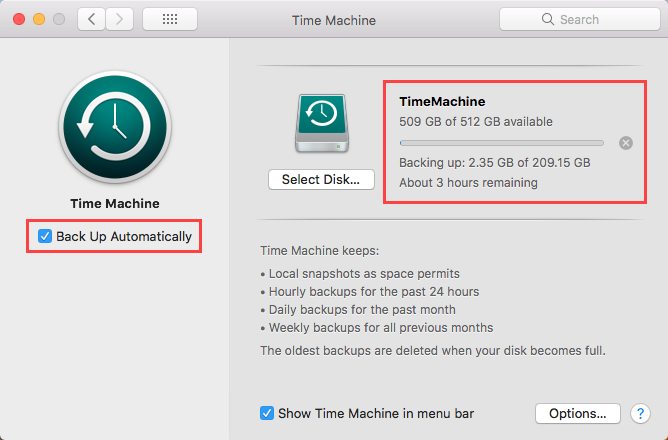
Once you’ve set up your backup, Time Machine starts preparing the backup and turns on automatic backups. The progress of the backup displays in the Time Machine Preferences.
If you don’t want to run automatic backups, uncheck the Back Up Automatically box in the Time Machine Preferences. The backup in progress stops.
When automatic backups are off, you can manually start a backup by opening the Time Machine menu on the menu bar and selecting Back Up Now from the menu (as discussed earlier).
Your first backup may take a long time, depending on how many files you have. Once you’ve done the first backup, Time Machine backs up only the files that changed since the previous backup, so future backups will be faster.
Feel free to continue using your Mac while a backup is in progress.
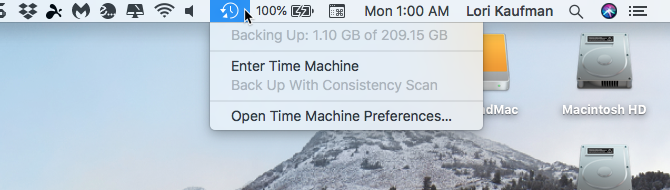
You can also view the progress of the backup on the Time Machine menu.
The Time Machine icon on the menu bar indicates when Time Machine is backing up, when it’s idle until the next automatic backup, or if it’s unable to complete the backup.
Time Machine uses notifications to keep you informed about the initial backup status. It displays a notification after the first backup is complete, or if any issues arise during the initial backup.
Click Close to dismiss the notification.
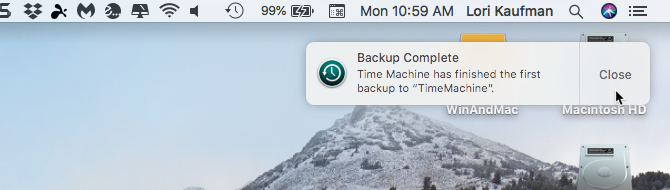
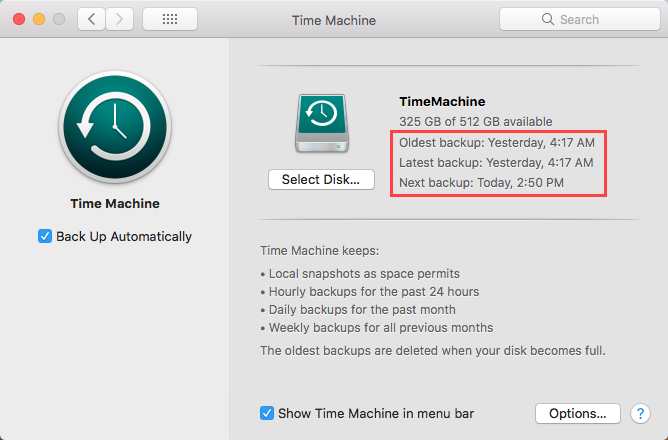
When a backup finishes, Time Machine gives you information about your Oldest backup, your Latest backup, and when the Next backup takes place.
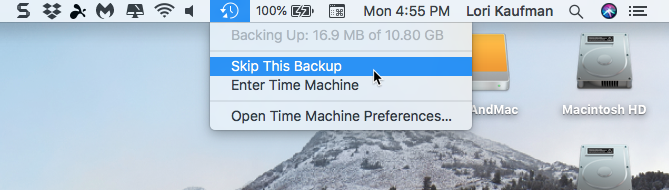
Pausing a Time Machine Backup
If you want to pause a backup and finish it later, select Skip This Backup from the Time Machine menu. Time Machine automatically tries to back up again at the Next backup time.
Restoring From a Time Machine Backup
Performing regular backups isn’t going to help if you can’t restore them. We’ve covered three ways to restore files from a Time Machine backup so you can always recover your files.
Using Local Snapshots in Time Machine
Local snapshots in Time Machine allow you to restore data even when your backup disk isn’t connected to your Mac.
Time Machine stores some backups as local snapshots on your main hard drive or other local drives. One snapshot saves every hour, if Time Machine is set to backup automatically. If you’re using macOS High Sierra, Time Machine also saves a snapshot before installing any update to macOS.
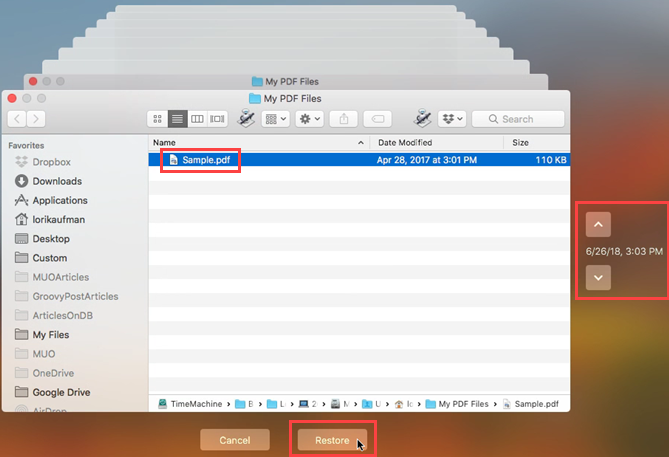
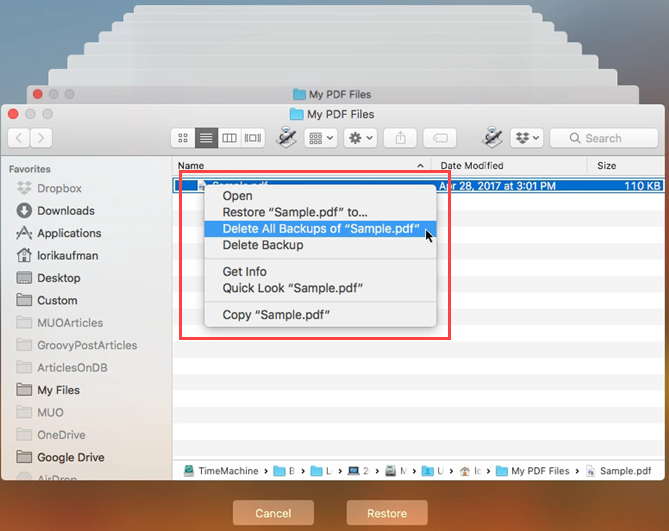
When you select Enter Time Machine from the Time Machine menu on the menu bar, you’ll see files from both your external backup and the hourly local snapshots on your Mac’s hard drive, if your external backup drive is connected to your Mac. If the backup drive is not connected, Time Machine shows you the local snapshots only.
Use the arrows on the right to scroll through versions of your selected file or folder. Then you can choose a version of a file or folder and click Restore to get that version of the item.
You can also perform additional tasks when you enter Time Machine, such as restoring individual files and folders. But the feature also works for deleting a version of or all versions of a backed-up item, getting information about an item, previewing an item using Quick Look, or copying an item.
Perform Regular Backups on Mac to Avoid Data Loss
Performing regular backups is critical to avoid losing data and Time Machine is a good, built-in backup option. But it’s not the only one available for Mac.
We’ve covered Mac backup solutions that aren’t Time Machine if you’re looking for something more robust.
Read the full article: How to Use Time Machine to Back Up Your Mac
Read Full Article
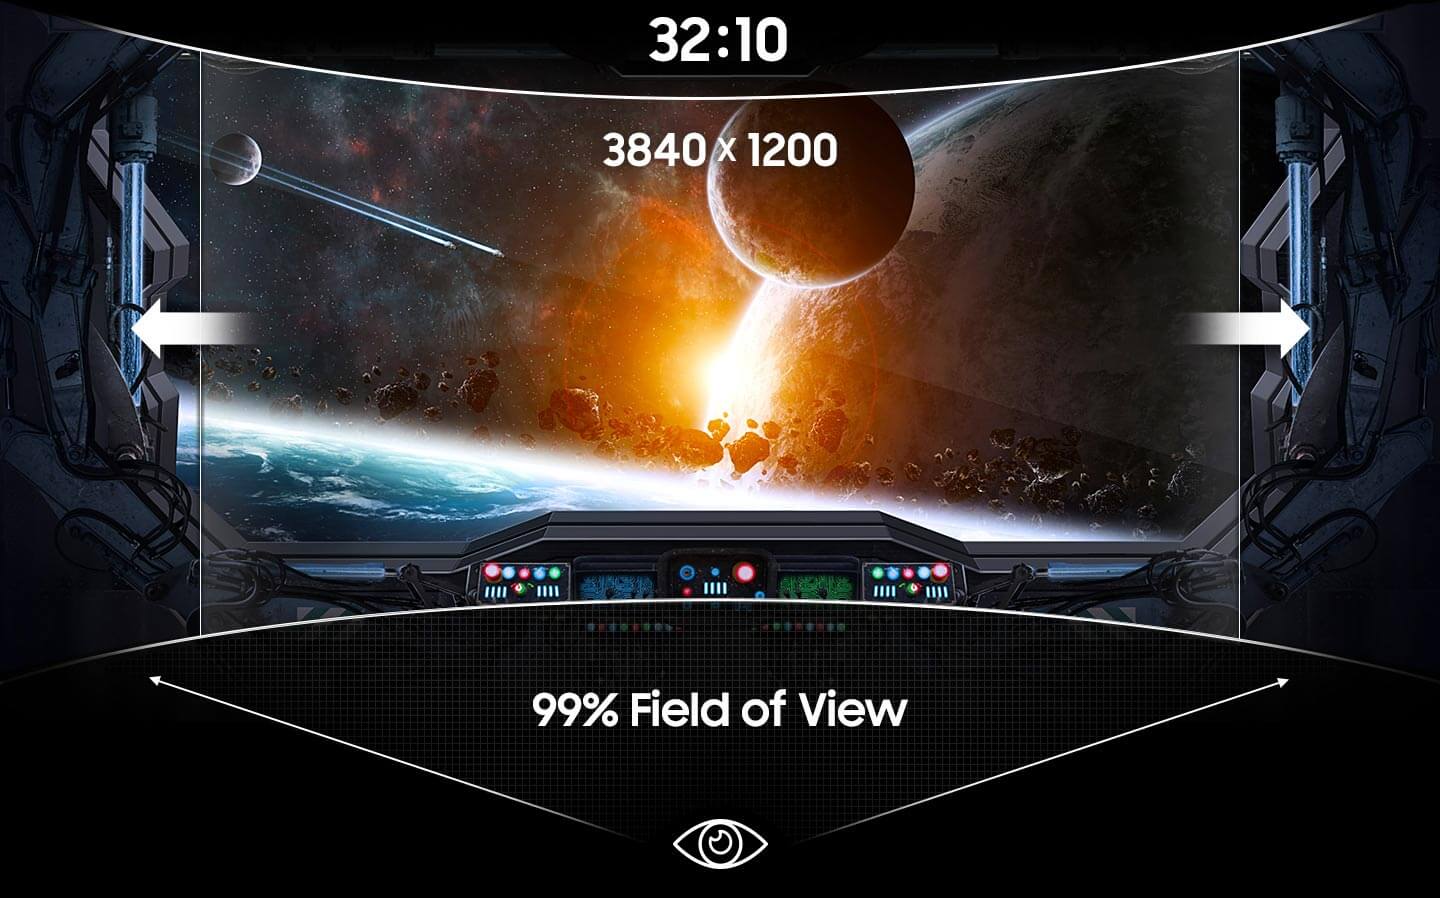 Actually it’s a little less wide than a couple of the monitors Samsung announced at CES — but those had two problems. First, they were 3840×1080. And I just need more vertical pixels than that. Second, they were 49 inches wide. That’s a BIG monitor! Not just big, but with those pixels spread out that far, it’s not going to be sharp at all.
 Just right?!
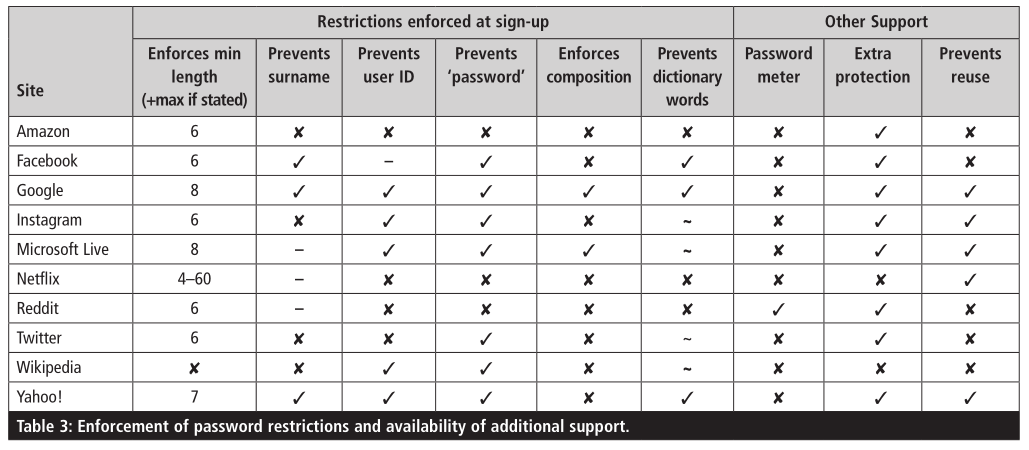 Even sites that do have restrictions, like requiring multiple character types or rejecting commonly used passwords, seldom explain themselves. Presented with no feedback at the start, users creating an account may enter a password, only to be told it must be longer… and then, again, that it can’t have a certain word (like the user’s last name)… and then, again, that it must include special characters. And some sites have different requirements when you sign up than when you set a new one!


 From porting playlists in music streaming services to health data from fitness trackers to our reams of photos and videos, the DTP could be a boon for startups. Incumbent tech giants maintain a huge advantage in popularizing new functionality because they instantly interoperate with a user’s existing data rather than making them start from scratch. Even if a social networking startup builds a better location sharing feature, personalized avatar, or payment system, it might be a lot easier to use Facebook’s clone of it because that’s where your profile, friends, and photos live.