“Whether for AR or robots, anytime you have software interacting with the world, it needs a 3D model of the globe. We think that map will look a lot more like the decentralized internet than a version of Apple Maps or Google Maps.” That’s the idea behind new startup Fantasmo, according to co-founder Jameson Detweiler. Coming out of stealth today, Fantasmo wants to let any developer contribute to and draw from a sub-centimeter accuracy map for robot navigation or anchoring AR experiences.
Fantasmo plans to launch a free Camera Positioning Standard (CPS) that developers can use to collect and organize 3D mapping data. The startup will charge for commercial access and premium features in its TerraOS, an open-sourced operating system that helps property owners keep their maps up to date and supply them for use by robots, AR and other software equipped with Fantasmo’s SDK.
With $2 million in funding led by TenOneTen Ventures, Fantasmo is now accepting developers and property owners to its private beta.
Directly competing with Google’s own Visual Positioning System is an audacious move. Fantasmo is betting that private property owners won’t want big corporations snooping around to map their indoor spaces, and instead will want to retain control of this data so they can dictate how it’s used. With Fantasmo, they’ll be able to map spaces themselves and choose where robots can roam or if the next Pokémon GO can be played there.
“Only Apple, Google, and HERE Maps want this centralized. If this data sits on one of the big tech company’s servers, they could basically spy on anyone at any time,” says Detweiler. The prospect gets scarier when you imagine everyone wearing camera-equipped AR glasses in the future. “The AR cloud on a central server is Big Brother. It’s the end of privacy.”
Detweiler and his co-founder Dr. Ryan Measel first had the spark for Fantasmo as best friends at Drexel University. “We need to build Pokémon in real life! That was the genesis of the company,” says Detweiler. In the meantime he founded and sold LaunchRock, a 500 Startups company for creating “Coming Soon” sign-up pages for internet services.
After Measel finished his PhD, the pair started Fantasmo Studios to build augmented reality games like Trash Collectors From Space, which they took through the Techstars accelerator in 2015. “Trash Collectors was the first time we actually created a spatial map and used that to sync multiple people’s precise position up,” says Detweiler. But while building the infrastructure tools to power the game, they realized there was a much bigger opportunity to build the underlying maps for everyone’s games. Now the Santa Monica-based Fantasmo has 11 employees.
“It’s the internet of the real world,” says Detweiler. Fantasmo now collects geo-referenced photos, scans them for identifying features like walls and objects, and imports them into its point cloud model. Apps and robots equipped with the Fantasmo SDK can then pull in the spatial map for a specific location that’s more accurate than federally run GPS. That lets them peg AR objects to precise spots in your environment while making sure robots don’t run into things.
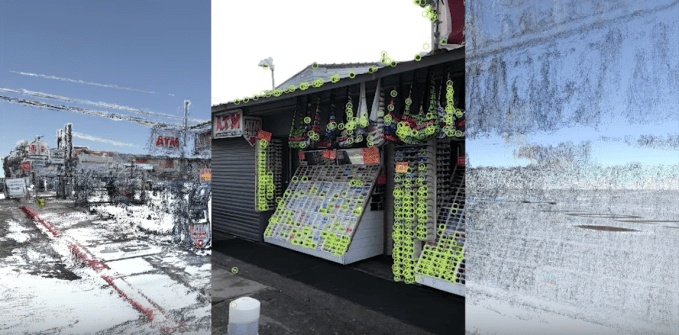
Fantasmo identifies objects in geo-referenced photos to build a 3D model of the world
“I think this is the most important piece of infrastructure to be built during the next decade,” Detweiler declares. That potential attracted funding from TenOneTen, Freestyle Capital, LDV, NoName Ventures, Locke Mountain Ventures and some angel investors. But it’s also attracted competitors like Escher Reality, which was acquired by Pokémon GO parent company Niantic, and Ubiquity6, which has investment from top-tier VCs like Kleiner Perkins and First Round.
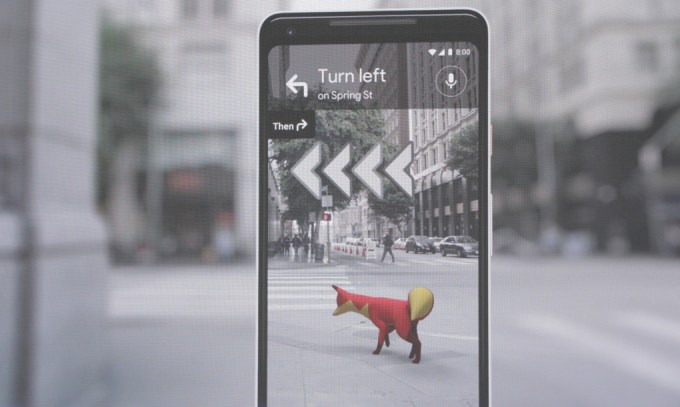
Google is the biggest threat, though. With its industry-leading traditional Google Maps, experience with indoor mapping through Tango, new VPS initiative and near limitless resources. Just yesterday, Google showed off using an AR fox in Google Maps that you can follow for walking directions.
Fantasmo is hoping that Google’s size works against it. The startup sees a path to victory through interoperability and privacy. The big corporations want to control and preference their own platforms’ access to maps while owning the data about private property. Fantasmo wants to empower property owners to oversee that data and decide what happens to it. Measel concludes, “The world would be worse off if GPS was proprietary. The next evolution shouldn’t be any different.”
Read Full Article