04 July 2020

This Week in Apps: India bans Chinese apps, Apple freezes game updates in China, iOS developer backlash continues


Welcome back to This Week in Apps, the Extra Crunch series that recaps the latest OS news, the applications they support and the money that flows through it all.

The app industry is as hot as ever, with a record 204 billion downloads and $120 billion in consumer spending in 2019. People are now spending three hours and 40 minutes per day using apps, rivaling TV. Apps aren’t just a way to pass idle hours — they’re a big business. In 2019, mobile-first companies had a combined $544 billion valuation, 6.5x higher than those without a mobile focus.

In this Extra Crunch series, we help you keep up with the latest news from the world of apps, delivered on a weekly basis.

This week, we’re tracking the continued ramifications of the in-app purchases incident ignited by Basecamp, which has emboldened more developers to voice their gripes with Apple publicly in the past few days. The app stores are also this week enmeshed in world of politics, ranging from the India-China border dispute to apps impacted by China’s big brother-esque regulations to the latest with Apple’s antitrust probe.

HEADLINES

Dozens of Chinese apps banned in India

In a major upset to mobile app businesses competing on a global stage, India this week blocked 59 apps developed by Chinese firms, due to concerns that the apps were engaging in activities that threatened the “national security and defense of India,” according to the Indian government.

The ban itself is a political power move as it follows deadly clashes between Indian and Chinese troops along the disputed Himalayan border in June, which led to the death of at least 20 Indian soldiers on June 16. (China didn’t disclose its casualties.) Indian government officials claimed they had received reports of the apps stealing and transmitting user data in an unauthorized manner to servers outside the country. This is what necessitated the ban, they said.

India’s move could prove to have larger repercussions, as it sets the stage for a world where Chinese internet companies are excluded from key markets. This isn’t something that’s limited to apps, of course. For instance, the  U.S. is rallying its allies to stop using Huawei technologies for 5G. But China’s policies could mean its more successful apps, like TikTok, will lose key markets and therefore, forfeit revenue and power.

  • India’s ban threatens TikTok’s growth in a key market 

The move to ban the Chinese apps in India most notably impacts TikTok. To date, India had been the app’s largest overseas market until now, with some 200M+ users across around 611M lifetime downloads. In the most recent quarter, TikTok and the 58 other banned apps combined, had been downloaded around 330M times. The ban is estimated to impact roughly one in three smartphone users in India, according to research firm Counterpoint.

Google and Apple began to comply with New Delhi’s order on Thursday, to prevent Indian users from accessing the banned apps. In addition, India’s Department of Telecommunications ordered telecom networks and ISPs to block access to those 59 apps immediately.

Kevin Mayer, the chief executive of TikTok, said on Wednesday his app was in compliance with Indian privacy and security requirements and he was looking forward to meeting with various stakeholders in the Indian government to discuss.


Read Full Article

How to Report Email Fraud and Spam to Authorities


Email spam is an unavoidable nuisance of online life. And while your email provider probably does a good job of filtering out junk, you might wonder how to report email fraud if you receive a particularly shady message.

Let’s take a look at how to report email fraud to the proper resources.

Reporting Fraud to Government Authorities

First, we’ll look at what government agencies you should report fraud to, based on where you live.

Where to Report Email Fraud in the US

If you receive a fraudulent email and live in the United States, you can report it to both the FBI and the FTC.

For the FBI, visit the IC3 (Internet Crime Complaint Center). There, you can file a complaint. Click the FAQ link to see some details about what a complaint entails. The page is intended for people who have been victims of online crime, but you can fill out the details even if you haven’t fallen for anything.

Next, you should also consider filing a complaint with the FTC. Select a category from the left side and walk through the steps to put your report into the correct category.

FTC Complaint Form

Finally, you can also report email fraud to your state’s consumer protection office. Visit USA.gov’s State Consumer Protection Offices page to find the information for your state.

How to Report Email Fraud in Canada

Residents of Canada should head to the Canadian Anti-Fraud Centre’s Report fraud page. This will walk you though reporting what happened.

Note that you’ll need to sign in with an approved partner account (such as a bank) or create a new GCKey account.

How to Report Email Fraud in the UK

If you live in the UK, the National Cyber Security Centre asks that you forward phishing emails to the Suspicious Email Reporting Service: report@phishing.gov.uk.

You also have the option of reporting it to Action Fraud using the online form.

Reporting Email Fraud in Australia

Those in Australia should head to the Australian Competition and Consumer Commission’s Scamwatch form.

Reporting Email Fraud to the Impersonated Company

While it’s a good idea to let the appropriate authorities about email fraud, it’s not the only step you can take. Agencies like the FBI probably won’t respond to what you file using their forms, and they can’t help you recover money if you handed it over to scammers.

If you receive a fraudulent email pretending to be from a certain company, you should report it to the real company. You’ll find contact info for most businesses on their website, and some have a dedicated email address for forwarding fraudulent messages.

For instance, Amazon’s suspicious communication page has instructions for reporting scam messages. It asks you to forward fraud emails to stop-spoofing@amazon.com. PayPal requests that you forward fake emails to spoof@paypal.com.

Hopefully, the company in question can have a team look into the specific scam in an attempt to shut it down. If many people report it, they’ll be more likely to start investigating.

Report Email Fraud to the Email Provider

The last step of reporting scam emails is to let the email service know. Companies like Google and Microsoft don’t want malicious users taking advantage of their services to rip people off.

Most email services have an option for reporting phishing messages, as well as options to report accounts that break the rules. Let’s look at a few of the most popular ones.

How to Report Fraud in Gmail

In Gmail, you can click the three-dot menu to the right of any message and choose Report phishing. This will remove the email from your inbox and report the danger to Google.

Gmail Report Phishing

If the fraudulent email came from a Gmail address, you can also use the Gmail abuse reporting form. This helps Google investigate people using the service for illicit means.

How to Report Email Fraud to Yahoo

Unfortunately, Yahoo Mail doesn’t have simple reporting tools like Gmail does. You can mark an email as spam in your Yahoo Mail account, but there’s no option to report fraud or phishing.

Yahoo’s help pages direct you to Yahoo Support to report security issues, but at the time of writing, this wasn’t working properly. Your results with it may vary.

How to Report Email Scams in Outlook

If you use Outlook on the web, open an email and select Junk > Phishing > Report to let Microsoft know about the problem.

Outlook Report Phishing Email

Microsoft has a dedicated email address for reporting phishing. Create a new email message and drag the scam message into it to add it as an attachment. Then send the message to phish@office365.microsoft.com so the company can take a look.

Microsoft also has a special page for reporting tech support scams.

The Reality of Email Fraud

If you receive a particularly nasty phishing email, it’s wise to report it using the above channels. Doing so will increase the chance that authorities take action against it.

Unfortunately, it’s hard to be optimistic about this. Due to the nature of email fraud, it’s very difficult to shut down scammers who use this method. The email provider may be able to cut off someone’s access, but that won’t stop them from opening another account and continuing on.

With just an email address to go on, government authorities probably won’t be able to shut down a scam operation. Email addresses are disposable, and the scammers can use VPNs and other methods to hide their location so you can’t trace the email.

This is why gift cards are such a common method of payment for scams. Compared to wiring someone money, gift card codes are essentially impossible to trace. As a result, requesting payment via gift cards is one of the telltale signs of phone scams.

If you or a loved one ever fall victim to email fraud, you can use these methods to explain what happened and hopefully get help. But in most cases, that money is gone. That’s why it’s vital to stay up-to-date on current scams and know how to spot email phishing.

The best defense against email fraud is a healthy caution of everything you receive.

Report Email Fraud When You Can

We’ve seen where you can report email fraud to government agencies, companies, and email service providers. Making more people aware of fraud is important, but it’s also very difficult to shut down scam operations before they pop back up.

If you also get similar messages on your phone, find out how to report spam text messages next.

Read the full article: How to Report Email Fraud and Spam to Authorities


Read Full Article

The 5 Best Ultrawide Monitors for All Budgets in 2020


best-ultrawide-monitors

If you’re looking for a monitor upgrade, you’ll first need to establish your budget. Once you have that settled, you can narrow down which monitor you’re after, ranging from an entry-level product to splashing out on a luxury purchase.

Whether you’re after an affordable device or want to go all-out, here are the best ultrawide monitors for every budget.

Best Budget Ultrawide Monitor:
VIOTEK GNV34DBE Ultrawide Gaming Monitor

VIOTEK GNV34DBE Ultrawide Gaming Monitor VIOTEK GNV34DBE Ultrawide Gaming Monitor Buy Now On Amazon

First of all, let’s explore a model that won’t break the bank: the VIOTEK GNV34DBE. Despite having a gaming focus, it doesn’t hike up the price to appeal to avid gamers. It’s priced at a highly affordable level that makes it an ideal entry point for those curious about 1440p ultrawide monitors.

Even though it’s a relatively cheap widescreen monitor, it doesn’t skimp on the quality. For the price, you get a 1440p resolution, a 34-inch screen, and a screen curvature for further immersion. You can either place it on the monitor stand or mount it to a wall, depending on which would suit your space best.

Despite the monitor being one of the best in its price bracket, it’s still covered by some great protective plans. VIOTEK offers a three-year warranty plan for this monitor, which also comes with a “no dead pixels” policy. Should a dreaded dead pixel appear, VIOTEK will replace it.

Best Budget Ultrawide Gaming  Monitor:
LG 34GL750-B 34-inch Ultragear

LG 34GL750-B 34-inch Ultragear LG 34GL750-B 34-inch Ultragear Buy Now On Amazon $659.95

While the above monitor is perfectly fine for gaming, you can pay a little more for a few more features while still respecting your bank balance. The LG 34GL750-B 34-inch Ultragear has some nice extras for both Radeon and Nvidia users, so you’re in luck regardless of which you use.

If you use Radeon, this monitor supports FreeSync, which helps remove screen tearing while you game. It also supports Nvidia’s equivalent of this technology, G-SYNC. Aside from this, the monitor has some nice touches that come in handy when gaming.

For instance, its 1ms motion blur reduction keeps the action crystal-clear so you can always see what’s happening. Unfortunately, it’s a little lacking in the resolution department. While other ultrawide monitors use a 1440p resolution, this one only goes up to 1080p. As such, if the resolution is important, consider one of the other monitors on this list.

Best Gaming Ultrawide Monitor:
Alienware Curved 34-inch WQHD Monitor

Alienware Curved 34-inch WQHD Monitor Alienware Curved 34-inch WQHD Monitor Buy Now On Amazon $754.51

If going budget isn’t your style and you want the best that money can buy, look no further than the Alienware Curved 34-inch WQHD Monitor. This is one of the best ultrawide monitors for gaming as it is compatible with G-SYNC, has a 1440p resolution, and is curved for added immersion. On top of this, it has a 120Hz refresh rate, 2ms response time, and good color quality.

The monitor also features In-Plane Switching (IPS) technology to ensure the colors are always vibrant. IPS prevents colors from being washed out when viewed from an angle, so you can always ensure a great picture quality regardless of where you look at it from.

Finally, this Alienware monitor is perfect if you want something with a fantastic visual design. It uses the company’s Legend Industrial Design, which gives a sleek and stylish look which keeps your PC looking futuristic.

The Best Office Ultrawide Monitor:
Samsung 34-inch Ultrawide Monitor

Samsung 34-inch Ultrawide Monitor Samsung 34-inch Ultrawide Monitor Buy Now On Amazon $418.45

If you’re constantly changing windows while working, you’ll know the importance of having everything laid out in front of you. The Samsung 34-inch Ultrawide Monitor is impressively sized and is one of the best ultrawide monitors for work.

You may wonder why it’d be better to buy a single ultrawide monitor, rather than several smaller ones. With multiple displays, you can place a window in each one, making multitasking a breeze. This Samsung model emulates this setup using Picture-by-Picture (PBP), which allows two sources to show their inputs on each side of the screen.

You can go even further with Picture-in-Picture (PIP), which reduces the second image to 25 percent of the screen and allows you to move it around. With these two features, you can customize your monitor’s display to highlight what’s important to you.

Additionally, the 34-inch display has a ratio of 21:9, giving each window plenty of space, so your workspace won’t feel cluttered. Whether you’re doing in-depth research or coding multiple applications, this ultra-widescreen monitor is a fantastic addition to your office.

The Best Curved Ultrawide Monitor:
Dell U-Series 38-inch Screen LED-Lit Monitor

Dell U-Series 38-inch Screen LED-Lit Monitor Dell U-Series 38-inch Screen LED-Lit Monitor Buy Now On Amazon $1,097.77

If you’re after the best ultrawide monitor on the market, you’ll be delighted with the Dell U-Series 38-inch Screen LED-Lit Monitor. The impressive 38-inch screen is coupled with an immersive design to really draw you in. That’s not to mention the fact that it comes equipped with a stunning 3840×1600 resolution.

There’s also two HDMI ports, a USB-C connection, two USB upstream powers, and one USB downstream port. As such, you can use this monitor to extend the USB ports on your computer. This is a desirable convenience if, for instance, your PC is on the floor and you have to bend down to plug in devices all the time.

The 5ms response time means that this monitor isn’t as suited to gaming as the the Alienware WQHD. However, for all other graphical or media tasks, it’s a dream. If you’re after an immersive ultrawide screen, then the Dell U-Series 38-inch monitor might be right for you.

The Best Ultrawide Monitor for You

If you’re interested in an ultrawide monitor, there’s a device here to suit your needs. Whether you’re after a performance improvement or a high-value investment, there’s an ultrawide monitor for you.

That said, even casual gamers might find themselves more interested in the best 4K gaming monitors for all budgets instead. We’ve also explained the differences between LCD and LED displays.

Read the full article: The 5 Best Ultrawide Monitors for All Budgets in 2020


Read Full Article

15 Multiplayer Brain Games to Play With Friends


brainy-multiplayer-games

No matter how old or young you are, or how intelligent you think you may be, it’s important to exercise your brain regularly. Thankfully, there are lots of fun ways to do that. One of which is to play multiplayer brain games with your friends.

These mobile games will test your gray matter, and let you show off your knowledge and skills to anyone willing to play with you. So, can you beat your friends at one of these awesome multiplayer brain games? They’re all free to play.

1. Maze King

Mazes can make for great brain exercise game and the bigger the maze, the more challenging it is. Maze King is a great game for showing off your solving skills against others. Play through the Stage Mode to get the hang of the game, then head to the Multiplayer Mode to take on a friend.

You can invite friends with a tap that will send a link to the game via text message. Or, you can compete against a random player if you prefer.

Download: Maze King for Android | iOS (Free, in-app purchases available)

2. Chess Time

Chess Time is a terrific mobile option for playing pals around the world. The game offers different background colors to choose from, leaderboards by country and rating, and a timer to see how long the challenge lasts. You can also enable options such as the quick chat keyboard, coordinates display, and valid move color.

Connecting with friends is easy: You can search for a player if you know their username or send an invitation to them via email or text.

Download: Chess Time for Android | iOS (Free, in-app purchases available)

3. Chess With Friends Free

If you prefer to take on your Facebook friends in a game of chess, then Chess With Friends Free is the way to go. Search for one of your pals or find a player by username. You can enable chat notifications, show yourself available to other players, and make yourself visible on the leaderboards.

Chat while you play or just concentrate on the game. You can also discover a new opponent and view the leaderboard for the month.

Download: Chess With Friends Free for Android | iOS (Free, in-app purchases available)

4. Skillz – Logical Brain

Skillz – Logical Brain is an excellent way to train your brain alone, but is even better against others. The app has a variety of brain teasers for you to pick from or you can play a random game.

Start off level one by picking a friend, once you sign into Google (on Android). Then, show off your skills in puzzles and challenges that put your memory, reflexes, accuracy, and speed to the test.

You can type a message to other players who are waiting in rooms to play and see where you stand on the leaderboard.

Download: Skillz – Logical Brain for Android | iOS (Free, in-app purchases available)

5. QuizUp

QuizUp is an enjoyable trivia games with a huge variety of topics. You can pick from business, education, history, and science. Or see who knows the most about sports, games, television, and music. The trick is to answer quickly and correctly in a round of questions. Move up the levels as you annihilate your pals in this battle of wits.

You can connect easily using Facebook and then search for friends who have the game installed. After you play a round, tap the chat button to gloat to your buddy about how you just outscored them.

Download: QuizUp for Android | iOS (Free, in-app purchases available)

6. Trivia Crack

The original Trivia Crack is still around and still a blast. Your goal is to collect a character for each of the six categories: art, history, science, sports, geography, and entertainment. To do this, continue to answer questions correctly for the category you hit when you spin the wheel.

Log into Facebook to play against friends or connect to Twitter to invite others. Trivia Crack is a turn-based game, so you can take your spin when you have time. You can also chat within the game and share your level achievements to rub in your victories.

Download: Trivia Crack for Android | iOS (Free, in-app purchases available)

7. Trivia Crack Kingdoms

If you enjoyed the first Trivia Crack game, then check out Trivia Crack Kingdoms. In a royal battle against your buddies, find out who really is the brainy one in the realm of trivia.

Pick a channel topic such as sports, world history, food and drink, movies, or television shows. Then when you answer correctly, you earn crowns, striving to collect them all before your opponent does.

By connecting to Facebook, you can challenge your friends. Plus, Trivia Crack Kingdoms offers an in-app chat for a little trash talk.

Download: Trivia Crack Kingdoms for Android | iOS (Free, in-app purchases available)

8. Words With Friends

Words With Friends has been popular around the world for years. But if you’ve never tried it and you enjoy word games, then you must check it out. Gameplay is similar to Scrabble, where you create words with the letters you are given. The words must connect on the game board and longer words and letters with higher point values help you score bigger.

Like Chess With Friends Free and made by the same company, Words lets you play against your Facebook pals. Chat during the game, take your turn when you have a minute, and show off your smart skills with high-scoring words.

Download: Words With Friends for Android | iOS (Free, in-app purchases available)

9. Word Chums

For a Words With Friends style game with cute characters, try your skills at Word Chums. With the same type of Scrabble gameplay, a colorful interface, and a cheerful experience, creating words for high scores is truly fun. Word Chums also offers power-ups for replacing all of your letters and getting high-scoring hints.

You can play against your Facebook friends, other Word Chums players, or someone in your contacts list. The game has an in-app chat for some friendly ribbing during the competition.

Download: Word Chums for Android | iOS (Free, in-app purchases available)

10. Pictoword

For a different type of word game battle, Pictoword is a picture-based challenge. The concept is simple. You see two images that combine to form one word. You just have to figure out what that word is with the number of letter spaces provided.

Unlike the other games in this list, Pictoword lets you create a “family” to play against others. You will need to solve your way through many levels first, but this is great practice. Then, create your group, invite members, and chat during a break.

Download: Pictoword for Android | iOS (Free, in-app purchases available)

11. Infinite Word Search

Another brainy game to play against your friends is Infinite Word Search. The game is played in the same classic style of the word search puzzles you have seen all over the place. But Infinite Word Search lets you choose the topic for your puzzle with options like animals, countries, fashion, and many more.

If you think your word finding skills are better than your Facebook friends, connect and play a pal. In real-time gameplay, see who can find the most words the quickest. This adds quite a bit of challenge to the gameplay, especially if you are both looking for the same word at the same time.

Download: Infinite Word Search for Android | iOS (Free, in-app purchases available)

Facebook Games

Don’t forget that there are tons of Facebook Instant Games worth playing as well. There are plenty to play alone, but what’s the fun in that when you can outscore a friend and brag about it?

Pop open your mobile Facebook app and select Gaming from the menu. Or, when you are online on a desktop or laptop, click the Home button and pick Games from the left-hand navigation.

Here are just a few brainy games you can play against your friends:

On your mobile device or online, just choose a game and hit Play.

These Multiplayer Brain Games Are Extremely Entertaining

It’s normal to love a game that you are good at. If you often outscore or simply outplay your friends, that’s even better. With these games, you can sharpen your skills and prove that you’re the smartest among your friends. So, let the brainy battle of wits begin!

For more fun games to play with friends, check out these cross-platform mobile multiplayer games.

Read the full article: 15 Multiplayer Brain Games to Play With Friends


Read Full Article

How to Report Email Fraud and Spam to Authorities


Email spam is an unavoidable nuisance of online life. And while your email provider probably does a good job of filtering out junk, you might wonder how to report email fraud if you receive a particularly shady message.

Let’s take a look at how to report email fraud to the proper resources.

Reporting Fraud to Government Authorities

First, we’ll look at what government agencies you should report fraud to, based on where you live.

Where to Report Email Fraud in the US

If you receive a fraudulent email and live in the United States, you can report it to both the FBI and the FTC.

For the FBI, visit the IC3 (Internet Crime Complaint Center). There, you can file a complaint. Click the FAQ link to see some details about what a complaint entails. The page is intended for people who have been victims of online crime, but you can fill out the details even if you haven’t fallen for anything.

Next, you should also consider filing a complaint with the FTC. Select a category from the left side and walk through the steps to put your report into the correct category.

FTC Complaint Form

Finally, you can also report email fraud to your state’s consumer protection office. Visit USA.gov’s State Consumer Protection Offices page to find the information for your state.

How to Report Email Fraud in Canada

Residents of Canada should head to the Canadian Anti-Fraud Centre’s Report fraud page. This will walk you though reporting what happened.

Note that you’ll need to sign in with an approved partner account (such as a bank) or create a new GCKey account.

How to Report Email Fraud in the UK

If you live in the UK, the National Cyber Security Centre asks that you forward phishing emails to the Suspicious Email Reporting Service: report@phishing.gov.uk.

You also have the option of reporting it to Action Fraud using the online form.

Reporting Email Fraud in Australia

Those in Australia should head to the Australian Competition and Consumer Commission’s Scamwatch form.

Reporting Email Fraud to the Impersonated Company

While it’s a good idea to let the appropriate authorities about email fraud, it’s not the only step you can take. Agencies like the FBI probably won’t respond to what you file using their forms, and they can’t help you recover money if you handed it over to scammers.

If you receive a fraudulent email pretending to be from a certain company, you should report it to the real company. You’ll find contact info for most businesses on their website, and some have a dedicated email address for forwarding fraudulent messages.

For instance, Amazon’s suspicious communication page has instructions for reporting scam messages. It asks you to forward fraud emails to stop-spoofing@amazon.com. PayPal requests that you forward fake emails to spoof@paypal.com.

Hopefully, the company in question can have a team look into the specific scam in an attempt to shut it down. If many people report it, they’ll be more likely to start investigating.

Report Email Fraud to the Email Provider

The last step of reporting scam emails is to let the email service know. Companies like Google and Microsoft don’t want malicious users taking advantage of their services to rip people off.

Most email services have an option for reporting phishing messages, as well as options to report accounts that break the rules. Let’s look at a few of the most popular ones.

How to Report Fraud in Gmail

In Gmail, you can click the three-dot menu to the right of any message and choose Report phishing. This will remove the email from your inbox and report the danger to Google.

Gmail Report Phishing

If the fraudulent email came from a Gmail address, you can also use the Gmail abuse reporting form. This helps Google investigate people using the service for illicit means.

How to Report Email Fraud to Yahoo

Unfortunately, Yahoo Mail doesn’t have simple reporting tools like Gmail does. You can mark an email as spam in your Yahoo Mail account, but there’s no option to report fraud or phishing.

Yahoo’s help pages direct you to Yahoo Support to report security issues, but at the time of writing, this wasn’t working properly. Your results with it may vary.

How to Report Email Scams in Outlook

If you use Outlook on the web, open an email and select Junk > Phishing > Report to let Microsoft know about the problem.

Outlook Report Phishing Email

Microsoft has a dedicated email address for reporting phishing. Create a new email message and drag the scam message into it to add it as an attachment. Then send the message to phish@office365.microsoft.com so the company can take a look.

Microsoft also has a special page for reporting tech support scams.

The Reality of Email Fraud

If you receive a particularly nasty phishing email, it’s wise to report it using the above channels. Doing so will increase the chance that authorities take action against it.

Unfortunately, it’s hard to be optimistic about this. Due to the nature of email fraud, it’s very difficult to shut down scammers who use this method. The email provider may be able to cut off someone’s access, but that won’t stop them from opening another account and continuing on.

With just an email address to go on, government authorities probably won’t be able to shut down a scam operation. Email addresses are disposable, and the scammers can use VPNs and other methods to hide their location so you can’t trace the email.

This is why gift cards are such a common method of payment for scams. Compared to wiring someone money, gift card codes are essentially impossible to trace. As a result, requesting payment via gift cards is one of the telltale signs of phone scams.

If you or a loved one ever fall victim to email fraud, you can use these methods to explain what happened and hopefully get help. But in most cases, that money is gone. That’s why it’s vital to stay up-to-date on current scams and know how to spot email phishing.

The best defense against email fraud is a healthy caution of everything you receive.

Report Email Fraud When You Can

We’ve seen where you can report email fraud to government agencies, companies, and email service providers. Making more people aware of fraud is important, but it’s also very difficult to shut down scam operations before they pop back up.

If you also get similar messages on your phone, find out how to report spam text messages next.

Read the full article: How to Report Email Fraud and Spam to Authorities


Informational Facts About NADRA


The national database and registration authority (NADRA) is an independent and autonomous body. The primary function of this agency is to maintain government databases and statistically manage the sensitive registration database of all national citizens of Pakistan. The main aim of this body is to protect the databases of the citizens in the view of […]

The post Informational Facts About NADRA appeared first on ALL TECH BUZZ.


5 Time-Saving Websites & Apps for the Best Shortcuts


Shortcuts

Time is the most precious commodity. We can’t create more time, so the best we can do is to save it. Through shortcuts and hacks, these websites and apps will help save time in many activities, and it all adds up.

Technology is all about speed, isn’t it? It helps us do things faster, or enables shortcuts that get the more done in less time. The internet is here to help you gain information faster by summarizing books or YouTube videos, or level-up your computer usage by learning keyboard shortcuts. It’s all about saving time and making the best use of it.

1. Sipreads (Web): Free Book Summaries by Real People

Sipreads offers free book summaries written by real people of personal development and start-up books

Don’t have the time to read a full book, but still want to know its best ideas? Sipreads is a free newsletter by two people who read books and summarize their salient points. Basile Samel and Ali Salah send one new book every week, while you can browse some of the previous summaries on the website.

Sipreads focuses on self-learning books, so you won’t find a summary of the latest Dan Brown novel here. Some of the famous titles already covered include Atomic Habits, The Subtle Art of Not Giving a F*ck, The Start-up of You, and How to Win Friends and Influence People. Nuggets of personal development wisdom in short time is the goal here.

The summaries are usually seven to ten minute reads. Both Basile and Ali have a concise writing style that turns the book’s major points into something like a Medium article, full of sub-headers and bullet points. And if you find that it works for you, then you can go read the full book. But you’re never left out of the conversation when people start discussing the book.

2. Summarize the Internet (Web): Linguistic AI Summarizes Any Online Article

Summarize the internet is the smartest way to get a short summary of a long article, removing all the fluff and reducing it to 50% or less of the original

Writers on the internet often drone on and fluff up their writing with unnecessary words to lengthen the material and make it seem more authoritative, like this sentence. Don Patrick wants to cut the fat and give you an instant summary of any article with his AI extension.

Summarize the Internet isn’t the first extension offering this, but it takes a different approach. Patrick, an amateur language programmer with a deep interest in AI, ditched statistical methods and came up with a combination of word choice, sentence weaving, and story flow. As he explains, the target was for the summarizer to extract what the writer found important, minus what the reader finds unimportant (like introductions, examples, speculation, etc.)

After trying a few of these summary-making extensions, I can say Summarize the Internet is better at drawing out important points than others. Typically, a good article reduces to 50%, while a weak article reduces to 30% of its original length. While the extension’s pop-up pane is open, you can skim the main article in the tab too, in case you want to cross-reference.

Download: Summarize the internet for Chrome | Firefox (Free)

3. FizzD (Chrome): Summarize YouTube Videos Into Chapters and Highlights

FizzD uses AI to analyze YouTube videos and turn them into chapters, highlights, and key concepts for easier browsing

Someone links you to a long YouTube video. Is it actually interesting or useful? FizzD uses AI to go through the video and summarize it into chapters, highlights, and key concepts, so you can browse a video like it was an article with sub-headers.

Once you install the extension, you’ll see a “Fizz It” button next to the Share and Save buttons under the video. Click it and wait for a minute for FizzD to work its magic. Soon, the video will have a few yellow dots, marking what FizzD thinks are chapters within the long video. Hover over a dot to see the chapter title, and click to jump to it.

In the top-right corner of the video pane, you’ll see two new overlays: Highlights and Key Concepts.

Highlights is a text summary of the main points of the video, but you can’t use them as timestamps. Key Concepts show up as blue dot timestamps, so you can see where one of the main subjects was discussed in different chapters.

FizzD is a fascinating implementation of AI in videos. It doesn’t work with every YouTube video and seems to be at its best in educational videos like TED talks and webinars.

Download: Fizzd for Chrome (Free)

4. Use the Keyboard (Web): Gorgeous Collection of Best Keyboard Shortcuts

Use The Keyboard is a gorgeous collection of keyboard shortcuts for the most popular online and offline apps in 2020

Stop reaching for your mouse or trackpad to go from one window to another. Just press Alt+Tab (or Command+Tab) to switch windows. The most amount of time you can save on a computer is by learning keyboard shortcuts like this.

Use the Keyboard (UTK) is a gorgeous collection of keyboard shortcuts for the most-used programs, apps, and websites in 2020. It includes guides for software like Zoom, Slack, Gmail, Notion, Chrome, Netflix, Trello, and a bunch of other offline and online apps that you use on a daily basis.

It’s especially nice that the guide includes web apps because often such keyboard shortcut guides ignore them and you have to rely on browser shortcuts alone.

With one switch, UTK can flip between Windows and macOS shortcuts. You can also check the original reference for any sheet of shortcuts, which usually comes from the developer’s official notes. UTK’s neat and tidy interface is fantastic to look at, and you might want to convert it into PDFs to print.

While UTK serves apps, it doesn’t have shortcuts for operating systems. So make sure you check out our master list of all essential Windows keyboard shortcuts, which you can also download for free.

5. The Skullery and Hurry The Food Up (Web): Quick Recipes Without Fluff

The Skullery is a no-nonsense recipe website without long preambles, and essential cooking tools built in

The internet is full of food writers sharing recipes, but there’s always a long preamble, right? The mood they were in, some story about how the recipe was handed down, and all those things you don’t need. These two recipe websites are about cooking quickly without wasting time.

The Skullery simply gives you recipes quickly. No registration, no meandering preambles, it’s all about cooking immediately. Your browser will remember favorites, you can change measures on-the-fly without going to another converter, and you can quickly browse or search for anything. The recipe has step-by-step instructions, which you can cross-off within the browser app too. It just works.

Hurry The Food Up is a vegetarian cooking blog with a time-oriented approach. Speed is key here, with most recipes being under 30 minutes. And yes, that includes both prep time and cook time. Choose your type of diet, time, and meal course to filter the recipes. Hurry The Food Up is also available as an app on Android.

Download: Hurry The Food Up for Android (Free)

Save More Time by Learning to Manage It

These apps are excellent time-saving shortcuts to many of the things you do daily. But technology is only going to go so far in freeing up time for you. If you truly want to squeeze more out of your daily 24 hours, you need to learn time management and set goals.

Read the full article: 5 Time-Saving Websites & Apps for the Best Shortcuts


Read Full Article

5 Time-Saving Websites & Apps for the Best Shortcuts


Shortcuts

Time is the most precious commodity. We can’t create more time, so the best we can do is to save it. Through shortcuts and hacks, these websites and apps will help save time in many activities, and it all adds up.

Technology is all about speed, isn’t it? It helps us do things faster, or enables shortcuts that get the more done in less time. The internet is here to help you gain information faster by summarizing books or YouTube videos, or level-up your computer usage by learning keyboard shortcuts. It’s all about saving time and making the best use of it.

1. Sipreads (Web): Free Book Summaries by Real People

Sipreads offers free book summaries written by real people of personal development and start-up books

Don’t have the time to read a full book, but still want to know its best ideas? Sipreads is a free newsletter by two people who read books and summarize their salient points. Basile Samel and Ali Salah send one new book every week, while you can browse some of the previous summaries on the website.

Sipreads focuses on self-learning books, so you won’t find a summary of the latest Dan Brown novel here. Some of the famous titles already covered include Atomic Habits, The Subtle Art of Not Giving a F*ck, The Start-up of You, and How to Win Friends and Influence People. Nuggets of personal development wisdom in short time is the goal here.

The summaries are usually seven to ten minute reads. Both Basile and Ali have a concise writing style that turns the book’s major points into something like a Medium article, full of sub-headers and bullet points. And if you find that it works for you, then you can go read the full book. But you’re never left out of the conversation when people start discussing the book.

2. Summarize the Internet (Web): Linguistic AI Summarizes Any Online Article

Summarize the internet is the smartest way to get a short summary of a long article, removing all the fluff and reducing it to 50% or less of the original

Writers on the internet often drone on and fluff up their writing with unnecessary words to lengthen the material and make it seem more authoritative, like this sentence. Don Patrick wants to cut the fat and give you an instant summary of any article with his AI extension.

Summarize the Internet isn’t the first extension offering this, but it takes a different approach. Patrick, an amateur language programmer with a deep interest in AI, ditched statistical methods and came up with a combination of word choice, sentence weaving, and story flow. As he explains, the target was for the summarizer to extract what the writer found important, minus what the reader finds unimportant (like introductions, examples, speculation, etc.)

After trying a few of these summary-making extensions, I can say Summarize the Internet is better at drawing out important points than others. Typically, a good article reduces to 50%, while a weak article reduces to 30% of its original length. While the extension’s pop-up pane is open, you can skim the main article in the tab too, in case you want to cross-reference.

Download: Summarize the internet for Chrome | Firefox (Free)

3. FizzD (Chrome): Summarize YouTube Videos Into Chapters and Highlights

FizzD uses AI to analyze YouTube videos and turn them into chapters, highlights, and key concepts for easier browsing

Someone links you to a long YouTube video. Is it actually interesting or useful? FizzD uses AI to go through the video and summarize it into chapters, highlights, and key concepts, so you can browse a video like it was an article with sub-headers.

Once you install the extension, you’ll see a “Fizz It” button next to the Share and Save buttons under the video. Click it and wait for a minute for FizzD to work its magic. Soon, the video will have a few yellow dots, marking what FizzD thinks are chapters within the long video. Hover over a dot to see the chapter title, and click to jump to it.

In the top-right corner of the video pane, you’ll see two new overlays: Highlights and Key Concepts.

Highlights is a text summary of the main points of the video, but you can’t use them as timestamps. Key Concepts show up as blue dot timestamps, so you can see where one of the main subjects was discussed in different chapters.

FizzD is a fascinating implementation of AI in videos. It doesn’t work with every YouTube video and seems to be at its best in educational videos like TED talks and webinars.

Download: Fizzd for Chrome (Free)

4. Use the Keyboard (Web): Gorgeous Collection of Best Keyboard Shortcuts

Use The Keyboard is a gorgeous collection of keyboard shortcuts for the most popular online and offline apps in 2020

Stop reaching for your mouse or trackpad to go from one window to another. Just press Alt+Tab (or Command+Tab) to switch windows. The most amount of time you can save on a computer is by learning keyboard shortcuts like this.

Use the Keyboard (UTK) is a gorgeous collection of keyboard shortcuts for the most-used programs, apps, and websites in 2020. It includes guides for software like Zoom, Slack, Gmail, Notion, Chrome, Netflix, Trello, and a bunch of other offline and online apps that you use on a daily basis.

It’s especially nice that the guide includes web apps because often such keyboard shortcut guides ignore them and you have to rely on browser shortcuts alone.

With one switch, UTK can flip between Windows and macOS shortcuts. You can also check the original reference for any sheet of shortcuts, which usually comes from the developer’s official notes. UTK’s neat and tidy interface is fantastic to look at, and you might want to convert it into PDFs to print.

While UTK serves apps, it doesn’t have shortcuts for operating systems. So make sure you check out our master list of all essential Windows keyboard shortcuts, which you can also download for free.

5. The Skullery and Hurry The Food Up (Web): Quick Recipes Without Fluff

The Skullery is a no-nonsense recipe website without long preambles, and essential cooking tools built in

The internet is full of food writers sharing recipes, but there’s always a long preamble, right? The mood they were in, some story about how the recipe was handed down, and all those things you don’t need. These two recipe websites are about cooking quickly without wasting time.

The Skullery simply gives you recipes quickly. No registration, no meandering preambles, it’s all about cooking immediately. Your browser will remember favorites, you can change measures on-the-fly without going to another converter, and you can quickly browse or search for anything. The recipe has step-by-step instructions, which you can cross-off within the browser app too. It just works.

Hurry The Food Up is a vegetarian cooking blog with a time-oriented approach. Speed is key here, with most recipes being under 30 minutes. And yes, that includes both prep time and cook time. Choose your type of diet, time, and meal course to filter the recipes. Hurry The Food Up is also available as an app on Android.

Download: Hurry The Food Up for Android (Free)

Save More Time by Learning to Manage It

These apps are excellent time-saving shortcuts to many of the things you do daily. But technology is only going to go so far in freeing up time for you. If you truly want to squeeze more out of your daily 24 hours, you need to learn time management and set goals.

Read the full article: 5 Time-Saving Websites & Apps for the Best Shortcuts


Space Basketball


Space Basketball

How to Add Subtitles to a Movie or TV Series


Subtitles are one of those things many people sneer at. But once you start using them to better understand what’s going on, it’s hard to stop using them. And if you’re watching a foreign-language movie, you might have no choice but to use subtitles.

In this article, we’ll show you how to add subtitles to movies or TV series on your computer. It’s quick, easy, and totally free to do.

Reasons to Start Using Subtitles

If you’re hard of hearing. subtitles are a lifesaver. They allow you to follow the plot or a movie or TV show without having the volume turned up to room-shaking levels.

If you’re watching a movie in a foreign language, you need to use translated subtitles to understand the plot. For most people, subtitles are less jarring than dubbed audio because you can enjoy the original performance of the actors without getting distracted by out-of-sync dialog.

But there are good reasons to add subtitles to a movie or TV show even if it’s in your native tongue:

  • Inaudible dialog: It’s tough to understand characters with thick accents, even when they’re speaking a language you know. This also happens when actors mumble their lines, making them impossible to hear over other sound effects.
  • Narrative comprehension: Sci-fi and fantasy shows include a wealth of made-up proper nouns for names, planets, and technology. When you’re watching complex shows like this, subtitles make it easier to follow what’s going on.

The Abyss movie with subtitles turned on

Unfortunately, when you download movies and TV shows to watch offline, they don’t always come with subtitles. This means you need to add them yourself, which is actually a lot easier than you might think.

How to Add Subtitles to Movies or TV Series

Now that you know why you should consider adding subtitles to movies or TV series, we can move onto the process of adding them. Which starts with finding subtitle files.

Where to Download Quality Subtitles

Before you can apply subtitles to a downloaded movie or TV show, you first need to find and download a subtitle file for that particular title. If possible, it’s best to download the subtitles from the same place you got the content. That way they are most likely to sync up with your video file.

However, if there aren’t any subtitles available from the same place, you can use other websites to download subtitles from instead.

We recommend the following two sites:

  • Subscene: Unless the movie or TV show you’re trying to watch is rare or decades old, you’re almost guaranteed to find working subtitles on Subscene. Subtitles are categorized by title, language, and closed captions for hearing-impaired people.
  • OpenSubtitles: This is a large database with plenty of working subtitles—including some that are missing from Subscene—but it is very heavy on the ads. Downloading subtitles can feel like a game of elimination as you try to figure out which download links are genuine and which ones are spam.

Subscene website showing subtitles for The Abyss

After downloading the subtitles you need—which should be in an SRT or SUB file—there are two methods you can use to add them to your videos: soft and hard.

Soft subtitles allow you to turn them on and off, switching between different languages or no subtitles at all while watching. Whereas hard subtitles merge with the video file itself. You can’t turn them off, but you never need to worry about adding subtitles again.

We’ll explain how to add subtitles, both hard and soft, to a movie or TV series below…

How to Add Soft Subtitle Tracks to a Downloaded Movie

All of the best modern video players support file-based subtitles. This means you can add as many subtitle tracks to a downloaded movie as you like, and switch between them at any time from the subtitle menu.

We’ll demonstrate how to add subtitles using VLC Media Player, which is free, open source, cross platform, and the most widely used video player around. But most other video players operate in much the same way.

Download: VLC Media Player for Windows | macOS | Linux (Free)

Add Subtitles to a Movie Automatically

The easiest way to add subtitles to a movie is to give the subtitle file exactly the same name as the video file (excluding the format extension). Then keep both files in the same folder. When you open the movie in a media player, such as VLC, it automatically loads the subtitles along with the video.

So if your video file is named:

The.Abyss.1989.BluRay.1080p.x264.mp4

Then you need to make sure the subtitle file is named:

The.Abyss.1989.BluRay.1080p.x264.srt

Since it doesn’t allow you to add a specific language to your subtitles file name, this method is best if you only want to add subtitles in a single language.

Folder with video and subtitle file with the same name

Add Subtitles to a Movie or TV Show Manually

If you want to use different file names for your video and subtitles files, you need to manually add the subtitles instead. This is the best method to use if you have multiple subtitle tracks you want to add to the same film.

There are two manual methods you can use to add subtitles in VLC.

First, open the video file in VLC, then go to Subtitles > Add Subtitle File from the menu bar and select the subtitle file you want to add.

Add Subtitle File menu from VLC options

Alternatively, open the video file in VLC, then click-and-drag the subtitle file from your file manager and drop it into the VLC window.

Drag-and-drop subtitle file in VLC

If you add multiple subtitle tracks, use the Subtitles option in the menu bar to switch between them.

How to Permanently Add Hard Subtitles to a Video

If you want to permanently add subtitles to a movie or television show, you can create a new video file using HandBrake. This isn’t as quick or easy as the methods above. But since HandBrake is free, open source, and cross platform, it’s still a good option if you never want to worry about adding subtitles again.

Download: HandBrake for Windows | macOS | Linux (Free)

To get started, launch Handbrake and select the video file as the Source. Switch to the Subtitles tab, then open the Tracks dropdown box and select Add External Subtitles Track. Select your subtitles file from the browser that appears.

Next to your subtitles track, turn on Burned In to permanently add hard subtitles to your movie. Alternatively, add multiple subtitle tracks, select a Language for each of them and choose one to use as your Default subtitles. This allows you to switch between various subtitles tracks without worrying about different files.

HandBrake window showing Subtitles track

After configuring your settings, click Start to burn the new video file.

Create Your Own Subtitles

You might struggle to find subtitles for niche or independent movies. You also might not find subtitles in a particular language if it isn’t widely spoken across the globe. In either of these circumstances, you should consider creating your own subtitles to add to a movie or TV show instead.

It’s a time-consuming endeavor. But you can follow our instructions detailing how to make your own subtitles, then use the steps above to add them to your movie. If you do a good job, don’t forget to share your subtitles online for other people to use as well!

Read the full article: How to Add Subtitles to a Movie or TV Series


Read Full Article

5 PC Parts That Tend to Die: How to Extend Their Lifespans


pc-part-die

In an ideal world, your PC would last as long as you need it, and the only reason to get a new one would be for the performance boost. Unfortunately, life isn’t fair. PC parts die. Replacements can be expensive—so it makes sense to get the most out of every part you can.

The most important thing you can do is maintain your PC components properly. A long-lasting PC starts and ends with good maintenance habits, especially when you build the PC yourself. To get started, check out these tips on how to extend the lifespan of your PC parts.

1. Motherboards

asus rog motherboard

There are several reasons why you should upgrade your motherboard. However, let’s hope you do so voluntarily instead of being forced into it by a broken motherboard. Motherboard reliability increases with each generation, as you might expect.

Why Do Motherboard’s Die So Quickly?

Even though there are no moving parts, motherboards are very complex and delicate in their designs. As the focal point for everything else on your system, small malfunctions can have catastrophic effects.

Motherboard lifespan is difficult to gauge, too, as accounting for individual user habits and local environments is almost impossible. Still, a 2018 Puget Systems study found that “while motherboards seem to be getting more and more complex,” the overall failure rate was just “2.1% or about 1 out of every 49 motherboards.” Importantly, this figure is “about half what we saw in 2017.”

A 2016 HardWare.fr report returned similar results, with ASRock motherboards coming in at 1.45% and MSI coming in at 2.36%.

The biggest reason for motherboard failure is that the capacitors deteriorate over time and become exhausted. Sometimes the capacitors will even leak, potentially damaging other hardware components. You can replace a capacitor, but it is a non-trivial DIY operation that you may be uncomfortable completing yourself.

Other causes of motherboard failure include heat, static, and moisture.

Tips for Prolonging Motherboard Lifespan

Keep your computer away from environmental hazards like excess moisture or extra-dry air, which can promote static buildup. Excess heat can sometimes cause a motherboard to warp, leading to shorts and broken components.

But the best thing you can do to prevent motherboard failures is never to touch the motherboard. That’s hyperbole—you obviously have to touch it to install or replace parts. But try to limit the motherboard’s exposure outside of the PC case.

When you must touch the motherboard, be sure to ground yourself first, so you don’t accidentally shock and fry the motherboard itself.

2. Data Drives

SSD solid state drive

Data drives come in two main forms: hard disk drives (HDDs) and solid-state drives (SSDs). A computer cannot function without one, because that’s where the operating system resides. It’s crucial to your system. If it dies, you’ll need to get a replacement ASAP.

Why Do HDDs and SSDs Die So Quickly?

HDDs and SSDs are both prone to failure, but for different reasons.

HDDs are mechanical—they have moving parts—and will physically break down over time. The platter might get scratched, the head might stop reading, or the parts might become “paralyzed” by a power surge.

SSDs are based on flash memory chips, so they have no moving parts. However, they have unreliable long-term data retention, they are more susceptible to extreme temperatures, and power outages can lead to data corruption.

Tips for Prolonging Data Drive Lifespan

No matter which kind of data drive you have, it’s always a good idea to invest in a good surge protector. Electrical surges can cause a lot of harm to all kinds of devices, not just PC parts.

Avoid extreme temperatures when possible. Refer to your data drive’s manual for safe operating temperatures. This means cleaning dust out of your computer to ensure good air circulation and prevent overheating!

Other than that, it’s mostly about buying a good model from a reputable brand. The next time you’re shopping for a data drive, check out our articles on some things to consider when buying a hard drive or a solid-state drive.

3. RAM

upgrade ram

RAM is vital for a pleasant computer experience, and it’s one of the first parts you should upgrade if you want to speed up your PC performance. How much do you need? Well, it depends, but 8GB is the current norm.

Of all of the computer hardware components, RAM has the lowest relative rate of failure. However, depending on the model and brand of RAM you buy, the lifespan of the RAM module can vary. Dead RAM modules do happen!

Why Does RAM Die So Quickly?

Given perfect conditions, RAM actually has a remarkably long lifespan. The same 2016 HardWare.fr study found incredibly low incidences of RAM returns, as low as 0.20% for Kingston and up to 1.08% for Corsair. Given the staggering amount of RAM in use around the world, these figures are extremely low.

But two things can kill a working RAM module in the blink of an eye: temperature and power surges.

Most RAM modules have an operating temperature between 0 and 85 degrees Celsius. If you head outside of those temperature limitations, you could corrupt your RAM. It won’t happen instantly, and it would be disingenuous to suggest otherwise. But prolonged exposure to “extreme” temperatures reduces the lifespan of your RAM.

Power surges from faulty motherboards, bad power supplies, and electrical spikes can also cause failure.

Tips for Prolonging RAM Lifespan

The most important piece of advice is to buy a high-quality module from a reputable manufacturer. Reputable manufacturers include Kingston, Crucial, G.Skill, and Corsair, although other manufacturers are available. Make sure to read the product reviews before buying.

Otherwise, ensure you have adequate surge protection. Check out the best surge protectors you can buy right now.

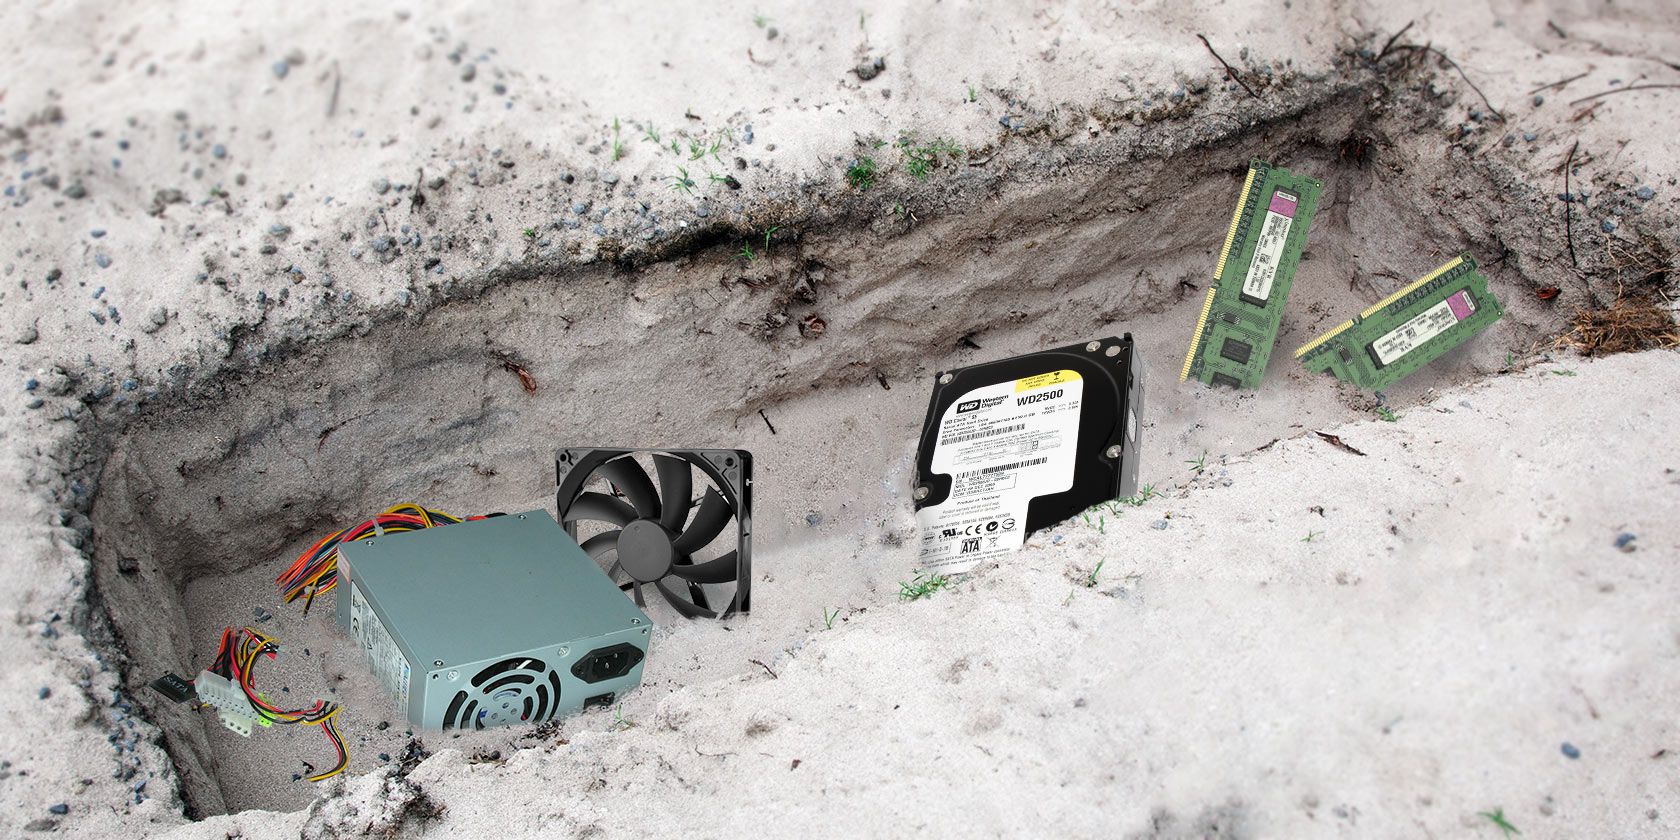
4. Power Supply Units

A PC power supply unit (PSU)

A power supply unit (PSU) delivers power to all of the components in your computer. There are a number of considerations to keep in mind when buying the right PSU for your needs, but lifespan is one of the more important ones.

Why Do PSUs Die So Quickly?

Despite the perception, PSUs are only slightly worse than RAM modules in terms of hardware lifespan under perfect conditions. The HardWare.fr indicates failure rates between 0.49% for the best performing PSU (Fortron) and 2.41% at the other end of the scale (Cougar).

Again, the Puget Systems report corroborates the PSU rate of failure, with a “total failure rate of 1.15%.”

Under normal intended use, a PSU should last a long time—at least five years, possibly up to 10 years if you’re lucky. But if you start putting the power supply under high loads over long periods, it can be overstressed.

Tips for Prolonging PSU Lifespan

As always, start with a high-quality model from a reputable brand. Many generic models are overrated and don’t have much tolerance for stress. Poor build quality can also lead to faster aging and early death.

Another thing to consider is that some brands don’t manufacture the PSUs in-house. Instead, some PSUs are sourced from OEMs. This process means that the quality of PSU models can vary, even within the same brand.

The only effective way to prolong your PSU lifespan is to cut back on high-stress activities. For example, cryptocurrency mining is a very strenuous process. Overclocking your CPU or GPU can also place additional stress on your power supply unit, although you can mitigate this using appropriately rated hardware.

If you want a new PSU and don’t know where to start, check out the best PSUs for PC builders.

5. Cooling Fans

pc case fans

You probably haven’t given your PC fans much thought. They spin up when you need them, and they spin down when you don’t. Sometimes, we don’t even notice when one stops working (at least, not straight away!). Fortunately, most case cooling fans are relatively cheap to replace.

The situation changes when you consider CPU cooling fans, which can be more expensive than their case cooling counterparts, and similarly, GPUs.

Why Do Cooling Fans Die So Quickly?

This one’s really simple. Just as with hard disk drives, cooling fans are mechanical—they have moving parts that are susceptible to general wear and tear. Over time, as the fans spin and spin and spin, they’re more likely to break down.

But this process is accelerated by the dust and particles that build up on the fan blades and within the rotating mechanism. When exposed to heat and moisture, the dust can even get caked on and turn into gunk, which could cause more friction and stress.

Tips for Prolonging Cooling Fan Lifespan

The first tip for keeping any type of cooling fan working effectively is cleaning. That means cleaning the excess dust and buildup from fan blades, plus the dust from the PC case that contributes to the issue.

You could also consider the location of your PC in your home. Leaving your PC on a thick carpet, for instance, can cause extra heat and additional dust ingress, in turn causing your fans to work harder to keep your system cool.

So, how often should you clean your cooling fans? If you’ve never cleaned them before, give everything in your case a good clean. Then, head back one month later and see how much dust and buildup are gathering on your cooling fan blades. You can gauge your PC cleaning schedule from there.

If your CPU dies, read our guide to choosing the right Intel Core processor. Alternatively, check out the best gaming CPUs for all budgets.

Stop Your PC Parts Wearing Out

There is no doubt that certain PC parts wear out quicker than others. You can manage the general wear and tear on yours computer using the tips set out in this article. Keeping your system cool, clean, and dust-free will maintain your PC hardware for much longer. Furthermore, looking after your hardware keeps costs down, as you won’t have to replace bits that break.

Of course, if you want to upgrade, do! Just make sure to ask yourself these important questions first.

Image Credit: Michael Wick/Shutterstock

Read the full article: 5 PC Parts That Tend to Die: How to Extend Their Lifespans


Read Full Article

10 Useful Xbox One Settings You Should Know About


There are a wealth of Xbox One settings worth exploring. Whether you want to unlock more functionality or fix annoying defaults, it’s worth taking a trip into the Xbox One settings menu every once in a while.

Microsoft has added more settings through updates over the years, so you may have missed some of these even if you’ve had the system since launch. Let’s take a look at the settings you should change to make your Xbox One experience even better.

To get to the Xbox One settings menu, press the Xbox button on your controller while on the home screen to open the Guide. Then press RB to navigate to your profile icon and choose Settings.

1. Mute the Xbox One Startup Chime

By default, your Xbox will make a little chirp when you turn it on. This is nice if you need confirmation that you powered it on successfully, but that’s probably not the case most of the time. If you often play at night and want your system to stay quiet, you can disable this chime.

Head to Settings > General > Power mode & startup, then choose Startup chime. You can turn it on or off, or Only with power button or voice.

Xbox One Startup Chime

The last option makes the most sense: when using the power button or voice methods, a quick confirmation that you touched the right spot or that the Xbox heard you are useful. When you want to keep quiet, just turn on the system by holding the Xbox button on your controller.

2. Appear Offline on Xbox Live

Sometimes when playing an online game, you don’t want friends inviting you to a party or another game. For those times, you can (appear to) go offline and play in peace.

To do so, open the Guide, then use RB to scroll to the menu with your profile picture. Select your username and on the resulting menu, choose Appear online and you can change it to Appear offline or use Do not disturb.

Xbox One Appear Offline

Appear offline simply makes it look like you’re away. However, Do not disturb will suppress party invites and other notifications, as well as displaying that status to your friends.

3. Disable Disc Auto-Start

By default, when you insert a disc—whether a game or a movie—your Xbox will immediately start playing it. This is useful if you switch media frequently, but when a disc automatically starts and you don’t want to play it, you have to wait for the game to start just to quit it.

If you want to only start discs when you choose, navigate to Settings > Devices & streaming > Disc and uncheck Play disc automatically. You’ll then have to start discs from the home menu.

Xbox One Disc Start

4. Remap Xbox Controller Buttons

Most games let you select from a variety of control schemes to suit your needs. For games that don’t offer this flexibility, or if you want to swap a few buttons for a tactical advantage, you can change button mapping natively on your Xbox.

Browse to Settings > Ease of Access > Controller > Button mapping. Here, select a button to remap, then a button to map it to. So if you select A in the first box and B for the second, pressing A will input B, and vice-versa.

If you prefer, you can instead press and hold a button to remap, followed by the button you want to map it to. Repeat this for everything you’d like to remap; the Xbox controller on the right side will update to keep track of your changes.

Xbox One Button Map

You can also specify if you’d like to swap the sticks, look inversion, or triggers here. These could be helpful for left-handed people, for instance. To set everything back to how it was, simply select Restore to default.

Remember that this changes the buttons at the system level, so games don’t know you’ve edited the controls. If a game tells you to press LT and you’ve swapped LB and LT, you have to translate that. Button changes remain in effect until you remove them and apply to all games as well as the Xbox menu.

5. Add a Passcode for Sign-In and Purchases

If you have young children or mischievous roommates that you’d prefer to keep out of your Xbox, you can require additional information to sign in.

You’ll find the applicable options at Settings > Account > Sign-in, security & passkey. On the left side of this screen, you’ll see your current level of protection. Select Change my sign-in & security preferences to make adjustments.

You can select from several levels of security here, with a few extra available if you have Kinect.

No barriers is the least secure option and allows anyone to turn on your Xbox, sign into your account, and spend money without any restriction. One level up is Ask for my passkey. With this, your Xbox will ask for a passcode when you try to sign in, change settings, or buy games.

Xbox One Passkey

If a passkey isn’t secure enough for you, you can choose Lock it down, which requires your Microsoft account password to make any changes. We don’t recommend this, as a PIN is enough for most people. Furthermore, you may be tempted to make your Microsoft account password weak if you have to type it every time you sign into your Xbox.

To fine-tune these login settings, scroll all the way right and choose Customize. Here, you can select individual options for each sensitive action on your Xbox. Want to require a passkey for purchases, but not for changing settings? You can lock everything down just the way you need it.

6. Stop Certain Xbox Notifications

By default, the Xbox One likes to notify you about every little occurrence on your system. While it’s nice to make sure you don’t miss important events, those popups can get in the way of your gaming and distract you. To turn some off, head to Settings > Preferences > Notifications.

You can turn off all notifications by unchecking the Notification banners on box. To fine-tune them, choose Xbox notifications to change what the system sends you. You can disable popups for Achievements, Clubs, Friends, Activity Feed, and more here.

Xbox One Notifications

Click App notifications to turn off notifications from installed apps, if applicable. Default notification position lets you move banners to a place where they won’t get in the way. Finally, choose Notification timing to decide if expired notifications should stay in the Guide and choose how long notifications stay on your screen.

7. Customize Your Home Background

The Xbox One gives you several options to customize your system’s look. Go to Settings > General > Personalization > My color & background, where you can change these to your liking.

Xbox One Change Background

The color is self-explanatory; you can change your Background to a solid color with art from recently played games, a screenshot or custom image, or art from Achievements you’ve earned.

This menu also lets you change the transparency of tiles on the home screen so you can see everything more clearly.

8. Adjust the Xbox One Chat Mixer Balance

Sometimes when you’re in a party, you need to hear your friends over the game audio. Other times, the game audio is what’s most important. If you feel like this balance is off, go to Settings > General > Volume & audio output > Chat mixer.

Xbox One Chat Mixer

There, you can select how much a game’s audio will drop when you’re in a party. The options are to reduce game audio by 80% or 50%, mute it entirely, or do nothing.

9. Stop Sharing Everything You Do

If you aren’t a social player, you can keep your Xbox from sharing information with others. Head to Settings > Account > Privacy & online safety to find these options.

Choose Xbox Live Privacy to decide what your system shares about most aspects of your playing. It features preset levels for a child, teenager, and adult; click View details & customize to set everything up manually.

Xbox One Privacy

You’ll find a wealth of settings to tweak here. They include who can see your real name and profile, if you publish activity about games, whether you can share content to social networks, and more. Have a look here to make everything as private as you like.

To see which apps use your data, select App privacy to turn off permissions for Location, Microphone, and the like. Finally, check the Message safety section to enable filtering for messages you receive.

10. Get a Reminder to Take Breaks

When you’re enjoying a game, it’s easy to play for hours without stepping away. To help with this, your Xbox One includes a feature to remind you to take occasional breaks.

To enable it, visit Settings > Preferences > Break reminder. You can choose to get a reminder at a minimum of every 30 minutes, or a maximum of every two hours. The timer starts when you sign in, but only displays when you’re playing a game.

Xbox One Break Reminder

Scour the Xbox One Settings Menu

The Xbox One settings menu hides a lot of useful tweaks that aren’t obvious at first glance. Hopefully you can get even more out of your console after adjusting these options to your liking!

If you’re running low on space, read our guide to Xbox One external hard drives. And for game recommendations, we have compiled a list of the best Xbox One exclusives.

Image Credit: Barone Firenze and Naschy/Shutterstock

Read the full article: 10 Useful Xbox One Settings You Should Know About


Read Full Article