

Our verdict of the Chuwi MiniBook 8:
The Chuwi MiniBook 8" does more than revive the netbook: it takes that form factor and packs a much more useful computer inside.
31 August 2019
You Can Now Order Photo Prints From Flickr

Flickr now lets you order prints of photos directly from the site. The new feature is designed to take the pain out of ordering photo prints, allowing you to order photo prints in just a few clicks. And Flickr is offering a range of different prints.
How to Order Photo Prints From Flickr
As detailed in this post on the Flickr Blog, you can now order photo prints from Flickr. You can only order prints of your own photos, so there’s no option to browse your favorite photographers’ photo streams in the hope of finding a print for your bathroom.
To order photo prints from Flickr, first, log into your Flickr account. Then select Prints from the top navigation bar. From here, you can select the photo you want to print, and then choose the product style, size, and finish before adding it to the cart.
Big day today, launched the project my team has been working on for a long while now. https://t.co/9zOsQTmtcQ #printBoldly #flickr
— cabbey (@cabbey) August 28, 2019
You can order metal prints, which use aluminum sheets to create photographic wall art, paper prints, which range from 6x4s to larger pieces for framing, and canvas prints, which offer a classic look and are guaranteed to make a statement.
Flickr is giving credit to SmugMug for developing this feature. As a reminder, SmugMug acquired Flickr in 2018. To ensure the Prints look their best, Flickr is partnering with photo labs including Bay Photo, Loxley Colour, and White House Custom Colour.
Other Websites That Sell Digital Prints
This is a fantastic new feature from Flickr, and it’s quite surprising it hasn’t offered the option to order prints of your own photos until now. The obvious next step is to let you order prints of other people’s photos and to let you sell your own prints to other people.
If you want to order prints online but don’t want to use Flickr, here are the best sites for printing digital photos. You should also be sure to read our article explaining how to get high quality prints online before placing your order.
Image Credit: Jocelyn Durston/Flickr
Read the full article: You Can Now Order Photo Prints From Flickr
Read Full Article
How to Digitally Enlarge a Picture Without Losing Quality

With today’s cameras boasting more megapixels, you’re more likely to scale a photo down than enlarge it. But there are times when increasing the size of an image can really come in handy. Unfortunately, it can be tough to enlarge a picture without losing quality.
There are several ways to tackle this problem, and in this article we’ll describe two of the best ways to enlarge a picture without losing quality.
Something to Keep in Mind When Enlarging an Image

When you increase image size, you’re asking your computer to add information. Put succinctly, you’re telling it to blow up an image with losing detail, and to do this by “guessing” what a larger image would look like.
This means that you’re never going to get a perfect recreation of your photo at a larger size, because it’s a matter of format and software: some apps will be better at it than others, and some pictures will resize better than others. But they all have to make a guess.
The amount of guessing your computer does will vary on how much you want to increase the size of your image. The more you enlarge a picture, the more likely you are to see a degradation of quality. Understanding that upfront is important, and will help you pick the best pictures to modify. If you’ve used upscaling with home entertainment equipment, you’ll have a good idea of what we mean.
How to Resample an Image With a 10 Percent Increase

This is a commonly recommended method for seeing how much upscaling you can get away with when enlarging an image without losing quality. It works best if you’re not trying to scale your image to a specific size, but trying to blow up an image as large as you can without making it look bad. We’ll use this picture of magazines on a coffee table as an example.
This picture is currently 670 pixels wide. If you lean towards your monitor and squint, you can probably make out all of the text. Right now everything is pretty smooth and the image looks nice.
To enlarge the image, we’re going to take advantage of Resampling, which is the “guessing” part we were telling you about earlier. And we’re going to use Photoshop to do it. Here’s what happens when we scale up the image to a whopping 2000 pixels wide (just to show you what the program can do):

How to Resize an Image Using Photoshop
To resize this image in Photoshop, click on the top menu in the app and click Image > Image Size. Then adjust the height and width in the Image Size dialog box. Also, make sure to have Resampling turned on, with Bicubic Smoother as your preset.
As you can see, Photoshop does an amazing job smoothing out this image from 670 pixels to 2000 pixels. Photoshop CC has really improved in leaps and bounds over the years, and while this image is definitely blurry around the edges and the text is not as sharp, you can still make out most of it with ease.
However, it’s easy to imagine some details in a different image becoming indistinguishable. So instead of making the jump all the way to 2000 pixels, we’ll just add 10 percent to the original image size.
To resample to 10 percent larger in Photoshop, go to Image > Image Size. Then—instead of adjusting the width and height by pixels—choose Percent. Type 110% and make sure Resampling: Bicubic Smoother is still turned on.

Here’s what the image looks like when you increase it by 10 percent:

As you can see, it still looks pretty clear. To experiment with this, keep on bumping up your image in Photoshop by 10 percent at a time until you start to see some graininess. As we’re trying to make small steps up to enlarge a picture as much as possible while still maintaining quality of the image itself, seeing graininess is your cue to stop.
If you’re going to use this method, it’s very important to make sure that Resample is enabled in your photo-editing app. Here’s what that looks like in the Image Size dialog box in Photoshop:

You can also use an app like Pixelmator or GIMP to resample an image. Both are good and will offer a similar option. If you’re lucky, you’ll be able to choose the interpolation algorithm (that is, the computer’s “guessing” method) for the scaling. When you’re scaling up, the Bicubic Smoother option is a good one.
How to Use a Dedicated App to Enlarge a Picture

Because so many people find themselves in need of larger photos, there are actually a number of apps designed to specifically enlarge an image without losing quality.
A Sharper Scaling, for example, is a free Windows app that promises better upscaling than Photoshop. The results posted on its website are quite impressive. This app does one thing and one thing only—and that’s increasing image size—but it’s free, so it’s definitely worth downloading.
Free equivalents for macOS are less plentiful, but that doesn’t mean you don’t have options. Waifu2x is a solid online option. Waifu has shown some very impressive results with zooming in on an anime picture and making it clear, although it can be slightly unpredictable with photos.
At the end of the day, you may just have to try out a few of these options to see which app works best to enlarge your picture. Above is an example of what Waifu can do for our image, compared with Photoshop side-by-side.
Even without zooming in on the picture to make it clear, you can probably see that the image from Waifu is very comparable to the latest version of Photoshop. The site’s use of deep convolutional neural networks (what are neural networks?) makes it very adept in the “guessing” that we mentioned earlier, and the result is significantly cleaner upscaled photos.
If Waifu isn’t working well for you, though, you can try Online Image Enlarger, Simple Image Resizer, or Rsizr.
Now You Can Enlarge a Picture Without Losing Quality
These two methods of increasing image size are probably your best bets when you want to enlarge a picture without losing quality. Neither is perfect, but because of the constraints of technology they’re about the best we can do.
Fortunately, most phones and cameras now take very high-resolution photos, so you shouldn’t have to deal with this too often. You can also save high-resolution images in Photoshop. Just remember to always work from the largest original image that you can.
Image Credit: fractal-an/Shutterstock
Read the full article: How to Digitally Enlarge a Picture Without Losing Quality
Read Full Article
Desktop vs. Microsoft Store Apps: Which Should You Download?

Historically, you downloaded Windows software through an EXE file from its official website or a third-party download site (called a desktop app). But starting in Windows 8 and today with Windows 10, you also have the option of downloading apps from the Microsoft Store (known as store apps).
Many apps are available as both traditional desktop apps and modern Store apps. Given the choice, which should you download? We’ll take a look and try to answer that question.
Why Does the Microsoft Store Exist?

Microsoft included its new app marketplace, called the Windows Store, with Windows 8. At the time, these “Metro apps” were only available in full-screen and many people ignored them.
This marketplace was carried into Windows 10 and eventually renamed the Microsoft Store (not to be confused with brick-and-mortar Microsoft stores). In addition to apps, the Microsoft Store carries games, movies, TV shows, and Edge extensions. Now, the lines between app types are blurred, as Store apps run in a window just like traditional desktop programs.
Check out our overview of the Microsoft Store for more info, if you’re new to it.
For some time, Windows was the only major platform not to offer an official marketplace for apps. Android has Google Play, macOS and iOS have the App Store, and Linux has several storefront repositories. Longtime Windows users may wonder why Microsoft even bothered to release an app store like this.
From the company’s perspective, this was mainly for two reasons: uniformity across platforms, and security of the OS.
Universal Microsoft Store Apps
As you might remember, Microsoft pushed the new Universal Windows Platform (UWP) apps (called Metro apps during Windows 8) pretty hard. The idea was to offer apps that worked on desktop Windows as well as Windows Phone.
Nowadays, even after the collapse of Windows 10 Mobile, apps on the Store often run across Windows 10, Xbox One, HoloLens, and other platforms. In theory, these let developers create an app once that’s usable across multiple devices.

Of course, having these apps on the Microsoft Store also provides an additional revenue stream for Microsoft.
Security Issues With Desktop Apps
Because desktop Windows programs are available all over the place, downloading them can lead to infection of your computer. If you don’t download from a trusted source, it’s often difficult to tell whether an app you find on a random website is a legitimate download or a dangerous fake. This leads to inexperienced users opening themselves up to malware just from downloading software.
Instead, the Microsoft Store gives Microsoft more control over what apps are available. The company does some level of vetting to weed out dangerous apps from the Store. For some time the Store had issues with fake and dead apps, but these are thankfully not as bad nowadays.
Desktop vs. Microsoft Store Apps: Security
As we’ve seen, Store apps have the advantage of living in a trusted environment. However, they’re also more secure at their core than desktop apps.
When you download a desktop app, it often requires permission to run as an administrator to install. While this is a normal part of installing software, providing admin rights to a program gives it permission to do whatever it wants to your computer.

If you grant admin privileges to a malicious app, it has free reign to install malware, trash your data, record your keystrokes, or otherwise do harm to your PC. Most apps don’t do this, of course, but this is how infections often spread.
In contrast, Store apps have limited permissions. They run in a sandbox, meaning they’re confined to a certain part of Windows. Since these apps don’t ever run as an administrator, they don’t have nearly as much potential to damage your system.
This is great even for apps like iTunes. By downloading the Store version of iTunes, you won’t get extra junk like Bonjour and Apple Software Update included along with it.
Like Android and iPhone apps, Microsoft Store apps also list out all the permissions they use. This lets you see exactly what functions they utilize in the background. In addition, you can block apps from using individual permissions in the Privacy section of Settings.

By default, Store apps all receive automatic updates. This is much easier than the update prompts most desktop apps provide, as you don’t have to worry about visiting the site and downloading the newest version manually. Uninstalling a Store app is also much cleaner than a desktop app, as there are no Registry entries and other scattered data to remove.
Desktop vs. Microsoft Store Apps: Selection
While there’s a wealth of great software available for Windows, you won’t find it all on the Microsoft Store. Developers must pay a small fee to register and get their apps on the Microsoft Store, which might not be worth it to creators of small tools.
A lot of popular apps, such as Discord, Steam, Calibre, Snagit, and many more are not available on the Store. This means gamers and users of power applications will have to stick to desktop apps in many cases.
However, you can also find Store versions for a lot of common desktop software. Slack, Spotify, iTunes, Messenger, WhatsApp, Telegram, and Evernote are just a few examples.

Many of the apps on the Microsoft store are mobile-style offerings like Netflix and Candy Crush Saga that are simple games or apps to access one website or service. However, even some small desktop utilities are available in a Store variant. This is the case with PureText, a great little app to paste text without formatting.
Fan-favorite image editing app Paint.NET is also available for a few dollars on the Store. It’s the same as the free version, but the developer offers it as an optional donation with more convenient updates.
Desktop vs. Microsoft Store Apps: Interface
The same app can vary quite a bit between versions. In general, desktop apps offer more features and navigation icons, while Store apps use larger, more spaced-out buttons. This makes Store apps more convenient for touchscreen use.
As an example, look at the version of OneNote included with Microsoft Office compared to the OneNote Store app. Below is the desktop version:

You can see that like other Office apps, this has tabs along the Ribbon for all sorts of features. These include advanced tools like revision history, the ability to record video, and all sorts of tags, plus support for macros. The buttons are also close together, as you’d expect for something designed for a mouse.
In comparison, here’s what the Store version of OneNote looks like:

You can see how simple the interface is here compared to the desktop version. It has fewer tabs and buttons with icons that are spread further apart. In addition, the Store version offers far fewer settings than its desktop counterpart.
As mentioned earlier, this feels more like an app you’d use on your phone than a desktop program. It’s perfectly suitable for quick use, but OneNote power users will find many features lacking.
Check out a closer look at OneNote’s version differences if you’re interested in more.
Desktop vs. Microsoft Store Apps: VLC Example
Let’s quickly look at VLC, the popular media player, to see how its desktop and Store editions differ.
The desktop edition has a wealth of features you’ve come to expect from the program. Along the bottom bar, you can control the playback, including adjusting both audio and video effects. Desktop VLC supports subtitles, the ability to open media from sources like network streams, on-screen control customization, and a whole lot more.

In comparison, the Store edition of VLC is much more streamlined. You can change options, but only a handful compared to everything in the desktop version. It still offers support for subtitles and playback from network sources but doesn’t let you customize the interface, play from a DVD or Blu-ray disc, or use a lot of VLC’s other hidden tricks.

You’ll also notice that the buttons in this version are much larger, making them easier for touchscreen users. As I was testing it, the Store version also froze up several times when trying to start a video.
The Store version is serviceable, but power users will find a lot lacking.
Microsoft Store Versions of Web Apps
Aside from desktop app replacements, the Store contains many apps for web services. These include Pandora, Amazon, Netflix, Instagram, and others.
In some cases, these “apps” are simply a wrapper on a website (such as Amazon). There’s little reason to use these when you can just bookmark the site in your favorite browser.
However, others offer unique features or better layouts. For example, while you can scroll through Instagram in a browser, you need to use the Instagram Store app to access your DMs. You may also prefer to keep a desktop app for video services like Netflix and Hulu installed for easy access, especially if you often use your laptop in tablet mode.
Whether you should use a Store app or web app depends on your needs. Some people like having dedicated app s for services that they have open all the time, like Pandora, to cut down on browser tabs. Give both a try and see which you prefer.
Microsoft Store Apps and Desktop Apps
After looking at both kinds of apps, there’s no clear winner between them. Most people will probably use a combination of both.
Desktop apps offer superior functionality, but can have more confusing layouts. Conversely, while Store apps are fairly stripped-down experiences, they update automatically and come from a trusted source.
If the apps you use offer both options, give them a try and see which fits your needs better. Need some ideas? We’ve rounded up the best apps in the Microsoft Store.
Read the full article: Desktop vs. Microsoft Store Apps: Which Should You Download?
Read Full Article
6 Ways to Add a Chat Room to Your Website

When you start a new website, the first thing you need is a reputable web host. For WordPress sites, we highly recommend WP Engine, which handles all the hard work of site management for you. If you don’t mind getting your hands dirty, then InMotion Hosting and Bluehost are both viable options as well.
Next up, you might wonder: “How can I add a free chat room for my website?” To foster more real-time communication between users of your site or the readers of your blog, chat rooms can come in handy.
Fortunately, several free chat room services allow you to create your own room. They either provide a simple link to that room, or let you add that chat room to your site. Ready to start? Here are some of the best online chat rooms that you can easily add to your website.
1. Chatzy

Chatzy lets its users create public and private chat rooms. It provides a link to that room, which you can easily link to on a webpage or in an email. The site offers several ways to customize the chat experience to suit your needs. If you register on the site, you can view your Chatzy room list, making your chats easy to keep track of.
You can easily create a chat by selecting Start Quick Chat. After you input your name and subject, you can enter the room. Clicking Invite/Share on the left menu bar will provide you with a share link.
To embed a private chat room on your website, head to Hosted Rooms on the left menu bar. This page gives you instructions on how to customize your chat room, as well as how to embed the provided code into your site.
2. Tlk.io

Tlk.io lets you simply start an online chat room, making it one of the best chat room sites like Chatzy. As soon as you enter the website, Tlk.io asks you to input a channel name, as well as your nickname. Clicking Join brings you to your very own chat room. Copy and paste the chat room’s URL in the address bar to place in emails or on your social media page.
To embed Tlk.io into your website, scroll down on the homepage until you see a button that says Get Embed Code. This option allows you to name your channel, choose a chat room height, and even pick a theme. Copy the generated code on the right side of the screen, and add it to your website to make a chat room in an instant. Tlk.io’s convenience can even make it a great team communication alternative to Slack.
3. Dead Simple Chat

To get started on Dead Simple Chat, you have to register for an account. After that, the site will direct you to your dashboard where it shows you the shareable link to your chat room, and also gives you the code to embed it on your website.
If you want to customize your chat room, click Chat Rooms on the left menu bar. Under the chat room of your choice, click Chatroom settings. You can then change the sidebar and background color of your chat room, as well as change its name. When you’re done, click Update Chat Room, and then hit Embed Chat Room to copy and paste the code into your webpage.
Dead Simple Chat also offers several paid plans. With the Pro Plan, you can have up to 2,000 different users, an unlimited amount of chat rooms, and storage for up to 180 days.
All of these perks prove that you don’t need the features of Facebook Messenger in order to communicate effectively.
4. Minnit

Like Dead Simple Chat, Minnit also requires you to sign up in order to create a chat room. Once you create your account, navigate to the Quick Links dropdown menu, and click Create your own chatroom in less than a minute. Input your chat room name, description, and then decide if you want to make your chat private or public.
Minnit will then create your chat and will ask you which plan you want. The free plan offers unlimited messages, up to 40 users, and lets you censor certain words. If you decide to upgrade to one of the paid plans, you’ll get more customization options.
When you’re ready to embed your chat room into your site, head to the page of your chat room, and then select Embed Your Chat. If you have already set up a WordPress blog, you can use the Minnit plugin to add a chat room. You can also use the Wix plugin to add Minnit to your website, or you can simply copy and paste its code onto your own domain.
5. RumbleTalk

If you’ve tried embedding a chat room into your website in the past, you might remember ParaChat. Since ParaChat has closed, RumbleTalk serves as its alternative. You must register for an account before you create your chat room with RumbleTalk.
To customize your chat room, head to Design in the top menu bar. You can then insert a background image, edit text color, change your font, and even add a skin.
If you want to monetize your chat, RumbleTalk has settings for that as well. Head to Monetize on the top menu bar, and input your PayPal information. Rumbletalk also offers paid plans for an increased amount of chat seats and rooms.
When you’re ready to embed your chat room, click Embed on the top of the page. Select Get Code to copy and paste the code right on your website.
6. Pure Chat

If you don’t know how to add a chat room to your website, Pure Chat will walk you through the steps. Create an account, and you can then access all of its helpful features. Its free live chat gives you plenty of customization options, allows you to transfer files, and even lets you have unlimited chat rooms. For more than three users, you’ll have to upgrade to one of Pure Chat’s paid plans.
After you register, Pure Chat will give you a code that lets you embed Pure Chat into your website. When you’re ready to chat, you can have conversations from your site, and from Pure Chat’s mobile app.
Web Chat Communication Made Simple
Embedding a chat room on your website doesn’t have to involve any complicated coding. In fact, it only requires you to install a widget, or simply copy and paste a code that the chat room creator generates for you. Choose one of these options from this online chat website list, and you’ll have a reliable way to communicate with your readers, customers, or your team.
Want to extend your conversations to your smartphone and your computer? Check out these messaging apps that you can use on your phone or computer.
Read the full article: 6 Ways to Add a Chat Room to Your Website
Read Full Article
At-home blood testing startup Baze rakes in $6 million from Nature’s Way
By now, the venture world is wary of blood testing startups offering health data from just a few drops of blood. However, Baze, a Swiss-based personal nutrition startup providing blood tests you can do in the convenience of your own home, collects just a smidgen of your sanguine fluid through an MIT manufactured device, which, according to the company, is in accordance with FDA regulations.
The idea is to find out (via your blood sample) what vitamins you’re missing out on and are keeping you from living your best life. That seems to resonate with folks who don’t want to go into the doctor’s office and separately head to their nearest lab for testing.
And it’s important to know if you are getting the right amount of nutrition — Vitamin D deficiency is a worldwide epidemic affecting calcium absorption, hormone regulation, energy levels and muscle weakness. An estimated 74% of the U.S. population does not get the required daily levels of Vitamin D.
“There are definitely widespread deficiencies across the population,” CEO and Baze founder Philipp Schulte tells TechCrunch. “[With the blood test] we see that we can actually close those gaps for the first time ever in the supplement industry.”
While we don’t know exactly how many people have tried out Baze just yet, Schulte says the company has seen 40% month-over-month new subscriber growth.
That has garnered the attention of supplement company Nature’s Way, which has partnered with the company and just added $6 million to the coffers to help Baze ramp up marketing efforts in the U.S.
 I had the opportunity to try out the test myself. It’s pretty simple to do. You just open up a little pear-shaped device, pop it on your arm and then press it to engage and get it to start collecting your blood. After it’s done, plop it in the provided medical packaging and ship it off to a Baze contracted lab.
I will say it is certainly more convenient to just pop on a little device myself — although it might be tricky if you’re at all squeamish as you’ll see a little bubble where the blood is being sucked from your arm. For anyone who hesitates, it might be easier to just head to a lab and have another human do this for you.
The price is also nice, compared to going to a Quest Diagnostics or LabCorp, which can vary depending on what vitamins you need to test for individually. With Baze it’s just $100 a pop + any additional supplements you might want to buy via monthly subscription after you get your results.
Baze’s website will show your results within about 12 days (though Schulte tells TechCrunch the company is working on getting your results faster). It does so with a score and then displays a range of various vitamins tested.
I was told that, overall, I was getting the nutrients I require with a score of 74 out of 100. But I’m already pretty good at taking high quality vitamins. The only thing that really stuck out was my zinc levels, which I was told was way off the charts high after running the test through twice. Though I suspect, as I am not displaying any symptoms of zinc poisoning, this was likely the result of not wiping off my zinc-based sunscreen well enough before the test began.
For those interested in conducting their own at-home test and aren’t afraid to prick themselves in the arm with something that looks like you might have it on hand in the kitchen, you can do so by heading over to Baze and signing up.
Read Full Article
Skype upgrades its messaging feature with drafts, bookmarks and more
Skype is best known for being a video calling app and, to some extent, that’s because its messaging feature set has been a bit underdeveloped. Today, the company is working to change that image with a series of improvements to Skype’s chatting features aimed at further differentiating it from rival apps.
One of the most useful of the new features is support for Message Drafts.
Similar to email, any message you type up in Skype but don’t yet send is saved within the conversation with a “draft” tag attached. That way you can return to the message to finish it and send it later on.

It’s a feature it would be great to see other messaging clients adopt, as well, given how much of modern business and personal communication takes place outside of email.
People have wanted the ability to draft and schedule iMessage texts for years — so much so that clever developers invented app-based workarounds to meet consumers’ needs. Some people even type up their texts in Notepad, while waiting for the right time to send them.
In another email-inspired addition, Skype is also introducing the ability to bookmark important messages. To access this option, you just have to long-press a message (on mobile) or right-click (on desktop), then tap or click “Add Bookmark.” This will add the message to your Bookmarks screen for easy retrieval.

You’ll also now be able to preview photos, videos, and files before you send them through messages — a worthwhile improvement, but one that’s more about playing catch-up to other communication apps than being particularly innovative.

And if you’re sharing a bunch of photos or videos all at once, Skype will now organize them neatly. Instead of overwhelming recipients with a large set of photos, the photos are grouped in a way that’s more common to what you’d see on social media. That is, only a few are display while the rest hide behind a “+” button you have to click in order to see more.

Unrelated to the messaging improvements, Skype also rolled out split window support for all versions of Windows, Mac, and Linux. (Windows 10 support was already available).
As one of the older messaging apps still in use, Skype is no longer the largest or most popular, claiming only 300 million monthly active users compared to WhatsApp’s 1.5 billion, for example.
However, it’s good to see its team getting back to solving real consumer pain points rather than trying to clone Snapchat as it mistakenly tried to do not too long ago. (Thankfully, those changes were rolled back.) What Skype remaining users appreciate is the app’s ease-of-use and its productivity focus, and these changes are focused on that direction.
Outside of the expanded access to split view, noted above, all the other new features are rolling out across all Skype platforms, the company says.
Read Full Article
Skype upgrades its messaging feature with drafts, bookmarks and more
Skype is best known for being a video calling app and, to some extent, that’s because its messaging feature set has been a bit underdeveloped. Today, the company is working to change that image with a series of improvements to Skype’s chatting features aimed at further differentiating it from rival apps.
One of the most useful of the new features is support for Message Drafts.
Similar to email, any message you type up in Skype but don’t yet send is saved within the conversation with a “draft” tag attached. That way you can return to the message to finish it and send it later on.
It’s a feature it would be great to see other messaging clients adopt, as well, given how much of modern business and personal communication takes place outside of email.
People have wanted the ability to draft and schedule iMessage texts for years — so much so that clever developers invented app-based workarounds to meet consumers’ needs. Some people even type up their texts in Notepad, while waiting for the right time to send them.
In another email-inspired addition, Skype is also introducing the ability to bookmark important messages. To access this option, you just have to long-press a message (on mobile) or right-click (on desktop), then tap or click “Add Bookmark.” This will add the message to your Bookmarks screen for easy retrieval.
You’ll also now be able to preview photos, videos, and files before you send them through messages — a worthwhile improvement, but one that’s more about playing catch-up to other communication apps than being particularly innovative.
And if you’re sharing a bunch of photos or videos all at once, Skype will now organize them neatly. Instead of overwhelming recipients with a large set of photos, the photos are grouped in a way that’s more common to what you’d see on social media. That is, only a few are display while the rest hide behind a “+” button you have to click in order to see more.
Unrelated to the messaging improvements, Skype also rolled out split window support for all versions of Windows, Mac, and Linux. (Windows 10 support was already available).
As one of the older messaging apps still in use, Skype is no longer the largest or most popular, claiming only 300 million monthly active users compared to WhatsApp’s 1.5 billion, for example.
However, it’s good to see its team getting back to solving real consumer pain points rather than trying to clone Snapchat as it mistakenly tried to do not too long ago. (Thankfully, those changes were rolled back.) What Skype remaining users appreciate is the app’s ease-of-use and its productivity focus, and these changes are focused on that direction.
Outside of the expanded access to split view, noted above, all the other new features are rolling out across all Skype platforms, the company says.
Read Full Article
30 August 2019
Gmail can now tell your coworkers you’re on vacation BEFORE they email you
Emailing a coworker without realizing they’re on vacation is a bummer for everyone involved. The second you get that “out of office” auto-reply, you suddenly remember the twenty minute conversation you had about their upcoming trip to Hawaii and feel like a goober. Meanwhile, they come back to a thousand “Hey, can you help with this? OH NEVERMIND SORRY ENJOY YOUR TRIP!” email threads.
Google is trying to make this happen a little less often with a feature it’ll soon roll out for its G Suite (read: paid Gmail/Docs/Hangouts/Calendar/etc. plans for businesses) users. If you’ve marked yourself as out of office on your calendar, your coworkers will get a heads up before they email you.
The heads up comes in the form of a little yellow banner that hovers right above the send button, alerting the sender that you’re currently out of the office, and when you’re set to return.
A similar message will pop up if they try to message you in Hangouts, too.
It all ties into the out-of-office functionality that the company introduced into Google Calendar last year, which automatically declines all meeting requests for the window in which you’ll be gone.
You probably don’t want every rando/spammer who tries to email you to know your travel plans, so Google says that the Gmail/Hangouts heads up functionality will only work with Gsuite users that have already been granted access to your calendar otherwise. So it’s information they already had, now they just don’t have to go looking for it.
If you don’t like the concept or the banner screws with your workflow for some reason, each user can disable it — go into the “Access permissions” section of your Google Calendar settings, and turn off ‘Show calendar info in other Google apps’.
Google says the feature should roll out to all G Suite users by September 16th.
Read Full Article
Daily Crunch: Apple will unveil the next iPhone on Sept 10
The Daily Crunch is TechCrunch’s roundup of our biggest and most important stories. If you’d like to get this delivered to your inbox every day at around 9am Pacific, you can subscribe here.
1. Apple will unveil the next iPhone September 10
Apple has sent out invites confirming rumors that its next major press event will happen on September 10. The event is expected to focus on the iPhone 11, unveiling three different models — the standard 11, as well as two Pro options.
If this happens, it would mark a subtle-but-significant shift in the way Apple structures its phone lineup. With a lower-priced flagship replacing the budget XR, the company could appeal to consumers who’ve been turned off by the rising prices for higher-end options.
2. Uber and Lyft are putting $60M toward keeping drivers independent contractors
In the event that California’s Assembly Bill 5 passes — forcing Uber and Lyft to make their drivers W-2 employees — each company is putting in $30 million to fund a 2020 ballot initiative that would enable them to keep their drivers as independent contractors.
3. Google lets David Drummond do the talking
Anyone wondering if Alphabet might reprimand its chief legal officer David Drummond for a long-ago extramarital affair with a former subordinate (which recently resurfaced in a much-discussed blog post), the answer seems to be . . . not right now.

Image via Getty Images / vladwel
Most new TVs come with a bunch of random junk turned on by default; things like motion smoothing that makes epic movies look like soap operas, or noise reduction that can wash out details and make an actor’s skin look cyborg-y. With Filmmaker Mode, you’ll be able to push a button and all that crap gets turned off.
5. Nike Huaraches get updated for the smartphone age
Slowly but surely, Nike has made its self-lacing motor technology more accessible. The next step: Bringing the tech to its Huarache line next month.
6. What is Andela, the Africa tech talent accelerator?
To put it succinctly, Andela is a startup — backed by $180 million in venture capital — that trains and connects African software developers to global companies for a fee. (Extra Crunch membership required.)
Benioff is coming to TechCrunch Disrupt in San Francisco to discuss how to build a highly successful business while giving back to the community.

Read Full Article
You can now share music from Spotify to Facebook Stories
Spotify this morning announced a new way for you to share music with friends (or fans, if you’re an artist) — by way of a new Facebook Stories integration that includes 15-second song previews. Viewers can also optionally tap on the “Play on Spotify” button in the Story to be redirected to the Spotify app to hear more.
The feature is designed largely with artists and their teams in mind, as it gives them another way to promote their new music across Facebook’s social network. Musicians and their managers often today use the Spotify app’s sharing feature to post their content across social media, including to Instagram, Twitter, WhatsApp, and elsewhere.
Last year, Spotify introduced a way to share music to Instagram Stories, including their albums, tracks, and playlists, as part of Facebook’s announcement that it was opening up sharing to Facebook and Instagram Stories from other, third-party apps.
At the time, the company said an integration with Facebook Stories was coming soon.
Since its launch on Instagram, the sharing feature has been mutually beneficial for both Spotify and Instagram alike, as it made users’ Stories more engaging while also sending traffic back to the Spotify app for further music discovery.
Add some music to your story
Audio sharing to Facebook Stories is now available. pic.twitter.com/HSBgmxYd8G— Spotify (@Spotify) August 30, 2019
There’s likely not as much demand for sharing to Facebook Stories, however.
In order to share the 15-second clips to Facebook Stories, you’ll tap the “Share” button from the Spotify app and choose Facebook as the destination.
Side note: We’re not seeing the option to share to News Feed as the picture Spotify published shows (see above. Instead, tapping “Facebook” launches you right into the Story interface, as shown in the tweet above.
You can then customize your Story as you would normally using the Story editing tools and post it to your profile. Viewers will get to hear the 15-second song clip, and can then tap to go to Spotify to hear more.
Spotify had offered Facebook Story sharing in the past, but the access was later pulled.
These song previews only work when you’re sharing a single track to Stories. If you choose to share other content, like albums, playlists, or an artist profile page, viewers can click into that content, but won’t hear any preview, Spotify says.
Read Full Article
How I escaped North Korea -- and found freedom | Yeonmi Park
How I escaped North Korea -- and found freedom | Yeonmi Park
"North Korea is unimaginable," says human rights activist Yeonmi Park, who escaped the country at the age of 10. Sharing the harrowing story of her childhood, she reflects on the fragility of freedom -- and shows how change can be achieved even in the world's darkest places.
Click the above link to download the TED talk.
September’s Mate 30 launch could be a major test for Huawei
Apple isn’t the only smartphone manufacturer planning a big September launch. Huawei’s got a big event on the books as well, set for September 18 in Munich, just over a week after the new iPhones are unveiled. For Huawei, however, the Mate 30 announcement is about more than just smartphones.
The event is effectively the first big handset launch since the embattled Chinese manufacturer was added to the U.S. trade blacklist. The move had seemingly been a long time coming, after years of allegations ranging from spying to sanctions violations, but with the ban in place, the move will mark a key moment of truth for a company that has so far been dependent on offerings from U.S. companies like Google.
The Mate 30, which also marks a push into 5G, could potentially launch without Google apps. The recent U.S. government reprieve only applied to already announced products, according to a statement Google gave to Reuters. Trump has suggested that ban on Huawei products could be lifted with a new U.S.-China trade deal, further clouding the suggestion that the move made purely out of concerns for security.
The smartphone maker gave its own comment to Reuters, noting, “Huawei will continue to use the Android OS and ecosystem if the U.S. government allows us to do so. Otherwise, we will continue to develop our own operating system and ecosystem.”
That last bit is a clear allusion to HarmonyOS. The recently unveiled operating is largely limited to low end handsets and IoT device, but Huawei is also certainly readying itself for a longterm life after Google.
Meanwhile, CNBC is citing a source that suggests the phone will launch with or without Google apps, depending on how things shake out over the next few weeks. That would likely amount to a minor nuisance, requiring users to download them after purchase, while a full out Android brand would prove far more harmful to its bottom line.
It seems quite unlikely at the moment, however, that the company would attempt to launch such a high end device with its own partially baked operation system.
Read Full Article
Chuwi MiniBook 8: The Netbook Makes a Comeback?
Netbooks didn’t last all that long the first time around. These cheap, portable devices weren’t supposed to be powerful, but they were incredibly affordable. Their deficiencies when it came to specs also meant they weren’t well suited to many computing use cases.
The rapid growth of popularity and power in phones and tablets sent netbooks to an early grave. Now we’re seeing a resurgence in the form factor, but there’s a difference. Models like the Chuwi MiniBook 8″ are far from underpowered, and this means they aren’t all that cheap either.
Chuwi MiniBook 8″ Hardware Specifications
Based on the form factor, you may not expect much in terms of specifications. That’s partially true. This is no monster desktop replacement. That said, it’s in line with what you’d expect from larger laptops in the same price range.
- CPU: Intel Gemini Lake N4100
- GPU: Intel UHD Graphics 600
- RAM: 8GB
- Storage: 128GB eMMC
- Battery: 26.6Whr
- Screen: 8″, 1920 x 1200 multi-touch IPS display @ 283dpi
- Dimensions: 201x128x19mm or 7.91×5.03×0.74 inches
- Wireless: Dual-band 802.11ac / Bluetooth 4.0
- Ports: USB-C, USB 3.0, USB, mini-HDMI, 3.5mm audio
- Expandable Storage: M.2 SSD Slot
The expandable storage is a nice touch, especially given the limited internal storage. If you’ve got a spare M.2 MSATA SSD lying around, you can easily double the available storage space.
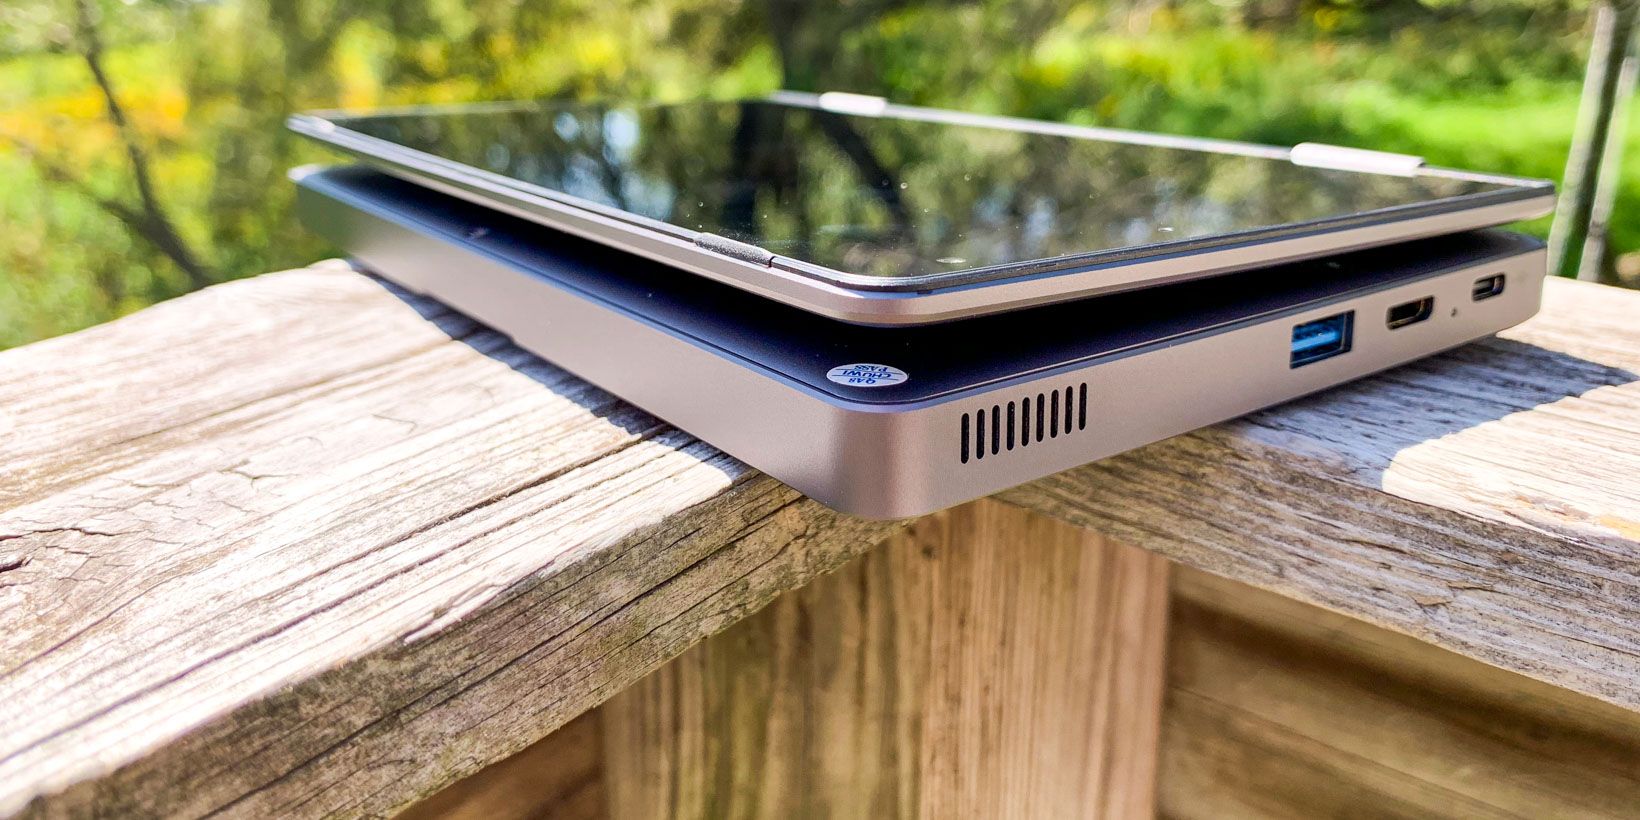
Body and Design

The Chuwi MiniBook 8″ is small, and we’re talking seriously small. Before the review unit arrived, I knew I would be looking at a very small computer. I was still surprised by just how small it was when I took it out of the box. You can see the dimensions listed above, but the MiniBook may still surprise you when you see it in person.
Chuwi had to make some sacrifices to get the MiniBook as small as it is. Fortunately, not many of them seemed to affect performance. Instead, the MiniBook isn’t as sleek looking as some of Chuwi’s other models. After looking at the Chuwi SurBook Mini, this looks somewhat brutalist by comparison.
There’s a certain novelty to using the Chuwi MiniBook 8″ due to its small size. At times, the tiny computer just doesn’t seem like it should be able to manage the feats of computing it is achieving. This isn’t a toy, but sometimes you have to remind yourself of that fact.
That isn’t to say that the MiniBook is flimsy. The body is made of aluminum alloy which makes it both strong and lightweight. It’s also capable of pulling off some feats of gymnastics.
The MiniBook uses what Chuwi refers to as a 360-degree “Yoga” design. This means it can work as a standard laptop, in tent mode, or in presentation mode, just like larger 2-in-1 designs.
Display and Brightness

Given the 8-inch screen size, you might expect less than HD resolution. That isn’t the case. The Chuwi MiniBook 8″ has a resolution of 1920 x 1200, meaning that the display looks quite sharp, no matter how close you look.
The combination of screen size and resolution give the MiniBook a pixel density of 283dpi, well within what Apple would deem “Retina” if this was one of its computers. Of course, UI scaling in Windows means that everything can feel a little cramped, but it’s easy enough to get used to.
The colors are rich and well-represented on the display as well. The display is fairly bright, though you may have some difficulty using the MiniBook in direct sunlight. This has more to do with the glossy finish on the screen than brightness.
The touch screen supports 10-point multi-touch. Chuwi also sells a stylus to use with the display, though we didn’t have one handy so we weren’t able to test this.
How is the Keyboard?

I have a feeling the keyboard is going to be the make or break point for most people with the MiniBook 8″. It’s small, and there’s really no getting around that point. Some keys, like the Delete key, are almost absurdly small. On the other hand, it is backlit, which is nice.
I did start to get used to the keyboard after testing the MiniBook for a few days. The only problem is that once I felt comfortable typing on the MiniBook’s keyboard, there was a period of adjustment in going back to standard-size keyboards. I’m a touch typist, but if you aren’t you’ll likely have an easier time.
Fortunately, the keys you’ll use for the majority of your typing aren’t all that small. The Delete key, the split space bar, and the strange location of the Tab key are likely where you’ll run into the most trouble, assuming you do run into trouble.
What About the Pointer?

The small size of the Chuwi MiniBook 8″ makes equipping it with a standard touchpad impossible. Instead, Chuwi decided to outfit the MiniBook with what it calls a Super Optical Finger Navigation Module.
In practice, this works like a combination of a tiny trackpad with the TrackPoint made famous by IBM ThinkPads. Like the keyboard, using this effectively requires some patience. Once you’ve gotten used to the concept, basic navigation is easy enough.
Even once you’re used to the navigation module though, it takes a while to feel natural. During my time testing the MiniBook, I never quite felt at home using this. I would have felt more at home using a standard TrackPoint, but that could just be me.
This would be much more of an issue if the MiniBook wasn’t equipped with a touch screen. This makes working with the system much easier and could be partially to blame for why I never got along with the navigation module.
Performance

Chuwi’s marketing around the MiniBook 8″ makes it clear that this computer should be able to serve as your only PC, should you wish it to. This is a clear difference from the netbooks of old. Those were best used for browsing the web, as the name implied. The MiniBook can do much more.
Our review unit uses the Intel Celeron N4100 processor, while the MiniBook is also available with a Core m3-8100Y. Even though we’re looking at the less powerful model, the computer rarely if ever felt sluggish during standard use.
One worry with smaller computers or even larger laptops is thermal throttling. Fortunately, the MiniBook is equipped with fans to help keep this issue at bay. These fans rarely spun up during normal use, and even with more hardware-intensive tasks, they were never intrusively loud.
Running GeekBench 4.4.1, the Chuwi MiniBook 8″ got a CPU score of 1812 for single-core performance and 5510 for multi-core. The GPU received a score of 9050. That’s higher than both the Chuwi Hi13 tablet and the 14.1-inch Lapbook.
Operating System Options
The Chuwi MiniBook 8″ sent to me for testing arrived running Windows 10. Right now, that appears to be the only way you can order it. That said, an option on the box seems to indicate that Chuwi may one day sell the MiniBook preloaded with Linux.
If you’re inpatient or looking to dual-boot, you can always install Linux yourself. Early reports on the web look like you’ll encounter trouble with some distributions. The good news is that Chuwi has made a version of Ubuntu 18.04 available that works with the MiniBook 8″.
Battery Life

Chuwi equipped the MiniBook with a 26.6Whr battery. I routinely got around eight hours of use off of a charge, though this lowered somewhat when running benchmarks and other hardware-intensive apps. You may get more or less depending on your usage.
This 2-in-1 doesn’t seem to sip much power when the lid is closed. Given the mobile focus of the MiniBook, that’s handy. You shouldn’t need to worry about fully shutting the computer down to save power.
Another handy thing when it comes to mobility is how the MiniBook charges. It uses a standard USB-C plug for charging, with a 7.6V input for fast charging using the PD standard. This means you can easily top up the battery with a battery pack. Chuwi says the MiniBook supports anything above 12V.
When it comes to recharging the battery, the fast charging helps. From a completely drained battery, you can expect a recharge to take a little over three hours.
Should You Buy the Chuwi MiniBook 8″?

For most people, a single question can help you determine whether you should buy the Chuwi MiniBook 8″: How important is a small size for you? If mobility is your number one concern, getting used to the cramped keyboard and less-than-perfect mouse replacement won’t be a waste of your time.
That said, it may be tough to come to terms with the price. Considering the power that’s packed into its tiny frame, this computer isn’t overpriced. It just feels like it should cost less than it does, given the small size. Given the lower price of other Chuwi computers like the excellent 14.1-inch Lapbook, the price feels even more like an anomaly.
Don’t forget that this is a very capable computer, surprisingly so given the form factor. We’re talking about a computer the size of a large paperback novel that can easily run your day to day productivity applications. If you’ve been pining for the glory days of the netbook, this isn’t just the next best thing, it’s even better.
The Chuwi MiniBook 8″ is currently available as part of an Indiegogo campaign. The price is currently $434 for the N4100 model and $534 for the m3-8100Y model. Chuwi plans to begin shipping in September. Prices are set to rise in the future, so if you’re looking to get one of these, you may want to do so sooner rather than later.
Enter the Competition!
Chuwi MiniBook 8 GiveawayRead the full article: Chuwi MiniBook 8: The Netbook Makes a Comeback?
Read Full Article
Subscribe to:
Posts (Atom)