16 March 2019

Twitter’s New Camera Lets You Take Photos Instantly


Twitter has updated its in-app camera, and made it a lot more useful in the process. For starters, the new Twitter camera can be opened with a single swipe, making it quicker and easier to shoot photos and videos. And you can also broadcast live instantly.

Twitter is primarily a text-based social network. You condense your thoughts into 280 (formerly 140) characters, and tweet them out for the world to judge. And judge they will. However, the rise of Instagram and Snapchat has forced Twitter to evolve.

How to Use the New Twitter Camera

The new Twitter camera can be opened with a single swipe left. It’s then ready and waiting for you to capture and share what’s happening around you. Which is the very essence of Twitter regardless of whether it’s presented in written form or a visual medium.

There are two options: Capture and Live. Capture allows you to take a photo (with a short press) or shoot a video (with a long press), while Live allows you to start broadcasting live. You can also turn the flash on or off, and switch cameras from front to back.

Once you have taken a photo or video, you can add a description, add a location, and then compose a tweet containing the media. Twitter will also suggest tags to add to make your photo or video more visible to the wider world. If that’s something you desire.

To be clear, you can still add media not shot using the Twitter camera. When you’re composing a tweet just hit the Images icon, which opens your Gallery. And from there you can select a folder, and browse through all of the media on your smartphone.

Twitter Experiments With New Features

Twitter’s new camera is a vast improvement over the old one. It’s quicker and easier to access, has more options available, and is designed to encourage you to use media as well as words. Which should help prevent your feed from being a boring wall of text.

The new camera is just the start of Twitter’s plans to evolve and adapt the platform to better serve its users. To that end, Twitter has launched a new app called twttr, which is designed to be a testing ground for new features. And here’s how to sign up to twttr.

Read the full article: Twitter’s New Camera Lets You Take Photos Instantly


Read Full Article

U.S. federal court jury finds Apple infringed three Qualcomm patents


Mobile chipmaker Qualcomm has chalked up another small legal victory against Apple in another patent litigation suit.

A jury in a U.S. federal court in San Diego found Friday that Apple owes Qualcomm about $31M for infringing three patents, per Reuters.

Qualcomm has filed a number of patent suits against the iPhone maker in the U.S., Europe and Asia in recent years. The suits are skirmishes in a bigger battle between the pair over licensing terms that Apple alleges are unfair and illegal.

As we reported earlier the San Diego patent suit relates to the power consumption and speed of boot-up times for iPhones sold between mid-2017 and late-2018.

Qualcomm had asked to be awarded up to $1.41 in unpaid patent royalties damages per infringing iPhone sold during the period.

Reuters suggests the award could have wider significance if it ends up factoring into the looming billion dollar royalties suit between Apple and Qualcomm. By putting a dollar value on some of the latter’s IP, the San Diego trial potentially bolsters its contention that its chip licensing practices are fair.

At the time of writing it’s not clear whether Apple intends to appeal. Reuters reports the iPhone maker declined to comment on that point, after expressing general disappointment with the outcome.

We’ve reached out to Apple and Qualcomm for comment.

In a statement provided to the news agency Apple said: “Qualcomm’s ongoing campaign of patent infringement claims is nothing more than an attempt to distract from the larger issues they face with investigations into their business practices in U.S. federal court, and around the world.”

Cupertino filed its billion dollar royalties suit against Qualcomm two years ago.

It has reason to be bullish going into the trial, given a preliminary ruling Thursday — in which a U.S. federal court judge found Qualcomm owes Apple nearly $1BN in patent royalty rebate payments (via CNBC). The trial itself kicks off next month.

The U.S. Federal Trade Commission also filed antitrust charges against Qualcomm in 2017 — accusing the chipmaker of operating a monopoly and forcing exclusivity from Apple while charging “excessive” licensing fees for standards-essential patents.

That trial wrapped up in January and is pending a verdict from Judge Lucy Koh.

At the same time, Qualcomm has also been pursuing several international patent suits against Apple — also with some success.

In December Apple filed an appeal in China to overturn a preliminary ruling that could have blocked iPhone sales in the market.

While in Germany it did pull older iPhone models from sale in its own stores in January. But by February it was selling the two models again — albeit with Qualcomm chips, rather than Intel, inside.


Read Full Article

5 Unique Podcast Apps When You Want to Enjoy Them Differently

After Christchurch, Reddit bans communities infamous for sharing graphic videos of death


In the aftermath of the tragic mosque massacre that claimed 49 lives in Christchurch, New Zealand, tech companies scrambled to purge their platforms of promotional materials that the shooter left behind. As most of the internet is now unfortunately aware, the event was broadcast live on Facebook, making it one of the most horrific incidents of violence to spread through online communities in realtime.

As Twitter users cautioned others from sharing the extraordinarily graphic video, some Reddit users actively sought the video and knew exactly where to look. The infamous subreddit r/watchpeopledie was quarantined (making it unsearchable) in September 2018 but until today remained active for anyone to visit directly. The subreddit has a long history of sharing extremely graphic videos following tragic events and acts of violence, like the 2018 murder of two female tourists in Morocco.

After Thursday’s shooting, the subreddit became extremely active with users seeking out a copy of the video, which was shot in first-person perspective from a head-mounted camera.

After the flurry of interest, one the subreddit’s moderators locked the a thread about the video and posted this statement:

“Sorry guys but we’re locking the thread out of necessity here. The video stays up until someone censors us. This video is being scrubbed from major social media platforms but hopefully Reddit believes in letting you decide for yourself whether or not you want to see unfiltered reality. Regardless of what you believe, this is an objective look into a terrible incident like this.

Remember to love each other.”

Late Thursday, the subreddit’s members were actively sharing mirrored links to the Christchurch video, though they did so largely via direct messaging. After watching the footage, many users returned to the thread to express that the content was extremely disturbing and to caution even their most violence-hardened peers from seeking the video.

The subreddit remained active until some time late Friday morning Pacific Time, when Reddit banned the controversial community.

Reddit declined to provide details about its decision to ban the long-running community after this particular act of violence. “We are very clear in our site terms of service that posting content that incites or glorifies violence will get users and communities banned from Reddit,” a company spokesperson told TechCrunch. “Subreddits that fail to adhere to those site-wide rules will be banned.”

The subreddit’s many detractors consider the act of seeking and sharing such graphic depictions of death both inherently disturbing and disrespectful to victims and their families.

The subreddit is unquestionably grisly but remains surprisingly well-loved by some devotees, who insist that its graphic depictions of death are in fact life-affirming.

“Definitely saved me and helped me figure out I didn’t necessarily have tomorrow to get my shit in order,” one former member said in a thread discussing the since-banned community.

“Don’t think it is the kind of place to spend too much time in but, we all need reminders.”

Reddit banned the adjacent subreddits r/gore and r/wpdtalk (“watch people die talk”) on Friday as well.


Read Full Article

How to Create an ISO Image of Your Windows System


windows-iso

Need a quick and easy way to backup and restore Windows without relying on backup tools or the cloud for your personal data?

Several third-party Windows backup and restore tools are available, but they can be complicated and time-consuming to use. So, why not learn how to make an ISO image of your Windows PC instead?

Why Choose a Windows 10 Image Backup?

We all know that backing up our data is important, especially when upgrading to a new version of Windows. But rather than fiddle around with partitions for specific data, or syncing to the cloud, why not simply back up your entire Windows installation?

You can add personal folders to an image backup, but omit apps and games. Alternatively, you could opt to create an image of your entire system drive. Naturally, you would need a suitable volume of storage for such a backup.

Thanks to the ISO image format, it is possible to back up your entire PC. This essentially creates an exact copy of your entire drive or selected directories. You’ll be able to restore the image backup should disaster strike.

ISO files can also be used to back up existing CDs and DVDs.

Creating a Windows 10 ISO System Image With DataNumen

One popular use for disk images is creating a clone of your hard storage (hard disk drive or solid-state drive), which might be on its last legs.

DataNumen Disk Image (a.k.a. “DDKI”) is one such solution, runs on all versions of Windows and is available as freeware.

Create a Windows 10 ISO backup

After downloading and installing the utility, use the Clone tab to select the drive you wish to make an image of; to clone multiple drives, use the Batch Clone tab.

Select the destination location and assign a filename in the Output image file as box, where you should select the target disk drive. This is device you’re using to save the backup to. It might be an existing external drive, or a HDD you’ve recently purchased.

Click Start Cloning. This copies your disk to its destination device, ready to use. Our look at HDD cloning covers this topic in greater depth.

Creating an ISO Disk Image in Windows 7

Although cloud backups are easy, there’s no reason not to prepare an ISO disk image for disaster recovery scenarios. You might make an image of the system in its current state. You might alternatively create an image of a freshly installed operating system. Perhaps this will include some apps and games that you have installed.

If you’re using Windows 7, backing up to an ISO disk image is part of the Windows 7 backup and restore feature.

To create a system image in Windows 7, open Start > Getting Started > Back up your files. In the left-hand pane, click Create a system image, and select the destination.

Select the destination for your backup ISO

This might be an external hard disk drive or some other large volume. You can also write to DVDs (you’ll need more than one) or Blu-ray.

Do you have a home server, or some large storage on your network, perhaps in the shape of a purchased NAS? If so, you can use the On a network location option. If you want to use a USB flash device, connect this to your computer in advance and select it as the destination.

Also ensure that the System drive (by default the C: drive) is selected.

The confirmation screen will detail how much space will be taken up by the backup. Check this to ensure the figure matches the remaining space on the target device. Proceed with the backup and wait while it completes. The duration will depend on the size of the backup and the speed of the drive.

Restoring the Windows 7 Disk Image

Once complete, Windows will suggest you create a system restore disc. This is a good idea, so find a blank disc and follow the instructions. You can then use this to boot your PC and select the System Image Recovery option to restore the ISO Disk Image of your Windows installation following a disaster scenario.

Creating an ISO Disk Image in Windows 8.1

The same tool for creating a disk image is available in later versions of Windows. You ideally need to have upgraded Windows 8 to Windows 8.1 before proceeding here.

To find the system image creation tool, press Start and type “file history“. The automatic search will display Restore your files with File History entry first, so click this to open the File History tool, then System Image Backup in the lower left corner.

Find the File History option in Windows 8

You can then proceed as detailed in the Windows 7 section above. With the ISO backup created, use the steps for Windows 8.1, below, to restore the image in Windows 10. In a disaster recovery scenario, you will need to boot into the Windows 10 equivalent of Safe Mode to restore the image.

Restoring Your Windows 8.1 Disk Image

If a Windows 10 upgrade doesn’t work out for you (perhaps you’ll experience a reboot loop), having an ISO image to fall back on is a massive advantage. You can restore the Windows 8.1 disk image in Window’s Advanced options screen, which you will find by pressing F8 repeatedly when your PC boots up (or holding SHIFT as you click Restart).

In Advanced Startup Options, select Repair your Computer > System Image Recovery and follow the instructions, ensuring that Windows can find the ISO file.

Note that even if you have the Windows 8.1 installation media you can still restore the disk image. At the Install now screen, use the Repair your computer link and then Repair.

From here you’ll be redirected to the Advanced Startup menu, so select Troubleshoot > Advanced options > System Image Recovery, following instructions to restore your Windows ISO system image.

Back Up Your Windows PC With an ISO Image

As you can see, creating an ISO image backup of your entire Windows system is perfect for backing up in advance of a major system upgrade. Additionally, the speed with which the ISO can be created and subsequently restored should make it a far more attractive option than just backing up your data and hoping for the best.

Once your ISO is made, you may need to boot your computer with it following a system failure. Try one of these tools to make a bootable USB from your ISO file.

Read the full article: How to Create an ISO Image of Your Windows System


Read Full Article

The 7 Best Bluetooth Headsets With Good Battery Life

How to Use Messenger Without Facebook

How to Run Really Old Software on a 64-Bit PC: 6 Methods


old-soft-64bit-windows

Bit by bit, Windows’ reverse compatibility is fading. Your Windows 10 64-bit installation cannot run software from the 16-bit era. At least, not natively. For most people, this isn’t a major issue. Windows 3.1, the last 16-bit version of Windows hit the market in 1992.

If you do have an old bit of software you need to run, it does present a problem. Here’s how you fight back and get your old 16-bit software and games up and running on Windows 10.

How Do You Run 16-Bit Programs on 64-Bit Windows?

So, your 64-bit Windows 10 installation cannot run 16-bit software. However, what you need to know is that you can virtualize or emulate your 16-bit program or game within Windows 10. Setting up a virtual machine to run an old Windows version is an easy way for you to delve into those old games once more.

1. Windows XP Mode

Windows 7 had a cool feature known as Windows XP Mode. Windows XP Mode was a complete Windows XP virtual machine you could run. It was simple to use and made jumping back to Windows XP from Windows 7 accessible to anyone.

Unfortunately, Windows XP Mode didn’t make the jump to Windows 8, nor Windows 10. But, don’t fret. You can follow my guide on how to legally download Windows XP for free. The guide shows you exactly how to download Windows XP Mode, import it into a virtual machine, and fire it up so you can play your favorite old games.

2. Setting Up Your Own Virtual Machine for Old Games

Do you have an old Windows disc lying around? Use a virtual machine like VirtualBox or VMware Workstation to create a virtual environment. VirtualBox or VMware Workstation allows you to create a virtual computer using your old installation disc. It is even better if you still have your old license code.

It doesn’t take long to get your old Windows version up and running. Unsure what to do? Follow Ben Stegner’s How to Use VirtualBox: User’s Guide for a handy walkthrough.

3. Run Windows 3.1 in DOSBox

DOSBox is almost unsurpassed when it comes to tools that let you play your old games. But did you know DOSBox can run the full Windows 3.1 operating system? Windows 3.1 was basically a big MS-DOS program, meaning it plays very nicely with the DOSBox emulation environment.

chips-challenge-dosbox

Yep, that’s Windows 3.1 running in DOSBox, running Chip’s Challenge.

You can follow this tutorial to find out to boot Windows 3.1 in DOSBox. It takes a little time, and you do need your own version of Windows 3.1 to boot up (it is ancient, but not freeware).

4. Run Old Windows Software in Wine (Mac & Linux)

macOS and Linux users don’t have to give up their old Windows games and programs. In fact, at times, it is almost easier to get those 16-bit games up and running on macOS or Linux. How you ask?

The Wine software compatibility layer gives Mac and Linux machines the ability to run old Windows software without leaving your operating system.

chips-challenge-wine

You can even use Wine to emulate Windows programs on a Raspberry Pi, such is the depth of the program.

5. Find a Modern Alternative to Your 16-Bit Program

Does virtualization seem to complex? Or just like a lot of time? There could well be either a 32-bit version of the old program you want or even a modern remake or equivalent.

Let’s use the example of Chip’s Challenge, and figure out a few 32-bit alternatives.

Chip’s Challenge on Steam

You can download and play Chip’s Challenge on Steam. In fact, you can download and play Chip’s Challenge 2 on Steam, too. The 2015 follow up to the Windows 3.1 classic puzzle challenge picks up where Chip (and you!) left off.

By downloading and playing Chip’s Challenge through Steam, it is guaranteed to work on your 64-bit system.

Tile World 2

Tile World 2 is a remake of Chip’s Challenge that comes bundled with a number of free puzzles. If you have the original puzzle, you can copy them into Tile World 2 and relive Chip’s adventure.

tileworld-default

If you don’t like this, you can grab the original tileset and use that, if you want. I found them on the Chip’s Challenge Wiki.

tileworld-custom-tiles

Just like that, we have a very close approximation of Chip’s Challenge up and running on a 64-bit machine.

Classic Reload

Classic Reload is a “Game and Software Preservation” site. In that, they upload versions of old software and games to their site and make them available to anyone that wants to play. At the time of writing, Classic Reload has over 6000 DOS, Windows, and console games available to anyone.

6. Use Windows 10 Program Compatibility Troubleshooter

Windows 10 has an integrated Program Compatibility Troubleshooter that helps to “detect and fix common compatibility problems.”

It doesn’t always figure out what is wrong, and most of the time, because it is a 16-bit program attempting to run in 64-bit Windows, it cannot help. But if you are struggling with a 16-bit program in a 32-bit version of Windows, the integrated troubleshooter can sometimes find a suitable configuration.

To find out how this works, check out how to make your old games and software run in Windows 10.

What 16-Bit Software Do You Still Run?

Are you still reliant on 16-bit software? Some old programs do their job, do it well, and don’t need replacing. In other cases, the developer ceases to exist and the company requires that specific 16-bit program to continue functioning.

For most people, however, it’s about the games. Firing up those old classic games is always an entertaining time. Steam and GOG.com now feature many of the best PC games from the 16-bit era, making it easier than ever. Want more 16-bit gaming? How about building your own NES or SNES emulator using a Raspberry Pi?

Read the full article: How to Run Really Old Software on a 64-Bit PC: 6 Methods


Read Full Article

Using a Raspberry Pi as a Desktop PC: 7 Things I Learned After a Week


raspberry-pi-desktop

The Raspberry Pi is a great little computer, but can it substitute a standard office or school desktop? A recent Twitter exchange (in which I extolled the values of the Pi’s power) got me thinking, so I’ve decided to put my theory to the test.

For the next seven days, I’m using only a Raspberry Pi. Every piece of work I write and edit for an entire week will be done on a credit card-sized computer posing as an office PC.

Can the Raspberry Pi Work as a Desktop PC?

I spotted a conversation on Twitter recently about the lack of modern computer equipment in school.

Now, you might be thinking I’m totally wrong. Certainly, the people I engaged with on Twitter did:

It’s a fair argument. The only way to find out if the Pi can replace a PC for office tasks is to try it. What general tasks might you expect from a standard desktop?

  • Internet connectivity
  • Email
  • Web browsing
  • Word processing and spreadsheets
  • Printing
  • Collaboration

All these features are available via the Raspberry Pi’s default operating system, Raspbian Stretch. With the right set up and a focus on productivity, using the little computer for day-to-day work should be achievable.

Admittedly this won’t be perfect for everyone. My daily workload looks something like:

  • Check email
  • Check Slack
  • Editing work
  • Writing
  • Pitch emails
  • Internet research
  • Editing photos and screenshots

There might be some music playing, although I often farm that task out to the Amazon Dot. Based on this, I reckon it’s possible to use a Raspberry Pi as a desktop PC and stay productive.

Right, let’s find out…

Day 1: The Initial Set Up

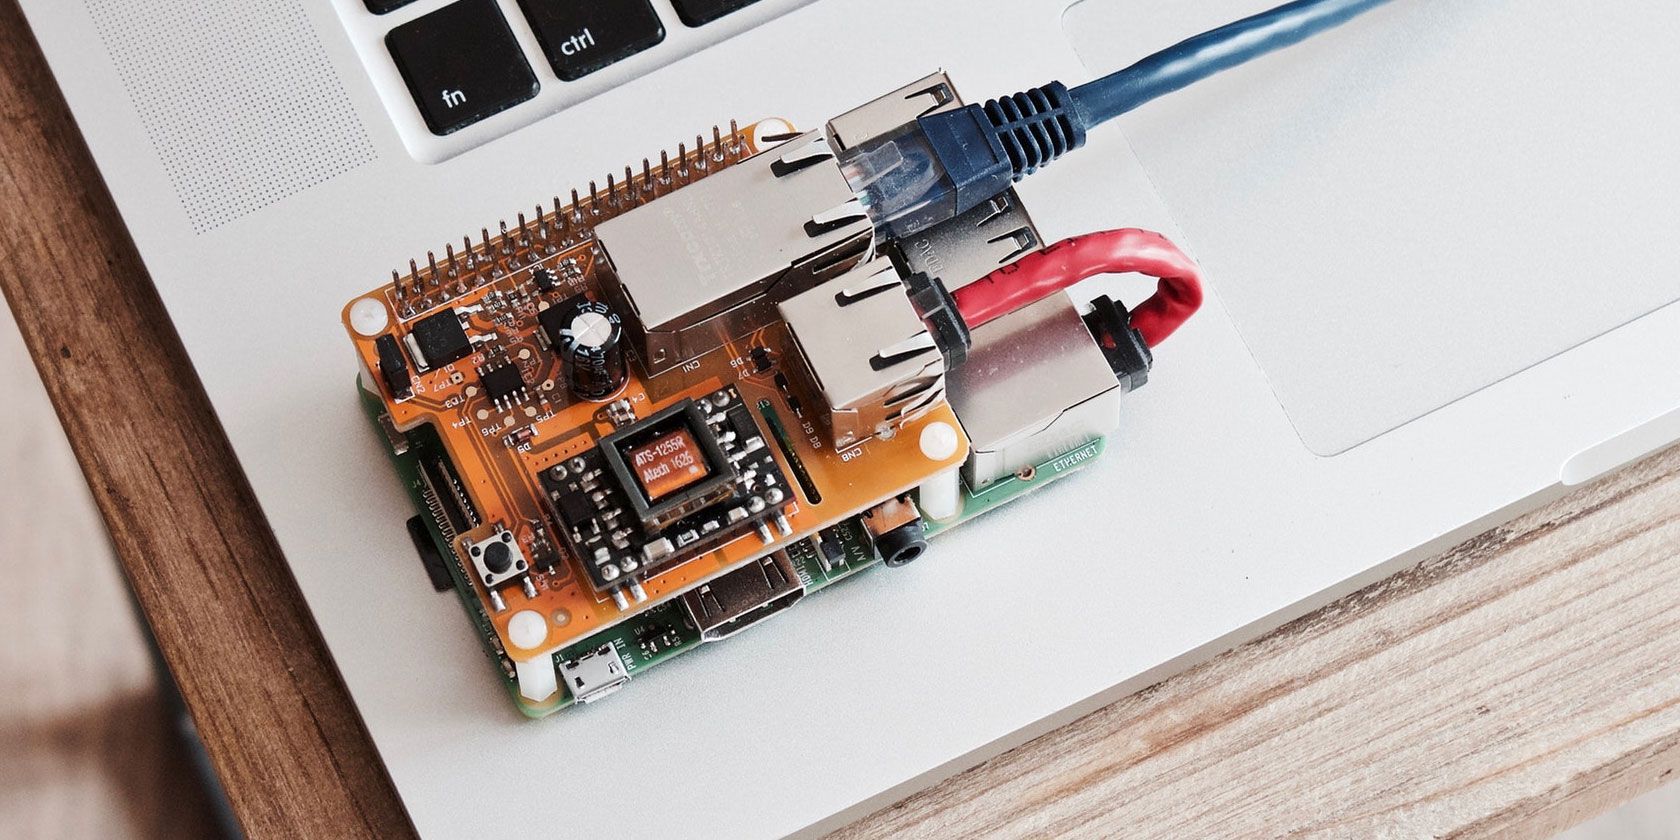
Getting started meant hooking up a keyboard and mouse, finding a display I could use for a few days, and connecting the Raspberry Pi to the network.

A Raspberry Pi desktop setup

First, however, I would need to choose a device. With 12 Raspberry Pi devices to choose from, I opted for the best advantage with a Raspberry Pi 3 B+.

This computer has a 1.4GHz 64-bit quad-core ARM Cortex-A53 CPU, 1GB of RAM, built in Wi-Fi and Bluetooth, and 4 USB ports. There’s also the microSD card slot for the main storage, although I’m using just 8GB for this. Any additional storage I need will be provided via a USB drive.

Normally I work a five-day week, Monday-Friday, but it made sense to have the Pi set up in advance. As such, I got everything ready on the Sunday evening. Of course, the last thing anyone wants to do is waste time with computer set ups on a Sunday night.

Fortunately, setting up my Raspberry Pi desktop took under 30 minutes.

Day 2: Using a Wireless Mouse

Kicking off the week on Monday morning, I booted up the Pi mostly out of interest to see just how far I could push it. After all, I needed to know just what I could expect. What would slow the computer down? What apps should I avoid loading?

It turned out that getting started was hampered by an issue with my wireless mouse. Each movement and click had a half second delay, enough to be distracting. Fortunately, I was able to fix this with a minor edit to the /boot/cmdline.txt

sudo nano /boot/cmdline.txt

Here, I scrolled to the end of the line and added:

usbhid.mousepoll=0

After saving and exiting (Ctrl + X, then follow the instructions on-screen), I rebooted the Raspberry Pi. Upon restarting, the mouse was lag-free!

This was always going to be the toughest day, but within a few minutes everything seemed to be running fine. My password manager plugin worked fine, saving considerable time, and every browsing and editing task I performed worked seamlessly.

Day 3: Using Multiple Browser Tabs

This would be the make or break day: writing and research. Would the Raspberry Pi be up to multiple browser tabs and word processing?

Microsoft Office Online

Apparently, yes.

Limiting activity to four or five open tabs worked. My main problem was probably syncing data from Dropbox, necessary for me to grab any ongoing work. Fortunately, this went well, giving me access to my files and opening them in Office Online.

While using LibreOffice was a perfectly fine option, I had one eye on losing work if this mad idea didn’t pan out… Meanwhile, WordPress editing in the browser window on the Raspberry Pi was indistinguishable from using my usual laptop.

Day 4: Switching to the Laptop for Today

I’ll be honest, being stuck in my home office all week kind of sucks. So today I ducked out of Raspberry Pi computing and worked off my laptop from my local cafe. The Pi just isn’t portable enough by default to accommodate this, so…

Day 5: All Good Except for Keyboard Woes

Back to work using the Raspberry Pi.

One of the things I’ve noticed so far is that most things are actually fine. However, the keyboard I’m using is a massive pain. It’s just awful to type with. Using the laptop yesterday hasn’t helped adjusting to this keyboard.

The major takeaway here is to choose a decent, usable, comfortable keyboard. This is a good lesson for any computing project really, especially for a desktop computer.

Day 6: Image Editing Works Fine

Image editing on Raspberry Pi with GIMP

It’s the final day of using the Raspberry Pi for work. With a couple of articles to submit, I realized it was time to edit some images. Rather nervously, I began the process of installing GIMP, happily noting its presence in the Raspbian repository. A few minutes later I was cropping and resizing as if using a full desktop.

Don’t get me wrong. GIMP on a Raspberry Pi is unlikely to be suitable for high-end photo processing. For medium resolution photos and graphics, however, it’s fine.

Day 7: What About Playing Games?

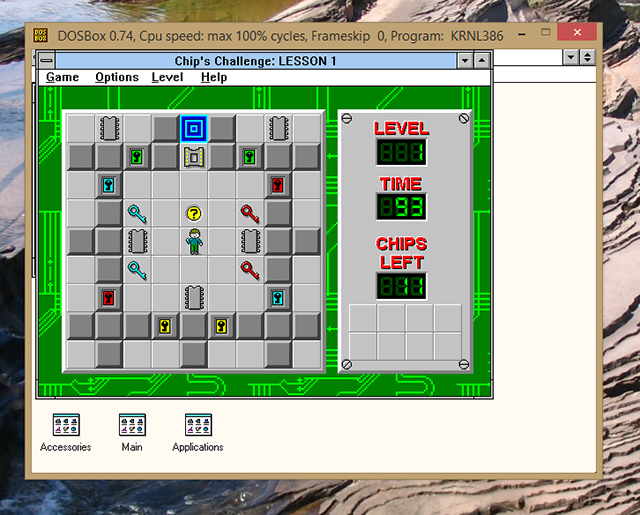
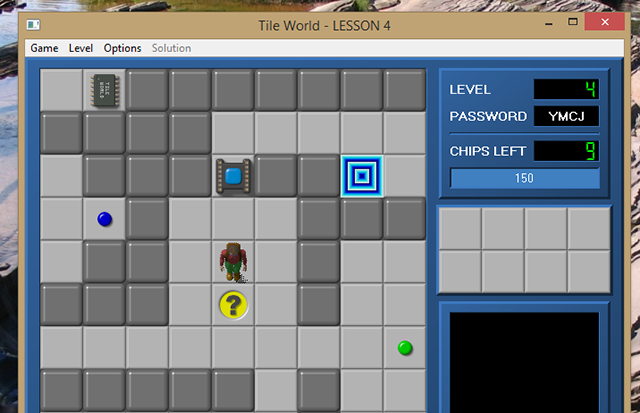
Saturday is a day of rest. For me, that means some gaming…

The Raspberry Pi makes a great retro gaming machine. Thanks to wireless HDMI technology, you can even stream games from a PC to a TV using a Raspberry Pi. On this occasion, I opted to install DOSBox on the Raspberry Pi and revisit some of my favorite retro gaming experiences.

The Raspberry Pi: It Makes a Productive Desktop PC!

So, after a week, can the Raspberry Pi can act as a substitute desktop PC? Here’s a quick summary of my experience:

  1. Extensions pre-installed in Chromium seemed to conflict with those that auto-installed when I signed in with my Google account. Disabling the extra extensions solved this.
  2. Multiple browser tabs must be kept to a minimum.
  3. The Raspberry Pi isn’t easily portable.
  4. Slack cannot open! I use Slack regularly, but the Raspberry Pi seems unable to cope with the webpage. Additionally, the Linux app version doesn’t seem to work.
  5. Downloading from the cloud can be slow.
  6. The wrong keyboard and/or mouse can prove troublesome.
  7. GIMP runs on the Raspberry Pi, affording quality image editing.

Overall, these are minor issues that wouldn’t trouble most users, and it’s been an acceptable experience. Writing and editing, my stock-in-trade, has been straightforward, as has basic image editing.

Ultimately, this proves my point about the Raspberry Pi’s viability as a desktop PC. Sure, there have been moments of frustration, but standard office users and students probably wouldn’t miss much. The keyboard was also an issue, but on the other hand using my favored mouse has been an advantage.

In short, I believe my point that the Raspberry Pi is an adequate low-budget computer is vindicated. It isn’t perfect, but it serves its purpose, and can prove a valuable stop-gap until more suitable PC equipment can be sourced.

Looking for an affordable or sensible alternative to a desktop PC? If the Raspberry Pi doesn’t suit, why not consider Samsung DeX? Since 2018 Samsung phones and tablets have shipped with a hidden desktop mode that lets you use Android like a PC.

Read the full article: Using a Raspberry Pi as a Desktop PC: 7 Things I Learned After a Week


Read Full Article

Moza Air 2 Review: The Best Value Gimbal for Videography Enthusiasts

Twitter confirms a new ‘Subscribe to Conversation’ feature for following tweets of interest


In addition to testing out a new format for conversations within a prototype app called twttr and other features like a “Hide Tweet” button, Twitter today confirmed it’s also developing a feature that would allow users to subscribe to individual conversations taking place on its platform.

The new option was first spotted by Jane Wong, a reverse engineer who often peeks inside popular apps to discover their yet-to-be-launched features and changes.

Wong tells TechCrunch she found the “Subscribe to conversation” feature within the Android version of the Twitter app, where it’s a user interface prototype for now. The button simply reads “Subscribe to conversation” and is positioned at the top right corner of a tweet view, she says.

Reached for comment, Twitter didn’t provide any details about its plans but pointed TechCrunch to its tweet confirming the feature’s development. The company’s short statement reads, “This is part of our work to make Twitter more conversational.”

Healthier and better structured conversations are among Twitter’s top goals at present, as the company tries to make its app easier to use and less prone to abuse.

The new subscription feature would allow someone to follow a thread without directly signaling their interest, or having to join in the conversation themselves. With a click of the button, users could instead opt to receive notifications when new tweets were added to that conversation.

To some extent, this feature is another example of how the change from stars to hearts as Twitter’s favoriting mechanism has had a ripple effect on Twitter’s development. The star had indicated interest, but didn’t convey an emotion. Twitter wanted to evoke a more positive vibe, so it shifted over to hearts several years ago. But as a result, people felt they could no longer save tweets they wanted to later reference using the default engagement mechanism, as it indicates an endorsement. (And not all tweets you’re saving are those you support.)

Twitter later addressed this problem with a separate tweet-saving feature, Bookmarks.

Now it’s creating yet another way to track tweets – and, in this case, the resulting conversation, too.

If Twitter had kept stars, it could have built out its “Likes” page with all these variations on tweet-saving and more. It could have added toggles for notifications, and who knows what else – keyword search across your saves? bookmarking with tags? private and public boards or collections, like Moments, but built from bookmarked collections?

Aggregating these features in one place could have made Twitter a valuable reference and “Read It Later” tool to rival apps like Pocket and Instapaper – or even web browser bookmarking itself.

But that’s not the path Twitter took, so now we’ll have Likes (hearts), Bookmarks, and conversation subscriptions, it seems.

Twitter declined to say when the new feature would arrive.


Read Full Article