Windows Narrator is one of several accessibility functions in Windows 10. It serves as a simple screen reader for users with visual impairments.
But even if you don’t need it for that reason, you may still find Windows Narrator useful. To that end, you might wish to download and install Windows Narrator voices other than the default. We’ll show you how to easily get new Windows 10 Narrator voices for text-to-speech (TTS).
How to Change the Windows Narrator Voice
You actually don’t have to go outside Windows to get new Narrator voices, as it does include a few extras besides the default. To change them, go to Settings > Ease of Access > Narrator. Under Personalize Narrator’s voice, choose a new voice from the dropdown box.
In addition to changing the voice sound, you can adjust other aspects of it too. Use the sliders to Change voice speed, voice pitch, and voice volume. There are many more options about how the Narrator works below, but they’re not directly related to the voice.
In recent versions of Windows 10, Microsoft added the ability to download more Narrator voices from inside Settings. However, this is really just a shortcut to download more voice packs for other languages.
When you click Add more voices, you’ll jump to the Speech tab of the Time & Language section of Settings. Scroll down to find the Manage voices section, where you can click Add voices again. This will bring up a list of languages that you can download voice packs for.
Obviously, languages that you don’t know are of little use to you as Narrator voices. But you can get some use out of these by downloading variations of your language in other regions. For example, if you live in the US, you can download the English (Australia) pack to use voices that have an Australian accent.
Once you download a pack, it will appear in the Installed voice packages section. Close the Settings app, then go back to the Narrator options and you can choose voices from the new pack you downloaded.
More Third-Party Windows Narrator Voice Options
If none of the above options work for you, you’ll have to turn to third-party tools for more text-to-speech voices. Microsoft’s page on customizing the Narrator recommends several third-party speech synthesizer software tools that you can use to add more voices. These all support SAPI 5, and include:
While most of these tools aren’t free, if you need a high-quality screen reader or voice, they’re worth paying for. Once you add the tools to your system, you can select their voices using the same menu above. Give Zero2000’s free text-to-speech voices a try if you don’t want to pay.
Why do people distrust vaccines? Anthropologist Heidi Larson explores how medical rumors originate, spread and fuel resistance to vaccines worldwide. While vaccines cannot escape the "political and social turbulence" that surrounds them, she says, the first step to stopping the spread of disease is to talk to people, listen and build trust.
The growth of movie downloading paired with the crippling consequences of 2020’s COVID-19 pandemic means fewer people than ever are watching movies with their friends. People just don’t go to theaters any more.
That’s had a knock-on effect on the social aspect of movie watching. Going to see a brand new movie in a packed cinema can be an exhilarating experience. You don’t get that experience sat on your sofa.
Thankfully, it’s possible to watch Plex together with your friends. The functionality is available from directly within the app using Watch Together, or from a third-party tool called SyncLounge.
Plex’s Watch Together Feature
First, let’s take a look at the native Plex tool for watching videos with friends. Called Watch Together, it’s officially still in the experimental stage. However, the feature appears to work flawlessly and the interface is easy to use. It definitely gets the MakeUseOf stamp of approval.
Who Can Use Plex’s Watch Together?
While Plex’s Watch Together feature remains in beta, it’s free to use for all Plex users. However, this may change when it’s launched officially. Plex’s own documentation appears to suggest that Watch Together will remain free if you only want to stream content from Plex’s free, in-house, ad-supported streaming service. However, if you want to stream content from your own library, it seems likely that you’ll need to subscribe to Plex Pass.
At the time of writing, you’ll need to have an Android, Android TV, Apple TV, iOS, or Roku device to be able to use Watch Together. You cannot use Watch Together from the web app.
How Many People Can Tune In Using Watch Together?
Officially, Plex hasn’t named a limit of the number of users (although we’re sure one exists).
In practice, however, the amount who can sync content together will depend on the Plex Media Server’s hardware, your network connection, your disk speed, and the video quality.
Confused? Here’s how Plex describes the user limit:
“If your Plex Media Server and network could not handle that number of users streaming things individually all at the same time, then it would also not be able to support them for Watch Together.”
Beware, trying to add too many users will lead to playback issues and the video will be unwatchable.
How to Use Watch Together on Plex
Assuming you’re using one of the supported devices, you’ll need to hit the More button (three horizontal dots) on a video’s pre-play screen, then select Watch Together from the list of options.
Next, you need to add people to your Watch Together session. You can only invite Plex users who you are “Friends” with. When you’re ready, click on the names of the friends you want to add and hit Done. To add a new friend, go to Settings > Users and Sharing > Share Libraries and enter the username or email address of the person you want to connect with.
(NB: If you just added a new friend and don’t see them in the list, you will need to restart your app to refresh the screen.)
If you’re being invited to someone else’s Plex Watch Together session, you’ll see a Watch Together row appear at the top of your app’s home screen, along with the video that’s been loaded by the host.
As users accept invitations, they’ll all appear together in a lobby. Once everyone has arrived, the host can begin playback. Only the host can control play/pause functionality once the video has started. Hosts also have sole control over different audio streams and subtitle tracks.
Formerly called Plex Together, SyncLounge is another great way to watch Plex together with friends.
Like Plex’s official Watch Together tool, SyncLounge will sync up your individual Plex apps so that you’re all watching the same footage at the same time.
SyncLounge Features
SyncLounge has some features that are not yet available in the official tool. For example, you can hide your Plex username when you sign into a room, you can rejoin recent rooms, and you can automatically play the next episodes when you’re binge-watching TV with friends.
We also really like the app’s user status indicators. Each user has a colored ring around their profile picture to denote sync distance, and you can even see the type of Plex client they are using if you hover over their name.
How to Use SyncLounge for Plex
To begin, click the Get Started link on the Sync Lounge website and enter your Plex login details. If you don’t fancy handing over your credentials, you can download the app from GitHub and run it directly on your own server.
Hosts will need to create a room and invite other people to join them. Invitees just need to accept the invite when it arrives.
Like Watch Together, only hosts can play and pause the video, change the subtitles, and change the audio.
Signing Out of SyncLounge
Don’t worry, SyncLounge isn’t the type of app that requires you to revoke access if you ever stop using it; your Plex user details are not held on the developer’s servers.
Plex’s Watch Together vs. SyncLounge
SyncLounge has some benefits over Plex’s official Watch Together tool.
Firstly, you don’t need to be “Plex buddies” to sync your content. Secondly, the Plex servers of every person connected to the room are available, thus creating a super-repo of content.
The danger, of course, is that Plex might pull the plug on the backend API that makes a third-party app possible, especially once its own Watch Together feature comes out of beta.
Longterm, we’d assume Plex’s backing of its in-house tool will help to establish it as the better product, but for now, it’s easy to make the case for SyncLounge instead.
How to Watch Other Video Apps Together With Friends
Windows Narrator is one of several accessibility functions in Windows 10. It serves as a simple screen reader for users with visual impairments.
But even if you don’t need it for that reason, you may still find Windows Narrator useful. To that end, you might wish to download and install Windows Narrator voices other than the default. We’ll show you how to easily get new Windows 10 Narrator voices for text-to-speech (TTS).
How to Change the Windows Narrator Voice
You actually don’t have to go outside Windows to get new Narrator voices, as it does include a few extras besides the default. To change them, go to Settings > Ease of Access > Narrator. Under Personalize Narrator’s voice, choose a new voice from the dropdown box.
In addition to changing the voice sound, you can adjust other aspects of it too. Use the sliders to Change voice speed, voice pitch, and voice volume. There are many more options about how the Narrator works below, but they’re not directly related to the voice.
In recent versions of Windows 10, Microsoft added the ability to download more Narrator voices from inside Settings. However, this is really just a shortcut to download more voice packs for other languages.
When you click Add more voices, you’ll jump to the Speech tab of the Time & Language section of Settings. Scroll down to find the Manage voices section, where you can click Add voices again. This will bring up a list of languages that you can download voice packs for.
Obviously, languages that you don’t know are of little use to you as Narrator voices. But you can get some use out of these by downloading variations of your language in other regions. For example, if you live in the US, you can download the English (Australia) pack to use voices that have an Australian accent.
Once you download a pack, it will appear in the Installed voice packages section. Close the Settings app, then go back to the Narrator options and you can choose voices from the new pack you downloaded.
More Third-Party Windows Narrator Voice Options
If none of the above options work for you, you’ll have to turn to third-party tools for more text-to-speech voices. Microsoft’s page on customizing the Narrator recommends several third-party speech synthesizer software tools that you can use to add more voices. These all support SAPI 5, and include:
While most of these tools aren’t free, if you need a high-quality screen reader or voice, they’re worth paying for. Once you add the tools to your system, you can select their voices using the same menu above. Give Zero2000’s free text-to-speech voices a try if you don’t want to pay.
Our verdict of the DJI Robomaster EP Core:
The most powerful STEAM learning robot ever. A comprehensive education toolkit and curriculum for both Scratch and Python programming is provided, and further expansion is possible with various microcontrollers and sensors.1010
You probably think of DJI as that drone company, but they’ve actually turned their engineering geniuses to a lot more than just drones. The DJI Robomaster EP Core is the next generation of intelligently programmable, remote-controlled, or entirely autonomous robots. It’s insanely good fun, a great learning experience, and I’m completely smitten with it.
Read on to find out more.
Robomaster EP Core: At a Glance
Omnidirectional movement via Mecanum wheels and custom servo motors with 250Nmm torque.
Four hit detectors (impact or laser) with RGB ring lights.
2-axis grabber.
2400mAh battery (around 1-hour battery life).
HD camera, microphone, and onboard speaker.
Micro-SD card slot.
Local Wi-Fi or router connectivity.
Proximity sensor.
Dimensions: H13 x W10 x L15.5 inches (H33 x W25 x L39 cm) with grabber fully retracted.
Weight: 7lbs 8oz (3.4kg).
Expandable with Raspberry Pi, Arduino, micro:bit, or NVIDIA Jetson; sensor adaptors provided.
FPV remote control via desktop or smartphone app.
Scratch or Python programming.
Curriculum and structured competitive modes.
Note: we received an engineering sample for testing. Contents and build guide may differ, and we didn’t have access to the full educational curriculum, only the existing Robomaster app (which is primarily designed for the Robomaster S1 Series).
Building the Robomaster EP Core
Before you can really get started, the Robomaster EP Core package arrives in an enormous box consisting of five trays of parts. That’s right: it’s flat-packed and you’ll need to build it yourself. That would the Engineering part of the STEAM learning experience.
It took me a good half-day of solid build time to get this put together (which you can see in the video review compressed down to about a minute!).
Thankfully the instructions are detailed, and despite two full trays of screws and bolts, each part is labeled well and at no point was I confused about where something ought to be placed.
If you can build some Ikea furniture, you can do this. Just be sure to pick the right screw from the right part of the tray.
Getting Started
You can connect to the Robomaster either via a local Wi-Fi, or by allowing the Robomaster to connect to your router. The latter is preferable, as it allows you to access the Robomaster from any networked client for truly remote control and programming.
A desktop version of the software is available for Mac or PC, though it appears to be a direct port of the mobile app, and runs full-screen.
A switch on the side of the grey controller box selects which mode to operate in. Simply type in your Wi-Fi password to the app so it can generate a QR code. The camera mounted on the Robomaster will then read this, and connect to the network.
Note that the Robomaster is unable to roam between enterprise Wi-Fi access points, so you should use a single high powered router or ensure adequate coverage in the location you’ll be operating the Robomaster. Driving down my hallway resulted in the Robomaster disconnecting from one Unifi access point and pausing for a few seconds as it reconnected through another.
Robomaster Chassis
There are two main parts to the build. The first is the wheels and chassis. We’ll talk more about the “Mecanum” wheels in a moment, but the chassis itself is built around a large solid metal frame, which includes extra mounting points for your own 3D printed parts, accessories, or additional sensors.
The front half has a slight suspension on it, allowing it to traverse small bumps with ease.
This chassis houses the battery as well as the power distribution board and communication bus. It’s this that you’ll plug everything in to. The battery is removable, and spares can be purchased. Each charge lasted me about an hour of constant use.
The 2400mAh battery can be swapped easily and spares purchased separately.
One outstanding feature of the Robomaster EP Core is the four Mecanum wheels. Each wheel is driven by its own powerful custom DJI servo.
Rather than a traditional rubber tire, these wheels has a set of twelve freely-rotating rollers, mounted at a 45-degree offset. Confused? I don’t blame you.
This curious arrangement of rollers on the wheel means that simply rotating the wheel actually forces it to move sideways instead. In order to create the normal forward or backward motion, you need another Mecanum wheel with its rollers mounted in the opposite direction. When both wheels are then rotated in the same direction, the sideways forces cancel each other out, and the chassis actually moves forward or backward as intended.
However, the magic comes when each wheel is driven in opposite directions, both creating the same sideways motion instead. With four such wheels mounted in this configuration, the Robomaster can both strafe left and right, and rotate 360-degrees on the spot. This is called omnidirectional movement. And it’s nothing short of amazing.
If you haven’t already watched the review video to see this in action, you really need to go do that now. Go on, I’ll wait.
This isn’t just incredible to watch though, it also opens up so many more programming possibilities for maneuvering because of the precision involved.
It also adds more interest to the remote control aspect. Maneuvering now requires two analog joysticks, rather than an accelerate and brake pedal, and steering wheel. Anyone familiar with first-person shooter games will feel at home immediately. You can strafe around a target in a circle, for instance, or easily drift around corners. The Robomaster EP Core is highly agile in tight spaces, and racing this thing is immensely fun.
Stop having fun though: this is a learning experience!
Grabber
Mounted on top of the chassis are the grabber attachment and grey controller box. The controller handles Wi-Fi communication, as well as the micro-SD card for recordings.
Powered by three strong servos, the grabber can lift up and down, push or pull, as well as pinch in or expand its rubber claws. Obviously the first thing I did was to grab a courgette and lug it around the kitchen for a while.
This is a screenshot from a video taken using the on-board camera.
When fully extended, the lifting power of the servo is limited, so you may need to pull an object in closer before it can be lifted up again. It’s reasonably powerful and was able to lift up some small blocks of wood or toy cones, but struggled with an iPhone 6 Plus (which is about 6 ounces).
Robomaster doing a spot of weeding with the grabber.
The Robomaster App
While a separate SDK is available and will likely be used for parts of the curriculum, your initial point of contact with the robot will be via the Robomaster app (for iOs, Android, Mac, or Windows). Launch this and you’ll be greeted with three choices:
Solo
Battle
Lab
Solo mode is for simple remote control. Use the joystick on the left to move forward, backward, and strafe. Drag left or right on the screen to rotate. Click the grabber button to bring up that control interface. The main screen area is taken up by the wide-angle first-person-view from Robomaster’s camera. You can also record a number of audio clips to playback on the robot. These are saved to the hardware and can be recalled or set on a loop with hilarious consequences.
The button for follow mode sadly does nothing without the gimbal attached. To move the camera view up or down, you’ll need to manipulate the grabber arm that it’s attached to. The health bar also doesn’t do much unless you’re being pursued by a Robomaster S1 equipped with a laser gun (not even kidding–that’s a thing).
Battle mode is a more structured FPV combat or race event. Without the gimbal and gel bead or laser gun, the battle type aren’t relevant, but the race mode can still be used. By placing the included visual markers around your track, Robomasters must visit each marker in order, which behave as checkpoints. A bonus marker can also be hidden for extra points. The AI recognition system will immediately identify any it sees (though I found this only worked with good lighting), and after visiting each one in turn for the required number of laps, you’re given a resulting time.
Camera and FPV
Unsurprisingly for a company known to produce superb quality video drones, the FPV camera mounted on top of the grabber is also superb.
With an f2.4 aperture and wide 120-degree field of view, I found video transmission to be rock solid and perfectly clear, though this will depend largely on your router and Wi-Fi performance. You can record HD video to a micro-SD card too (not included), which includes audio.
A screengrab from the on-robot camera.
Finally, the Lab is where you can learn all the Robomaster functions, as well as jump right into Python or Scratch coding. Road to Mastery consists of 11 guided Scratch tutorials. DIY Programming presents you with some ready-made Python or Scratch code examples or allows to start afresh. Robo Academy is really just three web links, taking you directly the developer documentation, video tutorials, and programming guide.
Again though, many of these resources rely on the gimbal attachment, so I wasn’t able to fully complete all of these with the EP Core. They’re still beneficial to run through however, and you may find you can convert many of the instructions for use with the grabber alone. The curriculum included with EP Core purchases will be tailored to the grabber.
Scratch Programming the Robomaster EP Core
Now taught to all school children from primary ages and up, Scratch is a visual block programming language that’s surprisingly powerful. The custom Robomaster GUI includes buttons to either bring up a first-person view (to drive the robot back tot he start position before running code again, for instance), and a debug overview of currently defined variables. As the robot runs through programs, blocks of code are highlighted, so it’s easy to follow along and see exactly what’s going on. You can even convert your Scratch program to Python code at any point if you’d rather.
I haven’t actually used Scratch before–the best I had in school was some a BBC Micro Turtle, with BASIC programming. I was pleasantly surprised at how easy it is to pick up, and how much of the Robomaster’s systems are exposed to graphical programming. The “Smart” block section includes things like action for when a visual marker is recognized in view, or when a number of claps are identified.
Robomaster S1 vs EP Core
Robomaster S1 was released last year and is available to purchase for all consumers. It features the same Mecanum wheeled chassis as the EP Core, but doesn’t have as any extensibility when it comes to additional power ports, sensor adaptors, or communications facilities for Arduino, micro:bit, or Raspberry Pi. It’s a more simple remote control and programmable robot, than an entire engineering platform.
The most noticeable difference is that the S1 featured a gel-bead and laser shooter mounted on a gimbal (“Warrior mode”), which could be used for Robomaster battles, or to shoot the included vision marker targets.
Instead, the EP Core instead uses a more education-focused (or school-friendly) grabber attachment, which DJI calls “Engineering mode”.
The EP Core also has a full curriculum for all suitable year groups to follow (though we haven’t had access to that so can’t comment further on it).
While many of the Robomaster app tutorials are currently reliant on having the gimbal attachment, the remote control element and programming components are all there for use with the grabber.
The other difference is pricing: Robomaster S1 can be purchased for around $500 from numerous stockists. The EP Core is only available through educational partners, or via direct inquiry to DJI. I couldn’t draw them on exact pricing (presumably there are bulk discounts for schools), but given the similarity to the S1, I wouldn’t have thought it was too far off the $500 mark.
The only slight frustration is that you can’t currently follow all of the Robomaster app tutorials. It’s not clear if these will be expanded to cover more of the grabber functionality, but the full curriculum will be tailored toward it and included with all purchases.
I’m quite envious of any lucky students who have the opportunity to learn to program using the EP Core. It’s simply an incredible learning tool. Sure you could learn Scratch without a cool robot to drive around, but it’s a whole lot more motivating to have that real hardware react to your programming. The EP Core model includes expansion ports and mounting holes for additional sensors and development boards, such as the Raspberry Pi, Arduino, or even NVIDIA’s Jetson Nano.
For pricing, you’ll need to enquire directly with DJI or via their local educational providers. Alternatively, if the expansion capabilities aren’t a concern and you’d rather the gimbal-mounted gel-bead and laser shooter instead of a grabber, check out the Robomaster S1, which is widely available.
The technology world is full of strange names, and “backdoor” is one of them. However, the implications of a backdoor on your system are more serious than a silly name would suggest.
Let’s take a look at what a backdoor is, what they do, and how they can affect you.
What Is a Backdoor?
Imagine you’re trying to get into an exclusive party. The only way to get in is to be on “the list,” and you know that some of your favorite celebrities have their name on it; unfortunately, you don’t.
You want to get in, so you look around the mansion where the party is taking place. As you’d expect, the front door is off-limits. Heavy-looking bouncers and security cameras watch the front and ensure nobody gatecrashes the party.
Fortunately, you find a way around the back of the mansion. Here, it’s much quieter; the garden is empty, there are no bouncers, and it’s dark enough that the CCTV won’t spot you.
You sneak through the garden and into a backdoor of the mansion. Now you can attend the party without being hassled by security. While you’re here, you could snap a few candid shots of your fave celebrities, listen out for gossip that the public won’t hear, or even pocket a few pieces of expensive cutlery.
This is what a backdoor is in computer science terms. It’s a way for an intruder to gain access to a system without going through the route with security on it. Because backdoors are invisible to a computer’s security system, victims may not realize their computer has one installed on it.
How Hackers Use Backdoors
Of course, if you used the back door enough times in future parties, the party organizers would catch on that someone was sneaking in. It’d only be a matter of time before someone caught you coming through the back, doubly-so if your little trick spread among eager fans.
Digital backdoors, however, can be harder to spot. Yes, a hacker can use the backdoor to do damage, but they’re also useful for spying and copying files.
When they’re used for spying, a malicious agent uses the secret entrance to gain remote access to the system. From here, they may click around and look for sensitive information without leaving a trace. They may not even need to interact with the system; they can instead watch the user go about their business and extract information that way.
A backdoor is also useful for copying data. When done right, copying data doesn’t leave a trace, allowing an attacker to harvest information that can lead to identity theft. This means someone can have a backdoor on their system that’s slowly siphoning their data.
Finally, backdoors are useful if a hacker wants to do damage. They can use a backdoor to deliver malware payloads without alerting the security system. As such, the hacker sacrifices the covert advantage of a backdoor in exchange for an easier time deploying an attack on a system.
How Do Backdoors Appear?
There are three main ways for a backdoor to come into existence; they’re discovered, created by hackers, or implemented by developers.
1. When Someone Discovers a Backdoor
Sometimes a hacker doesn’t need to do any work to create a backdoor. When a developer doesn’t take care to protect their system’s ports, a hacker can locate it and turn it into a backdoor.
Backdoors appear in all kinds of internet-connected software, but remote access tools are especially vulnerable. That’s because they’re designed to allow users to connect and take control of a system. If a hacker can find a way into the remote access software without needing credentials, they can use the tool for espionage or vandalism.
2. When Hackers Create a Backdoor
If a hacker can’t find a backdoor on a system, they may opt to create one themselves. To do this, they set up a tunnel between their computer and the victim’s, then use it to steal or upload data.
To set up the tunnel, the hacker needs to trick the victim into setting it up for them. The most effective way for a hacker to do this is to make users think it’s beneficial for them to download it.
For instance, a hacker may distribute a fake app that claims to do something useful. This app may or may not do the job that it claims to do; however, the key here is that the hacker laces it with a malicious program. When the user installs it, the malicious code sets up a tunnel to the hacker’s computer, establishing a backdoor for them to use.
3. When a Developer Installs a Backdoor
The most sinister applications of backdoors are when the developers themselves implement them. For instance, the manufacturer of a product will place backdoors inside the system that they can use at any time.
Developers create these backdoors for one of many reasons. If the product will end up on the shelves of a rival company, a company may implement backdoors to spy on its citizens. Likewise, a developer may add a hidden backdoor so that law enforcement can access and monitor the system.
Examples of Backdoors in the Real World
A good example of a developer-added backdoor is the Borland Interbase case back in 2001. Unbeknown to users of Interbase, someone could access the software over the internet on any platform by using a “master account.”
All someone needed to do was enter the username “politically” and password “correct” to gain access to any database. The developers eventually removed this backdoor.
Sometimes, however, a hacker won’t exploit a backdoor that they find or create. Instead, they’ll sell the information on the black market to interested parties. For instance, a hacker earned $1.5 million over a period of two years by selling backdoor information, some of which led to the networks of Fortune 500 companies.
Protecting Yourself From Backdoors
While they may have a funny name, backdoors are not a laughing matter. Whether a hacker creates them, or a developer sneaks one in, they can cause a lot of damage.
There are many reasons why you might want to combine photos. Maybe you’d like to merge two photos of your pets, children, or family members. Or, if you’re a business, you might want to put two pictures together of your office locations or related products.
You don’t have to be an expert at photo editing to turn two pictures into one. With these easy-to-use online tools, you can combine photos vertically or horizontally, with or without a border, and all for free.
PineTools lets you quickly and easily merge two photos into a single picture. If you want a fast tool that lets you add a border and is super simple to use, this is it.
Upload each image to get started and use the available zoom or move tools for each if you like. Then choose to position the photos next to each other either vertically or horizontally. You can adjust the sizes of the images next. This lets you magnify the smaller one, crop the largest, or constrain the proportions if you prefer.
Then you can add a border to the combined image. Use the slider to select the thickness and choose the color. PineTools gives you the option to select an exact color using the Hex code or RGB values.
When you finish, click Merge. Your combined photo will pop into the Output Image section of the page. From there you can download the image as a PNG, JPB, or BMP file.
IMGonline is another good site that lets you combine two images into one with extra settings to make your finished photo perfect.
Start by uploading each photo and selecting the position from vertical or horizontal. Then move onto the helpful settings. You can set an automatic adjustment for the sizes so that the images adapt to each other. For instance, you can have the larger of the two adapt to the smaller one. You can keep your images sized the way they are as well.
IMGonline also lets you rotate the photos if needed, trim them using values for each edge, and apply a mirror reflection for something different.
Select the file format you’d like to use from JPEG or PNG-24 and mark if you’d like to copy the metadata from the first photo. Then click OK and you’ll see and be able to download your merged photo.
It doesn’t get much easier to merge two photos than OnlineConvertFree. Similar to the other tools mentioned so far, this site gives you the basic option to combine two images.
You simply upload each photo, choose the position from vertical or horizontal, select the size adjustment, and pick the thickness of the border. Choose your image format from the dropdown box and then click the Save and Download Image button. It’s that easy!
As you may have guessed by the name, OnlineConvertFree offers additional features such as file conversions along with more image tools like a resizer, cropper, and rotator. So be sure to check those out as well.
If you’re interested in doing a bit more with the two photos you want to combine, take a look at PhotoFunny. On this site, you can choose from templates for your merged picture. So, if you’re looking for rainbows and hearts, wedding rings, or even Pokémon, there’s a fun theme for you.
Start by selecting your theme from the dozens available and then upload your photos. Optionally, you can check the boxes to add text, adjust the photos, or add a filter. Click Next and, depending on the theme and options you select, you’ll finish off your merged photo.
Click Download when you finish. You can then share the image on social media or download the JPG file. If you want a unique image, PhotoFunny gives you plenty of options.
If you want to combine more than two photos, check out Make Photo Gallery. This site lets you create more of a column collage type of image, which might be just what you need.
You can upload your photos by selecting them from your computer or by dragging them onto the page. Once they appear, you can rearrange them in a different order if you like.
Head to step two in the process and choose your background color, number of columns, maximum width, and margin size. You can also pop your own name into the Made By field. This will display on the bottom-right corner within the border of the finished photo.
Hit the Combine Photos button and almost instantly, you’ll see your new image. Click the Download button and you’ll receive your JPG file courtesy of Make Photo Gallery.
Another free website that lets you merge more than two photos is Photo Joiner. This site gives you an editing screen, so you can preview your finished project as you adjust the settings.
Click the Add Images button on the top-right and select your photos. They will display on that right side for you to drag onto the canvas. This lets you arrange them how you like. If you need to rotate, flip, or zoom in on a specific image, select it on the canvas and then click the Eye icon.
Once your photos are ready, you can use the settings on the left of the canvas. You can also start with the settings if you prefer. Choose the number of columns or rows, pick the finished image size, and if you’d like a border, select the thickness and color. You can use the settings on the far left to add text, change from vertical to horizontal, or create a Facebook cover.
When you finish, click Save right above the canvas. You can then download your photo as a JPG or pick a social network to share it directly from the Photo Joiner site.
Combine Photos to Create a Unique Picture
Whether you want to put two pictures side-by-side, on top of each other, or inside a fun frame, there is sure to be a free online tool here for you. And since it’s so easy to combine photos using these sites, you might want to try creating more than one merged picture. Just imagine the possibilities!
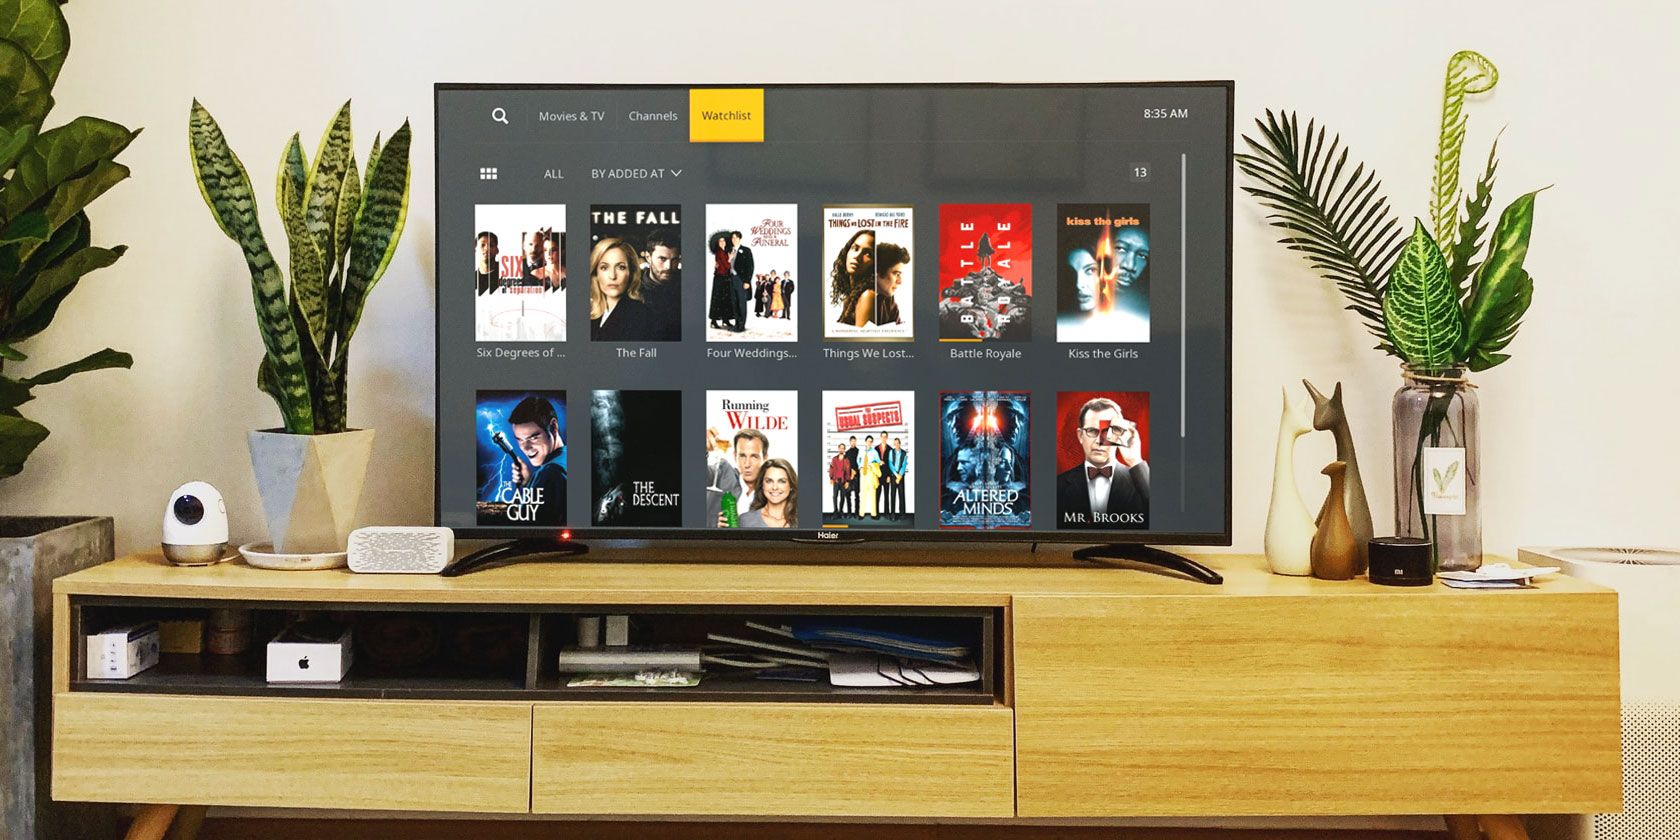
If your media collection is growing out of control, it may be time to organize your Plex library.
Content collections are a criminally underused part of the Plex app. Not only do they have massive organizational benefits, but you can also use them to customize the way your libraries look by using artwork and other metadata.
However, before you can use Plex collections, you need to understand how to enable them on your libraries, how to view them, and how to edit them. And some of the settings aren’t too easy to find.
Here’s how to organize your Plex library using collections…
How to Enable Plex Collections
Before you can organize your Plex library, you need to enable Plex collections for each individual library on your Plex server. Follow these steps to get started:
Open the Plex Media Server app (you cannot enable collections from a Plex Media Player app).
Locate the list of your Plex libraries on the left-hand side of the window.
Find the library on which you want to enable collections.
Hover over the library name and click the three vertical dots that appear on the right.
Using the popup menu, navigate to Manage Library > Edit.
Select Advanced in the left-hand panel.
Scroll down to Collections.
Set the option to either Hide items which are in collections or Show collections and their items.
Hit Save Changes.
There’s an important difference between Hide items which are in collections and Show collections and their items.
The first option will prevent items that you’ve added to collections from showing in the main library; only the collection itself will show as a single item. The second option will show both the collection and each individual item within the collection in your library.
How to Create a New Collection
Once you’ve enabled collections in your library, it’s time to make a new collection and start adding content.
To make a new collection, navigate to the preplay screen of the first movie, TV series, or episode you want to add, then click on the Edit button.
On the Edit screen, click on Tags in the left-hand panel, then scroll down to Collections.
In the text-entry field, type the name you want to call your new collection and click Add [collection name] in the popup box below the field. When you’re ready, hit Save Changes.
(NB: Collections are locked to the library on which you created them. You cannot add content from two different libraries to the same collection.)
How to Add More Videos to a Collection
Once you’ve created a collection, it’s time to start adding more videos to it.
Two methods are available. You can either repeat the steps above to add content on a case-by-case basis, or you can use multi-select to add videos to your collection in bulk. For most people, multi-select will be the way to go as it’s a lot faster.
To get started, highlight all of the videos in your collection that you want to add, then click on the Edit button in the upper-right corner of the Plex app.
In the Edit window, go to Tags > Collections and start to type the collection’s name. The field should auto-populate. You can add a video/series to more than one collection within the same library.
How to Browse Plex Collections
As long as you’ve enabled collections in the way we outlined at the beginning of the article, you’ll see them appear in-line in your library. However, even if you left that setting on Disabled, you can still see your collections for a given library by clicking on the drop-down tab at the top of the Plex window.
The tab has three viewing options—Recommended, Library, and Collections. Needless to say, you need to choose the latter.
When you click on a collection, you will be able to see all of the content that’s held within it.
How to Customize a Plex Collection
Now it’s time to customize your Plex collection. All of the same metadata fields are available that you’d find if you were editing the data of a standalone TV series or movie.
To start customizing, click on the collection’s name to open the pre-play screen, then hit the Edit icon. The four options in the left-hand panel that you need to pay attention to are General, Poster, Background, and Advanced.
General: Change the sort title of your collection and add a text summary of its contents.
Poster: With a bit of planning, you can make your collection posters look uber-slick. For example, why not use standardized fonts or iconography so that they all have the same style on your TV screen? If you don’t change the poster, it will default to the first item in your collection.
Background: You can set a background image to appear on the pre-play and buffering screens.
Advanced: This lets you override the default library settings for collection visibility and choose the order in which content appears within the collection.
Collections can also be shared with other users on a case-by-case basis, even if the library they are a part of is not shared.
Collections vs. Libraries
Finally, a quick note on when to use a collection versus when to use a library.
It’s perhaps easiest to think of collections as sub-libraries. For example, you wouldn’t want to group your TV shows and movies into a single library; there’s a clear delineation and it would play havoc with Plex’s automatic metadata import tool.
However, it wouldn’t make sense to spin out Brad Pitt movies into their own library; you’d want them to be part of your wider film library. In these cases, a collection makes sense.
The area that most often falls under the microscope in the library versus collections debate is kids’ content. There’s no right answer, but keep in mind that you can restrict access to videos based on content rating, as long as you’ve taken the time to set it up correctly on each video (Edit > General > Content Rating).
Working from home is all the rage at the moment. For most, it is necessity driving our home-work-cubicles—or rather, swamping the kitchen table with laptops, documents, coffee cups, and more.
One thing guaranteed to make your work-from-home-life that little bit easier is a second monitor. The positives a second monitor brings are immense. The extra screen real estate is perfect for keeping your document or spreadsheet up while you fact-find and cross-check charts. It’s a dream for productivity that’ll help you finish your work that bit quicker.
If your work-from-home situation has been forced upon you and you’re missing the extra monitor you have at work (or just want to watch Netflix while you plug data), you need the award-winning Mobile Pixels DUEX Pro Portable Dual Monitor.
The DUEX Pro normally retails for $250—a great price for a portable external—but you can grab a massive 29% discount using the SAVEDUEXPRO promo code, dropping the price to $179.35.
Why Buy the Mobile Pixel DUEX Pro Portable Dual Monitor?
First up, the DUEX Pro is super lightweight. Weighing just 1.6lbs and with a depth of 0.48 inches, the DUEX Pro takes up no extra room whether you’re at home or working elsewhere. For reference, a MacBook Pro weighs in at 3lbs, so you can add nearly twice the screen for half the weight!
If you are working from the local coffee shop, you don’t have to worry about power, either. The DUEX Pro has an exceptionally low power draw at 4.5W, with minimal impact on your laptop battery life.
The DUEX Pro has a 12-inch IPS Full HD anti-glare screen, contained in a stylish matte black frame. The screen size and pixel density make working from the DUEX Pro easy, with no blurriness or resolution issues.
Furthermore, the DUEX Pro rotates through 270°, allowing you to move the screen into a presentation mode, or maybe even let the kids watch a show while you work. And, while the DUEX Pro clips to the back of your laptop for easy access and storage, you can also use it separately in portrait mode.
At the current time, the Mobile Pixels DUEX Pro is available with a 29% discount using the special promo code SAVEDUEXPRO, dropping the price to $179.35.
DUEX Pro Specs
Here’s what you need to know about the DUEX Pro at a glance:
Compatible with Windows, macOS, Linux, Chrome OS, and Android
5″ IPS Full HD screen, 300 nit adjustable brightness
3-foot USB Type-C cable
USB Type-C to USB Type-A adapter
12 metal plates, enough for three laptops
The DUEX Pro works best when using a USB Type-C connection, as the power and data draw are faster. However, there is no discernible difference between the different connection options.
If your laptop has multiple USB ports, you can opt for multiple DUEX Pro Portable monitors, too. There is no limit to the number of DUEX Pro’s you connect to your laptop—only the number of USB ports on the device itself. Portable media center, anyone?
In the latest sign of US platforms bracing for the 2020 US presidential election in November, Twitter has said it will step up efforts to prevent its service from being used to target voters with false information around election participation.
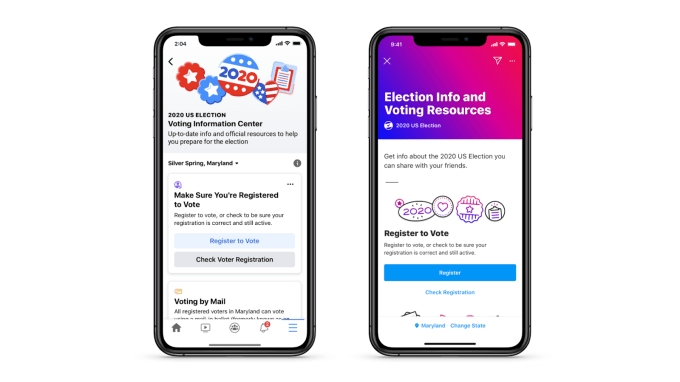
Earlier today Facebook announced the launch of a voting hub aimed at combating election misinformation on its platform by gathering together genuine election resources.
Twitter is spinning a bolder message — saying its aim is to “empower every eligible person to register and vote” by working to surface accurate information. The aim is then that genuine information being made more prominent will squeeze the risk of voters being tricked out of their vote by election misinformation being spread on its platform.
In a statement reported earlier by Reuters the company’s VP of public policy and philanthropy for the Americas, Jessica Herrera-Flanigan, said: “Twitter is working hard to increase informed participation in democratic processes around the world. Ahead of the 2020 US Election, we’re focused on empowering every eligible person to register and vote through partnerships, tools and new policies that emphasize accurate information about all available options to vote, including by mail and early voting.”
New tools, policies, and voting resources will be rolling out over the next month that reflect that mission, according to Twitter, though it’s not offering much detail on exactly what’s cooking.
More such tools and interventions are slated as on the way — with Twitter saying it’s exploring ways to expand itscivic integrity policies, including in order to address new challenges related to election and other civic events as a result of COVID-19.
The coronavirus has thrown a peculiar spanner in the works of democratic processes by attaching potential public health risk to in person voting, making alternatives such as vote by mail or staggered voting vital options to avoid voter disenfranchisement.
Per Twitter, part of the work it’s going to do to expand its civic integrity policies is likely to focus on tackling emerging trends that arise aroundmischaracterizations of mail in voting and other voting procedures, including voter registration.
Its current policy — which covers political elections, censuses and major referenda and ballot initiatives — states that:
You may not use Twitter’s services for the purpose of manipulating or interfering in elections or other civic processes. This includes posting or sharing content that may suppress participation or mislead people about when, where, or how to participate in a civic process.
But the policy is narrowly focused — on misleading information about vote participation. Whereas posting inaccurate information about a candidate or political party, hyperpartisan content or making broad claims that elections are “rigged” — such as this one — do not currently constitute a civic integrity policy violation, per Twitter’s guidance.
Despite its bold messaging today about empowering voters, there’s no sign Twitter is planning to broaden its policy to, for example, stamp on Trump’s ability to use its ‘free speech’ megaphone to trash established democratic processes with unfounded general claims of manipulation.
Instead, where election participation is concerned, Twitter looks focused on a ‘more speech to combat bad speech’ model. So it’s saying it will continue to promote voter registration resources prominently — while also expanding partnerships aimed at building out a suite of bona fide resources to support eligible voters to vote safely, including by mail and alternative early voting options.
It has also worked with organizations such as NASS and NASED, which support local election officials, and to support their #TrustedInfo initiative, along with a number of other nonpartisan civic tech and civil rights organizations which work on ensuring eligible voters have the information they need to engage in the democratic process.
The great huge elephant in the room here is of course voter suppression — and the risk of Twitter’s platform being used to spread negative messaging that’s intended to dissuade certain demographics from voting.
Trump’s baseless claims of “rigged” elections — which Twitter continues to allow to be broadcast at the push of a button to millions of its users — are intended to have such an effect, by firing up his own base to vote while encouraging others to stay at home by undermining trust in the democratic process.
The easiest way to launch an application in Windows 10 is to type its name in the Start/taskbar search and press the Enter key. But if you want to make it faster, assign custom keyboard shortcuts to your favorite programs and apps. By assigning a dedicated keyboard shortcut, you will be able to launch your […]
Leveraging the right set of best Amazon seller tools can be crucial for your Amazon selling business and define your success. There are many available solutions on the market, but sellers need to find the right one to fit their budget and all business needs. Finding the right set of tools will ultimately level up […]
Opportunity to Upgrade MCSA: Windows Server 2016 This exam is meant for IT professionals who want to upgrade their expertise in implementing the Windows Server 2016 core infrastructure services. For taking this exam you must have an MCSA: Windows Server 2008 or MCSA: Windows Server 2012 R2 certification as a prerequisite. In general, Microsoft 70-743 […]
Eager to avoid a repeat of its disastrous role as a super-spreader of misinformation during the 2016 election cycle, Facebook is getting its ducks in a row.
Following an announcement earlier this summer, the company is now launching a voting information hub that will centralize election resources for U.S. users and ideally inoculate at least some of them against the platform’s ongoing misinformation epidemic.
The voting information center will appear in the menu on both Facebook and Instagram. As part of the same effort, Facebook will also target U.S. users with notifications based on location and age, displaying relevant information about voting in their state. The info center will help users check their state-specific vote-by-mail options, request mail-in ballots and provide voting-related deadlines.
Facebook election information center
Facebook is also expanding the labels it uses to attach verified election resources to posts by political figures. The labels will now appear on voting-related posts from all users across its main platform and Instagram, a way for the platform to avoid taking actions against specific political figures while still directing its users toward verified information about U.S. elections.
Along with other facets of its pre-election push, Facebook will roll previously-announced “voting alerts,” a feature that will allow state election officials to communicate election-related updates to users through the platform. “This will be increasingly critical as we get closer to the election, with potential late-breaking changes to the voting process that could impact voters,” Facebook Vice President of Product Management and Social Impact Naomi Gleit wrote in a blog post about the feature. According to the company, voting alerts will only be available to government accounts and not personal pages belonging to state or local election administrators.
The company cites the complexity of conducting state elections in the midst of the pandemic in its decision to launch the info center, which is also modeled after the COVID-19 info center that it created in the early days of the crisis. While the COVID-19 info hub initially appeared at the top of users’ Facebook feeds, it’s now only surfaced in searches related to the virus.
Election night nightmare
Uncomfortable as it is with the idea, Facebook seems to be aware that it could very well become the “arbiter of truth” on election night. With 2020’s unprecedented circumstances leading to a record number of ballots cast through the mail, it’s possible that the election’s outcome could be delayed or otherwise confusing. Without clear cut results, conspiracy theories, opportunism and other forms of misinformation are likely to explode on social platforms — a nightmare scenario that social networks seem to be preemptively dreading.
“A prolonged ballot process has the potential to be exploited in order to sow distrust in the election outcome,” Gleit wrote in Facebook’s post detailing the election tools.
The company was one of nine tech companies that met with federal officials on Wednesday to discuss how they will handle concerns around misinformation on the platforms around election day.
Joint industry statement on ongoing election security collaboration between tech companies and USG agencies tasked with protecting the integrity of the election pic.twitter.com/c1fHERHWtw
The group of companies now includes Facebook, Google, Reddit, Twitter, Microsoft, Pinterest, Verizon Media, Linkedin and the Wikimedia Foundation. Some of the group’s members had met previously to discuss efforts ahead of U.S. elections, but the expanded coalition of companies formally working with federal officials to prepare for the U.S. election appears to be new.