
Election Commentary
Juul Labs is today launching a pilot for its new Track & Trace program, which is meant to use data to identify exactly how Juul devices wind up in the hands of minors.
Juul vaporizers all have a serial number down at the bottom, by the Juul logo. However, it wasn’t until recently that Juul had the capability to track those serial numbers through every step of the process, from manufacture to distribution to retail to sale.
 With Track & Trace, Juul is calling upon parents, teachers and law enforcement officials to come to the Juul Report web portal when they confiscate a device from a minor and input the serial number. Each time a device is input in the Track & Trace system, Juul will open an investigation to understand how that minor wound up with that device.
In some cases, it may be an issue with a certain retail store knowingly selling to minors. In others, it may be a case of social sourcing, where someone over 21 years of age buys several devices and pods to then sell to minors.
Juul will then take next steps in investigating, such as talking to a store manager about the issue. It may also enhance its secret shopper program around a certain store or distributor where it sees there may be a spike in sale/distribution to youth to identify the source of the problem. To be clear, Track & Trace only tracks and traces the devices themselves, and does not use personal data about customers. It’s also worth noting that Juul Labs has increased
Juul isn’t yet widely publicizing Track & Trace (thus, the “Pilot” status), but it is focusing on Houston as a testing ground with banner ads targeted at older individuals (parents, teachers, etc.) pointing them to the portal. Of note: the ad campaign is geofenced to never be shown in or around a school, hopefully keeping the program a secret from young people illegally using Juul.
The company wants to learn more about how people use the portal and test the program in action before widening the campaign around Track & Trace. That said, the Report portal is not limited to Houston residents — anyone who confiscates a Juul can report it through the portal and trigger an investigation.
“It’s important to note that the pilot is an opportunity for us to learn how the technology is working and optimize the technology,” said Chief Administrative Officer Ashley Gould. “It’s not just at the retailer level. It’s a whole process through the supply chain to track that device and find out if everyone who is supposed to be scanning it is scanning it, and the software that we’ve created to track that serial number through the supply chain to the retail store is working. The only way we’re going to know that is when someone puts in the serial number and we see if we have all the data we need to track it.”
According to Juul, every device in production will be trackable in the next few weeks. In other words, Juul vapes that are years old are likely not fully traceable in the program, but those purchased more recently should work with the system.
Juul has been under scrutiny from the FDA and a collection of Republican Senators due to the device’s rise in popularity among young people. Outgoing FDA Commissioner Scott Gottlieb has called it “an epidemic” and enforced further restrictions on sales of e-cig products.
Juul has also made its own effort, removing non-tobacco and non-menthol flavored pods from all physical retail stores, enhancing their own purchasing system online to ensure online buyers are 21+ and not buying in bulk, going after counterfeits and copycats posing as Juul products, and exiting its Facebook and Instagram accounts.
But Juul Labs also committed to build technology-based solutions to prevent youth use of the product. Cofounder and CPO James Monsees told TechCrunch at Disrupt SF that the company is working on Bluetooth products that would essentially make the Juul device as smart as an iPhone or Android device, which could certainly help lock out folks under 21.
However, the Track & Trace program is the first real technological step taken by the e-cig company. And it’s been an expensive one. The company has spent more than $30 million to update its packaging, adjust printing standards, changing manufacturing equipment, and integrate the data and logistics software systems.
For now, Track & Trace is only applicable to Juul vaporizers, but it wouldn’t be shocking to learn that the company was working on a similar program for its Juul Pods.
LumApps, the “social intranet” for the enterprise, has closed $24 million in Series B funding. The round is led by previous backer IdInvest, and will be used to scale LumApps’ global sales and marketing and accelerate product development.
Founded in Paris in 2012 — and now also with offices in London, Tokyo, San Francisco and New York — LumApps has developed a social web-styled intranet for enterprises to let company employees better connect and collaborate.
The solution integrates with both G Suite, Microsoft Office 365 and Microsoft SharePoint, and is accessible via mobile. Overall, it is designed to serve as a central hub for personalized content, social communications, work tools and enterprise applications.
“We launched LumApps Social Intranet solution in 2015, after our historical customer Veolia asked us to create a platform based on their needs,” LumApps founder and CEO Sébastien Ricard tells me. “We quickly realized there was a massive demand for modern intranets from all companies, to transform internal communications and the employee experience.”
That’s because, he says, communication within an enterprise is challenging, spread across disparate tools such as email, live chat and social networks — solutions that are typically disconnected and siloed. This is especially true in large enterprises, where finding information and reaching the right people can be very difficult.
“Our dream was to enable access to useful information in one click, from one place and for everyone. Just that simple. We wanted to build… a solution that bridged [an] intranet and social network, with the latest new technologies. A place that users will love.”
At its core, Ricard says LumApps goes further than just solving common business challenges, including fostering a collaborative workplace where employees are more engaged and more productive. “Every large company is building their digital workplace, and it’s critical that they have a central intranet that houses all employee communications, news, memos, applications, etc. from the corporate team but also from peers.”
That mission appears to be working, evidenced by today’s Series B funding and a customer base that spans enterprises small and large. Companies using LumApps include Veolia, Valeo, Air Liquide, Colgate-Palmolive, The Economist, Schibsted, EA and Logitech. The intranet software has on-boarded more than 4 million users globally.
Adds Ricard: “As a French entrepreneur, it has always been a dream to build such a global success,” says Ricard. “We encountered highs and lows, especially in 2016 when we started in the U.S. and lived our first year of setbacks. Why? All we had was our product and we didn’t yet understand the culture and market specifics. It took time to hire American talent to structure everything and build a solid base… Now we have a team of 150-plus people worldwide with a special focus on the U.S.”
Facebook upset millions upon millions of users five years ago when it removed chat from its core mobile app and forced them to download Messenger to communicate privately with friends. Now it looks like it might be able to restore the option inside the Facebook app.
That’s according to a discovery from researcher Jane Manchun Wong, who discovered an unreleased feature that brings limited chat features back into the core social networking app. Wong’s finding suggests that, at this point, calling, photo sharing and reactions won’t be supported inside the Facebook app chat feature, but it remains to be seen if that is simply because it is currently in development.
It is unclear whether the feature will ship to users at all as this is a test. Messenger, which has more than 1.3 billion monthly users, will likely stick, but this change would give users other options for chatting with friends.
We’ve contacted Facebook for comment, although we’re yet to hear back from the company. We’ll update this story with any comment that the company does share.
As you’d expect, the discovery has been greeted with cheers from many users who were disgruntled when Facebook yanked chat from the app all those years ago. I can’t help but wonder, however, if there are more people today who are content with using Messenger to chat without the entire Facebook service bolted on. Given all of Facebook’s missteps over the past year or two, consumer opinion of the social network has never been lower, which raises the appeal of using it to connect with friends but without engaging its advertising or news feed.
Wong’s finding comes barely a month after Facebook CEO Mark Zuckerberg sketched out a plan to pivot the company’s main focus to groups and private conversation rather than its previously public forum approach. That means messaging is about to become its crucial social graph, so why not bring it back to the core Facebook app? We’ll have to wait and see, but the evidence certainly shows Facebook is weighing the merits of such a move.
Apple has added another step to prevent users from accidentally signing up for an iOS app’s subscription – or, from being tricked into it by a scammy app not playing by the rules. The company recently rolled out a subscription confirmation dialog box that pops up as one final step to ensure you meant to opt in to the subscription being offered.
The change to iOS was first spotted by app developer David Barnard on Twitter and reported by Apple news site 9to5Mac.
Whoa! Apple added an additional confirmation step for subscriptions. This new alert comes after you confirm with Touch ID/Face ID. I hope they address this in a more elegant way in iOS 13, but I’m thrilled Apple took a definitive step to curb scam subscriptions.
@pschiller pic.twitter.com/oktaEVdx0o
— David Barnard (@drbarnard) April 11, 2019
The new confirmation box is a welcome addition, considering how many users were accidentally subscribing – particularly those with Touch ID-based phones who were trying to exit to the Home screen. Instead, they were giving the app permission to sign them up by placing their finger on the Home button, which triggered the Touch ID authentication process.
The update also arrives following several changes Apple has made to subscriptions in recent months to address problems around scammy subscriptions.
A good number of developers – especially those in the Utility category – were using sneaky tricks to tap into the subscription craze to bank thousands and even millions of dollars per year. Some apps would intentionally confuse users with their design, or make promises of “free trials” that converted in only a few days, or used other misleading tactics to get users to subscribe.
This left many consumers feeling they had been duped into paying, and a host of angry App Store reviews followed. The scams could have had a broader impact on the subscription economy, if Apple had allowed them to go unchecked, as consumers would have become wary of ever signing up for anything, as a result.
That would have been a problem, given how subscriptions have become a big business for the App Store. According to one forecast, they are poised to grow to $75.7 billion by 2022, in fact.
However, Apple has since begun to crack down on bad actors while also making subscriptions easier to manage by iOS users.
In January, it rolled out new developer guidelines to more clearly spell out what is and is not allowed; and in February it updated iOS to reduce the number of steps it took to get to your subscriptions, so you could more quickly and easily cancel them.
Now, the new dialog box will ensure that users understand they’re opting in to a paid subscription, with a message that reads:
“Confirm Subscription. The subscription will continue unless canceled in Settings at least one day before a subscription period ends.”
Apple didn’t formally announce the change, but it appears to have rolled out sometime in the last week, reports say.

How do you remove programs on Windows 10? In one sense, the answer is straightforward; in another, it’s perhaps more multi-faceted than you might realize.
Of course, you can delete Windows 10 programs using the operating system’s built-in tools—but sometimes those tools aren’t powerful enough. In addition to the native tools, there are “automagic” program removal options, malware removal apps, and more.
Confused? Let’s take a closer look at how to remove Windows programs and apps quickly.
We’ll begin with a quick overview of the built-in ways to uninstall programs on Windows.
Puzzlingly, there are two different ways to achieve the same goal. You can either use the Settings app or the Control Panel.

The Settings app approach is the newer of the two methods.
Microsoft said way back in 2015 that the company intended to phase out the Control Panel entirely, but given its long-standing tight integration with the operating system, it’s proving to be quite a challenge to unravel it all.
Nonetheless, if you want to be on safe ground, this is the more sensible method to become familiar.
To begin, open up the Settings app, go to Apps > Apps and Features, and scroll down the to the Apps and Features section.
You will see a list of all your apps, including their size and the date on which you installed them. You can use the filters and the top of the list to sort the items in the most useful way.
To delete an app, highlight the software in question and click on Uninstall.
Note: If you’re not sure where to start, check out our list of Windows 10 apps you should install right now.

If you’re a traditionalist, you might prefer to use the Control Panel to delete programs on Windows 10.
It’s also smart to use the Control Panel if you want a bit more insight into the app you are removing. In addition to the information listed in the Settings app, you can also easily see the version number and app publisher.
The Control Panel is no longer accessible by right-clicking on the Start menu, so you’ll need to search for it in Cortana to find it. Once the Control Panel is open, navigate to Programs and Features to see a list of all the programs on your computer.
Highlight an app and click Uninstall at the top of the window to remove it from your system.
Several third-party tools can remove apps on Windows 10. Here are some of the best:
Curiously, the native uninstaller tool in Windows 10 isn’t actually that good. It has a nasty habit of leaving behind registry entries, system files, and other unneeded junk. The only way to get rid of it is to go through all the old directories manually.
For a more powerful way to delete apps on Windows 10, check out Revo Uninstaller. There’s a free and a pro version. The free version doesn’t let you uninstall entire apps but does allow you to scan and remove any leftover files and folders from previously-deleted programs.
The pro version adds support for entire app removal but will set you back $25. There’s a 30-day free trial available in case you want to try before you buy.
CCleaner’s reputation has taken something of a battering in recent times—it’s easy to make the case that the app is now adware.
However, the underlying tools are still as good as ever. If you need an app that can remove a program on Windows 10 in a flash, CCleaner could be the answer.
To use CCleaner to remove a Windows app, fire up the software and go to Tools > Uninstall. You will see a list of all the apps on your system. Choose the app you want to remove and hit Uninstall to begin the process.

The final third-party uninstaller we recommend is IObit. The company makes several optimization apps, but we are specifically interested in Advanced SystemCare 12.
Much like the free version of Revo Uninstaller, it can remove old app remnants from your system. That includes invalid registry entries, orphaned folders, malware, and other junk files.
The pro version of the app, which costs $20, offers deeper registry cleaning and the ability to speed up your web connection.
Some programs—especially malware—might be resistant to the usual methods of app removal. In those cases, you need to turn to a dedicated anti-malware tool.
There are lots of great antivirus suites, but we particularly like Kaspersky Security.
Kaspersky Security offers two plans: Kaspersky Free and Kaspersky Paid. MakeUseOf readers can enjoy an exclusive discount if they sign up for one of the paid plans.
Lastly, a note about the Windows 10 apps that cannot be uninstalled. That includes programs such as Alarm and Clock, Calculator, Groove Music, and People.
Some third-party apps will let you uninstall these apps, but it’s actually possible to achieve this from within Windows without any external help; you need to use PowerShell.
To launch PowerShell, right-click on the Start menu and select Windows PowerShell (Admin).
When you’re ready to uninstall programs, type Get-AppxPackage *[app name]* | Remove-AppxPackage and press Enter.
Note: There is a strong possibility that the apps will reappear next time Windows updates itself.
The various ways to uninstall programs on Windows 10 that we’ve listed in this article should cover you for just about every eventuality. If we’ve missed any methods, make sure you let us know in the comments below.
And if you would like to learn about more cool Windows 10 tricks, make sure you check out our articles on how to fix slow boot times in Windows and our tips on how to speed up Windows 10.
Read the full article: How to Uninstall Programs on Windows 10 the Fast Way

The next time you walk into an Apple Store, ready to look down the line of MacBooks and iMacs and pick one out like a perp in a lineup, keep in mind that your options go far beyond what’s out on the show floor.
Here’s how you can use Apple’s website to design your own custom Mac, including some tips on what you should prioritize.
In-store and on the website, Apple has a bunch of pre-set Mac models. As you might expect, more expensive models come with additional features. For example, the entry-level 13-inch Macbook Pro does not come with a Touch Bar, but some of the mid-level and all the high-end models do.
Some options, however, come in too many different flavors for each to have only one set model. Once you hit Select for the model that comes closest to what you want, you’ll see a bunch of potential upgrades that you can take advantage of.

Keep in mind that in stores, only the base models are immediately available. You can get a custom order shipped to an Apple Store for pickup, but you’ll have to wait for delivery. This usually takes about a week or so.
Let’s examine the three most important aspects you can customize on your Mac.
The processor is the brain of the computer. There are two important considerations when it comes to choosing the right one for you.
The first factor to consider is the processor’s speed. To get a sense of this, you have to take into account its clock speed, which is measured in gigahertz (GHz). You also have to check what generation of chip it is, and whether it is an i5 or an i7.
In general, the more GHz and the later the generation, the faster the chip. Additionally, i7 chips are faster than i5. CPU speed matters most for heavy-duty tasks like rendering video, so consider an upgrade here if you do that often.
You also want to look at how many cores you might need. Each individual processor core can perform its own task, so multiple cores means that you can run many tasks at once without experiencing a loss of speed. More cores are great if you need to multi-task, particularly if you work with graphics or video.
The most tricked-out iMac Pro comes with an 18-core processor, which is definitely overkill. But you might consider upgrading to at least a quad-core for general use.
The next customizable item is memory, also referred to as RAM. Every time you open up a program on your Mac, the data in that program takes up space in your memory. Therefore, the more memory you have, the more programs you can have open at once without slowing your machine down.
Once your machine has used up all your memory, it starts running programs from what’s called Virtual Memory. This exists on your hard drive. Back in the days when hard drives were relatively slow spinning disks, this could lead to a huge slowdown. Now, however, all Mac notebooks come standard with SSDs, which are much faster, and the slowdown isn’t as noticeable. However, even SSDs are still slower than RAM.
Thus, if you’re the kind of person who has a hundred open browser tabs at once, you might consider upgrading your memory to at least 16GB. If you only use your Mac for light tasks like browsing and email, 8GB should be fine.
Finally, you should look at upgrading your storage space. The standard Mac notebooks come with drives that range from 128GB to 512GB. The upgrades, however, go as high as 4TB. All of these drives are SSDs.
On the iMac side, the standard models all come with at least 1TB hard disk drives (HDDS, not SSDs). You can upgrade them with SSDs or with higher-storage Fusion drives. A Fusion drive combines the speed of an SSD with the high capacity of an HDD.
SSD stands for Solid State Drive. They are smaller than traditional desktop hard drives and much faster. Due to the lack of moving parts, they’re also much less likely to break down than a spinning disk drive. The trade-off is that they are more expensive, especially at higher capacities.
Usually, that trade-off is worth it, as is splurging for a higher capacity. Having an SSD in your system improves speed across the board.

Most entry and mid-level Macs come with integrated graphics cards. Apple builds the graphics card right into the logic board, and it works seamlessly with the processor. They work fine for light use, but aren’t suitable for heavy-duty graphics work like gaming.
More expensive Macs come with dedicated graphics cards, which are separate components with their own processors and dedicated memory. These Macs allow you to customize your graphics cards to a certain extent.
If you do any graphics-related work like graphic design or film, or if you are a gamer, a dedicated graphics card will perform much better than an integrated one. The only person who really needs to max out their graphics card is someone who renders 3D graphics a lot, like a video game designer or animator.
If you are such a person, but you’re still on a budget, you want a card with the most memory you can get.
If you’re on a budget and you can only afford one upgrade, you have a decision to make. In the past, you could upgrade certain components on a Mac after purchase, particularly the hard drive or the RAM. But those days are essentially gone. You have to go into your Mac purchase knowing what you want to splurge on.
If there’s one aspect that almost everyone runs into an issue with eventually, it’s disk space. Most of the entry and mid-level Macs only come with 256GB, so you should avoid getting a Mac with minimum storage if you can. You’ll thank yourself later.
Here are a couple under-the-radar custom options to get you started.
Buy your Mac at the right time of year to take advantage of every deal you possibly can. Combine those deals with your ideal customizations to get the Mac you want at a better price.
Read the full article: How to Build Your Perfect Mac on Apple’s Website

Today, we’re blessed with lots of ways to share files and folders with other people. There’s email, instant messenger apps, online file transfer services, cloud storage sharing, and more.
But what about the Windows File Explorer app? It might not be near the top of many people’s list; nevertheless, it’s a quick and efficient way of sharing files.
Want to learn how sharing files from Windows File Explorer is possible? Keep reading.
There are a few different ways to share a file in Windows Explorer; we’re going to look at them all in turn.
Firstly, let’s consider the File Explorer Share menu. To access it, open the app and click on the Share tab at the top of the window.

The most prominent icon is the sizeable green Share button. Clicking it will open up the native Windows 10 Share window.
At the top of the window, you will see all your frequently used contacts. Further down is a list of nearby Bluetooth devices that you can share your file with. And finally, at the bottom of the window, you will see a list of any apps on your machine that you can use to share the file. They include services like OneNote and Mail.
To share the file with any of the apps or devices you see in the list, just click on the appropriate option and follow the on-screen instructions.
There are a few other useful sharing tools in the Ribbon that you can use.
Alongside the Share icon is a shortcut for sharing via email and a shortcut for creating a ZIP file. If you need to share a large file, one of the most efficient ways is to compress it as a ZIP file before sending it. The file will be much smaller and thus upload and download more quickly.
If you click on the ZIP icon, the new ZIP folder will be created in the same folder as the existing file. The email shortcut will fire up your default mail client, ready for sharing.
Further along the Ribbon are print and faxing options, along with—if your machine supports it—CD burning.
Finally, there are options to share a file with other people/devices in your workgroup or domain.

OneDrive is tightly integrated with the Windows 10 operating system. One of the places where the integration is most apparent is in the File Explorer app.
Assuming you signed into Windows using a Microsoft account rather than a local account, OneDrive will appear as a location on the list in the left-hand panel of the app.
You have a few ways to share files in OneDrive through the File Explorer app.
The easiest way is to navigate to the file in question, right-click on it to open the context menu, and select Share a OneDrive link.
Windows will automatically copy the link to the clipboard. From there, you can share it with as many people as required. Any shared files are denoted in the File Explorer app with a small icon of a person’s head.

If you need more advanced sharing options, head back to the context menu and click on More OneDrive Sharing Options.
The OneDrive web app will open, and a share box will pop up. It lets you toggle editing options, set an expiry date on the shared file, and set a password. If you expand the More menu, you will also find links to share the file via Facebook, Twitter, LinkedIn, and Sina Weibo.
Note: It is not possible to stop sharing a file on OneDrive from File Explorer. Instead, you need to open the OneDrive web app, navigate to the file and highlight it, then click on the Info icon in the upper right-hand corner of the screen. You can manage who has access as well as the active sharing URLs in the Has Access section.

Since October 2018, Homegroup is no longer a part of Windows 10. But don’t worry—the sharing functionality still exists thanks to the network sharing feature.
You can make a file available to everyone on your home network using the network access tools.
To begin, find the file you want to share and right-click on it to open the context menu. On the context menu, head to Give Access To > Specific People.
A new window will open. Click on the dropdown menu and select Everyone. Alternatively, if you know the user credentials of a single user on your network, you can select Create a New User and enter the details.
As long as you have Network Discovery turned on (Settings > Network and internet > Wi-Fi > Manage Known Networks > [Wi-Fi Name] > Properties > Private), permitted people on your network will see your computer as a network location that they can access.
Finally, you could consider using third-party cloud storage providers like Google Drive and Dropbox. Many cloud storage providers offer a Windows plug-in which places a shortcut to the drive in File Explorer.
You can drag-and-drop files into the storage providers’ folders to upload them, then share them with other people using the usual channels. If you need more information, refer directly to the provider’s own literature.
Sharing files is one of those odd tasks that we all do every day, yet very few of us are using the most optimal tool for the job on each occasion.
As we said at the start, Windows File Explorer is far from being the only sharing method at your disposal, but it can play an important role in your workflow if you know when to deploy it.
If you would like to learn about other ways to share files in Windows, we have got you covered. Make sure you check out our articles on how to share files with QR codes and how to share files without a cloud storage account.
Read the full article: 4 Ways to Quickly Share a File From Windows Explorer

Compared to many tech products, Apple devices hold their value extremely well. Of course, they tend to cost quite a bit in the first place, which balances everything out a bit.
This ability to hold value makes Apple products useful even when it comes time to upgrade. The problem comes when you need to decide where to go? The Apple trade-in program, GiveBack, lets you trade devices in for credit toward a new one. On the other hand, a site like Mac of All Trades instead promises cold hard cash.
Which one is right for you? There are a few factors to consider that may help make that decision.
If Apple didn’t give customers a fair deal when they turned in their computers, word of mouth would spread fairly quickly. With a smaller company like Mac of All Trades, we can’t entirely rely on word of mouth. Fortunately, the company seems to be on the up and up.
Mac of All Trades has an A+ rating with the Better Business Bureau. The company also has a positive rating of 3.5 stars. Considering far more customers tend to leave reviews if they have a poor experience than a good one, that’s not a bad score.
Before you decide which company to use to sell your Mac, iPhone, or another piece of Apple hardware, you need to know why you’re doing it. The Apple trade-in program is just that: a trade-in option for a new device. Meanwhile, you get more flexibility with Mac of All Trades.

If you’re getting rid of your iPhone to trade up to the newest model, it might make more sense to go with Apple. For those considering this path, you might want to instead look at Apple’s iPhone Upgrade program, which lets you get your hands on a new model every year. Get a new iPhone and recycle your old one. It’s simple.
On the other hand, if you’re looking to buy something else or just need cash, Mac of All Trades makes more sense. If you want to sell a MacBook Pro, sell your old iPhone, or sell an Apple Watch, this is also safer than selling on a site like eBay, since you don’t have to worry about getting scammed.
With the Apple GiveBack trade-in program, you get a gift card to spend in the Apple Store. You can use this for anything, so you don’t need to trade in a MacBook Pro to save on a new MacBook Pro, for example. Combining your gift card with Apple hardware discounts can net you some serious savings.
Of course, the value of your gift card depends on what you’re trading in. To get specifics, you’ll need to know the exact model number and/or specs of what you’re trading in. That said, the site provides a rough idea of just how much you can save through the Apple buyback program.

Of course, a computer is the most valuable item you can trade in. Apple will credit you for up to $1,100 on a Mac trade-in. As you can imagine, this would only be for the highest-end hardware the company offers.
An iPhone trade-in will get you up to $500 in gift card credit, while an iPad trade-in can get you as much as $405. As you may imagine, an Apple Watch trade-in is less lucrative, getting you a maximum credit of $191.
For older devices and items like an iPod or Apple TV, you won’t get any money, but you can send them in to Apple to recycle them.
When you head to Mac of All Trades to sell your Mac, you’ll actually go to a separate part of the company. This division also has a cute name: Mac Me an Offer.
Compared to Apple, Mac of All Trades accepts a much larger variety of hardware. This means it also potentially offers much more money.
The trade-in value for a top-of-the-line 2013 Mac Pro is roughly $1,925. Meanwhile, you can sell your iMac Retina 5K for $1,160.

A top-of-the-line MacBook Pro can also get you a lot of cash, with the maxed-out 2018 Core i9 model fetching an estimated $1,680. Even the most recent MacBook Air will fetch a fair price at $655 in perfect working order.
There are some items that Mac of All Trades doesn’t accept. An old 17-inch MacBook Pro from 2009 or earlier won’t get you anything, for example.

You can sell an old iPhone for a good price too. A 51 GB iPhone XS will get you $880. You probably won’t want to sell one of them anytime soon, but even a 256GB iPhone 7 Plus will fetch $270.
Mac of All Trades accepts iPads for a good price too. While the company won’t take the original iPad, you can trade in the fairly dated 16GB iPad Air for $100. Looking at a newer iPad, trade-in value for a Wi-Fi-only 512GB 10.5-inch iPad Pro is a respectable $405.
If you’re looking to sell your Apple Watch, you’ll only get $20 for the Series 1. That said, if you want to sell your Series 3 Apple Watch to upgrade to a Series 4, you can get $125 for it.
Did you recently buy a smart TV and find you’re not using your Apple TV much anymore? You won’t get rich from it, but you can sell the 64GB Apple TV 4K for $70.
What if you’re not selling off old devices, but instead are looking to buy some new or at least nearly new tech? A lot of the same advice here applies to buying just as well as it does to selling.
Both Apple and Mac of All Trades sell refurbished Macs, iPhones, iPads, and even Apple Watches. They often come in such good condition that you can’t even tell they were refurbished.
Apple’s stock tends to rotate, so you might have to wait a while to get what you’re looking for. It’s also priced on the higher side. If you’re looking to buy a MacBook Pro on the cheap, Mac of All Trades is your best bet. Whichever route you pick, follow our tips for saving money when you buy a MacBook.
Read the full article: Apple Trade-In vs. Mac of All Trades: Where to Sell Your Used iPhone, iPad, or Mac?

If you didn’t know about the services menu on your Mac or have ignored it so far, it’s time to change that.
The services menu is accessible via a right-click on selected elements or via the menu bar at the top of your screen. It hides useful options that allow you to perform complex actions in a single click (much like the right-click menu of File Explorer on Windows does.)
What’s more, you can make the services menu more useful by adding custom actions to it easily! We’ll see how to do that right after taking a closer look at the menu.

To reveal the services menu for any app:
In every app, the services menu gives you more options for the task you’re performing by borrowing features from other apps.
For example, if you highlight a snippet of text in your browser, you might see options to look it up in the Dictionary app, have it read aloud to you, or create a sticky note out of it. You can then perform any of these actions without leaving the current app.
These actions can depend on the apps on your Mac, too. If you have, say, Evernote installed, you’ll also see an option to add the text snippet to Evernote.
Now, let’s assume you highlight someone’s name instead of a block of text. In this case, you can use the services menu to call that person up on Skype or send them an SMS.
As you can see from the examples above, the services menu is a contextual menu. This means that its contents vary depending on the app you’re viewing, the task you’re performing, and the apps you have installed on your Mac. Quite often, it’s empty because there aren’t any options relevant to the current task.
Also, if the app in question does not work with services, its services menu will remain permanently empty.

To control what displays in your services menu, click on Services Preferences from the Services menu in any app. This reveals the settings pane for services. You can also access it via System Preferences > Keyboard > Shortcuts > Services.
In the settings pane that shows up, you’ll see an extensive list of services with checkboxes next to each of them. Third-party apps you have installed also add their own services to this list. The services appear in categories like Pictures, Text, Files and Folders, and so on, which makes it easy to find a particular service.
As you might have guessed, enabling and disabling services is a simple matter of checking and unchecking relevant boxes in this list. If you mess up your selections and want to start from scratch again, you can revert to the stock settings by clicking the Restore Defaults button.
Each service in the list lets you add a corresponding keyboard shortcut. Thus, you don’t always have to go through the services menu to trigger your favorite services.
To create a shortcut for a service, click on the placeholder text that reads none next to the service in question. The text should then change into an Add Shortcut button. Click on it and then hit the keyboard shortcut you want to use. That should assign the shortcut to the corresponding service.

The default list of services that shows up in the settings pane is long and varied enough, but you can extend it in a couple of ways:
Automator, the in-built automation app on macOS, is quite versatile. It gives you countless ways to simplify and speed up your workflow, and services are a type of Automator workflow you can create. Consider these examples:

For more ideas, you can browse the web for lists of useful Automator services to create. We’ve looked at time-saving Automator workflows to give you some ideas.
While creating a service using an online tutorial written pre-macOS Mojave, you must pay attention to a couple of points:
The services menu on macOS is easy to overlook since it’s tucked away under a context menu and rarely seen. But once you take the time to explore this menu and set up custom services that speed up your workflow, you aren’t likely to forget about it!
After you set up the services menu to your liking, you might want to explore a few more tiny but useful macOS features.
Read the full article: How to Add Useful Options to the macOS Services Menu

Around 33% of the entire internet runs on WordPress, and thousands of new WordPress blogs are launched every day. Whether you’re using a slow shared hosting plan or a blazingly fast managed WordPress host, it’s never been harder to compete.
And if you want maximum performance with minimal hassle, we really do recommend using a managed WordPress host. Our recommendation is WP Engine, which we use ourselves to run our sister sites.
But starting a blog is easy. Keeping it going and getting it popular is the real challenge. The problem is that even with great blog content, your blog doesn’t automatically become popular. The adage “build it and they will come” doesn’t apply to blogs. But we can help!
Let’s take a look at several strategies you can adopt today to make your blog more popular.
Many people start writing a blog with the glorious plan of writing about their life, the universe, and everything. The sad truth is that while one or two of your posts may appeal to some, the broad range of content will prevent many visitors from coming back for more. But if you insist on talking about anything and everything, vlogging might be a more appropriate format.
If you want to write a popular blog, you need to focus on one or two topics and write about them often. If you don’t feel like you can write about a single topic that much, then try gradually broadening your topic as your traffic grows. For instance, your real passion is strawberry plants, but that’s hardly going to fuel a blog for more than a few weeks, so perhaps pivot to advice on growing fruit trees, then move on to gardening in general, etc.
I’ve often found blogging to be a great driver for personal growth: writing reinforces the learning process. So as you explore your topic and broaden your knowledge, write about it.
Who would you trust more for information on cancer therapies: Marie Curie Cancer Research or Joe Blog’s Healing Crystals? The answer is obvious, and Google knows that too, which is why Joe Blog’s Healing Crystals was probably nowhere to be found in the search results.
Trustworthiness is an important factor that Google looks for, whether that’s by the automated ranking algorithm or the human quality checkers that review websites. This is particularly important for posts that talk about health or money issues, but applies to all topics to a lesser degree.
So even with a blog focused on one particular topic, you’ll need to ensure you have sufficient expertise to be writing about that topic in the first place before you can stand any chance of becoming popular.
5 Things You Can Do Right Now to Improve Your Google E-A-T Rating https://t.co/lY8Wr3IUeZ – Google takes into account expertise, authority, trust (EAT) when ranking pages. Without these important factors, you will lose clients and visibility in the search results. pic.twitter.com/vdGMb3FUfT
— Debra Murphy (@MasterfulMktg) October 23, 2018
So how do you show your expertise? The precise ranking mechanism is not known, but we can assume it relies heavily on links from existing trusted websites. Link building is a vast topic and not something you should seek to do unnaturally.
But there are also things you can do on your blog to demonstrate expertise, like displaying any qualifications or experience you have in your author biography. If you’re CCNA certified and have 10 years experience building corporate network infrastructure, writing a blog where you review network routers, then proudly say so!
There’s nothing wrong with telling people why you know what you’re talking about. Brag about your achievements. Show you’re an expert. Tell people why they should trust you.
Previously known as Webmaster’s Tools, the Google Search Console is a free service offered by Google to give you direct feedback on things like:
This is a separate service to Google Analytics, which gives statistics about traffic and visitors). It’s easy to set up and completely free.

Around half of all web searches are now done from mobile devices, and that’s on the increase. If your website doesn’t work as well on mobile, scales badly, or takes too long to load over a limited speed 3G connection, you’re losing out on potential visitors.
I hate to keep banging on about Google, but that’s where most of your traffic will come from, at least until you’ve built a loyal audience. Mobile-first indexing means that sites with mobile issues will be shown lower down in the search results to mobile visitors.

So how do you make your site mobile-friendly? Picking a design that scales well is critical. Look for themes tagged as being “responsive”. Many theme stores also offer a preview feature that allows you to switch between desktop or mobile emulation, but if not, you can use the Chrome desktop browser to emulate a mobile device.
The best source of social traffic, without having to build up a huge following first, is Reddit. While Reddit works best if someone else posts your content, self-promotion isn’t banned.
However, you should keep within a sensible ratio. You shouldn’t exclusively use your Reddit account for self-promotion. Be an active member of the community, comment, and post others content too. Also, be prepared for brutally honest feedback. Redditors aren’t nice if they detect you’re abusing the system.
In my experience, Twitter is the least effective at generating traffic, though there are other reasons to maintain a Twitter account than purely blog promotion. Facebook is less effective at driving traffic (unless you pay), but is still great for creating communities. If your content is quite visual in nature, Pinterest can be an effective source of traffic, but again, is likely to be more effective if it’s not you doing the posting.
If you’ve got lots of related content, it’s safe to assume any visitors will be interested in that too. Various plugins are available to do this, but Related Posts for WordPress is the easiest way to get started. If looking for alternatives, be aware that some are very server intensive, and may even be banned by your hosting provider. If your blog is already slow or contains thousands of posts, installing any related posts plugin will inevitably slow it down further.
If a reader comments on your post, they obviously have something to say. By replying to your readers and keeping them engaged, you foster a relationship that keeps readers coming back, as well as making them more inclined to post your story to their friends.
The native WordPress commenting system isn’t great though, so consider installing Jetpack to supercharge them. Jetpack is made by the creators of WordPress, and includes a host of other features too (some paid).
Blogging is not a short-term thing; you really need to be in it for the long haul if you want to build a large base of readers. Keep publishing fresh, expertly written, shareable content, and you’ll get there eventually. It takes time to get noticed, establish authority, and build a readership.
And for the best crack at it, ensure you’re using a reputable managed WordPress host like WP Engine that takes away the hassle of server maintenance, letting you focus on the content and the success of your site.
Read the full article: 8 Proven Tips to Make Your WordPress Blog Popular
If you’re a YouTube TV subscriber we have some good news and some bad news. The good news is you’re gaining access to a host of new channels. The bad news is you’ll be paying for them. The even worse news is you don’t have a choice in the matter.
When YouTube TV first launched it cost $35/month. In March 2018, YouTube added a host of new channels, including TNT, CNN, and Cartoon Network, and raised the price to $40/month for new subscribers. Now, everyone will be paying $50/month or more.
YouTube is raising the price of YouTube TV as a result of adding eight channels from the Discovery network. These being The Discovery Channel, HGTV, Food Network, TLC, Investigation Discovery, Animal Planet, Travel Channel, and MotorTrend.
On the Official YouTube Blog, YouTube insists people have been asking for these channels. And yet we suspect most of those asking didn’t expect them to cause a price hike. YouTube will also be adding OWN: Oprah Winfrey Network later this year.
Today we added @Discovery @hgtv @FoodNetwork @TLC @DiscoveryID @AnimalPlanet @travelchannel & @MotorTrendTV to our lineup. @EPIXHD is available for an additional charge. pic.twitter.com/S1Uo6WiQ4Y
— YouTube TV (@YouTubeTV) April 10, 2019
YouTube is justifying the new price by claiming it’s “giving you the content you want when you want it”. YouTube TV now includes “70+ networks, 6 accounts per household (each with its own unique recommendations and cloud DVR), and 3 concurrent streams”.
The price hike to $50/month (or $55/month if you get billed through Apple) will apply to all YouTube TV subscribers. New subscribers will pay the new asking price immediately, with existing subscribers charged in their subsequent billing cycle after May 13.
This feels like a step backwards. The reason people started cutting the cord in the first place is because they were being charged for channels they had no interest in watching. Cutting the cord meant paying only for what you wanted to watch.
By forcing people to pay for the whole YouTube TV package rather than allowing them to pay for bundles geared towards their interests, YouTube is becoming the thing it was meant to replace. At this rate people are likely to start reconnecting the cord.
If this price hike has you rattled we have previously looked at Sling TV vs. DirecTV Now vs. PlayStation Vue to see how some YouTube TV alternatives compare.
Read the full article: YouTube TV Is Getting a Price Hike to $50/Month

If you’re looking to protect your Google account from hackers, Google has a new 2FA trick up its sleeve. It involves using your Android handset as a security key, and it’s available to anyone who owns a device running Android 7.0 or later.
Two-factor authentication or two-step verification is a key weapon in a fight against phishing. As the name suggests, 2FA or 2SV adds an extra element to the login procedure. This makes it much harder, though not impossible, for hackers to sign into your accounts.
2FA usually involves being sent an SMS text message or employing an authentication app. However, you can also use physical security keys such as dongles. Google’s latest innovation means you can now use your Android handset as a physical security key.
To use your phone as a security key all you need is handset running Android 7.0 or later, and a Bluetooth-enabled computer running Windows 10, macOS X, or Chrome OS. You must also be enrolled in Google two-step verification program.
Then, all you need to do is:
If you’re using a Google Pixel 3 you’ll be able to activate the security key by pressing the volume-down button. All other eligible Android devices will need to sign in and tap a button. This currently only works for logging into Google services.
For more detailed instructions, see this Google Support Note.
This may seem overkill for personal accounts, but with the best hackers using sophisticated methods to bypass security efforts, it’s worth doing. It’s also surprisingly simple to set up, so if you have a phone running Android 7.0+ it’s worth considering.
Read the full article: You Can Now Use Your Phone as a Security Key

There are so many Linux distributions out in the wild, but there is only one thing that they are guaranteed to have in common: the Linux kernel. Yet while a lot of people talk about the Linux kernel, many don’t really know what it does.
Let’s take a look at Linux kernel and why it’s needed, with as few geeky terms as possible.

Each operating system uses a kernel. Without a kernel, you can’t have an computer that actually works. You may see and interact with a lot of different software, but it’s the kernel underneath that does much of the grunt work.
The kernel serves as the bridge between your computer hardware and the software you wish to run. It talks to the hardware via the drivers that are included in the kernel (or installed later on in the form of a kernel module).
This way, when an app wants to do something (say change the volume setting of the speakers), it can submit that request to the kernel, and the kernel can use the available speaker drivers to actually change the volume.
The kernel is also highly involved in resource management. It has to make sure that there is enough memory available for an app to run and to place an app in the right location in memory. The kernel tries to optimize the usage of the processor so that it can complete tasks as quickly as possible.
Failures can lead to deadlocks, where the entire system halts because one app needs a resource that another one is using.
It’s technically incorrect to think of Linux as a complete operating system. Linux actually refers specifically to the kernel, named after founder Linus Torvalds. Everything else you see on screen comes from other projects and developers.
Torvalds created the Linux kernel in 1991. He initially named the project Freax (a combination of “free,” “freak,” and “UNIX”). A coworker preferred the name Linux, and that name stuck. Torvalds released the first Linux version in 1992 under a GNU copyleft license, which became a big part of the project’s success.
Much of the Linux desktop experience comes from the GNU Project, an older initiative that had created a nearly complete desktop operating system. All it needed was a kernel, and Linux filled that need. This is why some people refer to the OS as GNU/Linux.
Other free and open source desktops, such as FreeBSD, look and feel like Linux because they run most of the same GNU software.
Since the Linux kernel was available under a GNU license, there was less interest in continuing to develop a separate kernel as part of the GNU Project. And rather than create other competing kernels, like those found in Windows and macOS, many companies have chosen to use and contribute to the Linux kernel instead.
The Linux kernel has grown into a massive project containing millions of lines of code. Thousands of people, and over a thousand companies, have contributed to the kernel’s development. It is one of the most prominent examples of free and open source software in the world.
While Linux remains a relatively niche desktop operating system, the kernel is widely used elsewhere. Thanks to Android, the Linux kernel now powers most of the world’s smartphones. It appears in all kinds of mobile devices, including wearables and cameras.
Linux powers the 500 most powerful supercomputers and much of our internet infrastructure. When you think of the cloud, you’re thinking predominantly of interconnected Linux-powered servers.
Linux began as a hacker’s project, and while the kernel has seen near unimaginable corporate adoption, Linux still powers hardware for tinkerers. The tiny $35 Raspberry Pi is a Linux-powered computer the size of a credit card, completely open for people to modify and use in projects however they like.
It’s not alone. Competitors like the Pine64 have helped to drastically reduce the price of computing.
The kernel remains under active development, so new Linux versions come out all the time.
The most straightforward way to see which release is on your machine, that will work across any version of Linux, is to use the uname command. This is a command line tool that provides system information. You can find the Linux kernel version you’re using by opening a terminal window and typing the following:
uname -r
I am currently running Linux kernel version 4.20.16-200.fc29.x86_64. Let’s break down what this means.
The last bit will be specific to the distribution you are running. This string indicates that I am running a 64-bit version of Fedora 29.
For the most part, the Linux kernel operates quietly in the background. You don’t know it’s there, and you have little reason to think about it. For the most part, the best way to update your Linux kernel version is to upgrade to the latest version of your preferred Linux-based operating system.
New versions of Ubuntu and Fedora, for example, come out roughly every six months and bring with them a newer version of the Linux kernel.
While the kernel is largely invisible, there are a few reasons to upgrade to a newer Linux kernel. Unlike on Windows, Linux hardware drivers come bundled with the Linux kernel. So if you have a relatively new laptop with speakers, Wi-Fi, or a touchpad that your version of Linux doesn’t yet detect, you may have to wait for a newer version. Releases also come with stability and speed improvements, so your computer may run more smoothly on one version versus another.
Read the full article: What Is a Kernel in Linux and How Do You Check Your Version?
We all love the cutting-edge operating systems of today. But there are times when it’s fun to cast your mind back to yesteryear and relive some of the operating systems of old.
And no, we’re not talking about those of you who still insist on running Windows 7, or worse, XP.
If you want to emulate Windows 95, Mac OS X Lion, and more, you’ve come to the right place. Here are eight classic operating systems you can access in your browser.

Released in August 1995, Windows 95 was one of the defining operating systems of the decade.
It laid the foundation for the Windows we all recognize today. The Start menu and the Taskbar made their respective debuts, and for the first time, a Windows operating system didn’t rely on MS-DOS for file and disk access.
This Windows 95 emulator runs Windows 95 OSR2. The version did not have USB support and struggled with Pentium.
While running the emulator, you can use the controls in the upper-right hand corner to toggle full-screen mode and to enable/disable the mouse. As with all browser-based operating system emulations, any changes you make will not be saved between sessions.

Back in 1984, Apple released its first machine in the Macintosh—later “Mac”—line of products. It was a ground-breaking computer, becoming the first mass-marketed PC to offer a graphical user interface.
This Macintosh emulator runs System 7.0.1 with three early Mac apps—MacPaint, MacDraw, and Kid Pix.
Because the operating system requires significantly fewer system resources than the Windows 95 emulator, it will load in your browser considerably more quickly.

Two years after the introduction of the first Macintosh computer, Apple released the follow up: Macintosh Plus.
It had an original price tag of $2,600, proving that Apple’s penchant for exorbitant prices is far from a modern phenomenon. The computer shipped with 1MB of RAM (and support for up to 4MB), it supported up to seven peripherals, and it had an 800KB floppy disk drive.
By 1986, significantly more apps and games were available. This emulation includes Risk, Cannon Fodder, and Shufflepuck.

Windows 3.1 hit the shelves in April 1992, replacing the original Windows 3.0.
Despite the similar name, it offered vast improvements over its predecessor. Most notably, the introduction of a TrueType font system turned the operating system into a desktop publishing powerhouse for the first time. Three fonts were natively available—Arial, Courier New, and Times New Roman.
Other features seen for the first time included drag-and-drop icons, mouse support in MS-DOS applications, and the Program Manager app. The theoretical maximum memory limit was an era-busting 4GB, though in practical terms it was 256MB.
Windows 3.1 was replaced by Windows 95, but support lived on until as late as 2008.
The Windows 3.1 emulator offers classic games such as Minesweeper and Solitaire, accessories like Write, Paintbrush, and even access to the Control Panel.

AmigaOS version 1.2 was first seen on the Commodore Amiga 500.
The 500 was the best-selling computer in the entire Amiga range. Announced at CES 1987, it was released around the world in the spring.
Although it was a multi-purpose home computer, the PC carved out a niche for itself as a gaming machine. Titles such as The Secret of Monkey Island, Lemmings, Elite, and Sensible Soccer won worldwide acclaim.
Specs-wise, the Amiga 500 had a resolution between 320×200 and 640×400, a 32-color screen, and 512 KB of RAM.
This Amiga 500 emulator includes old Amiga apps such as Boing, Robocity, Juggler, Dots, Boxes, Lines, and Speech.

At the same time that Apple and Commodore were jostling for market position with their respective Mac and Amiga lines, IBM had swiftly become the manufacturer to beat with its IBM PC range.
The first IBM PCs went on sale in 1981, but this emulation of the PC DOS 5 is running on the 1986 update—the IBM PC XT 286.
The XT 286 had 640KB of RAM, a 20MB hard drive, and 6MHz processors.
PC DOS 5 itself was released in 1991 and marked one of the most substantial DOS overhauls in its history. Perhaps more notably, however, it was the last version of DOS for which Microsoft and IBM shared the full code.
The PC DOS 5 emulation offers three classic games for you to check out: Wolfenstein 3D, the original Civilization, and Monkey Island.
(Remember, it’s still possible to play old DOS games on a Mac if you’re so inclined.)

Mac OS X 10.7—also known as Mac OS X Lion—is the most recent operating system on our list. It only went live in July 2011.
Like the other operating systems we’ve looked at, Mac OS X 10.7 saw a lot of “firsts” for Apple users. For example, it was the first time we saw AirDrop and the Launcher app, and it was the first Mac operating system to ship with the emoji font and FaceTime.
Lion also saw the end-of-the-line for some features. Front Row, iSync, and the QuickTime Streaming Server were all dropped.
Unfortunately, modern restrictions mean the Mac OS Lion emulation is more restricted than the other systems. It’s a CSS recreation, so you can only access the desktop, menus, and some basic system information. However, you’ll still be able to get a feel for what the operating system was like.

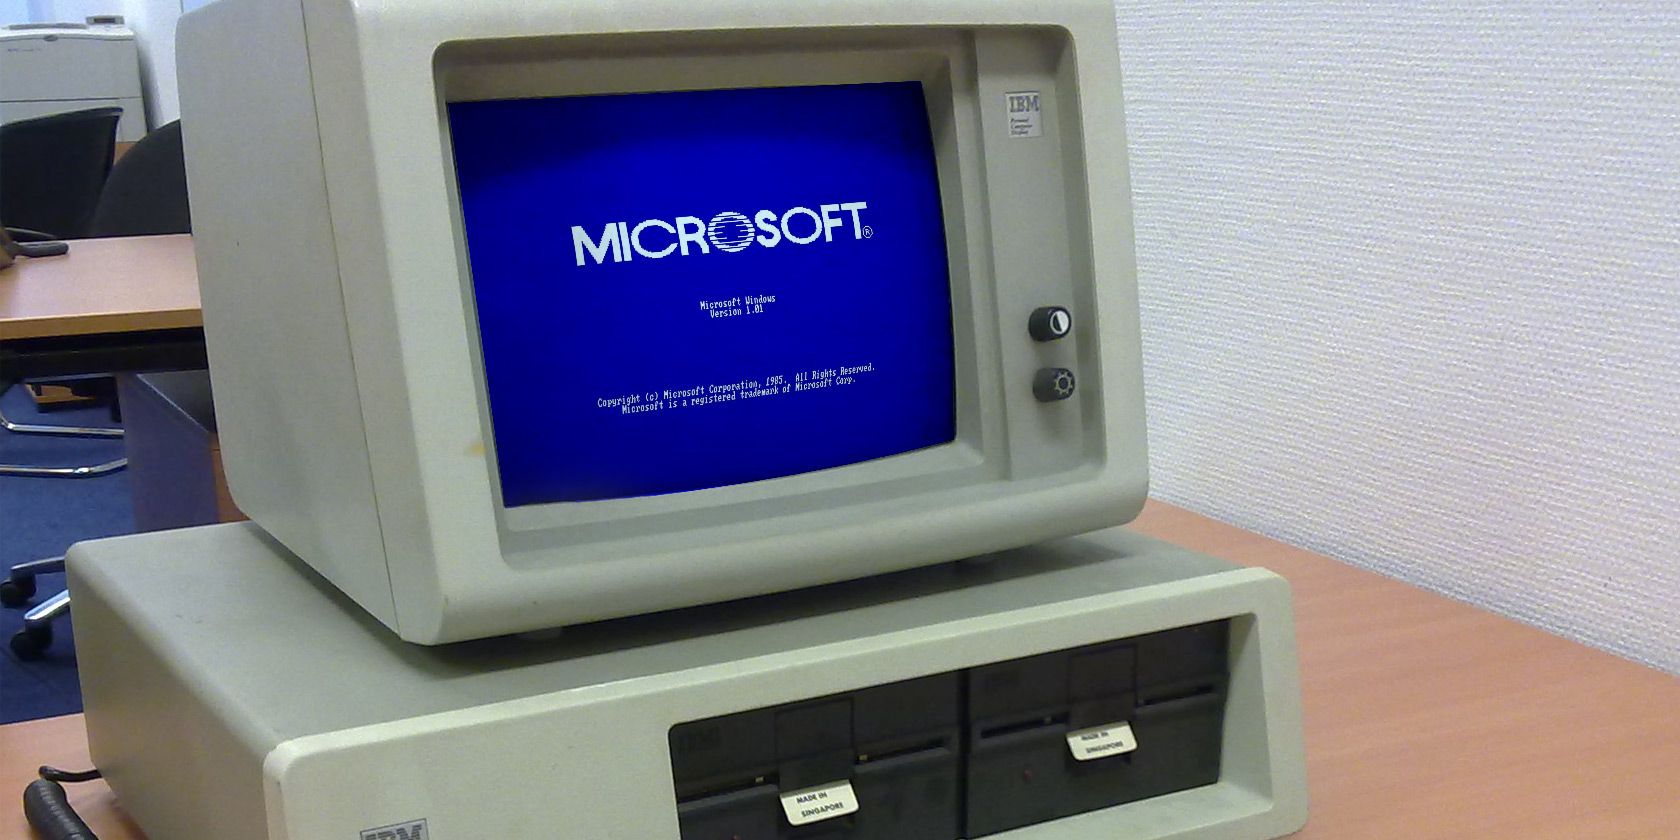
Released in November 1985, Windows 1.01 was the first publicly-available version of Bill Gates’ operating system.
The operating system is essentially a graphical front-end for MS-DOS. Indeed, Windows 1.01 ran as an MS-DOS program.
Apps on the OS included Calculator, Calendar, Clipboard Viewer, Clock, Notepad, Paint, Reversi, Cardfile, Terminal, and Write. They are all available in this emulation.
Behind the scenes, Windows 1.0 also had its own drivers for video cards, mice, keyboards, printers, and serial communications, and applications.
All seven of these browser-based classic operating systems are sure to evoke to memories, no matter what your age or when you started using computers.
We’d love to hear which is your favorite classic operating system, so make sure you let us know in the comments below.
And if you would like to learn more about how we got to this point, make sure you check out our article about the history of computers.
Read the full article: 8 Classic Operating Systems You Can Access in Your Browser