02 August 2019

What to expect from Samsung’s Galaxy Note event


Samsung’s never been particularly good at keeping things under wraps. That’s no doubt, at least in part, by design. The company loves priming the rumor pump ahead of product announcements, and like clockwork, we’ve already seen plenty of what we expect is planned for next Wednesday’s Unpacked event in Brooklyn.

Earlier this week, Samsung announced the Galaxy Tab S6, its latest shot against the iPad Pro. Doing low-key product announcements ahead of events has become a bit of a thing of late. Apple and Google both did it earlier this year. Among other things, it’s a way of letting the world know that you’ve got more stuff to announce than a single event could possibly hold.

It seems like Samsung’s got a fair amount lined up for Wednesday, but the big show at Barclays is really about one thing:

The Galaxy Note 10

Screen Shot 2019 08 02 at 1.05.42 PM

Duh, right?

If there’s one thing Samsung likes more than devices, it’s a lot of devices. Following on the heels of a bunch of new Galaxy S devices, the company is expected to release between two and three new models.

The big news here is the expected addition of a Plus or Pro model. For whatever percentage of the population that’s been holding off on buying a Note over concerns that the screen just isn’t large enough, the new model is a expected to support a 6.8-inch display compared to the standard Note’s 6.3 (both AMOLED). That’s definite tablet territory, but Samsung’s made great strides on the body-to-screen ratio front, so it may not be the size and weight of a manhole cover.

A third model, which is more wishful thinking than full-on rumor for now, has the company releasing a 5G model. It makes sense from a strategy standpoint. Samsung released an everything-and-the-kitchen-sink version of the S10 with 5G last month, and the company clearly prides itself at being one of the first to bring the tech to market — even though carriers haven’t really caught up.

Rumors point to a triple-lens camera this time out, including a 16-megapixel ultra-wide on board, while the Pro/Plus is getting a depth-sensing time of flight sensor. Internally, we expect the addition of the Snapdragon 855 Plus. The Note would be among the first to sport the newly souped-up chip announced by Qualcomm a couple of weeks back.

Charging is expected to be sped up to support the beefy 3,600mAh/4,300mAh batteries, and 8/12GB of RAM are expected on the standard and Plus models, along with 25GB of storage.

Oh yeah, and then there’s that dongle.

Galaxy Watch Active 2

Screen Shot 2019 08 02 at 1.07.25 PM

It’s been less than half a year since Samsung showed off the original Galaxy Watch Active, but the company is rumored to already be ready for part two. Available in both 40 and 44mm versions, the watches are said to bring ECG detection and fall monitoring, following recent additions for the Apple Watch. Rumors also point to the removal of the spinning physical bezel in favor of a touch version.

Etc.

DSCF5301 1

More information on the Galaxy Fold seems like a no-brainer. We got a rough time frame of September a couple of weeks back. I’d anticipate something more specific on the long-awaited and much-delayed foldable, along with some more information on those fixes.

Similarly MIA is the Galaxy Home, which was announced this time last year. We still don’t have a specific date on the company’s HomePod competitor, in spite of rumors that the company was already working on a cheaper version. Or maybe Samsung would rather sweep the Bixby delivery device under the carpet altogether?

All will be revealed on Wednesday, August 7, starting at 1PM ET/11AM PT.


Read Full Article

Unpopular Opinions


Unpopular Opinions

A closer look at China’s smartphone market


In February 2013, China surpassed the United States to become the world’s largest smartphone market. More than half a decade on, it still proves an elusive target for international sellers. A glance at reports from the past several shows reveals the top spots dominated by homegrown names: Huawei, Vivo, Oppo, Xiaomi.

Combined, the big four made up roughly 84 percent of the nearly 100 million smartphones shipped last quarter, per new numbers from Canalys. Even international giants like Apple and Samsung have trouble cracking double-digit market share. Of the two, Apple has generally done better, with around six percent of the market — around six times Samsung’s share.

But Apple’s struggles have been very visible nonetheless, as the company has invested a good deal of its own future success into the China market. At the beginning of the year, the company took the rare action of lowering its guidance for Q1, citing China as the primary driver.

“While we anticipated some challenges in key emerging markets, we did not foresee the magnitude of the economic deceleration, particularly in Greater China,” Tim Cook said in a letter to shareholders at the time. “In fact, most of our revenue shortfall to our guidance, and over 100 percent of our year-over-year worldwide revenue decline, occurred in Greater China across iPhone, Mac and iPad.”

When it came time to report, things were disappointing as expected. The company’s revenue in the area dropped nearly $5 billion, year over year. On the tail of two rough quarters, things picked up a bit for Apple in the country. This week, Tim Cook noted “great improvement” in Greater China.


Read Full Article

The Best Android TV Box for All Budgets

How to Remove a Background in Photoshop


remove-background-photoshop

Adobe Photoshop is great for editing photos, as its name suggests. There’s a lot of different things you can do in Photoshop, ranging from color corrections to sharpening blurry edges. You can also remove a background in Photoshop, so in this article we explain how to remove a background in Photoshop.

Step 1: How to Remove a Background in Photoshop

How to Remove a Background in Photoshop Choose a Picture

The first thing you need to know is that removing a background is never going to be easy. It will always by time-consuming, no matter which way you try it (and there are several ways).

If you’re joining us for this tutorial, we’re going to assume that:

  1. You have access to Photoshop.
  2. You’ve used Photoshop before.

To remove a background in Photoshop, you need the right sort of picture: not every image will work. Choose something with high contrast values and sharper edges. For this tutorial, I’ve used a picture of my desk lamp.

Set up Your Quick Selection Tool

How to Remove a Background in Photoshop Use Your Quick Selection Tool

There are a couple of different ways to remove a background in Photoshop. The first way we’re going to try is my personal favorite: the Quick Selection Tool.

This method is straightforward but thorough. To get started, go to your Quick Selection Tool, located in the left-hand toolbar. It will be grouped with the Magic Wand Tool.

Select Subject With Quick Selection Tool

The Quick Selection Tool determines what to select based upon:

  • Your color sample.
  • What is next to that color sample.
  • The edges of color within your image.
  • The “focal” point in your image.

Yes, it’s that smart.

Once you choose Quick Selection Tool, you’ll see its controls pop up along the top of your screen.

Make sure Auto-Enhance is turned on. Auto-Enhance allows Photoshop to do more fine-tuning along the edges of your selection, which is a good thing to have if your edge has a lot of curves or details to it.

Next, press Select Subject.

Select Subject tells Photoshop to select the most dominate item in your picture. This will be easier for the program to pick up if you’ve chosen an image where there is a clear front, middle, and back.

Create Your Selection

Add to Your Selection With Quick Selection Tool

Once I press Select Subject, Photoshop selects the head of my lamp. You can see the outlines of this selection by the line of “marching ants” around it.

This selection is not perfect, as it only selected part of my lamp and some of the background. But touching up your selection is part of the game and this is a great head start.

At the top of the screen, make sure your Add to selection option is active. Next, click and drag from your selection along the rest of your lamp. Photoshop will learn what to select based upon the colors beneath it and the edges of your previous selection.

By the end, most of your lamp should be selected.

Use the Lasso Tool to Adjust Your Selection

Once your selection is made, you might want to use the Lasso Tool (found in the left-hand toolbar) to quickly smooth out the edges.

I use the Add to selection option for the Lasso, then draw along the edge of my selection to make it look less jagged. It will pick up small areas of pixels that the Quick Selection Tool has missed.

Use the Polygonal Lasso Tool to Adjust Your Selection

One thing to note is that removing a background—and using the Lasso Tool—is much, much easier if you’re working with a pen and tablet. It gives you greater hand-to-eye coordination.

If all you have is a mouse, however, there’s still a way to touch up your selection. Just use the Polygonal Lasso Tool, as it relies on click and drag anchor points to create straight-edged selections.

With the Lasso Tool, you have to draw everything by hand instead.

Remove Your Background

How to Remove a Background in Photoshop Select Inverse

Once your selection is to your liking, go back to your Quick Selection Tool. Mouse over your selection, then right click.

Choose Select Inverse.

By selecting Inverse, Photoshop will select everything in your image except your main object.

How to Remove a Background in Photoshop Cut Selection

Next, go Edit > Cut. When you press this, Photoshop will erase your background in one fell swoop. This is how to remove a background in Photoshop.

How to Remove a Background in Photoshop Transparent Background

Afterwards, you’ll see a gray and white checkerboard area that indicates that the space around your object is transparent. Now that you’ve removed your background, however, you may notice that some of the edges around the object are still rough.

How to Remove a Background in Photoshop Use Color Layer to Adjust Edge

To further refine your edge, go over to your Layers panel and add a layer of solid color beneath your image. This color is not a permanent part of your image: it’s just there to help you edit. You can switch its visibility “off” when you’re not editing.

For this layer, it’s best to pick a color that contrasts sharply with the leftover “bits” you have around your image. I’ve chosen a bright blue, because blue tends to “vibrate” when placed next to a bright red and makes it easier to see.

Next:

  1. Click on your image layer so it’s active.
  2. Go back to your Lasso or Polygonal Lasso Tool and select the rough bits around your lamp that you want to get rid of.
  3. Click Edit > Cut to erase them.

If you’re still confused about the use of layers, check out our tutorial explaining how to use the blending mode in Photoshop.

Step 2: How to Erase a Background in Photoshop

How to Remove a Background in Photoshop Magic Eraser Tool

If you’re looking for a quicker way to remove a background in Photoshop, then maybe you want to erase an image background instead.

There are two eraser tools that work well for this. You’ll find your erasers along the left-hand toolbar, seen here in red.

The Magic Eraser Tool

Erase Background With Magic Eraser Tool

The first tool you’ll want to try out is the Magic Eraser Tool. To use the Magic Eraser, go to your eraser icon, click on the small white arrow to access the dropdown menu, then choose the appropriate tool.

The Magic Eraser Tool is incredibly easy to use. It samples the color that’s under your cursor, then erases all pixels that are the same color: both those that are under your brush and any pixels nearby.

By simply clicking on the red chair behind my lamp, you can already see that I’ve erased a large chunk of my background. Let’s keep clicking.

Remove Pixels With Lasso Tools

As mentioned, removing a background in Photoshop will never be perfect. After you’ve gotten rid of most of it, you’ll still have some small areas that weren’t picked up.

To erase these areas:

  1. Select your Lasso Tool.
  2. Make a large selection of your background, transparent areas included.
  3. Go to Edit > Cut.

This will delete not only the areas you can see, but the microscopic 1-2 pixel samples that have been left over. It makes for a cleaner image.

Use a Contrast Layer to Touch up Your Edges in Photoshop

Once again, if you want to zoom in and really fine-tune stuff, activate that solid color layer beneath your image to increase the contrast. Then reactivate your image layer, zoom in, and use the Lasso Tool to select and cut.

The Background Eraser Tool

Use Background Eraser Tool to Remove Background in Photoshop

The second tool that you can use is the Background Eraser Tool. It’s finicky and not as quick, so I don’t use it too often. When I do, I use it for close detail work.

Adjust Your Background Eraser Settings in Photoshop

When you click on the Background Eraser Tool, you’ll see its controls pop up along the top of your screen. This is where you can adjust its settings, and we recommend that you do.

The most important settings to keep in mind:

  • Your brush icon, seen here as a white circle.
  • Your Limits. Next to this, you will find a dropdown menu with three options to control what gets erased:
    • Find Edges erases color areas that are side by side, but keeps the “edges” of objects within your image.
    • Contiguous erases a sampled color and all the colors next to it.
    • Discontiguous erases your sampled color, but only when it passes beneath your brush.

Beside Tolerance, you’ll see a slider that you can adjust. The lower the percentage, the pickier Photoshop will be when selecting which colors to erase. If you set the Tolerance too high, it will erase related colors, too—not just the ones you wanted to delete.

Background Eraser Tool With Find Edges Activated

Once you’ve adjusted your controls, you can start erasing. If you look inside my blue box, you can see the Background Eraser Tool in action.

Even though my brush is currently over the lamp, the eraser tool is only erasing the red pixels while leaving the lamp intact. This is because I have Find Edges turned on, and it has detected an edge.

Once again—after you’re done erasing—you can go back in with your Lasso Tool and clean things up.

Step 3: How to Remove a White Background in Photoshop

How to Remove White Background in Photoshop

What if you want to remove a white background in Photoshop?

Make sure your image is in its own separate layer. Next, make sure your contrasting color layer is beneath your picture.

Go to the left-hand toolbar and click on the Magic Eraser Tool. Activate your picture layer, then click anywhere on the white within that picture.

Photoshop will automatically remove all the white in your background because it was one continuous “color”. Yes, it’s that simple.

Use Magic Eraser Tool to Erase White Background

Once your background is removed, turn on your solid color layer to check and see if there’s any edges that need to be fixed. They’ll show up as a thin white line around your object.

After you’re done fixing these edges with the Lasso Tool, turn the visibility on your color layer off.

How to Remove a Background in Photoshop Save File as PNG

When you remove a background in Photoshop, you can either add a new background or keep it transparent.

To keep your background transparent, go File > Save As, then choose PNG as your file format. It will preserve the transparent edges in your image.

Other Photoshop Tutorials to Check Out

With this tutorial under your belt, you should know how to remove a background in Photoshop.

Looking for other useful tips and tricks related to this article? Then you should read our tutorial explaining how to smooth edges in Photoshop.

Image Credit: RodimovPavel/Depositphotos

Read the full article: How to Remove a Background in Photoshop


Read Full Article

How to Upgrade the RAM on Your Mac


upgrade-mac-ram

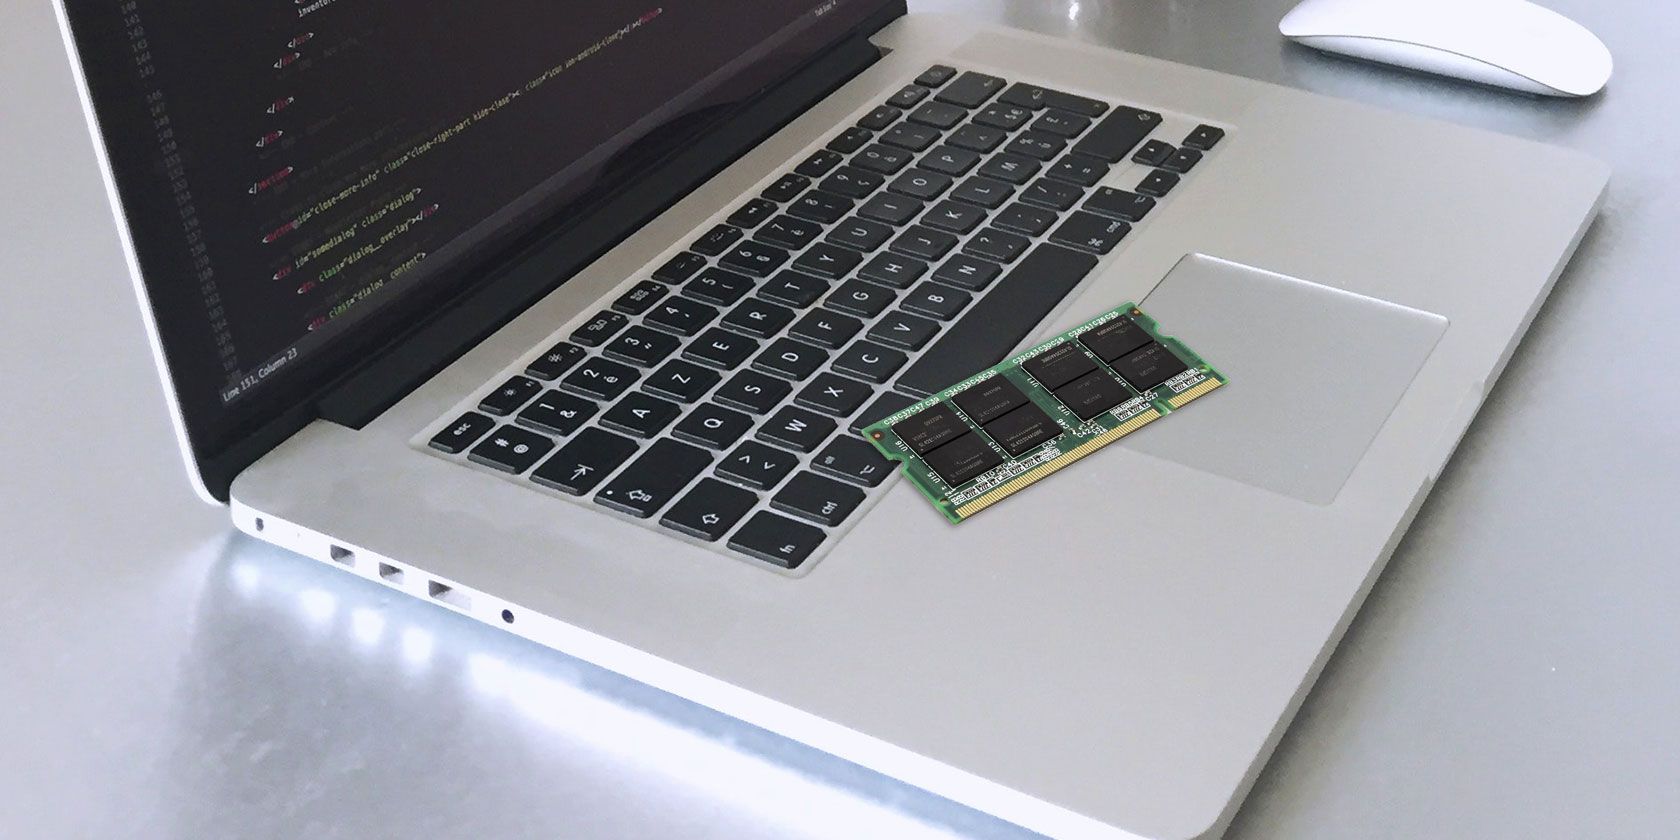
If your Mac is feeling sluggish, upgrading the RAM is a great tweak to make. While swapping an old hard disk drive for a modern SSD is the most drastic hardware improvement, a Mac RAM upgrade lets you run more programs simultaneously.

However, what you can do with your Mac’s RAM depends on your exact model. We’ll look at which Mac models allow RAM upgrades, where to buy Mac RAM, and how to actually upgrade the RAM on your device.

Which Mac Models Allow for RAM Upgrades?

iMac on desk

Unfortunately, most modern Macs don’t allow you to upgrade the RAM yourself.

Recent MacBook Pro and MacBook Air models have the RAM soldered to the motherboard. Some newer iMacs technically have user-upgradeable RAM, but doing so requires extensive teardown of the machine. We wouldn’t recommend trying this unless you’re extremely experienced with electronics and your machine is already out of warranty.

The below Mac models have user-upgradeable RAM:

  • iMac (All except the following 21.5-inch models: Late 2012, Late 2013, Mid 2014, Late 2015, Retina 4K Late 2015, 2017, Retina 4K 2017, and Retina 4K 2019)
  • Mac Pro (All models)
  • Mac Mini (2010-2012 models)
  • MacBook (2008-2011 models)
  • MacBook Pro 13″ (2009-2012)
  • MacBook Pro 15″ (2008-2012)
  • MacBook Pro 17″ (All models)

If you have one of the following Mac models, you cannot upgrade the RAM (in some cases, such as the 2018 Mac Mini, it is possible but quite difficult):

  • iMac Pro (All models)
  • Mac Mini (2014, 2018)
  • MacBook Air (All models)
  • 12″ MacBook (All models)
  • MacBook Pro with Retina Display (All models)
  • MacBook Pro with Touch Bar (All models)

In essence, the newer your Mac model, the less likely it is that you can upgrade the RAM.

How to Find Which Mac Model You Have

About This Mac

Many Macs look alike, so you should check the exact model that you have before you start shopping for RAM.

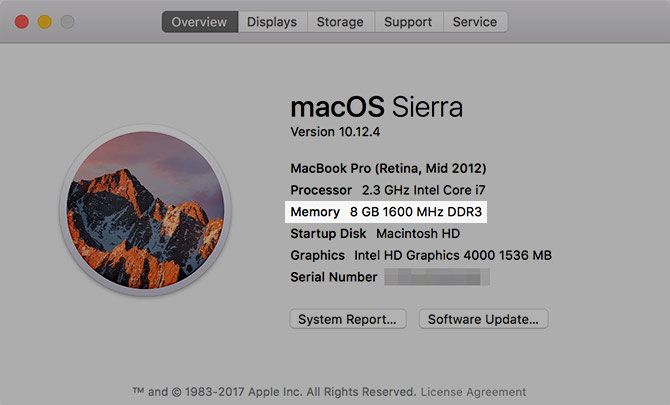
macOS makes this process easy. Click the Apple menu in the top-left corner of your screen and choose About this Mac. On the resulting Overview tab, you’ll see the name of your Mac at the top of the information. This will be something like MacBook Pro (15-inch, 2016). This page shows how much memory you have installed, as well.

To avoid any mistakes, you should also get the exact model identifier for your device. To do this, click the System Report button. Then, in the Hardware Overview section, look for the Model Identifier field. This will be something like MacBook7, 1.

Keep this in mind as you look for RAM to buy.

How to Buy the Right RAM for Your Mac

OWC MacBook RAM Upgrades

Due to the sheer number of Mac models available, we can’t give exact details on the correct RAM for every machine. However, you’ll find a variety of sites that make finding the right sticks of RAM for your model easy.

The first place you should stop is Other World Computing’s Mac RAM page. This allows you to select your Mac model to find compatible RAM. You’ll see the Macs each kind of RAM works in, along with easy videos on how to replace it. The company even offers trade-in value for your old RAM.

As an alternative, have a look at Crucial’s Mac memory hub. Here you can either enter your computer info (found earlier) or download a scanner tool that checks for you. You’ll then see a page containing SSDs and RAM that are guaranteed to work in your machine.

For more detailed guides, have a look at iFixIt’s Mac Repair page. You’ll find detailed steps for RAM upgrades here.

Ensuring Mac RAM Compatibility

When buying RAM, compatibility with your system is vital. Not every type of RAM will work in every Mac computer, so it’s important to make sure you buy a component that’s suitable. Otherwise, you could go through all the effort to upgrade the RAM and end up with an unusable computer.

This is why we recommend buying from a store that specializes in Mac RAM upgrades. You might be able to shop around and find a better price for RAM found on the above sites. If you do so, make sure you search by SKU so you don’t end up buying something that’s slightly different.

We recommend staying away from cheap, junky RAM with few or poor reviews. The few dollars you save isn’t worth the risk of bad RAM bringing down your system.

Finally, you’ll need to buy the right amount of RAM for your system. Have a look at OWC’s MaxRAM page to see how much RAM your particular machine will take. In many cases, this exceeds the “maximum” provided by Apple.

This page also details how many memory slots your machine has; most MacBook models have two slots. To take advantage of dual-channel memory, you’ll want to buy two sticks that add up to your desired total. For example, if you want to upgrade to 8GB of RAM, buy the 4GB x 2 pack.

How much RAM you should buy depends on your needs. 8GB is a good baseline if you aren’t a heavy computer user. If you often multitask, and your computer supports it, jumping to 16GB is a good idea.

See our quick guide to RAM if you’d like more info.

How to Upgrade the RAM in Your Mac

Finally, let’s review the general process for the actual RAM upgrade in your machine. As mentioned, we can’t go over the instructions for every single Mac model. Check the videos OWC offers on its RAM purchase pages for more specific instructions.

Below we’ll provide a basic overview of how this looks on a mid-2010 MacBook. While it may be slightly different on yours, the basic process is the same. Most iMac models have a convenient window to access the RAM compartment, making it even easier than on a laptop.

While working, beware of static discharges, which can damage computer components. Make sure to ground yourself on a metal object before you start this process, and work on a static-free surface. Don’t wear fuzzy pants or drag your feet on carpet while working.

When you handle the RAM, make sure you grab it by the sides so as not to touch any of the sensitive parts. Avoid handling the RAM by the gold connection pins.

Step 1: Remove the MacBook Cover

MacBook Bottom Cover

First, shut down your computer if it isn’t already. Next, unplug your Mac from its power source and remove any connected accessories. Flip your MacBook upside-down, and you’ll see several screws securing the bottom cover. Remove these using a standard Phillips head screwdriver.

Take care not to strip the screws as you remove them. You may want to keep a paper towel or something to place the screws on, as they’re small and easy to lose.

Step 2: Remove the Old RAM

MacBook RAM Location

Once the cover is off, you should be able to spot the RAM, as MacBooks don’t have many user-removeable parts. In the above image, the RAM is the small green component above the Samsung drive.

With our MacBook in this example, two small clips on either side of the RAM hold it in place. Gently push these towards the outside of the RAM and it will spring up, allowing you to pull it out.

MacBook RAM Clips Removal

Repeat the process of pushing the clips out to free and remove the second stick of RAM, then set the old components aside.

Step 3: Install the New RAM

MacBook RAM Notches Aligned

Grab your new RAM and line up the notch in its connection pins with the notch in the RAM seat. It will only go one way, so it shouldn’t be difficult to find the right fit.

After lining up the notches at roughly a 30 degree angle and pushing in gently, push down on the RAM softly and you’ll feel it click into place. Repeat this once more for the second stick, and you’re all set.

After the new RAM is securely in place, you’re ready to put the cover back on. However, while you have your computer disassembled, it’s worth taking a minute to clean any visible grime. Use a cotton swab or some canned air to remove any dust buildups, especially in the fan.

To put the cover back on, simply line it back up and screw the screws back in.

Step 4: Confirm That Your Mac Recognizes the RAM

After this, you can boot up your computer to make sure it’s recognizing the RAM correctly. In the About This Mac window we visited earlier, you should see the new amount of RAM next to Memory. If you want to see more details, you can open System Report and click the Memory tab.

Afterward, check out other ways to make your old Mac feel like new.

Your Mac RAM Upgrade Is Complete

Now you have everything you need to complete this process. Whether you’re interested in an iMac or MacBook Pro RAM upgrade, you know how to find the right RAM for your system and get it installed. It’s a relatively straightforward computer upgrade that will have a big effect.

Before spending money on new RAM, consider replacing your Mac with a new one instead.

Read the full article: How to Upgrade the RAM on Your Mac


Read Full Article

The 5 Best Ring Lights for Selfies and Videos

What Is Xbox Game Pass? Everything You Need to Know

Google to auction slots on Android default search ‘choice screen’ in Europe next year, rivals cry ‘pay-to-play’ foul


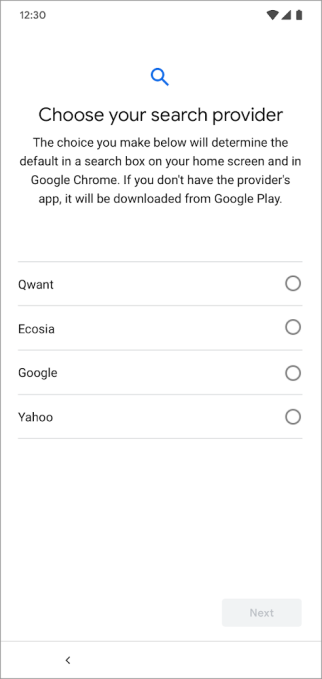
Starting early next year Google will present Android users in Europe with a search engine choice screen when handsets bundle its own search service by default.

In a blog post announcing the latest change to flow from the European Union’s record-breaking $5B antitrust enforcement against Android last year, when the Commission found Google had imposed illegal restrictions on OEMs and carriers using its dominant smartphone platform, it says new Android phones will be shown the choice screen once during set-up (or again after any factory reset).

The screen will display a selection of three rival search engines alongside its own.

OEMs will still be able to offer Android devices in Europe that bundle a non-Google search engine by default (though per Google’s reworked licensing terms they have to pay it to do so). In those instances Google said the choice screen will not be displayed.

Google says rival search engines will be selected for display on the default choice screen, per market, via a fixed-price sealed bid annual auction — with any winners (and/or eligible search providers) being displayed in a random order alongside its own.

Search engines that win the auction will secure one of three open slots on the choice screen, with Google’s own search engine always occupying one of the four total slots.

“In each country auction, search providers will state the price that they are willing to pay each time a user selects them from the choice screen in the given country,” it writes. “Each country will have a minimum bid threshold. The three highest bidders that meet or exceed the bid threshold for a given country will appear in the choice screen for that country.”

android choice screen

If there aren’t enough bids to surface three winners per auction then Google says it will randomly select from a pool of eligible search providers which it is also inviting to apply to participate in the choice screen. (Eligibility criteria can be found here.)

“Next year, we’ll introduce a new way for Android users to select a search provider to power a search box on their home screen and as the default in Chrome (if installed),” it writes. “Search providers can apply to be part of the new choice screen, which will appear when someone is setting up a new Android smartphone or tablet in Europe.”

“As always, people can continue to customize and personalize their devices at any time after set up. This includes selecting which apps to download, changing how apps are arranged on the screen, and switching the default search provider in apps like Google Chrome,” it adds.

Google’s blog post makes no mention of whether the choice screen will be pushed to the installed base of Android devices. But a spokeswoman told us the implementation requires technical changes that means it can only be supported on new devices.

Default selections on dominant platform are of course hugely important for gaining or sustaining marketshare. And it’s only since competition authorities dialled up their scrutiny that the company has started to make some shifts in how it bundles its own services in dominant products such as Android and Chrome.

Earlier this year Google quietly added rival pro-privacy search engine DuckDuckGo as one of the default choices offered by its Chrome browser, for example.

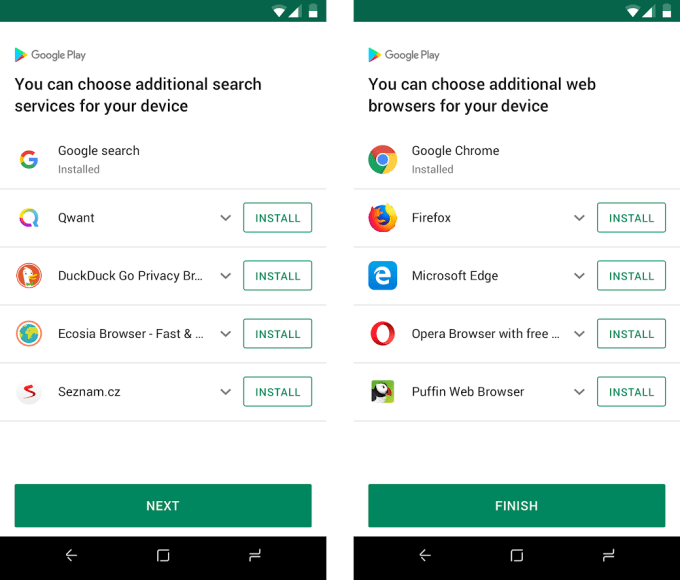
In April it also began rolling out choice screens to both new and existing Android users in Europe — offering a prompt to download additional search apps and browsers.

In the latter case, each screen shows five apps in total, including whatever search and browser is already installed. Apps not already installed are included based on their market popularity and shown in a random order.

android choice app screen.max 1000x1000

French pro-privacy search engine, Qwant, told us that since the rollout of the app service choice screen to Android devices the share of Qwant users using its search engine on mobile has leapt up from around 2% to more than a quarter (26%) of its total userbase.

Qwant co-founder and CEO Eric Léandri said the app choice screen shows that competing against Google on search is possible — but only “thanks to the European Commission” stepping in and forcing the unbundling.

However he raised serious concerns about the sealed bid auction structure that Google has announced for the default search choice — pointing out that many of the bidders for the slots will also be using Google advertising and technology; while the sealed structure of the auction means no-one outside Google will know what prices are being submitted as bids, making it impossible for rivals to know whether the selections Google makes are fair.

Even Google’s own FAQ swings abruptly from claims of the auction it has devised being “a fair and objective method” for determining which search providers get slots, to a flat “no” and “no” on any transparency on bid amounts or the number of providers it deems eligible per market…

Screenshot 2019 08 02 at 16.51.50

“Even if Google is Google some people can choose something else if they have the choice. But now that Google knows it, it wants to stop the process,” Léandri told TechCrunch.

“It is not up to Google to now charge its competitors for its faulty behavior and the amount of the fine, through an auction system that will benefit neither European consumers nor free competition, which should not be distorted by such process,” Qwant added in an emailed press statement. “The proposed bidding process would be open to so-called search engines that derive their results and revenues from Google, thereby creating an unacceptable distortion and a high risk of manipulation, inequity or disloyalty of the auction.”

“The decision of the European Commission must benefit European consumers by ensuring the conditions of a freedom of choice based on the intrinsic merits of each engine and the expectations of citizens, especially regarding the protection of their personal data, and not on their ability to fund Google or to be financed by it,” it also said.

In a further complaint, Léandri said Google is requiring bidders in the choice screen auction to sign an NDA in order to participate — which Qwant argues would throw a legal obstacle in the way of it being able to participate, considering it is a complainant in the EU’s antitrust case (ongoing because Google is appealing).

“Qwant cannot accept that the auction process is subject to a non-disclosure agreement as imposed by Google while its complaint is still pending,” it writes. “Such a confidentiality agreement has no other possible justification than the desire to silence its competitors on the anomalies they would see. This, again, is an unacceptable abuse of its dominant position.”

We’ve reached out to the Commission with questions about Google’s choice screen auction.

DuckDuckGo founder, Gabriel Weinberg, has also been quick to point to flaws in the auction structure — writing on Twitter: “A ‘ballot box’ screen could be an excellent way to increase meaningful consumer choice if designed properly. Unfortunately, Google’s announcement today will not meaningfully deliver consumer choice.

“A pay-to-play auction with only 4 slots means consumers won’t get all the choices they deserve, and Google will profit at the expense of the competition. We encourage regulators to work with directly with Google, us, and others to ensure the best system for consumers.”


Read Full Article

A groundbreaking expedition to the bottom of all five oceans | Victor Vescovo

A groundbreaking expedition to the bottom of all five oceans | Victor Vescovo

Victor Vescovo is leading the first-ever manned expedition to the deepest point of each of the world's five oceans. In conversation with TED science curator David Biello, Vescovo discusses the technology that's powering the explorations -- a titanium submersible designed to withstand extraordinary conditions -- and shows footage of a never-before-seen creature taken during his journey to the bottom of the Indian Ocean.

Click the above link to download the TED talk.

Texas joins growing list of AGs looking to block T-Mobile/Sprint merger


Late last week, the DOJ green lit T-Mobile and Sprint’s $26 billion deal to become nation’s number three carrier. The deal isn’t officially official just yet, with some prominent opposition facing the merger. A growing list of attorneys general have sued to block the merger, and other big name just came on board.

With the addition of Texas Attorney General Ken Paxton, the number moves to 15, including the District of Columbia. California, Colorado, Connecticut, the District of Columbia, Maryland, Michigan, Mississippi, New York, Virginia and Wisconsin filed the initial suit in June and were soon joined by Hawaii, Massachusetts, Minnesota and Nevada.

Notably, Paxton is one of only two Republicans on the list — probably not surprising as many conservative lawmakers have suggested that a merger of the third and forth largest carriers might actually promote competition. Trump appointed DOJ antitrust chief Makan Delrahim agreed with carrier suggestions that a merger would help a larger T-Mobile accelerate 5G growth.

Paxton disagreed with the sentiments.

“After careful evaluation of the proposed merger and the settlement, we do not anticipate that the proposed new entrant will replace the competitive role of Sprint anytime soon,” Paxton said in a statement provided to TechCrunch. “It is the Attorney General’s responsibility to preserve free market competition, which has proven to result in lower prices and better quality for consumers. The bargain struck by the U.S. Department of Justice is not in the best interest of working Texans, who need affordable mobile wireless telecommunication services that are fit to match the speed and technological innovation demands of Texas’ growing economy.”

T-Mobile has also come under scrutiny for intense lobbying, including $195,000 spent at Trump’s D.C. hotel since last April.


Read Full Article

"You Have the Rite" | Marc Bamuthi Joseph

"You Have the Rite" | Marc Bamuthi Joseph

In a breathtaking, jazz-inflected spoken-word performance, TED Fellow Marc Bamuthi Joseph shares a Black father's tender and wrenching internal reflection on the pride and terror of seeing his son enter adulthood.

Click the above link to download the TED talk.

Google ordered to halt human review of voice AI recordings over privacy risks


A German privacy watchdog has ordered Google to cease manual reviews of audio snippets generated by its voice AI. 

This follows a leak last month of scores of audio snippets from the Google Assistant service. A contractor working as a Dutch language reviewer handed more than 1,000 recordings to the Belgian news site VRT which was then able to identify some of the people in the clips. It reported being able to hear people’s addresses, discussion of medical conditions, and recordings of a woman in distress.

The Hamburg data protection authority told Google of its intention to use Article 66 powers of the General Data Protection Regulation (GDPR) to begin an “urgency procedure” under Article 66 of GDPR last month.

Article 66 allows a DPA to order data processing to stop if it believes there is “an urgent need to act in order to protect the rights and freedoms of data subjects”.

This appears to be the first use of the power since GDPR came into force across the bloc in May last year.

Google says it response to the DPA on July 26 to say it had already ceased the practice — taking the decision to manually suspend audio reviews of Google Assistant across the whole of Europe, and doing so on July 10, after learning of the data leak.

Last month it also informed its lead privacy regulator in Europe, the Irish Data Protection Commission (DPC), of the breach — which also told us it is now “examining” the issue that’s been highlighted by Hamburg’s order.

The Irish DPC’s head of communications, Graham Doyle, said Google Ireland filed an Article 33 breach notification for the Google Assistant data “a couple of weeks ago”, adding: “We note that as of 10 July Google Ireland ceased the processing in question and that they have committed to the continued suspension of processing for a period of at least three months starting today (1 August). In the meantime we are currently examining the matter.”

It’s not clear whether Google will be able to reinstate manual reviews in Europe in a way that’s compliant with the bloc’s privacy rules. The Hamburg DPA writes in a statement [in German] on its website that it has “significant doubts” about whether Google Assistant complies with EU data-protection law.

“We are in touch with the Hamburg data protection authority and are assessing how we conduct audio reviews and help our users understand how data is used,” Google’s spokesperson also told us.

In a blog post published last month after the leak, Google product manager for search, David Monsees, claimed manual reviews of Google Assistant queries are “a critical part of the process of building speech technology”, couching them as “necessary” to creating such products.

“These reviews help make voice recognition systems more inclusive of different accents and dialects across languages. We don’t associate audio clips with user accounts during the review process, and only perform reviews for around 0.2% of all clips,” Google’s spokesperson added now.

But it’s far from clear whether human review of audio recordings captured by any of the myriad always-on voice AI products and services now on the market will be able to be compatible with European’s fundamental privacy rights.

These AIs typically have trigger words for activating the recording function which streams audio data to the cloud. But the technology can easily be accidentally triggered — and leaks have shown they are able to hoover up sensitive and intimate personal data not just of their owner but anyone in their vicinity (which of course includes people who never got within sniffing distance of any T&Cs).

In its website the Hamburg DPA says the order against Google is intended to protect the privacy rights of affected users in the immediate term, noting that GDPR allows for concerned authorities in EU Member States to issue orders of up to three months.

In a statement Johannes Caspar, the Hamburg commissioner for data protection, added: “The use of language assistance systems in the EU must comply with the data protection requirements of the GDPR. In the case of the Google Assistant, there are currently significant doubts. The use of language assistance systems must be done in a transparent way, so that an informed consent of the users is possible. In particular, this involves providing sufficient information and transparently informing those concerned about the processing of voice commands, but also about the frequency and risks of mal-activation. Finally, due regard must be given to the need to protect third parties affected by the recordings. First of all, further questions about the functioning of the speech analysis system have to be clarified. The data protection authorities will then have to decide on definitive measures that are necessary for a privacy-compliant operation. ”

The DPA also urges other regional privacy watchdogs to prioritize checks on other providers of language assistance systems — and “implement appropriate measures” — name-checking rival providers of voice AIs, Apple and Amazon.

This suggests there could be wider ramifications for other tech giants operating voice AIs in Europe flowing from this single Article 66 order.

The real enforcement punch packed by GDPR is not the headline-grabbing fines, which can scale as high as 4% of a company’s global annual turnover — it’s the power that Europe’s DPAs now have in their regulatory toolbox to order that data stops flowing.

“This is just the beginning,” one expert on European data protection legislation told us, speaking on condition of anonymity. “The Article 66 chest is open and it has a lot on offer.”

In a sign of the potential scale of the looming privacy problems for voice AIs Apple also said earlier today that it’s suspending a similar human review ‘quality control program’ for its Siri voice assistant.

The move, which does not appear to be linked to any regulatory order, follows a Guardian report last week detailing claims by a whistleblower that contractors working for Apple ‘regularly hear confidential details’ on Siri recordings, such as audio of people having sex and identifiable financial details, regardless of the processes Apple uses to anonymize the records.

Apple’s suspension of manual reviews of Siri snippets applies worldwide.


Read Full Article

Microsoft Uses Mac Book to Sell the Surface Laptop


Microsoft has released a new ad for the Surface Laptop 2. And, as is the company’s wont these days, Microsoft take the opportunity to troll Apple. How? By using a guy called Mackenzie Book, whose name can be shortened to Mac. Mac Book, geddit?

Microsoft Trolls Apple With a Guy Called Mackenzie

Those of you of a certain age will remember the Get a Mac ads that ran between 2006 and 2009. They portrayed PC and Mac as humans, with PC being boring and broken, and Mac being cool and capable. It was a great campaign that helped Mac succeed.

Apple has since moved on, talking up the Mac without referencing PCs. However, Microsoft’s ads for its Surface devices openly attack Macs, and its new one is no exception. However, for this one the company employed someone called Mackenzie Book.

As you can see, the only reason Microsoft employed Mackenzie was so it could flash up on the screen “Mac Book says…” followed by a host of bold claims comparing the Surface favorably to MacBooks. The closing shot being. “Mac Book says get a Surface Laptop”.

Microsoft Really Wants You to Buy a Surface Laptop

Turning the tables in this way actually makes some sense. Apple’s Get a Mac ads, commonly known as Mac vs. PC, played on the fact people felt Macs couldn’t compete with Windows PCs. And the ad campaign was an effort to change people’s opinions.

Now, the Mac has a reputation, and it’s Microsoft trying to muscle in on that territory with its Surface devices. Hence the callback to an ad campaign that ended 10 years ago. Or, perhaps, Microsoft is still bitter about those ads and wants revenge.

Should You Swap Your MacBook for a Surface Laptop?

What next? Maybe for the follow-up Microsoft will employ Apple Martin to troll Cupertino. Or perhaps Apple will find someone called Mike Rosoft. Somehow we don’t think either of these are likely, so make the most of the insanity while it lasts.

This ad is, of course, just a little bit of fun. However, deciding whether to invest in a MacBook or a Surface Laptop is a more serious business. With that in mind, here are the things you need to know before replacing a MacBook with a Surface Laptop.

Read the full article: Microsoft Uses Mac Book to Sell the Surface Laptop


Read Full Article

You Can Stream Lollapalooza Live on YouTube


YouTube is streaming Lollapalooza live, allowing music fans from around the world to experience the sights and sounds of Lollapalooza 2019. Performances from artists including Twenty One Pilots and Janelle Monae will also be available on YouTube Music.

What Is Lollapalooza and When Did It Start?

Lollapalooza is an annual music festival held in Chicago, Illinois. It started out when Jane’s Addiction singer Perry Farrell created Lollapalooza in 1991. It then ran until 1997 before being revived in 2003. There have also been international versions held.

Lollapalooza 2019 is being held in Grant Park, Chicago between August 1-4. Artists performing include Ariana Grande, Childish Gambino, and The Strokes. More than 100,000 people will attend the event, with YouTube catering to everyone else.

How to Stream Lollapalooza Live on YouTube

According to the Official YouTube Blog, YouTube is hosting an exclusive live stream of Lollapalooza. This is available on the official Lollapalooza YouTube channel, which is hosting three live streams in order to cover multiple stages.

As well as the live streams there will be what YouTube is calling “curated performances” from the likes of The Revivalists and Rufus Du Sol. There will also be backstage moments capturing what goes on behind the scenes mixed in with the performances.

YouTube Music is also getting in on the act, with extra content from some of the artists performing at Lollapalooza 2019. These include “iconic music moments” and “Lollapalooza themed playlists” called The Lineup and Emerging Artists.

If you’re planning on tuning into Lollapalooza 2019 you can see the full Lollapalooza live stream schedule on Pitchfork. Lennon Stella is kicking off proceedings at 7:30pm ET today (August 1), with Flume headlining at 9:45pm ET on Sunday (August 4).

Essential Tech to Take to a Music Festival

If you attend music festivals regularly, we’ve compiled a list of the essential tech gadgets for music festivals. Or, if you’re more of a stay-at-home-and-watch-YouTube kinda person, you may be interested to know that YouTube is remastering music videos into HD.

Image Credit: Swimfinfan/Flickr

Read the full article: You Can Stream Lollapalooza Live on YouTube


Read Full Article

Apple suspends Siri response grading in response to privacy concerns


In response to concerns raised by a Guardian story last week over how recordings of Siri queries are used for quality control, Apple is suspending the program world wide. Apple says it will review the process that it uses, called grading, to determine whether Siri is hearing queries correctly, or being invoked by mistake.

In addition, it will be issuing a software update in the future that will let Siri users choose whether they participate in the grading process or not. 

The Guardian story from Alex Hern quoted extensively from a contractor at a firm hired by Apple to perform part of a Siri quality control process it calls grading. This takes snippets of audio, which are not connected to names or IDs of individuals, and has contractors listen to them to judge whether Siri is accurately hearing them — and whether Siri may have been invoked by mistake.

“We are committed to delivering a great Siri experience while protecting user privacy,” Apple said in a statement to TechCrunch. “While we conduct a thorough review, we are suspending Siri grading globally. Additionally, as part of a future software update, users will have the ability to choose to participate in grading.”

The contractor claimed that the audio snippets could contain personal information, audio of people having sex and other details like finances that could be identifiable, regardless of the process Apple uses to anonymize the records. 

They also questioned how clear it was to users that their raw audio snippets may be sent to contractors to evaluate in order to help make Siri work better. When this story broke, I dipped into Apple’s terms of service myself and, though there are mentions of quality control for Siri and data being shared, I found that it did fall short of explicitly and plainly making it clear that live recordings, even short ones, are used in the process and may be transmitted and listened to. 

The figures Apple has cited put the amount of queries that may be selected for grading under 1 percent of daily requests.

The process of taking a snippet of audio a few seconds long and sending it to either internal personnel or contractors to evaluate is, essentially, industry standard. Audio recordings of requests made to Amazon and Google assistants are also reviewed by humans. 

An explicit way for users to agree to the audio being used this way is table stakes in this kind of business. I’m glad Apple says it will be adding one. 

It also aligns better with the way that Apple handles other data like app performance data that can be used by developers to identify and fix bugs in their software. Currently, when you set up your iPhone, you must give Apple permission to transmit that data. 

Apple has embarked on a long campaign of positioning itself as the most privacy conscious of the major mobile firms and therefore holds a heavier burden when it comes to standards. Doing as much as the other major companies do when it comes to things like using user data for quality control and service improvements cannot be enough if it wants to maintain the stance and the market edge that it brings along with it.


Read Full Article

10 Tips for Building an Audience for Your Live Streaming Channel


live-stream

With YouTube ads no longer providing the revenue they once did, many gamers have turned to live streaming. However, it can be tricky to build and retain a live streaming audience. With that in mind, here are some live streaming tips to help your channel succeed.

1. Find Games That Are Trending

twitch game live streaming app

When choosing games to play on a live stream, you’ll want to opt for new and popular games that are currently attracting attention. Trending games are more likely to get the attention of viewers, helping them discover your channel.

Check the best gaming sites and search engines to see which recent games are in the news and garnering praise from players. If you manage to get a pre-release copy of a certain popular game, that’s even better.

The Twitch homepage also shows a list of popular games among viewers if you’re struggling to find ideas. But it’s always advisable to do your research if you really want to find out what the gaming community is currently focusing on.

At the same time, you don’t want to choose games that already have oversaturated coverage. Some popular games will still have streamers covering them months or years after launch. It’s difficult to compete with heavily established streams that have covered particular games for a considerable time.

Audiences of AAA titles with oversaturated coverage tend to stick to the streamers they know, as they’ve had ample time to discover who covers games in a way that they enjoy. Therefore, you may want to opt for new indie titles that are less mainstream, yet still popular.

2. Live Stream Games Consistently

As with any sort of content publishing, you need to keep a regular schedule when starting a streaming channel. You can adjust this schedule depending on your own time commitments, but consistency is key. You should keep a steady, regular output instead of streaming in bursts and then going silent for unpredictable periods of time.

If you don’t have much time during the week, don’t try to stream daily. It’s better to stream once a week or only on weekends if this is the case. Audiences prefer consistency over erratic and irregular content schedules.

3. Keep the Conversation Going

use microphone streaming tips for audience

If you just sit silently while playing your game on a live stream, there’s not much of a reason for others to watch you. Don’t worry: you won’t need to constantly talk, especially if your game requires focus. However, keeping a conversation flowing goes a long way in keeping your audience engaged.

In a skill-intensive game or dungeon, explain your strategy and what you’re doing. When playing a casual game, comment on your first impressions.

If you’ve already done this, talk to your viewers, who will likely post questions and comments in the chat section. It doesn’t all need to be related to the game—sometimes your audience just wants to get to know you.

The type of conversations you have will also depend on your audience. For example, subscribers to the various Yogscast live streams typically enjoy their tangential humor. But an audience of hardcore gamers might want more guidance and tips when it comes to difficult games.

4. Thank New Subscribers on Your Stream

Subscribers on game streaming sites such as Twitch are your bread and butter, so you should thank them accordingly. Even a small contribution helps you make money from gaming, so make sure your audience knows that you appreciate it.

This may be difficult to do when you’re trying to focus on a game, but you can use a streaming plugin to somewhat automate the process. You should note that this doesn’t replace the need to make a personal mention during your stream. But it does give them some recognition while you wait for a gap in your gameplay where you can shift your attention.

5. Take Game and Song Requests

This is another way to show your audience that you care about their input and opinions. During your stream, ask them which games they would like you to try for your next session.

If you like to play songs during your stream, you can also take requests. The simple gesture of allowing audience members to select a song on your playlist goes a long way in fostering interaction.

6. Interact With Your Followers on Social Media

twitter app sign up account

Speaking of interaction, some of your audience members will want to interact with you outside of stream chat. This is especially true if they can’t tune in every time. You should share your various public social media handles with your subscribers.

No, you don’t have to become Facebook friends with each follower. But you can share your Twitter handle and any other social media pages that you want them to visit.

Even if you’re not necessarily sharing gaming-related posts, many audience members will still be interested in what you have to say. You can even check out social networks that are specifically for gamers. The important idea is to engage your audience outside of streaming sessions.

7. Give the Audience Incentives to Return

Increasingly, audience members are willing to subscribe to or sponsor content creators who give them the right incentives. Live streaming, however, is slightly different from traditional content creation. So what can you do to incentivize your audience?

One of the best ways to do this is using giveaways. Just make sure that you understand the rules around contests for the platform you are using, and the region you are running the competition in.

Great ideas for giveaways are gift cards, game service subscriptions, and games. Items like these, which you can send keys for digitally, can save you shipping costs when you’re just starting out. Depending on your streaming platform, you may be able to incentivize subscriptions. For example, Twitch offers subscriber-only streams.

As your channel grows, you can aim higher and even get sponsored prizes from certain companies. But if you’re still a newbie, you could perhaps find some gaming deals to give away.

8. Get a Sponsor for Your Live Stream

For this step, you will need to already have a bit of a following. However, getting a sponsor can actually help you grow your audience further.

Getting a sponsor is often cited by streamers as a way of gaining a larger following. Some attribute this to the increased credibility that comes with being endorsed by a brand.

If you are unable to find a sponsor just yet, you should aim for affiliate status on a platform like Twitch. This increases your credibility while giving you additional revenue streams. However, this takes considerable hard work and is not a quick solution to gaining a following.

9. Get Other Gamers Involved

While live streaming is mostly a solo venture, it’s great to get some other gamers involved in your streams. It doesn’t have to be a regular feature or an official partnership. However, the occasional variety can be a great addition to your channel.

Try to find gamers with whom you have some chemistry. Banter is one of the most entertaining things for gaming audiences, especially in multiplayer games. You won’t necessarily need the gamer to appear in person. In fact, some great partnerships are formed between streamers who have never met offline.

You can also appear on someone else’s stream, which will give you extra exposure to potential new audience members. Squad Stream lets Twitch streamers broadcast together.

10. Use Decent Equipment

One major factor that affects your audience’s viewing experience is streaming quality. You don’t need to worry about establishing a flawless, 4K stream. But you need to make sure the quality is acceptable. Hissing microphones, serious packet loss, and highly pixelated visuals will chase most audiences away.

Make sure to equip yourself with a decent microphone and a fast internet connection before you stream. If you want to put a face to your stream, invest in a decent webcam too. Also, don’t try to play games which are too intensive for your gaming rig.

More Live Streaming Tips

Now you know some of the main ways to attract and retain an audience for your live streaming channel. However, you should use these live streaming tips while also improving the quality of your channel overall.

If you need more guidance, be sure to check out our guide listing live streaming tips to make your channel more professional.

Read the full article: 10 Tips for Building an Audience for Your Live Streaming Channel


Read Full Article