27 January 2020

Get ready to see Spotify’s looping videos on Instagram


Following Spotify’s confirmation of a new Stories feature, initially being tested by social media influencers, the company this morning announced it will now allow artists to reach their Instagram fan bases in a new way, too. However, in this case, they aren’t creating Spotify Stories they can market elsewhere on their social media, but instead are able to share their unique video art from Spotify’s Canvas feature directly to their Instagram.

Canvas launched into beta last fall, allowing artists to replace the album art that appears when a song is playing with a moving, visual experience that plays in a short loop. Canvas videos have had mixed reviews as some users find the imagery distracting while others seem to prefer it.

Starting today, the thousands of artists in the Canvas beta will be able to share their looping videos to Instagram with just a tap.

From the app’s Artists profile, each track that included a Canvas will have a “Share” icon next to it. By tapping that icon, artists can share the song and its Canvas to Instagram Stories. The post will look like a regular Spotify share with cover art and a link to play the track on Spotify. However, now their looping video will be the backdrop.

Currently, the Canvas beta is only available to those using the Spotify for Artists app on iOS. Spotify says it’s working to bring the sharing feature to Android users soon.

In addition, fans seeing the Canvas on Instagram aren’t counted in the Canvas metrics, unless they click through to Spotify, the company says.

The feature itself is intended to aid artists who are marketing their new songs to fans on Instagram as well as for highlighting updates to Canvas — like those that are updated to include clips from a new music video, new art, or live performances, for example.

One high-profile artist who’s taking advantage of Canvas is Billie Eilish — the artist who just swept last night’s Grammy Awards by winning the four biggest prizes — best new artist, record of the year, album of the year, and song of the year. Eilish has used Canvas to share animated versions of fan art, which helps her to better engage with her fan base.

Spotify claims that adding a high-quality Canvas has increased track shares by up to 200%, in addition to lifting streams, saves, and artist profile visits. By expanding Canvas to Instagram, those shares should bump up even higher, the company believes.

Despite its social media media-inspired features, like the new Stories addition or the looping videos of Canvas, Spotify doesn’t intend for its streaming app to become a new social platform. Instead, its focus is on building features that artists and listeners can leverage to better connect with social media fan bases elsewhere — either to help market themselves and their music or to improve discoverability of new music among their followers.

Artists interested in Canvas can sign up for the waiting list here.


Read Full Article

My story of magic, kindness and survival during the Holocaust | Werner Reich

My story of magic, kindness and survival during the Holocaust | Werner Reich

Holocaust survivor Werner Reich recounts his harrowing adolescence as a prisoner transported between concentration camps — and shares how a small, kind act can inspire a lifetime of compassion. "If you ever know somebody who needs help, if you know somebody who is scared, be kind to them," he says. "If you do it at the right time, it will enter their heart, and it will be with them wherever they go, forever."

Click the above link to download the TED talk.

The Top 8 GoSkills Courses to Boost Your Business Skills


goskills-courses

Getting ahead in your career can be tough, no matter where you work or what you do. And while improvement takes many different elements, sharpening your skills is one method that can certainly help. Not only can you learn new information to incorporate into your current position, but possibly open doors to additional opportunities.

Unlock the FREE "Essential Excel Formulas" cheat sheet now!

This will sign you up to our newsletter

Enter your Email

With GoSkills, you have easy access to affordable online courses. These let you enhance the skills you already possess or learn new ones—both of which can take your career to the next level. Here are several of the top business classes and options offered by GoSkills that you should check out.

1. Microsoft Excel—Basic & Advanced

GoSkills Excel Basic and Advanced

If you work in the business world, you likely need to use Microsoft Excel. GoSkills offers a Microsoft Excel—Basic & Advanced course to up your knowledge and skills a notch. Learn the basics you need and then move onto VLOOKUP, data validation, macros, and other helpful Excel tools and features.

Course Details:

  • 52 lessons with exercise files, quizzes, and reference guides.
  • Almost five hours of video.
  • A Certificate of Achievement or Certificate of Training.

The class is intended for beginner-level users, and the estimated study time is 26 hours.

GoSkills offers several additional Excel courses including the basics on its own for a nice refresher. Or you can zero in with classes on macros and VBA, pivot tables, or power query. You can also check out Excel courses specifically for Mac.

2. Photoshop for Beginners or Photoshop—Advanced

GoSkills Photoshop Advanced

Adobe Photoshop is one of the most popular image creation and editing tools. Whether you’re completely new and need to learn the basics, or have some knowledge and want to learn advanced tricks, GoSkills has a course for you.

Course Details (Photoshop for Beginners):

  • 58 lessons with exercise files, quizzes, and reference guides.
  • Nearly five hours of video.
  • A Certificate of Achievement or Certificate of Training.

The class is intended for beginner-level users and the estimated study time is 29 hours.

Course Details (Photoshop—Advanced):

  • 55 lessons with exercise files, quizzes, and reference guides.
  • Over five hours of video.
  • A Certificate of Achievement or Certificate of Training.

The class is intended for intermediate-level users and the estimated study time is 27.5 hours.

In addition to Photoshop courses, GoSkills offers both beginner and advanced classes for Adobe Illustrator. So you can move onto drawing and design for even more creative skill enhancement.

3. PMP Certification Training

GoSkills PMP Certification Training

If you’re a project manager preparing for the PMP exam, then the PMP Certification Training course is for you. The class helps you recognize the requirements for the certification and identify the processes and tools used in project management. You can also earn the required 35 contact hours needed with online training.

Course Details:

  • 47 lessons with exercise files, quizzes, and reference guides.
  • Over four hours of video.
  • A Certificate of Achievement or Certificate of Training.
  • GoSkills is a Registered Education Provider (R.E.P) with the Project Management Institute (PMI).

The class is intended for advanced-level project managers and the estimated study time is 35.5 hours.

For other topics in your field, you can check out the GoSkills courses for CAPM certification training, along with scrum and project management for business professionals and engineers.

4. Introduction to SQL

GoSkills Introduction To SQL

If you’re ready to dip your feet in the development field for enhancing your business skills, the Introduction to SQL course is a great place to start. SQL (Structured Query Language) is a commonly used programming language for database management and much more.

Course Details:

  • 33 lessons with exercise files, quizzes, and reference guides.
  • Two hours of video.
  • A Certificate of Achievement or Certificate of Training.

The class is intended for beginner-level programmers and the estimated study time is 16.5 hours.

While you’ll use Microsoft SQL Server’s T-SQL for the class, you’ll be able to use what you learn for additional database types like MySQL, PostgreSQL, and Oracle.

5. Introduction to Python

GoSkills Python

Another option in the development category is Introduction to Python. Python is a popular programming language that helps you build tools like apps for data analysis and robots with Raspberry Pi.

Course Details:

  • 41 lessons with exercise files, quizzes, and reference guides.
  • Three hours of video.
  • A Certificate of Achievement or Certificate of Training.

The class is intended for beginner-level programmers and the estimated study time is 20.5 hours.

If you’re looking for additional courses in the development area, you can also take a look at the introductions to HTML, CSS, JavaScript, and Ruby on Rails, which are excellent programming languages for beginners.

6. Leadership Training

GoSkills Leadership Training

Soft skills in business are just as important as any other. And with the GoSkills Leadership Training class, you can increase your chances of gaining a managerial or supervisory role in your company. Learn about personality types, how to motivate a team, and ways to overcome challenges in the workplace.

Course Details:

  • 21 lessons with exercise files, quizzes, and reference guides.
  • Almost two hours of video.
  • A Certificate of Achievement or Certificate of Training.

The class is intended for beginner-level individuals and the estimated study time is 10.5 hours.

Additional courses in the soft skills category include public speaking, customer service training, and press releases.

7. Financial Modeling Basics

GoSkills Financial Modeling Basics

Maybe your chosen topic for learning is finance. GoSkills offers several financial courses, one of which is Financial Modeling Basics. You’ll learn about financial modeling in Excel to build a solid foundation. Review the concepts, understand the functions, and work with examples to design your financial model.

Course Details:

  • 55 lessons with exercise files, quizzes, and reference guides.
  • Five hours of video.
  • A Certificate of Achievement or Certificate of Training.

The class is intended for beginner-level individuals and the estimated study time is 27.5 hours.

For other courses with a finance emphasis, take a look at finance for operations managers, project managers, or non-financial professionals.

8. Lean Six Sigma—Yellow Belt

GoSkills Lean Six Sigma Yellow

With the Lean Six Sigma Yellow Belt course, you’ll learn the fundamentals, practices, and principles you need to prepare for the Yellow Belt exam and become a member of the Lean Six Sigma team.

Course Details:

  • 40 lessons with exercise files, quizzes, and reference guides.
  • Nearly four hours of video.
  • Accredited by the International Association for Six Sigma Certification (IASSC).
  • A Certificate of Achievement or Certificate of Training.

The class is intended for beginner-level individuals and the estimated study time is 21.5 hours.

GoSkills offers additional Six Sigma certification classes as well, including Green Belt and Black Belt.

GoSkills Course Features

Along with the above details for each course on the list, you’ll also receive these benefits:

  • Access to all GoSkills courses
  • Personalized learning with exercise files, quizzes, and reference guides.
  • Unlimited tests and quizzes
  • Mobile learning
  • Education from the comfort of your home at your own pace

For Teams: GoSkills Learning Management System for Teams

GoSkills For Teams

Perhaps you’re looking at the courses here for your team or employees rather than yourself. If so, check out GoSkills for Teams. With the GoSkills Learning Management System (LMS), you can manage your team’s training easily.

GoSkills LMS Details:

  • Create your own or assign courses from GoSkills’ growing library of 70 courses.
  • Use gamification for an entertaining way to learn.
  • Participate in social education to see what others are learning.
  • Set up teams and assign courses to members.
  • Review reports and analytics including courses completed, time taken, and certificates earned.

If you’re ready to boost participation from the team you’re training, microlearning with these tools from GoSkills is an excellent way to do it.

With shorter, more focused lessons using videos, images, text, and gamification, your team is likely to engage. This allows you all to meet your training objectives more effectively.

GoSkills Accreditations and Awards

In addition to the accreditations mentioned above for the PMP and Six Sigma courses, GoSkills has received many awards. These include the Reimagine Education E-Learning Award for both 2018 and 2019, the EdTech Digest’s Cool Tool Award 2019, and the Gold Award for Brandon Hall’s Excellence in Learning Management Technology 2019, just to name a few.

You can check out the entire list of GoSkills accreditations and awards for all the details.

Go Learn With GoSkills

Whether it’s to master an application like Excel or Photoshop or training for the PMP exam, GoSkills has a wide variety of courses to improve your business knowledge and skills.

You might also consider giving the gift of learning! GoSkills makes a terrific gift for holidays, birthdays, or other occasions when a digital gift fits the situation.

Read the full article: The Top 8 GoSkills Courses to Boost Your Business Skills


Read Full Article

8 Gory Sites to Get Your Dose of Cheesy Horror


scariest-horror-games

Let me start this post with a fair warning—if you have a weak stomach get out while you can. We are going to enter the realms of the best gore sites on the web.

The word “cheesy” could prove to be a bit misleading. “Cheesy” is synonymous with kitschy and unnecessarily emotional. We will attempt to stay closer to gruesome and morbid because there are enough gore sites on the visible web.

The web was never sanitized. So, close the doors, draw the curtains, and click the mouse as I try giving you a dose of the gore at these eight horrific gory websites.

1. BME: Body Modification Ezine

Body Modification Ezine Homepage An Example of a Gory Website

From the streets of New York to the bylanes of Nanjing, tattoo art is pretty much a 21st Century subcultural trend. But some people can take it really far and turn their bodies into walking canvasses.

BME has curated 3.5 million photos and more than 14000 videos on how to turn your body over to pins, needles, and ink. It is a definitive tattoo, scarification, and ritualistic piercing resource.

As the site says—they are the uncommon subculture and community built by and for modified people.

The body piercings and tattoo art on the site may be tame stuff for some, but for a person who hates the sight of needles, the tattoo detailing and body modifications aren’t far from absolute gore. Some parts of the site require a subscription.

2. The Damaged Corpse

The Damaged Corpse website with a collage of dolls

Movies like Annabelle and Curse of Chucky might have ruined the innocence of dolls for you. So this site is another knife slice. The site is in French, but the images speak the universal language of “holy creeps!”

Françoise Duvivier is a wonderfully (and ghoulishly) creative artist who uses mixed media like collages, masks, and dolls to give life to her artistic expression.

Here’s a brief profile on her, but follow the title link to glimpse her unique but scary work.

3. Best Gore

Best Gore Homepage with warning

Best Gore is strictly for 18+ audiences. The site can give any other site on this list a run for its money and come out on top. The gore pages are filled with graphic images and videos of bloody, gut-wrenching, and grisly human conditions.

Take the domain name for what it means.

4. The Blood Factory

The Blood Factory homepage

Enable Flash in your browser. The first thing that makes you tingle is the background music. It’s a scare site for sure. And brought to you by none other than Danny DeVito, himself a fan of horror films.

The Blood Factory features horror shorts called Splattercuts. There are about 16 horror shorts on the site now. You can watch them in the “darkened theater” and vote for them.

The site was launched in 2009, but I am not sure how frequently it is getting updated. Maybe, it will stay on as a piece of internet memorabilia.

5. Bloody Fingernail

Bloody Fingernail is a horror messaging site

You always wanted to write on the walls with blood. Here’s your chance. You can use your mouse to stand-in for your chopped finger and write a message on the “Flash” wall.

You can then send forth the unique message via email, to whomsoever you want to spook. This is less of a horror site and more of a cheesy prank site.

6. Programming Language Inventor Or Serial Killer

Programming Language Inventor or Serial Killer Trivia Game

Turn your thirst for cheesy horror into a chance to bump up your knowledge of trivia. The above screenshot says it all. Play the quiz and find out if you know your serial hacker from your code hacker.

Don’t forget to check out More Stuff on the site for some more ways to cure your boredom online.

7. Death Date

Death Date website to predict the date of your death

The vote for the ultimate gore website can go to this one if you take it too seriously. After all, who would like to know one’s date of death!

It’s a fun site and my guess is the mechanism behind it takes into account any addictions you have to calculate your death age. The site gives your date of death in neutral, optimistic, and pessimistic modes. Take your pick and satisfy your morbid curiosity.

But if you really want to get serious about life, take the assumed date and start living your life to the fullest.

8. Scary for Kids

Scary for Kids website

As adults, it takes a lot of convincing to buy into cheesy horror. But kids are naturally drawn to them and also seem to enjoy the goosebumps. So let’s end our list with a “horror” site made just for kids.

Scary for Kids might seem like a creepy website for kids. But try to find out if any of the stories, videos, or scary pictures tingle your spine too. I couldn’t spot the gore here, so it’s safe to sit with your children in front of the monitor.

Maybe, a storytelling session at night would work better.

A Bit of the Cheesy Gore You Can Find on the Web

I decided to stop while I was ahead. These eight are just a whiff of the gore you can find on the web, and to be frank these sites are relatively tame. The dark side of the web is definitely not for the squeamish.

There are websites that wouldn’t have passed muster with the most liberal censor or our family-friendly readership.

It just opens the debate on the dangers of sickening gore being left open on the web. If your taste is still on cheesy horror and disgusting gore, then there are more than enough creepy sites on the web.

Read the full article: 8 Gory Sites to Get Your Dose of Cheesy Horror


Read Full Article

How to Deactivate Kik and Delete Your Kik Account


kik-cryptocurrency-kin

Kik is a popular messaging app for Android and iOS, but it isn’t for everyone. So, if its appeal has faded for you, it may be time to delete or deactivate your Kik account.

This may be because none of your friends use it any more, or because you’re a parent and want to delete your teenager’s account over privacy concerns.

Whatever your reasons, here’s how to delete Kik permanently or deactivate your Kik account temporarily.

How to Deactivate Kik Temporarily

If you don’t want to permanently delete your Kik account, you can take the less intensive option and deactivate it. Make sure you understand what Kik is before resorting to this, though.

As it turns out, Kik doesn’t let you deactivate or delete your account through its mobile app. You’ll need to do this through its website, though you can visit the site on your phone or using a computer, depending on your preferences.

To start, visit the Kik account deactivation help page for some information. This explains that deactivating your profile will result in the following:

  • You won’t receive any Kik messages or emails about your account.
  • People cannot search for your Kik username.
  • Your name will disappear in the contact lists of those you’ve talked to.

If you change your mind after deactivating your Kik profile, you can reactivate it by signing back in as normal. You’ll need your password to do so. If you need to reset it, you can do so as long as you have access to your email account.

To temporarily deactivate your Kik account, head to Kik’s deactivation page. You’ll need to enter the email address associated with your account. Kik will then send you a link to deactivate your profile. Follow this to complete the deactivation.

How to Deactivate Kik Account

How to Delete Your Kik Account Permanently

Like temporary deactivation, you must delete your Kik profile through the website portal. We recommend reviewing the information on Kik’s account deletion help page so you understand what this does first.

When you delete your Kik profile:

  • Your profile is no longer accessible, and you can never recover it.
  • You won’t receive any more Kik messages or emails from the team.
  • Nobody can search your username on Kik.
  • After a short time, your profile will be deleted for people you’ve talked to.

If you’re sure you want to permanently delete your Kik account, open the Kik permanent deletion page and enter your username and email address, and explain why you’re leaving. Confirm that you want to do this, and click Go to delete it.

How to Delete Kik Account

We recommend backing up any important messages before doing this, as you’ll lose them forever. Also, keep in mind that people you’ve chatted with will likely still be able to see your profile for a few days, since it’s cached on their device. This will expire before long.

New Messaging Apps to Try After Deleting Kik

Thanks to this article you should now know how to delete your Kik account. It’s not tough, but you should make sure you really want to take this step before doing so. Once you’ve deactivated or deleted Kik, simply uninstall the app from your phone to fully remove Kik from your life.

Now that you’ve left Kik, take a look at the messaging apps you can use on your phone and computer.

Read the full article: How to Deactivate Kik and Delete Your Kik Account


Read Full Article

How to Remove a Broken Headphone Plug From a Phone or Tablet


remove-broken-headphone-jack

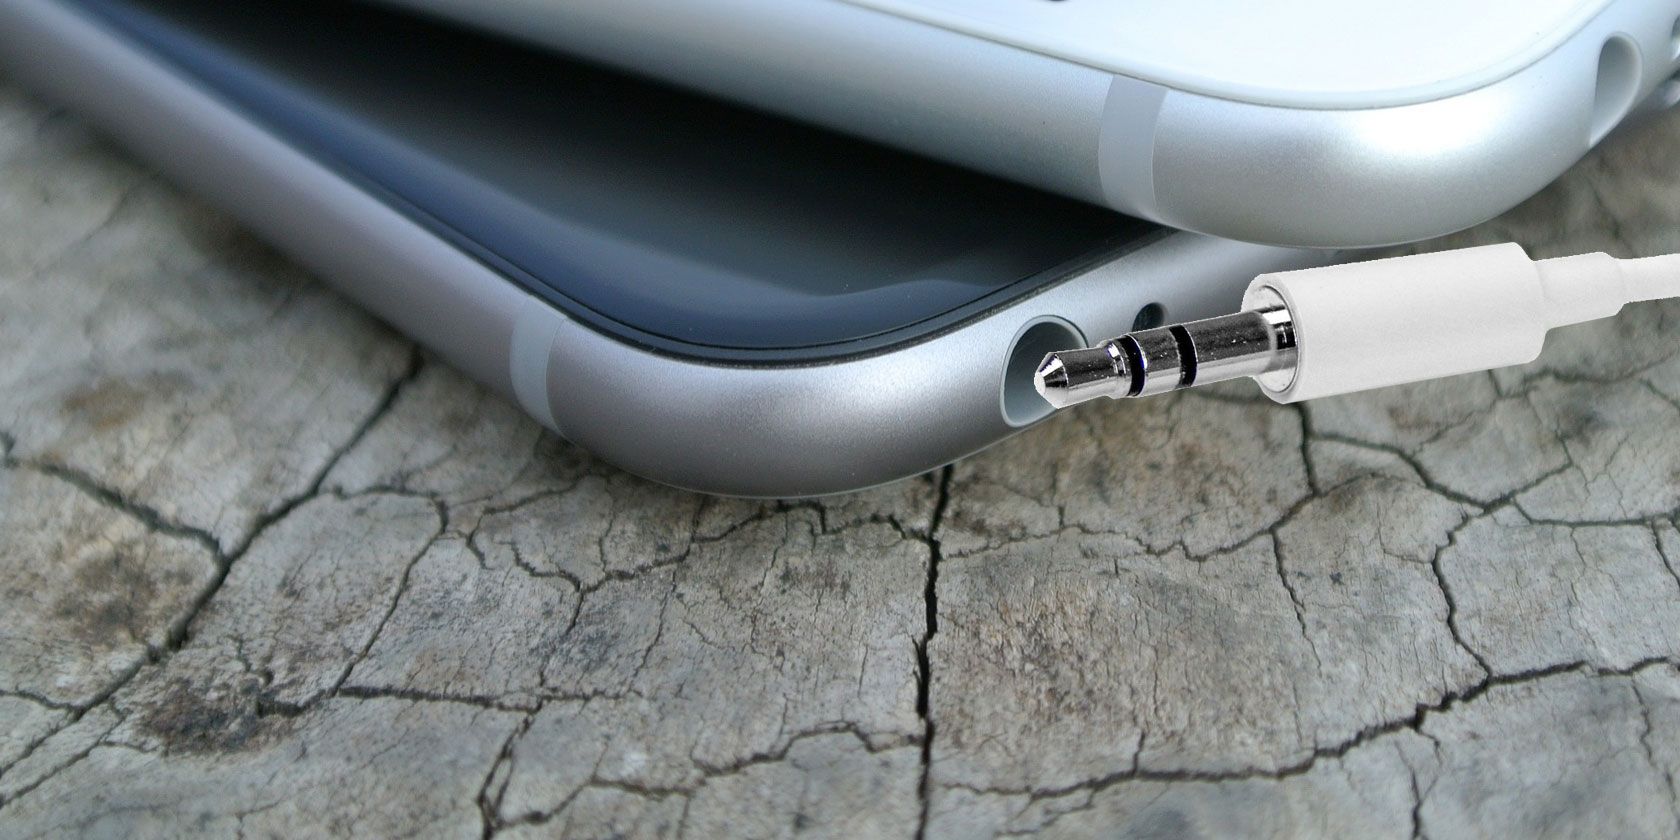
Holding a broken headphone plug, and wondering where the end is? Pulled the earphones too quickly from your tablet or smartphone, only to discover a bit was left behind?

Sadly, earphone connectors aren’t built for regular and repeated insertion and removal. But if a headphone jack has broken off in your phone, iPad, or MP3 player, the socket can’t be used. You’ll need to remove it before you can use any replacement earphones.

These six methods should help you remove a broken headphone jack.

How to Remove a Broken Headphone Jack

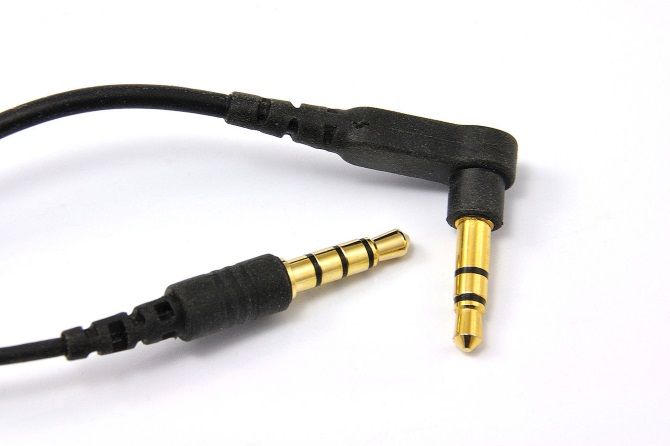
All too often, the end of a broken headphone jack gets stuck in your phone or tablet. It turns out that these small metal cylinders are weak where the (usually) black plastic rings appear along the length. This is the same for any wired earphones.

Earphone jacks

It’s difficult, but several solutions have been discovered to remove a broken headphone jack:

  1. Inside of a Biro
  2. Supergluing the rest of the connector plug
  3. Thumbtack with a bent point
  4. A toothpick with hot glue
  5. A heated paperclip
  6. A dedicated tool called the GripStick

When withdrawing the broken component, make sure you’re holding your device with the earphone socket pointing downwards. Gravity always helps!

Also, before looking at these methods in more detail, note that these solutions are performed entirely at your own risk. While less invasive than repairing headphone speakers, a wrong move could result in a broken phone or tablet.

1. Can a Biro Get a Broken Headphone Jack Out?

Fun fact: the tube running up the inside of your biro is almost the same diameter as an earphone jack. With a bit of force and adjustment, this can be used to remove the broken connector from your device.

To do this, remove the inner tube of the pen. This is the piece with the ink in it and is almost always removed by pulling the nib of the pen.

At the bottom of the tube, the opposite end to the nib, you should find there is no ink. You can use this portion of the tube to remove the broken plug. Simply push it firmly into your earphone socket and remove the broken headphone jack. The tube should grip the broken part and pull it out.

If this doesn’t work first time, you have some options. The first is to slightly widen the tube with a nail, to ensure a snug fit for the plug. Alternatively, you could quickly heat the end of the tube to soften it, then push it into the socket. Leave it for a moment, then withdraw.

Have a very steady hand? Try hot glue or superglue, in a very small quantity, on the end of the tube before insertion. The video above demonstrates a similar approach, using chewing gum.

Finally, you might be missing some pressure. If you can, cut a two-inch length of the tube (or find something of a similar size, such as the tube from a can of lubricating oil), then insert into the earphone socket. Next, tap into place with something firm (like a shoe or slipper) just to ensure the lost part is gripped. When you’re happy it is held by the tube, remove from the phone.

2. Superglue the Other End of the Plug

If the pen cartridge doesn’t work, or you prefer a different approach, then the answer could be superglue. You probably know that when using superglue, you never bind two surfaces immediately after application.

Instead, you wait, until they have dried slightly and become tacky. This tackiness is key to removing the broken piece in this scenario.

Using a cocktail stick or some other narrow applicator, place a tiny blob of superglue on the remaining end of the earphone plug. That’s the piece that didn’t break off in the phone! Wait (as per the packet instructions) for it to become tacky, then slide into the socket. After pushing down for 30 seconds or so, pull. If the broken headphone jack is attached, you’ve solved the problem.

It’s important to use small amounts of glue. Otherwise, residual glue might cause problems later. To resolve this, simply apply a little rubbing alcohol to a Q-tip and swiftly clean inside the socket.

3. Remove a Broken Headphone Jack With a Thumbtack

If you want a simpler approach, a bent thumbtack or drawing pin can be used. Grab a normal tack and hammer the point to form a sort of “L” shape.

With your phone or tablet in one hand, take the thumbtack and push it into the earphone socket. Do this so that the point of the thumbtack touches the plastic part of the connector, push firmly, and twist.

The bent point should burrow slightly into the plug. When you’re confident you have enough purchase, pull the broken headphone jack out.

4. Toothpick and Hot Glue

Looking for some other object that is small enough to fit into the socket and remove a broken headphone jack?

Try a toothpick; plastic or wooden, either is fine. Just make sure it is narrow and long enough to reach into the socket and reach the broken earphone plug. Then, tab a tiny amount of hot glue onto the end and wait a moment for it to cool slightly.

Carefully insert into the earphone socket until it touches the debris. Wait for the glue to cool and dry, then remove. If all has gone according to plan, the missing broken headphone jack will be removed!

5. Heated Paperclip

No glue to hand? Heat is a good substitute, as the broken part of the connector is almost always accompanied by ring of plastic. To grab hold of this, take a paperclip, and unwind it, bending the main length out by 90 degrees.

Next, hold the paperclip with something heatproof, and heat the end of the bent piece. With your phone in your other hand, insert the heated paper clip carefully into the socket, straight down the middle. Push firmly and wait a few minutes for the plastic to cool. If all has gone well, you should soon be able to remove the broken piece of the earphone connector.

6. GripStick Broken Headphone Jack Removal Tool

If DIY fixes aren’t working for you, it might be time to consider the pro-level solution. GripStick is the result of a successful Kickstarter campaign, designed specifically for the task of removing broken off earphone plugs.

Although pricey, it’s considerably less than paying a professional to remove the lost earphone connector. Similarly, if your phone is under warranty or smartphone insurance, it will be inconvenient to send it away for repairs. Buying a GripStick will avoid this being an issue.

Use of the GripStick is simple. Slide the cylinder into the earphone socket, push it into place, and pull it out again using the ring. The broken headphone jack will be held by the GripStick.

It’s Time to Switch to Bluetooth Headphones

If for some reason you cannot get the broken earphone plug out of your device, don’t panic. It’s possible that your device volume still works, so find out. Play some audio; if the device speaker is still working, then you can consider another solution.

No audio? This is because the broken plug is telling your device that it is plugged in. As far as your phone or tablet is concerned, it is sending audio to your earphones. You’ll have a silent experience (frustrating for phone calls) until you can dislodge the offending object.

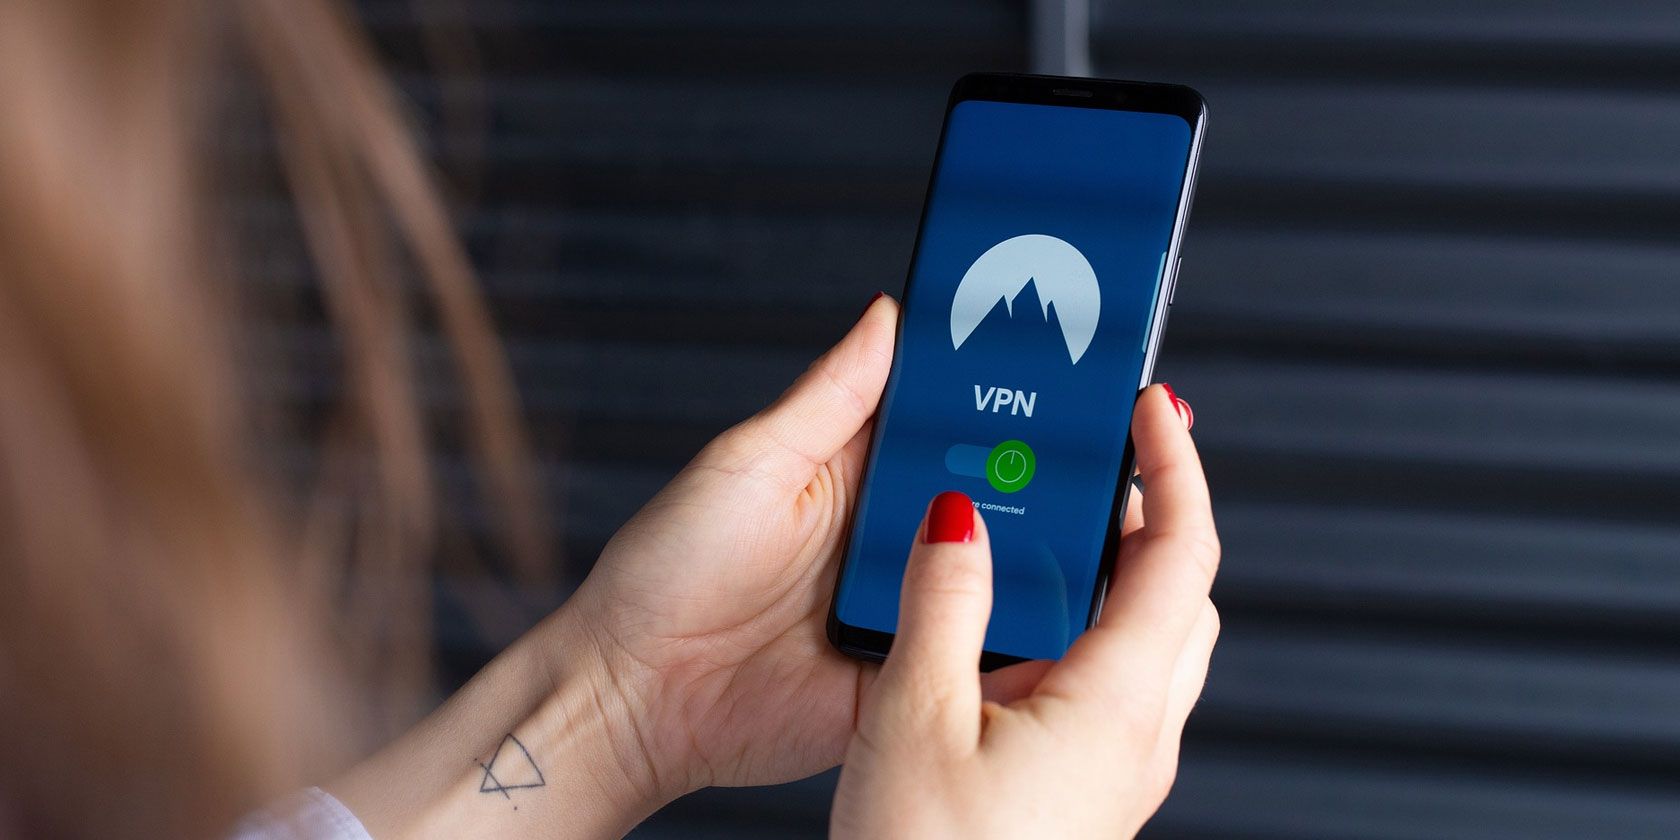
It might be inconvenient and may require you to rethink your audio options but switching to Bluetooth is the best way to avoid broken earphone connectors in the future.

While you might use one of the fixes above, buying Bluetooth earphones is the best option. Need help? Check our Bluetooth earphones buying guide.

Cheaper Earphones Are More Likely to Break

Personally speaking, I’ve found that cheaper earphones are likely to have poorly made plugs. This has a dual risk: the plug may break, but it might also damage the socket. This can happen with standard use if the connector is cheaply manufactured; the result is invariably frustration and disappointment.

If your phone is damaged in other ways, check out how to recover data if your phone has a cracked screen.

Read the full article: How to Remove a Broken Headphone Plug From a Phone or Tablet


Read Full Article

Google Calendar + Tasks Is the Only To-Do List You’ll Ever Need


In early 2018, Google migrated all users to its newest version of Google Calendar. As part of this migration, Google Tasks was integrated more thoroughly with the calendar itself.

Unlock the "Essential Google Drive Keyboard Shortcuts" cheat sheet now!

This will sign you up to our newsletter

Enter your Email

A lot of people already use external to-do apps to keep their tasks synced with Google, but keeping track of multiple apps can get annoying. Instead, why not try out the powerful, in-house combination of a Google Task list with Google Calendar? It could potentially replace any other to-do apps you might use.

In this article, we’ll show you how.

Step 1: Viewing Google Calendar Tasks

If you haven’t customized your task calendar on Google yet, the default view will look very plain. Maybe even a little boring.

Default Google Calendar

However, this boring facade can be extremely deceptive. Enabling Google Tasks in Google Calendar will add a high degree of functionality to the app that you might not otherwise expect.

Now, we understand why some people might not believe in this functionality. The Google Tasks app used to be one of the worst to-do applications online. To integrate more useful features, you actually had to install browser add-ons like GTasks.

However, the newest version of Google Tasks is much more useful. To use it alongside Google Calendar, enable the Google Tasks widget by expanding the My calendars section in the bottom left-hand corner of your desktop browser.

Check off the checkbox that says Tasks:

Turn on Google Tasks

Next, go to the right-hand side of your Google Calendar, and click on the Google Tasks icon, seen here in red:

Google Tasks Widget

When you click on it, Google will dock Google Tasks on the right-hand side of Google Calendar. Once Tasks is enabled, you’re ready to add Tasks to the calendar itself.

Add Tasks to Google Calendar

Step 2: How to Create a Google To-Do List

A lot of power from this Google Calendar combination comes from how you organize your to-do list inside of Google Tasks.

If you haven’t read up on how to combine goal apps with to-do apps, we recommend that you take some time to do so now. It’ll help you create and organize your list.

After that is done, gather your list of goals that you want to accomplish, alongside the associated list of tasks needed to complete them. Then, click on the Tasks dropdown menu at the top of the Tasks bar.

There, you will see a selection of previously created lists. You will also see the button Create new list.

Create Google Calendar Tasks

These lists will be your top-down controls in Google Calendar. You can either click Create new list—which will allow you to create a new task list for high-level goals—or you can click on one of your previously created organizational aides.

The choice for which one you use is up to you.

Inside each list, there will be a spot where you can create a Google to-do task. To create a new task, click + Add a task. Start typing.

Google To Do List

The Importance of Subtasks

Inside each individual task, there will also be the option to create subtasks. Subtasks are added as regular tasks within each of these main tasks.

Once you click on a task, you can list all of the steps you have to take in order to accomplish that goal. With Google Tasks, the process of listing subtasks is easy.

Press the Edit icon beside the main task to open up the Add subtasks option. Click on it, then type each subtask into the box.

Google Tasks Subtask List

Once that’s done, press Enter to insert the text and move onto the next subtask. You can see my own process and what that looks like, here in red:

Add Tasks to Google Calendar

It’s important to give each subtask on your Google Calendar to-do list a realistic due date. Remember, you’ll be loading all your goals into the calendar itself. So taking everything you’re planning into consideration will help you keep those dates manageable.

If you try to add a due date to a subtask, you’ll notice that you can’t add one when you first create it. You need to go back to the main list level and add from there.

Once you’re back on your main list level, click on a task to go back into your subtasks. Add the due date to the subtask by clicking on the Edit details icon next to it:

Edit Google Tasks Subtask

After this, you’ll see the due date option has been added to your subtask page.

When you click on Add date, Google will give you a pop-up calendar where you can choose a specific day to show when this task is due.

Add Due Date to Google Tasks Subtask

More Tips

  • If you use some other to-do app like Todoist or RememberTheMilk, we recommend going through this same process to manually transfer these tasks over.
  • By using the same techniques listed above, Google Tasks and Google Calendar can do everything those apps can do, plus more.

Another important thing to consider as you’re adding deadlines is that you should use an actual start date for when you want to begin working on the main tasks. Most apps will place your task in the priority to-do list based upon when they’re due.

The neat thing about Google Tasks integration, however, is that it will lay this information out in clean, chronological order on your calendar.

Step 3: How to Use Google Task Inside of Google Calendar

When you enable Tasks in your navigation menu, it will add every task’s due date to your Google Tasks calendar. If there is no specific time during the day when this task is due, you’ll see your task listed at the top of each day that you have a deadline:

Default Google Calendar

This visual display is really helpful for spotting days during the week when you’re overloaded. To avoid this, we recommend that you take a look at your upcoming tasks at the beginning of each week. Try shifting things around when necessary to level out your workload.

You can do this by clicking on any of the task items in your calendar, then clicking on the Edit icon to change the due date.

Edit Google Tasks in Google Calendar

After you change the due date, Google Calendar automatically moves that task to a new spot in the calendar. A lot of apps lack this ability to seamlessly shift tasks around on the fly, and this is the second benefit to using Google Calendar with Google Tasks.

Without it, it can be difficult to visualize your workload.

Another quick way you can change the due date for a task is by clicking and dragging it to another spot on the calendar:

Move Google Tasks on Google Calendar

Step 4: Don’t Over-Schedule Yourself With the Google Tasks App

To get into the habit of using Google Calendar, every morning you should take a look at it. Double-check your deadlines, and block off additional time during the day when you plan to work on your Google tasks.

By planning your day in the mornings, you give yourself more flexibility for your whole schedule. This way if something unexpected happens and you need to shift around the tasks later, you don’t need to rework your entire schedule to do so.

Whichever frequency you choose—either by checking your calendar daily, or weekly—this regular review follows the important 80/20 rule of time management.

Lastly, it’s important to state that with a lot of apps, your daily to-do list is laid out in a text-based format. A list might be deceptive in how you’re structuring your workload.

With Google Calendar’s visual approach, however, you’ll quickly see whether or not you actually have enough hours in the day to accomplish what you want.

Time Management Google Tasks

More Tips

  • Include the final due date in the task note. This is so you know how far you can push the tasks out if you don’t get them done right away.
  • Consider using task batching when you schedule out each day.
  • Try to keep a healthy balance between tasks for short term goals and long term goals.
  • For Google Tasks recurring in a similar fashion to an early-morning workout, make a repeating task that will automatically refresh for specific days of the week.
  • Google Calendar tasks for Android and iOS can be adjusted on your phone, so long as you have the Google Calendar app installed.

Use Google Tasks and Google Calendar for Time Management Tips

Using Google Tasks with Google Calendar keeps the most important goals in front of you every day. If you aren’t satisfied with this combination, however, no problem. You may have other productivity apps to choose from, although we recommend that you at give Google Tasks a chance.

Having a great scheduling strategy is only the first step, however. There is so much more that goes into making sure you’re focused on the most important things.

If you’re looking for more great ideas to stay productive, check out our productivity life hacks from Reddit that really work.

Read the full article: Google Calendar + Tasks Is the Only To-Do List You’ll Ever Need


Read Full Article

What Is a VPN? How Tunneling Protects Privacy


android-vpn-setup

A VPN, or Virtual Private Network, is an easy way to link two locations like they are using the same local network. Once the reserve of large organizations and businesses, people now use VPNs to protect privacy, enhance security, and access geo-locked services, such as Netflix.

Let’s go over the reasons you might want to use a VPN, the difference between a VPN tunnel and other VPN services, and why a paid VPN is always the best option.

What Is a VPN?

First things first: VPN stands for Virtual Private Network.

A VPN is a secure tunnel between two parts of the web. Think about it like this: a tunnel that goes under a mountain. Both sides link to a direct path through the mountain. In this case, the mountain is the internet.

One of the main reasons for using a VPN is privacy and security. The VPN uses encryption to protect your data in transmission. Anyone snooping on your connection will struggle to figure out what you’re doing online when you use a VPN. Encryption is a vital privacy tool for all internet users.

You can use a VPN connection for any number of reasons, including privacy, security, logging into remote services, accessing your office intranet from an external location, and watching geo-locked content from a restricted location, to name but a few.

What Is a VPN Tunnel?

A VPN tunnel is an alternative way of referring to a VPN. The phrase “VPN tunnel” isn’t used as commonly as just “VPN,” as more people became aware of and began using VPNs for regular internet activities, not just protecting privacy or logging into a remote computer network.

How Does a VPN Work?

Without a VPN, your data flows between your computer and the servers of whichever website you are visiting, like MakeUseOf. Your ISP, government, and other organizations can track and analyze the data you use and it could be vulnerable to snooping and other internet attacks.

A VPN protects your data in transit from your computer to the VPN server. The VPN provider encrypts your data, making sure that no prying eyes can intercept or read data coming from your PC, laptop, smartphone, or otherwise.

The VPN connection only protects your data as far as the VPN server. Once your data leaves the VPN server, it is back in the wild. The website server won’t know the originating IP address and therefore won’t trace you to a single location. However, as mentioned, if you connect to your Facebook account even while using a VPN, they still know that it is your Facebook account.

In the early days of VPN use, you would have to set up a VPN tunnel that forwarded all of your web traffic. Whereas, you now have a massive choice of VPN providers, most of whom provide an easy to use VPN client for your computer.

Is It Safe to Use a VPN?

Using a VPN is safe. But the legality of using a VPN depends on your locale. There are several countries around the globe where the use of a VPN is illegal specifically, or the use of encryption (for private citizens) is illegal. You should always check local laws before using a VPN in a new country, especially those with a restrictive government.

The other side of VPN safety is understanding how secure your data really is. A VPN will protect your privacy to an extent. If you log into your Facebook account while using a VPN, Facebook will still know that it is you. It’ll just appear that you’re in a different location to usual and because of that, you might encounter an extra security check.

If your Google account remains logged in, Google can still link your Google searches to your profile, and so on. Did you know that some people avoid Google search altogether? Check out one of these privacy-focused Google search alternatives to boost your privacy.

So yes, a VPN does protect your privacy. But only if you attempt to use the internet in a private manner.

Is a Free VPN Safe?

There are two types of VPN: free and paid.

Many people see the word “free” and think that a VPN is just a VPN; it does what it says on the tin. That isn’t the case though. A free VPN is free because it monetizes the service through alternative methods. In the case of a free VPN, the monetization can come from collecting your data and selling it, displaying intrusive ads, and more.

There are other issues with free VPN services, too. A free VPN might skimp on important security measures, such as the level of encryption, the type of VPN protocol, the number of available servers, and speed restrictions to name a few.

The safety of your VPN can come down to a paid-for VPN versus a free VPN. If you know that you’re paying for the service, and the VPN has no need to advertise or sell your data, that is a positive privacy and security step.

What Is the Best Paid VPN Service?

MakeUseOf always advises using a paid VPN service where possible. There are times when using a free VPN is okay, but you shouldn’t expect it to protect your privacy in the same manner as a paid VPN.

With that in mind, MakeUseOf recommends ExpressVPN. ExpressVPN protects your privacy, provides outstanding connection speed, and has servers all around the globe. MakeUseOf readers can grab an exclusive 49% discount on an ExpressVPN subscription, so give our top-ranked VPN a try.

express vpn locations

VPNs Protect Your Privacy

When you use a premium VPN, you’re giving your privacy an instant boost. A VPN isn’t perfect. It won’t protect against malware or block tracking scripts online. That isn’t what a VPN does. It can make accessing certain content easier, and it definitely makes it more difficult to pinpoint your location, which is excellent for many VPN users.

There are many VPN providers out there. ExpressVPN is one of MakeUseOf’s top recommendations, but there are lots of excellent paid VPN alternatives, too.

Read the full article: What Is a VPN? How Tunneling Protects Privacy


Read Full Article

How to Reduce Haze in Photos Using Lightroom


dehaze-lightroom

Adobe Lightroom boasts a slider that helps you reduce haze in photos. You can use the Dehaze slider in Lightroom to fix those photos you discarded because they were too foggy or hazy.

Lightroom’s Dehaze slider might give these photos a second chance, even if you couldn’t save them using contrast, exposure, and tone curve edits.

So, let’s see how to reduce haze in photos using the Dehaze slider in Lightroom. We’ll show you where to find it, and how to use it to give your landscape photography a boost.

Where Is the Dehaze Tool in Adobe Lightroom?

You can find the Dehaze tool in the Basic panel in Adobe Lightroom CC Classic. Dehaze is also a feature in Lightroom CC, the Lightroom mobile apps, and Lightroom Web, plus Camera RAW and Adobe Photoshop CC.

The Dehaze tool is under Effects in all other versions. But it was moved under the Basic panel in the more powerful Lightroom CC Classic. So, let’s look at the Classic panel first.

  1. Launch Adobe Lightroom.
  2. Go to File > Import Photos and Videos. Browse to your image and click on Import.
  3. Switch to the Develop module.
  4. On the right-hand panel, go down to the Basics panel (in earlier versions, it was under Effects).
  5. In the Presence section, drag the Dehaze slider to the right to reduce haze in your photo.
  6. You can also move the Dehaze slider to the left to increase haze in your photo for a creative effect.
  7. To reset your adjustments back to the default, double-click the slider to return it to its neutral value of zero.

Highlighting the Dehaze tool in Lightroom

The Dehaze Tool in Lightroom Mobile

Lightroom Mobile is among the best tools for editing photos on mobile. In iOS and Android, locate the Dehaze option under Effects.

Dehaze tool in Lightroom for iOS

How Does Dehaze Work in Lightroom?

The Dehaze tool uses an intelligent algorithm to estimate the light that your photo has lost due to the natural scattering of light or other factors like smog. According to Adobe, “It is based on the physical model of how light is transmitted.”

In short, it analyzes the scene to determine what it would look like without the haze.

The Dehaze tool is different from the Contrast slider or even the Tone curve sliders.

Contrast increases the difference between the light and dark areas and works across the entire image. The Dehaze tool, on the other hand, is more intelligent and works on local areas where it thinks the light is weak or washed out.

Adobe also recommends that you optimize the white balance for the image before using Dehaze.

Dehaze is best suited for landscape photos where the sky has been knocked out. You can bring back the details by moving the slider to the right. In most cases, Dehaze will bring out more details in the washed out areas than other tools like Contrast, Tone Curve, or Clarity.

A before and after example of dehaze in Lightroom

This is an example of using Dehaze on the entire photo. Now, let’s use the Dehaze tool on targeted areas within the image and make local adjustments.

How to Use Dehaze With Local Adjustments

The Dehaze slider can also be found in the toolbox of the Graduated Filter, Radial Filter, and the Adjustment Brush which sit just below the Histogram in the Develop module. You can use them with the Dehaze slider to boost weak areas in your photo.

Local Adjustments in Lightroom

1. Click on the Adjustment Brush tool, the Graduated Filter tool, or the Radial Filter in the tool strip of the Develop module.

The Graduated Filter allows you to apply an effect in a linear direction and you can fade it softly in the direction you choose. It works like the graduated neutral density filter on your camera lens that tries to prevent bright areas like the sky from being washed out.

The Radial Filter helps you apply an effect in an elliptical area around any part of the image.

The Adjustment Brush tool lets you selectively apply adjustments to photos by painting the areas you want to change in the photo. After selecting the Adjustment Brush, you can down to the Brush panel and choose the options for your brush. These include:

  • Size: Set the diameter of the brush tip in pixels.
  • Feather: Set a soft transition between the brushed areas or reduce it.
  • Flow: Control the rate of application of the adjustment.
  • Auto Mask: Select this, and brush strokes will be applied to areas of similar color.
  • Density: Controls the amount of transparency in the stroke.

2. Choose the type of adjustment you want to make from the Effect pop-up menu or drag the sliders for each of the effects. Moving the slider to the right increases the effects and moving it to the left decreases it.

Choosing the Dehaze Effect from the Effect Pop-up Menu in Lightroom

3. Let’s see how the adjustments work with the photo below.

The Before view is what we start with and the After image represents the Dehaze effect that reduces the haze on the horizon.

A Before and After Split View of the Dehaze Effect in Lightroom

4. In the image above, the sky in the original photo has a lot of haze.

To limit the adjustment to the sky, I can click on the Graduated Filter tool, set the Dehaze slider to a value like 35, and from the top of the image drag a transition that covers the sky.

5. Tapping the shortcut alphabet key “o” on the keyboard displays the red mask and a better view of the gradient effect. You can press “o” to get rid of it.

Dehaze with Graduated Filter in Lightroom

6. You can keep making local adjustments by moving the Dehaze slider to the left or right as long as the filter is selected.

7. Click on the Graduated Filter again to apply the effect when you are happy with the Dehaze effect.

If there are still other areas to tweak, use the other local adjustment tools to reduce the haze.

For instance, the mountain still looks washed out because of the atmospheric haze. Follow the steps above but choose the Adjustment Brush to “paint” on the mountain peaks where you think the haze is more.

Before you save your image, compare your Lightroom edits with the Before and After views. This allows you to check if the photo looks better or you have gone a bit overboard with the Dehaze slider.

Create Dramatic Effects With the Dehaze Tool

The Dehaze tool is a slider, so you can also have a blast by moving it to the left to increase the haze. For example, you can use it with the Radial filter to back light portraits. Or, you can boost a black and white photo by adding a subtle haze to create that touch of mystery.

This is just an introduction to the Dehaze tool. So keep playing and exploring the benefits of the feature. And do remember the Dehaze tool doesn’t have to work alone. Use them with the other sliders to boost your images from the mundane to the sublime.

The best trick of all is to take perfect, noise-free photos in the first place so that you have less editing to do in Adobe Lightroom.

Read the full article: How to Reduce Haze in Photos Using Lightroom


Read Full Article