01 May 2018

5 Popular Security and Privacy Apps You Should Uninstall and Replace


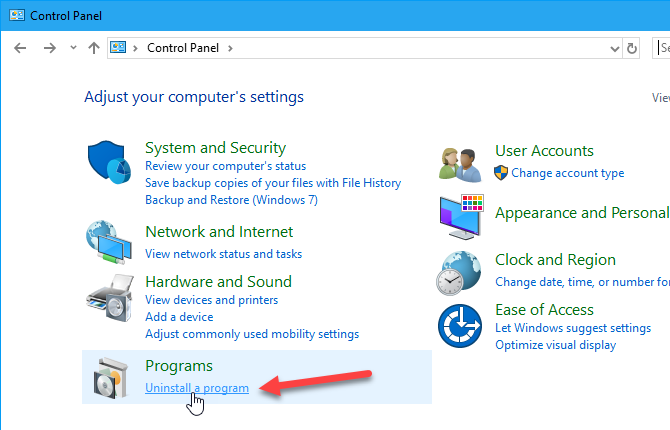
You’ve been using these tools for years… but it turns out, they may not be as great as once thought. Perhaps the company isn’t supporting the app anymore. Perhaps better tools have come along.

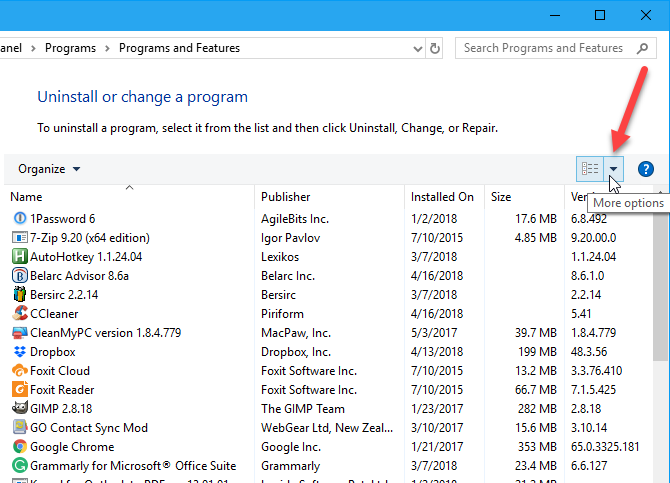
At the end of the day, these apps and utilities aren’t keeping your data secure any longer, so it’s time to uninstall and replace them. Here are five security and privacy apps that you should uninstall when you get the chance, and what to replace them with.

1. Swap CCleaner for BleachBit

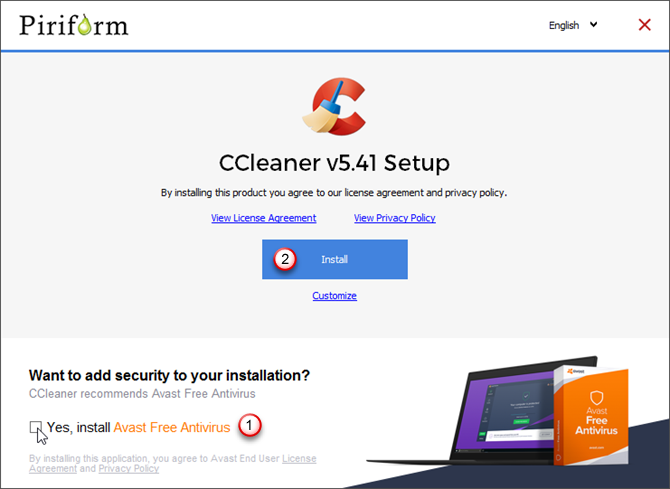
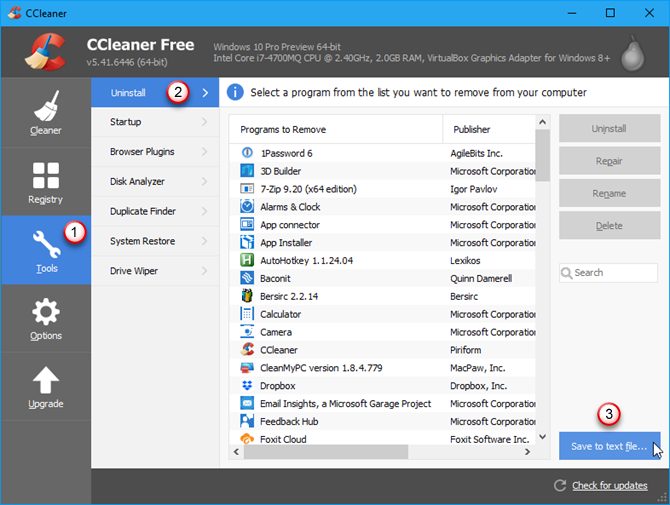
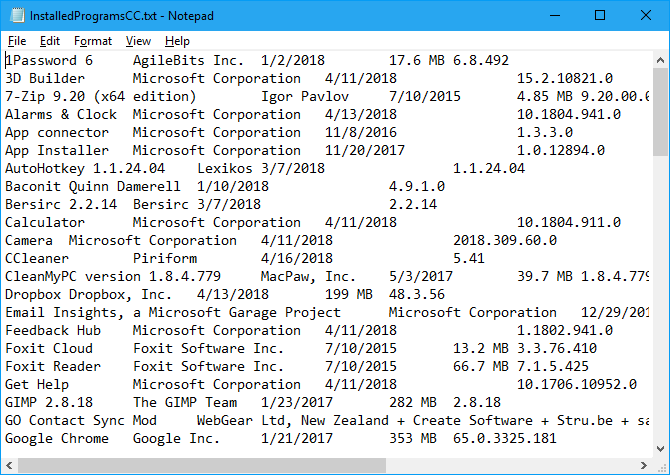
We start with what is arguably the most popular third party utility for Windows. CCleaner was once a great tool, perfect for tidying up unwanted files, temporary internet data, and more. While it can still do these things, a couple of incidents have soured CCleaner for many.

First was the August 2017 release which was hijacked by hackers. Their modified version of CCleaner was released on the Pirifom website, and included “a two-stage backdoor capable of running code received from a remote IP address on affected systems”. This backdoor could, for instance, have been used to push malware, keyloggers, and evebn ransomware to unsuspecting users.

After this, Piriform’s new owner Avast decided to bundle Avast Free Antivirus into the download. Not the best way to rebuild trust!

As an alternative, we suggest you check out BleachBit, an open-source alternative that is capable of doing all the tasks you’re happy with in CCleaner, with additional secure deletion.

Download: BleachBit

2. Swap TunnelBear for ExpressVPN

With 500MB of free data use a month, TunnelBear is perhaps the most popular free VPN (even though unlimited free VPNs exist).

It’s available for Windows, Mac, iOS and Android… but the world of free VPNs appears to be in decline, and following TunnelBear’s purchase by McAfee, it seems unlikely that this cute service will continue in its free form. Throw in the fact that you can’t use TunnelBear to watch Netflix abroad, and it all seems a bit useless.

popular security and privacy apps to uninstall and replace

While we recommend holding on until time is finally up for the free version of TunnelBear, you might prefer to jump ship straight away. Many strong VPN alternatives are available, but our favorite is ExpressVPN. Use the link below to get three free months!

Download: ExpressVPN

3. Swap Junkware Removal Tool for Malwarebytes

Junkware Removal Tool (aka JRT) is designed to remove potentially unwanted programs from your PC. The list of PUPs includes things like browser extensions, adware, and unwanted toolbars (the type that sneakily appear in the install wizard when you’re installing something else) and others.

Sounds useful, doesn’t it? Malwarebytes certainly thought so; they bought JRT in 2015, so if you’re using their Antimalware tool already, it now deals with junkware. Although JRT was supported after the buyout, it was retired in late 2018, and Malwarebytes officially ended support on April 26, 2018.

If you have JRT still installed on your computer, it’s now redundant. Old versions might prove to be a vulnerability that malware might exploit, so uninstall it as soon as possible.

Download: Malwarebytes

4. Swap Web of Trust for Bitdefender TrafficLight

A community-based browser extension, Web of Trust (WOT) gives each site you visit a rating, based on Trustworthiness, Vendor Reliability, Privacy, and Child Safety. You might already have received a new PC with it pre-installed; this often has the side effect of slowing down Windows.

That’s enough of a reason to consider uninstall Web of Trust, but it actually gets worse. In 2016, it was found that WOT was selling user data to advertisers. While an opt-out setting was eventually added, this is an unforgivable breach of privacy, and, well, trust.

We previously recommended that users uninstall and replace Web of Trust. If you need to find out a site’s trustworthiness before you visit, try one of these alternatives.

Download: Netcraft | Webutation | Bitdefender TrafficLight

5. Swap ZoneAlarm for a Paid Security Suite

Once upon a time, ZoneAlarm was the first thing you installed after setting up a fresh Windows installation. In the days when Windows’ built-in firewall was inadequate, this free firewall was essentially.

Things have changed.

popular security and privacy apps to uninstall and replace

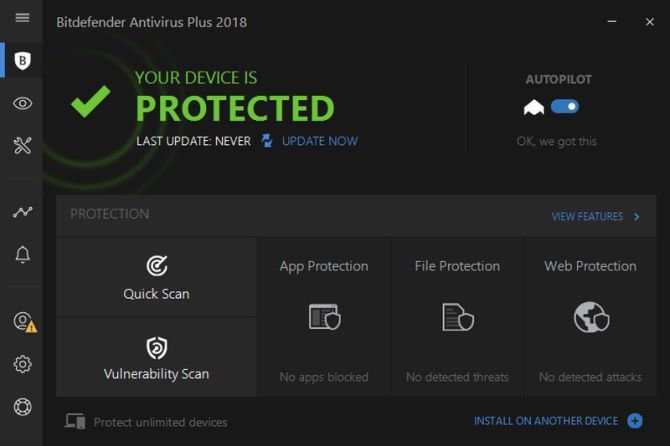
Recent tests have shown that the free antivirus component of ZoneAlarm scores poorly. Instead of removing malware, it opts to lock offending malicious software in a secure vault. While a paid version is available, you have plenty of superior alternatives. Operating system firewalls are now far more reliable, but it’s still a good idea to install security software capable of blocking intruders. Our list of the best security tools should help you here.

Download: Malwarebytes Premium or one of our recommended security suites

Replace Your Old, Insecure Apps!

It should be clear at this point that even the most accomplished security software can end up making your system vulnerable to intrusion. But you can avoid this by staying up to date with developments, and being open to trying new solutions.

Here, we’ve suggested you try out

  • BleachBit
  • ExpressVPN
  • Malwarebytes Antimalware
  • Netcraft, Webutation, or Bitdefender TrafficLight
  • A security tool with a firewall from our best of list

Remember, if you’re concerned about an app or tool, there’s almost always a replacement. Keep it going with some of these awesome open-source security apps.


Read Full Article

How to Split Screen on iPad (And the Best Tips and Tricks When Doing It)


The ability to run split screen apps on iPhones and iPads has been around for several years. However, it arguably remains one of the most underused features of iOS.

It’s perhaps understandable that split screens have never really caught on among mobile users. On-screen real estate is running at a premium, even with the increased screen size of the iPhone X.

However, tablet users stand to benefit significantly from making split screen apps part of their workflow. The feature helps you save time and be more productive.

Let’s examine how to use the split screen feature on your iPad. We’ll also introduce you to some of the best tips and tricks for getting the most out of split screen mode.

What Is Split View on iPad?

Split screen—or Split View as Apple calls it—lets you use two apps side-by-side. For example, you could write an email explaining directions to someone while simultaneously looking at the map.

The feature is most comfortable to use when you’ve orientated the screen in landscape mode, but it also works in portrait.

Note: Not all iPad models support the split screen feature. You need at least an iPad Pro, iPad Air 2, or iPad Mini 4. If your iPad does not meet the requirements, you can still use the four-finger horizontal swipe gesture to jump between apps.

How to Launch Split Screen Mode on an iPad

To launch the split screen mode, you first need to make sure one of the two apps you want to use is on your dock. Remember, unless you’ve changed the default setting, your most recently used apps will be on its far right side.

Next, open the other app that you want to use in split screen mode. It does not need to be on the dock.

Once one app is open, swipe up from the bottom of your screen to reveal the dock. Press and hold on the icon of the app you want to open and drag it to the right-hand side of your screen.

The screen should automatically re-adjust. When you see the readjustment happen, you can release your finger. These two apps will now be open in split screen mode.

How to Adjust the Split Screen Size

When you’re multitasking with two apps, there will be times you need to adjust the size of the app you’re currently working on without shutting the other app.

It’s easy to do. Just locate the black dividing line between the two apps, then tap and drag it to your desired location.

How to Close Split Screen Apps

When you’ve finished multitasking, you need to close one the two apps to return to normal usage.

Once again, locate the black bar between the two apps. You need to tap and drag it, but this time, slide all the way to the edge of the screen.

This is also the method to use if you want to close one app and reopen another app in split screen mode.

Using Slide Over on an iPad

Another feature that’s closely tied to split screen is Slide Over. To use it, you need at least an iPad Pro, iPad Air, or iPad mini 2.

It allows you to work in a second app in a floating window over the top of a full-screen app, much like you’re accustomed to doing on your computer.

how to split screen on ipad - iPad Slide Over

For Slide Over to work, you once again need to make sure the app you want to use is available in the dock.

To begin, open a regular app so that it’s full screen. Next, swipe up from the bottom of the screen to show to the dock. Press and hold on the icon of the app you want to use in Slide Over mode, drag it up onto the screen, and release your finger.

To close a Slide Over app, swipe it to the right-hand side of the screen.

Swap From Slide Over to Split Screen

If you’re working in Slide Over mode, you can easily jump into the split screen view instead.

Just swipe down from the top of the Slide Over app and drag it to the side of the screen. Don’t release your finger until you see the main pane bump over.

Swap From Split Screen to Slide Over

Similarly, you can switch between the split screen view and Slide Over mode.

Again, swipe down from the top of the app you want to change into Slide Over, drag it to the middle of your iPad’s screen, and drop it.

How to Open Three Apps at Once on an iPad

It’s even possible to open three apps at the same time by using a combination of split screen and Slide Over.

Firstly, launch the split screen view by following the earlier instructions. Once you’re looking at the split screen view, swipe up from the bottom of the screen and drag one of the dock’s icons into the center of your screen.

You have to drop the app you want to run in Slide Over mode precisely on top of the black divider between the two split screen apps. If you don’t place it right, it will instead replace one of the split screen apps with the app you’re dragging.

Drag and Drop on an iPad

Whenever you’re using either split screen or Slide Over mode, you can drag and drop files between the apps you have open thanks to iOS 11’s drag and drop feature.

Not all apps are compatible, but most productivity apps are. It means you could drag a text file from iMessage into Notes, or a photo from your email account into a calendar entry, for example.

how to split screen on ipad - drag and drop

To drag and drop an item, press and hold on the file in question until it pops up from the screen. If you wish, you can select multiple items by using another finger to tap on more files.

When you’ve selected all the files you need, drag the items into the app where you want them and release your finger.

If your iPad doesn’t support the feature, you can use a third-party drag-and-drop app.

Multitasking on Your iPad Made Easy

Apple’s vision of iPads replacing laptops might still be in the distant future. However, there’s no denying that features like split screen and Slide Over will make more and more users question whether they need a laptop when their current one eventually dies.

With every new version of iOS that Apple releases, the iPad becomes a more impressive productivity tool.


Read Full Article

3 Common PayPal Problems and How to Fix Them

How to Install RetroPie as an App in Raspbian on Raspberry Pi


Want to install RetroPie but don’t want to lose your existing Raspbian projects and environment? Not keen on the idea of dual booting? The answer is to install RetroPie as an application in Raspbian. In fact, it’s so simple, you’ll wonder why you didn’t do this way befor

You Don’t Always Need a Dedicated Disk Image

Raspberry Pi users have been sold the idea of having a single function for their computer. This single function is typically the Raspbian distro, which users are encouraged to reinstall for each major project. Not only does this reduce the lifespan of your SD card, it’s unnecessary.

The Raspberry Pi can support booting from USB devices, and it’s even possible to install multiple operating systems on a HDD via BerryBoot.

In short, things have moved on since the Raspberry Pi first appeared in 2012. Dedicated disk images might be useful for Pi-based retro gaming projects, but if you want more of a versatile experience, Raspbian Stretch is more than adequate. We’ve already looked at how to install Kodi in Raspbian, so let’s find out how to install and configure RetroPie.

What You’ll Need

As ever for a Raspberry Pi project, you’ll need a reliable power supply, a microSD card (at least 8GB, with Raspbian Stretch pre-installed), and a HDMI cable (unless you’re using a touchscreen display).

Manually install RetroPie on a Raspberry Pi

You’ll also need an Ethernet cable connection to your router (or Wi-Fi connectivity), a keyboard and mouse, and a game controller. Whether you keep these connected or not will depend on the type of games you intend to play.

Indeed, if you’re interested in a very particular type of game (such as those released for the Commodore 64), then a keyboard and two-button joystick will be all you need.

Configure Raspbian to Install RetroPie

To get started, boot up your Raspberry Pi, and change the locale options. This can be done in the command line using:

sudo raspi-config

Here, go to Localisation Options > Change Locale and scroll through the menu to select the en_US.UTF-8 UTF-8 option. Select OK to confirm, and wait while the change is made.

Manually install RetroPie on a Raspberry Pi

Then, reboot the Raspberry Pi with:

sudo reboot

You might prefer to use the desktop Raspberry Pi Configuration Tool, available in the Preferences menu. In this case, go to the Localization tab, select Set Locale, and choose the en_US.UTF-8 character set. You’ll be prompted to reboot, so click OK.

With the computer restarted, open a new terminal window and enter the command:

locale

Check that each parameter has the en_US.UTF-8 value assigned.

Install RetroPie on Raspbian

Before you install RetroPie, you’ll need to ensure that git is installed in Raspbian:

sudo apt install git

With this done, you’re ready to install RetroPie:

git clone https://github.com/RetroPie/RetroPie-Setup.git

Manually install RetroPie on a Raspberry Pi

The RetroPie-Setup folder will download, so change directory, and make the retropie_setup.sh script executable:

cd RetroPie-Setup
chmod +x retropie_setup.sh

You can now install RetroPie using the setup script:

sudo ./retropie_setup.sh

Wait while this runs. Some additional packages may be installed. Once this is done, the RetroPie-Setup Script menu will appear. Select OK to close the intro screen, then choose 1. Basic install.

Manually install RetroPie on a Raspberry Pi

This installs all packages from the core and main RetroPie projects; select Yes to proceed, and wait as the emulation suite is installed.

This will take a while, and once done, you’ll be returned to the setup menu. Select R Perform Reboot, and select Yes to confirm.

Log In and Configure RetroPie

When the computer restarts, you’ll see the desktop at first; then this will close and display the command line interface. Login with the usual Raspberry Pi credentials. Once you’ve done that, run EmulationStation:

emulationstation

The user interface to RetroPie will load up, and you’ll be prompted to configure your controller. If you prefer to skip this and navigate via your keyboard, you can deal with the controller later.

Next, if you’re using wireless networking, rather than Ethernet, you’ll need to connect to your wireless network. Go to the RetroPie menu, then choose WiFi. Select 1 Connect to WiFi network and select the correct network name. Click OK, then enter the passkey, confirming with OK.

When this is done, wait for the menu to appear again; if successful, it should display the IP address for the wireless connection. Select Exit to close the menu.

Manually install RetroPie on a Raspberry Pi

As things stand, you’re ready to install BIOS files and game ROMs on your Raspberry Pi. But you might need some emulators first. You’ll find these via RetroPie > RetroPie Setup > M Manage packages. Here, select opt Manage optional packages, and find the one that suits the platform you wish to emulate.

Along with recognizable gaming platforms like the Nintendo 64 and Sega Dreamcast, you’ll find old 8-bit systems and even arcade games (always labelled “MAME”). Meanwhile, classic games ported to the Raspberry Pi can be found in the list (such as Doom and Quake), as can the ScummVM program, which enables you to run certain point-and-click graphic adventure games.

When you find the emulator(s) you want to add, select them one at a time, using Install from source. This can take a while depending on how many (and which) emulators you have chosen. Click Back when you’re done until you return to the main RetroPie-Setup Script menu, then select R Perform reboot again.

BIOS and Game Files

In order to play games on RetroPie, you need a BIOS file for the emulator concerned, and ROM files for the games you want to play. Due to copyright law, we cannot link to these, but you should find what you need via Google. Note that if you’re using ROM files, you should already own a copy of the physical media.

Manually install RetroPie on a Raspberry Pi

When you have the files (ROM files should be saved to the appropriate emulator folder, BIOS files to the BIOS directory), you’ll be able to run the games in EmulationStation.

Usually, we would instruct you to do this via SSH or FTP from a second computer. However, this isn’t necessary if you can easily drop out of RetroPie and back to the PIXEL desktop in Raspbian. This way, you can use the Chromium browser to find and download your BIOS and ROM files, and save them to your Raspberry Pi.

Exiting RetroPie

To exit RetroPie, click the Start button (which you will have configured earlier) and select Quit > Quit EmulationStation, then when the command line appears, enter:

sudo systemctl start lightdm

This will restart the Pixel desktop on Raspbian, and you can continue using your Raspberry Pi as normal. Perhaps you have a project you’re developing? If not, there are many other great uses for a Raspberry Pi.

Whenever you want to launch RetroPie again, simply use the emulationstation command.

Remember, RetroPie isn’t the only retro gaming option for the Raspberry Pi. Other retro gaming methods for Raspberry Pi exist, although they may not support manual installation like RetroPie does.


Read Full Article

3 Reasons Why LinkedIn Premium Is Worth Paying For


LinkedIn is a great free service that helps you build a professional network—but if you’ve used LinkedIn, you’ll know that the site tries to get you to upgrade to its premium offering on a regular basis. So, is LinkedIn Premium worth it?

In this article, we’ll take a look at LinkedIn Premium, discovering how much it costs, the benefits you get, and whether or not it’s good value for money.

How Much Does LinkedIn Premium Cost?

LinkedIn Premium actually has four different price tiers:

  • Premium Career: $29.99/month
  • Premium Business: $59.99/month
  • Sales Navigator Pro: $79.99/month
  • Recruiter Lite: $119.95/month

These prices don’t include sales tax, which could be applicable where you live. And you can pay annually to save 20 percent, which is a sizable amount of money.

Each tier offers different features, which we’ll cover later. However, most LinkedIn users will be interested in Premium Career—so you can plan on paying $30/month (or $288/year).

You can get a free LinkedIn Premium trial to try it out for a month. That will give you a good idea of how the features will help you in your quest to land a new job. Many of the benefits are long-term, though, so do keep that in mind.

LinkedIn Premium Features

Let’s start with the basic Premium Career features:

  • 5 InMail messages per month
  • See how many searches you appeared in and how many people have viewed your profile
  • Additional information on posted jobs
  • Additional salary information
  • Access to on-demand learning videos

The first two features are probably the big draw of Premium Career. Being able to message other users (with or without GIFs) without connecting to them first (or being in the same group) is a huge benefit of LinkedIn Premium.

Here’s what you gain from each level of LinkedIn Premium:

  • Premium Business gives you additional information businesses and unlimited people searches.
  • Sales Navigator Pro gives you advanced search filters and the ability to make notes on user profiles, as well as numerous sales tools.
  • Recruiter Lite gives you guided search smart suggestions, projects, and other recruiting-focused features.

LinkedIn Premium Benefits

Since most readers will be interested in Premium Career, we’ll focus on the benefits of that particular LinkedIn subscription.

In short, Premium Career helps you make connections and find a job. And that’s what could make LinkedIn Premium worth it for you.

If you’re searching for a job, Premium Career’s InMail credits, insight into who looked at your profile, and additional job information will all be very useful.

InMail lets you reach out to people who work at companies you’re interested in without trying to connect with them first—it’s a great tool for networking.

Message with InMail

In the above image, you can see the LinkedIn Premium icon next to the message button. That means I can send an InMail using my Premium credits.

The value of taking a look at who’s viewed your profile can’t be overstated. You can connect with those people, reach out to recruiters who have shown interest, or use your InMail credits to offer any help to people who look like they’d be valuable connections.

Additional job information may or may not be useful; when you’re looking through job listings, LinkedIn will tell you if you seem like a good candidate for a particular position.

Job info from LinkedIn Premium

Premium Career has some limitations, though. If you run a lot of people searches in a short period of time, LinkedIn will stop showing you results and tell you to get a Business subscription. And if you’re serious about making connections, you’re going to want more InMail credits.

That’s where the Premium Career vs. Premium Business distinction comes in. With Premium Business you get 10 InMail credits and unlimited people searching. Which is great for making connections. The additional information you can find on businesses may or may not be useful to you.

The next two levels are for sales and recruiting professionals. If you’re considering one of these products, you probably already know quite a bit about it. Segmentation, suggestions, email integration, projects, and other features will be a huge help in doing your job.

Reasons Why LinkedIn Premium Is Worth It

If you’re still not sure if you should pay for LinkedIn Premium, here are three specific reasons to consider:

1. See Who Looks at Your Profile

The first reason is because you get to see the people who looked at your profile. That might not seem like a big deal, but it’s hugely useful for making valuable connections.

Who Viewed Your Profile in LinkedIn Premium

Lots of people are looking at profiles on LinkedIn. Some are recruiters. Others are executives and managers looking to hire. Many are people in your field looking to make professional networking connections. All of these people make LinkedIn Premium worth it.

Even if you’re not looking for a job at the moment, you probably will be at some point in the future. And being well connected with people in your field has a lot of benefits, even outside of job hunting.

When you see that someone looked at your profile, it means they wanted to learn more about you. And that’s plenty reason to get in touch, either with an InMail or a connection request.

2. Get Access to Improved Metrics

The second reason is the ability to see your search appearances and profile views. Again, this might not seem like a huge deal. But if you’re trying to improve your LinkedIn profile (and you should be!), it’s a great metric for measuring your success.

LinkedIn Premium profile views

When I joined LinkedIn Premium and started keeping track of my profile views, I had 30 or so per week. I now have closer to 150 per week. That’s five times as many people that see my profile on a weekly basis.

This means that when you update your LinkedIn profile, you’ll get feedback very quickly on whether or not those changes have worked.

Without this, you’re going to have a much harder time figuring out whether or not you’ve improved your LinkedIn profile.

3. Unlock the LinkedIn Premium Badge

Finally, having a LinkedIn Premium account can improve your image. It seems inconsequential, but the little gold icon in your profile and on search results shows that you’re serious about using LinkedIn to build connections.

linkedin premium icon

You might be surprised at how much more seriously people take you when you have that badge. Which makes it worth having when it comes to professional networking and job searching.

In conclusion, we believe LinkedIn Premium is well worth the investment, but you’ll need to make sure your profile is great to really take advantage of it. Start by using these tips to perfect your LinkedIn summary.


Read Full Article

Think Twice Before Giving Up Smartphones: 5 Apps You Can’t Live Without


Are you planning to replace your smartphone with a dumb phone? That could turn out to be a sensible move. But if you don’t plan ahead, it could also lead to quite a bit of unexpected stress.

To avoid that, we recommend that you first give some serious thought to the most useful apps you’ll be losing. Consider if you’re ready for it, and have smartphone-free alternatives to those vital apps ready to go. Start with the app examples in the list below.

1. WhatsApp

Apps You Can't Live Without - Whatsapp chatstep

Like it or not, WhatsApp is convenient. It’s a lot like Gmail. Everybody uses it and gives you “the look” if you say you don’t have an account.

While it’s possible to use WhatsApp on a computer, it’s not nice and easy without an internet-enabled smartphone. Minus the smartphone, your best options are:

WhatsApp on BlueStacks

You can install WhatsApp without a phone by using an Android emulator like BlueStacks. You’ll still need a phone number to complete the verification process, but you don’t need a smartphone for it.

The BlueStacks setup is not foolproof, and you might face technical problems at times. Real time conversations also take a hit. When plans change, as they often do in WhatsApp groups, you might end up clueless about those changes if you don’t have access to your computer.

Multiple Communication Channels

You can split your communication across emails, phone calls, SMSes, Skype and similar services. Remember this:

  1. Go where most of your contacts are.
  2. Try to limit the number of channels you use for communication to 2-3.

For chatting from your desktop, the Signal app is a secure option. But good luck trying to get people to sign up for it when there’s a convenient alternative like WhatsApp available. You’re better off getting an account with Chatstep. It allows you to create multiple private chat rooms and have users join them without signing up.

You can also have people send emails to your cell phone. For making video calls, try the no-signup service Appear.in.

If the majority of your friends and family are all on the same platform, say, Google Hangouts, iMessage, and FaceTime, you have a definite advantage. Chatting, video calling, sharing files—all of it is simple even without a smartphone.

2. Uber and Other Ridesharing Apps

Apps You Can’t Live Without - uber on desktop

When it comes to transport, being able to step out of the door and into a waiting cab at any time of the day is as stress free as it gets for car-free people. And apps like Uber and Lyft have made it possible. No wonder they seem indispensable.

You’ll have to learn to do without the convenience of Uber if you give up your smartphone. Not completely though, because Uber has added a few useful features for non-smartphone users. Thanks to them you can:

Uber is also introducing a call-to-book feature in some countries. Keep an eye out for it.

3. YouTube and Other Video/Audio Apps

Apps You Can’t Live Without - binaural beat machine

You don’t need a smartphone to make the best of YouTube. You can get your dose of entertainment on your computer with ease.

But when it comes to activities like learning, you’ll rue the lack of a smartphone. That’s because video tutorials, online courses, and the like are super useful to have when you’re out and about, especially when you’re commuting.

Also, it’s nice when you can listen to binaural beats for relaxation and meditation playlists in bed. And it’s tedious to get back to your computer every time to control such media. At least, you can move the audio files to a portable media player or to the microSD card on your phone. For music on demand, you can also turn to the FM radio built into your dumbphone.

4. Mobile Banking App

Apps You Can’t Live Without - banking apps

Want to pay a forgotten bill at the last minute? You can do that from anywhere with a smartphone. Want to loan money to a friend in an emergency? You can do that too.

Having the ability to move your money around on the go is handy in many situations. But without a smartphone, you lose a big chunk of that convenience. With some planning and scheduling, you’ll get used to it.

Besides, dumbphones can be quite versatile. They also support certain basic financial transactions thanks to the SMS banking facility that’s available with many banks. All you need is a bit of research and communication with your bank to start using it.

5. Google Maps

Apps You Can’t Live Without - google maps

No place in the world seems inaccessible or difficult to get out of when you have the power of Google Maps at your fingertips.

Whether you’re on foot, in a car, or taking public transport, Maps is there to tell you if you’re headed in the right direction. It’ll also tell you how far you’re from your destination and what’s the estimated time of arrival. With Maps you get to see which routes are busy and which ones will save you time, and you can change direction accordingly.

Now imagine if you didn’t have any of that information. It’d be somewhat like… it was a few years ago before smartphones came into the picture. In short, normal and nothing to worry about.

But you won’t think so, now that you’ve had Maps holding your hand for so long, especially when you’re lost, in unknown territory, or a long way from home.

Are you willing to go back to Google Maps on the desktop, paper atlases, and asking strangers for directions? Can you handle printed maps, handwritten ones, and serendipity? If so, then go right ahead and kick that smartphone out of your life. And while you’re at it, arm yourself with these five skills for the outdoors.

You might also want to consider investing in a handheld GPS device and/or an in-car Sat Nav system to replace Google Maps.

Is Your Phone Dumb Yet?

When I switched from a smartphone to a dumbphone, it was like I’d released a big mental breath that I didn’t know I was holding. Now I don’t want to go back to a smartphone. Once you ditch yours, you probably won’t want to either. But you might, for the sheer convenience of it. Unless:

  1. You have another portable smart device like an iPod Touch or a smartwatch. Using that will probably defeat the purpose of giving up an addictive and intrusive gadget like your smartphone.
  2. You start relying on your computer for everything once again and forget that you had a smartphone in the first place.
  3. You’re determined to go the “dumb” route in a world that’s increasingly “smart”.

Note that we’ve previously explored what it was like to not own a smartphone in the modern era, and it was enlightening. There’s nothing wrong with doing that as long as you know what you’re giving up and willing to live with it.

Image Credit: belchonock/Depositphotos


Read Full Article

How to Download a Copy of All Your Instagram Data Right Now


Did you know you can download a copy of your data on most social media websites? This has many uses; perhaps you want to keep a backup of this information for your own purposes, or plan to delete your social media accounts and want to export everything before you do. Thankfully, Instagram makes it easy to do this on its web version. Here’s how.

How to Download a Copy of All Your Instagram Data

Download Instagram Data

  1. Open Instagram on your desktop and log in if you’re not already.
  2. Click the Profile icon (the outline of a person) in the top-right corner.
  3. On your profile, click the Settings gear.
  4. Choose the Privacy and Security entry.
  5. Select the Privacy and Security tab on the left if it’s not already highlighted.
  6. Under the Data Download header, click Request Download.
  7. Enter your credentials to authorize the download.
  8. You’ll receive an email containing your data. It may take up to 48 hours, but in some cases it will arrive in just a few hours.

What does this data package include?

  • Photos: As you’d expect, downloading your data from Instagram includes all the photos you’ve uploaded to the service.
  • Videos: In addition to photos, you’ll get any videos you’ve shared.
  • Comments: Your data download includes all comments you’ve made on any post.
  • Your profile info: Everything on your profile, like your email address, website, and bio, is part of the download too.

While Instagram has likely added this feature due to new privacy laws in Europe and the recent Facebook advertising controversy, it’s still useful to have the option to download your data whenever you want.

If you’re sticking with Instagram after downloading your data, check out our tips for making your Instagram photos stand out.


Read Full Article

How to Use Google Drive Access Checker for Smarter File Sharing


Google Drive wouldn’t be a top-notch collaboration platform if it didn’t have the smarts to impress enterprise users. There are some features that work under the hood to ensure teamwork stays on the rails. The Google Drive Access Checker is one such “background” feature that ensures the recipient of a shared Google Drive file has access permission.

If you haven’t paid attention to it lately, check it out the next time you share a file. The Access Checker is a G Suite feature.

How Does Google Drive Access Checker Work?

Google Drive Access Checker in G Suite

When you share any file hosted on Google Drive through Gmail or Google Calendar, the Access Checker will automatically check if the recipients have access to the file. If they don’t have permission to view the file, then the Access Checker will prompt you to change the file sharing permissions.

Google Drive Access Checker is smarter because:

  • It shows you the names of the recipients who need access.
  • It is more precise than the earlier option that prompted you to switch on link sharing for the shared file.
  • It is a smart tool as it predicts the recipients who need access to a file and then defaults to sharing with those recipients only.

Just remember, in G Suite the level of permissions via the Access Checker can be configured by the administrator only. The levels can be set to specific recipients only. Or you can open it up to anyone who has the link within the organization or the public.

The Access Checker gives you instant control over the share permissions. You can do it on the fly and avoid the back and forth into Google Drive to change the permissions. This makes Google Drive file sharing simpler and safer with your team.


Read Full Article

Hate the Gmail Redesign? How to Switch Back to Classic Gmail


Google’s big email redesign is finally here and it brings with it a lot of powerful new Gmail features that will probably make most people want to use it right away. But not everyone feels that way. If you’ve switched to the new design and feel lost, you can just as easily switch back.

The redesign is a sleek, cleaner version of its predecessor. It also makes it easier to access your calendar and tasks right there in Gmail without having to open another tab in what is probably already a pretty crowded browser.

That said, not everyone is going to love the new redesign. Part of it simply comes down to an aversion to change. No matter what the changes may entail, there will always be a group of people that understandably prefer to stick with the older version. They know where everything is, it works for them, and they just don’t have a need for the new, flashy features. Not to mention that this is the biggest overhaul Gmail has seen in years.

If you’re among those who were cringing when Google announced the redesign earlier this month, you’ll be happy to know that you don’t have to actually stick with the redesign.

If you’ve tried out the Gmail redesign and you want to retreat to the comfort of your classic Gmail interface, it’s just two clicks away:

  1. Launch Gmail in your browser and click the Settings button.
  2. Click Go back to classic Gmail.

That’s it. You’re back in the old interface… for now. Google hasn’t made it clear how long you’ll be able to stick to the classic interface, but for the time being, you can keep things just the way they are.

Image Credit: alexey_boldin/Depositphotos


Read Full Article

5 Lesser-Known Free Stock Image Sites for Images That Stick Out


Photos and images have copyrights. If you want to use an image, you need permission from the photographer or employ other legal ways to use a photo. The easiest free option is to use a royalty-free image.

The internet is full of amazing stock photography sites that give you such free images. You’ve probably heard of the more popular ones like Pexels, Unsplash, and Pixabay. But everyone goes there! So if you want to stand out from the crowd, you need images from places that most people don’t know about.

These lesser-known stock photography sites are just as good as any of the popular ones. But since you are one of the lucky few MakeUseOf readers to know about them, chances are that they will be unique in your circles.

1. UnDraw: Illustrations for Designs and Mockups in SVG Format

lesser-known free stock image sites

Whether you’re designing a new app or creating a PowerPoint presentation, a few good illustrations can really spruce things up. SVG, or Scalable Vector Graphics, is the most popular format for that. And UnDraw is a resource for such free, hand-drawn illustrations.

All of the graphics on the site are completely free and don’t even require an attribution, so you can include them without any linkbacks or credits. Since every file is in the SVG format, you can resize it to make it as large as you want, even large enough to print billboards out of it.

And SVG also makes the color palette customizable, so you can change the colors to your liking. Or pick a color and UnDraw will show illustrations to match it.

UnDraw is a shockingly good site for the number of clean illustrations it offers for free. In fact, it’s better than most of the high-quality vector art sites you already know. Designers and app developers will especially love these since they can be a template to create something magnificent.

2. Moose: Professional Photographers and Models Make Stock Photos

lesser-known free stock image sites

Usually, stock photography is all about cheesy images or amateur photography. But Moose takes a different approach, with professionals in both the photography and modeling spheres.

Moose’s aim is to make stock photos that you can ideally use together. That’s why you will often find different pictures with a similar background, or the same model in different settings, and so on. The lighting is also kept as static as possible so that you can Photoshop two pictures into one without it being jarring.

At any point, you can sort Moose by the category of photos, the models, or the photographers. All the pictures are free to use as long as you link back to Moose with accreditation, or you can buy the picture and not link or attribute it.

3. Clipstill: Free Cinemagraphs to Stun Your Viewers

lesser-known free stock image sites

Cinemagraphs are images with one small part of the scene in motion. It’s a visually stunning end result, adding just that little bit of action to bring the photo to life. Cinemagraphs are a creative way to use animated GIFs, and now you can get a few for free.

Clipstill all about paid stock cinemagraphs, but every month, it offers six high-quality items for free. It’s probably a good idea to download these for the future since the site will change those as time goes on.

Of course, it’s only six. So here’s another lesser-known site with ten more royalty-free, attribution-free stock cinemagraphs. Over at Free Cinemagraphs, the makers took free stock video footage and turned them into cinemagraphic GIFs.

4. Reshot: A New Alternative to Unsplash

lesser-known free stock image sites

Since it first launched, Unsplash has become a stock photography darling. We’d go so far as to say that it’s the best site for guaranteed free-to-use high-quality images. But it has also become a bit boring, and you will see images from the site used in many places.

Reshot, in some ways, is the new Unsplash. It too has images that are manually curated by its staff, so you will only get good quality photos, not a bunch of nonsense. Importantly, Reshot seems to scour through a lot of other stock photography sources that Unsplash doesn’t, so its collection is markedly different. If you’re bored of Unsplash or its search is giving you the same results, Reshot is a breath of fresh air.

Importantly, Reshot offers a “Diversity Matters” pack with photos that celebrate all the diversity in humans, be it race, age, sex, or whatever else. This is guaranteed to make your pictures look more inclusive and connect with a wider audience.

5. Librestock: Multi-Site Search for Stock Photos

lesser-known free stock image sites

Many of the popular stock photography sites are actually aggregators. Both Pixabay and Pexels feature plenty of imagery from other sources. So now we have a “super-aggregator” in Librestock, which searches through several of these existing aggregators.

Librestock searches Stocksnap, Negative Space, Picography, ISO Republic, Gratisography, Shotstash, Pexels, and Foodie Factor. The thumbnails are large enough to give you a good look at the image before you go to the host site, saving you a few of those back-and-forth clicks.

Librestock also has a section for video search to help you find quality copyright-free stock footage, searching the best sites that cater to videos instead of images.

A Lot More Than Just Stock Images…

Speaking of videos, the whole “stock media” space is much larger than just photography. And it’s not just these big aggregators. Individual artists often put up their work for free so that anyone in the world can use it.

To get started, check out these sites to find stock audio, video, images, and icons. You won’t be disappointed!


Read Full Article

Facebook Is Testing Reddit-Style Downvotes


Facebook is currently testing a Downvote button. This is only a small test limited to Australia and New Zealand, but it’s a test nonetheless. And if the feature is ever rolled out to everyone then expect all of your friends to express opinions on your comments.

In February 2018, we reported how Facebook was experimenting with the idea of letting people Downvote comments, which would then flag it for moderation. However, the test now seems to have evolved into proper Reddit-style Upvote and Downvote options.

Upvoting the Idea of Downvotes

Facebook’s Like button is now the stuff of legend. We all know what it signifies and we all use it regularly to let people know we have seen their post or comment without having to reply. Unfortunately, Facebook has resisted all calls to add a Dislike button.

However, Facebook IS now actively testing Upvotes and Downvotes for comments. Just like Reddit. Facebook is pitching this feature a little differently than Reddit, suggesting this is to let you vote up good comments and vote down bad comments.

The reality is people will use this however they want. Which, for most Facebook users, means giving comments they agree with an Upvote and comments they disagree with a Downvote. Which makes this system no different than having Like and Dislike buttons.

It isn’t yet clear what Upvotes and Downvotes will actually do. They could move comments up and down, making the popular comments more visible. Or maybe they’ll do nothing but show a number representing how many Upvotes versus how many Downvotes.

Facebook Is Serious This Time

This is currently just a test, and a small one at that. However, we know that Facebook has been testing different forms of Downvotes for at least three months, so it’s obviously seriously considering enabling this across the board at some point in the future.

If Facebook ever does enable Upvotes and Downvotes, it would mean there’s a lot of different things to take notice of when scrolling through your News Feed. After all, Facebook’s various Reaction options already tell us what people think of our posts.

Image Credit: Guillaume Capron/Flickr


Read Full Article

An Introduction to Facebook’s Closed and Secret Groups


One of the more interesting aspects of Facebook is the ability to create and join groups. There are groups for everything on the social network, including groups for dating, groups to sell stuff, groups for mothers, and more besides.

The thing is, in addition to the open groups, there are closed and secret Facebook groups too. In this article, you’ll learn more about Facebook groups and the differences between each type, and we’ll show you how to find the closed and secret groups.

What Are Open, Closed, and Secret Facebook Groups?

There are three types of Facebook groups: open, closed, and secret. Facebook groups, regardless of the type, all have some things in common. All are designed to allow members to share locations, plan events, and exchange contact information. But there are some differences.

Open Groups

Open groups are, not surprisingly, accessible to anyone with a Facebook account. This means anyone can see the group’s name, location, member list, and posts. Perhaps most importantly, anything that’s posted in the group is available in Facebook searches and on the news feed.

Want to join an open Facebook group? Go right ahead; membership doesn’t require an invite or approval.

Closed Groups

Closed groups, by contrast, add some restrictions. Like open groups, the name, description, and member list of a closed group are readily available. Closed groups are also found in Facebook searches.

Unlike open groups, however, closed groups require that new members get approved by an administrator or get invited to join by a current member. Additionally, only current members can see what’s being discussed in group posts and on its news feed.

Secret Groups

Secret groups, as you would suspect, are the most private of the three types of Facebook groups. No aspect of a secret group is publicly visible, new members must be added or invited by current members to join, and only members can see group posts with or without a comment. However, former members who have voluntarily left the group can still find the group in search and see its name, description, tags, and location.

How to Find Closed Facebook Groups

Unsurprisingly, there’s no simple way to find a listing for all Facebook groups, at least those which are open or closed. Actually, this is a good thing, given that there are hundreds of thousands of Facebook groups.

However, there are some awesome ways to discover new Facebook groups. To find a closed group on Facebook, you’ll want first to become familiar with Facebook Search. This tool will find almost anything you want, but you should take your time and use it correctly. Using filters and keywords can help you narrow your search.

Because Facebook already knows a lot about you, check out Facebook’s Groups page. Here you can see what groups you have joined, and what groups you have been invited to join. And if you click the “Discover” tab you’ll see groups Facebook recommends for you, groups local to you, and groups your friends have joined.

The Facebook Sale Groups is another excellent URL worth exploring. You can find plenty of communities right here which are looking to buy or sell stuff. There’s also an easy-to-use map that shows you the location of sale groups near you.

facebook sale groups

If you’re looking to find some more bizarre Facebook groups, we recommend you search Reddit for “Facebook groups” and prepare to get a surprise. It seems the world is full of some rather twisted Facebook groups.

Using this method I discovered closed Facebook groups for anime, LuLaRoe sellers, and “extreme triggering,” to name a few of the more benign ones.

How to Find Secret Facebook Groups

Thanks to the internet, it’s becoming increasingly difficult to hide anything anymore, including the fact that these secret Facebook groups exist.

Finding a secret Facebook group is all about finding a member list or the administrator of the group. Once you do that, you can try to get an invite by contacting them on Facebook. You should also take advantage of your own friends by asking around to see if they belong to any secret groups that might interest you.

For example, if you’re a parent, the odds are pretty high that some of your Facebook friends are also parents. Some of those almost certainly belong to secret Facebook groups for parents. Remember, just like real life, social networking requires a certain amount of, well, networking.

As with closed groups, you can also search Reddit for “secret Facebook groups”. Here, you’ll find a running list of secret groups discovered by Reddit members. Not everything discussed here is appropriate for everyone, nor are the listings always verified. Still, if you’re willing to go down a slightly murky rabbit hole, this is a great place to start.

Secret Facebook groups are out there waiting to be discovered if you do some digging.

Making Use of Facebook Groups

If you’re looking for a community of like-minded individuals, joining a Facebook group is a great way to go about doing so. Facebook’s open, closed, and secret groups allow you to increase your circle of friends and learn more about the things you already love.

There’s much more to discover about Facebook too. Perhaps you want to learn about some hidden Facebook tricks, or discover the unwritten rules for Facebook friend requests.

Image Credit: zentilia/Depositphotos


Read Full Article

5 Ways to Generate a List of All Installed Programs in Windows


You’ve probably installed many programs over time on your Windows PC and you probably don’t remember all of them. Generating a list of installed programs in Windows is useful for several reasons:

  • Reset or reinstall Windows. A list of installed programs allows you to know what was installed before the reset or reinstall. You can refer to the list once Windows is running again.
  • Setting up a new PC. You probably want to install at least some of the same programs you had on your old PC.
  • Free up space on your PC. Generating a list of installed programs and reviewing it helps you discover programs you haven’t used in years and don’t need anymore.

Today we’ll cover five ways you can generate a list of installed programs in Windows.

The tools we discuss here do not include license keys and serial numbers for the programs in the list. We’ve previously covered ways to recover serial numbers for Windows programs.

1. List Installed Programs Using PowerShell

PowerShell is a more powerful command line environment than the traditional command prompt. It can perform a lot of the same tasks as the command prompt, but also can be extended and scripted using “cmdlets.”

Don’t be scared off by the power of PowerShell. It can do simple things also, like generate a list of installed programs on your PC.

Open PowerShell by pressing Win + X and selecting Windows PowerShell on the Power User menu.

Open PowerShell from the Win+X Power User menu

Enter the following command at the prompt and press Enter. You can copy and paste the command from here but replace the path and file name portion (“C:\Users\Lori\Documents\InstalledPrograms\InstalledProgramsPS.txt”) with your own path and the file name you want to use:

Get-ItemProperty HKLM:\Software\Wow6432Node\Microsoft\Windows\CurrentVersion\Uninstall\* | Select-Object DisplayName, DisplayVersion, Publisher, InstallDate | Format-Table –AutoSize > C:\Users\Lori\Documents\InstalledPrograms\InstalledProgramsPS.txt

PowerShell command to generate list of installed programs

The list contains the name, version, and publisher for each installed program. You may notice several blank lines between some of the items.

Installed programs list from PowerShell in Notepad

2. List Installed Programs Using Command Prompt

If you’re more comfortable using the traditional command prompt rather than PowerShell, you can use the Windows Management Instrumentation Command line tool (WMIC) in the Command Prompt window.

Press Win + R to open the Run dialog box. Then, type “cmd.exe” in the Open box and click OK or press Enter.

If the User Account Control dialog box displays, click Yes to continue.

Open the Commant Prompt window using the Run dialog box

At the command prompt, type “wmic” and press Enter.

Enter the following line at the wmic:root\cli prompt and press Enter. Replace the path and file name portion (“C:\Users\Lori\Documents\InstalledPrograms\InstalledProgramsWMIC.txt”) with your own path and the file name you want to use:

/output:C:\Users\Lori\Documents\InstalledPrograms\InstalledProgramsWMIC.txt product get name,version

Once you get the wmic:root\cli prompt back, type “exit” and press Enter to return to the normal command prompt.

Type “exit” again and press Enter to close the Command Prompt window.

Generate a list of installed programs using the wmic command

The text file with the name and version for the installed programs on your PC is generated and saved in the location you specified.

Installed programs list from wmic in Notepad

3. List Installed Programs Using Control Panel

If you don’t want to type commands to generate a list of installed programs, there are other methods. One way is to view all your installed programs on the Programs and Features screen in the Control Panel.

Type “control panel” in the Search box next to the Start menu. Then, click Control Panel under Best match.

Open Control Panel using the Start Menu search box

On the Control Panel window, click Uninstall a program under Programs.

If you’re viewing the items by small or large icons, click the Programs and Features item.

Click Uninstall a program in Control Panel

To see all the details for each program in the list on the Uninstall or change a program screen, click the More options arrow on the Change Your View button and select Details.

Click on the title bar of the Control Panel window to make sure it’s active. Then, press Alt + Print Screen (or Alt + Fn + Print Screen on some laptops or other devices) to take a screenshot of the window.

Select Details from the Change Your View button menu

Paste the screenshot into another program like Paint and save the image. In Paint, you can save your screenshot as a PNG, JPEG, BMP, GIF, or other formats.

Depending on how many programs are installed, you may need to take multiple screenshots of the Control Panel window, scrolling down for each one to capture the next part of the list. If this is the case, you may want to paste each image directly into a word processor like Word to save them all in one file.

Screenshot pasted into Paint

4. List Installed Programs Using CCleaner

CCleaner is a Windows program that allows you to easily clean up and free up space on your PC. You can delete temporary files, your browsing and download history, and recent documents lists in some programs.

The program also includes an uninstaller tool, which generates a list of installed programs on your PC. This list can be saved to a text file.

Download CCleaner and install it. Be aware that Avast Free Antivirus will be automatically installed while installing CCleaner unless you uncheck the Yes, install Avast Free Antivirus box before clicking Install to begin the installation.

Turn off option to install Avast in CCleaner installer

Open CCleaner and hit the Tools button on the gray sidebar on the left. Then, make sure that Uninstall is selected to the right of that sidebar.

Click the blue Save to text file button in the lower-right corner.

On the Save As dialog box, navigate to the folder where you want to save the installed programs list, enter a File name and click Save.

Click Save to text file in CCleaner

The list of installed programs includes the company, date installed, size, and version number for each program.

The text is tab-delimited, which makes it somewhat hard to read in a text editor. You can import the text from this file into Word or Excel to make it easier to read. Read on to learn how to convert this data into a table in Word or into a worksheet in Excel.

Remember that if you save your list of programs in Word or Excel, you must install that program on the newly installed or reset Windows system before you can access your list. Or use online document viewers. The next two tips show you how to format the text list into neat tables.

Installed programs list from CCleaner in Notepad

Tip: Convert Your List of Programs Into a Word Table

To convert your list to a table in Word, open the text file you saved in Word. The File Conversion dialog box displays before the file opens, showing how the text will look in the Preview box.

Accept the default settings and click OK.

File Conversion dialog box in Word

Select the text you want to convert to a table. Then, on the Insert tab, click Table and select Convert Text to Table.

Select Convert Text to Table in Word

Make sure the number of columns is 5 and that Tabs is selected under Separate text at.

Click OK to continue with the conversion.

Convert Text to Table dialog box in Word

Format the table any way you want. Be sure to save the Word file to an external or network drive so you’ll have access to it once you reinstall or reset Windows.

Installed programs list from CCleaner in Word

Tip: Convert Your List of Programs Into an Excel Worksheet

If you’d rather have your list of programs in Excel, here’s how to convert the list to an Excel worksheet.

First, we recommend you make a copy of the original text file. Change the extension on the copied file from .txt to .csv and open the .csv file in Excel.

On the first screen of the Text Import Wizard dialog box, make sure Delimited is selected under Choose the file type that best describes your data.

Accept the defaults for the rest of the settings on this screen and click Next.

Excel Text Import Wizard - Step 1 of 3

On the second screen, make sure Tab is checked under Delimiters.

Click Finish. For our purpose, we don’t need to do Step 3.

Excel Text Import Wizard - Step 2 of 3

Your list of programs is imported into columns on a worksheet in Excel, making it easier to read. Be sure to save the Excel file to an external or network drive so you’ll have access to it once you reinstall or reset Windows.

Installed programs list from CCleaner in Excel

5. List Installed Programs Using Geek Uninstaller

Geek Uninstaller is a free, portable Windows program used to thoroughly uninstall programs, including all leftovers. The program will also forcefully remove stubborn or broken programs. You can use Geek Uninstaller to generate and save a list of installed programs on your PC.

Download Geek Uninstaller. The program is portable. Simply unzip the downloaded file into a folder on your PC and run the EXE file.

A list of installed programs displays on the Geek Uninstaller main window. To save this list to an HTML file, open Geek Uninstaller and go to File > Export to HTML, or press Ctrl + S.

On the Save As dialog box, navigate to the folder where you want to save the installed programs list, enter a File name and click Save.

Select Export to HTML in Geek Uninstaller

The HTML file automatically opens in the default browser once it’s saved. The list includes the name and size of each program and the date on which the program was installed.

If you’re using a browser like Firefox, Chrome, or Vivaldi, hit Ctrl + S to save the Installed Programs HTML page to a location you choose with a custom file name. You can save it to your local hard drive but be sure you transfer the file to an external or network drive before reinstalling Windows. Other browsers may have a different shortcut or option for saving HTML files.

Regular installed programs list from Geek Uninstaller in browser

Geek Uninstaller also allows you to display a list of apps installed from the Windows Store. Go to View > Windows Store Apps.

Export Windows Store Apps using Geek Uninstaller

All the apps installed on your PC from the Windows Store display. You can export this list to an HTML file the same way you did for the list of regular Windows programs.

Windows Store Apps list in Geek Uninstaller

Store the Generated App Lists on External Media

You might have noticed that each of the methods we mentioned here produces a slightly different list of programs. So you might want to use more than one method and keep each separate list.

Remember to store your lists of programs on an external or network drive so you have access to it after reinstalling Windows. When you reset (instead of reinstalling) Windows 10, programs are removed but your data is preserved. No matter what the situation, it’s a good idea to back up your lists when backing up your data.


Read Full Article