The trend of open source software is growing on Mac, and there’s no shortage of quality apps. You might be familiar with some common ones, like VLC, Firefox, LibreOffice, Handbrake, and more.
Here’s a list of some less popular open-source Mac apps you should try. You may be surprised by how useful they can be.
1. IINA
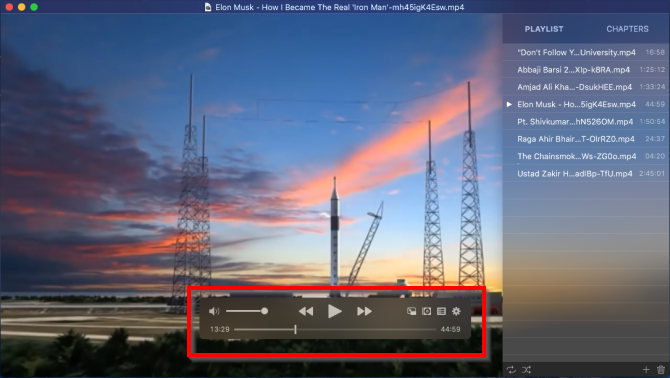
IINA is a modern audio and video player for Mac. It has an entirely new design and supports Force Touch, the Touch Bar, and picture-in-picture. When you open a video, it automatically adds other videos in that folder to a playlist. If you’re listening to an audiobook or podcast, then IINA lets you quickly navigate between MP3 chapters.
The player is minimal, with buttons for a playlist, music mode, picture-in-picture, and settings. It can automatically fetch subtitles for movies, provided you log in with an OpenSubtitles account.
It also offers many customization options, including changing the interface theme, tweaking audio/video settings, customizing the subtitle look, and configuring new key bindings.
Download: IINA
2. Cyberduck
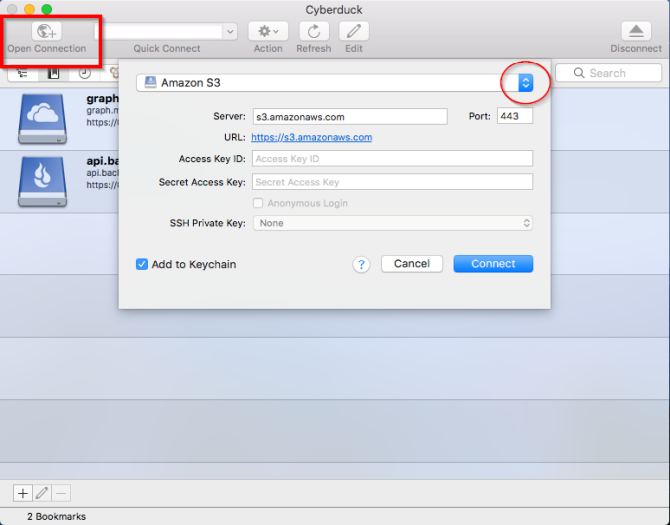
Cyberduck is an FTP client for Mac. It lets you connect, browse, and manage the content stored on SFTP, WebDAV, Dropbox, Amazon S3, Backblaze B2, and more. The interface works like a browser and mimics common navigation and sorting features.
The outline view lets you browse large folder structures efficiently, while the Quick Look feature can preview files without downloading them. You can also organize bookmarks with drag and drop and check the history of all visited servers.
Uploading files is a one-step procedure. Drag and drop bookmarks to Finder and drop files onto bookmarks to upload. You can even sync local directories with a remote server.
Download: Cyberduck
3. Cryptomator
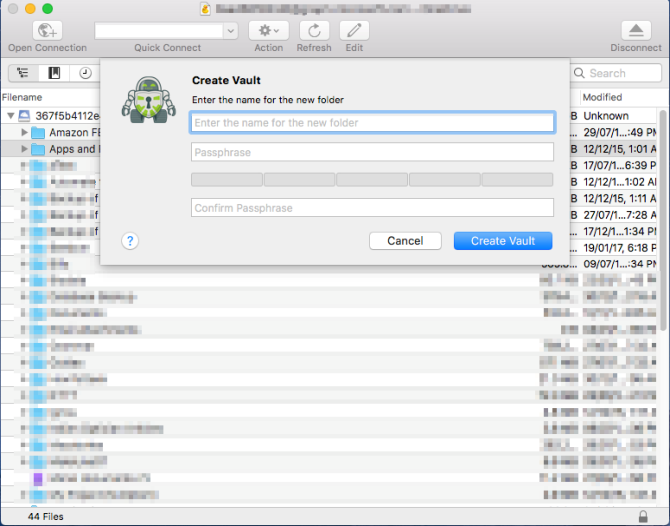
One of the best features of Cyberduck is the integration with Cryptomator. It works by creating a vault directory in the cloud storage and encrypts files and folders with AES-256 cipher keys. Anything you put inside this vault will encrypt transparently.
That means no hidden backdoors from third parties, and greater privacy when using cloud services. The app is easy to use. All you have to do is create a new vault and enter a name and passphrase to secure it.
Download: Cryptomator
4. Skim PDF Reader
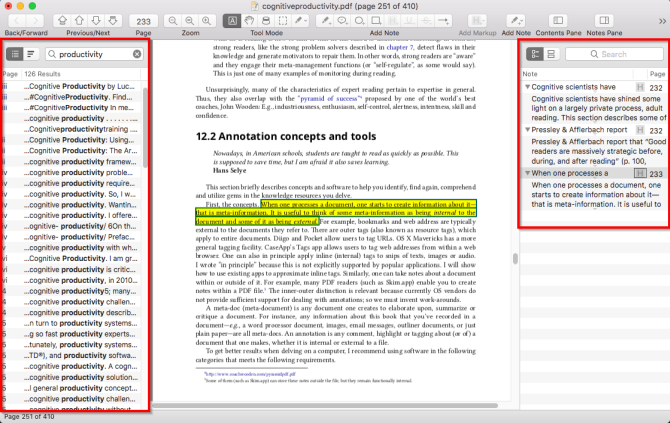
The built-in Preview app has exceptional support of PDFs and images, but alternative PDF reader Skim goes one step ahead. It has built-in support for AppleScript, LaTeX, BibDesk, and more. The left side of the main window lets you view page thumbnails or the table of contents. Meanwhile, the right side has a note panel that allows you to see all the annotations and notes you created.
Skim includes a feature called the reading bar to help you concentrate. And the content pane has a powerful built-in search feature: it highlights the search term on relevant pages and groups them by density and sheet.
If the book has thousands of pages, you can take a snapshot for reference or split the PDF into two halves. In combination with thumbnails/table of contents, you can skim the book faster. And finally, you can export all notes and annotations as a text file.
Download: Skim PDF Reader
5. BibDesk
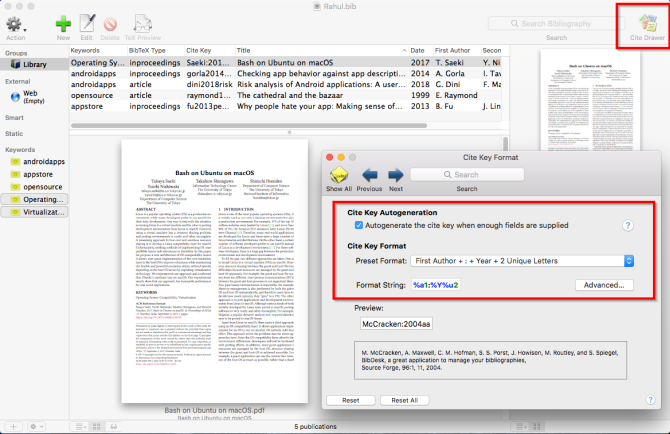
Creating a bibliography is a tough job; it’s easy to make formatting errors. That’s where the BibDesk app can help. Just get the BibTeX citation of a source and put it in the app to create a well-organized library. If you work in different LaTeX editors, then you can write and cite with BibDesk effortlessly.
Using the app is easy. Create a library and search for papers on Google Scholar, ACM, arXiv, JSTOR, Springer Link, and more. Every publication offers a cite key with details like the article type, author, year, and more. Copy the cite key, and BibDesk will automatically retrieve all the details.
You can also drag and drop the PDF and fill in the details. The app supports exporting the bibliographic information to various formats, such as BibTeX, XML, HTML, and more. Or if you prefer, simply copy the details and paste them into your documents instead.
Download: BibDesk
6. SelfControl
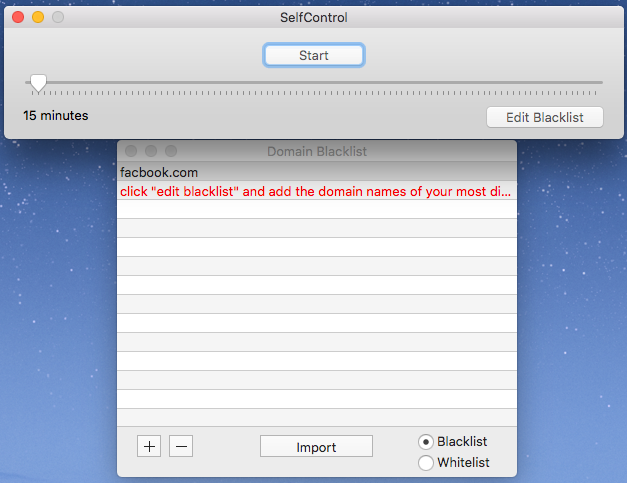
If you find yourself slipping into procrastination and wasting time on distracting sites, then this app will prove useful. Add the website you want to block in the blacklist window. Move the slider to decide the duration of the block (the minimum is 15 minutes). Click Start, then type your password to start the block.
Download: SelfControl
7. Katana
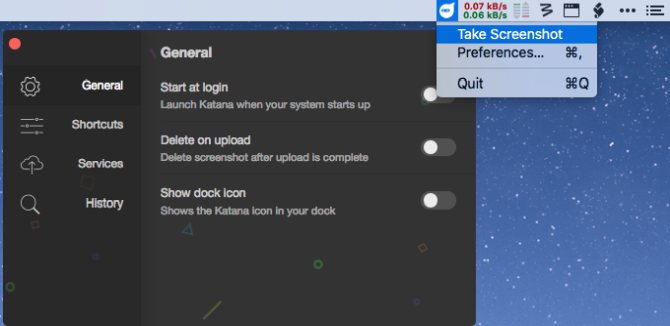
Katana is a simple screenshot utility that lives in your menu bar. Take a screenshot with a hotkey, and the app will then upload the file to several image hosts, including Imgur and Pomf. If you wish to shorten the link, copy the URL and press another of the app’s hotkeys.
Download: Katana
8. Kap
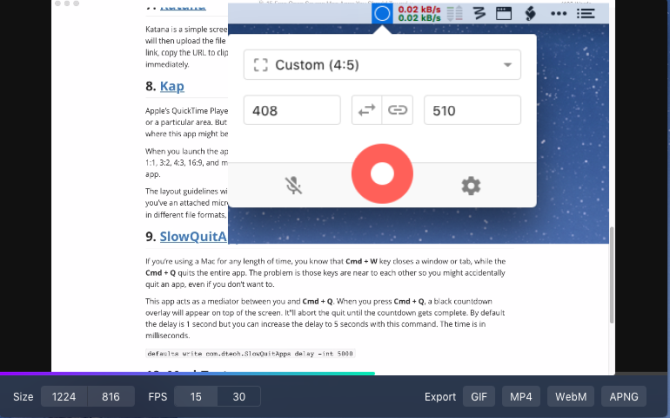
QuickTime Player comes with screen recording capabilities, but they’re pretty limited. Kap is a great alternative that sits in your menu bar for easy access.
The crop tool menu has six preset layouts, including 1:1, 4:3, 16:9, and more. You can also manually insert custom values or capture the entire window of an app—the layout guidelines will always remain visible. Kap even lets you record mouse movements.
If you have an attached microphone, you can add your voice to the recording. Finally, you can export your screeencast in different file formats, such as GIF, MP4, WebM, and APNG.
Download: Kap
9. SlowQuitApps

Most Mac users know that Cmd + W key closes a window or tab, while the Cmd + Q quits the entire app. The problem is that since those keys are near each other, it’s easy to quit an app by mistake.
This app adds a delay to Cmd + Q to prevent accidental closures. When you press Cmd + Q, a countdown overlay will appear above the current window. This puts the quit action on hold until the countdown completes. You can increase the delay from one second to, say, five seconds with this Terminal command (the time is in milliseconds):
defaults write com.dteoh.SlowQuitApps delay -int 5000
Download: SlowQuitApps
10. MarkText
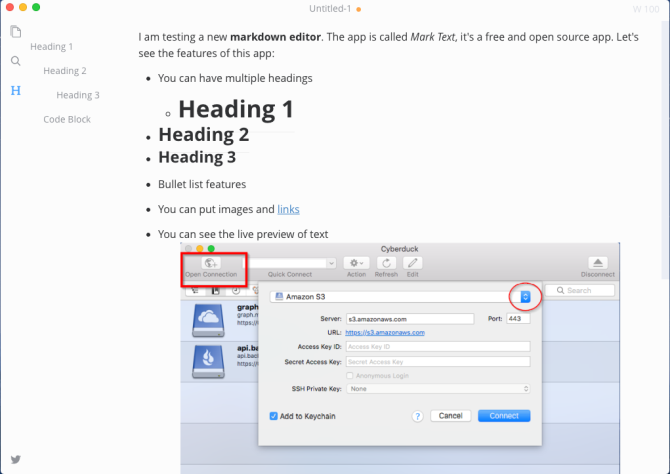
MarkText is a cross-platform Markdown app (what’s Markdown?) designed with simplicity. It supports both CommonMark Spec and the GitHub Flavored Markdown Spec. The app has all the features of a typical Markdown app, including support for both light and dark themes. The standard preview window that replaces markdown syntax symbols with their proper formatting is here too.
It includes different modes to help you focus on writing, whether it’s an article or code. MarkText also has an autocomplete feature to pair brackets, supports emojis, and has built-in support of MathJax. You can export your draft as HTML or PDF if you like.
Download: MarkText
11. CotEditor
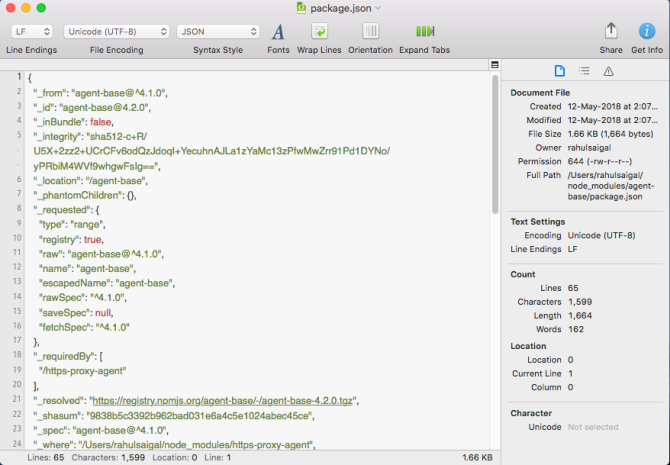
CotEditor is a lightweight text and code editor. It features a clean and straightforward interface that lets you quickly change line endings, file encoding, and syntax coloring. It supports nearly 60 programming languages, so you can choose the syntax coloring as needed.
The built-in Info side panel lets you view detailed information about the file, including text encoding, character count, and more. It has excellent support of regular expressions, a powerful feature for finding and replacing text usually found only in paid editors.
It also lets you split the window into two halves, so you can keep one window for reference while you work in another. If you work with a lot of text, this is a handy app to have.
Download: CotEditor
12. KeePassXC
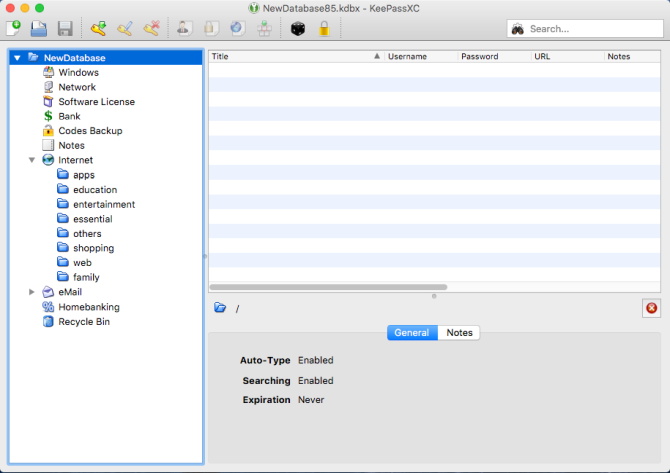
KeePass is a popular password manager for Windows. Unfortunately, it’s not available for macOS. One Mac alternative is KeePassX, but it rarely gets updated. KeePassXC is a community fork of KeePassX and the best way to use this tool on your Mac.
KeePassXC uses the KDBX password database format. That means you can share your database with KeePass without worrying about compatibility issues. It also natively integrates with any browser. Just press a hotkey to autofill username and password fields.
You can organize passwords into different groups, plus it has a password generator that allows you to generate long and secure passwords. By default, the app will lock after 30 seconds, but you can increase that duration. When you copy a password, the clipboard will clear itself after 10 seconds for security.
Download: KeePassXC
13. Sloth
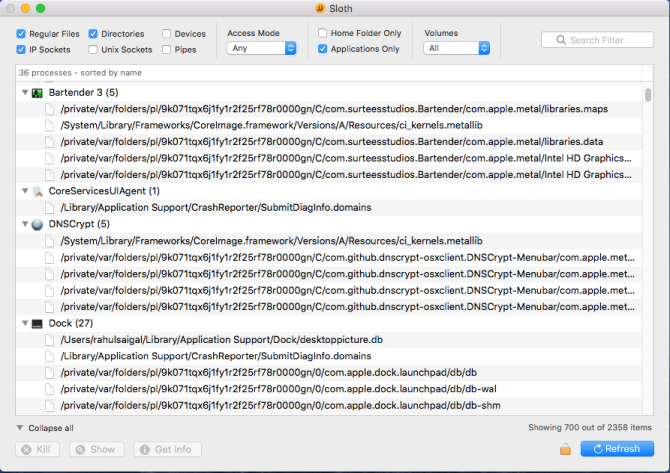
Longtime Mac users have likely seen an annoying error message that a particular file, process, or port is in use. For example, you can’t unmount a disk because some unspecified files are in use. This type of error is difficult to troubleshoot.
The lsof Terminal command lists all open files, processes, directories, devices, and more on your device. But using this command is tough. That’s where this app can pitch in.
Sloth offers a GUI built on top of lsof with additional useful features. You can filter the output, kill a file’s owner process, display file info, and more. This makes it easier to inspect what apps are using which files and sockets.
Download: Sloth
14. Fluor
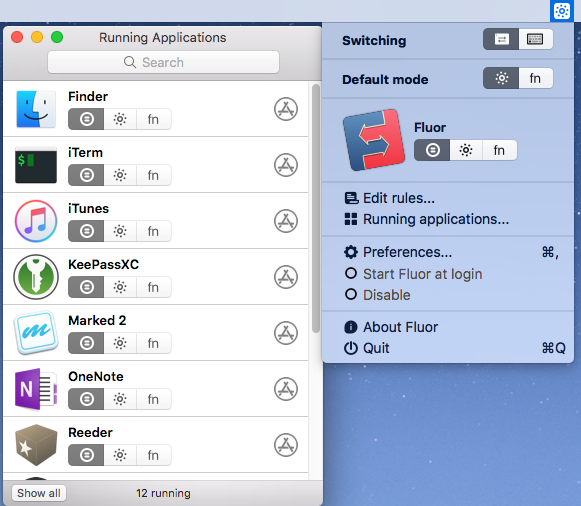
Apple’s keyboard (aside from MacBook Pro models with the Touch Bar) has a row of function keys at the top. These keys perform dual functions; as well as shortcuts like changing your screen brightness and volume, they can also act as standard function keys. The Fn modifier key adjusts this behavior.
Fluor lets you change the behavior of the function keys on a per-app basis. It detects the active app and changes the behavior of the keys in the background. In the app, the circle icon represents the default option. The sun icon is for the key’s shortcut, whereas the Fn button acts as standard function keys (F1, F2, etc.).
Download: Fluor
15. Karabiner-Elements
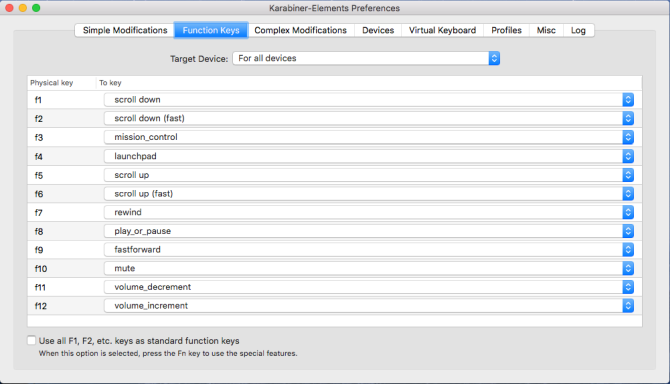
Karabiner-Elements lets you remap the entire keyboard. You can remap a single function key or make complex modifications. If you switch between Windows and macOS often, this app will help you create a consistent experience.
Some rules are available for download, so you get a feel for the capabilities of this app. I use it to assign complex modifier keys to a single function key and media keys to different functions. The app also lets you set up profiles or create rules for input devices.
Download: Karabiner-Elements
Open-Source Mac Apps Are Awesome
These open-source apps for Mac showcase some of the best options available, and they’re all free to boot. Chances are you can find an app that does just what you need and doesn’t cost anything.
If this list has intrigued you, check out our guide to living an open-source life.
Read the full article: 15 Free Open-Source Mac Apps You Must Install
Read Full Article
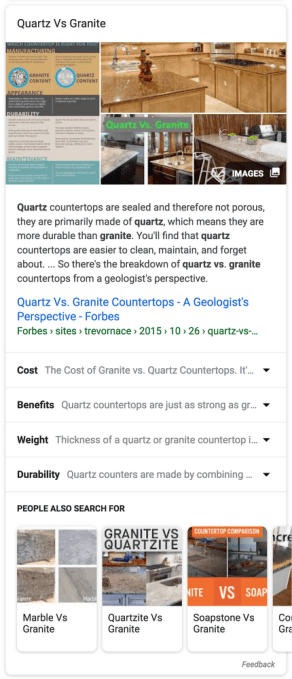 Google’s canonical example for a query to trigger this new panel is ‘quartz vs. granite.’ This query brings up the usual snippet, plus subtopics like cost, benefits, weight and durability. Those topics are automatically chosen based on what Google’s algorithms understand about this topic.