14 May 2019

Apple, Google and Microsoft release patches for ZombieLoad chip flaws


Big tech is stepping in to patch newly disclosed security flaws affecting almost every Intel chip since 2011.

Researchers on Tuesday released details of the vulnerability, known as ZombieLoad — or microarchitectural data sampling as its technical name — which can leaked sensitive data stored in the processor, such as passwords, secret keys and account tokens and private messages.

You can read our coverage here. In short, don’t panic — but you should patch your systems. Here’s how.

Apple released macOS fixes

Apple has fixes out for every Mac and MacBook released during and after 2011.

The tech giant said in an advisory that any system running macOS Mojave 10.14.5, released Monday, is patched. This will prevent an attack from being run through Safari and other apps. Most users won’t experience any decline in performance. But some Macs could face up to a 40 percent performance hit for those who opt-in to the full set of mitigations.

The security update will also be pushed to Sierra and High Sierra versions. iPhones, iPads and Apple Watch devices aren’t affected by the bugs.

Google patches Android, will update Chrome

The search and browser maker also confirmed it has released patches to mitigate against ZombieLoad.

Google said the “vast majority” of Android devices aren’t affected but Intel-only devices will need to be patched once device makers make updates available

Chrome OS devices, such as Chromebooks, are already protected in the latest version and permanent mitigations will be pushed to devices in the next version.

And, the company’s Chrome team has a technical advisory out but said users should rely on patches for their computer. “Operating system vendors may release updates to improve isolation, so users should ensure they install any updates and follow any additional guidance from their operating system vendor,” said Google. In other words, make sure your Windows PC or your Mac is patched.

Google also rolled out patches to its datacenters, so cloud customers are already patched but should be aware of the company’s guidance.

Microsoft rolls out Windows updates

Microsoft has released patches for its operating system and cloud.

Jeff Jones, a senior director at Microsoft, said the software and cloud giant has been “working closely with affected chip manufacturers to develop and test mitigations” for its customers. “We are working to deploy mitigations to cloud services and release security updates to protect Windows customers against vulnerabilities affecting supported hardware chips,” he said.

In a TechNet article, the company said customers may need to obtain microcode updates for their processor directly from their device maker. Microsoft is pushing many of the microcode updates itself through Windows Update, but are also available from its website.

Software updates will be released Tuesday also through Windows Update. Microsoft also has a page with guidance for how to protect against the new attacks.

Microsoft Azure customers are already protected, the company said.

Amazon and Mozilla did not return a request for comment. We’ll update if we hear back.

Read more:


Read Full Article

Adobe ties up with Amazon to build D2C stores powered by Amazon’s commerce and fulfillment tools


E-commerce giant Amazon was built on the concept of a large marketplace that could be the home for all online shopping, whether it was for items and services it was selling itself or those sold by third parties. Now — capitalising on the new trend for direct-to-consumer (D2C) selling, it is partnering with Adobe to step up its efforts to play a role in even transactions beyond the Amazon.com web.

Today, Adobe announced that it is working with Amazon on a new program called Branded Stores for Amazon Sellers, to create what they are describing as “branded storefronts” (not described specifically as websites) aimed at smaller merchants that have already been selling through Amazon (and possibly other marketplace platforms) to build their own first-party commerce experiences — while still using some of the transaction and fulfillment tools of the Amazon ecosystem. For now, those tools don’t appear to include Prime, although from what I understand expanding Prime beyond the Amazon.com ecosystem is on the roadmap. Instead, it covers Amazon Pay, fulfillment and hosting on AWS.

This is not an exclusive deal, but Adobe says Amazon is calling it the preferred partner. The Branded Stores offering is rolling out first in North America, with plans to expand to Europe in the coming months. Pricing has yet to be announced.

The timing of the news is interesting on two fronts. On Adobe’s end, it follows on from an announcement made yesterday, where Adobe (which is holding its Imagine event this week in Vegas) noted that Magento was getting integrations with Amazon and Google. Merchants now can use the Magento platform to manage inventory, pricing and other details on Amazon listings. Today’s news is another sign of how Adobe may indeed have a lot of tools for merchants to fuel its new Commerce Cloud effort (launched in March), but it lacks the scale of transactions and merchant customers that Amazon has.

“Small and mid-market businesses are taking direct ownership over how they manage customer experiences to differentiate, grow, and build loyalty,” said Jason Woosley, vice president of Commerce Product and Platform, Adobe, in a statement. “Our work with Amazon empowers this large community of sellers to get closer to their customers while saving them time and money on development.”

On the part of Amazon, the collaboration with Adobe is a sign of how the company is trying to change with the times, and specifically to respond better to the rise of D2C in the world of e-commerce. In D2C — which has been strong in the fashion world but also appears increasingly in other categories too — brands develop direct relationships with their customers (not via Amazon.com listings) that can span not just websites, but big social media presences on Instagram, Snapchat, Facebook, Twitter and so on. In fact, in some cases even websites are being thrown out the window, in aid of reaching customers wherever they happen to be.

“We are excited to support the Branded Stores for Amazon Sellers offering from Magento, which builds on our long-running collaboration with Adobe,” said Terry Wise, VP, Channels and Alliances, Amazon Web Services, Inc. “Powered by AWS, this launch will provide sellers a seamless way to grow their business and scale for peak shopping periods.”

To be clear, Amazon has been offering the option to create brand stores on Amazon.com since 2017. The downside of these is that they are limited in their interfaces and do not give a lot of control to the sellers in terms of functionality. Navigate beyond the first page, and you are likely to find yourself again in the basic Amazon experience: great for Amazon, and I suppose somewhat helpful in its predictability, but not what every brand wants or needs today.

To continue growing, Amazon has been making gradual steps to expand how the commerce tools that it has built for its own platform can be applied elsewhere. In March, the company announced a partnership with Worldpay to build Amazon Pay into its payment experience: this means that any online merchant using Worldpay to take card and other online payments can now offer Amazon Pay as a payment option.

At the time, Patrick Gauthier, VP of Amazon Pay, hinted to us that while Prime was not part of the proposition then, the company was already quietly making a few third-party websites and brands Prime-eligible, meaning that if you were a Prime member, there would be certain items for sale on participating sites that would qualify for free, often next-day or same-day, shipping.

Coupled with today’s development, you can see a gradual picture building up for how Amazon hopes it can continue to remain relevant in the next phase of online omnicommerce, wherever it happens to be.


Read Full Article

Twitter’s new Developer Labs offers beta access to rebuilt APIs


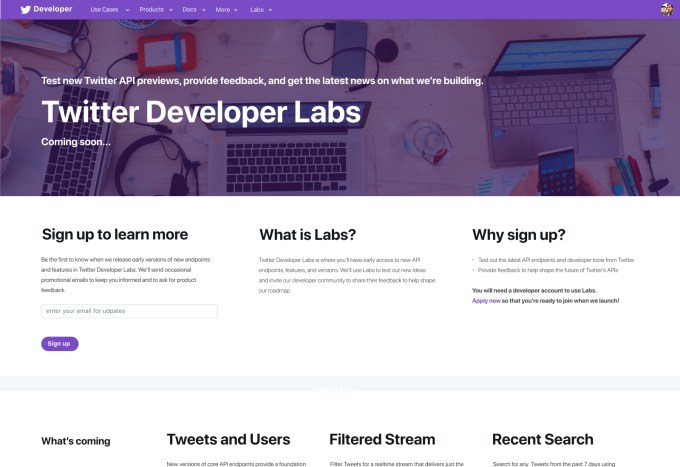
Twitter is finally modernizing its core APIs after seven years of stagnation, and it wants early feedback from developers. That’s why today it’s launching Twitter Developer Labs, which app makers can sign up for to experiment with pre-release beta APIs. First up will be real-time streaming access to the Twitter firehose with the expansion of tweet filtering plus impressions and engagement metrics that were only previously only available in its expensive enterprise API tiers. Twitter will also be adding newer features Polls to the API.

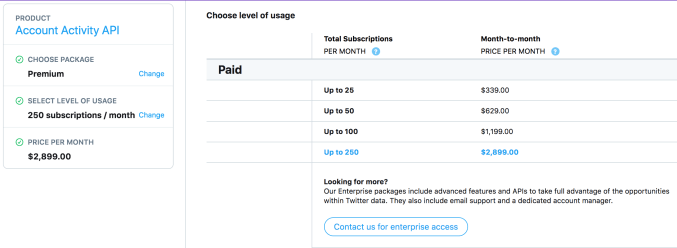
Giving developers longer lead-times and more of a voice when it comes to rebuilding its APIs could help Twitter get more app makers paying for its premium API ($339 to $2.899 per month) and enterprise API tiers (even more expensive). It might also stimulate the creation of dev-made analytics, measurement, and ads businesses that convince brands to spend more money on Twitter marketing. The Labs program and the first API endpoint changes will roll out in the coming weeks. To join, people can sign up for developer accounts, join an email list for updates on the Labs site, follow the TwitterDev account, and start providing feedback.

Twitter’s data and enterprise solutions product manager Ian Cairns acknowledged some of the whiplash Twitter has put developers through in the past, rapidly changing strategies and restricting rate limits in ways that made developers’ businesses unsustainable. For example, last year a change broke many third-party Twitter reading clients. “There are certainly times over the years when the ways in which we’ve managed our APIS . . . have changed and we know some of those have changed in ways that have been disruptive to developers. What we’re doing with the Twitter Developer Labs program is focusing on trying to use that as a vehicle to build trust and make sure we’re having a two-way conversation and that the voice of the people who use our platform the most are driving the future.”

Twitter’s main API hasn’t been overhauled since its release in August 2012, despite a bunch of progress on enterprise and ads APIs in the meantime. The advantage of that is that the old API was optimized for backwards compatibility so developers didn’t have to constantly update their apps, allowing old utilities to survive. But that also prohibited integrating some newer features like Polls. Twitter plans to move to a more regular versioning system where breaking changes are communicated far enough in advance for developers to adapt.

More recently, Twitter announced a streamlining of its APIs that also instituted the paid tiers in 2017. But last year it broke Twitter clients and sold its Fabric developer toolset to Google as part of cost-cutting measures that previously spelled the demise of Vine.  And this year, Twitter has made moves to crack down on API abuse for spamming and services for buying followers. That comes after the Cambridge Analytica scandal rocked confidence in developer platforms and forced their owners to limit functionality in order to preserve safety and privacy.

Developer Labs will act serve as the nerdy brother of the new “twttr” beta consumer app that launched in March to let people try out potential changes to how replies and the feed work. Twitter writes that “Our initial focus in Labs will be on developers who work with conversational data, including academics and researchers who study and explore what’s happening on Twitter, and social listening and analytics companies that build products for other businesses.”

Twitter’s relationship with developers has always been rocky, in large part due to lack of communication. If a developer builds something, and then Twitter either messes it up with API changes or builds a similar feature itself, it can cost a ton in wasted engineering effort. If Labs opens a clearer dialogue with developers, Twitter could count them as allies instead of PR liabilities.


Read Full Article

How to Change Country/Region in Google Play Store

The 11 Best Tools for Ripping DVDs and Blu-rays to Your Computer


rip-dvds

Despite the prevalence of free and paid streaming services, DVDs and Blu-rays persist. So, if you’ve got shelves full of DVDs and Blu-rays waiting to be ripped, we’ve got the tools you need to digitize your collection.

There are many reasons to use a DVD ripper or Blu-ray ripper to pull physical media onto your hard drive. Here are the best tools for ripping DVDs and Blu-rays to your computer.

1. MakeMKV

MakeMKV

Available on: Windows, Mac, Linux

In MakeMKV, you’ll find a superb cross-platform Blu-ray and DVD backup utility. It boasts DVD and Blu-ray decrypter functionality. To rip a DVD or Blu-ray to your computer, pop in a disc, select the media in MakeMKV. Upon doing so, MakeMKV runs through some initial work loading information. You’ll see the various titles and can expand the sections to view subtitle and audio track information.

From here, select the subtitle and audio tracks you’d like to rip, along with the titles you want to transfer. Generally, the title with the most tracks will be the feature, while smaller titles are bonus features, deleted scenes, or whatever else is on the disc. However, this varies by disc. Deselect everything you don’t need, then click the MakeMKV button.

Now, let MakeMKV get to work. DVDs typically rip in under 20 minutes. However Blu-rays can range from 30 minutes to a couple of hours depending on the length of the movie and the extras you want.

MKV files are slightly smaller than original disc images. DVD backups are about 10 percent smaller, with Blu-ray rips roughly 40 percent smaller than their disc counterparts. Ripping a Blu-ray disc provides a much larger file than a DVD, well over 4GB. While a Blu-ray MKV rip provides maximum quality, it takes up more space. Converting your MKV to another format such as an MP4 might produce a smaller file, albeit at the cost of audio and video quality.

2. Handbrake

handbrake

Available on: Windows, Mac, Linux

Handbrake is a fantastic open-source DVD ripper. It’s a completely free Blu-ray ripper. Aside from ripping DVDs and Blu-rays, Handbrake can do lots of clever things, including converting videos, adding subtitles to films, and more. Simply select a profile depending on the target device or quality, decide if you want to use Handbrake to attach subtitles to a movie file, then hit Start Encode.

Presets range from device options including iPad and iPod to high quality 1080p options, and more. Plus, you can pick different formats such as MP4, H.265, and H.264. With Handbrake, you can easily rip a DVD to MP4 and MKV files. Since you can tweak tons of settings or merely choose a preset and start encoding, Handbrake is as intuitive or complicated as you make it. Overall, it’s one of the best free DVD rippers you can download.

This Blu-Ray and DVD decrypter is cross-platform, free, and open-source. Moreover, frequent updates ensure that Handbrake offers a cutting edge feature set.

3. Freemake Video Converter

Available on: Windows

Freemake remains a top choice for DVD ripping software. What’s neat is Freemake’s arsenal of video editing options. Not only is Freemake one of the top free DVD ripping software options available, it’s packed with editing capabilities.

Using Freemake, you can join files together. You can even join up files to have one big merged file. Videos can also be converted to Flash or HTML5, as well as MP3. Among its many output file formats, you can rip DVDs to MP4, AVI, MKV, 3GP, and more.

One great feature is when you rip it to become a DVD, you can also add a menu with clickable chapter titles. With its ability to rip videos to a variety of formats as well as video modification, Freemake is an excellent free DVD ripper.

4. WinX DVD Ripper

WinX

Available on: Windows, Mac

WinX is another one of the best DVD rippers. It comes in two flavors: there’s a free DVD ripper as well as WinX DVD Ripper Platinum Edition. While WinX’s def ripping software is free, it’s basically a trial version of the Platinum edition. However, once the trial expires, it’s totally usable and merely drops a few premium features.

The free iteration will rip a DVD to MP4, WMV, AVI, FLV, MOV, MPEG, H.264, iPhone, iPod, Apple TV, Android, Samsung, HTC, and PSP. With it, you create an exact 1:1 clone with no quality loss. WinX DVD Ripper boasts a fast backup speed, with taking roughly five minutes to create an MPEG2 copy of a DVD.

The Platinum version adds additional output formats, such as creating ISO files. You’ll see faster ripping speeds as well as video editing features. WinX DVD Ripper is a superb alternative to Handbrake and Freemake.

5. WonderFox DVD Ripper Pro

WonderFox-Video-Formats

Available on: Windows

In addition to WinX, we really enjoyed WonderFox DVD Ripper Pro. It’s simple to use, making DVD ripping easy. Just pop in a DVD, select your preferred output format, and start digitizing your DVDs.

WonderFox DVD Ripper Pro lets you quickly backup DVDs in as little as five minutes, and can create 1:1 copies for top-notch quality.

The app costs $30.

6. Aurora

aurora media player

Available on: Windows, Mac

Aurora is a free Blu-ray ripper that sports cross-platform compatibility. It will burn the Blu-ray disc into an ISO file, and then burn the ISO file onto a blank disc. Alternatively, simply use media server software such as Plex to play your ISO files. This is a powerful Blu-ray decrypter that’s fast and free.

While Aurora includes a robust feature set, it’s limited as Blu-ray ripping software. You may copy a Blu-ray to an ISO file. Unlike options such as Handbrake, WinX DVD Ripper, or MakeMKV, you won’t find additional video file output formats or compression tools.

Still, Blu-ray ripping is indeed speedy, and it’s a robust Blu-ray ripper with Mac and Windows installers.

7. CloneDVD and CloneBD

 CloneDVD

Aptly named, CloneDVD clones your DVDs. Simply insert your disc, select which chapters you want copied, choose your language, whether you want subtitles, then rip your DVD.

Once the file, in DVD format, has been copied to your computer, you can burn the ISO to a blank DVD disc, use software like Handbrake to convert your DVD file to an MP4, or mount the ISO file on your computer using a virtual drive.

Aside from its DVD backup utility, there’s Blu-ray ripping software as well. CloneBD can backup entire Blu-ray discs as ISO files, or output to the likes of MKV, AVI, and MP4.

CloneDVD costs $36; CloneBD will set you back $92.

8. DVD Shrink

 DVDShrink

Available on: Windows

DVD Shrink is unique in its ability to back up an entire movie and compress it for burning to a blank DVD. A standard DV-R/RW disc is 4.7GB whereas most common films exceed that size. Therefore, DVD Shrink compresses the data from the original disc, making the file as small as possible.

You can create a compilation from one or more source discs, as well as discard any parts you don’t need. This software provides a solution to rip an entire DVD to your computer or reauthor the video to abandon chunks you don’t need.

9. VLC Player

vlc

Available on: Windows, Mac, Linux

While there are loads of video playback apps, VLC remains one of the most popular and feature-rich media players.

VLC Player rightfully earned its reputation for being able to play virtually any video format you want to watch. Although it’s commonly considered the go-to for media playback, you can also use VLC to rip a DVD or Blu-ray.

Choose what you want to be converted, select No disc menus if you don’t want menus, point VLC to the disc drive on your computer, then click Convert/Save. Ripping can take quite some time, though. Some users have reported it taking up to two hours. Options like MakeMKV or Freemake can do it in 15-20 minutes.

10. DVDFab

DVDFab

DVDFab is DVD ripping software which has received a lot of positive praise. As well as being able to rip a DVD to your computer in standard formats, it can also rip only the audio. So if you’d like music from a film or show, then DVDFab can grab it for you.

Batch conversion allows you to rip more than one title at a time. Specify the start point and end point that you want to be converted in a disc, and you can also automatically crop the screen to show what you want. For a nifty Blu-ray decrypter, check out DVDFab’s Blu-ray ripper.

The DVD version is $55; the Blu-ray version is $65.

11. DVD Decrypter

The 11 Best Tools for Ripping DVDs and Blu-rays to Your Computer - DVD Decrypter

Available on: Windows

DVD Decrypter is an awesome free DVD ripper. While its official site shut down in 2005, it’s still available via an unofficial mirror. Ridiculously easy to use, DVD Decrypter loads title information making it easy to back up an entire or partial disc. Overall, it’s an excellent DVD ripping software option that’s totally free to use.

The Best Tools for Ripping DVDs and Blu-rays

While these are the best DVD rippers and Blu-ray rippers available, there are plenty of options to rip a DVD or Blu-ray to your computer. Which option you choose depends on whether you’re ripping Blu-rays or DVDs, what file formats you prefer, your ideal quality, and more.

If you’d rather carry on using a DVD or Blu-ray player, you might want to choose one of the best region-free DVD and Blu-ray players. And in case you need to go really old-school, make sure you check out how to convert VHS tapes to DVD.

Read the full article: The 11 Best Tools for Ripping DVDs and Blu-rays to Your Computer


Read Full Article
How to Use a VPN for Online Identity Protection


vpn-online-identity

At first glance, VPNs can seem daunting. While the technology behind them is complicated, using a VPN is relatively simple. But why might you want to protect your identity online? Well, there’s the risk of cybercrime, not to mention state surveillance, and region blocking by video streaming platforms. To avoid these things, you are going to need to use a Virtual Private Network (VPN).

Don’t know where to start? It’s time to learn what a VPN is and how to set up Private Internet Access, a well known paid VPN service.

What Is a VPN?

A VPN is a piece of software which encrypts the data from your computer to prevent it from being intercepted online. They also mask your IP address, making it impossible to determine your location.

There are several different VPN protocols which determine exactly how this process works, but for the most part, you won’t need to know about them. Your VPN software will configure what kind of protection you need, and protect you accordingly.

Why Use a VPN?

Stay safe on public Wi-Fi with a VPN

Encrypting and re-routing your internet connection seems like a lot of work. You don’t need to bother unless you have something to hide right?

Actually, you’d be surprised.

You’ll find people have many legitimate reasons for VPN use, and something as simple as logging onto public Wi-Fi could be dangerous. Everyone can benefit from the protection a VPN gives.

Do VPNs Provide Identity Protection?

Yes! A good VPN will encrypt your data and your location. Remaining anonymous online is a choice for some and a necessity for others.

A common criticism of anonymity online is the potential for abuse. However, the act of wishing to remain anonymous online is not inherently morally wrong. VPN services provide anonymity to anyone, regardless of location or government control.

Should I Use a Free or Paid VPN?

Digital Encryption Locks

While there are free VPN services that many people use without problems, using them is unwise. Paid VPNs make money from their users, and therefore have an interest in keeping them safe.

Even well-intentioned free VPNs need to make money, and in an age where user data is so valuable, it may not be smart to trust a free service with your privacy.

Are VPNs Safe?

Even though you are anonymous while using a VPN, concerns persist as to their safety. In truth, paid VPNs are secure in almost every circumstance. The only point of weakness is any logs the companies keep, and many claim to keep none at all.

As above, trusting a free VPN may not be a great idea in this regard. In any case, if you are using a VPN to do something illegal, you stand a chance of getting caught. Simple answer? Don’t break the law in the first place!

How to Use a VPN

PIA has several price plans

There are many good choices for a VPN out there. In this example, we are going to use Private Internet Access (PIA). The PIA service is well trusted, and the software is available for Windows, macOS, Linux, iOS and Android, along with browser extensions for Firefox and Chrome. It’s the best identity protection you are going to find in 2019.

To begin, head to the PIA website and buy a plan. If you are concerned about anonymity, you can pay for PIA with cryptocurrency or even gift cards! Traditional payment methods like PayPal and credit/debit cards are also available.

You’ll receive two separate emails, one confirming your purchase, and one with links to the PIA software for various platforms.

Buy: Private Internet Access

How To Install and Use Private Internet Access VPN

PIA has an automatic installer
Open the second email labeled Private Internet Access Installer Links and get the installer for your platform. This tutorial uses Windows, but the process is the same for macOS and Linux.

Open the installer, and click Yes when prompted by the Windows User Account Control dialog box. The installer will open and automatically install PIA. If you are prompted to install the virtual network driver for PIA, allow it to install.

When the installer finishes, PIA will start in your system tray, located in the bottom right of your screen. For the first 48 hours after purchase, PIA’s custom installer will enter your user details in for you, so you don’t have to log in.

PIA login and normal service window

If you are installing it sometime later as in the left of this image, enter your username and password to log in.

PIA had gateways all over the globe
Using PIA is pretty simple. You can set it up to automatically use the best performing server for your region, or select from servers all over the world. To choose, click VPN Server and select from the list.

Clicking on the three dots in the top right of the PIA interface will bring up the settings panel. Here you can set PIA to start when you turn your computer on and configure network and connection preferences. Most users will not need to change anything here.

PIA kill-switch for extra protection

One thing you may wish to enable is the VPN Killswitch. This stops any traffic from traveling to and from your computer without the VPN being on. PIA does this automatically by default, but setting it to Always will block your connection whenever the VPN isn’t running, protecting you further.

You can also activate PIA MACE here to block ads, trackers, and malware before they reach your computer.

Test It Out!

IPleak helps test your VPN's security

To test out your VPN, head to IPLeak. Make sure you have your VPN activated and refresh the page. You should see IP details for the location of the PIA server rather than your own location.

You’ll find various settings on this page for testing out your anonymity, including tests for Geolocation and Torrent Address Detection. As you can see from the above image, it’s working. That is unless they’ve moved Berlin to Texas during the night.

Safe Surfing

Now that you have your VPN set up, it’s time to use it. A paid VPN is perfect for Kodi and much safer than other free options.

If you are still on the fence about whether you need to bother encrypting your data, our VPN Checklist should help you make up your mind.

Read the full article: How to Use a VPN for Online Identity Protection


Read Full Article

Most Powerful Robot Vacuum Yet, But Is It Good Enough? Roborock E35 Review

How to Share Your Nintendo Switch Gameplay Online


share-switch-online

Sharing your gameplay with friends is always fun, but sharing your Nintendo Switch gameplay can be tricky. Thankfully, with a little ingenuity, you can freely share your Switch media online.

In this article, we explain how to share your Nintendo Switch gameplay online, in the form of screenshots and videos.

What You Need to Share Nintendo Switch Gameplay Online

You may have already noticed that the Nintendo Switch’s Album software allows you to share photos on Facebook or Twitter. While this can be useful, setting up an account on the Nintendo Switch can be fiddly, and it doesn’t allow you to share the image elsewhere online. It also uploads the pictures in poor quality, which is annoying for people who want crisp photos.

If you want to share media without using the Album app, you’ll need a Micro SD card and a device that can read them. Micro SD cards usually come with SD “docks” that fit SD card-sized ports, so if you own a PC or laptop with a regular SD card slot, you’re good to go. If you need to buy one, note these mistakes to avoid when buying a Micro SD card.

If you’re having trouble finding where the Micro SD card goes on the Nintendo Switch, lift the “leg” on the back of the console. You’ll find the Micro SD slot underneath.

How to Share Nintendo Switch Screenshots

A screenshot of Breath of the Wild on Switch

How to Take Screenshots on Your Nintendo Switch

Taking a screenshot on your Nintendo Switch is very easy. When something picture-worthy happens in-game, press the Capture button on your controller. If you’re using a Joy-Con, it’s the square button underneath the arrow buttons. If you’re using the Pro Controller, it’s the square button underneath the minus button.

You’ll hear a camera shutter, and the Nintendo Switch will take the screenshot. This will automatically save itself in the Album app, where you can share it on Facebook on Twitter. However, we’re going to perform some additional steps that allow us to share it wherever we like.

How to Retrieve Screenshots From Your Nintendo Switch

Once you’ve finished playing with your Nintendo Switch, turn the console off. Be careful, because turning it off is different from putting it in Sleep Mode. You’ll have to hold down the power button on the console, select Power Options, then Turn Off.

Once the Nintendo Switch has shut down, retrieve the Micro SD card from the console and plug it into your computer. Open it up in a file explorer, then go to Nintendo then Album. Then, click on the folder with today’s year, then the folder with today’s month, then the folder with today’s date. For example, if you take a screenshot on May 7, 2019, you’ll go to Album>2019>05>07.

If you’ve taken multiple screenshots today, you’ll find a few images in this folder. They all have automatically generated names, so you’ll have to manually check through them to find the one you want to upload. Once you find it, you can copy it straight onto your desktop.

How to Share the Chosen Image

Once you’ve found the image you want to share, you have a few options. If you want to share it on social media, the site usually has its own way of uploading pictures. Otherwise, you can upload it to Imgur or one of these Imgur alternatives we recommend, then share the link that way.

How to Share Nintendo Switch Videos

People watching a Mario Kart 8 video on Switch

Nintendo Switch ideos are a little tricker to share online than screenshots, but it’s still possible.

How to Record Videos on Your Nintendo Switch

At the time of writing, there are only four games that support recording videos: Breath of the Wild, Mario Kart 8 Deluxe, ARMS, and Splatoon 2. If you want to record video outside of these games (except Super Smash Bros. Ultimate, which we’ll discuss later), you’ll have to wait until Nintendo releases support for it.

To record a gameplay video for one of the above games, perform the same actions as taking a screenshot, but hold down the Capture button instead of just pressing it. The console will record the last 30 seconds of gameplay, so be quick on that shutter finger!

How to Edit Your Nintendo Switch Videos

If you want to share the entire 30-second clip, you can skip to the next section. If you’re going to trim it down to size first, go to the Album app, select the video you want to edit, select Editing and Posting, then Trim. You’ll arrive in an editor where you can tweak the video to your liking.

How to Retrieve Your Nintendo Switch Videos

Retrieving videos is identical to getting your screenshots: take out the SD card, plug it into your PC, open the Album folder, then follow the files in accordance to today’s date. You should find them in today’s folder as .MP4 files, which are a pretty good video format for sharing.

How to Share the Chosen Video

Sharing videos is a little trickier than screenshots. Generally, if you want to make a GIF of the gameplay, a service like Gfycat will serve you well. If you instead want to share a full video and keep the quality and sound, Streamable is an excellent tool for hosting gameplay videos.

How to Share Super Smash Bros. Ultimate Replays

We mentioned above that video recording only works with four games right now, but SSBU is an exception. That’s because there’s a workaround to share replays in Super Smash Bros. Ultimate.

How to Save a Super Smash Bros. Replay

To do this, you first need to save a replay. You can only do this at the very end of a match when the result cards appear for each player. Press A once to go to the stats page, then press Y. The game will ask you if you want to save a replay. Say Yes, and it’ll save a full replay of the game you’ve just played.

How to Convert Replays Into Videos

Unfortunately, you can’t share the replay as-is on social media. Smash replays are instructions for the game to recreate your match. You’ll need to convert it into a video to make it shareable.

To do this, go to the main menu of the game, then select Vault, then Replays, then Replay Data. Find the replay you want to share and select Convert to Video.

You’ll see the replay player appear. Press Plus on your controller to begin recording your video. Sit back and wait for the replay to play out. Once this finishes, you’ll have a video ready to share.

How to Edit SSBU Replay Videos

If you want to share the entire match, you’re now free to skip to the next section. However, Smash does have some helpful video editing tools if you want to share just a clip of the match. To do this, go to Vault, then Replays, then Edit Video.

How to Share SSBU Replay Videos

To share the replay video, perform the same initial steps as with sharing screenshots—turn off the console, take the Micro SD card out, and plug it into your PC.

However, when you go into the Album folder, go into Extra instead of the folder named after the current year. Then, access the folder with a long string of letters and numbers. You’ll then see a folder with the current year on it; at this point, the rest of the steps are identical to sharing screenshots and videos.

Getting the Most From Your Nintendo Switch

Sharing Nintendo Switch gameplay isn’t easy, but it is possible. As we have explained. With a little bit of extra work, you can give yourself the freedom to share screenshots and videos wherever you please.

Now that you know how to share Nintendo Switch gameplay you just need some more games to show off your skills. So take a look at the best Nintendo Switch games available right now.

Read the full article: How to Share Your Nintendo Switch Gameplay Online


Read Full Article

6 Ways to Make Your Instagram Stories More Engaging

How to Make a Flyer for Any Occasion Using Canva


create-flyer-canva

Canva is an amazing design website that helps you create everything from postcards to resumes using a collection of pre-made templates.

It’s perfect for people who are running short on time and need a quick design, or for people who don’t have design experience but still want to create something nice.

However, if you’re using Canva and you want to create a poster for an event, how do you go about it? Here’s how to make a flyer in Canva suitable for any occasion.

Step 1: Find the Right Template

How to Make a Flyer in Canva Find a Template

The first thing you want to do to make a flyer is log into Canva. Or, if you haven’t already signed up for an account, do that first and then log in.

After you’ve signed up and logged in, you’ll see a homepage that is very similar to the screenshot above. Under Create a design, you’ll see a list of templates that are the most commonly used.

You can also search for a template under What would you like to design?

Fortunately, Flyer is one of of the most popular designs on the website. All you have to do is click on its icon, seen here highlighted in red. No searching is necessary.

How to Make a Flyer in Canva Search Templates

Once you open the Flyer template, you’ll be taken to a blank page. Along the left side you’ll see templates divided by the purpose they’re best suited for.

We’ve talked about these categories before in our tutorial on how to find the perfect resume using Canva. If you want to learn more about this step, we recommend reading that article.

Step 2: What Is Your Event About?

How to Make a Flyer in Canva Choose Event Flyer

The type of event you’re holding will influence your design. It will also influence the Canva template that is best suited for it.

For this tutorial, let’s suppose we’re designing a flyer for an upcoming birthday party. The birthday recipient’s name is Bill, and the theme of Bill’s party is “bad movies”.

Because our event is film-related, I went to the Event Flyer section and found a template that looks like it has to do with movies. This particular template is a free design that I can modify, so let’s choose that.

Step 3: Change Your Flyer Text

How to Make a Flyer in Canva Change Text

The next thing you’ll want to do after you pick your template is input the information for your event. For posters I like to input the text first, because the information about my event will affect the rest of my design and how it’s laid out.

To change the text, simply click on each individual section so the text bounding box is highlighted. Erase the placeholder information and input your own.

You can change the style of font, color, size, and spacing by using the control panel in the top left-hand corner of your screen.

To learn more about this step, check out our tutorial on how to create a resume from scratch using Canva.

Step 4: Change the Color of Your Elements

How to Make a Flyer in Canva Element Color

Now that you’ve fixed your text, it’s time to adjust the visual elements on your page. It’s important to note that the steps we’ll be using here can be used on any sort of visual element in any of the other templates, regardless of the element’s shape.

To modify the elements, click on one. Its bounding box will pop up in faint gray lines, and you can see which one we’re referencing here by the additional red highlight around it.

In the top left-hand corner of your workspace, you’ll see a new set of tools—Color, Crop, and Flip.

Let’s change the color.

How to Make a Flyer in Canva Change the Color of Your Element

To change the color, click on one of the color boxes that corresponds with the color that you see in the element. In this case, I clicked on the medium blue.

When you click on the individual color swatch, your Color panel will show up. You can pick a default color from there.

Since this party is about bad movies and off-green colors can convey a feeling of “queasiness”, let’s go with a lime green shade to get across that effect.

How to Make a Flyer in Canva Color Picker

If you don’t like any of the default colors that are currently available, you can also pick a custom color.

To pick a custom color, click on the + button in your Color panel, highlighted here in red. It will bring up your color picker and you can add a custom color from there.

Repeat this step until all your elements have been adjusted to your preference.

Step 5: Text Color

How to Make a Flyer in Canva Text Color

Now that you’ve changed the color of the elements you might have a better idea about the overall mood or tone you’re going for in your flyer.

If you haven’t changed the color of your text yet, or if you don’t like the colors you picked before, you can simply click on each individual text box to fix it. Then click the Text color option seen here at the top of the screen.

There is no need to highlight the text to change its color, by the way. Just make sure you have the entire text box active—not the cursor to type new text. Canva will read the box as one unit and change all of the text accordingly.

Step 6: Move Your Elements

How to Make a Flyer in Canva Move Your Element

Lastly, you might decide that you don’t like your visual elements in their current position. Maybe it just looks too uniform, or there are too many pictures and you want to switch things up.

To move your elements, click on the element you want to adjust. Then click and drag it across the page to the position you want.

If you want to get rid of the element entirely, select it so that the bounding box appears. Then hit delete on your keyboard.

How to Make a Flyer in Canva Undo Button

If you accidentally delete an element, or decide that you don’t like the look of your poster once it’s gone, this is an easy fix.

Just go to the top left-hand corner of your workspace. Along your blue navigation bar you’ll see one (or two) curved arrows, depending on the steps you’ve taken so far in your document.

The left-facing arrow is the undo button. The right-facing arrow is the redo button.

Click on the undo button to get to a previous stage in your design.

Step 7: Export Your Design for Print

How to Make a Flyer in Canva Export Design for Print

Now that your flyer is complete, do one final check to make sure everything is spelled correctly and all the elements are where they should be.

After you’re done, click on the downwards-facing arrow in the top right-hand corner of your screen. When you do, Canva will show you a couple different options for downloadable file types, along with the ability to add crop marks and bleed.

You can also check out the option to order prints with Canva directly.

PDF Print is recommended for print files. Once PDF Print is selected, click on the blue Download button. It will prepare your template.

How to Make a Flyer in Canva Preparing Design

While the file is being prepared, a screen will pop up that says Preparing your design…

During this stage, you have the chance to cancel your download. If everything’s good, however, just let it run and it will prompt you to save the file to your device once it’s finished.

Et voila! You’re done.

You Can Do a Lot More With Canva

Creating a flyer takes a lot less work than a resume or cover letter. And if you’re planning a party with your friends, there’s also a chance to do something really fun with the design. By following the tutorial above you should now know how to make a flyer using Canva.

Are you looking for guidance on what else you can use Canva for? Here are some of the things you can create using Canva.

Read the full article: How to Make a Flyer for Any Occasion Using Canva


Read Full Article

Google makes travel planning easier


Google today announced a major revamp of its travel planning tools on the web. After launching a similar set of tools on mobile last year, the company today announced that google.com/travel on the web will now let you see information about all of your previously reserved trips and easily switch between flight, hotel and package searches.

In many ways, this finally brings all of Google’s travel services under one hood — a process that has taken far longer than I would’ve anticipated after Google bought ITA nine years ago.

Google Trips is essentially the landing page for the new site and brings together your existing bookings and information about your destination. The service will then feed your travel information back into Google Search and Maps. To do this, Google.com/travel (which I think we can safely call Google Travel, even if Google itself doesn’t do so), will use the confirmation emails and receipts from your Gmail inbox to build the timeline of your trip.

Since both the web and mobile versions are now on feature parity, this also makes it easier to pick up your trip planning on any device. Like always, though, you won’t be able to make any reservations through Google’s systems. Instead, Google will send you to an airline’s or hotel’s reservation system to complete a booking.

The actual flight and hotel search engines are still the same, though if Google previously offered the ability to buy flight and hotel packages, it did a good job of hiding that. Now, this option gets first billing, together with the hotel and flight searches.

“Our goal is to simplify trip planning by helping you quickly find the most useful information and pick up where you left off on any device. We’ll continue to make planning and taking trips easier with Google Maps, Google Search and google.com/travel—so you can get out and enjoy the world.”

Sadly, Google hasn’t ported Inbox’s useful Trip Bundles over to Gmail yet, though, despite promises to do so before shutting down Inbox. For the time being, though, the new Google Travel site is a pretty good alternative.


Read Full Article

Twitter’s new Developer Labs offers beta access to rebuilt APIs


Twitter is finally modernizing its core APIs after seven years of stagnation, and it wants early feedback from developers. That’s why today it’s launching Twitter Developer Labs, which app makers can sign up for to experiment with pre-release beta APIs. First up will be real-time streaming access to the Twitter firehose with the expansion of tweet filtering plus impressions and engagement metrics that were only previously only available in its expensive enterprise API tiers. Twitter will also be adding newer features Polls to the API.

Giving developers longer lead-times and more of a voice when it comes to rebuilding its APIs could help Twitter get more app makers paying for its premium API ($339 to $2.899 per month) and enterprise API tiers (even more expensive). It might also stimulate the creation of dev-made analytics, measurement, and ads businesses that convince brands to spend more money on Twitter marketing. The Labs program and the first API endpoint changes will roll out in the coming weeks. To join, people can sign up for developer accounts, join an email list for updates on the Labs site. follow the TwitterDev account, and start providing feedback.

Twitter’s data and enterprise solutions product manager Ian Cairns acknowledged some of the whiplash Twitter has put developers through in the past, rapidly changing strategies and restricting rate limits in ways that made developers’ businesses unsustainable. For example, last year a change broke many third-party Twitter reading clients. “There are certainly times over the years when the ways in which we’ve managed our APIS . . . have changed and we know some of those have changed in ways that have been disruptive to developers. What we’re doing with the Twitter Developer Labs program is focusing on trying to use that as a vehicle to build trust and make sure we’re having a two-way conversation and that the voice of the people who use our platform the most are driving the future.”

Twitter’s main API hasn’t been overhauled since its release in August 2012, despite a bunch of progress on enterprise and ads APIs in the meantime. The advantage of that is that the old API was optimized for backwards compatability so developers didn’t have to constantly update their apps, allowing old utilities to survive. But that also prohibited integrating some newer features like Polls. Twitter plans to move to a more regular versioning system where breaking changes are communicated far enough in advance for developers to adapt.

More recently, Twitter announced a streamlining of its APIs that also instituted the paid tiers in 2017. But last year it broke Twitter clients and sold its Fabric developer toolset to Google as part of cost-cutting measures that previously spelled the demise of Vine.  And this year, Twitter has made moves to crack down on API abuse for spamming and services for buying followers. That comes after the Cambridge Analytica scandal rocked confidence in developer platforms and forced their owners to limit functionality in order to preserve safety and privacy.

Developer Labs will act serve as the nerdy brother of the new “twttr” beta consumer app that launched in March to let people try out potential changes to how replies and the feed work. Twitter writes that “Our initial focus in Labs will be on developers who work with conversational data, including academics and researchers who study and explore what’s happening on Twitter, and social listening and analytics companies that build products for other businesses.”

Twitter’s relationship with developers has always been rocky, in large part due to lack of communication. If a developer builds something, and then Twitter either messes it up with API changes or builds a similar feature itself, it can cost a ton in wasted engineering effort. If Labs opens a clearer dialogue with developers, Twitter could count them as allies instead of PR liabilities.


Read Full Article

Google makes travel planning easier


Google today announced a major revamp of its travel planning tools on the web. After launching a similar set of tools on mobile last year, the company today announced that google.com/travel on the web will now let you see information about all of your previously reserved trips and easily switch between flight, hotel and package searches.

In many ways, this finally brings all of Google’s travel services under one hood — a process that has taken far longer than I would’ve anticipated after Google bought ITA nine years ago.

Google Trips is essentially the landing page for the new site and brings together your existing bookings and information about your destination. The service will then feed your travel information back into Google Search and Maps. To do this, Google.com/travel (which I think we can safely call Google Travel, even if Google itself doesn’t do so), will use the confirmation emails and receipts from your Gmail inbox to build the timeline of your trip.

Since both the web and mobile versions are now on feature parity, this also makes it easier to pick up your trip planning on any device. Like always, though, you won’t be able to make any reservations through Google’s systems. Instead, Google will send you to an airline’s or hotel’s reservation system to complete a booking.

The actual flight and hotel search engines are still the same, though if Google previously offered the ability to buy flight and hotel packages, it did a good job of hiding that. Now, this option gets first billing, together with the hotel and flight searches.

“Our goal is to simplify trip planning by helping you quickly find the most useful information and pick up where you left off on any device. We’ll continue to make planning and taking trips easier with Google Maps, Google Search and google.com/travel—so you can get out and enjoy the world.”

Sadly, Google hasn’t ported Inbox’s useful Trip Bundles over to Gmail yet, though, despite promises to do so before shutting down Inbox. For the time being, though, the new Google Travel site is a pretty good alternative.


Read Full Article

TC Sessions: Mobility announces its July 10 agenda


TechCrunch Sessions is heading to San Jose on July 10 and we’re thrilled to announce our jam-packed agenda, overflowing with some of the biggest names and most exciting startups in the transportation industry. With Early Bird ticket sales ending soon, you’ll want to be sure to grab your tickets after checking out this agenda.

Throughout the day, you can expect to hear from and partake in discussions about the future of transportation, the promise and problems of autonomous vehicles, the potential for bikes and scooters, investing in early-stage startups and more.

We’ll be joined by some of the most esteemed and prescient people in the space, including Dmitri Dolgov at Waymo, Argo AI Chief Safety Officer Summer Craze Fowler, Nuro co-founder Dave Ferguson, Karl Iagnemma of Aptiv, Seleta Reynolds of the Los Angeles Department of Transportation and Ford Motor CTO Ken Washington.

We’ll also spend time discussing how cities will adapt to meet the new demands of this technology, an entirely new way to keep this tech secure, and what new once-unimaginable forms of transport are around the corner.

Our agenda showcases some of the powerhouses in the space, but also plenty of smaller teams that are building and debunking fundamental technologies in mobility. And of course, it wouldn’t be a TechCrunch show without some incredible startups demonstrating the latest groundbreaking tech.

We still have a few tricks up our sleeves and will be adding some new names to the agenda over the next month so keep your eyes open. In the meantime, check out these agenda highlights:

TechCrunch Sessions: Mobility
California Theatre, San Jose // July 10

9:35 AM – 10:00 AM
Building Mobility-First Cities with Avery Ash (INRIX) and Seleta Reynolds (Los Angeles Department of Transportation)

What does it look like to move around the city of the future? We’ll be talking with Avery Ash, head of Autonomous Mobility at INRIX and Seleta Reynolds, general manager of the Los Angeles Department of Transportation to figure it out. More speakers to be announced

10:00 AM – 10:25 AM
Will Venture Capital Drive the Future of Mobility? With Michael Granoff (Maniv Mobility), Ted Serbinski (Techstars) and, Sarah Smith (Bain Capital)

Three leading early-stage investors will come together to debate the uncertain future of mobility tech and whether VC dollars are enough to push the industry forward.

10:25 AM – 10:45 AM
Waymo’s Way Forward with Dmitri Dolgov (Waymo)

We’ll talk to Waymo’s CTO about the state of AI, the company’s approach to developing, testing and validating its self-driving vehicle technology and what challenges remain for this Alphabet company and the rest of the AV industry.

10:45 – 11:05
Innovation Break with Softwheel Technology
Sponsored by Softwheel Technology

11:05 AM – 11:30 AM
The Last Mile: Challenges and Opportunities for startups with Stonly Baptiste (Urban Us) and Regina Clewlow (Populus). More speakers to be announced.

Populus founder and CEO Regina Clewlow and Urban Us co-founder Stonly Baptiste unpack what it means to be a last-mile innovation business, the dollars required for success, how data and technology will change how people move from Point A to Point B — and the hurdles that stand in the way.

11:30 AM – 11:40 AM
DEMO with Nils Wollny (Holoride)

Audi spinout Holoride will show how they aim to bring an interactive VR experience to the backseat of every car, no matter if it’s a Ford, Mercedes or Chrysler Pacifica minivan. Check out what this VR future in the car might look like.

11:40 AM – 12 PM
Delivering the Future with Dave Ferguson (Nuro)

Nuro is building a self-driving vehicle with a focus on local deliveries like groceries, food, and retail goods. We’ll talk with Nuro co-founder Dave Ferguson to hear all about the strengths and challenges of their focused approach.

12:00 PM – 1:00 PM
Break

1:00 PM – 1:10 PM
Demo with Jay Giraud (Damon Motorcycles)

Damon CEO and founder will bring a motorcycle on stage to demonstrate the company’s rider protection system that uses a combination of radar, camera and other sensors to track the speed, direction and velocity of up to 64 objects at a time.

1:10 PM – 1:35 PM
Bringing Ethics to Self-Driving Cars with Oliver Cameron (Voyage) and Clark Haynes (Uber)

When you hear the words ethics and autonomous vehicles, the age-old and often overused “trolley problem” thought experiment might spring to mind. We promise this isn’t about that. Instead, Oliver Cameron and Clark Haynes will discuss ethical decision-making in autonomous vehicles, and detail how robot cars are designed to prioritize some objects over others.

1:35 PM – 1:55 PM
Where Intel’s $15 billion bet is headed with Amnon Shashua (Mobileye)

In the two years since Intel bought Mobileye, co-founder and CEO Amnon Shashua has scaled up the business beyond ADAS with an eye towards launching an autonomous vehicle platform in 2021. We’ll talk to Shashua about his vision for the company, future business pursuits and a progress report on the AV program.

1:55 PM – 2:20 PM
Scooter Wars with Katie DeWitt (Scoot), Tony Ho (Segway-Ninebot) and Ryan Rzepecki (JUMP Bikes)

Scooters have taken over cities, and there’s no sign that these deployments are slowing down.Three leaders on the front lines of this battleground will dig into what’s next for scooters, the sustainability of a shared model, unit economics and more.

2:20 PM – 2:40 PM
Rebuilding the Motor City with Ken Washington (Ford Motor Company)

Hear from Ford’s CTO and Vice President of Research and Advanced Engineering how the historic automaker is rapidly changing its culture and processes while it prepares for an electric future.

2:40 PM – 3:00 PM
Coming Soon!

3:00 PM – 3:15 PM
Break

3:15 PM – 3:35 PM
Rethinking Urban Mobility with Erik Buell (Fuell)

Motorcycle racing pioneer Erik Buell is back with a new company and vision. We’ll talk to Buell, now chairman of EV startup Fuell, about the Flow electric motorcycle and the Fluid electric bicycle.

3:35 PM – 4:05 PM
Autonomous Robotaxis vs Shuttles with Karl Iagnemma (Aptiv), Alisyn Malek (May Mobility), Lia Theodosiou-Pisanelli (Aurora)

Some of the top minds trying to bring autonomous vehicle technology to the masses will debate what approaches makes the most sense, have the best chances for economic viability and what safety and security vulnerabilities and other challenges could throw these off track.

4:05 PM – 4:30 PM

The Future of Freight with Stefan Seltz-Axmacher (Starsky Robotics) and other speakers to be announced.

Trucking is the backbone of the economy; it’s also in peril. Startups and OEMs are scrambling to come up with the solution. We’ll debate whether autonomous trucks are the fix we need or if another near-term technology can pave the way to a more efficient and profitable industry.

4:30 PM – 4:50 PM

Uber Takes Flight with Mark Moore (UberElevate)

Uber wants to have flying taxis by 2023 and test flights are expected as early as next year. Mark Moore, a 30-year NASA veteran and engineering director of aviation at Uber, reveals what he and the ride-hailing company have been working on — and how they intend to take to the skies.


Save $100 with Early Bird Tickets ($195) when you book today before prices go up.

Startup Demo Packages (includes 3 tickets + a table) are still available here.

Students, grab your $45 tickets before we sell out.


Read Full Article