07 November 2019

10 Gift Ideas for Android Users


android-user-gifts

Picking a gift for someone can take hours, and yet, it still may not be the right choice for the person. But if they’re an Android user, there is a range of items you can select from that will be both meaningful and fit right into their digital lifestyle.

Here are the best gift ideas for Android users you can buy right now.

1. Google Nest Hub Max

Google’s smart display, the Nest Hub Max is an ideal device for someone who’s already used to talking to the Google Assistant or calling through Google Duo. The Nest Hub Max will make it easier for the person to access and perform all these actions with a set of far-field microphones, stereo speakers, and a 10-inch touchscreen.

The Nest Hub Max’s fabric exterior and clean design also goes well with any decor. Plus, it can function as a home security camera, and you can remotely check the camera’s live feed from your phone. Google offers an affordable alternative called the Home Hub in case the Nest Hub Max is out of your budget. It has almost the same abilities, except for a smaller 7-inch display, entry-level speakers, and no camera.

2. Google Chromecast Ultra

The Google Chromecast Ultra is another potentially worthy addition to an Android user’s home. The media streaming stick works seamlessly with Google’s mobile operating system and allows you to stream video content from your phone to a TV in an instant. In addition, you can cast an Android phone’s screen and employ it for mirroring just about anything such as presentations or games.

The Chromecast Ultra is capable of streaming in up to 4K resolution and supports Google’s cloud gaming platform Stadia too. Similar to the Nest Hub Max, the Chromebook Ultra has a cheaper counterpart simply dubbed Chromecast. It has all of Ultra’s features minus the 4K hardware and Stadia compatibility.

3. Google Play Gift Card

If you aren’t quite sure which apps, movies, or subscriptions your recipient already has, a Google Play Gift Card is your best bet. It enables them to buy a digital item of their choice, including a music streaming subscription, movies, ebooks, apps, and games on the Google Play Store.

You can purchase a Google Play Gift Cards are available at a range of retailers, including Amazon. You have the option to enter the amount manually or select from a handful of pre-configured denominations. The gift card can have a maximum value of $200.

4. Xiaomi Wireless Charging Power Bank

Xiaomi Wireless Charging Power Bank Xiaomi Wireless Charging Power Bank Buy Now On Amazon $59.99

Your friend or family member may already have a traditional power bank. But if they own a recent Android flagship phone, Xiaomi’s Wireless Charging Power Bank can be a helpful gift for them.

Using this power bank, you can charge your phone by simply placing it over the device—no wires needed. The charger also has traditional USB ports, too, so you can use the USB charging connection as an alternative.

5. Moment Camera Lenses

Moment smartphone telephoto lens

The Moment Smartphone Camera Lenses expand what you can do with a phone’s camera and are perfect gifts for someone who’s into photography. The company has a range of different lenses depending on the kind of photos you want to take, too.

There are wide-angle, telephoto, and macro lenses available, alongside an anamorphic option for cinema-grade videography. Instead of using clips, the lenses are part of a case that easily attaches to your phone. Moment only supports a couple of high-end Android phones such as the Google Pixel range, the Samsung Galaxy S series, and OnePlus devices.

6. Android Figurines

Android Figurines Android Figurines Buy Now On Amazon $9.99

For staunch fans, you can even consider getting some collectible Android Figurines. These customized figures are all based on the Android robot mascot, and are suitable for Android fans of all ages. This edition is a blind box, so you won’t know which design is inside, but there is a wide range available.

The figures themselves are just three inches tall, so are perfect for desktops or display units. There are often Christmas and Halloween themed releases too. Each design is created by a different artist to bring some color to the infamous green robot.

7. Polaroid ZIP Wireless Mobile Photo Mini Printer

Polaroid ZIP Wireless Mobile Photo Mini Printer Polaroid ZIP Wireless Mobile Photo Mini Printer Buy Now On Amazon $159.99

The Polaroid ZIP Wireless Mobile Photo Mini Printer lets you print photos from your phone in an instant. All it takes is a Bluetooth connection, and you can produce physical copies of your favorite moments anywhere. The printer has a pocket-sized form factor and can print color shots on a 2×3-inch photo paper.

The ZIP Gift Bundle includes the printer, extra photo paper, frames, sticker sets, a carry case, and photo album. However, to bring the cost down a little, you can opt to just buy the camera itself, too. There are a few colors to choose from, so you can pick the right one for your recipient.

8. Anker Nebula Capsule 2

Anker Nebula Capsule 2 Anker Nebula Capsule 2 Buy Now On Amazon $579.99

The Anker Nebula Capsule 2 is a portable, soda can-sized projector. Apart from the compact form factor, the Nebula Capsule’s other highlight is that it runs on a battery. This means you don’t have to deal with any wires while projecting 100-inch HD video content on a wall.

You can play movies or videos either through the projector’s built-in Android interface or connect it to a computer or phone. The Nebula Capsule 2 even supports Chromecast, allowing you to stream videos wirelessly.

It charges via a USB-C port so that you can top it up through your phone’s charger or power bank. Further, there’s a single 8W speaker, but you do have the ability to channel the audio output through an external Bluetooth or wired speaker.

If you want to know more about the projector before you buy, check out our review of the Anker Nebula Capsule 2.

9. PhoneSoap 3

PhoneSoap 3 PhoneSoap 3 Buy Now On Amazon $69.10

The PhoneSoap 3 is a smartphone sanitizer that uses UV rays to disinfect the exterior. It has a unique design, with a cradle for holding your phone and openings for the charging cable.

Therefore, before going to bed, you can put your phone inside, and by the morning, it will be squeaky clean. PhoneSoap is not just for phones, either. You can clean anything that fits inside, such as credit cards and earphones.

10. Samsung Galaxy Watch Active2

Samsung Galaxy Watch Active2 Samsung Galaxy Watch Active2 Buy Now On Amazon $279.99

The Samsung Galaxy Watch Active2 is the best smartwatch for Android. It has a battery that can last two days, an elegant, round design, and all the essential features you’d expect from a smartwatch. However, unlike many smartwatches, it runs Samsung’s Tizen operating system, rather than Google’s WearOS.

The watch also comes with several useful sensors, including a heart rate reader, NFC, and GPS. Instead of tapping on a tiny touchscreen, you can navigate around its interface through an virtual bezel that runs around the watch’s circular display.

The Best Gifts for Android Users

These gifts will make any Android phone user happy. You can pick one based on what their interests and how much you’re willing to spend. The products we’ve listed range from the affordable to the expensive, so there’s something here for every budget.

If, after browsing through this list, you still aren’t sure any of these ideas are right, you could always get them a phone case they’ll actually love using.

Read the full article: 10 Gift Ideas for Android Users


Read Full Article

Tumblr Launches Disappearing Group Chats


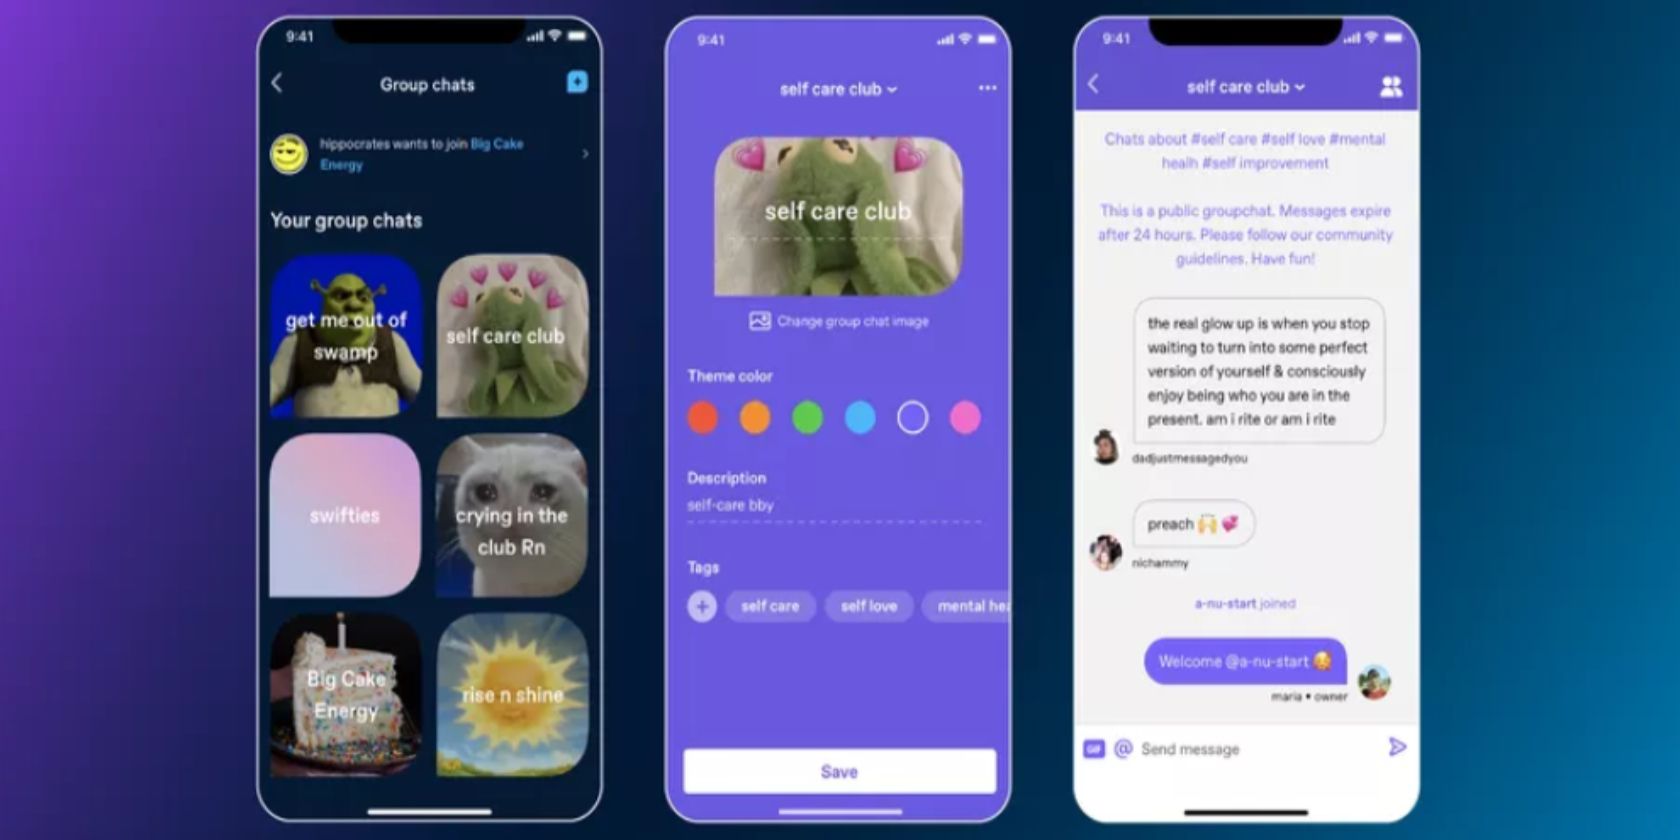
Tumblr has launched group chats. Tumblr’s group chats are ephemeral, publicly viewable, and designed to connect people who are passionate about niche interests. And they’re available right now on Tumblr’s mobile apps on Android and iOS.

Tumblr hasn’t had a great time of it of late. To the point that many people seem to have forgotten it even exists. Tumblr has always been home to an eclectic mix of people with niche interests, and it was also NSFW until Tumblr banned adult content.

Now, Tumblr is trying to tempt lapsed users back with a new group chats feature.

How to Use Tumblr’s Group Chats

Tumblr’s new group chats are designed to foster realtime discussions and help connect communities across the social media platform. All group chats are publicly viewable, so anyone on Tumblr can view them. However, only members can participate in group chats.

Owners of group chats can invite people to join them. And approve or deny requests to join. Group chats supports up to 100 members, including the owner. All messages disappear after 24 hours, and once a message has gone live it cannot be edited.

To get started using Tumblr’s new group chats, first, update Tumblr to version 14.5.1 or later. Then, you can either find and join existing group chats by searching for the subjects(s) you’re interested in, or create a new group chat about your passion.

Existing group chats will show up in searches based on their title, tags, and description. You can then preview the group chat, and “Request to join”. To create a new group chat, click the group chat icon in the top-right, and tap the “+” button.

Useful Tumblr Tips for Beginners

Tumblr’s group chats are an interesting development. Tumblr is a platform built on static content which is shared and liked. Group chats add a realtime element, allowing people to connect in a different way. Which will hopefully help foster communities.

If this piques your interest in Tumblr, check out our useful Tumblr tips for beginners.

Read the full article: Tumblr Launches Disappearing Group Chats


Read Full Article

How to Schedule Email on Your Mac


mac-mail-schedule

If you want to schedule an email on your Mac, you have a few possible ways to do this. Sadly, however, the functionality is not a native part of the Apple Mail app. That means you need to look at alternative solutions.

You can either use an entirely separate email app, an Apple Mail plugin, or the oft-overlooked Mac app Automator. We’ll show you how to use these methods to schedule an email on macOS.

How to Schedule an Email Using Automator

Automator is an Apple app that comes pre-installed on all Mac computers. It lets you automate a wide range of tasks and actions by creating workflows and scripts.

If you want to explore some of the great ways you can use Automator, check out our list of time-saving Automator workflows. Today, however, we’re only interested in how to schedule an email in Apple Mail using the app.

1. Create an Email Workflow

To begin, open the Automator app. You will find it in the Utilities folder, or you can easily bring it up by searching in Spotlight with Cmd + Space.

The app will prompt you to select a type of file for your document. Select Application from the list of options, then hit Choose.

automator choose application

Next, expand the list of options under Library in the left-hand menu and click on Mail. You will see a selection of email-based options appear in the adjacent panel. Locate the New Mail Message option in the list and drag it into the main window.

mac automator mail options

2. Compose Your Email Message

Use the New Mail Message panel to compose the email that you want to automate. As with a regular email, you can add multiple recipients, as well as CC and BCC recipients. If you have multiple email accounts associated with the Mail app, you can also select which account you want to send the message from.

mac new mail message in automator app

3. Create the Email Automation

Once you’re happy with your message, it’s time to set up Automator to send the email at a specific time.

To do so, head back to the list of email actions in the middle panel and find the option titled Send Outgoing Messages. Again, you need to drag and drop it into the main window. Make sure you drop it below the New Mail Message action that you just set up.

automator outgoing message schedule email mac

When you’re ready, go to File > Save. Make sure that you choose Application from the File Format dropdown menu before you hit the Save button.

4. Use Calendar to Set the Time and Date to Send the Email

To schedule the email, you need to head to the Calendar app; you can close Automator now.

Use Calendar to navigate to the date when you want the email to send, then create a new event. In the New Event dialog box, click on Alert to expand the dropdown menu. Select Custom from the list of options.

A new mini window will open. Click on Message to expand the dropdown menu, then choose Open File from the list. In the second dropdown menu (where it says Calendar), click on Other. A Finder window will open. Use it to navigate to and select the Workflow you just created in Automator.

calendar event automate email

To complete the process, click on OK.

5. Leave Your Mac Turned On

You don’t need to do anything else. As long as you set up the calendar entry correctly, you can relax.

There is one condition, however. For the scheduled email to work as expected, you need to ensure that your Mac is turned on and awake at the specified time. If it’s not, your scheduled email will not send.

Other Ways to Schedule an Email on Mac

Sending a scheduled email using Automator is fine for one-off messages. However, if you frequently need to send automatic emails, the process is a bit cumbersome and long-winded. You would be better served using a different approach.

Here are some of the best third-party tools to send an email at a specific time on your Mac.

1. Mailbutler

Mailbutler is one of the best email productivity suites on the market. In additional to Apple Mail, it also works with Gmail and GSuite.

The tool offers message templates, email snooze functionality, reminders, task management, signature templates, email tracking, and a whole lot more. Importantly, Mailbutler also lets you use Apple Mail to schedule an email. The tool is easy to use; it merely adds a Send Later button to Apple Mail’s New Message window.

To unlock the Send Later feature, you need to sign up for the Pro plan. Its pricing is listed in euros at €6.50/month, which is approximately $7.20 at the time of writing.

Download: Mailbutler Pro (~$7.20/month)

2. MailSuite 2019

MailSuite 2019 is a plugin for the Apple Mail app. It consists of four components:

  • MailTags: To tag your messages by keywords, projects, importance, color, and due dates.
  • Mail Act-On: An email automation tool that includes the email scheduling feature.
  • Mail Perspectives: To customize how you navigate your email messages.
  • SigPro: An email signature creation tool.

Because it’s a plugin, if you use MailSuite 2019, you can schedule emails from directly within the Apple Mail app. The plugin costs $60 for a lifetime license.

Download: MailSuite ($60)

3. Use a Third-Party Email Client

spark mail app mac

Lots of third-party email clients for Mac have a built-in way to send an email at a specific time. Two of the most notable include Spark and Airmail.

Of the two, Airmail is the more powerful all-round tool. It has iCloud syncing, support for aliases, a selection of themes, and several additional extensions. However, it costs $27, while Spark is free. Both apps have a version for macOS and iOS.

Download: Spark (Free)
Download: Airmail ($26.99)

The Best Ways to Schedule Email on Your Mac

So what is the best way to schedule email on macOS? Much depends on your personal use case.

As mentioned earlier, people who only need to schedule emails occasionally can get by with Automator. If you need to perform the process regularly, a third-party tool or app might be more suitable. You also need to decide whether you want to stick with Apple Mail or if you’re happy to move to a third-party email client.

To take email even further, have a look at ways to make Apple Mail more productive for professionals.

Read the full article: How to Schedule Email on Your Mac


Read Full Article

What Is a Social Media Handle?


social-media-handle

If you’re not a frequent social media user, you might find some of its terms confusing. One of these being “social media handle”.

In this article we take a look at social media handles, explaining what they are, how to pick one, and how websites use them.

What Is a Social Media Handle?

A social media handle has nothing to do with grasping something.

Rather, a social media handle is a public username that represents people on social media sites. The public distinction is important, as usernames exist on other sites where they don’t serve the same purpose.

For example, when you sign into your bank’s website, you have to provide your username and password to log in. But this username isn’t a handle, since it’s not used as a public identifier. Nobody needs to know your banking username except you.

Where Does the Term “Handle” Come From?

Your next question after hearing this might be “what is a handle?” As it turns out, “handle” didn’t originate online.

The term was used by CB (Citizens Band) radio users before the internet was around. These folks identified themselves by nicknames, which were eventually called “handles.”

Once the internet brought message boards and other forms of discussion to the masses, people started using “handle” to refer to their usernames.

Where Are Social Handles Used?

As you’d expect, handles are most common on social media websites.

Because these websites have millions of users, many of them with similar or identical names, social media handles allow everyone to have a unique identity on the service. Thus, when you create an account on a social media site, it checks to make sure your chosen handle isn’t already taken.

Let’s examine some of the most popular social media websites to see how they implement handles.

What Is a Twitter Handle?

The term “handle” is closely associated with Twitter, as the service has called its usernames handles for some time.

When you create an account with Twitter, you set up a unique handle for yourself. In addition, you can add your first and last name, which is different from your handle. You can see in the below tweet that my social media handle is @stegnersaurus, but my name is Ben Stegner:

This allows you to provide more information to others. You might have a preferred handle that has nothing to do with your name, so adding your name lets people find you more easily.

Twitter is built around sending short messages called “tweets.” If you want to mention another user in your tweet, you can include their handle using the @ symbol. For example, MakeUseOf’s handle on Twitter is @MakeUseOf. Below is an example of a tweet that includes it:

The act of including someone’s social media handle in a tweet is called “tagging.” By default, being tagged sends that person a notification. You can also click on the @handle to view that user’s profile.

Check out our guide to Twitter if you’d like more help getting started with it.

What Is an Instagram Handle?

Instagram uses handles in a similar manner to Twitter. Everyone has a handle that identifies them on the service. If you want to tag someone in a post or a comment, include their handle with an @ symbol before it.

Like Twitter, this notifies the person you tagged and lets people click on their name to visit their page. You’ll notice the person’s handle appears at the top of everything they post, making it easy to spot.

What Is a Facebook Handle?

Facebook is a little different when it comes to usernames. The site doesn’t use @handles like Twitter and Instagram do. This is primarily because Facebook is designed for more personal connections than Twitter and Instagram, so it uses your real name when you sign up.

If you want to tag someone in a Facebook post or comment, you can still type the @ symbol followed by their name. This notifies them that you’ve mentioned them and lets people click their name to see their profile. The only difference is that it uses their real name instead of a username, and doesn’t show the @ sign.

Facebook Tagging Example

However, Facebook does have a username feature. Its main purpose is to provide a unique URL that goes right to your page.

You’ll see this on business cards and in company advertisements. A business will often have its Twitter @handle next to the Twitter logo, then put /acme.corp next to the Facebook logo. This lets you know you can go to Facebook.com/acme.corp to visit them.

You can check your own username by logging into Facebook, clicking the small arrow in the top-right corner, and choosing Settings.

From the left side of this page, choose General, and you’ll see a Username field where you can change your username. By default, Facebook sets this to your first and last name separated by a period, which works fine.

Facebook Set Username

If you don’t have one set, it’s a good idea to pick one. Otherwise, your profile URL will consist of random numbers, which aren’t easy to remember.

How to Pick a Social Media Handle

Social media handles are quite important for brands and online influencers who want to maintain a consistent presence across the web. While they aren’t as vital for an average user, you can still follow a few general guidelines to create a solid handle.

  • A tried and true handle is your first name and last name. Something like @MarkJohnson isn’t fancy, but it is easy to remember.
  • If you don’t want to use your real name, nicknames are good fits for handles.
  • A shorter username is better. The longer it is, the harder it is to type and remember. There’s also a greater chance for typos.
  • Numbers can make your handle harder to remember, and might make you look unoriginal. It’s a good idea to avoid numbers unless they’re connected to you, such as a jersey number for a sport.
  • Want to spruce up your handle? Try adding terms like “The Real” or “I Am” before your username. “TheRealAlexHodges” has a fun air about it.
  • If the service allows capital letters in usernames (Instagram is all lowercase), use them to make your username easy to read. “GregWhiteBlogs” is clearer than “gregwhiteblogs”.

Namechk is a great resource for checking the availability of social media handles. You can type in the username you’re interested in and see the sites where it’s already taken.

Have Fun Picking Your Social Media Handles

In this article we’ve looked at what a social media handle is, how the biggest social media websites use it, and offered up some tips for creating your own. If you haven’t created a public username yet, creating one will make it easier for people to find you on the web.

To learn more about this topic, check out the social media slang terms you should know.

Read the full article: What Is a Social Media Handle?


Read Full Article

Jackery Explorer 240/250: Emergency Power Backup for All The Things


jackery explorer 250 outside
Our verdict of the Jackery Explorer 240:
An essential part of any household emergency resilience toolkit, the only downside to the Jackery Explorer 240/250 is the eight hour charge time.
910

As millions of Californian residents face rolling power outages, it’s fair to say that natural disasters are increasing in both intensity and frequency. Having your own source of electricity in an emergency has never been more important, particularly if you’re reliant on powered medical devices.

The Jackery Explorer 240/250 is an essential bit of kit for every modern household to include in their resilience plans. It retails for $250, stores a whopping 250 watt-hours of energy, and weighs less than 7lbs.

Note: we’ve reviewed the Explorer 250 model, a UK version of the Explorer 240. It’ll be available to buy in the UK next year, but the product itself is functionally identical to the Jackery Explorer 240, just with a different plug socket and output voltage. 

What’s a Watt-Hour?

A watt-hour is the amount of power required to run a device that uses a watt of energy for an hour. So a 250 watt-hour (wH) battery holds enough power to run a 250-watt device, for an hour.

In reality, the Jackery Explorer 240/250 is limited to a continuous output of 200 watts. A more real-world example might be a 5m LED strip running at full white brightness, which can use up to 50 watts. The Jackery could power this for around 5 hours.

Another comparison might be your smartphone. Mobile batteries are typically stated in milliamp-hours rather than watt-hours, but the two can be converted easily enough as long as you know the voltage. A typical smartphone battery is usually 10-12wH, so you could fully charge your mobile battery around 20-25 times from the Jackery, if that’s all you were doing with it.

view of jackery explorer 250 from the side

AC Power Output

The key difference between your average mobile battery and this, other than the sheer amount of power stored within, is the ability to plug in AC electrical devices. The only restriction is that you can’t draw more than 200W continuous or 400W peak on the Explorer 240/250 model. This means you couldn’t plug in, for example, a kettle, or other induction heating appliance, which can exceed a few kilowatts. Most refrigerators use 100-400W. CPAP machines are 30-60W, so would happily work with this.

Before purchasing with the intention of using it with a specific device, check the packaging to find out exactly what the power requirements are. Divide 250 by the wattage to get a rough running time in hours. If the device needs more than 200W or the running time is too short, you may need to consider the larger model. The Jackery Explorer 500 stores twice as much power, and allows up to 400W continuous.

font of the jackery explorer 250

Sockets Everywhere

In addition to the AC power outlet (that’s a UK socket you see in the photos), there are also two fast-charging 5V USB ports at up to 2.4A, and a car/cigarette lighter socket at 12v 10A.

All the plugs can be used simultaneously, and each type is individually switched, requiring a single button press to activate. However, bear in mind that everything you plug in contributes to the overall 200W limit. So a phone charging at the full 2.4A would use 12W.

using the jackery explorer 250 with an AC powered electric knife
The electric knife we’ve been using to trim down insulation panels is rated at 180W, but actually settled at around 108W.

Helpfully, an illuminated LCD display shows exactly how much power is being drawn at any time (albeit with a few seconds delay).

The device itself is fairly rugged with the solid black and orange ABS case featuring a helpful carrying handle on top. Measuring 5.2 x 9 x 7.7 inches, all the ports and the LCD display are found on one side. The display can be activated briefly even when nothing is plugged in, to check at a glance precisely what percentage of battery power is left.

jackery 250 handle

Charge Time

Included in the package is a neoprene case containing two charging options. The first is a basic AC power adaptor; this takes 8 hours to fully charge the Jackery Explorer 240/250. The second option is a car adaptor for on-the-go; this also takes 8 hours. Be careful to only charge from your car battery when you’re actually driving, otherwise, you may drain the car battery entirely.

As an optional extra, you can also purchase a 60W or 100W solar panel. This option takes a little longer at around 10 hours, and that’s assuming a reasonably bright day.

All the charging methods connect through a single standardized 8mm DC input socket. This is a common connector, so you may find third-party products that do the job too. Input is limited to 42W, which is why it’ll take at least 8 hours to charge. This is the biggest downside to the Jackery Explorer 250, and it’s shame they didn’t develop some quick charging technology that restores 90% of power in an hour or two.

Using the jackery 250

On the plus side–and this is a huge plus–you can simultaneously use and charge the battery. Again though, keep in mind both input and output wattage. Since the input is limited to a maximum of 42W, if you’re taking more than 42W on the output side then it will still drain the battery eventually.

The most useful aspect of this simultaneous charge and use will be to simply extend the battery life using a solar panel. As a quick example, if you had a 100W device running off a fully charged Jackery 240/250, it would normally last around 2.5 hours. With the solar panel plugged in and charging at the maximum rate, your usage time would be extended to just over 4 hours.

Should You Buy the Jackery Explorer 240/250?

As the name suggests, the Jackery Explorer range is aimed more at outdoorsy types who need some power on the go; camping or fishing trips, that sort of thing. For that, it’s ideal, no doubt. You can power all the things. For a long time.

But I would argue that keeping an emergency source of power at home should also be high on your list of priorities, and the Jackery Explorer range is perfect for that too. Even if it’s just to keep your phone powered for two weeks and maintain lines of communication, having access to backup power during an emergency could make all the difference.

The only reason not to buy the Jackery Explorer 240/250 is if you need more power. In which case, the Explorer 500 probably has you covered, albeit at twice the price.

Please, don’t wait until emergencies actually happen to try and prepare for them.

Enter below for your chance to win a Jackery Explorer 240. Please note, this competition is only open to US residents as the UK model is not available yet. 

Enter the Competition!

Jackery Explorer 240 Giveaway

Read the full article: Jackery Explorer 240/250: Emergency Power Backup for All The Things


Read Full Article

How to Insert a Watermark in Microsoft Word (Or Remove One)


watermark-word

The humble Microsoft Word watermark says a lot about a document. The most frequently used “Draft” watermark tells everyone that this is an early copy. The “Confidential” mark alludes to something hush-hush.

A watermark is just a faint or washed-out text or a picture behind the text. It can be a branding or a warning.

That it can say a lot sitting behind the main content suggests its importance. It is so easy to insert watermarks in Word. Let’s learn how.

The screenshots below are from Microsoft Office 365.

Insert Watermark in Word

Word supplies four default watermarks like “Confidential”, “Urgent”, “ASAP”, and “Do Not Copy” in text form. If they are all you use, then it’s almost a single-click operation to insert them in your document.

1. Launch Microsoft Word. Select the Print Layout from the three icons at the bottom right of Word.

2. Go to the Ribbon > Design tab.

3. Click on Watermark in the Page Background group to expand the options under it.

Insert watermark in Word

4. Choose any of the default watermarks from the choices Word provides, but do make sure it is appropriate for the document.

5. Word places the faded watermark on the document just behind your text. Again, the watermark is only visible in the Print Layout view.

An inserted watermark in Word

How to Use a Custom Watermark

The default watermarks are there when speed and convenience matter. But there may be occasions when the limited choices on Word don’t work for you. You can use make your own watermark and use it with the document.

Custom watermarks are of two types:

  • Text watermark
  • Picture watermark

Follow the same steps as above but choose Custom Watermark under the dropdown menu.

Insert custom watermark in Word

How to Insert a Custom Text Watermark

Custom watermark ideas can include your organization’s logo, your name, a copyright symbol, or anything that’s relevant to the document.

Here’s how to create a text watermark.

The Printed Watermark Window in Word

  1. The Printed Watermark window opens.
  2. Choose the Text Watermark option. The fields are self-explanatory
  3. Type the text you want to use as a watermark into the Text box. Configure the options for language, font, size, color, and orientation. Select the Semi-transparent box if you want a lighter shade of the text, or de-select it if you want to go darker.
  4. Click Apply and OK when you’re done.

How to Insert a Picture Watermark

You can get really creative with picture watermarks because images used well can say a thousand words. For instance, with casual documents, you can use a funny image or the number of minutes it will take to read the page.

You can even make a pattern that repeats across the whole page. Set it up with these steps.

Use a Picture Watermark in Word

  1. In the Printed Watermark window, select the Picture Watermark option and then click on the Select Picture button.
  2. You can upload an image file from your desktop, search Bing for an image, or source it from your OneDrive folder on the cloud.
  3. Click on Insert if you upload an image from your computer. For the other two online options, just click on Apply to use the watermark.
  4. You can tweak the appearance of the watermark. The “Scale” is set to automatic by default, but you can use the dropdown to select a specific percentage.
  5. The Washout option displays a watermark the way it is supposed to be—faded into the page. You can disable this to bring out the actual image, but it can overpower the text on top of it.

Select and Customize Your Watermark

Just adding your own text or a picture isn’t the only way to customize your watermark. The basic ones are all pale gray. Word also allows you to click the appearance by changing its color, size, and position on the page manually.

But how do you select the watermark when it is in the background?

The watermark is part of the header in the document even though it appears in the middle of the page or repeats across the entire page. All you have to do is open the header by double clicking somewhere near the top of the page.

With the header section open, click the watermark to select it like any other object on the page. Move the cursor over the watermark until the cursor turns into a four-headed arrow.

Select and Customize Your Watermark

Then, you can customize it in four ways after selecting it:

  • Drag the watermark to any part of the page.
  • You can add different watermarks to the different sections in your document.
  • If it’s a text watermark, you can use the WordArt Tools tab to customize the text.
  • If it’s a picture watermark, you can use all the options in the Picture Format tab to adjust the image or apply effects.

Change one watermark and the customization will automatically reflect in all the pages of your document.

How to Remove a Watermark

There are two ways to remove a watermark.

  • Open the Header and Footer area as explained above. As the image or text watermark is now editable, you can select it and hit the Delete key.
  • Go to the Design tab > Click the Watermark button > Select the Remove Watermark option.

Just like moving or resizing a watermark, deleting one removes it from every page of your document.

A Few More Tips on Word Watermarks

There are a couple of more things you can do with watermarks to speed up your productivity in any documents that follow.

1. Save a watermark to the gallery and reuse. You can customize a watermark and select it. Then from the Watermark menu in the design tab, just select Save Selection to Watermark gallery. Give the watermark a name, and click OK.

Save Watermark Gallery

Try this out: On a blank Word page, insert your own text and customize its size and appearance. Select and save it to the watermark gallery.

Select it under General in the gallery of watermarks and apply it to any other document. 

2. Insert watermark in Word on just one page. Word automatically places a watermark on all pages of your document. If it’s an overkill, just apply the watermark to the first page of your document.

Place your cursor on the right page. Go to Design > Watermark > Right click the watermark you want >SelectInsert at Current Document Position. The watermark is displayed within a text box which you can then move, rotate, or resize.

Insert watermark at current document position

Use Watermarks for Both Work and Personal Use

A watermark can be just one of those little things that amp up the professional look of your document. But as we suggested above, don’t let that stop you from using it on personal documents.

It is one of those overlooked features in Microsoft Word that make makes your life easier.

Read the full article: How to Insert a Watermark in Microsoft Word (Or Remove One)


Read Full Article

The 10 Best War Documentaries to Watch on Netflix


war-documentaries-netflix

If you want to watch the best war documentaries ever made, look no further than Netflix.

Netflix has lots of great documentaries to watch. Whether you like biographies, science, music, or history, there is something for everyone. And Netflix excels with its choice of war documentaries.

Here are the best war documentaries to watch on Netflix right now.

1. World War II in Colour

best war documentaries - world war ii in colour

If you enjoy watching original footage rather than talking heads, World War II in Colour is the best documentary about the Second World War that you’ll find on Netflix.

This series was first released in 2009 on British TV. It combines original and digitally colorized footage, some of which had never been seen before. Robert Powell narrates the entire series.

Powell has narrated some of the other best World War II documentaries. They include Hitler’s Bodyguard, The Story of the Third Reich, and Secrets of World War II. Sadly, none of them are on Netflix.

World War II in Colour consists of 13 episodes. They cover the action on the Western Front and Eastern Front, as well as in North Africa and the Pacific.

After learning about the historical events between 1939 and 1945, you should watch the best World War II movies on Netflix.

2. The Vietnam War

The Vietnam War is a 10-part TV series directed by famed documentary maker, Ken Burns. It’s the first of two Burns productions on our list. First broadcast on PBS in 2017, it is an epic series and is unquestionably one of the greatest war documentaries ever made; the entire series took more than 10 years to put together.

It contains original first-hand interviews with 79 witnesses (including those who fought in the war and those who protested against it). Burns also worked through 24,000 photos and 1,500 hours of video in a bid to leave no stone unturned.

The series contains 10 episodes and has a total runtime of more than 17 hours.

3. 1945: The Savage Peace

best war documentaries - 1945 the savage peace

World War II claimed the lives of millions of people and led to untold suffering. However, for the defeated Germans, the end of hostilities in 1945 marked the beginning of a new chapter of pain.

This BBC war documentary investigates the post-war reprisals against otherwise innocent German people who lived in other Eastern European countries after the Nazis surrendered.

It’s packed with original footage, most of which was unseen prior to airing. Be warned, it’s harrowing stuff. The reality of shootings, death marches, the rapes of women and children, and hideous torture are all laid bare.

4. The Age of Tanks

The Age of Tanks traces the history of one of the 20th century’s most revolutionary creations—the tank.

The series begins with the story of Basil Henriques. During World War I, the British soldier became the first man to drive a tank in active combat and use it to fire on enemy combatants. Over the following four episodes, the use of tanks in the German Blitzkrieg, the Cold War, and 21st-century wars are all examined under the microscope.

5. Five Came Back

Five Came Back is an adaptation of the book of the same name. It tells the story of five famous American film directors (John Ford, William Wyler, John Huston, Frank Capra, and George Stevens), all of whom found themselves on the frontlines during the Second World War.

Narrated by Meryl Streep, the three-part series used more than 100 hours of archival footage to discuss the 40 documentaries and training films that the directors made to help the war effort. There’s a particular focus on Ford’s Battle of Midway, Capra’s Why We Fight, and Stevens’ life-changing experiences at Dachau.

6. The Civil War

The Civil War is the second Ken Burns documentary on our list. First broadcast in 1990, it’s considerably older than Burns’ The Vietnam War, but it still stands up as one of the best documentaries ever made about the all-American battle.

Indeed, at the time of release, it became the most-watched program ever on PBS on its way to picking up two Emmy Awards, two Grammy Awards, and a Peabody Award.

The series starts with the pro-secessionists and abolitionists in 1861 and progresses through nine episodes until the murder of Abraham Lincoln in 1865.

7. The Bomb Squad

Ostensibly started as a result of the 9/11 terrorist attacks in the United States, the War in Afghanistan is now the longest war in US history. The total cost of the conflict has cost American taxpayers nearly $1 trillion.

The Bomb Squad is a two-part BBC documentary. It explores the role of British bomb disposal teams stationed on the ground during the struggle. It explores the relationship between the men, as well as the stress that their jobs place on their families back home.

8. Behind Enemy Lines

best war documentaries - behind enemy lines

This isn’t the 2001 movie starring Owen Wilson and Gene Hackman. We’re talking about the excellent BBC documentary of the same name (also from 2001).

In 1940, the UK was in a precarious position. Western Europe had collapsed, the Battle of Britain raged in the skies, and Hitler was desperate to force Churchill into signing a peace agreement. In response, Churchill created the Commandos, a specialist unit designed to help turn the tide of the war.

This four-part documentary explores the new units’ role at four critical junctures in the progression of the conflict: Dunkirk, the St Nazaire Raid, the North African campaign, and Operation Market Garden.

9. November 13: Attack on Paris

Terrorism is a type of warfare unlike any other. The most noteworthy terrorist events in history—9/11, the Lockerbie Bombing, the 2011 Norway attacks—will be ingrained in our collective minds forever.

One such incident is the November 2015 Paris attacks. 130 people lost their lives in a series of coordinated bombings and shootings across the entire city. The attack became the deadliest on French soil since the Second World War.

This three-part Netflix documentary chronicles the events of the day. It includes a timeline of proceedings and dozens of interviews with survivors and eyewitnesses.

10. Nazi Concentration Camps

Out of all the horrors which occurred during World War II, the Nazi concentration camps were among the worst. Today, experts believe that between 15 million and 20 million people were either killed or imprisoned in the camps between 1933 and 1945.

This film, from 1945, opened the world’s eyes to the scenes that lay within. Compiled from 80,000 feet of film taken by Allied military photographers after liberation, it is a camp-by-camp analysis of the atrocities committed.

The Allies used the film as evidence in the Nuremberg trials. Ultimately, the footage proved vital in securing convictions against many of the Nazi high command, including Karl Dönitz, Hermann Göring, Rudolf Hess, Alfred Jodl, and Wilhelm Frick.

More Documentaries to Watch on Netflix

We hope you agree with our list of the best war documentaries on Netflix. And if you think we’ve missed out on a must-watch documentary, be sure to let us know in the comments.

If you would like to learn about some of the other great documentaries available, read our article listing the best travel documentaries to watch on Netflix.

Read the full article: The 10 Best War Documentaries to Watch on Netflix


Read Full Article

What’s the Most Secure Way to Handle OS Upgrades?


upgrade-os-safely

Your computer’s operating system may or may not be designed with security in mind, but without ongoing software updates, your computer is vulnerable. How do operating systems handle sending out these updates and which approaches are the most secure?

Why Do We Need Software Updates?

There are three key reasons software updates are important.

  • New Features: OS developers provide new features all the time. We want them. Gone are the days when you buy a new box to get the new code. Now you get the goods via software updates.
  • Security Patches: It’s impossible to know all of the vulnerabilities in a program before releasing it into the wild. Updates containing security patches bolster the defenses of the code running on our devices. You can mitigate much of your risk by running the latest versions of software.
  • Ongoing Support: These days we declare a device alive or dead not based on whether it still works, but rather if it still receives updates. A device that no longer receives updates is one that will gradually lose access to newer apps, successfully loads fewer websites, and becomes increasingly vulnerable to exploitation.

There are two ways to distribute these updates. One approach is a centralized model, where a single company manages all of the updates that go to your device, regardless of which brand or model you use.

In a decentralized model, the components that go into your OS come from many sources. There is a degree of separation between the developers and those who package all those various parts together for users.

Both approaches have their pros and cons. Proprietary desktop OSes such as Microsoft Windows, Apple macOS, and Google Chrome OS all take a centralized approach. GNU/Linux has a decentralized model.

How Microsoft Windows Distributes OS Updates

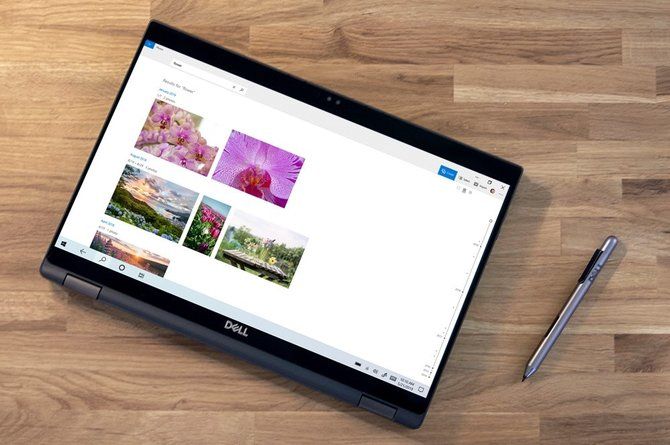
Windows 10 on a Dell convertible laptop
Image Credit: Microsoft

Microsoft distributes OS updates to anyone with a Windows PC. These updates go out based on what version of Windows you run.

For most of Windows’ history, switching to a new version of the OS was expensive. This encouraged many people to continue using older versions. With Windows 10, the situation is different. Microsoft provided Windows 10 for free initially and has said that rather than release another major upgrade, the company will now focus on iterating the desktop through software updates.

Microsoft has traditionally supported popular versions of Windows well after the release of one or two successive releases. Windows 7, for example, still received updates half a decade after the release of Windows 10.

Windows Update automatically downloads updates and forces users to install them. This can be frustrating, but it keeps computers up to date. Just make sure you create regular backups. While unlikely, system updates can botch your installation of Windows (or any other OS for that matter).

Security Assessment

Microsoft is transparent about how long Windows releases will receive support. This helps users make informed decisions about their hardware purchases. Forced updates also keep users patched and up-to-date, protecting more of us from exploits.

Still, a large number of Windows users aren’t using Windows 10. Some are using versions that are severely out of date, making the Windows landscape as a whole a vulnerable and easy target.

How Apple macOS Distributes OS Updates

macOS on an Apple MacBook

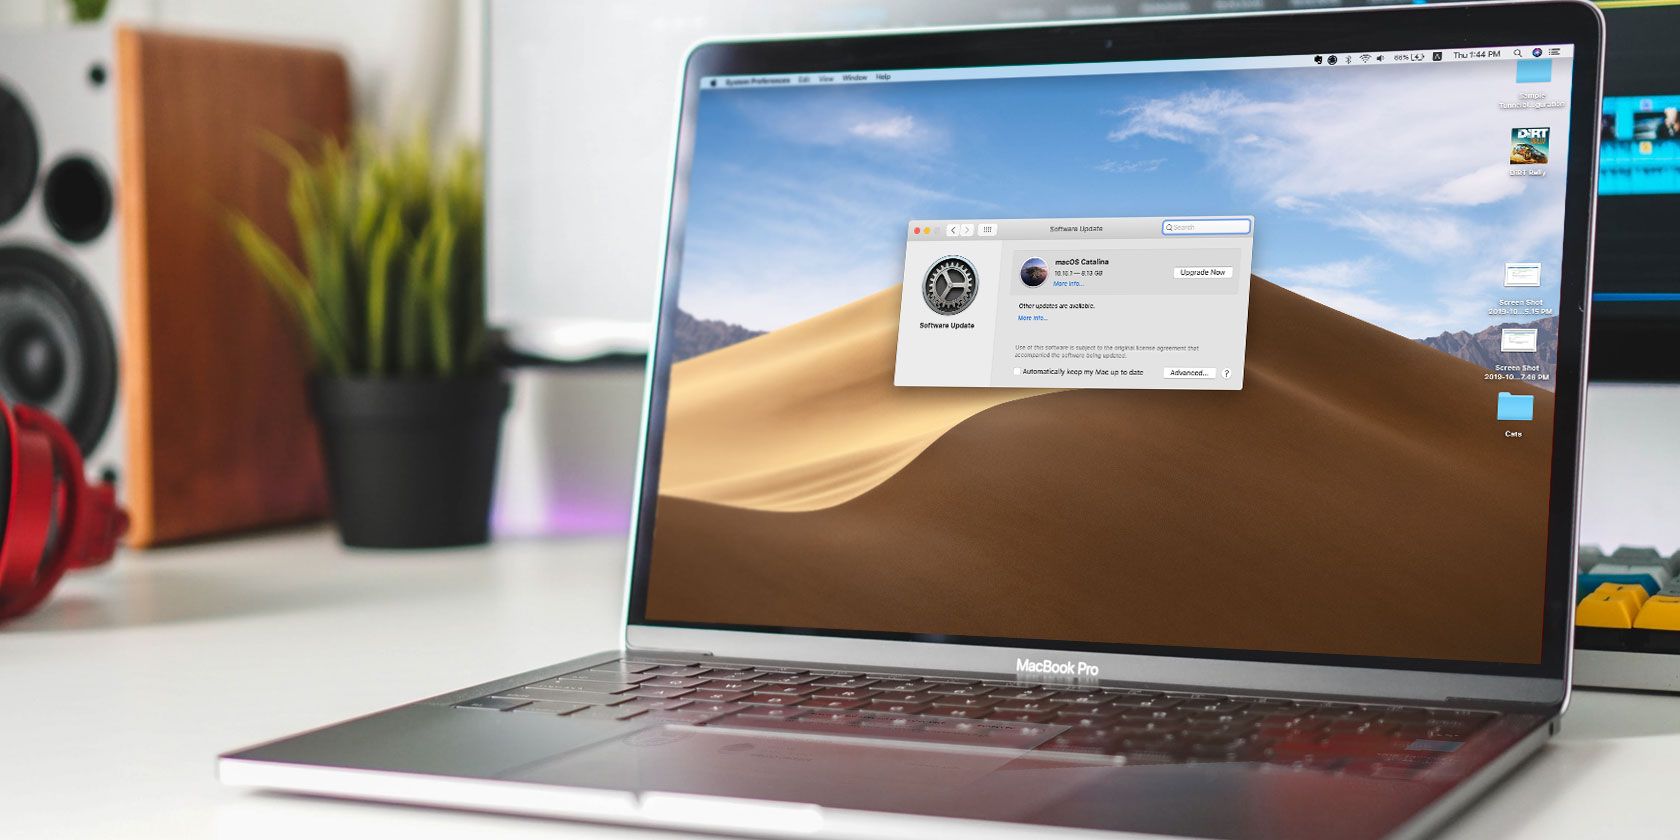
Apple provides OS updates directly to users via a dedicated Software Update tool. Unlike Windows, macOS does not automatically update your OS, but you can turn that feature on. Manual updates give you time to backup your data before getting new software.

Apple doesn’t explicitly state how long it will support each version of macOS. Generally, the three most recent releases will receive security patches. With new versions arriving every year, that means you can expect roughly three years of support.

Unfortunately, the end of life for older releases can arrive at any time without any heads up or official announcement. Apple’s security updates page shows what updates have arrived but not how long they will keep coming.

This doesn’t tell the whole story. Generally speaking, there’s little reason not to upgrade to the latest version of macOS. Changes tend to be more iterative compared to the revolutionary changes that took place between Windows 7 to 8 and Windows 8 to 10. Upgrades were relatively cheap in the past, and now they’re free.

Since macOS is only available on Apple hardware, the company can explicitly list which devices it will support. Unfortunately, if your MacBook or iMac is not on the list, you’re out of luck. You must now replace macOS with Windows or Linux to have an OS with ongoing updates, even if your hardware is technically perfectly capable of running the latest version of macOS.

Security Assessment

Manual updates give you time to back up your data, but many people choose to never install updates, leaving them more vulnerable to exploits. Apple also doesn’t tell us when a given OS release will reach the end of its support period.

On the flip side, Apple generally supports a given computer model for many years. Just make sure you consistently upgrade to the latest OS. You can check out Apple’s list of obsolete products.

How Google Chrome OS Distributes OS Updates

Google Chrome OS on a Samsung convertible laptop

On a Chromebook, updates are quiet and automatic. It doesn’t matter which device you buy, if your model is supported, you will receive each update in a matter of days. Google manages most of the software experience, so Chrome OS feels the same regardless of which Chromebook you buy.

Google provides updates on a regular schedule. Maybe OS updates come roughly every six weeks, with security patches and software updates arriving twice as frequently. You have the option to turn off automatic updates if you prefer.

But Google is not transparent about how long each Chromebook or Chromebox will receive support. The company doesn’t actually base support times on operating system version (like Microsoft) or specific devices (like Apple). Instead, Chrome OS support depends on which chipset sits inside your machine. Google promises to support each chipset for six and a half years after launch.

That poses a problem. Most of us do not know what hardware lies underneath our keyboards. We can easily buy a Chromebook using a chipset that’s been around for five years already, without knowing we will only receive one and a half years of support.

Thanks to Chrome OS’s design, the danger of going without software updates is magnified. Since Chrome OS combines the web browser with the rest of the OS, when OS updates stop, your web browser will no longer receive updates. This is not the case on other platforms, where you can update apps separately.

Security Assessment:

Chrome OS strikes a nice balance between keeping users up to date with automatic updates while giving us the freedom to upgrade at our own pace by doing things manually. But the company’s support period is largely obscure and, given Chrome OS’s design, substantially more important.

How GNU/Linux Desktops Distribute OS Updates

Purism Librem 13 privacy laptop
Image Credit: Purism

We usually refer to GNU/Linux simply as Linux, but in this case it’s important to clarify things. Google’s Chrome OS is based on Linux, but how it operates is fundamentally different from other versions of Linux based on GNU software.

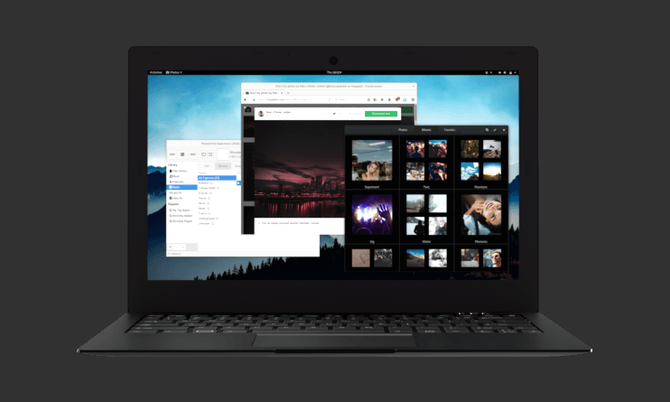
There are hundreds of different GNU-based desktops you can download. Most give you a degree of freedom on how you approach software updates. Generally, notifications will arrive automatically, but you must manually download and install the update. You can do so using a simple app or the command line.

How often you receive updates depends on the size of your chosen Linux distribution. You can use a given version of Linux until your machine no longer meets the minimal system requirements, which for a growing number of Linux desktops means a 64-bit processor.

If you use a more niche version of Linux, you have a greater risk of losing access to updates due to the project ceasing to exist. Under such circumstances, you’re free to switch to another version of Linux and keep on trucking.

Security Assessment

GNU desktops have the longest support life. Your desktop will continue to work for as long as your hardware meets system requirements. And if your preferred Linux distribution does end support, you can just switch to another.

Updates are not automatic, but there are other aspects of the way free software gets distributed that have a larger impact on whether the various parts of your OS are truly up-to-date. Since software is not produced in a central location, new updates and patches may be available for months or years before the people who make your version of Linux get around to packaging and releasing them.

Which Method Is the Most Secure?

In this case, the means is less important than the ends. If you manually update your PC every day or two and keep software up-to-date, then your machine is effectively as secure as one that receives automatic updates.

Making updates automatic primarily prevents machines from going months and years without updates, becoming susceptible to long-fixed vulnerabilities that make not only those machines but, due to botnets, the rest of us less safe.

Read the full article: What’s the Most Secure Way to Handle OS Upgrades?


Read Full Article

10 Ways to Restore Your Creative Energy Using Technology


boost-creativity-tech

Whether you’re a DIYer trying to solve a problem, a writer working on a new story, or a designer looking to spice up an old model, perhaps you need help restoring your creative energy.

This article is designed to help you restore your creative energy when it has upped and left you. Maybe one tip will do the trick, or perhaps you’ll have to work your way through the list.
1. Go for a Walk

If you’ve been working on the same thing for a long time, your creative juices may be running dry. If so, it’s time to take a break by doing something else entirely.

One simple idea is to go for a walk. It might not sound like much, but a short walk can reset your system and break the monotony of working.

If you’re feeling lazy, fitness trackers (the best fitness trackers with heart rate monitors) can be of great help. These devices can help keep you motivated when doing exercise. Their constant feedback about the calories you burn will help you go the extra mile. You can even add friends on some of these devices and compare your activity data.

2. Get Rid of Distractions

digital-entertainment
Image Credit: MikeRenpening/Pixabay

If you’re unable to get creative because you open Facebook or check your messages every five minutes, you need to get rid of these distractions.

While smartphones are amazing devices, they can also make us less productive. To fix this problem, you can uninstall the distracting apps from your phone or disable notifications on your phone to work free from distractions.

You can also try apps that limit your time on social media. We recommend OFFTIME, Moment, or Flipd.

3. Have a Snack

Hunger can play havoc with our ability to get things done. A research paper published by Science Daily shows that our stomach produces ghrelin, a hormone that affects our decision making abilities and can lead to impulsive choices.

There are several helpful apps such as Noom that will not just find the right snack according to your cravings, but also find a way for you to achieve your fitness goals.

Once you’ve satisfied your stomach your brain may just let you get back to work.

4. Come Up With 100 Bad Ideas

Instead of coming up with something good, come up with something awfully bad. And a lot of it. So that there’s no pressure on you.

If you’re a writer, come up with 100 bad story ideas. If you’re a musician, come up with a 100 awful tunes. And if you’re an architect, come up with 100 bad designs for buildings.

You can create your list of bad ideas on apps like Evernote or Google Keep. These apps store all of their data in the cloud, meaning you can revisit it at any time.

The logic behind this method is that out of those 100 ideas, a couple will always turn out to be good. When you try to create something absurdly bad, you utilize a creative side that you hadn’t ever explored before.

5. Change your Surroundings

reorganize workspace
Image Credit: Skitterphoto/Pixabay

You don’t have to make big changes. Just change something in your environment. Replace the items on your desk and reorganize the space you’re in. If you work in a typical office cabin environment, try adding some colors to your cabin.

Make use of apps such as Houzz to give your home workspace a virtual makeover before investing any real money. You can also get ideas from Pinterest or Tumblr.

Fresh surroundings make way for fresh ideas.

6. Organize Your Thoughts Visually

There are several platforms that let you organize your thoughts in a better way to help your creativity. Websites like Coggle, Popplet, and MindMaster help you visualize your ideas using flowcharts or drawing tools.

This lets you get a better picture of your ideas and reach solutions faster.

7. Discuss Your Ideas Online

You’ll find several forums where there are experts who will happily share their opinion on your creative piece. For example, if you are an artist, you can showcase your art on DeviantArt and interact with other users. There’s a thriving community that can offer you support and inspiration.

Reddit is full of great communities on every subject you can think of. And you can either be a passive participant reading other people’s threads or an active member starting conversations. Either way, as you discuss things with others, you might find a creative angle you didn’t consider earlier.

8. Listen to Happy Music

Research suggests that listening to happy music can trigger creativity. Music is known to enhance cognition and improve memory and learning, which boosts creativity as well.

Maybe all you need to restore your creative energy is a little dose of happy music. And all you need to do to find it is open up your favorite streaming service—whether it’s Apple Music or Spotify—and search for “Happy Music”.

9. Meditate to Regain Focus

meditation apps
Image Credit: akiragiulia/Pixabay

It sounds cliche but if you get rid of all thoughts (or at least try to clear your current thoughts), you get to reach your spiritual side. Even if you don’t have a lot of time, it’s the consistency that matters and not the duration. If you can spend just 3-5 minutes a day meditating, it can help your creative energies.

While most people have heard of meditation, many don’t try it because they find it difficult to focus. If you’re one of these people, you can seek help from meditation apps such as Insight Timer and Calm.

10. Enjoy a Little Humor

If you’re planning to reap the benefits of technology to be creative, have fun while you’re at it. Research suggests humor can enhance creative thinking as it lets you associate ideas more broadly and freely.

So don’t hesitate to watch funny videos on YouTube or to browse funny GIFs on Giphy.

Creativity cannot be forced. Let go of the pressure and have a laugh. But make sure online entertainment doesn’t become too much of a distraction for you. Remember, everything is good in moderation.

Carry on Training Your Brain

Creativity is like a muscle. If you don’t use it for a long time, it will lose its strength. You need to flex it every day so that it stays healthy. While some people are naturally better at it, others can build it with practice.

To flex your creative muscles, keep training your mind constantly. You can do this by playing brain exercise games on your smartphone.

Read the full article: 10 Ways to Restore Your Creative Energy Using Technology


Read Full Article