23 March 2020

Massively Scaling Reinforcement Learning with SEED RL


Reinforcement learning (RL) has seen impressive advances over the last few years as demonstrated by the recent success in solving games such as Go and Dota 2. Models, or agents, learn by exploring an environment, such as a game, while optimizing for specified goals. However, current RL techniques require increasingly large amounts of training to successfully learn even simple games, which makes iterating research and product ideas computationally expensive and time consuming.

In “SEED RL: Scalable and Efficient Deep-RL with Accelerated Central Inference”, we present an RL agent that scales to thousands of machines, which enables training at millions of frames per second, significantly improving computational efficiency. This is achieved with a novel architecture that takes advantage of accelerators (GPUs or TPUs) at scale by centralizing model inference and introducing a fast communication layer. We demonstrate the performance of SEED RL on popular RL benchmarks, such as Google Research Football, Arcade Learning Environment and DeepMind Lab, and show that by using larger models, data efficiency can be increased. The code has been open sourced on Github together with examples for running on Google Cloud with GPUs.

Current Distributed Architectures
The previous generation of distributed reinforcement learning agents, such as IMPALA, made use of accelerators specialized for numerical calculations, taking advantage of the speed and efficiency from which (un)supervised learning has benefited for years. The architecture of an RL agent is usually separated into actors and learners. The actors typically run on CPUs and iterate between taking steps in the environment and running inference on the model to predict the next action. Frequently the actor will update the parameters of the inference model, and after collecting a sufficient amount of observations, will send a trajectory of observations and actions to the learner, which then optimizes the model. In this architecture, the learner trains the model on GPUs using input from distributed inference on hundreds of machines.

Example architecture for an earlier generation RL agent, IMPALA. Inference is done on the actors, usually using inefficient CPUs. Updated model parameters are frequently sent from the learner to the actors increasing bandwidth requirements.
The architecture of RL agents (such as IMPALA) have a number of drawbacks:
  1. Using CPUs for neural network inference is much less efficient and slower than using accelerators and becomes problematic as models become larger and more computationally expensive.
  2. The bandwidth required for sending parameters and intermediate model states between the actors and learner can be a bottleneck.
  3. Handling two completely different tasks on one machine (i.e., environment rendering and inference) is unlikely to utilize machine resources optimally.
SEED RL Architecture
The SEED RL architecture is designed to solve these drawbacks. With this approach, neural network inference is done centrally by the learner on specialized hardware (GPUs or TPUs), enabling accelerated inference and avoiding the data transfer bottleneck by ensuring that the model parameters and state are kept local. While observations are sent to the learner at every environment step, latency is kept low due to a very efficient network library based on the gRPC framework with asynchronous streaming RPCs. This makes it possible to achieve up to a million queries per second on a single machine. The learner can be scaled to thousands of cores (e.g., up to 2048 on Cloud TPUs) and the number of actors can be scaled to thousands of machines to fully utilize the learner, making it possible to train at millions of frames per second. SEED RL is based on the TensorFlow 2 API and, in our experiments, was accelerated by TPUs.
Overview of the architecture of SEED RL. In contrast to the IMPALA architecture, the actors only take actions in environments. Inference is executed centrally by the learner on accelerators using batches of data from multiple actors.
In order for this architecture to be successful, two state-of-the-art algorithms are integrated into SEED RL. The first is V-trace, a policy gradient-based method, first introduced with IMPALA. In general, policy gradient-based methods predict an action distribution from which an action can be sampled. However, because the actors and the learner execute asynchronously in SEED RL, the policy of actors is slightly behind the policy of the learner, i.e., they become off-policy. The usual policy gradient-based methods are on-policy, meaning that they have the same policy for actors and learner, and suffer from convergence and numerical issues in off-policy settings. V-trace is an off-policy method and thus works well in the asynchronous SEED RL architecture.

The second algorithm is R2D2, a Q-learning method that selects an action based on the predicted future value of that action using recurrent distributed replay. This approach allows the Q-learning algorithm to be run at scale, while still allowing the use of recurrent neural networks that can predict future values based on the information of all past frames in an episode.

Experiments
SEED RL is benchmarked on the commonly used Arcade Learning Environment, DeepMind Lab environments, and on the recently released Google Research Football environment.
Frames per second comparing IMPALA and various configurations of SEED RL on DeepMind Lab. SEED RL achieves 2.4M frames per second using 4,160 CPUs. Assuming the same speed, IMPALA would need 14,000 CPUs.
On DeepMind Lab, we achieve 2.4 million frames per second with 64 Cloud TPU cores, which represents an improvement of 80x over the previous state-of-the-art distributed agent, IMPALA. This results in a significant speed-up in wall-clock time. IMPALA requires 3-4x as many CPUs as SEED RL for the same speed.
Episode return (i.e., the sum of rewards) over time on the DeepMind Lab game “explore_goal_locations_small” using IMPALA and SEED RL. With SEED RL, the time to train is significantly reduced.
With an architecture optimized for use on modern accelerators, it’s natural to increase the model size in an attempt to increase data efficiency. We show that by increasing the size of the model and the input resolution, we are able to solve a previously unsolved Google Research Football task, “Hard”.
The score of different architectures on the Google Research Football “Hard” task. We show that by using an input resolution and a larger model, the score is improved, and with more training, the model can significantly outperform the builtin AI.
Additional details are provided in the paper, including our results on the Arcade Learning Environment. We believe SEED RL and the results presented, demonstrate that reinforcement learning has once again caught up with the rest of the deep learning field in terms of taking advantage of accelerators.

Acknowledgements
This project was done in collaboration with Raphaƫl Marinier, Piotr Stanczyk, Ke Wang, Marcin Andrychowicz and Marcin Michalski. We would also like to thank Tom Small for the visualizations.

Does Windows 10 Freeze Your Computer? Try This!


windows-10-update-freeze

Windows 10 should run smoothly for most people, but there are times when Windows 10 can freeze or lock up your system. Sitting there while your computer hangs is frustrating and you shouldn’t have to deal with it.

Whether your computer is freezing after installing Windows 10 or one of its updates, or if it’s just suddenly starting locking up, we’re going to provide various steps to stop Windows 10 freezes.

1. Free Up Storage Space

Your computer can slow down if your drive is nearly at full capacity. This is because Windows 10 doesn’t have enough space to effectively manage itself.

Windows 10 This PC drives

To check your situation, navigate to This PC in File Explorer to take a look at the volume of your drives. If they’re in the red, it’s time to delete unnecessary data. See our guide on which Windows files and folders to delete.

You might also want to invest in a new storage drive if you’re constantly battling with the amount of space you have. External hard drives are cheap, if you’re not confident in installing something within the computer case itself.

2. Clean the Inside of Your Computer

Dust will build up inside your computer over time. This is likely to happen quicker if you have your computer close to the floor or have pets. Not only is it gross to have your computer full of dust, but it can also slow your system down too.

Dusty computer
Image Credit: Vinni Malek/Flickr

Your computer generates heat, which is why your case has fans to try to regulate airflow and keep temperatures stable. However, if your computer is full of dust then it can be hard for those fans to be effective. If your computer gets too hot, it then throttles performance to prevent the components from burning out and failing.

Turn your computer off, unplug everything, open up the case, and use compressed air to blast the dust out. More information can be found in our Windows PC spring cleaning checklist.

3. Check the Health of Your Components

If you’ve had your computer a while, the components inside might be failing. Faulty RAM is often the source of Windows 10 freezing. A failing hard drive could also be the culprit, especially if you notice the freezing when trying to access files.

Follow our guide on how to test your PC for failing hardware. If your hard drive is failing, back up your data immediately, then ideally replace it with a solid state drive. Replacement RAM is usually inexpensive.

4. Update or Rollback Your Drivers

Generally, you should only update drivers when there’s a problem with your computer. Now, it might be that a driver updated and that’s what has caused Windows 10 to freeze. Alternatively, you might need to update a driver to solve the problem.

For information on how to update, see our guide on how to find and replace outdated drivers. If that doesn’t work, you should try going back to an older driver version. For help on how to do that, see our guide on how to take back driver control.

5. Uninstall Antivirus and Cleaner Tools

You don’t need to bog your computer down with multiple antivirus programs or pointless cleaner tools. If you have lots of these programs running, they’re likely going to clash and hog your system resources. For most people, the inbuilt Windows 10 Security package is more than enough.

Press Windows key + I to open Settings and click Apps. Then, select each unnecessary program on the list in turn, and click Uninstall.

Windows Security full scan

Next, it’s time to do a virus scan to ensure your system isn’t infected. A virus could be draining your system resources and causing it to freeze. Do a system search for Windows Security and open the app.

Go to Virus & threat protection > Scan options > Full scan > Scan now. The tool will automatically clean up any viruses or malware.

6. Assess the Event Viewer

A good way to check what problems are occurring on your system is with Event Viewer. Do a system search for Event Viewer and open it.

Windows 10 event viewer

On the left pane, double click Windows Logs. This is broken down into different sections. The relevant ones are Application and System. Look in these two logs and check for entries with a date and time that coincide with Windows 10 freezing. Alternatively, look for those with a level of Error or Critical, since these detail the worst problems.

Once you have found something, copy and paste the event information into Google. There are far too many possibilities to cover here, so hopefully someone else has asked about the error online.

7. Create a New User Account

Creating a new local account can stop Windows 10 freezing. To do this, press Windows key + I to open Settings. Then navigate to Accounts > Family & other users. Beneath Other users, click Add someone else to this PC.

Windows 10 create a new user

On the new window, click I don’t have this person’s sign-in information. Then click Add a user without a Microsoft account. Fill out the fields and click Next. Then log out of your account and into the new one.

8. Go Back to the Previous Version of Windows 10

If Windows 10 started freezing after an update, it makes sense to reverse that update. If it’s been less than 10 days since you updated then you can go back to an earlier version easily.

To do this, press Windows key + I to open Settings. Navigate to Update & Security > Recovery. Beneath Go back to the previous version of Windows 10, click Get started and follow the instructions.

Go back to the previous version of Windows 10

If this option isn’t available then you could download an ISO for a previous Windows 10 version and install from that. However, Microsoft doesn’t provide these, so you’ll have to get one from an unofficial source or use one you’ve previously created.

If you have one available, check out our guide on how to create Windows 10 installation media.

Keyboard Shortcut to Fix a Frozen Computer

While system freezes aren’t as common as they used to be, they do still occur—and since there are many reasons why it could happen, it can be hard to pinpoint the problem. Hopefully, one of the troubleshooting steps here has resolved your frozen Windows 10 computer.

If you want some more tips to combat a Windows 10 freeze, check out this keyboard combination to combat a frozen computer.

Read the full article: Does Windows 10 Freeze Your Computer? Try This!


Read Full Article

How Does Private Internet Access Protect Your Online Activity?


Using a virtual private network (VPN) can help boost your online privacy. But while some VPNs are excellent, others are less so. A lousy VPN might retain logs of activity or slow your speed to a crawl. Others might sell your data, fail to fix DNS leaks, and generally offer a poor service.

Private Internet Access has one of the greatest reputations among VPN providers. To find out if this standing is deserved, we downloaded the app, signed up, and tested Private internet Access.

Do You Need a VPN? Yes, You Do

Getting online is simple these days, but it’s never 100 percent safe, secure, and private. Risks threaten at every turn. You might have your identity stolen or your activity monitored by hackers or even government. Perhaps you’ll be targeted by malware or ransomware, or even lose access to your online accounts.

One way to reduce these and other risks from becoming an issue is to modify your online behavior. In conjunction, however, you should use a VPN.

Using a VPN via a client app on your computer or mobile (or through your router) encrypts your online activity. With a monthly (or annual) subscription, this encryption can enhance your privacy considerably.

You can then use a VPN to overcome state censorship or region-blocking, and improve your security on open Wi-Fi networks. Our guide to why you need a VPN explains this in more detail.

Given the myriad of threads online, everyone should be using a VPN to connect to the internet. It’s as sensible as keeping your windows locked when you’re out.

How Much Is Private Internet Access?

Private Internet Access (also known as PIA) offers access to over 3,301 servers in 30 countries. That’s amazing and will cost you as little as $3.33 a month when you pay for 12 months at $39.95. This is a 67 percent markdown on the usual price of $119.40, making it well worth considering.

If your budget isn’t up to paying for a 12-month VPN subscription, consider the monthly option of $9.95. Private internet Access also lets you pay six-monthly for $35.95 (40 percent off the usual $59.70). This works out at $5.99 a month.

So a Private internet Access subscription is priced roughly the same as its competitors. Now, why should you use this VPN? And, perhaps more importantly, why should you trust Private internet Access?

Cross-Platform VPN for All Devices

Install an app or extension to use Private internet Access

Private Internet Access offers encrypted private browsing across most devices. You can download an app for:

  • Windows 10 (32-bit and 64-bit versions)
  • macOS
  • Linux
  • Android
  • iPhone/iPad

In addition, the VPN provides extensions for the Chrome, Firefox, and Opera browsers. Plus, there is support for OpenVPN and routers running DD-WRT, Tomato, and PfSense firmware. Running a VPN on your router rather than individual devices saves a lot of messing around with switching servers.

However, it’s not necessary for PIA, as its servers can handle 10 connections from a single account. That should be enough for most families.

Is This a VPN You Can Trust?

Feeling that you can trust your chosen VPN is vital. Without trust, there is no point in paying the monthly subscription. The VPN is essentially selling trust. For your money, you should expect fulfillment of two key concepts: encryption and privacy.

Private Internet Access is a US-based company, owned by Kape Technologies, who also operate the CyberGhost VPN company.

The location of PIA means that it’s under the purview of the Five Eyes alliance. This is a multilateral agreement existing among the USA, UK, Canada, Australia, and New Zealand to cooperate on intelligence.

This means that if requested, Private internet Access would be legally compelled to release all information about online activity. Single accounts, activity during a particular time or date range, sites visited, and anything else would all be fair game.

However, Private internet Access declares on its pages that it retains no traffic logs. If accurate, this would mean it has no activity to release. Instead, requests from government on activity would be limited to sign-in and server connection data.

PIA maintains a privacy report page that you can check. This lists court orders, subpoenas, and warrants received by PIA from governments. These reports go back to mid-2018.

Private Internet Access Features

Subscribing to PIA doesn’t just give you access to a wealth of apps and VPN servers around the world. Several key VPN features are bundled into the service.

IP cloaking, for example, hides your true IP address. This privacy is increased by encryption (AES-256), which secures all online transactions. As noted, no traffic logs are retained by PIA, while a VPN firewall is also included to prevent malicious connections.

Private internet Access VPN privacy settings

Using PIA will enable identity protection, so long as you don’t log into any sites while using it. You can also use this VPN to unblock websites that might be closed to you by government or local policy.

Private Internet Access supports peer-to-peer networking, ideal for using BitTorrent. Note that not all BitTorrent uses are illegal. PIA also blocks ads, trackers, and malware from reaching your device, and offers unlimited bandwidth. You can therefore use it as much as you like and download almost anything.

As with most VPNs, PIA offers various protocols: OpenVPN, IPSEC/L2TP, PPTP, and the SOCKS5 proxy. In most cases, you won’t need to tweak these settings.

Get Online With Private Internet Access

Using Private Internet Access is as straightforward as downloading the app or extension, adding your credentials, and connecting. Below we look at using the VPN in three scenarios: using a desktop PC, desktop browser, and a mobile device.

Private Internet Access on Windows

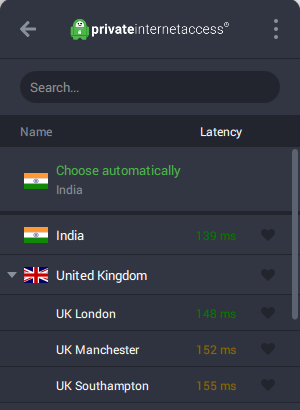
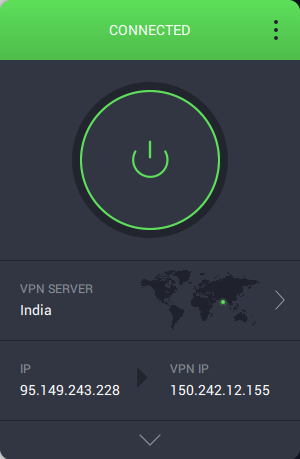
The PIA app for desktop requires you to sign in after installation. It highlights an automatic selection, based on ping time, as the fastest VPN server in your region.

Simply select it to connect.

The app also provides a range of settings, including managing network preferences, changing the app’s appearance, and connection/proxy preferences.

Although useful, the PIA app for Windows has a default “attached to tray” setting in the General tab. This can be frustrating, as it means you cannot Alt + Tab to switch between your current app and PIA. Switching the Dashboard Appearance setting to Window will detach it for easy task switching.

How to Use Private Internet Access With a Browser Extension

If you prefer to secure only your browsing, it’s easy to add PIA to Google Chrome, Mozilla Firefox, and Opera. Each browser has a Private Internet Access extension available in its respective library.

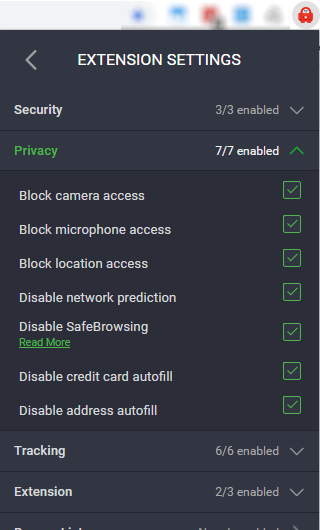
This features a slimmed-down version of the main desktop app with the same quick-connect tools. However, you’ll also find settings for privacy and security, including tracking protection and both microphone and camera blocking.

Get PIA on Your Mobile

We tested Private Internet Access on Android. A more streamlined app than the desktop version, it again defaults to an automatic server choice. Quick settings are accessible from the top-right corner to choose a server, activate the kill switch, snooze the service, and monitor usage.

More detailed settings are available via the hamburger menu (top-left). Encryption settings, preferences, kill switch, port and port forwarding, and even per-app settings live here.

For example, you might prefer for one or two apps to circumvent VPN protection. Some streaming services actively block VPNs, so bypassing this block by suspending VPN use with those apps is useful.

Will Private Internet Access Slow Your Connection?

Connecting to a VPN will almost certainly impact the speed of your connection. In most cases this will be negligible, but with poor VPNs, the slowdown will be considerable.

It’s worth noting that connecting to a VPN on the other side of the globe will naturally be slower than one in your own region. While such a selection might be necessary, take that distance into account when considering speed.

We tested Private Internet Access with two servers. The first was local in the UK; the second was a server in the USA.

We conducted the test using the following baseline speed, measured without a VPN connection using Speedtest.net:

  • Download: 42.47Mbps
  • Upload: 10.64Mbps
  • Ping: 14ms

This is via a connection to a server around 70 miles away.

VPN Speed Test 1: UK to UK

Connecting to a Private Internet Access VPN server in London (roughly 250 miles) provided the following results:

  • Download: 42.06Mbps
  • Upload: 10.29Mbps
  • Ping: 15ms

As you can see, these results are roughly consistent with the baseline. Local internet traffic plays a part in the near-identical speeds.

VPN Speed Test 2: UK to USA

With a connection to a server in New York (about 3,300 miles away) the results are:

  • Download: 40.90Mbps
  • Upload: 9.97Mbps
  • Ping: 84ms

Despite the considerable difference in ping, the speed of the VPN connection to the New York server is good, as reflected in the speed values.

Private Internet Access: An Affordable VPN With Great Options

By this point you should have an idea as to whether you’re going to trust PIA as your VPN. It’s full of features and supports a wealth of platform. And as we saw, PIA is definitely fast and the app is simple to use.

However, there is the issue of successfully overcoming geoblocking when streaming to consider. If you have concerns around true privacy, PIA’s residence in the USA might also be a problem. However, Private Internet Access is fast, flexible, supports custom firmware with OpenVPN, and provides privacy for peer-to-peer activity.

For most users, Private Internet Access is an ideal choice of VPN.

Read the full article: How Does Private Internet Access Protect Your Online Activity?


Read Full Article

The 7 Best Apps and Sites to Check Air Quality Anywhere


air-quality

The air you breathe every day is more toxic than ever as pollution levels continue to rise across the globe. Whether you’re going out for a run or leaving for work, it’s wise to keep tabs on your neighborhood’s air quality so you can take precautions if needed.

Here are the best air quality apps and services that will help you, whether you’re on your computer or phone.

How Is Air Quality Measured?

Several factors determine an area’s air quality. Together, those elements combine to form a near-universal metric called the Air Quality Index (AQI). The AQI for a specific location depends on characteristics like the time, how concentrated the pollutants are, and what kind of pollutants are in the air.

Since there’s a time factor involved, AQI is typically grouped into ranges. Each of those ranges is assigned a descriptor, color code, and standardized public health advisory like Poor, Unhealthy, and others.

Best Air Quality Index Apps for Android and iOS

Let’s first look at the best apps to check air quality on your mobile device while on the go.

1. AirVisual

AirVisual is one of the most comprehensive AQI apps for Android and iOS. In addition to letting you see quality levels, AirVisual offers a range of other features.

One of these is health recommendations, through which the app shows steps you can take to avoid getting sick. These include wearing a mask, closing your windows, or avoiding cycling.

AirVisual can send you alerts when the AQI fluctuates, which you can use as a widget on Android. Plus, you can view an overview of the entire globe to check how other cities compare to yours. To share on social networks, you can take a picture and apply the AirVisual filter on it. This adds details such as the AQI and location onto the image.

Download: AirVisual for Android | iOS (Free)

2. Plume Air Report

Plume is an air pollution checking app for users who want to adjust their outdoor activity sessions based on air quality. It has a sleek interface that shows exactly when you should, for instance, take your dog for a walk. There’s a timeline at the bottom half of the app and a visual at the top that displays the air quality, temperature, and other data.

Tap the upper section to reveal further details such as particle concentration, the best day of the year for air quality, and more. You can even select an activity beforehand and Plume will tell you the best times for it. Like AirVisual, Plume also offers a social image tool, periodic alerts, and a world view.

Download: Plume Air Report for Android | iOS (Free)

3. Sh**t! I Smoke

This little tool takes a unique approach compared to other air quality checking apps. Instead of throwing up the usual array of numbers, Sh**t! I Smoke shows the cigarette equivalent of the air you breathe.

For example, it might say “Shoot! You’ll smoke 2.7 cigarettes today” rather than simply telling you the AQI levels. You can still check those specific metrics by selecting More Details, though. To augment the experience, the app even plays a smoke animation on the right edge of the screen.

Download: Sh**t! I Smoke for Android | iOS (Free)

4. How to Check Air Quality on macOS

Air Mac Menu Bar App

If you want to stay on top of air quality updates while working on a Mac, try an app called Air. It’s a straightforward Mac utility that shows your ZIP code’s air quality in the menu bar. Air automatically determines your location and functions perfectly out of the box.

Plus, its background in the menu bar even adapts to the conditions, such as showing bright red for unhealthy environments. Apart from this, you don’t have many options except for manually choosing a ZIP code. At the time of writing, Air only works in the United States.

Download: Air for macOS (Free)

5. Check Air Quality on a Windows PC

Airqualiter Windows App

On Windows, the best air quality app is Airqualiter. It’s a standard AQI app that displays all the information you’d expect. You can add multiple cities, browse the world view, plan your days with hourly forecasts, and more.

Download: Airqualiter for Windows (Free)

6. Check Air Quality From Your Browser

check air quality in browser

If you don’t want to install a dedicated AQI measurement app, you can check air quality from your browser too. There are a lot of websites that offer a similar set of features without installing anything.

Two you should try are BreezoMeter and Aqicn. Both of them provide largely accurate results. As it turns out, Aqicn actually stems from a social enterprise project called The World Air Quality Index Project.

Visit: BreezoMeter
Visit: Aqicn

7. Get an Air Monitor

For people who live in a highly polluted city, buying an air monitor might be the best option. It offers the most accurate readings and updates by the minute. In addition, you can pair them with a phone to check the quality from wherever you are.

Our review of the Plume Labs Flow 2 found it to be a quality device, so it’s worth a look. For even more options, our guide to the best smart air quality monitors will help you decide which is right for your space.

Breathe in Cleaner and Safer Air

With pollution levels soaring, it’s likely none of these websites and apps brought you good news. To stand the crummy air and avoid getting sick all the time, it’s wise to know what the air is like so you can make the best decisions for your health.

Speaking of air-related devices, make sure to watch out for common air conditioner mistakes to avoid during hot days.

Read the full article: The 7 Best Apps and Sites to Check Air Quality Anywhere


Read Full Article

How to Partition Your External Time Machine Hard Drive


mac-partition-hard-drive

Now that almost every Mac ships with a speedy solid-state drive, many of us have learned to live with smaller storage capacities in our computers. At the same time, external hard drives are cheaper than ever. That means it’s easy to get yourself an external drive big enough to partition for both Time Machine backups and external storage.

If you plan to use a drive for both of these purposes, there are a couple of points you need to know first. We’ve explained everything below, including how to store files on your Time Machine hard drive without even partitioning it first.

How Time Machine Works

Time Machine showing historical backups of Home folder

Time Machine works by creating historic backups of your Mac. This means it keeps older copies of files even after you edit or delete them, until a time when you need more storage for newer backups. Thanks to these historic backups, you can travel back in time to restore your Mac’s data from days, weeks, or months ago.

In contrast, the alternative to historic backups is to overwrite the previous files every time you back up your Mac. With this method, you’d have no way to retrieve a deleted file if you already made a new backup. Obviously, that isn’t particularly useful.

The downside to Time Machine’s historic backups is that the oldest files remain on your drive until it runs out of storage. You might not care to have extensive backups of files you deleted years ago, in which case there are better uses for your external drive.

Be Careful When Storing Files on Your Time Machine Drive

The more you use a mechanical item, the more likely it is to fail. Your external hard drive is no exception; it has moving parts that read and write data, which can give out over time.

If you choose to use your Time Machine drive as external storage, you might shorten its lifespan by doing so. This is because the drive will carry out many more read and write actions as you save, edit, and delete extra files.

Copying files to Time Machine drive progress bar

It’s also worth mentioning that Time Machine doesn’t back up any extra files you keep on your external drive. Even if it did, you’d lose the original files and the backup at the same time if your drive stopped working.

We strongly suggest you keep multiple backups in different places for any important data.

Store Files on Your Time Machine Drive Without a Partition

Time Machine drive being used for file storage in Finder

Technically, there’s no need to partition your hard drive if you want to use it for external storage as well as Time Machine backups. All you need to do is start copying files and folders onto the drive using Finder.

If your Time Machine backups are encrypted, you might need to authenticate changes to the drive with your administrator password.

Just make sure you don’t edit or save anything to the Backups.Backupdb folder. This is where Time Machine stores all its backups.

As your external drive runs out of storage, Time Machine deletes the oldest files from the Backups.Backupdb folder to make space for new ones. If your files are in that folder, Time Machine might delete them as well.

You might want to create a new folder, called Files, to clearly separate your files from your Time Machine backups.

Time Machine drive with separate Files folder

The Pros and Cons of Avoiding a Partition

The above method is the quickest and easiest way to save files on your external Time Machine drive. Unlike using a partition, which we’ll explain below, you can start saving files to the drive without erasing all your existing Time Machine backups first.

But the lack of a partition also means your Time Machine backups will continue to swell in size until they take up all the free space on your external drive. Although Time Machine won’t delete your personal files when this happens, it might take up more space than you want it to.

That’s why a partition is the most practical long-term solution. You can allocate a set amount of space for your Time Machine backups and for your file storage so neither one hogs the available storage.

Create a Partition to Store Files on Your Time Machine Drive

Disk Utility showing Time Machine drive with partition

After you partition a hard drive, your Mac sees each partition as a separate drive. They have distinct names, varying amounts of storage, and can use different formats. You even need to eject each partition separately before you can safely unplug your drive.

Unfortunately, creating a new partition often erases your external drive. That means you may lose any existing Time Machine backups. You can make a Time Machine backup after partitioning the drive, but your backup history will restart from that point forward.

When you partition your hard drive, you get to choose how much space to allocate for your Time Machine backups. We recommend that you allow two to four times the size of your Mac’s internal drive. If you don’t want years’ worth of backups, you can reduce this size as you see fit. However, you shouldn’t go smaller than double the size of your Mac.

For example, if you have a 128GB MacBook, you should allocate at least 256GB for Time Machine backups. If you can spare more space, definitely do so.

How to Partition Your External Drive

  1. Connect your external hard drive to your Mac. Then go to Applications > Utilities and launch Disk Utility.
    1. If you can’t find it, press Cmd + Space to search for Disk Utility using Spotlight.
  2. Select your external drive from the sidebar and click the Partition button. Use the Add (+) option to create a new partition and choose the Name, Format, and Size for each partition by selecting it in the diagram.Partition options from Disk Utility in macOS
  3. Your Time Machine partition must use the Mac OS Extended (Journaled) format, but your file storage partition can use any format. Choose ExFat if you plan to use it with Windows; otherwise choose Mac OS Extended (Journaled).
  4. When you’re ready to create your partition, click Apply, followed by Partition. When the process completes, you should see each partition as a separate drive in Finder.Partition confirmation popup in Disk Utility
  5. If you can’t partition your external drive, you may need to reformat it first. Select your drive in the sidebar and click the Erase button. Choose any name and select the Mac OS Extended (Journaled) format. After erasing the drive, return to step two above.Disk Utility erase window

After partitioning your drive, you need to set up Time Machine again. To do this, open the Apple menu and go to System Preferences > Time Machine. Click Select Disk and choose your new Time Machine partition to start creating a backup.

Remember that your Time Machine backups will start from scratch from this date forward. Also, don’t forget that you need to create separate backups for anything in your file storage partition.

Better Use for Your Mac Storage

If you don’t need access to five years’ worth of backups—and you’re careful about keeping your most precious data safe—you probably don’t need too much space for Time Machine. By partitioning your drive, it’s easy to create a separate space for Time Machine backups alongside other media or files you want to store.

If you find you’re still running short on storage, you’ll be glad to know that external hard drives are cheaper than ever. Take a look at the best external drives for a Mac to find out what options are available.

Read the full article: How to Partition Your External Time Machine Hard Drive


Read Full Article

How to View and Delete All Your Windows 10 Activity History


windows-10-privacy

Windows 10 collects and saves your activity history both on your computer and to the cloud, from browsing history to location information. Luckily, Microsoft makes it easy to see all the data they store and allows you to delete it.

Let’s explore the different ways Microsoft stores data on you, and how to view your Windows 10 activity history.

What Data Does Windows 10 Track?

The data that Windows collects includes:

  • Edge browsing history
  • Bing search history
  • Location data (if it’s enabled)
  • Cortana voice commands
  • Windows 10 usage for the Timeline feature

If you use Microsoft’s HealthVault or the Microsoft Band device, any activity collected through that service is also stored. Microsoft says it collects this data to provide you with more relevant results and content that is useful for you.

How to Delete Your Windows 10 Activity History

You can easily see what data Microsoft stores and how to delete it. There are two ways you can clear your recent activity on Windows 10:

  • From your computer’s settings.
  • From your Microsoft cloud account.

To do it on your computer, click on the Settings button on the Start menu.

The Settings button on the Start menu.

Then, click Privacy.

Windows 10 Privacy Settings

On the left bar, select Activity History.

The "Activity History" option on the sidebar.

Under Clear Activity History, click the Clear button.

The "Clear" button to erase your activity history.

This will clear the activity history for the account you’re currently using.

How to Disable Activity Tracking in Windows 10 Timeline

Back in 2018, Microsoft added a new Timeline feature that tracks all your recent activities on Windows 10. You can view it by pressing the ALT+Windows keys. You’ll see all the windows you currently have open, as well as all the files you’ve opened in the past.

This activity syncs between all your devices, so if you’d rather Windows didn’t store your activity, you should turn this feature off.

To do this, access the Activity History page as you did above. From here, uncheck Store my activity history on this device. This stops Windows from remembering what you did on your timeline.

Then, untick Send my activity history to Microsoft to stop your data from being sent to Microsoft’s servers. Now that both boxes are unticked, you should notice a lack of activity tracking in the future.

The tickboxes relating to activity history.

How to View All Windows 10 Activity History

If you want to view all activity history on Windows 10, you can do so on the Microsoft account privacy website. When you access the website and log in, you’ll see a range of categories. Each one will take you to a page that shows all the information Microsoft has stored about you, relating to that category.

There’s a lot to take in on this page, so here’s a brief rundown of each category and which you should check.

The Windows 10 Activity History Categories

Microsoft Privacy Settings

Browsing history handles the data you’ve stored via browsing Microsoft’s browser, Edge. As such, if you only use Edge to download Firefox or Chrome, you probably won’t find a lot of data here. If Edge is your primary browser, take a look to see what browsing habits are stored here.

Search History is only useful if you use Bing. When you use a search engine like Google, they tend to “remember” what you searched for to improve your experience. Microsoft uses your search data to better tailor search results, Cortana answers, and future search suggestions.

Location Activity includes the times where you let a Windows device get access to your location. It’s good to double-check this part to see if Windows is storing your location.

Voice Activity should be the top priority if you’ve ever used Cortana before. Here, you’ll find saved clips of you giving commands to Cortana, used by Microsoft for better speech recognition.

Media Activity is where Microsoft keeps tabs on what you enjoy watching to further your recommendations. If you’re getting weird suggestions because of something someone else watched, it’s worth checking out.

Product and service cover how you use Microsoft products. This category splits into two sections; activity for actions you’ve performed and performance for system logs.

Cortana’s Notebook is where Cortana keeps all her logs. If you use Cortana a lot, you’ll find a lot of data stored here. It’s a good idea to give it a once-over to see what Cortana is logging and erase anything you don’t like.

You can also click on the Activity History tab to will view a full list of all data types: voice, search, browsing history, and location information. Microsoft also makes it easy to filter down to each category by clicking on it

How to Use Windows 10 and Maintain Your Privacy

Microsoft is eager to get everyone using Windows 10 as quickly as possible, resorting to offering free upgrades to encourage migration. However, users have never considered Windows 10 as a bastion of privacy. Ever since its release, users have discovered ways that the operating system tracks what you do.

As such, a privacy-minded person may feel uneasy that their new PC has Windows 10 on it. If you’d rather not scrub the drive clean to install a different operating system, there are steps you can take to reduce what data Microsoft gathers about you.

Unfortunately, there is no silver bullet for Windows 10 privacy. Recommended steps range from setting options during the initial OS setup to installing third-party tools to keep tabs on everything.

The topic of maintaining your privacy while using Windows 10 is so big it deserves its own guide. Be sure to check out our complete guide to Windows 10 privacy settings for the full run-down.

Keeping Your Data Safe in Windows 10

Windows 10 is not the privacy advocate’s top choice for operating systems, but you can monitor your data and tweak the privacy settings to suit your needs. Now you know how to view the data Microsoft has on you, and how to erase them.

If you don’t trust that Microsoft has taken their eyes off you, try one of these tools to manage privacy settings in Windows.

Read the full article: How to View and Delete All Your Windows 10 Activity History


Read Full Article

10 Insanely Weird Wikipedia Articles You Should Read


weird-wikipedia

Wikipedia is full of useful information, but it also has lots of weird things to read about. These can be fun articles to read for an educational laugh.

We’ve rounded up some of the weirdest and strange Wikipedia pages to keep you entertained. Start reading and enjoy getting lost in these crazy articles.

1. Danish Protest Pig: A Porky Flag Replacement

Danish protest pig
Image Credit: Axel Krampe/Wikimedia Commons

The Danish Protest Pig is a nickname for the Husum Red Pied, a rare pig breed that originated at the beginning of the 20th century. Danes living in the Prussian-ruled North Frisia were prohibited from raising their red-and-white striped flag.

Because of the pig’s red color and white belt, the creature became a symbol of national identity and stand-in for the real flag. The breed was considered extinct in 1968, though small numbers have cropped up again since 1984 (mainly in zoos.)

2. Mary Toft: Claimed to Give Birth to Rabbits

Mary Toft supposedly giving birth to rabbits
Image Credit: William Hogarth/Wikimedia Commons

Mary Toft was an English woman who in 1726 claimed to have given birth to rabbits. Following a miscarriage, Toft said she had become startled by a rabbit and then became obsessed with them, before eventually giving birth to parts of the animal. Supposedly.

The case came to the attention of King George I and gained national attention. Toft was studied in London, but after a grilling she eventually admitted that she had placed the rabbit parts inside her. She was imprisoned for the hoax, but later released without charge.

3. Ruth Belville: Sold People the Time

Ruth Belville and Maria Belville
Image Credit: Hulton Archive and Royal Museums Greenwich/Wikimedia Commons and Wikimedia Commons

Believe it or not, a world existed before smartwatches. Since there was no internet to connect to for syncing clocks, Ruth Belville, along with her mother Maria Elizabeth and father John Henry, sold people the time from the mid-1800s to the mid-1900s.

Ruth Belville would attend the Greenwich Observatory at 9am, where she would set her watch to the conservatory clock—the most accurate clock in England. People would subscribe to her services, and she would travel around and set their clocks to the right time. Ruth retired at age 86 and died three years later.

4. My Immortal: The Worst Fan Fiction Ever Written

Hogwarts letter
Image Credit: Liam Truong/Unsplash

My Immortal is a Harry Potter fan fiction that was published online between 2006 and 2007, telling the tale of a vampire who falls in love with Draco Malfoy. It’s considered by many to be the worst fan fiction ever due to its awful writing, inconsistent plot, and disregard for the source material.

The true author is unknown and is considered to be a detriment to people who want to bring legitimacy to fan fiction—indeed, some believe the story to be a satirical work. Nevertheless, it has inspired a YouTube series and further fan fiction.

5. Elvis Sightings: The King of Rock and Roll Lives On?

Elvis Presley
Image Credit: Metro-Goldwyn-Mayer, Inc./Wikimedia Commons

You’d be forgiven for thinking that Elvis Presley died in 1977. In fact, according to authors like Gail Brewer-Giorgio, the famous singer didn’t actually die and instead went into hiding. Perhaps he checked in at the Heartbreak Hotel.

Alleged sighting locations include airports, amusement parks, and in the background of movies. Of course, all of them can be plainly explained, but it didn’t stop satirical newspapers like Weekly World News mocking the conspiracy theory with a front page headline of “New wave of Elvis sightings!”

6. Hubert Blaine Wolfeschlegelsteinhausenbergerdorff, Sr.: The Longest Name Ever

Hubert Blaine
Image Credit: Associated Press/The Tuscaloosa News

Hubert Blaine Wolfeschlegelsteinhausenbergerdorff Sr. may seem like a long name on its own, but that’s actually an abbreviated version of the real 988-letter surname—the exact length and spelling is even up for debate, owing to various printing errors over time.

Hubert was a German-born American typesetter who holds the record for the longest name. He said that his great-grandfather created the surname in the 19th century when German Jews were forced to take a second name as the government didn’t like traditional patronymic names.

7. Glasgow Ice Cream Wars: Violence Under the Cover of Ice Cream

Ice cream truck
Image Credit: Pixabay/Pixabay

The Glasgow Ice Cream Wars took place in Scotland during the 1980s. It wasn’t actually a feud over ice cream, but instead a turf war between rival criminal organizations operating out of ice cream trucks.

Drivers often used violence and intimidation tactics to try to hold their ground and eventually the tension mounted and bubbled over. Sadly, one family was killed in an attack which then resulted in a 20-year battle in court.

8. Great Stink: When London’s Sewage Filled the Thames

The silent highwayman
Image Credit: Punch Magazine/Wikimedia Commons

In the 19th century, London’s longstanding sewage problem came to a head when the hot weather exacerbated the smell of waste in the Thames river. The event was dubbed the Great Stink, but worse than the smell were the outbreaks of cholera, diphtheria, and scrofula.

An engineer, Joseph Bazalgette, came to the rescue and reworked London’s entire sewer system. He and his crew did so well that much of their system is intact today.

9. Extreme Ironing: Outdoor Thrills With a Well-Pressed Shirt

Extreme ironing
Image Credit: Phil Shaw/Wikimedia Commons

Ironing isn’t the most exciting thing. Extreme ironing, on the other hand, aims to add some danger to this mundane household chore.

The sport is tongue-in-cheek, with contestants aiming to take photos of themselves ironing in crazy locations. Spots include the Antarctic, the middle of a go-kart race, or whilst parachuting.

10. Shizo Kanakuri: Completed a Marathon in 54 Years

Shiso Kanaguri
Image Credit: Asahi Shinbun/Wikimedia Commons

Shizo Kanakuri was a Japanese marathon runner who was reported to have set a world record in the qualifying trials for the 1912 Stockholm Olympics. He was then one of two athletes that Japan sent for the games.
However, during the Olympic marathon, he fainted. He was so embarrassed by this that he went home to Japan without telling anyone. The Swedes considered him missing until he was found 50 years later. He then completed the rest of the marathon, setting a time of 54 years, 8 months, 6 days, 5 hours, 32 minutes, and 20.3 seconds.

“It was a long trip. Along the way, I got married, had six children and 10 grandchildren,” said Kanakuri.

Discover More With Wikipedia

These are only a selection of the weird and wonderful articles that Wikipedia has. They even have their own list of all their unusual articles.

Wikipedia is undoubtedly an amazing resource. If you want to get more from it, check out these tools to make Wikipedia better.

Read the full article: 10 Insanely Weird Wikipedia Articles You Should Read


Read Full Article