Apple devices continue to lead the wearables market, according to a new report from IDC out today, which claimed the Cupertino-based company shipped a total of 46.2 million wearables for the year. The firm also reported the worldwide market for wearable devices grew 31.4 percent during the fourth quarter of 2018, to reach 59.3 million units shipped, while shipments for the year grew 27.5 percent for a total of 172.2 million. Apple retained its number one position in wearables again in Q4, with 16.2 million wearables shipped – 10.4 million of which were Apple Watches, the report said.
Smartwatches together grew 54.3 percent in 2018, and accounted for 29.8 percent of all wearables. Apple Watches accounted for nearly half that market, the report said.
IDC forecasts that Apple’s growth in wearables will continue, thanks to a strong start for the newer Apple Watch Series 4.
In addition, IDC noted it recently revised its “ear-worn” category of wearables to include wireless headphones that allow users to call upon a smart assistant through either a touch of a button or hot-word detection. That means devices like Apple’s AirPods, Google’s Pixel Buds, Bose’s QC35II and others are now being counted among the wearables category.
Much of the growth in wearables was also attributed to the increasing number of these sorts of ear-worn devices, like Apple AirPods.
In Q4, for example, ear-worn devices grew 66.4 percent from the year-ago quarter to capture at 21.9 percent market share.
The firm said the growth was due to a combination of factors, including the increasing popularity of smart assistants and the ditching of the smartphone’s headphone jack, led by Apple.
“The market for ear-worn wearables has grown substantially this past year and we expect this to continue in the years to come,” said Jitesh Ubrani senior research analyst for IDC Mobile Device Trackers, in a statement. “It is the next battleground for companies as these types of headphones become a necessity for many given the exclusion of headphone jacks from modern devices. Add to that the rise of smart assistants and in-ear biometrics and companies have the perfect formula to sell consumers on a device that’s complimentary to the device ecosystem that lives on their wrist and in their pocket,” he added.
Meanwhile, smartwatches grew 55.2 percent to capture a 34.3 percent share. Wristbands reached a 30 percent market share, thanks to launches from Xiaomi, Huawei, and Fitbit.
Xiaomi was in second place for the quarter, behind Apple, with a 12.6 percent market share compared with Apple’s 27.4 percent. The company remains strong in its home country of China, but sales of its Mi Band 3 have also done well. Of note, its Mi Band 3 accounted for over 30 percent of all wristbands shipped during Q4.
Behind Xiami was Huawei, which grew by a sizable 248.5 percent thanks to Huawei and Honor phones being bundled with wearables, along with other product launches. Fitbit and Samsung rounded out the top 5, with the former returning to growth thanks to the Charge 3 and promotions around its Versa, and the latter also by bundling wearables with its smartphones.
Samsung shipped 4 million wearables in Q4, compared with Apple’s 16.2 million.
Let me blunt up front: I think Google should launch a censored search engine in China (albeit with careful organizational boundaries). And I think that Google employees who would undermine such a project need to step down and walk out the front door to opportunities more in line with their purported values.
I am reacting to Ryan Gallagher’s piece yesterday in The Intercept, in which his sources within the search giant have been tracking changes in the Project Dragonfly software repository, the code that would power a hypothetical Google search engine in China. As Gallagher wrote:
But Google executives, including CEO Sundar Pichai, refused both publicly and privately to completely rule out launching the censored search engine in the future. This led a group of concerned employees — who were themselves not directly involved with Dragonfly — to closely monitor the company’s internal systems for information about the project and circulate their findings on an internal messaging list.
Gallagher seemingly celebrates the guerrilla actions of these disaffected workers, but what confuses me is why these employees continue to work at Google at all? It’s one thing to vociferously argue against a business decision within the confines of a corporate campus; it is something completely else to regularly track activity and leak that to a journalist. When did Mountain View become Capitol Hill?
You’re reading the Extra Crunch Daily. Like this newsletter?Subscribe for free to follow all of our discussions and debates.
At least some employees appear to be understanding that paradox and taking action. As Gallagher wrote:
The lack of clarity from management has resulted in Google losing skilled engineers and developers. In recent months, several Google employees have resigned in part due to Dragonfly and leadership’s handling of the project. The Intercept knows of six staff at the company, including two in senior positions, who have quit since December, and three others who are planning to follow them out the door.
If you disagree with the ethics of your company, the best course of action — particularly in the strongest employment economy in years — is to find a job more in line with your values.
Dragonfly and the intensifying ethical tradeoffs of tech
That said, these ethical tradeoffs are a pattern we are going to see more and more frequently in tech. The intellectual and ethical purity of the original internet as written by people like John Perry Barlow has been subsumed by the power politics of capitals like Washington, Beijing, and Brussels.
The internet as independence movement is 100% dead.
That makes the ethical terrain for Silicon Valley workers much more challenging to navigate. Everything is a compromise, in one way or another. Even the very act of creating value — arguably the most important feature of Silicon Valley’s startup ecosystem — has driven mass inequality, as we explored on Extra Crunch this weekend in an in-depth interview.
What’s worse is that product designers are losing their agency to even affect those tradeoffs. A decade or two ago, Google might have made something of a difference in the development of the Chinese internet. But today? It’s impossible for me to see how Google could convince the Chinese Communist Party of, well, pretty much anything.
There is an incredible arrogance that a product decision made at Google these days will somehow affect the course of Chinese civilization. As Gallagher concluded his piece:
If Google is still developing the censored search engine, [Anna Bacciarelli, a technology researcher at Amnesty International] said, “it’s not only failing on its human rights responsibilities but ignoring the hundreds of Google employees, more than 70 human rights organizations, and hundreds of thousands of campaign supporters around the world who have all called on the company to respect human rights and drop Dragonfly.”
“Respect human rights” by not offering a censored search product in a country where every other search engine already has the same censorship? What exactly is Google pioneering here? How does its entry negatively affect anything or further deny human rights?
China is now the world’s largest internet userbase, and Google ignores it at its peril. I want Google services in China, if only because I trust Google far more than other companies (American or Chinese) to try to push toward openness even in a closed system. Maybe it will censor slightly less than its competitors — and isn’t that what progress looks like?
Technology in this context isn’t about disruption or liberation but about the margin: it’s the tweaks in aggregate that might one day make a difference.
Yes, there are huge implications for execution. Creating an independent operating unit with its own P&L and separately reported financials would be critical to ensure that Chinese censorship policies don’t seep into Google’s main search product in the West. Thankfully, Alphabet is already setup to do just that.
I am a resolute defender of human rights, but the world is the world. China’s government has incredible control over its internet, and those constraints are unlikely to relax in the short-to-medium term. Google can be “pure” and just ignore the largest internet market in the world, but that seems like a seriously naive tradeoff. Far better to engage and try to find venues to push for openness, even if it will be mostly unsuccessful.
Like that strategy or hate it, but these sorts of compromises are increasingly the future for Silicon Valley. In this way, the tech industry is joining the ranks of pretty much every other industry in the economy. Changing the world sometimes means playing by unfair and dubious rules.
Obsessions
Perhaps some more challenges around data usage and algorithmic accountability
We have a bit of a theme around emerging markets, macroeconomics, and the next set of users to join the internet.
More discussion of megaprojects, infrastructure, and “why can’t we build things”
Thanks
To every member of Extra Crunch: thank you. You allow us to get off the ad-laden media churn conveyor belt and spend quality time on amazing ideas, people, and companies. If I can ever be of assistance, hit reply, or send an email to danny@techcrunch.com.
This newsletter is written with the assistance of Arman Tabatabai from New York
You’re reading the Extra Crunch Daily. Like this newsletter?Subscribe for free to follow all of our discussions and debates.
A good development environment is essential for every programmer. Whether you are developing the latest web apps or learning a language for the very first time, the environment you use should be convenient and easy to use.
IDEs (Integrated Development Environments) are designed to make coding easier for developers. Most of them are offline programs installed onto the computer’s hard disk.
Many browser-based IDEs are suitable for coding in the cloud. Most of them have limitations when compared to their offline counterparts, but they are improving all the time. No matter what you plan to make, there is an IDE for almost every use.
When Amazon bought the Cloud9 IDE in 2016, it was already a firm favorite with developers. Full integration with Amazon Web Services makes it arguably the most powerful and extendable online development platform currently available. The online IDE combines a code editor with a terminal and powerful debugging tools.
Cloud9 also features a pair programming mode similar to VS Live share allowing collaborative remote programming in teams. Need fast prototyping? Cloud9 gives you direct access to AWS services through the integrated terminal assist.
CodeTasty is a fully featured cloud IDE in the cloud, and is quick and simple to set up.
All major languages are supported, along with linting and transpiling for Typescript among others. The editor itself is a full virtual development environment complete with terminal and output windows. CodeTasty is free and fully functional, though paid tiers are available for more project options and team collaboration.
Codecademy combines an online IDE with lessons to teach coding from beginner to expert. Their diverse catalog covers popular languages including Python, JavaScript, CSS, HTML, and Ruby.
Alongside language learning, Codeacademy provide Pro and Pro Intensive paid courses designed to cover whole subjects. Expert courses on machine learning, test driven development and front end web development are just some of those available.
The p5.js library is based on JavaScript and provides tools for creating interactive art through code. Rather than installing the library and running a local server, the p5.js web editor allows you to code instantly online.
As well as creating beautiful visuals, the p5.js library offers opportunities for interaction. Our Voice-Sensitive Robot Animation tutorial shows how quick and easy it is to create reactive art with p5.js.
An online Python IDE needs to be quick, easy to use, and have a terminal for testing. Codenvy provides all of these things and much more. Codenvy is language agnostic, and each instance of the IDE is an independent development environment.
Extra packages and modules can be installed using the online terminal. Codenvy is a robust development and collaboration tool, and capable of almost all forms of modern development.
While the concept of a GitHub IDE might seem strange at first, it makes a lot of sense. Gitpod exists as a way to edit files on GitHub in the browser. A browser extension adds a button to the GitHub page, which when clicked opens a workspace for the current project.
Editing takes place in an IDE based on VS Code. Side by side code comparison is built in, along with commenting for collaboration within a team. Gitpod is a unique idea and currently in a free beta stage for public and private repos.
8. Best Online IDE for Ruby and Ruby on Rails: Repl.it
Ruby holds a special place in many coders’ hearts. It is easy to read, concise to write, and the backbone for the ever trendy Ruby on Rails platform. An online IDE for Ruby should be bold, simple and aesthetically pleasing. Repl.it has environments for both Ruby and Ruby on Rails and is the perfect place to sharpen your skills.
If you want to make beautiful looking things for the web, Codepen.io is the place for you. The IDE operates like a sketchbook for all kinds of front end web development. A massive community of all skill levels continuously push the limit of what is possible in the browser.
The weekly Spark newsletter is a collection of the best pens from the week along with the Codepen Radio podcast. Alongside its community, Codepen has many other awesome features for coders and web developers.
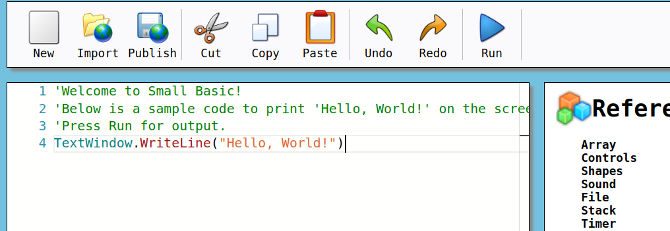
Starting to code is tough for kids. Small Basic includes a kid-friendly online editor which is forgiving with code syntax. The language is readable but close enough to actual code to be useful.
The included library covers drawing, text input, sound, and even some basic networking. Check out some simple coding projects for kids on the platform to see if it’s for you!
Parents and kids to learn together with the Tynker block-based platform. There are multiple free courses available to try the service out, but paying the monthly $7.50 subscription gets you much more. Tynker has an extensive library of coding, game, hardware and Minecraft modding courses for ages seven upwards.
Perhaps unsurprisingly, the best place to program Arduino boards online is Arduino’s own Create Web editor. While still in its infancy, it works much like the offline IDE. Alongside the code editor, the library manager and serial monitor are also available in the browser.
Currently, there is only support for official Arduino boards and a handful of others, however more support is coming in the future. One caveat of this IDE is the need to download a small bridge program to access the USB ports and upload code.
13. Best Online IDE for Visual Hardware Programming: XOD.io
XOD is an open source, node-based visual programmer for Arduino boards. Each block represents devices and sensors, and you can make links between them by dragging lines from each node.
The library comes with many nodes for different uses, and collections of nodes collapse into new nodes for clean, readable blocks.
Unfortunately, the browser version of XOD does not support upload to boards directly. There is, however, a Simulate mode which will test the program without the need for a connected board.
Coding on the Cloud
Many of the IDEs on this list are capable of doing nearly everything a coder requires. However, most come with some limitations. Many have a subscription cost to cover costs, and they all require a constant connection to the internet to function properly.
Offline IDEs have the convenience of not requiring an internet connection, and many, including Microsoft’s Visual Studio and VS Code are powerful and free.
Every time you’re about to take off on a plane, you hear the warning: “Your portable electronic devices must be set to airplane mode until further notice.”
You already know what to do with your smartphone: there’s a simple airplane mode toggle on both Android and iOS. But what about your MacBook?
A MacBook is an electronic device, and it’s certainly portable, so you might be puzzled about using it while in flight. Since there’s no airplane mode setting in macOS, does that mean you don’t have to do anything? And how do you put a MacBook in airplane mode manually?
It’s time to clear the confusion.
What Does Airplane Mode Do?
First, let’s clarify what airplane mode does and why it exists. On an iPhone, for instance, airplane mode setting disables the following services:
Cellular: This stopps your phone from communicating with the cell towers on the ground.
Wi-Fi: Disconnects your device from all Wi-Fi networks and prevents it from searching for networks.
Bluetooth: Disable any Bluetooth devices your phone is connected to (AirPods, for example). Your phone also stops searching for these devices.
GPS: Stops your device from getting signals from the satellite.
The reason airplane mode was originally introduced is that all these services transmit and/or receive radio signals at multiple different frequencies. The signals can potentially interfere with the radio system of aircraft as well as the towers on the ground.
So far, there’s been no evidence that radio signals emitted by electronic devices pose a more serious threat than a pesky noise on the aircraft radio. In theory, though, even that noise could distract the pilot or prevent them from getting critical information.
The Aviation Safety Reporting System has record of a few incidents where passengers’ devices allegedly caused radio static interference and even compass system malfunctions. That’s reason enough for the industry to stick to the rule.
Because airplane mode for smartphones disables Wi-Fi, Bluetooth, and GPS—which, aside from GPS, are also available on a MacBook—you’d assume they pose a risk, too. However, the main culprit of any possible interference is the GSM/3G radio. Its signal is way more powerful than those emitted by the Wi-Fi and Bluetooth radios and received by the GPS.
And MacBooks simply don’t have that.
The airplane mode setting on iOS and Android disables all radios present in your device because it’s easier and safer than picking and choosing. But the truth is the radio signals emitted by your laptop are too weak to cause any kind of trouble.
Regulations on Airplane Mode and Laptops
In 2013 the U.S. Federal Aviation Administration allowed in-flight use of Wi-Fi and Bluetooth—on the condition that the carrier provides Wi-Fi. In a 2013 guidance update, the E.U.’s Aviation Safety Agency named smartphones, tablets, and ereaders as electronic devices, with no mention of laptops whatsoever.
So from a legal standpoint, there seems to be no need to put your MacBook in airplane mode. However, switching off Bluetooth and Wi-Fi can help you save battery power, which is vital when you need your laptop to last for the whole flight.
MacBooks don’t have an actual GPS chip like your phone does. Instead, location services uses nearby Wi-Fi networks to figure out your location. This affects battery charge only when an app is actively using it. If you have an app constantly trying to pin down your location—like a weather tool that runs in the menu bar—you can either shut down the app or disable location services.
Airplane Mode on Mac: Disable Wi-Fi and Bluetooth
Switching off Wi-Fi and Bluetooth on a MacBook is easy. We’ll walk you through it in case you aren’t sure:
Click on the Bluetooth icon in the top menu bar and choose Turn Bluetooth Off to disable it.
Next, click the Wi-Fi icon next to it and choose Turn Wi-Fi Off.
If you don’t see one or both of these icons, you’ve probably hidden them. In this case, you’ll need to go to Apple logo > System Preferences. Select Bluetooth or Network to turn them off from than panel.
That’s it. And while you’re at it, you can also quit any apps you have running up in the menu bar. Normally they don’t use many system resources, but when you want to conserve as much energy as possible, you should shut down whatever you’re not using.
To quit an app that’s running in the menu bar, find the settings icon and click it. Settings usually include a Quit option.
Disable Location Services
Next, here’s how you can disable location services:
Go to System Preferences > Security & Privacy.
Open the Privacy tab and select Location Services on the left.
Here you’ll see a checked Enable Location Services box and the list of apps using your location. Both the checkbox and the list appear disabled until you authenticate.
To make changes, click on the lock in the bottom-left corner. Enter your user password and hit Enter or click the Unlock button.
Uncheck the Enable Location Services checkbox.
Click on the lock icon to save your changes.
If you don’t want to completely turn off location services for some reason, you can deny all apps access to it. This way, your MacBook’s location functionality won’t receive any signals. This is how you do it:
Just like before, go to System Preferences > Security & Privacy > Privacy > Location Services.
Click on the lock icon in the bottom left-hand corner.
Enter your password and click Unlock. The list of apps using location services should be active now.
Scroll down the list and uncheck all checkboxes.
Click on the lock again to save and password-protect your changes.
By following the steps above, you’ll essentially set your MacBook to airplane mode. Just keep in mind that regardless of your settings, you won’t be able to use the laptop during taxi, takeoff, and landing. The cabin crew will ask you to stash it away until you’re at a safe altitude.
MacBook Airplane Mode: Unnecessary but Handy
To answer the original question: no, you don’t really have to put your MacBook in airplane mode. But you might as well, because it saves battery power. Plus, it eliminates any chance (however slim) that your MacBook will mess with the complex machinery that keeps your plane in the air.
So in the end, it’s your call. You can simply keep everything on, or disable the services you won’t use anyway. After all, in-flight Wi-Fi is not always worth the money, and the free Wi-Fi hardly ever works.
If you’re new to Steam, you might not know of all the security features the digital distribution service has to offer. Thankfully, Steam has a plethora of great features you can use to better secure your account.
Let’s take a look at the different security options available in Steam.
Why Should I Bother With Steam Security?
If you’ve just downloaded Steam, your account probably has very few games on it. As such, you may not feel inclined to add protection to your account.
Why bother when you have so little to protect? While it may not seem crucial right now, locking down your Steam account really helps in the long run. Ideally, you should secure it the moment you create your Steam account!
It Protects Future Purchases
The more obvious reason for adding additional protection is to protect the games that you’ll add in the future. Steam frequently hosts sales on its store, where games reach irresistibly-low prices. It doesn’t take long for someone to amass an impressive collection through sales alone!
If a hacker does manage to get into your account, they’ll take your entire library with them until you get it back. By securing Steam now, you’ll avoid that future headache and keep your games safe.
It Enables Certain Features
Some of Steam’s features are locked away until you add security to your account. Even if you don’t really care for your game collection, it’s best to add security and unlock all the features that Steam has to offer.
Steam is more than just a video game store. Users can sell cosmetic items and collectible goods on a virtual marketplace for real money. As such, Valve has to ensure hackers can’t get into someone’s account and sell all the goods within.
To protect people from losing their items, people without Steam Guard can’t trade or sell on the market. Even after you add Steam Guard, it takes 15 days for the marketplace to fully unlock—so do it as soon as possible!
What Is Steam Guard?
You may have noticed reference to “Steam Guard” in the previous paragraph. Steam Guard is the best method of securing your account, and one of the easiest ways to protect your library.
It uses a simple two-factor authentication (2FA) system, which is tied with either your email address or the Steam app. When you log into Steam on a new computer, it’ll ask you for the 2FA code. You’ll receive the code either via email or app, depending on your preference.
Steam Guard is so secure, the CEO of Valve, Gabe Newell, gave out his Steam login details at its release. Anyone could steal his entire Steam library—if they could crack the Steam Guard defending it. Fortunately, Steam Guard kept his account perfectly safe.
How to Set Up Steam Guard
Method 1: Steam Guard Via Email
You can have Steam Guard send you an email when it detects a new login. In order to activate this, Steam requires a verified email address, so it knows where to safely send the code.
If you haven’t already, head into the inbox of the address you signed up with and check for a verification email. When it comes in, click the link to confirm your email.
Once this is done, quit Steam and reload it two times. To fully quit out of Steam, right-click the Steam icon in the taskbar and click Exit.
Once you’ve done this, Steam Guard should automatically activate on your account. If it hasn’t, you can double-check if it has been enabled by clicking on Steam in the top left, then Settings.
Finally, look for Manage Steam Guard Account Security and click on it to check if Steam Guard is up and running.
If you’d prefer to use your phone instead of checking your email, you can use the official Steam app as your 2FA authenticator. All you need to do is bind your account to the app and you’re ready to go!
To do this, first download the app for iOS or Android. Once it’s downloaded, sign into the app using your Steam account. Then, tap the icon on the left and select Steam Guard.
Tap Add Authenticator.
If you already added a mobile number to your Steam account, Steam will automatically send an SMS code to it. If not, it will ask for your phone number now.
Either way, once Steam has your number, you’ll receive a text message with the code needed to sign in. Go ahead and enter it.
You’ll be given a recovery code in case you need to remove the authenticator. Be sure to note this down!
Now when you sign in to Steam from a new location, you’ll be asked for a code. Just open the Steam app and enter the code that appears under Steam Guard to log in.
Adding a Phone Number to Steam
If your account is stolen or you forget your password, Steam can send you text messages to help get you back into your account. It also allows you to transfer the mobile authenticator to another phone.
To do this, open the Steam program. Find your username at the extreme top-right, click it, and then click Account Details.
Look for Add a phone number and click on it.
Here, you can enter your number to confirm your mobile phone. Once done, Steam can use your phone as a backup security measure.
Signing In to Third-Party Sites With Steam
Sometimes, a website will ask for your Steam login. Typically, this is performed by websites that scan your inventory or games list in order to provide you with a specific service.
When a legitimate website asks for your Steam login, it’ll do so by using Steam’s official sign in method. This redirects you to Steam’s Community page where you can log in.
This method doesn’t show the third-party website your login details, so you don’t have to worry about being hacked. Once you’re logged in, Steam will tell the website about your inventory and games without revealing your private info.
If a website needs your Steam account information, look for this icon:
When you click this image, you’ll be redirected to the Steam Community website where you can safely log in.
Of course, anyone can copy this image and make it redirect to a fake Steam login site. That’s why it’s important to double-check the URL and make sure it goes to https://ift.tt/1qnrM60 with an HTTPS certificate. If you don’t see either of these, don’t enter your details onto the site!
Also, never enter your Steam login details into a website that doesn’t use this official method. Any website worth logging into will use it, so don’t bother with any service that doesn’t.
Staying Safe in the Future: Avoid Steam Scams!
Now that your account is secure, it’s a good idea to learn about how people can trick you out of your library. There are scammers out there that skirt around Steam’s security in order to steal accounts. The best way to fight them is to learn how they operate and how to defend yourself.
Steam is a great service for buying and playing games on, but its always-online nature makes it susceptible to hackers. Thankfully, Steam comes readily-equipped with some great security measures to protect you.
Instagram is fast becoming the most popular social network. It’s also a great place to promote your product or build an audience. Of course, posting photos and answering comments every day is time consuming. But with Postable, you can delegate most of the work. This intelligent tool lets you schedule posts in advance, and automate your engagement. You can pick up a lifetime subscription now for just $39 via MakeUseOf Deals.
Automated Growth
The key to making waves on Instagram is being active. Most top accounts post at least once every day. They also follow new people, comment on and like relevant posts, and respond quickly to messages. For side-hustlers and small startups, this level of engagement can be difficult to maintain. Postable offers a little respite.
The app lets you schedule posts in advance, complete with captions and hashtags. You can do the same with stories. The process couldn’t be easier: simply drag and drop photos into Postable, and then select the publishing time and date.
Postable can also help you gain followers. Tell the app who your target users are, and Postable will auto-follow them. You can set up similar rules for reposts, likes, comments, and messages. Thanks to in-depth analytics, you can see exactly what’s working and what isn’t.
Lifetime Service for $39
Order now for $39 to get your lifetime Postable subscription, worth $325.
If you want to read paid-for Medium articles without actually paying, you can now bypass the paywall using Twitter. Medium insists writers who produce paywalled content won’t lose any revenue, so this seems like a win-win for everyone involved.
The History of Medium’s Paywall
In March 2016, Medium started offering paid memberships. For $5/month or $50/year, Medium members gain exclusive access to articles, early access to new features, and no more ads. This means some articles are hidden behind a paywall to non-paying plebs.
At first, Medium’s Partner Program was limited to certain writers. However, in October 2017, Medium opened its Partner Program up to everyone, which means you can now get paid to write Medium articles. The problem is getting enough people to pay up.
How to Bypass Medium’s Paywall
In an effort to drive traffic to Medium, and potentially encourage people to start paying, Medium CEO Ev Williams has announced that people visiting Medium from Twitter will be able to bypass the paywall. Williams happens to be the co-founder of Twitter.
Essentially, anyone clicking a link to a paid-for Medium article from Twitter will be catapulted over the paywall without needing to pay. Medium authors expressed concerns this would mean less money, but Williams has assured them this isn’t the case.
All @Medium paywalled stories are now free and unmetered when you’re coming from Twitter.
The only question mark remaining is whether offering people an easy way to bypass the paywall is more or less likely to turn them from free users into paid users. On the one hand they’ll get a taste of the content on offer, but on the other, their need to pay disappears.
Blame People Using Ad-Blockers
Williams obviously hopes that by giving people a backdoor pass behind the paywall, Medium will add more paid subscribers. However, it’s certainly a gamble, as it’s surely only a matter of time before a Twitter bot starts linking to every paywalled Medium article.
And as for paywalls, no one likes them. However, they’re becoming more common thanks to people using ad-blockers. If you kill content creators’ passive income streams then they’re forced to seek more active income streams which require cold, hard cash.
Facebook is rolling out a new Dark Mode for Messenger. Facebook Messenger’s Dark Mode is designed to make it easier to use the app at night or in low light conditions. And if you know how, you can enable Messenger’s Dark Mode early by sending an emoji.
How to Enable Messenger’s Dark Mode
At the time of writing, Facebook is slowly rolling Messenger’s new Dark Mode out to Messenger on Android and on iOS. Over the coming weeks, the option to enable Dark Mode will appear in the settings, at which point you’ll be able to flick between the two.
However, if you want to start using Messenger’s Dark Mode right away, you can. All you need to do is send a crescent moon emoji to someone in any Messenger chat. This will unlock the new setting, and enable you to turn on Messenger’s new Dark Mode early.
Whether you enable it by using that emoji or wait until it’s available in settings, you’ll be able to switch between light and dark modes. According to Facebook, Messenger’s Dark Mode “provides lower brightness while maintaining contrast and vibrancy”.
The crescent moon Easter egg is available to everyone running the latest version of Facebook Messenger on Android and on iOS. It’s just that Dark Mode is hidden from view unless and until you send the crescent moon emoji to reveal the feature.
I once argued that websites with dark backgrounds suck. And I stand by that opinion. However, giving people the option to switch from a light background to a dark background makes absolute sense. Especially for people who like using their phone in bed.
This is why many of the big apps, as well as some operating systems and online services, now offer a dark mode or night mode. With that in mind, here’s how to enable dark mode in Firefox, Chrome, Opera, and Edge, so you’re sorted whatever web browser you use.
Someone is searching for you online. The web is full of websites and services that provide your details to others, sometimes free, sometimes for a fee.
It’s an uncomfortable sensation to know that your personal data can be used to track you. While unlikely anyone who has Googled you would intend harm, it is useful to know who they are.
It might be a potential employer, former lover, or even a long lost relative. If someone is searching for you online, these are the five most likely ways they have of finding you.
Who Is Searching for Me Online?
If you’re concerned that someone might be looking for you, there is sadly no way of knowing who they are.
In most cases, however, you probably have a good idea. Friendly faces will probably turn up via Facebook. Others, however, are likely to find another way.
While it’s not possible to reveal who they are, you can at least use the same tools they’re using. So, while you can’t find out who searched for you on Google, you can set up alerts whenever your name appears on a website, in a forum, or on social networks.
From there, you should be able to trace the message back to the original poster and find out who they are.
1. Use Google Alerts
Want to know who has Googled you? The first thing to do is to set up a Google alert. It might seem somewhat self-absorbed, but this is genuinely the first step in playing it safe.
Just don’t tell anyone you’ve got an alert for your own name on Google Alerts…
Sign into Google and visit google.com/alerts. Here, enter your name in the alert box at the top of the page and click Create Alert.
Use the Show Options link to expand the view. This lets you set how often email alerts will arrive and where they should be delivered. You’ll see a preview of your alerts too, to give you an idea of how they will look.
Now, whenever Google spots your name on a website, news page, social media, forum, or blog post, it will send you an email alert!
2. Look for Social Mentions
Like Google Alerts, but focusing on social networks that might see mention of your name is Mention.com.
This is a web-based alert system that offers apps for Windows 10 and macOS, as well as Android and iPhone. Signup is free for the standard service, while Mention also offers a 14-day trial of the fully featured service.
Once you sign up, sign in and create an alert. You can choose up to four additional alerts, which in this case might be the names of close family members.
Click Get Started to proceed. Mention will start scanning sources, including blogs, forums and social networks like Facebook and Twitter.
A default selection of sources is scanned initially; click the Edit alert button in the Mention dashboard to edit this.
The Mention dashboard lists all occurrences of your alert, which by default is sent to your email inbox. When an email is received, click the notification to instantly find out what context your name has been used in.
Is someone looking for you?
3. Set Up a LinkedIn Profile
A LinkedIn profile is incredibly useful for finding a new job. You might be a freelancer, an expert in your field or if you’re simply looking for a change of career.
However, a presence on LinkedIn means that you can be found.
Signing into the service will display a total of profile views for the current period. LinkedIn Premium members will see full details of those viewing them; the free account holders will only see a handful.
If someone is using LinkedIn to track you down, there is a good chance that it is for work-related reasons. On the other hand, you might like to know just who is looking, and why. Using the LinkedIn Premium service is a good way to get a handle on this.
4. Is Long Lost Family Searching for You?
Mawkish long-lost family reunions are TV ratings gold. They’re also often responsible for people trying to track down distant (or estranged) relatives for a reunion after many years.
Various websites exist that can be used to track you and your family down under the auspices of “family research”.
For example, adoption search sites (such as www.adopteeconnect.com) can be used to trace you, or your remote siblings. While no adoption agency would allow contact with individuals without permission, registering with one of these sites involves submitting consent.
Meanwhile, genealogy research behemoth www.ancestry.com has a vast database that could theoretically be used to track your current whereabouts.
It is, of course, one of many excellent online tools for researching your family tree. But like many of the tools we’ve mentioned here, it can be misused.
As an Ancestry member you receive notification if you have been added to other family trees. However, you cannot tell if anyone has checked yours or your ancestors’ details. It is possible to put a lock on your record, however, to prevent access by unrelated parties.
5. Obituaries and Death Notices
Interestingly, a death and subsequent announcement can show people where you are. Too busy being dead to care?
What if it was the passing of a loved one? Your mention in their obituary or death notice in the local press, replicated for the online edition, could place a big “I am here” notice about your head.
There are many people who share names, common and uncommon. Perhaps it won’t matter. But it’s worth taking care. After all, this information might be the last piece in the puzzle for someone trying to track you down.
It’s worth considering that the announcement of births and marriages in the press can also alert people to your location.
Use Alerts and Stay Aware!
People are always looking for you, be it friends, family, even fans. On the other hand, it might be debt collectors, potential employers, or even criminals.
There is no way to know who they are, so the smart option is to manage all interest in you. Five options are open to people trying to find you:
Google Alerts
Social networks like Facebook, Twitter, and Instagram
Professional networking tools such as LinkedIn
Public record and genealogy sites
Obituary and death notices of relatives
Meanwhile, it’s a good idea to take advantage of your own website (should you own one) to direct contact attempts. Don’t have your own site? Use one of the many free services to create a modest homepage.
As you may have gathered from our review of Samsung’s Galaxy S10, it’s a very solid phone with lots of advanced features. But one thing that’s especially difficult to test is the absolute quality of the displaymate — which is why we leave that part to the experts. And this expert says the S10’s screen is the best ever on a smartphone.
Ray Soneira has tested every major phone, tablet, and laptop series for many a year, using all the cool color calibration, reflectance and brightness measurement, and other gear that goes with the job. So when he says the S10’s display is “absolutely stunning and Beautiful,” with a capital B at that, it’s worth taking note.
OLED technology has advanced a great deal since the first one I encountered, on the Zune HD — which still works and looks great, by the way, thank you. But originally it had quite a few trade-offs compared with LCD panels, such as weird color casts or pixel layout issues. Samsung has progressed well beyond that and OLED has come into its own with a vengeance. As Ray puts it:
The Absolute Color Accuracy on the Galaxy S10 is the Most Color Accurate Display we have ever measured. It is Visually Indistinguishable From Perfect, and almost certainly considerably better than your existing Smartphone, living room HDTV, Tablet, Laptop, and computer monitor, as demonstrated in our extensive Absolute Color Accuracy Lab Measurements.
The very challenging set of DisplayMate Test and Calibration Photos that we use to evaluate picture quality looked absolutely stunning and Beautiful, even to my experienced hyper-critical eyes.
Make sure you switch the phone’s display to “natural mode,” which makes subtle changes to the color space depending on the content and ambient light.
And although he has enthused many times before about the quality of various displays and the advances they made over their predecessors, the above is certainly very different language from, for example, how he described the reigning champ until today — the iPhone X:
Apple has produced an impressive Smartphone display with excellent performance and accuracy, which we cover in extensive detail below. What makes the iPhone X the Best Smartphone Display is the impressive Precision Display Calibration Apple developed, which transforms the OLED hardware into a superbly accurate, high performance, and gorgeous display, with close to Text Book Perfect Calibration and Performance!!
High praise, but not quite falling all over himself, as he did with the S10. As you can see I rate smartphone displays chiefly by the emotional response they evoke from Ray Soneira.
At this point, naturally, the gains from improving displays are fairly few, since to be honest, not many people care or can even tell today’s flagship displays apart. But little touches like front and back sensors for ambient light detection, automatic calibration and brightness that take user preferences into account — these also improve the experience, and phone makers have been adding them on at a good clip as well.
No matter what flagship phone you buy today, it’s going to have a fantastic camera and screen — but if you like to see it all in black and white, read through the review and you’ll find your hopes justified.
Posted by Yanping Huang, Software Engineer, Google AI
Deep neural networks (DNNs) have advanced many machine learning tasks, including speech recognition, visual recognition, and language processing. Recent advances by BigGan, Bert, and GPT2.0 have shown that ever-larger DNN models lead to better task performance and past progress in visual recognition tasks has also shown a strong correlation between the model size and classification accuracy. For example, the winner of the 2014 ImageNet visual recognition challenge was GoogleNet, which achieved 74.8% top-1 accuracy with 4 million parameters, while just three years later, the winner of the 2017 ImageNet challenge went to Squeeze-and-Excitation Networks, which achieved 82.7% top-1 accuracy with 145.8 million (36x more) parameters. However, in the same period, GPU memory has only increased by a factor of ~3, and the current state-of-the-art image models have already reached the available memory found on Cloud TPUv2s. Hence, there is a strong and pressing need for an efficient, scalable infrastructure that enables large-scale deep learning and overcomes the memory limitation on current accelerators.
Strong correlation between ImageNet accuracy and model size for recently developed representative image classification models
In "GPipe: Efficient Training of Giant Neural Networks using Pipeline Parallelism", we demonstrate the use of pipeline parallelism to scale up DNN training to overcome this limitation. GPipe is a distributed machine learning library that uses synchronous stochastic gradient descent and pipeline parallelism for training, applicable to any DNN that consists of multiple sequential layers. Importantly, GPipe allows researchers to easily deploy more accelerators to train larger models and to scale the performance without tuning hyperparameters. To demonstrate the effectiveness of GPipe, we trained an AmoebaNet-B with 557 million model parameters and input image size of 480 x 480 on Google Cloud TPUv2s. This model performed well on multiple popular datasets, including pushing the single-crop ImageNet accuracy to 84.3%, the CIFAR-10 accuracy to 99%, and the CIFAR-100 accuracy to 91.3%. The core GPipe library has been open sourced under the Lingvo framework.
From Mini- to Micro-Batches
There are two standard ways to speed up moderate-size DNN models. The data parallelism approach employs more machines and splits the input data across them. Another way is to move the model to accelerators, such as GPUs or TPUs, which have special hardware to accelerate model training. However, accelerators have limited memory and limited communication bandwidth with the host machine. Thus, model parallelism is needed for training a bigger DNN model on accelerators by dividing the model into partitions and assigning different partitions to different accelerators. But due to the sequential nature of DNNs, this naive strategy may result in only one accelerator being active during computation, significantly underutilizing accelerator compute capacity. On the other hand, a standard data parallelism approach allows concurrent training of the same model with different input data on multiple accelerators, but cannot increase the maximum model size an accelerator can support.
To enable efficient training across multiple accelerators, GPipe partitions a model across different accelerators and automatically splits a mini-batch of training examples into smaller micro-batches. By pipelining the execution across micro-batches, accelerators can operate in parallel. In addition, gradients are consistently accumulated across micro-batches, so that the number of partitions does not affect the model quality.
Top: The naive model parallelism strategy leads to severe underutilization due to the sequential nature of the network. Only one accelerator is active at a time. Bottom: GPipe divides the input mini-batch into smaller micro-batches, enabling different accelerators to work on separate micro-batches at the same time.
Maximizing Memory and Efficiency
GPipe maximizes memory allocation for model parameters. We ran the experiments on Cloud TPUv2s, each of which has 8 accelerator cores and 64 GB memory (8 GB per accelerator). Without GPipe, a single accelerator can train up to 82 million model parameters due to memory limits. Thanks to recomputation in backpropagation and batch splitting, GPipe reduced intermediate activation memory from 6.26 GB to 3.46GB, enabling 318 million parameters on a single accelerator. We also saw that with pipeline parallelism the maximum model size was proportional to the number of partitions, as expected. With GPipe, AmoebaNet was able to incorporate 1.8 billion parameters on the 8 accelerators of a Cloud TPUv2, 25x times more than is possible without GPipe.
To test efficiency, we measured the effects of GPipe on the model throughput of AmoebaNet-D. Since training required at least two accelerators to fit the model size, we measured the speedup with respect to the naive case with two partitions but no pipeline parallelization. We observed an almost linear speedup in training. Compared to the naive approach with two partitions, distributing the model across four times the accelerators achieved a speedup of 3.5x. While all experiments in our paper used Cloud TPUv2, we see even better performance with the currently available Cloud TPUv3s, each of which has 16 accelerator cores and 256 GB (16 GB per accelerator). GPipe enabled 8 billion parameter Transformer language models on 1024-token sentences with a speedup of 11x when distributing the model across all sixteen accelerators.
Speedup of AmoebaNet-D using GPipe. This model could not fit into one accelerator. The baseline naive-2 is the performance of the native partition approach when the model is split into two partitions. Pipeline-k refers to the performance of GPipe that splits the model into k partitions with k accelerators.
GPipe can also scale training by employing even more accelerators without changes in the hyperparameters. Therefore, it can be combined with data parallelism to scale neural network training using even more accelerators in a complementary way.
Testing Accuracy
We used GPipe to verify the hypothesis that scaling up existing neural networks can achieve even better model quality. We trained an AmoebaNet-B with 557 million model parameters and input image size of 480 x 480 on the ImageNet ILSVRC-2012 dataset. The network was divided into 4 partitions and applied parallel training processes to both model and data. This giant model reached the state-of-the-art 84.3% top-1 / 97% top-5 single-crop validation accuracy without any external data. Large neural networks are not only applicable to datasets like ImageNet, but also relevant for other datasets through transfer learning. It has been shown that better ImageNet models transfer better. We ran transfer learning experiments on the CIFAR10 and CIFAR100 datasets. Our giant models increased the best published CIFAR-10 accuracy to 99% and CIFAR-100 accuracy to 91.3%.
Conclusion
The ongoing development and success of many practical machine learning applications, such as autonomous driving and medical imaging, depend on achieving the highest accuracy possible. As this often requires building larger and even more complex models, we are happy to provide GPipe to the broader research community, and hope it is a useful infrastructure for efficient training of large-scale DNNs.
Acknowledgments Special thanks to the co-authors of the paper: Youlong Cheng, Dehao Che, HyoukJoong Lee, Jiquan Ngiam, Quoc V. Le, and Zhifeng Chen. We wish to thank Esteban Real, Alok Aggarwal, Xiaodan Song, Naveen Kumar, Mark Heffernan, Rajat Monga, Megan Kacholia, Samy Bengio, and Jeff Dean for their support and valuable input; Noam Shazeer, Patrick Nguyen, Xiaoqiang Zheng, Yonghui Wu, Barret Zoph, Ekin Cubuk, Jonathan Shen, Tianqi Chen, and Vijay Vasudevan for helpful discussions and inspirations; and the larger Google Brain team.