Emailing a coworker without realizing they’re on vacation is a bummer for everyone involved. The second you get that “out of office” auto-reply, you suddenly remember the twenty minute conversation you had about their upcoming trip to Hawaii and feel like a goober. Meanwhile, they come back to a thousand “Hey, can you help with this? OH NEVERMIND SORRY ENJOY YOUR TRIP!” email threads.
Google is trying to make this happen a little less often with a feature it’ll soon roll out for its G Suite (read: paid Gmail/Docs/Hangouts/Calendar/etc. plans for businesses) users. If you’ve marked yourself as out of office on your calendar, your coworkers will get a heads up before they email you.
The heads up comes in the form of a little yellow banner that hovers right above the send button, alerting the sender that you’re currently out of the office, and when you’re set to return.
A similar message will pop up if they try to message you in Hangouts, too.
It all ties into the out-of-office functionality that the company introduced into Google Calendar last year, which automatically declines all meeting requests for the window in which you’ll be gone.
You probably don’t want every rando/spammer who tries to email you to know your travel plans, so Google says that the Gmail/Hangouts heads up functionality will only work with Gsuite users that have already been granted access to your calendar otherwise. So it’s information they already had, now they just don’t have to go looking for it.
If you don’t like the concept or the banner screws with your workflow for some reason, each user can disable it — go into the “Access permissions” section of your Google Calendar settings, and turn off ‘Show calendar info in other Google apps’.
Google says the feature should roll out to all G Suite users by September 16th.
The Daily Crunch is TechCrunch’s roundup of our biggest and most important stories. If you’d like to get this delivered to your inbox every day at around 9am Pacific, you can subscribe here.
Apple has sent out invites confirming rumors that its next major press event will happen on September 10. The event is expected to focus on the iPhone 11, unveiling three different models — the standard 11, as well as two Pro options.
If this happens, it would mark a subtle-but-significant shift in the way Apple structures its phone lineup. With a lower-priced flagship replacing the budget XR, the company could appeal to consumers who’ve been turned off by the rising prices for higher-end options.
In the event that California’s Assembly Bill 5 passes — forcing Uber and Lyft to make their drivers W-2 employees — each company is putting in $30 million to fund a 2020 ballot initiative that would enable them to keep their drivers as independent contractors.
Anyone wondering if Alphabet might reprimand its chief legal officer David Drummond for a long-ago extramarital affair with a former subordinate (which recently resurfaced in a much-discussed blog post), the answer seems to be . . . not right now.
Most new TVs come with a bunch of random junk turned on by default; things like motion smoothing that makes epic movies look like soap operas, or noise reduction that can wash out details and make an actor’s skin look cyborg-y. With Filmmaker Mode, you’ll be able to push a button and all that crap gets turned off.
To put it succinctly, Andela is a startup — backed by $180 million in venture capital — that trains and connects African software developers to global companies for a fee. (Extra Crunch membership required.)
Spotify this morning announced a new way for you to share music with friends (or fans, if you’re an artist) — by way of a new Facebook Stories integration that includes 15-second song previews. Viewers can also optionally tap on the “Play on Spotify” button in the Story to be redirected to the Spotify app to hear more.
The feature is designed largely with artists and their teams in mind, as it gives them another way to promote their new music across Facebook’s social network. Musicians and their managers often today use the Spotify app’s sharing feature to post their content across social media, including to Instagram, Twitter, WhatsApp, and elsewhere.
Since its launch on Instagram, the sharing feature has been mutually beneficial for both Spotify and Instagram alike, as it made users’ Stories more engaging while also sending traffic back to the Spotify app for further music discovery.
Add some music to your story
Audio sharing to Facebook Stories is now available. pic.twitter.com/HSBgmxYd8G
There’s likely not as much demand for sharing to Facebook Stories, however.
In order to share the 15-second clips to Facebook Stories, you’ll tap the “Share” button from the Spotify app and choose Facebook as the destination.
Side note: We’re not seeing the option to share to News Feed as the picture Spotify published shows (see above. Instead, tapping “Facebook” launches you right into the Story interface, as shown in the tweet above.
You can then customize your Story as you would normally using the Story editing tools and post it to your profile. Viewers will get to hear the 15-second song clip, and can then tap to go to Spotify to hear more.
Spotify had offered Facebook Story sharing in the past, but the access was later pulled.
Hi there! We're afraid the "Share to Facebook Stories" feature is no longer supported on Spotify. Give us a shout if you have other questions /MT
These song previews only work when you’re sharing a single track to Stories. If you choose to share other content, like albums, playlists, or an artist profile page, viewers can click into that content, but won’t hear any preview, Spotify says.
How I escaped North Korea -- and found freedom | Yeonmi Park
"North Korea is unimaginable," says human rights activist Yeonmi Park, who escaped the country at the age of 10. Sharing the harrowing story of her childhood, she reflects on the fragility of freedom -- and shows how change can be achieved even in the world's darkest places.
Apple isn’t the only smartphone manufacturer planning a big September launch. Huawei’s got a big event on the books as well, set for September 18 in Munich, just over a week after the new iPhones are unveiled. For Huawei, however, the Mate 30 announcement is about more than just smartphones.
The event is effectively the first big handset launch since the embattled Chinese manufacturer was added to the U.S. trade blacklist. The move had seemingly been a long time coming, after years of allegations ranging from spying to sanctions violations, but with the ban in place, the move will mark a key moment of truth for a company that has so far been dependent on offerings from U.S. companies like Google.
The Mate 30, which also marks a push into 5G, could potentially launch without Google apps. The recent U.S. government reprieve only applied to already announced products, according to a statement Google gave to Reuters. Trump has suggested that ban on Huawei products could be lifted with a new U.S.-China trade deal, further clouding the suggestion that the move made purely out of concerns for security.
The smartphone maker gave its own comment to Reuters, noting, “Huawei will continue to use the Android OS and ecosystem if the U.S. government allows us to do so. Otherwise, we will continue to develop our own operating system and ecosystem.”
That last bit is a clear allusion to HarmonyOS. The recently unveiled operating is largely limited to low end handsets and IoT device, but Huawei is also certainly readying itself for a longterm life after Google.
Meanwhile, CNBC is citing a source that suggests the phone will launch with or without Google apps, depending on how things shake out over the next few weeks. That would likely amount to a minor nuisance, requiring users to download them after purchase, while a full out Android brand would prove far more harmful to its bottom line.
It seems quite unlikely at the moment, however, that the company would attempt to launch such a high end device with its own partially baked operation system.
Our verdict of the Chuwi MiniBook 8:
The Chuwi MiniBook 8" does more than revive the netbook: it takes that form factor and packs a much more useful computer inside.810
Netbooks didn’t last all that long the first time around. These cheap, portable devices weren’t supposed to be powerful, but they were incredibly affordable. Their deficiencies when it came to specs also meant they weren’t well suited to many computing use cases.
The rapid growth of popularity and power in phones and tablets sent netbooks to an early grave. Now we’re seeing a resurgence in the form factor, but there’s a difference. Models like the Chuwi MiniBook 8″ are far from underpowered, and this means they aren’t all that cheap either.
Chuwi MiniBook 8″ Hardware Specifications
Based on the form factor, you may not expect much in terms of specifications. That’s partially true. This is no monster desktop replacement. That said, it’s in line with what you’d expect from larger laptops in the same price range.
CPU: Intel Gemini Lake N4100
GPU: Intel UHD Graphics 600
RAM: 8GB
Storage: 128GB eMMC
Battery: 26.6Whr
Screen: 8″, 1920 x 1200 multi-touch IPS display @ 283dpi
Dimensions: 201x128x19mm or 7.91×5.03×0.74 inches
Wireless: Dual-band 802.11ac / Bluetooth 4.0
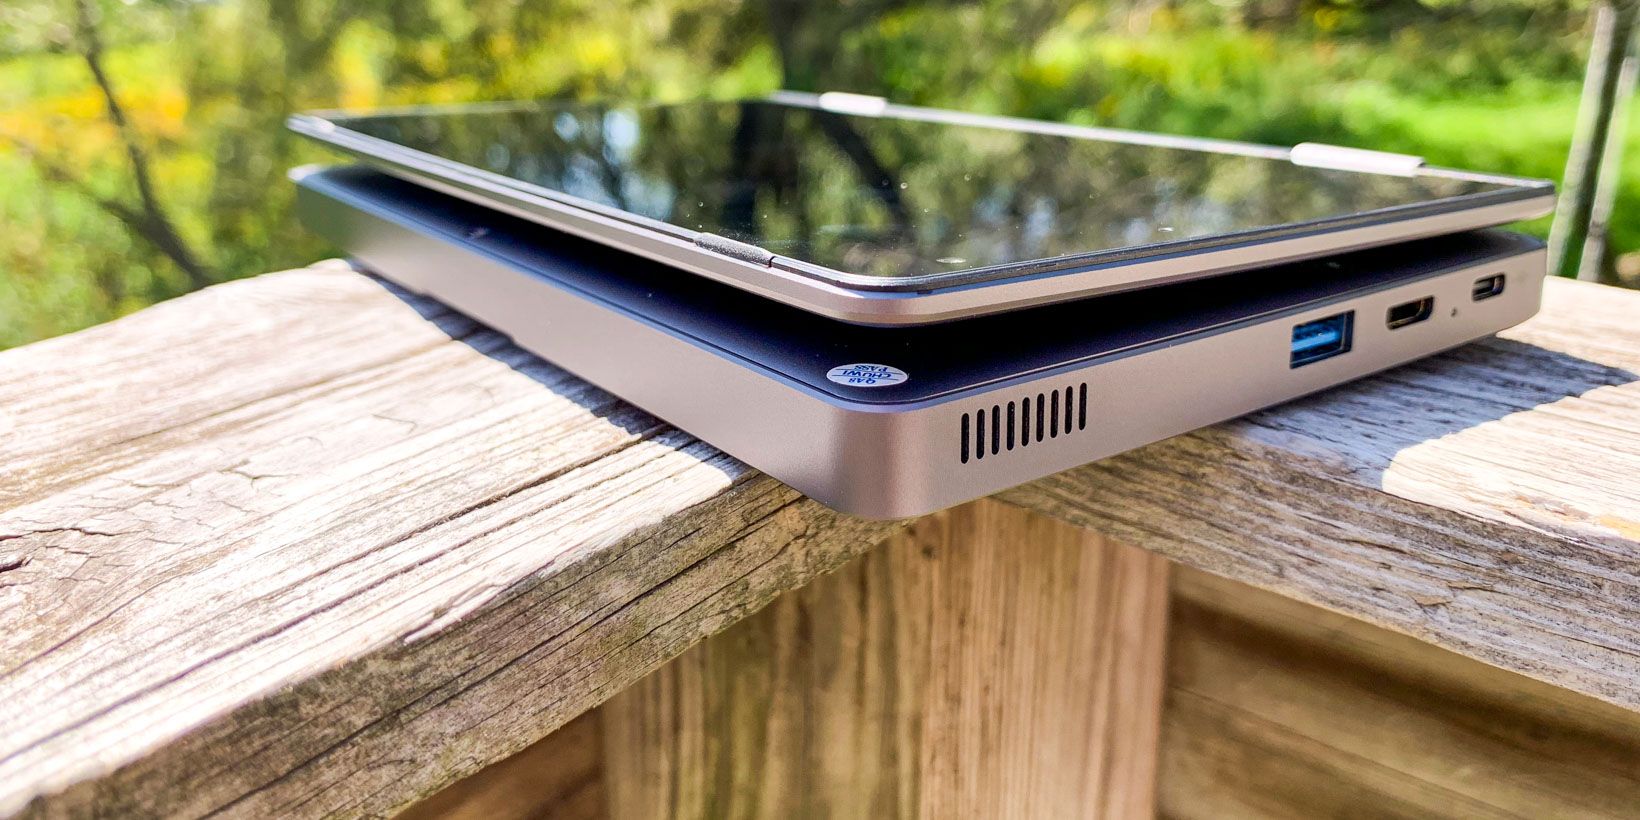
Ports: USB-C, USB 3.0, USB, mini-HDMI, 3.5mm audio
Expandable Storage: M.2 SSD Slot
The expandable storage is a nice touch, especially given the limited internal storage. If you’ve got a spare M.2 MSATA SSD lying around, you can easily double the available storage space.
Body and Design
The Chuwi MiniBook 8″ is small, and we’re talking seriously small. Before the review unit arrived, I knew I would be looking at a very small computer. I was still surprised by just how small it was when I took it out of the box. You can see the dimensions listed above, but the MiniBook may still surprise you when you see it in person.
Chuwi had to make some sacrifices to get the MiniBook as small as it is. Fortunately, not many of them seemed to affect performance. Instead, the MiniBook isn’t as sleek looking as some of Chuwi’s other models. After looking at the Chuwi SurBook Mini, this looks somewhat brutalist by comparison.
There’s a certain novelty to using the Chuwi MiniBook 8″ due to its small size. At times, the tiny computer just doesn’t seem like it should be able to manage the feats of computing it is achieving. This isn’t a toy, but sometimes you have to remind yourself of that fact.
That isn’t to say that the MiniBook is flimsy. The body is made of aluminum alloy which makes it both strong and lightweight. It’s also capable of pulling off some feats of gymnastics.
The MiniBook uses what Chuwi refers to as a 360-degree “Yoga” design. This means it can work as a standard laptop, in tent mode, or in presentation mode, just like larger 2-in-1 designs.
Display and Brightness
Given the 8-inch screen size, you might expect less than HD resolution. That isn’t the case. The Chuwi MiniBook 8″ has a resolution of 1920 x 1200, meaning that the display looks quite sharp, no matter how close you look.
The combination of screen size and resolution give the MiniBook a pixel density of 283dpi, well within what Apple would deem “Retina” if this was one of its computers. Of course, UI scaling in Windows means that everything can feel a little cramped, but it’s easy enough to get used to.
The colors are rich and well-represented on the display as well. The display is fairly bright, though you may have some difficulty using the MiniBook in direct sunlight. This has more to do with the glossy finish on the screen than brightness.
The touch screen supports 10-point multi-touch. Chuwi also sells a stylus to use with the display, though we didn’t have one handy so we weren’t able to test this.
How is the Keyboard?
I have a feeling the keyboard is going to be the make or break point for most people with the MiniBook 8″. It’s small, and there’s really no getting around that point. Some keys, like the Delete key, are almost absurdly small. On the other hand, it is backlit, which is nice.
I did start to get used to the keyboard after testing the MiniBook for a few days. The only problem is that once I felt comfortable typing on the MiniBook’s keyboard, there was a period of adjustment in going back to standard-size keyboards. I’m a touch typist, but if you aren’t you’ll likely have an easier time.
Fortunately, the keys you’ll use for the majority of your typing aren’t all that small. The Delete key, the split space bar, and the strange location of the Tab key are likely where you’ll run into the most trouble, assuming you do run into trouble.
What About the Pointer?
The small size of the Chuwi MiniBook 8″ makes equipping it with a standard touchpad impossible. Instead, Chuwi decided to outfit the MiniBook with what it calls a Super Optical Finger Navigation Module.
In practice, this works like a combination of a tiny trackpad with the TrackPoint made famous by IBM ThinkPads. Like the keyboard, using this effectively requires some patience. Once you’ve gotten used to the concept, basic navigation is easy enough.
Even once you’re used to the navigation module though, it takes a while to feel natural. During my time testing the MiniBook, I never quite felt at home using this. I would have felt more at home using a standard TrackPoint, but that could just be me.
This would be much more of an issue if the MiniBook wasn’t equipped with a touch screen. This makes working with the system much easier and could be partially to blame for why I never got along with the navigation module.
Performance
Chuwi’s marketing around the MiniBook 8″ makes it clear that this computer should be able to serve as your only PC, should you wish it to. This is a clear difference from the netbooks of old. Those were best used for browsing the web, as the name implied. The MiniBook can do much more.
Our review unit uses the Intel Celeron N4100 processor, while the MiniBook is also available with a Core m3-8100Y. Even though we’re looking at the less powerful model, the computer rarely if ever felt sluggish during standard use.
One worry with smaller computers or even larger laptops is thermal throttling. Fortunately, the MiniBook is equipped with fans to help keep this issue at bay. These fans rarely spun up during normal use, and even with more hardware-intensive tasks, they were never intrusively loud.
Running GeekBench 4.4.1, the Chuwi MiniBook 8″ got a CPU score of 1812 for single-core performance and 5510 for multi-core. The GPU received a score of 9050. That’s higher than both the Chuwi Hi13 tablet and the 14.1-inch Lapbook.
Operating System Options
The Chuwi MiniBook 8″ sent to me for testing arrived running Windows 10. Right now, that appears to be the only way you can order it. That said, an option on the box seems to indicate that Chuwi may one day sell the MiniBook preloaded with Linux.
If you’re inpatient or looking to dual-boot, you can always install Linux yourself. Early reports on the web look like you’ll encounter trouble with some distributions. The good news is that Chuwi has made a version of Ubuntu 18.04 available that works with the MiniBook 8″.
Battery Life
Chuwi equipped the MiniBook with a 26.6Whr battery. I routinely got around eight hours of use off of a charge, though this lowered somewhat when running benchmarks and other hardware-intensive apps. You may get more or less depending on your usage.
This 2-in-1 doesn’t seem to sip much power when the lid is closed. Given the mobile focus of the MiniBook, that’s handy. You shouldn’t need to worry about fully shutting the computer down to save power.
Another handy thing when it comes to mobility is how the MiniBook charges. It uses a standard USB-C plug for charging, with a 7.6V input for fast charging using the PD standard. This means you can easily top up the battery with a battery pack. Chuwi says the MiniBook supports anything above 12V.
When it comes to recharging the battery, the fast charging helps. From a completely drained battery, you can expect a recharge to take a little over three hours.
Should You Buy the Chuwi MiniBook 8″?
For most people, a single question can help you determine whether you should buy the Chuwi MiniBook 8″: How important is a small size for you? If mobility is your number one concern, getting used to the cramped keyboard and less-than-perfect mouse replacement won’t be a waste of your time.
That said, it may be tough to come to terms with the price. Considering the power that’s packed into its tiny frame, this computer isn’t overpriced. It just feels like it should cost less than it does, given the small size. Given the lower price of other Chuwi computers like the excellent 14.1-inch Lapbook, the price feels even more like an anomaly.
Don’t forget that this is a very capable computer, surprisingly so given the form factor. We’re talking about a computer the size of a large paperback novel that can easily run your day to day productivity applications. If you’ve been pining for the glory days of the netbook, this isn’t just the next best thing, it’s even better.
The Chuwi MiniBook 8″ is currently available as part of an Indiegogo campaign. The price is currently $434 for the N4100 model and $534 for the m3-8100Y model. Chuwi plans to begin shipping in September. Prices are set to rise in the future, so if you’re looking to get one of these, you may want to do so sooner rather than later.
If you’re searching for the perfect code editor, there’s a good chance that you’ve run into both Atom and Visual Studio Code. Sure, there are plenty of other editors, but these two are among the most talked about.
Atom has been around a while, but its popularity is flagging as of late. Visual Studio Code, once the new kid in town no one was quite sure about, now appears to be the hottest text editor around. That said, not everyone is so keen to move on from Atom.
Visual Studio Code vs. Atom: What’s Similar?
To start, Visual Studio Code and Atom share DNA. Both of these editors use Electron, which lets developers create full-fledged desktop apps with web technologies like JavaScript, HTML, and CSS. Some people are vehemently opposed to this idea, but that is another story.
The two editors are also closer than you may think in another way. Atom was created at GitHub, while as the name may hint, Microsoft created Visual Studio Code. In 2018, Microsoft announced that it would acquire GitHub. While some initially worried that this meant the end of Atom, Microsoft clarified that both editors would continue to exist.
Visual Studio Code vs. Atom: Performance
Visual Studio Code fans often point to its performance compared to Atom and other Electron-based apps. Electron apps have gained a reputation for sluggish performance and slow startup times across the board, but Visual Studio Code manages to avoid this.
The performance differences between Visual Studio Code and Atom come down to a few factors, but one major aspect is the approach with which each app is developed. Visual Studio Code has a tightly controlled core set of functionality, with plugins adding surface-level features.
Atom, on the other hand, uses a plugin-based approach to nearly everything. This approach has benefits, but also drawbacks. Atom is slightly slower out of the box, and this only gets worse when adding certain plugins.
VS Code has the clear advantage when it comes to performance, but neither editor is slow on a modern machine. This changes when you’re editing huge files. Visual Studio Code fares better than Atom, but either is noticeably slow when compared to an editor like Vim or even Sublime Text.
Visual Studio Code vs. Atom: Core Features
Visual Studio Code packs in more functionality out of the box than Atom or even many other text editors. It doesn’t quite have the features of an Integrated Development Environment (IDE), but it gets close. In addition to the standard text editor features, support for building and debugging apps is right there. So, of course, is Microsoft’s trademark IntelliSense autocompletion.
One feature popping up more often in modern text editors is Git integration. Again, Visual Studio Code also has this out of the box, letting you easily deal with version control without having to open a terminal window. Markdown support is also built-in, complete with preview functionality, so you can ensure your README.md file will look right on GitHub.
While Atom doesn’t have nearly the same amount of features on first launch, it does have Git integration. Atom even goes a step further, offering complete GitHub integration. This is almost expected, given the project’s origins, but it’s still handy, especially if you use GitHub for everything.
For the vast majority of functionality, however, Atom relies on plugins. These are easy to install from the app itself, letting you customize the editor in nearly any way you can think of.
Visual Studio Code vs. Atom: Plugins
Extensibility is where the largest difference between these two editors happens to lie. For Visual Studio Code, plugins add features. You can install themes, support for new languages, and build tools to help you when it comes to coding in Rust or Go, for example.
Atom, on the other hand, gives much more power to the plugins. As much of the editor’s functionality comes from built-in plugins, the right plugin can create an almost entirely new app. This makes Atom a much more “hackable” app. Atom even has a section in its manual aptly titled Hacking Atom.
This is somewhat similar to the days of the “editor wars” between Vim and Emacs. The sheer amount of functionality built into the latter led to some referring to Vim as an editor and Emacs as an operating system. Atom doesn’t reach the level of customizability seen in Emacs—nobody has written an Atom email client yet—but it gets closer than Visual Studio Code.
That isn’t to say that Visual Studio Code plugins don’t offer plenty of functionality. Look no further than our list of handy Visual Studio Code plugins for proof of that.
Visual Studio Code vs. Atom: Community
Both Visual Studio Code and Atom currently enjoy large communities and user bases. While Visual Studio Currently seems to be the more popular of the two, Atom still has a dedicated community of users and developers. If Microsoft decides to drop support for either editor, this may change, but that doesn’t seem like it will happen soon.
Atom seems to be embraced more by the open-source community than Visual Studio Code due to the Microsoft affiliation of the latter. That said, there is a community effort to create a Microsoft-free version of Visual Studio Code. Both editors are open source, but some users aren’t fond of the data collection used by either app.
Download Visual Studio Code and Atom
Both Visual Studio Code and Atom are available completely free of charge. The Atom editor is available under the MIT license, while the Visual Studio Code download is under a proprietary license despite the editor’s open-source codebase. Both editors are available for macOS, Linux, and Windows.
In a nutshell, Atom is a highly customizable text editor. With the right plugins, it can approach the functionality of an IDE. Visual Studio Code is similar, but with its feature set, it feels closer to an IDE right from the start. Neither of these has quite the features of a full IDE, however.
Are you unsure whether you should use a text editor or an IDE? Don’t worry, as we’ve already examined whether text editors or IDEs are better for programmers. You may not agree, but our take could help you make up your mind.
If you use Kodi, you probably already know how to listen to music files hosted on your hard drive. But what if you want to listen to Spotify on Kodi?
It’s actually really easy to stream music using the Spotify add-on for Kodi. And in this article we’ll show you how to listen to Spotify on Kodi.
How to Listen to Spotify on Kodi
To use the Spotify add-on for Kodi, you’ll need a premium Spotify account. (So you’ll have to decide whether Spotify Premium is worth its premium price.) And the add-on is created by a third party developer, so to install it we’ll first need to add a new repository called marcelveldt to Kodi.
How to Add the Marcelveldt Repository to Kodi
To add the new repository to your Kodi installation, first you need to download it as a zip file. To download the repository, navigate to the Marcelveldt repository on Github in your web browser. Then, right-click the .zip file and choose Save Link As…. Save the zip file to a convenient location such as your desktop.
Now, open up Kodi. From the home screen go to Add-ons in the left-hand menu, then click the icon on the left that looks like an open box. Then select Install from zip file.
In the popup box, navigate to the location where you saved the zip file. Select the zip file and click OK. This will install the repository and you’ll see a notification that it’s ready to use.
How to Install the Kodi Add-On From the Repository
With the repository added to Kodi, now we can install the add-on. Do this by starting at the Kodi home screen once again, and clicking on Add-ons from the left hand menu. Click the icon of the open box.
Now choose Install from repository. Find the option for Marcelveldt’s BETA repository in the list and click on it. Now select Music add-ons.
Click on Spotify from the list and then hit Install in the menu at the bottom of the popup. This will install the add-on to your Kodi system.
How to Configure the Spotify Add-On for Kodi
While we’re here, we’re going to configure the add-on as well. In the same menu where you installed the add-on from, click Configure.
This brings up a popup where you can add your Spotify username and password. Hit Username to add your Spotify username (the email address you use to access Spotify) and hit Password to enter your password. Save these options by hitting OK.
If you want to use multiple Spotify accounts with the Kodi add-on, this is also possible. Toggle the option for Enable support for multiple accounts to enabled and you’ll be able to add multiple usernames and passwords.
How to Use the Spotify Add-On for Kodi
Now you’re ready to use the add-on to listen to Spotify. To open the add-on, start on your Kodi home screen. Then go to Add-ons from the menu on the left and select Music add-ons. From here, click on Spotify to launch the add-on.
In the main menu of the add-on you’ll see three menu options: My Music, Search, and Explore, plus information about the current playback device and the currently logged in user. To start playing your Spotify music, go to My Music.
Here you can pick from options including Artists, Albums, and Songs. Navigate to the track or album you want to play and click on the title of a song to start playing it through Kodi.
Tips for Using the Spotify Add-On for Kodi
As well as playing your existing music through Kodi, the Spotify add-on can also perform a bunch of other functions too. Here are some tips on using the Kodi add-on.
Use Spotify Connect to Send Songs to Kodi From Another Device
One of Spotify’s handy features is Spotify Connect, which lets you use your phone as a Spotify remote. And you can use Spotify Connect with the Kodi add-on as well.
When you have the Spotify add-on open in Kodi, open Spotify on your phone or on another device. You should see a notification in the now playing section of your phone saying Devices available. Tap the icon that looks like a speaker in front of a monitor and select Kodi [your PC name] to connect to Kodi.
Now you can use your phone or other device to play and queue up tracks to play through Kodi. This is a great way to control music at a party or when you have friends over at your house.
Alternatively, you can also do the opposite: send songs from Kodi to your phone. To do this, start at the Spotify add-on menu and choose Playback device: Local playback on this device. In this menu you can see all the devices you have connected to Spotify. Click the name of a device to start playing music there instead.
Use the Add-On to Access Your Spotify Playlists in Kodi
As well as playing artists and albums, you can also access all your Spotify playlists. In the add-on main, go to My Music and then to Playlists. Here you can see all of your user-created playlists.
Click on any track to begin playing the playlist through Kodi.
Find New Music Using the Spotify Add-On for Kodi
One of the great things about Spotify is the ability to discover new music, and you can do this through the Spotify add-on for Kodi as well. Start off on the add-on home screen and then select Explore.
This takes you to a menu with options to browse through various genres, top lists, and new releases. The Top Lists section includes playlists like the current Global Top 50 or the Global Viral 50 where you can see which songs are being most played by other users around the world.
There’s also a Featured playlists option where you’ll find all the Spotify-created playlists like Music for concentration or Your Coffee Break. Like the user-created playlists, click on a title to view the tracks and click on a track to begin playback.
Search for an Artist Using the Spotify Add-On for Kodi
Finally, you can also search for a specific artist, album, or track through the add-on. To do this, select Search from the add-on’s main menu and enter your search term into the text box. You’ll then see results sorted into artists, albums, playlists, and songs. Click one of these options to see the search results, and from the list of results select the item you’re looking for.
From here you can click on the name of a track to begin playback.
Other Great Kodi Add-Ons Worth Installing
With this Spotify add-on for Kodi you can listen to all your Spotify music through Kodi, as well as discover new artists and new music. And when you’ve had your fill of Spotify, here are the best Kodi add-ons to install today.
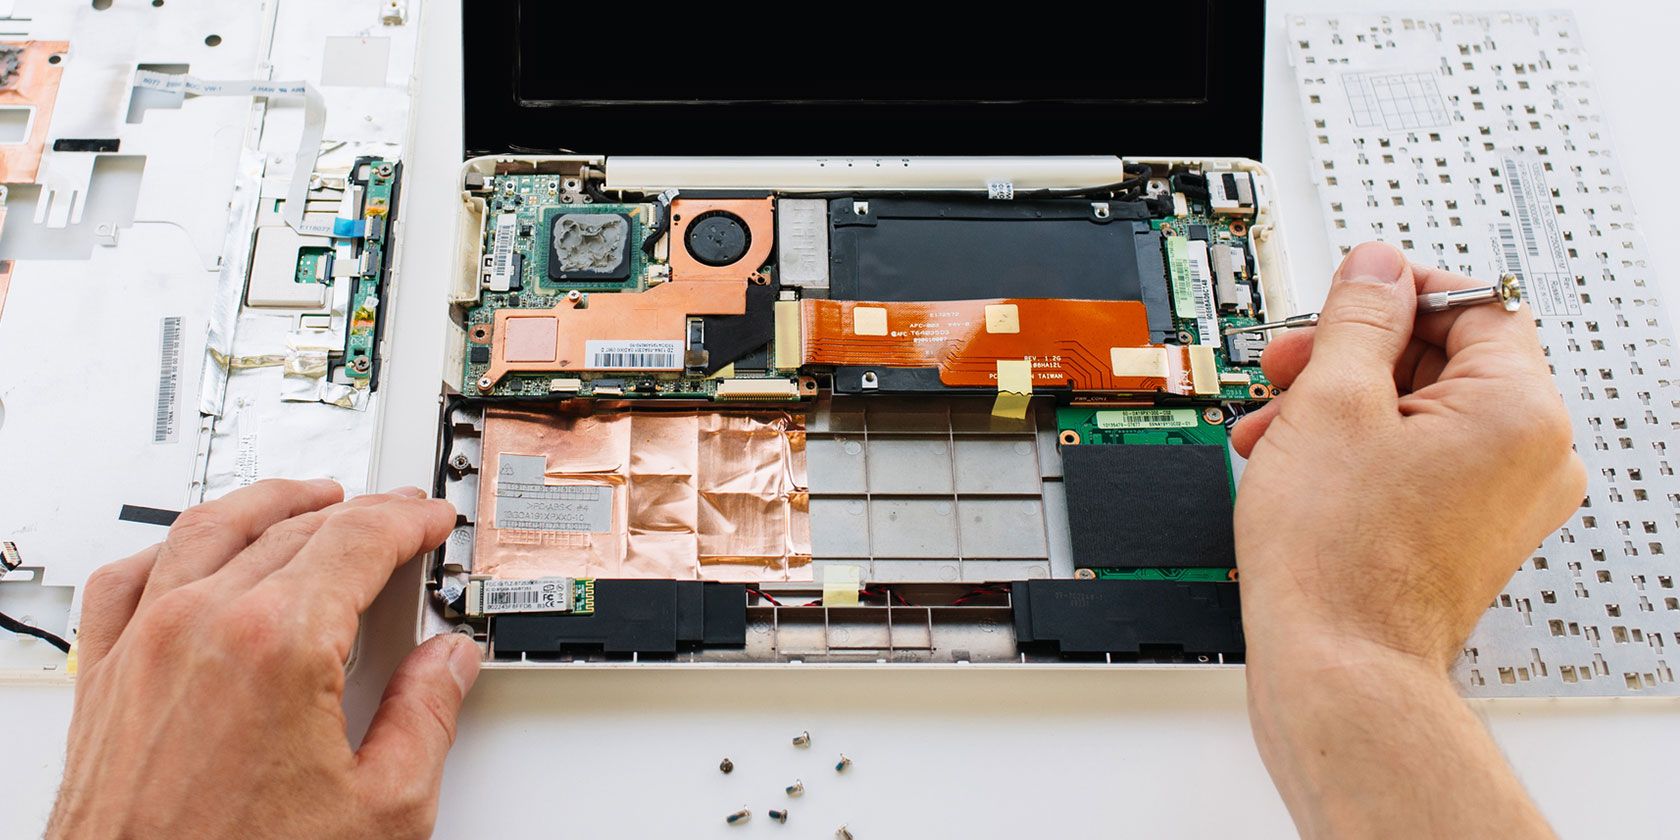
You’ve heard about building your own PC, but can you build a laptop from scratch? The trouble with laptops is that the components don’t adhere to any definitive standards. Consequently, the nearest you’ll get to building a laptop is upgrading the RAM and maybe the storage.
But with the help of specific hardware, kit computers, and 3D printing, it’s possible to build your own notebook computer. These six laptop building kits and project ideas will get you started.
1. Pi-Top Raspberry Pi DIY Laptop Kit
So many Raspberry Pi laptop project kits are around, but which one is best? We reckon it’s the Pi-top, a modular laptop with a retractable keyboard panel. It’s here that you place your Raspberry Pi, attach it to the Pi-top’s connection module, and start using the computer.
Designed for portable productivity as much as experimenting with the Raspberry Pi, the rail mounting system supports extra hardware. There’s also a cooling bridge to enable you to overclock your Pi for improved performance without overheating. The end result is an easy-to-carry Raspberry Pi experience, capable of running any project you can throw at it.
This isn’t the only Raspberry Pi laptop available. See our guide to Raspberry Pi laptops for more project ideas using the popular little PCB.
2. DIY Laptop With Cardboard and an Old Tablet
A truly DIY project, this homemade notebook project relies on you owning a 10-inch tablet and a keyboard. Oh, you’ll also need plenty of cardboard, decent knife, and a good supply of glue.
When cutting the card, take the time to plan out everything in advance. After all, the chances are you don’t have the exact same model of tablet and keyboard. Things will need to be adjusted, even if it’s only slightly. With a bit of care, you could replicate this project with any old tablet—the thinner, the better!
It is easy to laugh, but there is something ingenious about this project. The care that has gone into the design is clear and relying on an old tablet is inspired. Sure, you’ll need a keyboard and mouse, but for a DIY laptop, this is better than most actual notebooks.
For a truly compact DIY laptop solution, try this project which utilises a compact LattePanda computer. You’ll also need the affordable IPS LattePanda display for this DIY notebook which runs Windows 10.
A standard wireless keyboard and mouse combi is also used in the design, the bulk of which relies on an impressive 3D printed case. You can find the STL files for printing in the developer’s Thingiverse page.
By the end of the build, you should have a pocketable Windows 10 computer, smaller than a notebook. This might not be what you’re looking for in a DIY laptop project, but you’ll agree it’s impressive.
4. Xbox One S Laptop by Ben Heck
Following the tear-down of the comparatively slimline Xbox One S, YouTuber Ben Heck had the parts just laying around. His solution? To convert the Xbox One S into a portable gaming machine—an Xbox laptop, essentially.
Taking the motherboard, Blu-ray drive, PSU, and hard disk drive, the laptop features a 15-inch display, and machined aluminum base.
The project video is lengthy, but you’ll see how Heck made some interesting design choices and moved components around. Also, find out if the finished product is good enough for gaming. Of course, you can’t type on it; there are no Xbox word processing apps.
As a productivity device, this is a massive fail—but as a gaming laptop, it’s the ultimate.
5. Build Your Own Gaming Laptop
For a less complicated gaming laptop that has a keyboard, try this DIY laptop project.
Relying on affordable components from Amazon (or your preferred hardware retailer), the secret to this project is the case. Barebones laptop cases can be purchased online, featuring just the display, keyboard, motherboard, and CPU/GPU. These can be bought as-is, or with the chosen customizations added by the retailer.
This project takes the barebones case and makes some improved component suggestions. The result is a DIY laptop project with high speed RAM, fast SSD storage, and m.2 SSD for the OS. Of course, you can make your own customizations, based on your budget.
Various online retailers ship barebones laptops. One example is RJTech.com, where you’ll find a nice selection of barebones notebooks for all budgets.
6. Pizza Box Laptop
Ever broken a laptop and found yourself short of options? When the case itself breaks, it can seem like the end of the world. This is particularly frustrating if it is the lid—you’re suddenly unable to use a perfectly good computer.
One answer is to sell the laptop. Another is to find a new home for it. But you’re unlikely to find a case to precisely fit your hardware components. So, what is the answer?
Well, why not consider a pizza box?
Admittedly a somewhat amusing option, this pizza box laptop has two interesting qualities:
It works
You can see how the components are arranged
That second point is important, as it can inform your own future DIY laptop project. With any computer, the position of the components is paramount. In a notebook computer, more so.
Whether you choose to construct your laptop out of a new or old pizza box or something else entirely, the principle is simple: make it better than this.
Yes, You Can Build Your Own Laptop!
It’s incredible, but when you see the evidence with your own eyes, building your own laptop suddenly becomes achievable.
With a wealth of options from Raspberry Pi to pizza box, you’ll probably find that a guided DIY laptop project is the smart choice. To recap, we looked at six DIY laptop projects:
Pi-top Raspberry Pi laptop kit
DIY cardboard laptop using an old tablet
DIY Windows 10 Pocket PC
Ben Heck’s DIY Xbox One S laptop
A barebones gaming laptop
The legendary pizza box laptop
Discouraged by the limited options for DIY laptop projects? Don’t worry—you can always build your own PC instead.
Duolingo has launched its latest language learning course, and this one will help you learn to speak Latin. Latin isn’t the most obvious choice of languages to learn, but it’s a good choice for those either seeking to become polyglots or looking to challenge themselves.
For the uninitiated, Duolingo is a free language-learning app which uses gamification to help you learn languages. Duolingo offers courses in dozens of languages, including French, German, Spanish, and Italian. And it has now launched a Latin course.
How to Learn to Speak Latin Using Duolingo
Duolingo’s Latin-learning course will teach you to speak Classical Latin. This is the form that was spoken by writers, lawyers, and scientists. If you work in the legal profession, the medical field, or science labs, you’ll likely to be aware of Classical Latin.
To create its Latin course, Duolingo partnered with The Paideia Institute, which is a non-profit organization dedicated to teaching the classical humanities. The result is a course which teaches you Latin in bite-sized chunks, allowing you to learn at your own pace.
Fun Fact I: The Latin term for "tweet" is breviloquium.
Fun Fact II: Our Latin course is now available. Salvete!
Latin is considered a dead language, as there are no native speakers alive today. So, why would you want to learn Latin in this day and age? It turns out that there are a number of reasons to learn Latin, which Duolingo explores in this post on Making Duolingo.
The biggest reason is that Latin is the root of all Romance languages, such as Spanish, French, and Italian. Latin has also influenced other languages, so you’ll get a better understanding of your mother tongue. So it isn’t as dead as you may think.
Other Languages to Learn Using Duolingo
Even with the reasons to speak Latin Duolingo has listed, we still wouldn’t recommend learning Latin above other languages still very much in use today. But once you have mastered a second language, Latin would certainly provide a challenge.
Anyone wondering if Alphabet might reprimand its chief legal officer, David Drummond, for a long-ago extramarital, inter-office affair that continues to be a distraction to the company, the answer seems to be . . . not right now. Though a former subordinate outlined in greater detail than ever yesterday the “hell” she says she has endured in the years since her break-up with Drummond, including a custody battle for their son that she won, Google said today it is not sharing a statement on the matter.
Instead, we were pointed by Google to the personal statement that Drummond issued this afternoon, wherein he acknowledges the affair with Jennifer Blakely, a former senior contracts manager with the company during a time when Drummond was Google’s general counsel.
As BuzzFeed notes, he doesn’t apologize to Blakely, saying instead of their “difficult break-up 10 years ago” that “I am far from perfect and I regret my part in that.” He also emphasizes that there are “two sides to all of the conversations and details Jennifer recounts,” saying that he takes a “very different view about what happened.”
Drummond’s full statement:
It’s not a secret that Jennifer and I had a difficult break-up 10 years ago. I am far from perfect and I regret my part in that.
Her account raises many claims about us and other people, including our son and my former wife. As you would expect, there are two sides to all of the conversations and details Jennifer recounts, and I take a very different view about what happened. I have discussed these claims directly with Jennifer, and I addressed the details of our relationship with our employer at the time.
But I do want to address one claim that touches on professional matters. Other than Jennifer, I never started a relationship with anyone else who was working at Google or Alphabet. Any suggestion otherwise is simply untrue.
I know Jennifer feels wronged and understand that she wants to speak out about it. But I won’t be getting into a public back and forth about these personal matters.”
Drummond is presumably hoping that by acknowledging Blakely’s post, the affair will recede again into the background, and it might. Drummond has enjoyed the support of the company for the last 17 years, even while Google officially recognized the affair back in 2007.
On the other hand, other powerful people who’ve come under scrutiny for their decision-making have discovered they have less control over a situation than they imagined. While Alphabet isn’t a democracy, Google employees have shown they’re willing to flex their muscle if need be to force change on the company, and Blakely’s account has seemingly infuriated anew many who say the company’s culture has always been, and continues to be discriminatory toward women.
Mo Gawdat, the former Google and Google X executive, is probably best known for his book Solve for Happy: Engineer Your Path to Joy. He left Google X last year. Quite a bit has been written about the events that led to him leaving Google, including the tragic death of his son. While happiness is still very much at the forefront of what he’s doing, he’s also now thinking about his next startup: T0day.
To talk about T0day, I sat down with the Egypt-born Gawdat at the Digital Frontrunners event in Copenhagen, where he gave one of the keynote presentations. Gawdat is currently based in London. He has adopted a minimalist lifestyle, with no more than a suitcase and a carry-on full of things. Unlike many of the Silicon Valley elite that have recently adopted a kind of performative aestheticism, Gawdat’s commitment to minimalism feels genuine — and it also informs his new startup.
“In my current business, I’m building a startup that is all about reinventing consumerism,” he told me. “The problem with retail and consumerism is it’s never been disrupted. E-commerce, even though we think is a massive revolution, it’s just an evolution and it’s still tiny as a fraction of all we buy. It was built for the Silicon Valley mentality of disruption, if you want, while actually, what you need is cooperation. There are so many successful players out there, so many efficient supply chains. We want the traditional retailers to be successful and continue to make money — even make more money.”
What T0day wants to be is a platform that integrates all of the players in the retail ecosystem. That kind of platform, Gawdat argues, never existed before, “because there was never a platform player.”
That sounds like an efficient marketplace for moving goods, but in Gawdat’s imagination, it is also a way to do good for the planet. Most of the fuel burned today isn’t for moving people, he argues, but goods. A lot of the food we buy goes to waste (together with all of the resources it took to grow and ship it) and single-use plastic remains a scourge.
How does T0day fix that? Gawdat argues that today’s e-commerce is nothing but a digital rendering of the same window shopping people have done for ages. “You have to reimagine what it’s like to consume,” he said.
The reimagined way to consume is essentially just-in-time shipping for food and other consumer goods, based on efficient supply chains that outsmart today’s hub and spoke distribution centers and can deliver anything to you in half an hour. If everything you need to cook a meal arrives 15 minutes before you want to start cooking, you only need to order the items you need at that given time and instead of a plastic container, it could come a paper bag. “If I have the right robotics and the right autonomous movements — not just self-driving cars, because self-driving cars are a bit far away — but the right autonomous movements within the enterprise space of the warehouse, I could literally give it to you with the predictability of five minutes within half an hour,” he explained. “If you get everything you need within half an hour, why would you need to buy seven apples? You would buy three.”
Some companies, including the likes of Uber, are obviously building some of the logistics networks that will enable this kind of immediate drop shipping, but Gawdat doesn’t think Uber is the right company for this. “This is going to sound a little spiritual. There is what you do and there is the intention behind why you do it,” he said. “You can do the exact same thing with a different intention and get a very different result.”
That’s an ambitious project, but Gawdat argues that it can be done without using massive amounts of resources. Indeed, he argues that one of the problems with Google X, and especially big moonshot projects like Loon and self-driving cars, was that they weren’t really resource-constrained. “Some things took longer than they should have,” he said. “But I don’t criticize what they did at all. Take the example of Loon and Facebook. Loon took longer than it should have. In my view, it was basically because of an abundance of resources and sometimes innovation requires a shoestring. That’s my only criticism.”
T0day, which Gawdat hasn’t really talked about publicly in the past, is currently self-funded. A lot of people are advising him to raise money for it. “We’re getting a lot of advice that we shouldn’t self-fund,” he said, but he also believes that the company will need some strategic powerhouses on its side, maybe retailers or companies that have already invested in other components of the overall platform.
T0day’s ambitions are massive, but Gawdat thinks that his team can get the basic elements right, be that the fulfillment center design or the routing algorithms and the optimization engines that power it all. He isn’t ready to talk about those, though. What he does think is that T0day won’t be the interface for these services. It’ll be the back end and allow others to build on top. And because his previous jobs have allowed him to live a comfortable life, he isn’t all that worried about margins either, and would actually be happy if others adopted his idea, thereby reducing waste.
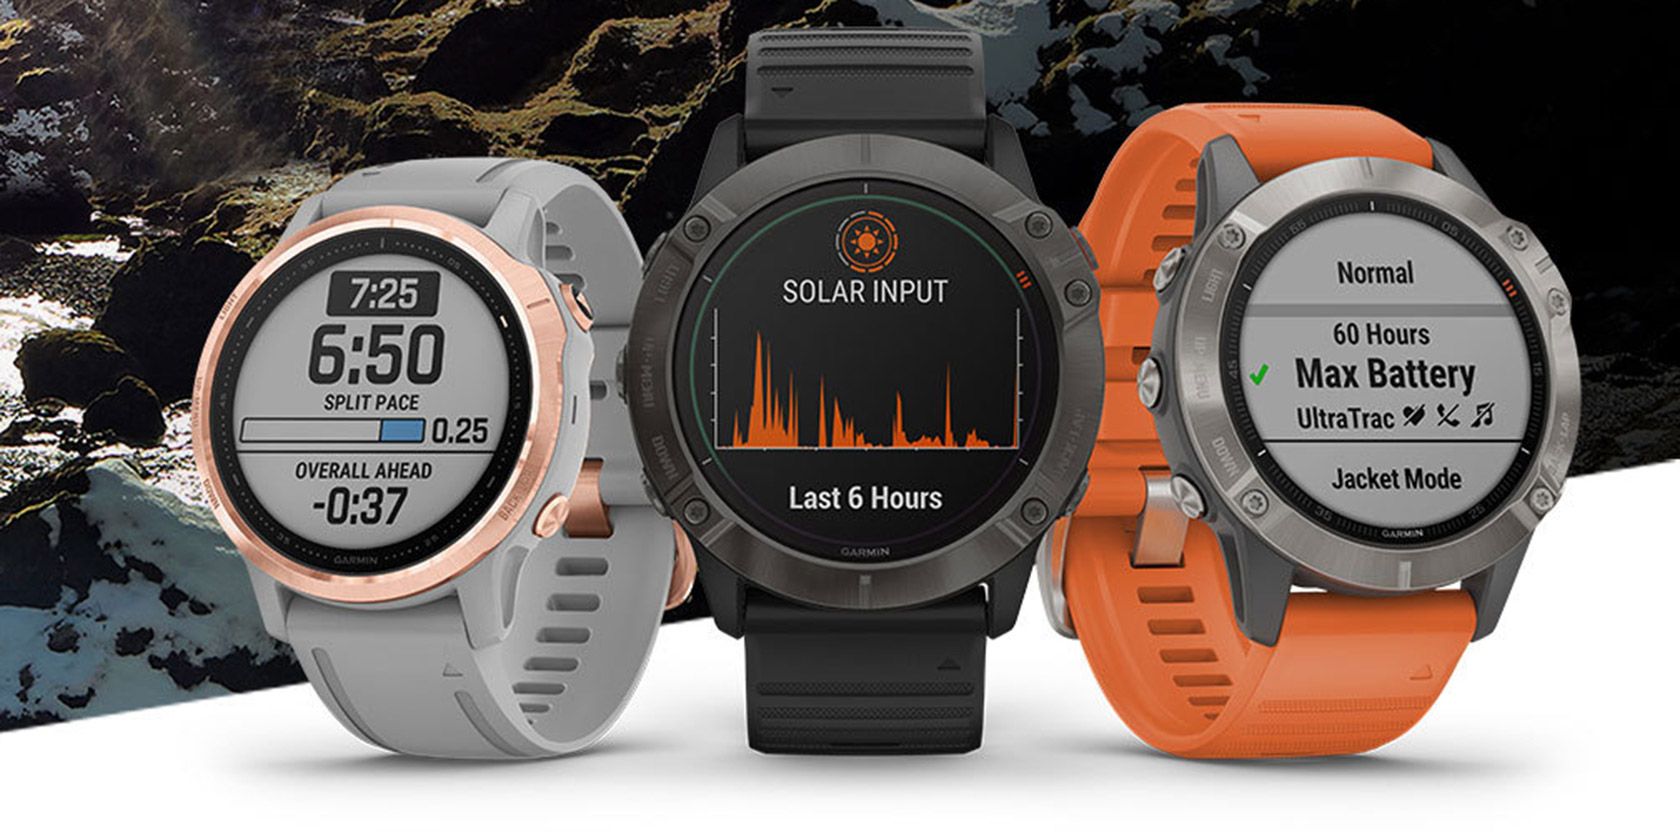
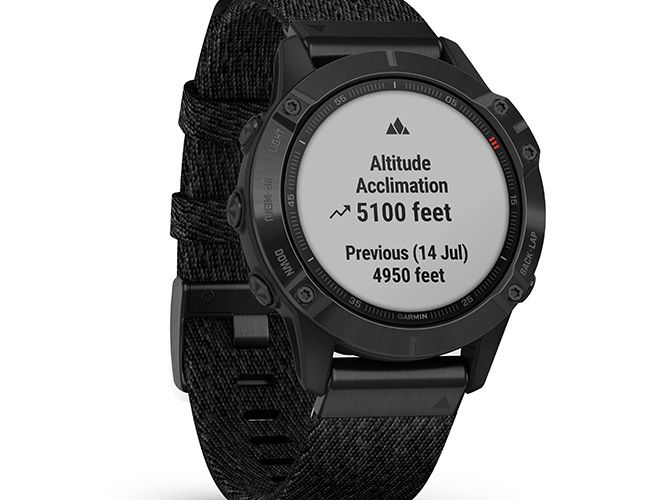
Garmin has introduced its latest GPS smartwatches, and one of them actually features solar charging that’ll keep the watch running for quite a bit longer. All of the watches come packed with some pretty cool features for people who like to get out there and go, but the solar charging is definitely the thing that made us stand up and take notice.
Fenix 6X Pro Solar Features
The flagship of Garmin’s new Fenix 6 line is the 6X Pro Solar. The watch features a transparent solar lens that will trap energy from the sun and extend the battery life by a bit, which will come in handy for anyone who’s looking to spend an extended period of time out in the wilderness without a charger.
Garmin says the watch will last for approximately 21 days when in smartwatch mode, and it can actually squeeze out to three more days of battery life with the solar charging feature.
Outside of the battery life, the Fenix 6X Pro Solar comes with a 1.4-inch display, which is a little bit bigger than the Fenix 5 models.
“We are thrilled to introduce solar charging into the new Fenix 6X Pro Solar edition, giving users all of the features they’ve come to expect from the Fenix lineup with increased battery life and larger displays,” said Dan Bartel, Garmin vice president of global consumer sales.
Fenix 6 and Fenix 6X Features
The Fenix 6 and the 6X are similar to the Pro Solar, only they lack the solar charging feature. The 6 comes with a 1.3-inch screen and the 6X features a 1.4-inch display.
Garmin didn’t announce any information regarding battery life for the Fenix 6 or 6X.
All of the watches, including the high-end Fenix 6X Pro Solar, share some features including built-in topographic maps, maps of over 2,000 ski resorts and 41,000 golf courses, on-device music storage of up to 2,000 songs, heart-rate monitors that work even while swimming, Garmin Pay, and plenty of other goodies you’d expect to see from a high-end smartwatch.
A really interesting feature that comes with all of the Fenix 6 watches is called Body Battery. It allows you to actually check your body’s energy levels at any given moment, which can help with planning workouts, rest time, and sleep.
Fenix 6, Fenix 6X, Fenix 6X Pro Solar Availability
The Fenix 6 watches are available right now. The base model Fenix 6 starts at $599.99. The Fenix 6X Pro Solar starts at $999.99 and goes up from there depending on chosen options and features.
Google Drive has come a long way from being an online-only, document viewer, and editor. Drive has some native features that make it an excellent PDF tool, but its compatible third-party Drive apps extend its usefulness and functionality.
Let’s take a look at ten fantastic ways you can make Google Drive work for you.
Fortunately, Google Drive comes equipped with some fantastic features to handle PDF management. Before you look for any addons for Google Drive PDF editing, double-check to see if it’s not already a feature.
1. Save to Google Drive From Chrome
While Chrome is a fantastic PDF viewer, it can also save PDFs to your Google Drive. You don’t even need to open Drive; the PDF viewer handles everything.
To do this, we need to take a unique path. Open the file in the Google Drive PDF viewer, then look at the top of the page where the additional controls are. If you don’t see the controls, move your mouse to the top of the page.
While you may be tempted to click the download button, don’t; instead, click the Print button. Under the Destination category, select Save to Google Drive. Then, click Print.
Chrome will upload your PDF to your Google Drive. It may take a little while to upload larger files, so don’t try to close out of the prompt if it appears to freeze up. Don’t worry; you won’t print out the document.
2. Search With Optical Character Recognition (OCR)
OCR is a technology that takes text from images and PDFs and converts them into a searchable and editable document.
To use OCR in Google Drive, right-click on a PDF, then Open with > Google Docs. Once you have opened it in Google Docs format, save it again, and you’ll have your searchable doc.
3. Export Any Document to a PDF File
If you have a Google Doc which you’d like to convert to PDF, open up the document in Docs. Once it’s open, click File > Download > PDF Document.
4. Scan Documents Into a PDF With the Mobile App
Saving physical information to the cloud is a great benefit of going paperless, especially with Google Drive’s OCR technology. If you need to backup receipts or important documents, you can take a photo of it and automatically convert it into a PDF file.
To get started, download and open the Drive app. Then, tap on the Plus icon that appears above the controls. In the pop-up that appears, tap Scan. Take a photograph of what you want to scan, and Drive will automatically convert it into a PDF file.
After you take the picture, you’ll see some editing options in the top right corner. The plus sign at the lower left allows you to put several photos together and upload as a single PDF. When you’re happy with the image, tap the checkmark in the lower right corner to name, and save the document to Google Drive.
Google recently added the ability to highlight PDFs in Google Drive natively. When you’re looking at a PDF in Drive, click the Add a Comment icon at the top left. It looks like a speech bubble with a plus icon in it.
Then, highlight the area where you want to comment. You can drag a highlight box across what you want to annotate, then type a comment in the box that appears.
These comments carry over if you save the PDF file to your desktop, which is excellent for showing other people what you annotated.
6. Add, Delete, and Reorder Pages With DocHub
If you want to add or remove specific pages in a PDF file, you can do this with DocHub. This addon features many excellent features, but not many extensions allow you to edit the pages directly.
If this sounds interesting to you, go to the DocHub website and sign in with the Google account you want it to access. Once you’ve added DocHub to Google Drive, right-click a PDF file in Google Drive and select Open With > DocHub.
Once the document is open, click the button at the top-left that looks like a 3×3 grid of boxes. This button opens the page manager sidebar. You can drag pages around in this sidebar to manage them, or use the buttons underneath to add and delete files.
7. Fill Out and Sign PDFs With HelloSign or DocuSign
Chrome’s built-in PDF viewer works great for filling out interactive PDFs, but if you have to add checkmarks, signatures or repetitive information, you may want to look at a service such as HelloSign (shown above) or DocuSign.
Both have modern interfaces allowing you to find your way around quickly, and also allow you to draw or import a picture of your signature.
The free accounts are very similar too. If you’re going to be collaborating and sharing a lot of PDFs, you may want to consider a premium account. HelloSign allows you to send three documents every month for free, where DocuSign only lets you send a total of three. Signing (but not sharing) from the services are always free.
Download:HelloSign (Free with premium options) Download:DocuSign (Free with premium options)
8. Merge Multiple PDFs With PDF Mergy
If you want to learn how to merge PDF files in Google Drive, PDF Mergy has all the answers. It’s easy to use and provides excellent results.
To combine PDFs in Google Drive, install PDF Mergy. Once installed, select all the PDF files you want to merge. You can select multiple files in Google Drive by holding down the CTRL button and clicking on each.
Once you’ve selected all the files you want to combine, right-click, hover over Open With, and click PDF Mergy. The files will appear on the PDF Mergy website.
Once you’re satisfied with the file selection, click the blue “Merge” button. You’ll be prompted to name and save locally or to Google Drive.
If you want to split one PDF into a file per page, try Split PDF. The name gives away its primary function, but it does contain some additional features which make it a useful PDF editing suite.
If you want to split a PDF, do note that Split PDF comes with a few restrictions. You can split documents without an account, or you can create a free account to split more. Free accounts can only split so many documents a day, while premium members can split as much as they like. Premium plans are $2.99 a month, or $47 for two years.
To split a PDF, download and install the extension. Click the extension button on your browser, and you’ll see a PDF upload page.
Select the Drive icon to upload via Drive, and upload your PDF file. Wait for Split PDF to process it. Once done, click the Split button at the bottom right.
Once it’s done splitting, you’ll receive a zipped folder containing every page of the PDF as an individual PDF file.
Large PDF files can take up a lot of your limited Google Drive space. If you want to make more room on your Drive, SmallPDF can help squash your PDF file sizes down. Of course, there is plenty of fantastic file compression and extraction software available already, but doing it inside of your browser is very convenient.
To use it, download and install the extension. Open the app, then click From Google Drive on the upload screen. Select the PDF you want to compress, then click Select.
SmallPDF will offer you a premium option to compress your PDF to a further degree, but the regular compression works very well. In fact, during testing, SmallPDF squashed an 8MB PDF file into an 800KB one.
Google Drive has fantastic PDF support built into it. Even if you do find something it can’t do, someone has created an addon that handles it. As such, Google Drive is a great way to manage and edit all your PDF files.