14 February 2019

The 5 Best Rescue and Recovery Disks for a Windows System Restore


windows-rescue

At times, Windows is an unruly operating system. Random crashes, boot failures, error messages, and full blue screen of death system crashes are part and parcel of Windows life.

If that sounds like your life, you must learn about some of the amazing Windows 10 rescue and recovery disks. These rescue disks have saved more than a few Windows user’s bacon on many occasions. Check out the Windows 10 rescue and recovery disks below—it could be the difference between a self-fix or a costly trip to the computer repair store.

1. Hiren’s BootCD PE x64

hirens boot cd windows 10 pe version

Hiren’s BootCD remains one of the single best Windows rescue and restore disks. Any IT technician or habitual technology tinkerer will have come across Hiren’s BootCD. If they have, they’ll sing its praises. However, the original Hiren’s BootCD ceased official updates in November 2012. Now, a trusty band of Hiren’s BootCD fans updates the rescue disk with the latest and greatest recovery utilities.

Hiren’s BootCD focuses on fixing Windows systems. The rescue disk contains a wealth of utilities including malware and rootkit detection, antivirus scanning, temporary file cleaners, data and driver backups, hardware scanning, partition scanning, imaging and saving, and even password crackers. You can also use Hiren’s BootCD to reflash your BIOS or wipe your CMOS if required.

Furthermore, to roll with the times, Hiren’s BootCD is now based in the Windows 10 Preinstallation Environment (PE). A PE is a lightweight version of the operating system primarily used for troubleshooting and is usually accompanied by additional recovery and rescue tools.

Need an old Hiren’s BootCD version? Use the drop-down menu to select the version you want.

2. Kyhi’s Recovery Drive

kyhis windows 10 pe recovery list of tools

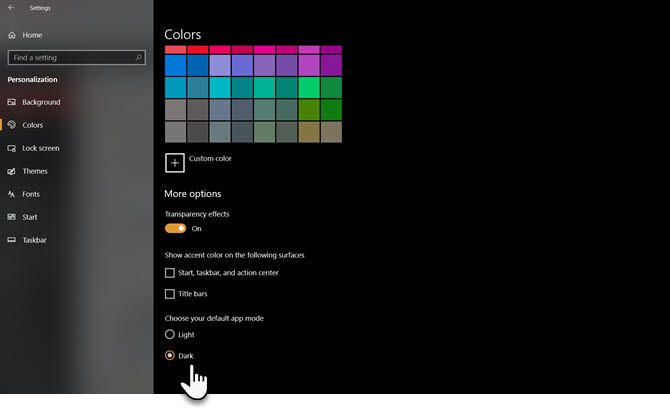
Kyhi’s Recovery Drive, also known with the cumbersome name of Windows 10 Recovery Tools—Bootable PE Rescue Disk, is a custom Windows 10 PE environment. In this case, TenForum’s user, Kyhi, has developed a Windows 10 PE environment filled with system restore and recovery tools.

Kyhi’s Recovery Drive comes with a huge range of tools for virus and malware removal, disk repairs, partition managers and scanners, networking, remote view and VNC tools, image backup and recovery tools, and much more. Better still, many users will find Kyhi’s Recovery Drive extremely easy to use due to the familiar environment. The recovery environment looks exactly like a Windows 10 installation, so navigation and access are just as you would expect.

The above image showcases just some of the array of Windows 10 recovery tools found in Kyhi’s Recovery Drive.

3. The Ultimate Boot CD

Ultimate BootCD

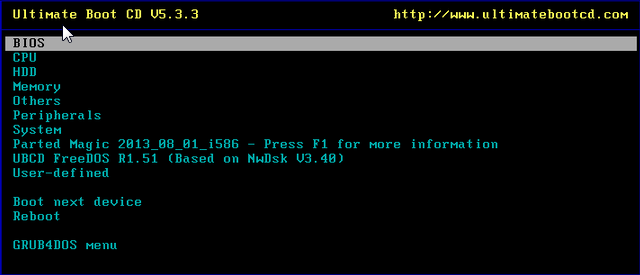
Similar to Hiren’s BootCD, UBCD troubleshoots both Windows and Linux systems with a massive range of helpful utilities. It is useful against issues up and down the system error board with drive cloning and data recovering tools, hardware testing, partition scanning and a host of other system repair tools.

UBCD aims to “consolidate as many diagnostic tools as possible into one bootable CD”—something the makers have come very close to achieving.

UBCD is completely free for download, so be wary of any site attempting to take payment for a download.

4. Knoppix

KNOPPIX

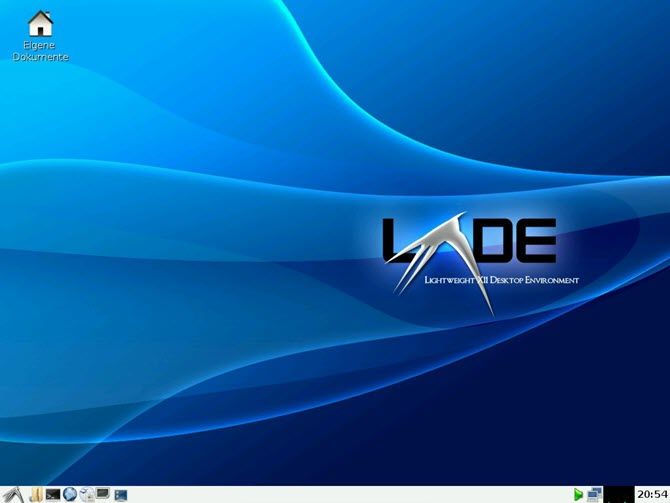
You cannot have a bacon-saving recovery disk list without including the grandfather of them all: Knoppix. This Linux Live CD provides a fully functional operating system once loaded onto a malfunctioning system, rather than just providing you a GUI with different system analysis options.

The Knoppix operating system comes with some 1,000 software packages for you to scan through, including troubleshooting, hardware analysis, data-recovery, and cloning tools alongside browsers, image-manipulation tools, and media players.

There DVD version of Knoppix is known as “Maxi,” bundling over 2,600 different pieces of software in a 4.7GB package. Most of the software included in both Knoppix packages are either free or open-source though there are some proprietary software packages

5. Native Windows Recovery Disk

The final recovery disk is the Windows Recovery Disk. If you have a recovery disk, there is always a chance you can repair your Windows installation.

Unsure how to create a Windows recovery disk? Here’s how to create Windows 10 installation media. When trouble arises, pop your installation media into your system and select the Repair mode when it appears.

Alternative Windows Rescue Disks

There is a huge amount of Windows rescue disks out there. Here are three few more for you to peruse.

The Trinity Rescue Kit

Trinity Rescue Disk

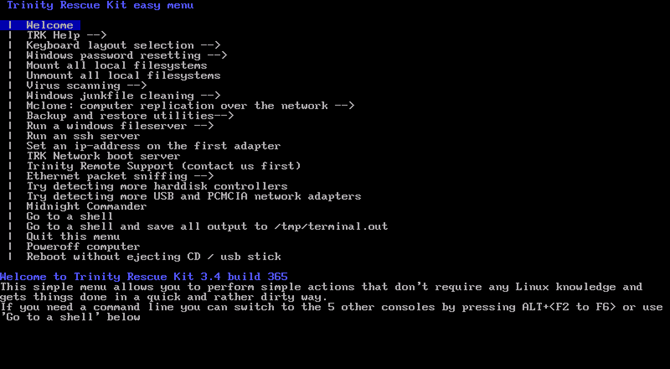
The Trinity Rescue Kit is specifically designed with common Windows and Linux issues in mind. Creator, Tom Kerremans, authored the Live CD to revitalize ailing systems using a range of virus and malware scanners, password recovery tools, partition recovery tools and drive cloning utilities.

TRK doesn’t have the massive range of HBCD or UBCD but is still extremely useful to have a copy of. Best of all, like many of the other resources on this list, it’s completely free, so grab a copy.

DriveDroid

DriveDroid

While not strictly a bootable disk, DriveDroid for Android is a ridiculously useful system restore tool to keep in your pocket. Those Android users with a rooted device can make use of DriveDroid’s massive selection of Linux distros, both big and small, in an app that boots as a USB drive.

Handy for pocket based recovery without optical media or USB drives, or if you just like carrying a massive amount of Linux distros around ready for deployment at any moment.

Note: Your Android device must have root access for DriveDroid to work.
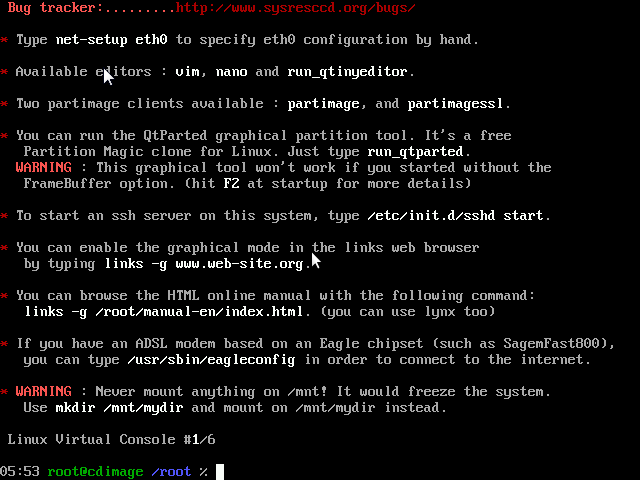
SystemRescueCD

System RescueCD

…It does exactly what it says on the disk…

But seriously, it does. SystemRescueCD is a Linux-based rescue disk designed to troubleshoot damaged Windows and Linux based systems. It comes packed with antivirus, malware, and rootkit tools, partition management and cloning, and is quite handy for network troubleshooting and diagnostics. The CD also includes a handy disc burner, so you can continue to burn while SystemRescueCD does its thing.

It can be used as a bootable disk or USB and, like all the best things in life, is completely free. Many IT technicians reach for SystemRescueCD following a system crash, and we understand why. Another must-have for your CD stack.

Always Keep a Windows Rescue Disk at Hand

One of the disks on this list is guaranteed to save your system in the future. And if not yours, it will come in handy when you play IT specialist for your family and friends. Better still, why not combine them all into a handy portable ISO image or USB flash drive?

Read the full article: The 5 Best Rescue and Recovery Disks for a Windows System Restore


Read Full Article

The 5 Best Wireless Security Cameras for Your Home

The 7 Best Windows 10 Dark Themes for Your Eyes


dark-theme-windows

The benefits of dark screens are easy to understand—less eyestrain, easier-to-read text, and well, they just look cool, don’t they?

After a couple of years of waiting, Windows 10 now offers a native dark theme mode. You’ll also find plenty of third-party dark themes out there; more than enough to suit every taste and style.

Here are some of the best Windows 10 dark themes you can get right now.

How to Change the Windows 10 Theme

Windows 10 Theme Settings

Windows personalization options allow you to change the background, lock screen, color, sounds, and the appearance of the cursor. You can change it from the desktop or dig into the Windows 10 settings.

First, either right-click on your desktop and select Personalize > Themes or head to Start > Settings > Personalization > Themes.

You can choose from one of Windows’ built-in themes, or click on Get more themes in Microsoft Store to see more.

1. Windows 10 Dark Theme

With the 2017 Anniversary Update, Microsoft introduced a system-wide Windows 10 dark theme, which previously was only available via a registry hack.

If you’re running the most recent version of Windows 10, head to Settings (Windows key + I) > Personalization > Colors, scroll down and set the default app mode to Dark.

Windows 10 Dark Mode

The theme will change the Windows system apps and Microsoft’s store apps. You will still need to change other third-party apps on a case-by-case basis.

For the record, here’s the old registry hack:

  1. Open Run (either right click on Start > Run or press Windows key + R).
  2. Type RegEdit and press Enter.
  3. Navigate to HKEY_LOCAL_MACHINE\SOFTWARE\Microsoft\Windows\CurrentVersion\Themes\Personalize.
  4. Create a new DWORD value called AppsUseLightTheme with a value of 0.
  5. Navigate to HKEY_CURRENT_USER\SOFTWARE\Microsoft\Windows\CurrentVersion\Themes\Personalize.
  6. Again, create a new DWORD value called AppsUseLightTheme with a value of 0.
  7. Restart your computer

Either delete the new registry entries or change their values to 1 to re-enable the light theme.

2. GreyEve

grey eve theme windows 10

The GreyEve theme is available for download from DeviantArt.

Unlike some of the other themes on this list, it can be installed without using any third-party tools or editing any system files—thus making it great for users who want a hassle-free option.

The developer warns that due to Microsoft’s limited dark theme options he was forced to make it a high contrast theme. You’ll have to check whether or not it suits your needs.

To start using it, download the file and place it in [USERNAME]AppData\Local\Microsoft\Windows\Themes.

3. Penumbra 10

penumbra theme windows 10

Before proceeding, be aware that this is a Windows 10-only theme. If you’re reading this article trying to find themes for Windows 7 or 8, this won’t work for you.

It’s been designed to use neutral dark colors, so there won’t be any jarring contrasts or unpleasant colors anywhere on your screen.

The installation process is more complicated than the previous options. Before installing anything, make sure you’ve downloaded these three essential tools:

To get the theme up and running, firstly install the Open Sans font (included in the theme download). Then install UXThemePatcher, and finally, OldNewExplorer.

Next, move the contents of the theme’s Visual Style folder to C:\Windows\Resources\Themes. Now is a good time to reboot your computer.

Lastly, select the theme in the Settings app as described earlier.

You can further customize this theme by changing the Taskbar’s color and opacity. The tool is available for download on the theme’s DeviantArt page.

4. Nocturnal W10

nocturnal theme windows 10

Once again, this is a Windows 10-only theme. Despite sharing the same name as its Windows 8 counterpart, it will not work on older versions of the operating system.

This is arguably the most complex to install. You will need four third-party apps before installing the main theme. They are:

To use the dark theme, install Blank.TFF, then run Blank.REG.

Next, copy the theme folder straight to C:\Windows\Resources\Themes. When ready, patch your system using UXThemePatcher.

Finally, navigate back to Settings > Personalization > Themes and choose the theme from the list.

5. Ades Theme

ades theme windows 10

Rather than going for total darkness, Ades Theme uses various tones of gray and introduces some color.

While it still requires a third-party tool, it’s easier than both Nocturnal and Penumbra to install. You will still need UXThemePatcher, but can otherwise download the file and put it straight into C:\Windows\Resources\Themes.

To make it look even better, install the developer’s associated icon pack. That’ll let you apply the cool icons you see in the image below.

6. Hover Dark Aero

hover dark aero theme windows 10

Hover Dark Aero uses translucent blacks and grays to create a sleek and visually impressive user interface. If you want to recreate the look you see in the image above, you will need to also download the creator’s associated theme pack. The icon pack is included in the theme’s download files.

There are six different versions of the theme to choose from—each has a slightly different feel.

To make the theme work, you will need to make sure you have installed the aforementioned UXThemePatcher.

7. Hastpy

hastpy theme windows 10

The last Windows 10 visual style we’re going to recommend is Hastpy.

The developer behind the theme is Cleodesktop. It’s the same person who is responsible for Hover Dark Aero and the similarities are obvious; both use the same icon packs.

Unlike Hover Dark Aero, Hastpy doesn’t have a translucent ribbon. Instead, it deploys a contrasting light grey color. Once again, six different versions of the theme are available.

To install Hastpy on your system, you need to be running UXThemePatcher. Move all the files in the theme download file %windir%/Resources/Themes folder to get up and running.

A Word of Warning Before Applying Windows Themes

Some of these themes make significant changes to your system files. As such, always create a system restore point and backup your work before attempting to install them.

And remember, there are lots of other non-dark Windows 10 skins available. If you would like to like to learn more about using themes on Windows 10, make sure you read our articles about the best Windows themes for every desktop, and the best white themes for Windows 10.

Read the full article: The 7 Best Windows 10 Dark Themes for Your Eyes


Read Full Article

6 Informative Android Sites You Should Bookmark Today


informative-android-sites

Android is a vast, diverse operating system you wish you could explore completely. But with a rapid development cycle, it can a little hard to keep up with.

After all, there are millions of apps, customizations, and features to stay familiar with. So get into the nitty-gritty with these six handy websites that every Android user should bookmark.

1. The Android Subreddit: Stay on Top of Every Android Development

The Android Subreddit

Reddit’s premier Android community is home to every little Android tip, news, or development you will ever need to know about. With over a million members, the subreddit is always active. And you just have to slide down the comments to understand a particular topic or get more insights.

Also, the channel has Telegram and Discord counterparts as well. However, the Android subreddit doesn’t allow personal posts and is not meant for tech support. So if you want help troubleshooting your device, head over to more specific subreddits like r/TeamPixel or r/Samsung.

2. Google Play Deals Subreddit: Catch All the App Deals

The GooglePlayDeals Subreddit

Another page on Reddit you must visit is GooglePlayDeals. The subreddit compiles all the apps or games on the Play Store that are on sale. It always stays up to date, so if there’s a deal which has expired, the post will have a relevant flag for it.

What’s more, it has flags that tell you whether a specific app is popular or new, how long will the deals last, and more.

You can check the original price and the discount right from the listing too. There are tens of thousands of subscribers, so new deals are added often.

3. Google Taste Test: Let Google Find Your Next Homescreen Setup

Google myAndroid Taste Test Demo

The home screen is one of the most critical aspects of your smartphone experience. It’s where you launch apps, perform web searches, check widgets, and much more. But finding the right elements to decorate it the way you prefer can a little challenging. So why not let Google do it for you?

Google offers a nifty web app called Taste Test. The app asks you a set of goofy and relevant questions with multiple choices to understand your taste. Then it suggests the right apps to personalize your homescreen.

You can choose from free alternatives as well. Taste Test also embeds links so that you can quickly download the apps. Plus, there’s a button for sharing the look on various social websites.

Once you’re prepared to take the next step, check out these nine apps for personalizing your Android home screen.

4. Don’t Kill My App: Escape Your OEM’s Erratic AI Optimizations

Don't Kill My App Website

In an effort to boost battery life and performance, Android vendors have begun to adopt a bunch of AI optimizations for their custom skin. While ideally, that should have made your phone much smarter, it has led to a headache in a few cases.

These background power savers can kill your regularly used apps indiscriminately. You might not get your notifications on time (if ever), or apps that require background processes like the alarm clock might just stop working.

However, if you know your way around the settings, you can escape these so-called features. And to do that, we recommend a website simply called Don’t Kill My App.

The website ranks all the Android manufacturers based on how unreliable their algorithms are and the steps you can follow to switch the AI optimizations off. Also, it provides solutions for specific models too in case the usual options don’t function the intended way. What’s more, you can read more on the issues there or contribute if you have discovered a better solution.

5. AOSMark: Check How Consistent an Android OEM’s Update Record Is

AOSMark Check Android OEM Software History

Android phone makers can be notorious when it comes to software updates. Some only pay attention to their latest models, some take ages to push new firmware out, and the rest don’t care about them at all. But unless you closely follow Android news, keeping track of which OEM, apart from Google, has a proven track record for updates is nearly impossible. Thankfully, a website titled AOSMark wants to take that burden off of you.

AOSMark aggregates all the Android vendor’s software history on a single platform. It shows and grades manufacturers based on how punctual they have been in the past. You can click individual companies to know how often and quickly their most recent phones received new firmware.

What’s more, AOSMark lets you search specific models or manufacturers too. You’ll also find a Hall of Fame section that displays the twenty most updated phones ever.

6. NVISO ApkScan: Scan Unfamiliar APK Files

NVISCO APKScan

This is another handy, free website for Android users. NVISO ApkScan thoroughly scans APK files for malware or other malicious activities. All you need to do is upload the file and wait a minute or two before the report has been generated.

NVISO ApkScan performs a wide variety of checks for ensuring the app doesn’t require any suspicious permissions. For instance, it will check if the app opens any network connections as soon as you install it. If you don’t want to wait, NVISO ApkScan has an option for enabling email alerts.

Keep Learning More About Android

Android can feel daunting to master at first. But with the right websites as listed above, you can easily learn more about it and keep tabs on its endless developments.

While there is a ton to explore, Android is still not perfect and there are a host of features we wish Google brings soon. Until then, replicate missing features on Android using these apps.

Read the full article: 6 Informative Android Sites You Should Bookmark Today


Read Full Article

How to Clean Your Apple Watch Safely and Efficiently in 4 Steps


clean-apple-watch

Did you know there’s a right and wrong way to clean most of your portable devices? The Apple Watch is no exception. Using the wrong tools for the job could damage your watch, void its warranty, or irritate your skin.

Today we’ll take a look at the right way to clean your Apple Watch. Want to clean your smartphone too? Check out our guide to safely cleaning your iPhone without damaging it.

Step 1: Remove Your Band

In order to clean each part of your Watch thoroughly, you’ll need to remove the band from the Watch unit. First, remove the Watch from your wrist. On the back, look for the two buttons near the point at which the Watch and the band meet (see the below photo).

Apple Watch band fasteners

Using your fingernail or a thin blunt object, depress each of these buttons and slide the band off in a horizontal motion. The buttons disengage the magnets within the Watch, but you may still need to apply some force to get the band off.

Step 2: Clean the Watch

With your Watch separated from the band, it’s time to start cleaning. What’s most important is that you avoid using anything that can damage your Watch. This includes:

  • Soaps and chemical cleaners
  • Household cleaning sprays
  • Abrasive materials (e.g. polish)
  • Compressed air canisters
  • Ultrasonic cleaners
  • External heat sources (e.g. steam)

All Apple Watch models are water-resistant to some degree. The early models (like the original “Series 0” Watch) are regarded as splash-proof but will survive a dunk under the tap or a quick shower. The newer models are rated for up to 55 yards of water resistance. These models can handle submersion in fresh, chlorinated, and salt water (provided you rinse them off afterward).

Apple Watch Cleaning (Front)

First, enable the water lock on your Watch by swiping up from the bottom of the screen and tapping the water droplet icon. This locks the touchscreen and aids with removing water from the speaker system when you’re done cleaning (Series 3 and 4 only).

Apple Watch Cleaning (back)

Hold your Apple Watch under warm running water for 10-15 seconds, then rub off any unwanted gunk with a damp, non-abrasive lint-free cloth. The screen should clean up pretty easily, but you may need to pay extra attention to the back of the Watch where the heart sensors reside.

Apple Watch dirty back

It’s common for this area to build up dirt, particularly if you’re using your Apple Watch to work out or sweating a lot. You may need to use a little elbow grease to clean the sensors and back of the Watch. Don’t be afraid to give it a good cleaning; provided you’re using a non-abrasive cloth and water, your Watch should be fine.

Apple Watch Cleaning (back)

With the front and back clean, it’s time to turn your attention to the edges. It’s possible for residue to build up around the Digital Crown, possibly to the point where it doesn’t turn smoothly anymore. To remedy this, hold the Digital Crown directly underneath warm running water for around 15 seconds, while turning the crown to loosen any grime.

Cleaning the Apple Watch Digital Crown

Once the Digital Crown turns freely, it’s worth giving your Watch one more check over. Pay close attention to the points at which the band connects to your Watch. These areas can get dirty, particularly if you never change bands. Too much grime here could prevent the magnetic clasp working, risking your Watch slipping off your wrist.

Apple Watch Cleaning (band connector)

One of the coolest Apple Watch features (at least on the newer models) is the ability to expel water after a shower or swim. Turn the Digital Crown to fill the meter up, at which point your Watch will emit some low noises followed by a bleep.

If you already triggered the self-cleaning while washing your Digital Crown, you can re-enable it by swiping up from the bottom of the Watch face and tapping the water droplet icon.

Apple Watch Expelling Water

Step 3: Clean Your Band

Not all bands are built equally, and not all bands are water-resistant either. In particular, Apple’s leather and stainless steel bands are not classified as water-resistant. In this instance, you shouldn’t swim, shower, or run them under water in order to clean them.

Instead, you should wipe them clean with a soft damp cloth to remove any dirt and grime. Avoid soaking the leather band in water, since this will likely damage it. You should wait until the band is completely dry before reattaching it to your Watch.

For nylon, silicon, and other durable bands, you don’t need to exercise quite as much caution. Silicon is easy to wipe clean and you can run it under the tap for a few minutes to loosen up any stubborn grime. It’s also fine to clean nylon bands and sport loops this way to return them to their former glory.

Cleaning an Apple Watch Sport Loop

You should avoid washing your band like you would an item of clothing. Even though the lighter fabric bands may get noticeably dirty, Apple recommends only using water to clean them.

Step 4: Reassemble Your Watch

With your Watch and band sparkling clean, it’s time to reassemble your Watch. To do this, slide the band into the coupling point at the top and bottom of the Watch face. If you have a band with a buckle, make sure the buckle end connects to the top of the Watch. For sports loops, make sure the Velcro is at the bottom of the Watch when the band is fully extended.

A Clean Apple Watch!

You can now put the Watch back on and start getting it dirty again. The more often you clean the Watch, the less time you’ll spend removing grime that builds up over time.

If you have a light fabric Watch band that’s started to discolor, you might want to consider replacing it. Check out our recommendations for cheap third-party Apple Watch bands before you open your wallet!

Read the full article: How to Clean Your Apple Watch Safely and Efficiently in 4 Steps


Read Full Article

The 5 Best Google+ Alternatives to Use Instead


google-plus-alternatives

Google+ is no more. After several years of underdevelopment, the consumer version of Google+ is shutting down on April 2, 2019.

This leaves a loyal fanbase looking for a new home. Google+ might never have been able to rival the likes of Facebook and Twitter, but it had some great features that aren’t easily replicated elsewhere.

With that in mind, here are the best Google+ alternatives that you need to consider.

1. MeWe

There’s a Google+ community called Google+ Mass Migration. It has almost 5,000 members, many of whom are the leaders of existing large Google+ communities that are looking for a new home.

The most common suggestion is MeWe. It is a privacy-focused network. There are no ads, no user tracking, and no data mining.

There are three types of group: Private (requires invite), Selective (approval needed to join), and Open. Each group has a chat (which is often unmoderated) which supports video and voice calls. MeWe also has its own version of staple Google+ features such as Circles and Collections. It also allows you to follow hashtags.

Uniquely in this list, MeWe comes closest to replicating Google+’s integration with Google Drive and Google Photos. All users get 8GB of free cloud space; you can upgrade it to 50GB for $4.99/month.

MeWe’s MeWePRO service might tempt businesses that want to move away from Google+. It costs $75 per year, per employee, though it is free for educational and non-profit organizations.

2. Mastodon

Many Google+ users are keen to avoid the same fate befalling them for a second time. Because even the most prominent social networks aren’t immune from deletion. You need to look no further than the rise and fall of MySpace for evidence of this.

A popular potential replacement for Google+, therefore, is Mastodon. Unlike regular social networks, Mastodon is decentralized. Anyone can host their own server node in the network.

The decentralized nature of the app also means there is much less regulation. Servers can set their own moderation policies and Terms of Service. For Google+ users who want to break free of their corporate master, it is an appealing proposition.

From a features standpoint, Mastodon is similar to Twitter. Indeed, the network’s main interface looks suspiciously like TweetDeck. The microblogging approach is ideal for Google+ communities who spend a lot of time chatting rather than posting links or other content.

3. Diaspora

diaspora social network

Like Mastodon, Diaspora is a decentralized network. It shares some similar features with the outgoing Google+.

Perhaps most notable is the Aspects tool. It’s a reimagined version of the Google+ circles which allow you to organize people into categories depending on who they are. When you create content, you can then choose to only share with one (or several) of your aspects.

Furthermore, like Google+, the network does not have a real-name policy (Facebook, on the other hand, does). Reshares and @ mentions are both supported.

The big downside is the lack of groups. You can use hashtags to see related content, but it’s not a suitable replacement for large Google+ communities who are looking for a new home.

Anecdotally, many Google+ users have already made their decision and migrated to Diaspora. At the very least, it is worth making an account to see whether your friends have made the jump.

Diaspora has 650,000 users compared to 1.5 million on Mastodon.

4. Minds

minds social network posts

Minds is probably the network that’s most visually similar to Google+ on this list. If you want a replacement where you’ll instantly feel comfortable, it’s worth checking out.

Posts are displayed in three columns with content from people and groups you follow appearing in chronological order. The site also shares some of Reddit’s characteristics; there is an upvote and downvote button.

Under-the-hood, however, Minds and Google+ could not be more different. Minds uses a blockchain, and users are paid in Minds Tokens for creating popular content. The token is Ethereum-based. You can trade it in for rewards, buy ad space, or use it for P2P content subscriptions.

Remember, even though Minds is blockchain-based, it is still a private company. It makes no promises regarding your data and privacy, and that will immediately put off some users.

5. BuddyPress

buddypress profile example

BuddyPress isn’t like a traditional social network; you cannot merely sign up and get cracking.

Instead, BuddyPress is a WordPress plugin that provides a way for groups and communities to create their own private social networks. It is ideal for gamers, sports teams, colleagues, or people who share the same hobby to discuss and develop their passion.

If you’re a Google+ community owner who’s competent with WordPress, you will struggle to find a better home for your group.

Some of the best features of BuddyPress include customizable profile fields, different content privacy settings, and the ability to create smaller micro-groups under a single BuddyPress install.

BuddyPress also includes a private messaging feature and a near-endless list of third-party plugins for additional features.

What About Facebook?

It perhaps should come as no surprise to learn that a lot of Google+ users are vehemently opposed to using Facebook as a Google+ alternative.

On the face of it, Facebook is a suitable replacement; it has groups, it has pages, and it has an unrivaled size of userbase.

But it’s still Facebook, and many Google+ users chose the outgoing network specifically because it wasn’t Mark Zuckerberg’s ubiquitous social network. Furthermore, they mostly made that decision before the company’s recent privacy practices came to light. Don’t expect many communities to end up back in the clutches of Facebook.

Goodbye, Google+

The sad truth for Google+ aficionados is that there is no ideal replacement. The five networks we’ve looked at offer similar features, but they’re not exactly the same.

Users are the ones who lead and define a social network’s ambiance. For any of the networks to succeed as a Google+ replacement, they’ll need to attract the majority of the old userbase. That’s very difficult—if not impossible—to achieve.

If you’d like to learn about more possible Google+ alternatives, you should check out the best Facebook alternatives and the best Twitter alternatives.

Read the full article: The 5 Best Google+ Alternatives to Use Instead


Read Full Article

Why Affinity Designer Is the Best Adobe Illustrator Alternative


affinity-designer

If the hefty price tag for the Adobe Creative Cloud puts you off, don’t worry. Affinity Designer is a viable (and cheaper) alternative to Adobe Illustrator.

Adobe Illustrator has taken over the graphic design market, and it hasn’t been shy about outshining smaller companies with its extensive amounts of features. However, Affinity Designer provides much-needed competition for this tech giant.

So, how does Affinity Designer stack up against Adobe Illustrator? Read on to find out.

An Overview of Affinity Designer

Affinity Designer was developed for the macOS by The Serif in 2014. Later in 2016, The Serif released a version for Windows as well.

It may have been released years ago, but Affinity Designer still remains an unknown option for many graphic designers and artists. That’s just unfortunate. How can you go wrong with a one-time payment of just $49.99 as opposed to $49.99/month for the Adobe Creative Cloud?

With such a low price, you might think that it lacks several key features, or that it just doesn’t perform as well as Adobe products. But that isn’t the case. Affinity Designer is a strong alternative to Adobe Illustrator, featuring both design and photo-editing elements.

Affinity Designer Price

This is why so many people are turning to Affinity Designer, as it’s a popular budget-friendly way to create vectors on macOS or on Windows.

The Look of Affinity Designer

For comparison’s sake, take a look at Illustrator’s layout:

Adobe Illustrator Client Screen

Now, check out Affinity Designer’s layout:

Affinity Designer Client Screen

At first glance, you’ll notice that Affinity Designer sports the same dark background option as Illustrator. Just like in Illustrator, if you’re not a fan of the dark background, you can always switch it to the lighter option. As you can see, Affinity Designer’s interface is also very similar to Illustrator’s interface.

To the left, you’ll see the toolbar, which comes equipped with all the basics like a brush tool, pen tool, pencil tool, and more.

The icons on the top of the screen represent Personas (we’ll get into that in a bit), view options, along with image ordering and flipping options as well.

The right side of the client offers various color and brush stroke tools. In addition, a floating menu lets you adjust typography settings.

If you’re not happy with the layout, Affinity Designer allows you to shift the placement of docks or panels, and to even create custom toolbars.

Affinity Designer’s Essential Features

Affinity Designer doesn’t fall short in terms of features. It’s jam-packed with all the tools you need to create beautiful artwork. Sure, the features might be a little different than Illustrator, but by no means does that make it a bad choice.

File Compatibility

Let’s be honest, the amount of times you have to open an AI or PSD file is innumerable. It becomes even more of a pain when you have to open an AI file when you don’t have Illustrator. Luckily, Affinity Designer has your back.

The developers of Affinity Designer make it easy for users to use a variety of file formats. Choose to export your file in PNG, JPEG, GIF, TIFF, PSD, PDF, SVG, EPS, EXR, or HDR format.

Affinity Designer File Types Export

Better yet, you’re even able to import and edit AI and PSD files.

Personas

Don’t you hate clicking back and forth between Photoshop and Illustrator documents just to complete one project? You’ll be happy to know that Affinity Designer incorporates both pixel and vector tools into one piece of software.

These three little buttons at the top left corner of your screen will be your best friends. They’re known as the Draw Persona, Pixel Persona, and Export Persona.

Affinity Designer Personas Options

The one on the left is the Draw Persona. This option allows you to work with vectors. You’ll have access to all the tools you need to do tasks like drawing shapes, curves, or toying with opacity and fills.

In the middle is the Pixel Persona. You can utilize pixel brushes, just like in Photoshop. The only difference is that you can use vector and pixel tools on the same screen. However, if you want photo-editing features like Photoshop’s clone tool, you’ll have to splurge on Affinity Photo.

Finally, the Export Persona lets you export specific areas, or slices, from your project into different file sizes or file formats. Neat, right?

Zoom Tool

Don’t underestimate the importance of a good zoom tool. Although Illustrator touts its newly updated zoom tool, Affinity Designer currently has the upper hand with this feature.

Not only does this software allow you to zoom at speeds of 60fps, but it also gives you a microscope-esque zoom of more than 1,000,000 percent.

Access to History

You make a huge mistake on your latest project. Don’t worry, Affinity Designer gives you the ability to hit the “undo” button over 8,000 times, no matter if you quit out of the document or not.

Just like in life, your history follows you wherever you go. Even if you decide to switch computers, you can still have access to the same line of history.

Affinity Designer presents your document’s history in a series of snapshots in the same way that Illustrator does. It also allows you to back up your projects to iCloud, as well as share them through AirDrop and various social media platforms.

Affinity Designer on Mobile Devices

Affinity Designer is available for both macOS and Windows, but it’s also optimized for the iPad. Let’s not forget that it’s one of the best apps to use with the Apple Pencil. It brings touch control, as well as drag and drop features, to the table, making it one of the most advanced design apps on the market.

While Adobe currently has its free Adobe Illustrator Draw app for Android and iOS, Affinity Designer’s app is a more in-depth alternative.

Affinity Designer’s app requires a separate payment of $19.99, but it’s worth it for its on-the-go advanced design features. Unlike Adobe Illustrator Draw, Affinity Designer for the iPad comes with most of the same tools you’ll find on the desktop version. With features like typography, shape tools, personas, and more, you can be sure that you’re getting your money’s worth.

Seeing the Affinity Designer app in action should be enough to convince you of its capabilities.

Getting Creative With Affinity Designer

Are you ready to hop off the pricey Adobe bandwagon and join forces with Affinity Designer? Whether you use it on your Mac, PC, or iPad, you won’t be disappointed with the array of features it provides.

While Adobe Illustrator comes chock-full of features, it’s not always ideal. The subscription plan alone may be enough to turn off freelance graphic designers and artists. Affinity Designer is, therefore, a solid alternative to Adobe Illustrator. So whether you’re looking for a change of pace, or are tight on cash, why not give it a try?

If Affinity Designer doesn’t fit your budget either, take a look at the best free browser-based Adobe Illustrator alternatives.

Read the full article: Why Affinity Designer Is the Best Adobe Illustrator Alternative


Read Full Article

What Is SLAM? How Self-Driving Cars Know Where They Are

First look at Twitter’s Snapchatty new Camera feature


Twitter has been secretly developing an enhanced camera feature that’s accessible with a swipe from the home screen and allows you to overlay captions on photos, videos, and Live broadcasts before sharing them to the timeline. Twitter is already used by people to post pictures and videos, but as it builds up its profile as a media company, and in the age of Snapchat and Instagram, it is working on the feature in hopes it will get people doing that even more.

Described in Twitter’s code as the “News Camera”, the Snapchat-style visual sharing option could turn more people into citizen journalists… or just get them sharing more selfies, reaction shots, and the world around them. Getting more original visual content into Twitter spices up the feed and could also help photo and video ads blend in.

Prototypes of the new Twitter camera were first spotted by social media consultant Matt Navarra a week ago, and he produced a video of the feature today.

He describes the ability to swipe left from the homescreen to bring up the new unified capture screen. After you shoot some media, overlays appear prompting you to add a location and a caption to describe “what’s happening”. Users can choose from six colored backgrounds for the caption and location overlay card before posting, which lets you unite words and imagery on Twitter for the first time to make a splash with your tweets.

Meanwhile, code digger and frequent TechCrunch tipster Jane Manchun Wong has found Twitter code describing how users should “Try the updated Twitter camera” to “capture photos, videos, and go live”. Bloomberg and CNBC had previously reported that Twitter was building an improved camera, but without feature details or screenshots.

Twitter confirmed to TechCrunch that it’s currently developing the new camera feature. A Twitter spokesperson told us “I can confirm that we’re working on an easier way to share thing like images and videos on Twitter. What you’re seeing is in mid-development so it’s tough to comment on what things will look like in the final stage. The team is still actively working on what we’ll actually end up shipping.” When asked when it would launch, the spokesperson told us “Unfortunately we don’t have a timeline right now. You could expect the first half of this year.”

Twitter has largely sat by as visual sharing overtook the rest of the social media landscape. It’s yet to launch a Snapchat Stories feature like almost every other app — although you could argue that Moments was an effort to do that — and it seems to have neglected Persicope as the Live broadcasting trend waned. But the information density of all the words on Twitter might make it daunting to mainstream users compared to something easy and visual like Instagram.

This month, as it turns away from reporting monthly active users, Twitter reported daily active users for the first time, revealing it has 126 million that are monetizable compared to Snapchat’s 186 million while Instagram has over 500 million.

The new Twitter camera could make the service more appealing for people who see something worth sharing, but don’t always know what to say,


Read Full Article

Firefox for iOS gets persistent private browsing tabs


Firefox for iOS is getting an update today that brings a new layout for its menu and settings, as well as new organization settings in the New Tabs features to iPhone and iPad users. But more importantly, it is also introducing persistent Private Browsing tabs that allow you to keep private browsing tabs alive across sessions.

Typically, when you exit Firefox, your private browsing sessions will exit, too. Now, when you relaunch Firefox, you’ll be right back in your private browsing sessions. And while it’s important to remember that private browsing doesn’t render you anonymous, it does automatically erase your cookies, passwords and browsing history. Sometimes you want those to persist across your sessions, though, given that it’s annoying to have to re-enter your passwords every time you quite the app, for example, and now Firefox lets you do that until you actively exit the private browsing mode.

“Keeping your private browsing preferences seamless is just another way we’re making it simple and easy to give you back control of the privacy of your online experience,” Mozilla explains in today’s announcement.

With this updates, users now also get different options to organize the view they see when they open a blank new tab. You can now chose between having new tabs open to your bookmarks list, Firefox Home (which features your top sites and recommendations from the Mozilla-owned Pocket), a list of your recent history or a custom URL (with your own homepage, for example). Or, if you just like to see a white page, you can also opt to see a blank page.

As for the new settings and menu layout, Mozilla notes that these now closely mirror the Firefox desktop version. That means you can now access your bookmarks, history, Reading List and download from the Library menu item, for example.


Read Full Article