08 June 2018

Google at NAACL


This week, New Orleans, LA hosted the North American Association of Computational Linguistics (NAACL) conference, a venue for the latest research on computational approaches to understanding natural language. Google once again had a strong presence, presenting our research on a diverse set of topics, including dialog, summarization, machine translation, and linguistic analysis. In addition to contributing publications, Googlers were also involved as committee members, workshop organizers, panelists and presented one of the conference keynotes. We also provided telepresence robots, which enabled researchers who couldn’t attend in person to present their work remotely at the Widening Natural Language Processing Workshop (WiNLP).
Googler Margaret Mitchell and a researcher using our telepresence robots to remotely present their work at the WiNLP workshop.
This year NAACL also introduced a new Test of Time Award recognizing influential papers published between 2002 and 2012. We are happy and honored to recognize that all three papers receiving the award (listed below with a shot summary) were co-authored by researchers who are now at Google (in blue):

BLEU: a Method for Automatic Evaluation of Machine Translation (2002)
Kishore Papineni, Salim Roukos, Todd Ward, Wei-Jing Zhu
Before the introduction of the BLEU metric, comparing Machine Translation (MT) models required expensive human evaluation. While human evaluation is still the gold standard, the strong correlation of BLEU with human judgment has permitted much faster experiment cycles. BLEU has been a reliable measure of progress, persisting through multiple paradigm shifts in MT.

Discriminative Training Methods for Hidden Markov Models: Theory and Experiments with Perceptron Algorithms (2002)
Michael Collins
The structured perceptron is a generalization of the classical perceptron to structured prediction problems, where the number of possible "labels" for each input is a very large set, and each label has rich internal structure. Canonical examples are speech recognition, machine translation, and syntactic parsing. The structured perceptron was one of the first algorithms proposed for structured prediction, and has been shown to be effective in spite of its simplicity.

Thumbs up?: Sentiment Classification using Machine Learning Techniques (2002)
Bo Pang, Lillian Lee, Shivakumar Vaithyanathan
This paper is amongst the first works in sentiment analysis and helped define the subfield of sentiment and opinion analysis and review mining. The paper introduced a new way to look at document classification, developed the first solutions to it using supervised machine learning methods, and discussed insights and challenges. This paper also had significant data impact -- the movie review dataset has supported much of the early work in this area and is still one of the commonly used benchmark evaluation datasets.

If you attended NAACL 2018, we hope that you stopped by the booth to check out some demos, meet our researchers and discuss projects and opportunities at Google that go into solving interesting problems for billions of people. You can learn more about Google research presented at NAACL 2018 below (Googlers highlighted in blue), and visit the Google AI Language Team page.

Keynote
Google Assistant or My Assistant? Towards Personalized Situated Conversational Agents
Dilek Hakkani-Tür

Publications
Bootstrapping a Neural Conversational Agent with Dialogue Self-Play, Crowdsourcing and On-Line Reinforcement Learning
Pararth Shah, Dilek Hakkani-Tür, Bing Liu, Gokhan Tür

SHAPED: Shared-Private Encoder-Decoder for Text Style Adaptation
Ye Zhang, Nan Ding, Radu Soricut

Olive Oil is Made of Olives, Baby Oil is Made for Babies: Interpreting Noun Compounds Using Paraphrases in a Neural Model
Vered Schwartz, Chris Waterson

Are All Languages Equally Hard to Language-Model?
Ryan Cotterell, Sebastian J. Mielke, Jason Eisner, Brian Roark

Self-Attention with Relative Position Representations
Peter Shaw, Jakob Uszkoreit, Ashish Vaswani

Dialogue Learning with Human Teaching and Feedback in End-to-End Trainable Task-Oriented Dialogue Systems
Bing Liu, Gokhan Tür, Dilek Hakkani-Tür, Parath Shah, Larry Heck

Workshops
Subword & Character Level Models in NLP
Organizers: Manaal Faruqui, Hinrich Schütze, Isabel Trancoso, Yulia Tsvetkov, Yadollah Yaghoobzadeh

Storytelling Workshop
Organizers: Margaret Mitchell, Ishan Misra, Ting-Hao 'Kenneth' Huang, Frank Ferraro

Ethics in NLP
Organizers: Michael Strube, Dirk Hovy, Margaret Mitchell, Mark Alfano

NAACL HLT Panels
Careers in Industry
Participants: Philip Resnik (moderator), Jason Baldridge, Laura Chiticariu, Marie Mateer, Dan Roth

Ethics in NLP
Participants: Dirk Hovy (moderator), Margaret Mitchell, Vinodkumar Prabhakaran, Mark Yatskar, Barbara Plank


What’s New in iOS 12? 9 Changes and Features Coming in Fall 2018

The ODROID Model Comparison Guide: Which One Is Right for You?

Beyond Trello Basics: 8 Handy Tips and Tricks for a Faster Workflow


trello-tricks

Once you have figured out the basics of using Trello, it’s time to level up! Your favorite digital Kanban tool hides quite a few useful tricks up its sleeve, and in this article we’re going to explore a few of them and how you can make use of them.

1. Turn Any Webpage Into a Trello Card

send-to-trello-bookmarklet

Find yourself creating many cards while browsing the web for inspiration or research?

You don’t have to interrupt your workflow by switching to a Trello board every time you want to create a card. With this Trello bookmarklet, you can turn webpages into cards on the fly.

Once you drag the Send to Trello bookmarklet to your Bookmarks, you’re all set. The next time you’re on a webpage that you would like to convert to a card, click on this bookmark in your browser’s bookmarks bar.

You’ll then get a popup in which you can select the board and list where the new card should go. If you change your mind midway and don’t want to create the card after all, hit the Never Mind button in the popup.

2. Use Markdown in Trello

markdown-formatting-trello

Markdown is everywhere, and with good reason. It makes writing for the web faster and intuitive. You can now use Markdown in your Trello workflow.

Basic formatting like emphasis, italics, and links follows standard Markdown syntax. Trello does have a few formatting restrictions in place. For example, certain syntax works only with card descriptions and comments, while some of it works in checklist items as well. It’s a pity you can’t use Markdown in card titles.

Read the official help page to learn how to format your text the Trello way. Want a quicker solution? Click on the Formatting Help link when you’re viewing the back of a card. Trello will then display its basic Markdown formatting rules in a popup on the right.

3. Clone Public Boards

copy-public-board-trello

Cloning boards with the Copy Board option in the Show Menu sidebar is one of those essential Trello productivity tips we recommend to all users. But don’t stop at your own boards!

With a bit of effort, you’ll find plenty of useful public boards to copy and repurpose. Trello itself has a roundup of handy public boards to inspire you.

Any public board you copy to your account is automatically classified as Private. Also, while copying the board you get the option to rename the copy and discard the cards if you would rather have only the lists in place.

4. Enable Trello Power-Ups

power-ups-trello

The power of Trello’s Power-Ups allows you to integrate custom fields plus data from various apps into your Trello boards.

For example, you can set reminders with the Card Repeater Power-Up, or build your own forms with the JotForm Power-Up.

This feature alone might be enough to tempt you to upgrade your Trello account to Business Class. (Each board in the free tier has a limit of one Power-Up.)

To enable a Power-Up for a board, first click on the Show Menu button in the top right section. In the fly-out sidebar that appears, click on the Power-Ups option to reveal Trello’s library of versatile add-ons. Hit the Enable button for any of them to integrate the Power-Up into the active board.

5. Automate Trello Card Creation

card-repeater-power-up-trello

Take the pain out of creating recurring cards by hand with a tool or two. One way to do that is with the Card Repeater Power-Up that we mentioned in the above section.

Once you enable the Power-Up, you’ll see a Repeat button appear under Power-Ups in the sidebar on the card back. Click on that button to schedule card creation. You get to pick the list, position, day of the week, time, and the frequency for recurring cards. After you tweak the available options, hit the Save button.

You can also fall back on the trusty IFTTT for some Trello automation. This IFTTT recipe creates cards out of emails in Gmail.

The Butler and Zapier Power-Ups can also automate the card creation process for you.

6. Cut, Copy, and Paste Trello Cards

While you’re used to the universal cut-copy-paste shortcut trio of Ctrl + X, Ctrl + C, Ctrl + V, you probably don’t expect it to work on cards. But it does! The best part is that it works across boards.

Hover over any card and cut or copy it. Next, hover over the Add a card button in any list on any board and hit the keyboard shortcut to paste.

Of course, you’ll have to replace the Ctrl key in the shortcuts with the Cmd key if you’re a macOS user.

7. Change Due Dates With Drag-and-Drop

calendar-view-trello

Want to reassign due dates for several cards? Sure, you can do it one at a time as usual. But you don’t have to!

If you enable the Calendar Power-Up, you can reschedule cards by dragging and dropping them onto the right date in the calendar view. This view shows up when you click on the Calendar button to the left of the Show Menu button.

Keep in mind that the Calendar button shows up only after you enable the Power-Up.

8. Insert New Lists Between Existing Lists

insert-list-trello

Clicking on the Add a List button after the last list on a board is how you create lists. If you want the new list to appear in a different position, you have to drag and drop it to the right location.

Want a quicker way to do that?

There is one. To insert a new list between two existing lists, double-click on the empty space between them. You’ll then see an option to create a new list right there.

If you double-click in the space below any list, you can create a new one to show up right after that list.

Add More Power to Trello With Third-Party Tools

Wish Trello could do this or that? It probably can, once you power it up with smart third-party tools. Start by getting a few browser extensions for Trello. They allow you to add card numbers, advanced sort options, list hiding, and so on. Next, move on to a few essential Trello integrations that will make your job easier.

Trello is as versatile as your ideas are. Once you become familiar with its various nooks and crannies, Trello can keep every bit of your day-to-day life on track. Now, are you ready to explore a few unique ways to use Trello?

Read the full article: Beyond Trello Basics: 8 Handy Tips and Tricks for a Faster Workflow


Read Full Article

The Beginner’s Guide to Apple AirPlay Mirroring on Mac and iOS


airplay-guide

Many people buy an Apple TV solely to send video or audio wirelessly from their Mac and iOS devices to the big screen in their living room via AirPlay. It’s a handy feature, with a huge number of applications, and it generally works quite well.

Both macOS and iOS handle AirPlay in their own ways. Whether you want to share family photos, give a presentation, or extend your Mac desktop beyond the confines of your laptop, it’s a powerful tool and one you should learn how to use.

Today we’re going to look at AirPlay and how you can get the most out of it.

What Is Apple AirPlay?

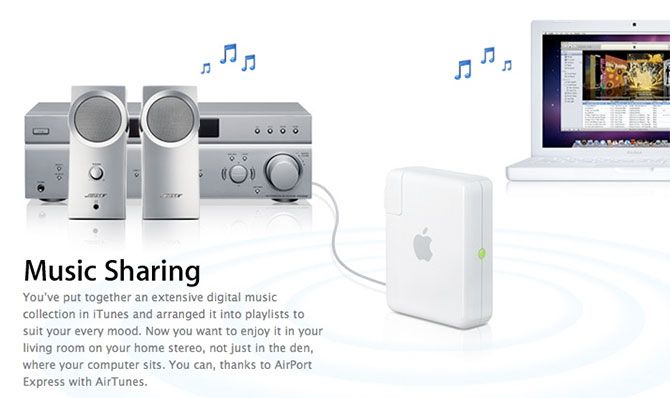
AirPlay is Apple’s proprietary wireless streaming protocol. It allows you to send video or audio from your Mac or iOS device to an AirPlay receiver, like an Apple TV. Apple first introduced AirPlay as AirTunes for iTunes in 2004.

Back then you could only stream wireless audio, but in 2010 the feature made its way onto iOS with support for video streaming too. The following year, the company introduced AirPlay mirroring, and in May 2018 Apple introduced its successor, AirPlay 2.

AirTunes Promo

What Is AirPlay Mirroring?

AirPlay mirroring is the ability to mirror your current display on an AirPlay receiver. The feature exists on both iOS devices like the iPhone and iPad, as well as Mac computers and laptops.

While mirroring sends both video and audio, some content is restricted due to potential copyright violation. If you try to mirror your Mac’s display while playing protected iTunes content, like Apple Music videos, you’ll see a grey box where the video should be.

What Is AirPlay 2?

AirPlay 2 was announced by Apple at WWDC 2017 and was due to launch with iOS 11 in the fall of that year. In May 2018, AirPlay 2 finally released, enabling multi-room audio for the first time. You can now stream music to multiple devices around your house, which was previously only possible using iTunes on a Mac or PC.

AirPlay 2 also plays a part in enabling full stereo playback (where available) on multiple HomePod smart speakers (our Apple HomePod review). The second version of Apple’s wireless streaming protocol is included in the iOS 11.4 update, enabling any device that can run iOS 11 to make use of the technology.

Apple HomePod

Apple TV units that update to tvOS 11.4 can also use AirPlay 2. Apple’s HomePod should update itself automatically. Follow our HomePod troubleshooting guide if it doesn’t. Older third-party devices may not be updated to include support for the refreshed protocol, so if you own any old receivers it’s worth checking with the manufacturer if they’re compatible.

How to Use AirPlay to Stream or Mirror

You can either use AirPlay to stream content to a receiver (audio or video), or to mirror your current device’s screen to a receiver (including audio). In order to use AirPlay, make sure Bluetooth and Wi-Fi are both enabled, and that Airplane Mode is disabled on your device.

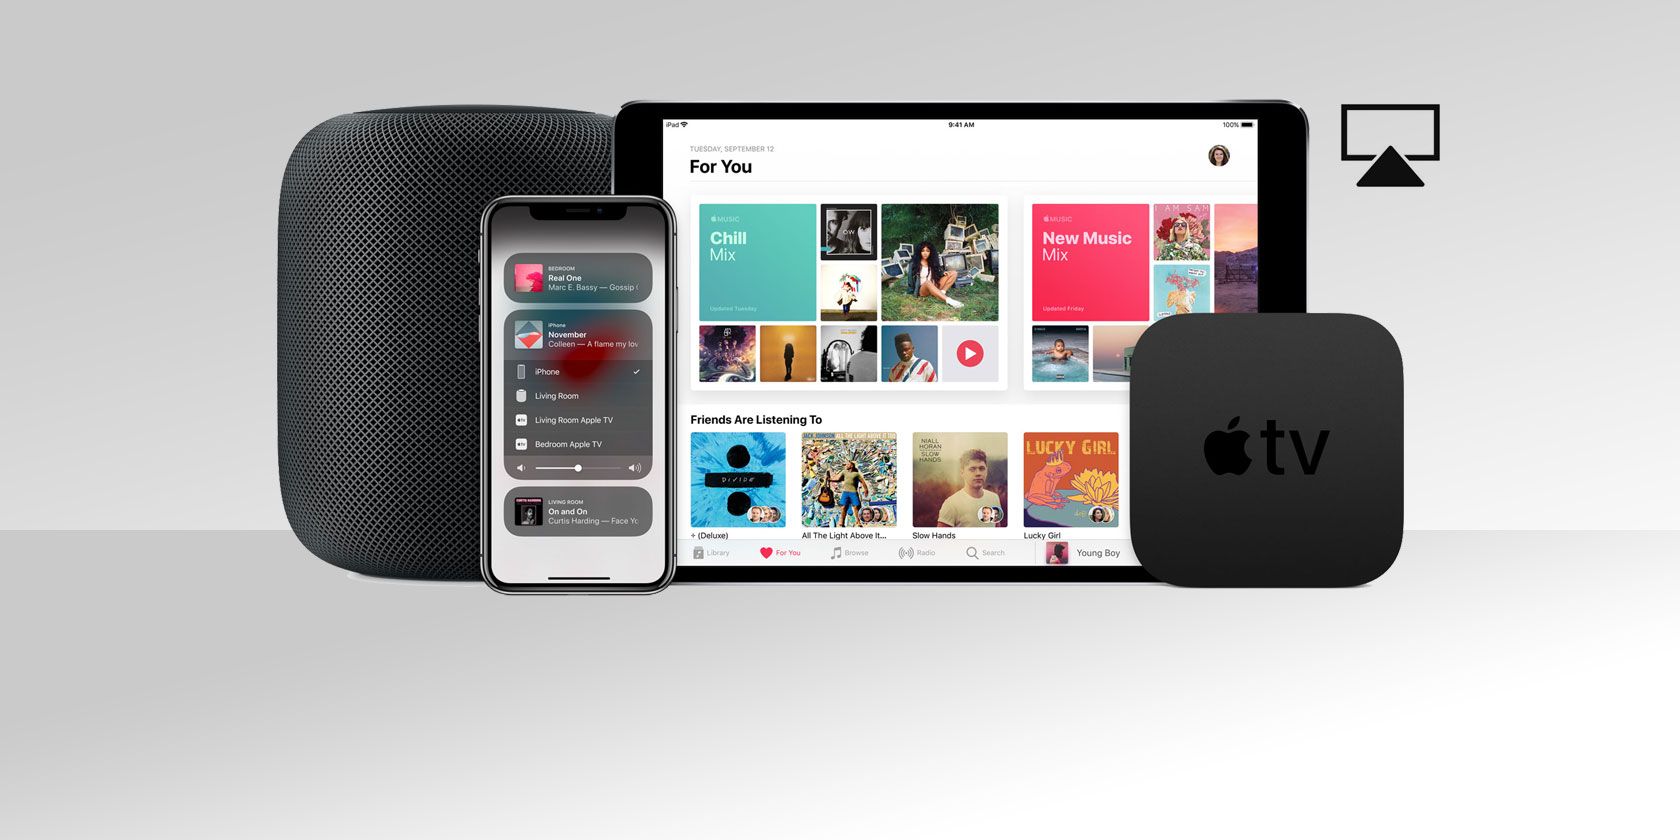
The easiest way to use AirPlay is to look for the AirPlay logo, which looks like a square with a triangle in front of it (pictured below). Any time you see this symbol, click or tap it and select your destination receiver from the list that pops up. Your media will then stream wirelessly.

Apple AirPlay

How to AirPlay From iPhone/iPad to Apple TV

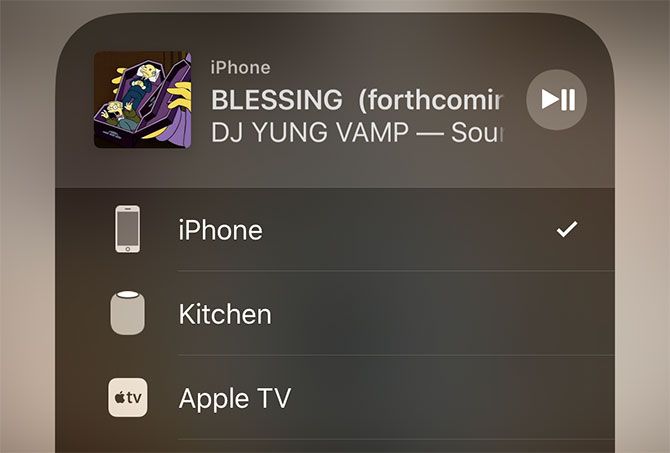
To stream audio or video to an AirPlay receiver from an iPhone or iPad:

  1. Swipe up from the bottom of the screen (non-iPhone X) to reveal Control Center. iPhone X users should swipe down from the top-right corner.
  2. 3D Touch the Now Playing box to the right of the screen.
  3. Tap on the wireless icon (three circles and a triangle) next to the playback controls.
  4. Wait for the AirPlay receiver to appear in the list.
  5. Tap on your chosen receiver and play some media.

AirPlay on iOS

To stop streaming via AirPlay, repeat the process and choose iPhone or iPad in step five.

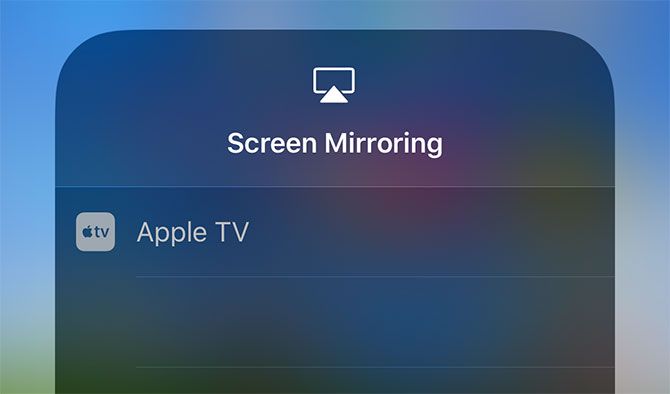
To mirror your iPhone or iPad screen:

  1. Swipe up from the bottom of the screen (non-iPhone X) to reveal Control Center. iPhone X users, swipe down from the top-right corner.
  2. Tap Screen Mirroring on the left-hand side of the screen.
  3. Wait for any nearby AirPlay devices to appear.
  4. Tap the receiver on which you would like to mirror your screen.

AirPlay Mirroring

To stop mirroring, repeat the process and tap Stop Mirroring in step four.

How to AirPlay From Mac to Apple TV

To connect your Mac to an Apple TV, look for the AirPlay icon in apps like iTunes and QuickTime. You can also use System Preferences > Displays to specify an AirPlay Display, which behaves like a wireless monitor connected to your Mac. This allows you to stream from a Mac to an Apple TV.

AirPlay on Mac

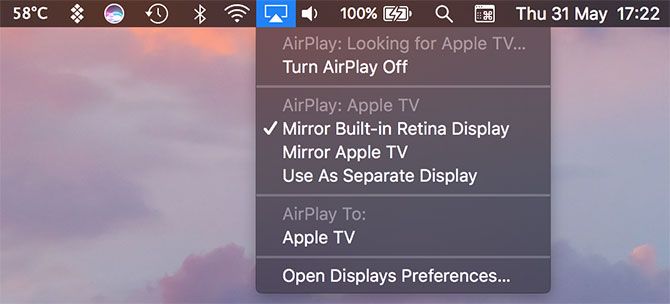
The easiest way to mirror your Mac to an Apple TV is via the menu bar shortcut. Click on the AirPlay logo in the top-right corner of the screen, then click on the receiver of your choice. Once connected you can choose:

  • Mirror Built-in Display: Match the size of your Mac’s screen, mirrored on an Apple TV.
  • Mirror Apple TV: Match the size of your TV, optimizing your Mac’s screen.
  • Use as Separate Display: Disable mirroring entirely, and use your Apple TV like an external monitor.

How to AirPlay From iPhone/iPad to Mac or Windows

Apple doesn’t allow a Mac (or Windows) computer to act as an AirPlay receiver, despite many users valuing the feature. Fortunately you can add this functionality with some third-party software. You currently have two good options:

  • AirServer ($20): The gold standard for AirPlay receiver emulation, available for Mac and Windows. Also works with Google Cast and Miracast for an all-around casting solution. There’s a 14-day free trial available.
  • Reflector ($15): A slightly cheaper alternative to AirServer, with support for Google Cast and Miracast. You can try it free for seven days.

You can try both of these solutions before you buy, and it’s probably worth doing so to ensure performance is adequate. Personal experience has led me to believe these software solutions are never quite as good as a genuine Apple TV, but your mileage may vary.

Troubleshooting and Settings for AirPlay

Sometimes, AirPlay doesn’t work as expected. Often, these issues are caused by external factors, but it’s always worth restarting your equipment before trying anything drastic.

Streaming, Quality, and Other AirPlay Playback Issues

Much of the time, problems streaming video or audio wirelessly is due to Wi-Fi congestion. Too many competing Wi-Fi signals, on similar channels to your receiver, can reduce the quality of the signal that reaches the Apple TV.

Older devices that feature slower wireless speeds can also struggle. There’s not much you can do about that beyond getting as close to the receiver as possible, or using a newer iOS device.

How to Change Your Apple TV’s AirPlay Name

Rename Apple TV's AirPlay name

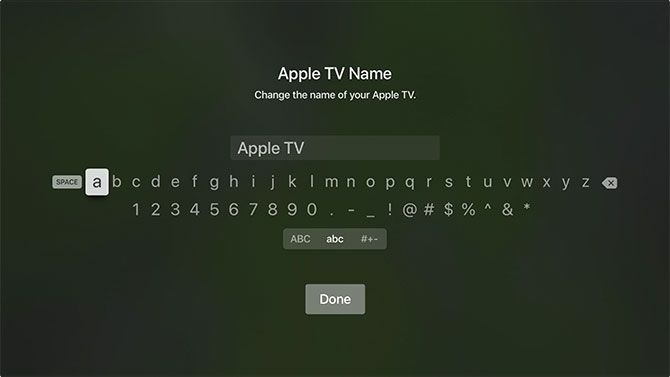
If you have multiple Apple TV units in one house, or your neighbor’s Apple TV is constantly showing up in the list, you can differentiate receivers by giving them unique names. To rename your Apple TV, head to Settings > General > About > Name.

How to Turn On/Off AirPlay on Your Apple TV

Turn AirPlay On or Off on Apple TV

You can turn AirPlay off entirely, or restrict who can use AirPlay under Settings > AirPlay on your Apple TV. Options include:

  • Allowing anyone to stream via AirPlay.
  • Restricting AirPlay to devices that are on the same network as your Apple TV.
  • Turning AirPlay off altogether.
  • Setting a password which other users must first enter before they can use AirPlay on that device.

Apple TV Doesn’t Show Up on Mac or iOS

If you can’t find your Apple TV (or other receiver) on your Mac, first make sure your Wi-Fi and Bluetooth are both on. Next make sure your Apple TV is on, and connected to power and a TV via HDMI.

The Apple TV should automatically wake up when it detects a new AirPlay connection, but sometimes clicking the remote and waking it manually can resolve the issue. If you still can’t see your Apple TV on your Mac or iPhone, try restarting it.

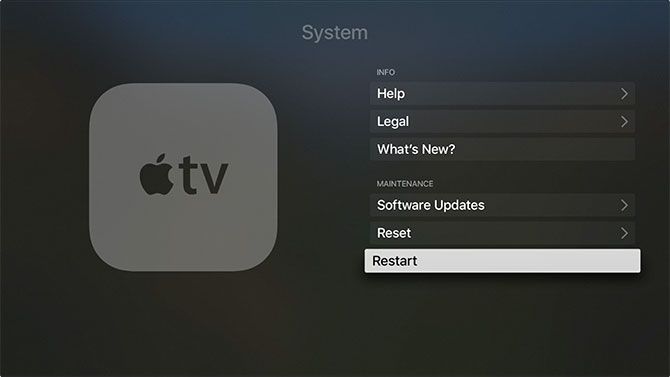
To restart an Apple TV, head to Settings > System > Restart. The process should take around 30 seconds, and you’ll need to wake the remote by pressing a button once it’s complete. If the Apple TV has crashed, you can simply pull the cord out of the back and wait 10 seconds, then power it back up.

Restart Apple TV

If none of that works, the next step is to restart your source device. That might be your Mac, iPhone, or iPad. Next try restarting your network equipment. If you’re still having trouble, try a different Mac or iOS device to isolate the problem further.

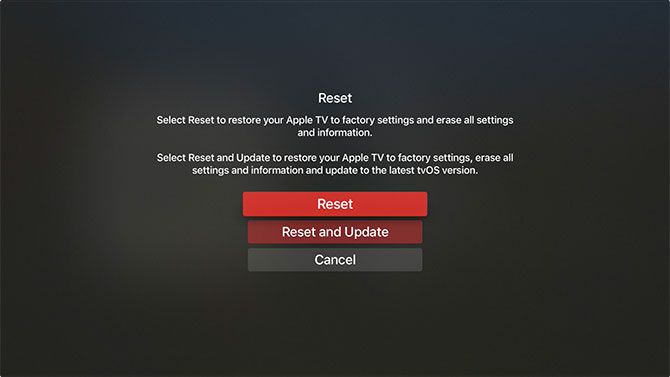
You can also restore your Apple TV to factory settings, which is a final resort for most but worth a try if nothing else works. Head to Settings > System > Reset and follow the prompts. You’ll need to set up your Apple TV from scratch once the reset completes.

Factory Reset Apple TV

AirPlay Is the Future of Wireless Home Media

The presence of AirPlay signifies that Apple is still serious about cutting the cord. As Wi-Fi performance improves, so too will the speed, quality, and reliability of AirPlay as a protocol.

Apple is betting big on other wireless technologies, too. In the last few years we’ve seen wireless earphones like the AirPods and BeatsX, an Apple Watch with integrated cellular, and wireless charging added to both the iPhone 8 and X. Who knows what will come next?

Read the full article: The Beginner’s Guide to Apple AirPlay Mirroring on Mac and iOS


Read Full Article

How to Stop Auto-Playing Videos in YouTube’s Home Feed

How to Customize App Borders and Shadows on Windows 10


windows-apps-enhance

On Windows, you’ve been able to change how apps look for almost the entire history of the operating system’s life.

However, Insider Preview builds of Redstone 5 (the next Windows update to be released in Fall 2018) suggest that Windows will automatically change the color of all app borders to gray. The theory is that it will match the new shadows better.

Thankfully, you will still be able to override those default settings and change the color. You can even turn the shadows on and off at your pleasure. Let’s take a closer look.

How to Customize App Borders and Shadows

Firstly, we will explain how to change the color of the app borders, and then we’ll look at how to turn the shadow on and off. To change the colors, follow the steps below:

  1. Open the Settings app.
  2. Click on Personalize.
  3. On the menu in the left-hand panel, select Colors.
  4. You can choose one of the default colors, or you can click on Custom color and enter your own RBG or hex code.
  5. Scroll down to Show the accent color on the following surfaces.
  6. Mark the checkbox next to Title bars.

If you would like to add shadows to your app windows, follow these steps:

  1. Go to Control Panel > System and Security > System > Advanced System Settings.
  2. Open the Advanced tab.
  3. In the Performance section, click on Settings.
  4. Click on the Visual Effects tab.
  5. Mark the checkbox next to Custom.
  6. Mark or unmark the checkbox next to Show shadows under windows as preferred.
  7. Click on Apply
  8. Finish by clicking on OK.

Remember one of the best ways to customize the operating is to use your own theme. You can choose a light theme for Windows or a dark theme for Windows.

Read the full article: How to Customize App Borders and Shadows on Windows 10


Read Full Article

How to Make Web Pages Load Faster With a VPN (Yes, It Really Works)


vpn-protocols-explained

As you’ve probably seen from the dozens of emails in your inbox, the European Union’s General Data Protection Regulation (GDPR) law has gone into effect. This has forced companies to change how they store your data, be more transparent about what data they have, and allow you to delete it if you want.

While this law doesn’t have much effect on those outside of the EU, those outside the EU can actually use it to their advantage. Indeed, thanks to the GDPR, most users can now enjoy faster web loading speeds.

The VPN Trick That Makes Websites Load Faster

The GDPR restricts websites from using common forms of tracking on the web, including ad servers, Google’s various analytics, and social media sharing buttons. Every time you open a website that uses these elements, your browser has to load them, which takes time.

GPDR-compliant websites strip away most of these elements, making each page load much faster. Of course, websites still want to collect information on users from other countries if they can. But no matter where you live, you can enjoy these same speed increases by using a VPN!

VPN-Connect-to-UK

If you didn’t know, VPNs disguise your browsing by making it look like your traffic comes from another location. With a reputable VPN service, you can simply connect to a server from the UK or another country in the EU and access the benefits of GPDR.

Web developers have found this makes a huge difference in both speed and amount of extra junk loaded onto websites.

When using this method, note that some websites block EU users because their site isn’t GDPR-compliant yet (or will never be). Also, keep in mind the dangers of using a free VPN. We recommend a reputable service like ExpressVPN, which won’t sell your browsing data or inject ads.

Read the full article: How to Make Web Pages Load Faster With a VPN (Yes, It Really Works)


Read Full Article