10 December 2019

How to Secure Your D-Link Wireless Router


D-Link Exo Mesh Routers CES 2019 Featured

Security is vital to your computing experience. It also probably one of the easiest areas to overlook. Your internet router is a core piece of hardware in your quest for home security and privacy. Taking a moment to configure your D-Link Wi-Fi router can make all the difference in protecting your home, your computers, and your family.

So, here’s how you set up and secure your D-Link Wi-Fi router.

1. Follow the Setup and Installation Guide

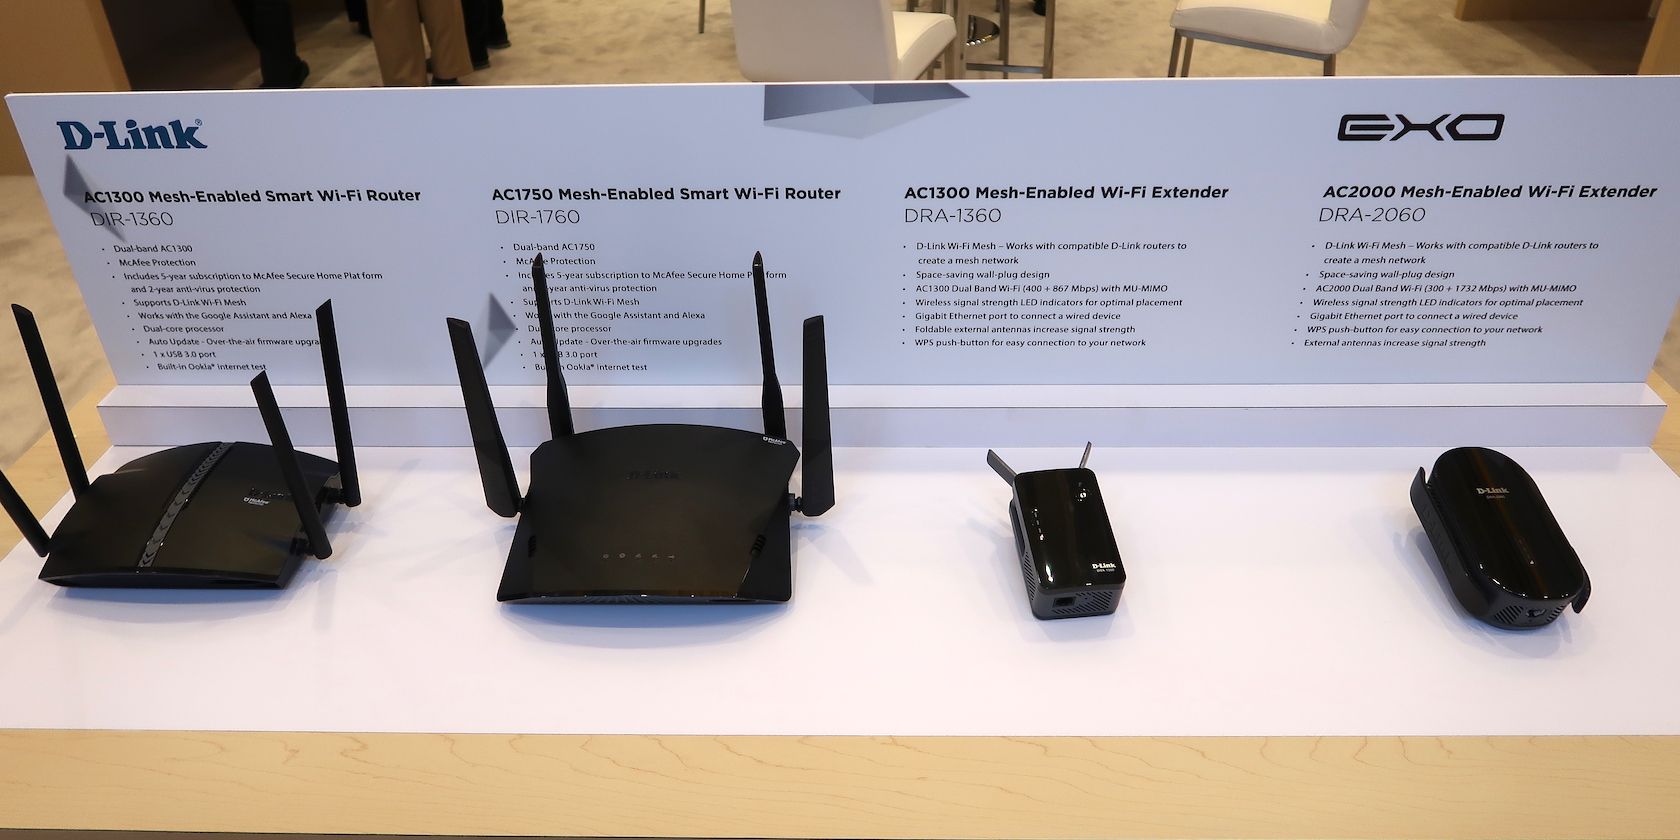
If you just bought a new D-Link router, it probably came with a quick start installation guide. The guide contains the essential information you need to set your D-Link router up and begin securing it.

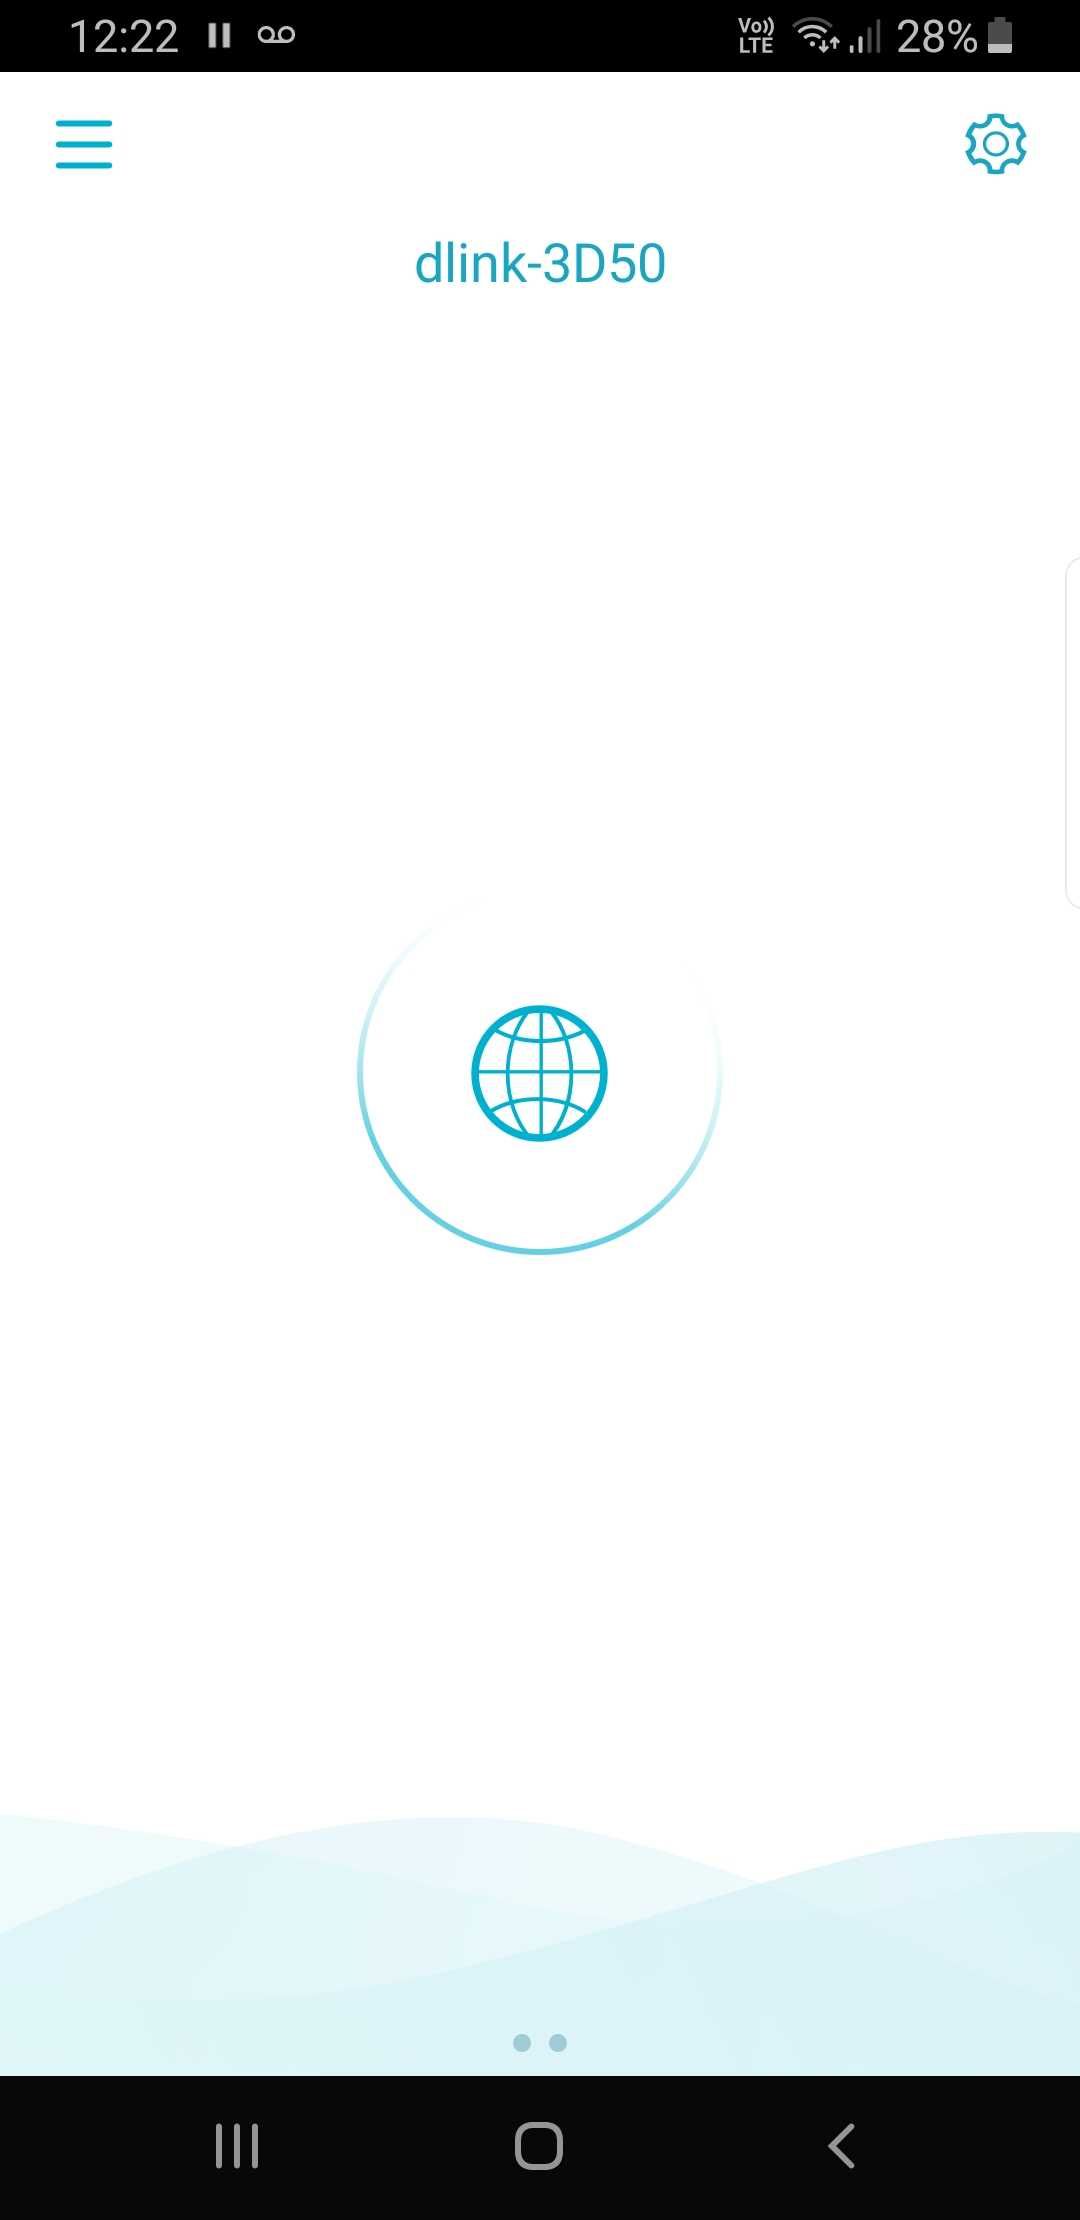
Some new D-Link routers even come with a scannable QR code that links to the D-Link Wi-Fi app. Simply download the D-Link Wi-Fi app on your Android or iOS smartphone, scan the QR code using the app, and complete the set-up guide within the app. It walks you through each step, making sure each part of the hardware is correct.

Download: D-Link Wi-Fi for Android | iOS (Both Free)

Once you finish installing your D-Link router, you can access it via your web browser. Open your web browser (such as Chrome, Firefox, or Opera) and input 192.168.0.1 in the address bar. This opens the D-Link router admin panel.

Wondering what your D-Link router admin password is? You will find the default router admin password somewhere within the D-Link router packaging. If you followed the quick-start installation guide in the D-Link Wi-Fi app, you’ll have created a new admin password already.

Set a Strong Administrator Password

Your D-Link Wi-Fi router requires an administrator password. The admin password protects your router from threats, both internal and external. By internal threats, I mean your kids (or otherwise) attempting to crack your D-Link router admin password to change the Wi-Fi settings.

A strong password doesn’t have to become a chore to remember. You can create perfectly strong passwords that you will not forget. Just make sure not to write it down on a sticky note on your desk!

2. Create Strong D-Link Wi-Fi Password

d-link wireless security wifi type

The next security step is protecting your Wi-Fi connections. It is highly likely your D-Link router is dual-band, perhaps even tri-band. What that means is that you can use your D-Link router on two frequencies: 2.4GHz and 5.0GHz.

It is common to use the same password for each Wi-Fi router band. Using the same password for each Wi-Fi frequency band lets your hardware switch between the two depending on signal strength, speed, etc.

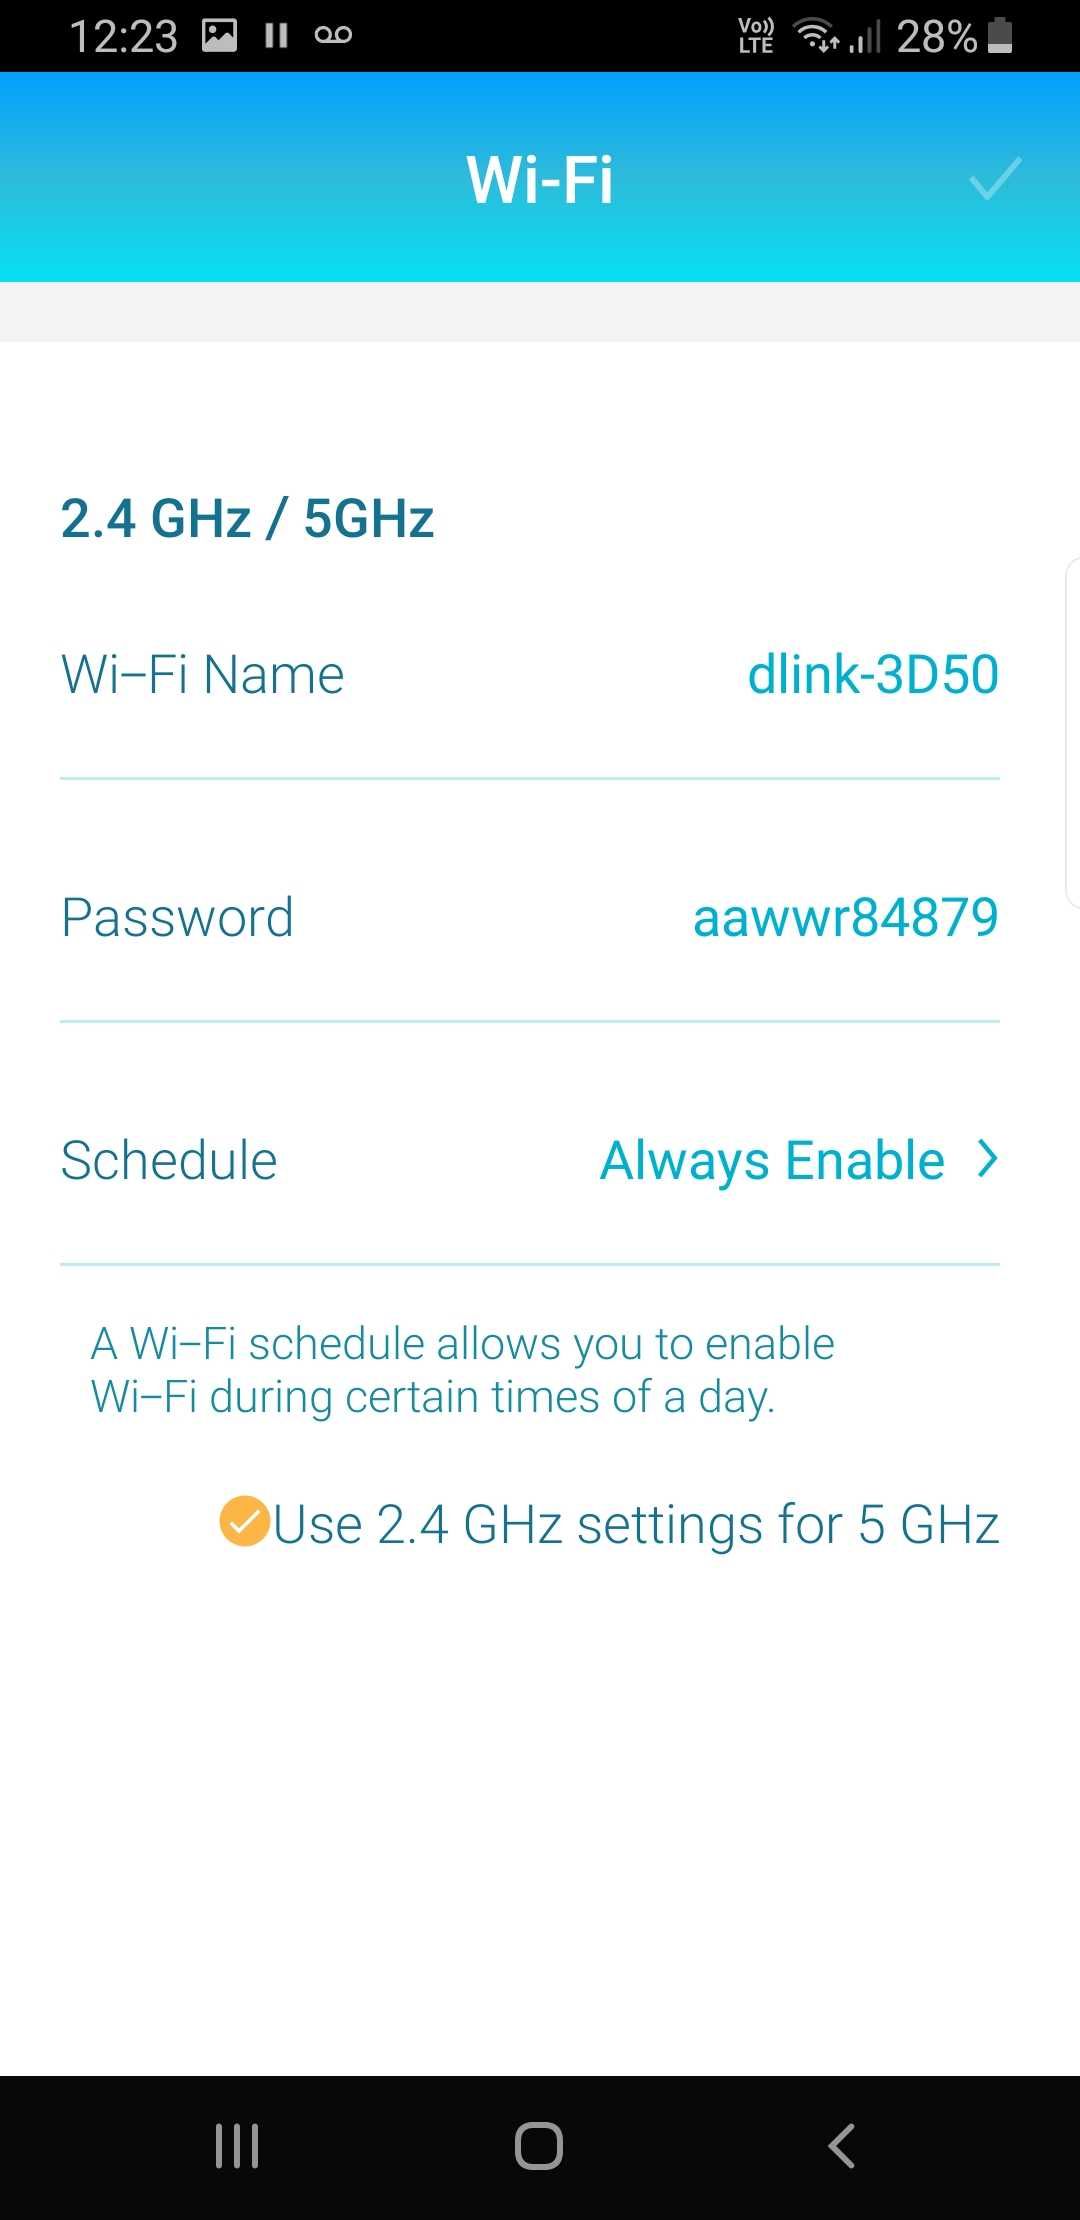
Like the admin password, you’re prompted to create a strong Wi-Fi password during the D-Link router setup process. If you want to change the Wi-Fi password later, input the D-Link router address in your browser address bar and login into your router.

Now, head to Settings > Wireless. Under the Wireless section, you can see your network name (known as the SSID) and the existing Wi-Fi password. Change the password to something strong, then select Save in the top-right corner.

After you update the D-Link router Wi-Fi password, each device will also require updating.

3. Make Sure Your D-Link Wi-Fi Router Uses WPA2

While you’re adjusting your D-Link Wi-Fi passwords, you should also select your Wi-Fi security mode. At the current time, WPA2 is the most common Wi-Fi security mode. Its replacement, WPA3, is yet to appear in mainstream consumer routers. For the time-being, WPA2 remains the most secure option.

In the Wireless settings, select Advanced Settings. Alongside Security Mode, select WPA2-Personal from the dropdown box. If the option exists, make sure to use AES encryption, rather than TKIP.

Whatever you do, do not use WEP, if it’s even an option. Some modern routers are phasing the WEP Wi-Fi encryption out because it is insecure and easily cracked.

Change Your Network SSID

Another thing to change while you’re adjusting your Wi-Fi network security is the Wi-Fi SSID, otherwise known as the Wi-Fi network name. The SSID is what appears when your smartphone or laptop scan the local area for a Wi-Fi network.

Your router uses a default SSID. This will give away the type of router you’re using—in this case, D-Link—and even the model. If someone knows what type of router you’re using, it becomes a little easier for them to break in. (More so if you have not changed the default D-Link router admin password.)

Should You Hide Your SSID?

Some D-Link routers allow you to hide your SSID. A hidden SSID is not broadcast to the surrounding areas. Theoretically, a hidden Wi-Fi network is more secure because fewer people know it is there. If someone wants to attack your router, they will find a way to do so.

Even if the SSID is hidden, it is still broadcasting its Wi-Fi signal. You’re probably just making it harder for your friends and family to connect to your Wi-Fi or guest Wi-Fi network.

4. Update the D-Link Router Firmware

Secure your D-link router - upgrade the firmware

Your D-Link router requires updating now and then. Just like your laptop or smartphone, your router also receives firmware updates to fix bugs and increase performance.

When you first plug your D-Link router in, it should check for any pending D-Link firmware updates. If not, you can check for a firmware update manually, or even download and install the latest firmware yourself.

Open your D-Link router admin page in your browser, then head to Management > Upgrade. Under Firmware, select Check for New Firmware. If there is a firmware update available, install it.

5. Disable UPnP and Automatic USB File Sharing

Keep your D-Link secure by disabling usb sharing and upnp

Another security step is switching off Universal Plug and Play (UPnP) for your D-Link router. Depending on your D-Link router model, you may have access to several different UPnP file-sharing options, including a UPnP Media Server, Windows File Sharing via SAMBA, and an FTP server.

As UPnP is potentially dangerous, you can switch these options off until you need them.

In your D-Link router admin page, head to Settings > USB Sharing, and switch each option to Disabled.

6. Use a Guest Wi-Fi Network

d-link guest wifi option

One option to keep your personal Wi-Fi network clear of interference is to create a guest Wi-Fi network. The guest Wi-Fi network runs alongside your regular Wi-Fi but does not interfere with your existing devices.

Head to Settings > Wireless > Guest Zone. From here, you can control the guest Wi-Fi SSID, the password, and depending on your D-Link router model, create a guest schedule.

7. Use the D-Link Wi-Fi App to Control Router Settings

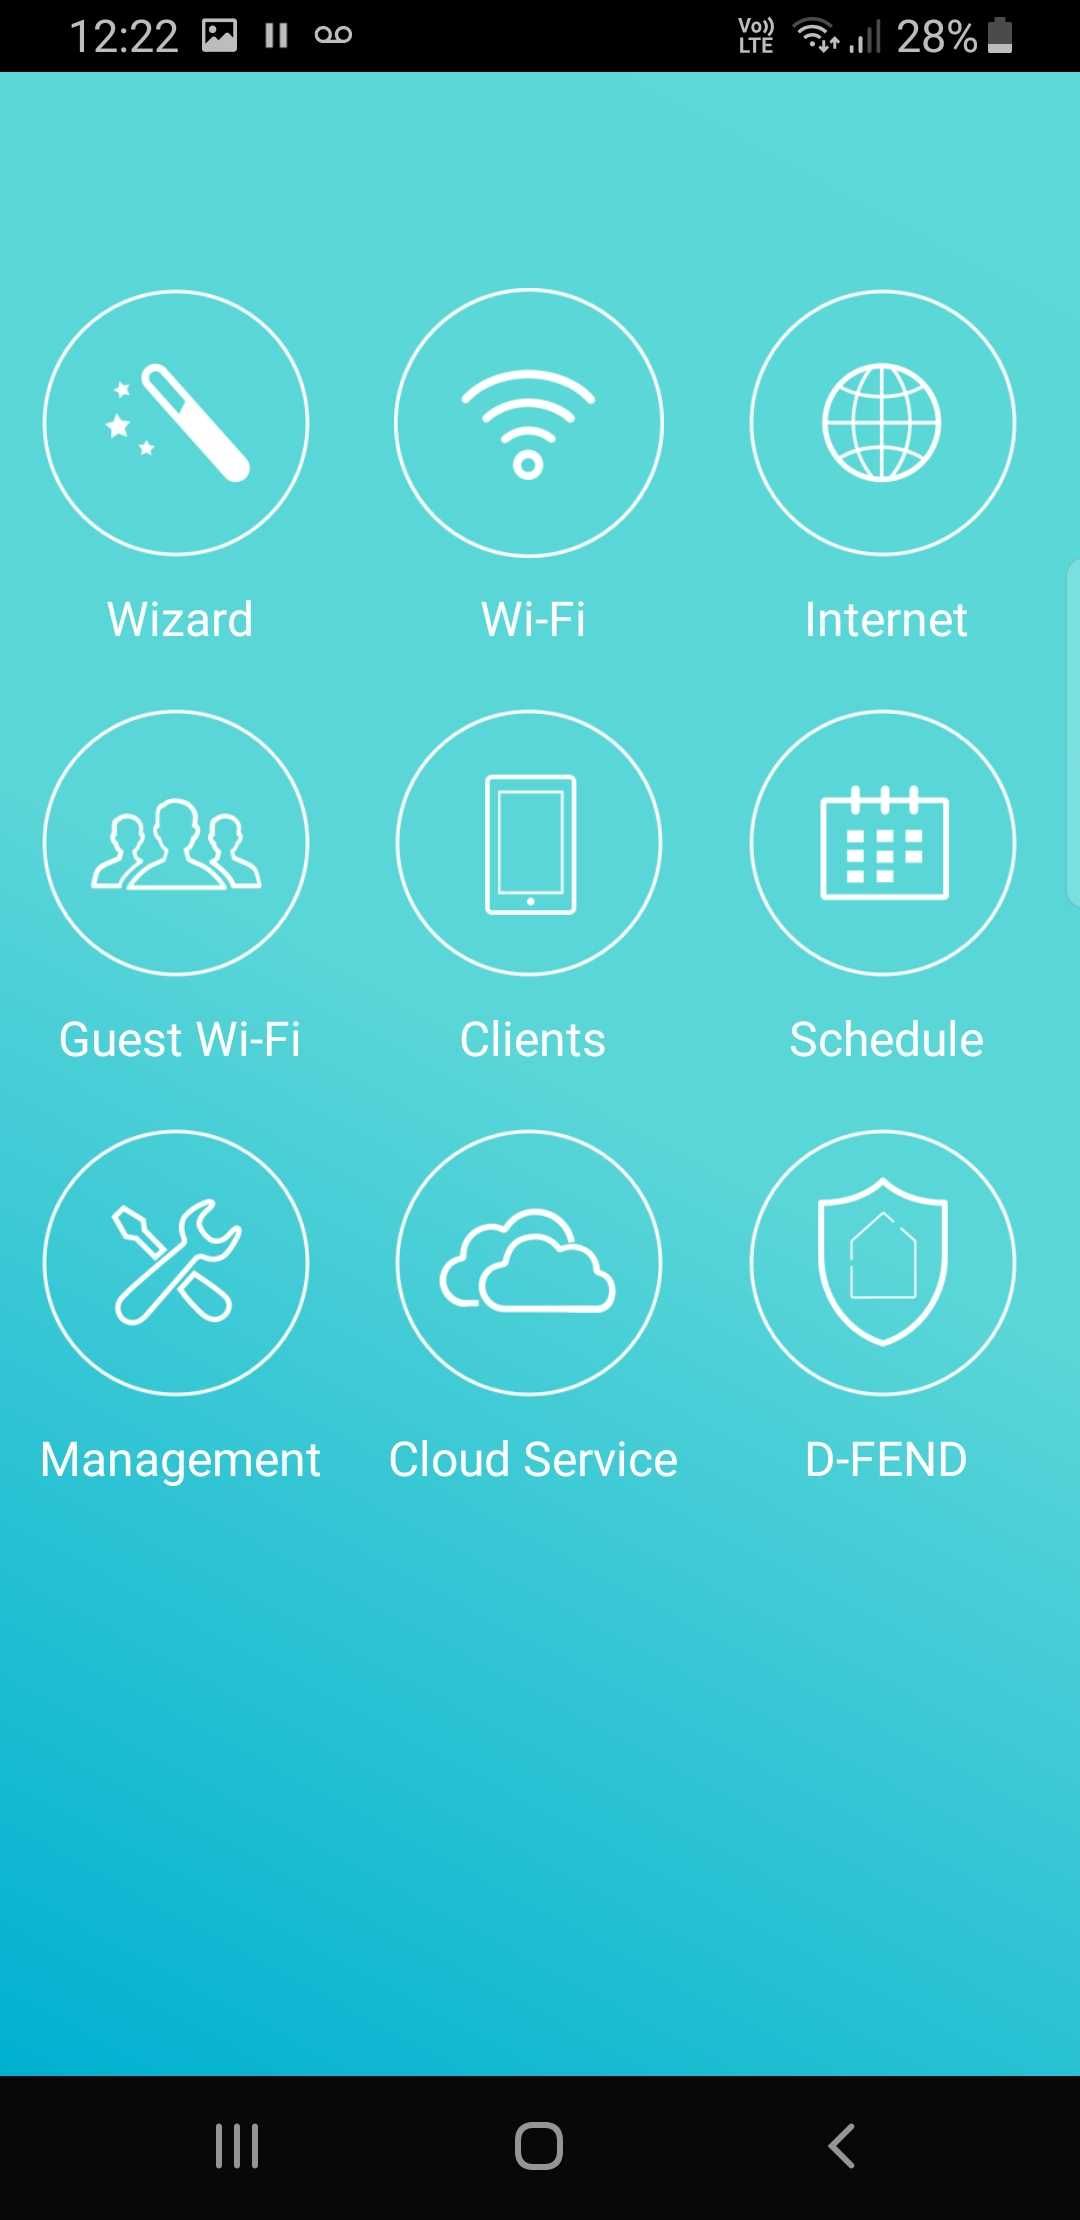
The D-Link Wi-Fi app is a central feature of your D-Link router. You can control all of the router settings from the app, including every setting and change previously covered in this article.

The app itself is easy to use. The options are clear and guide you through the various D-Link router features.

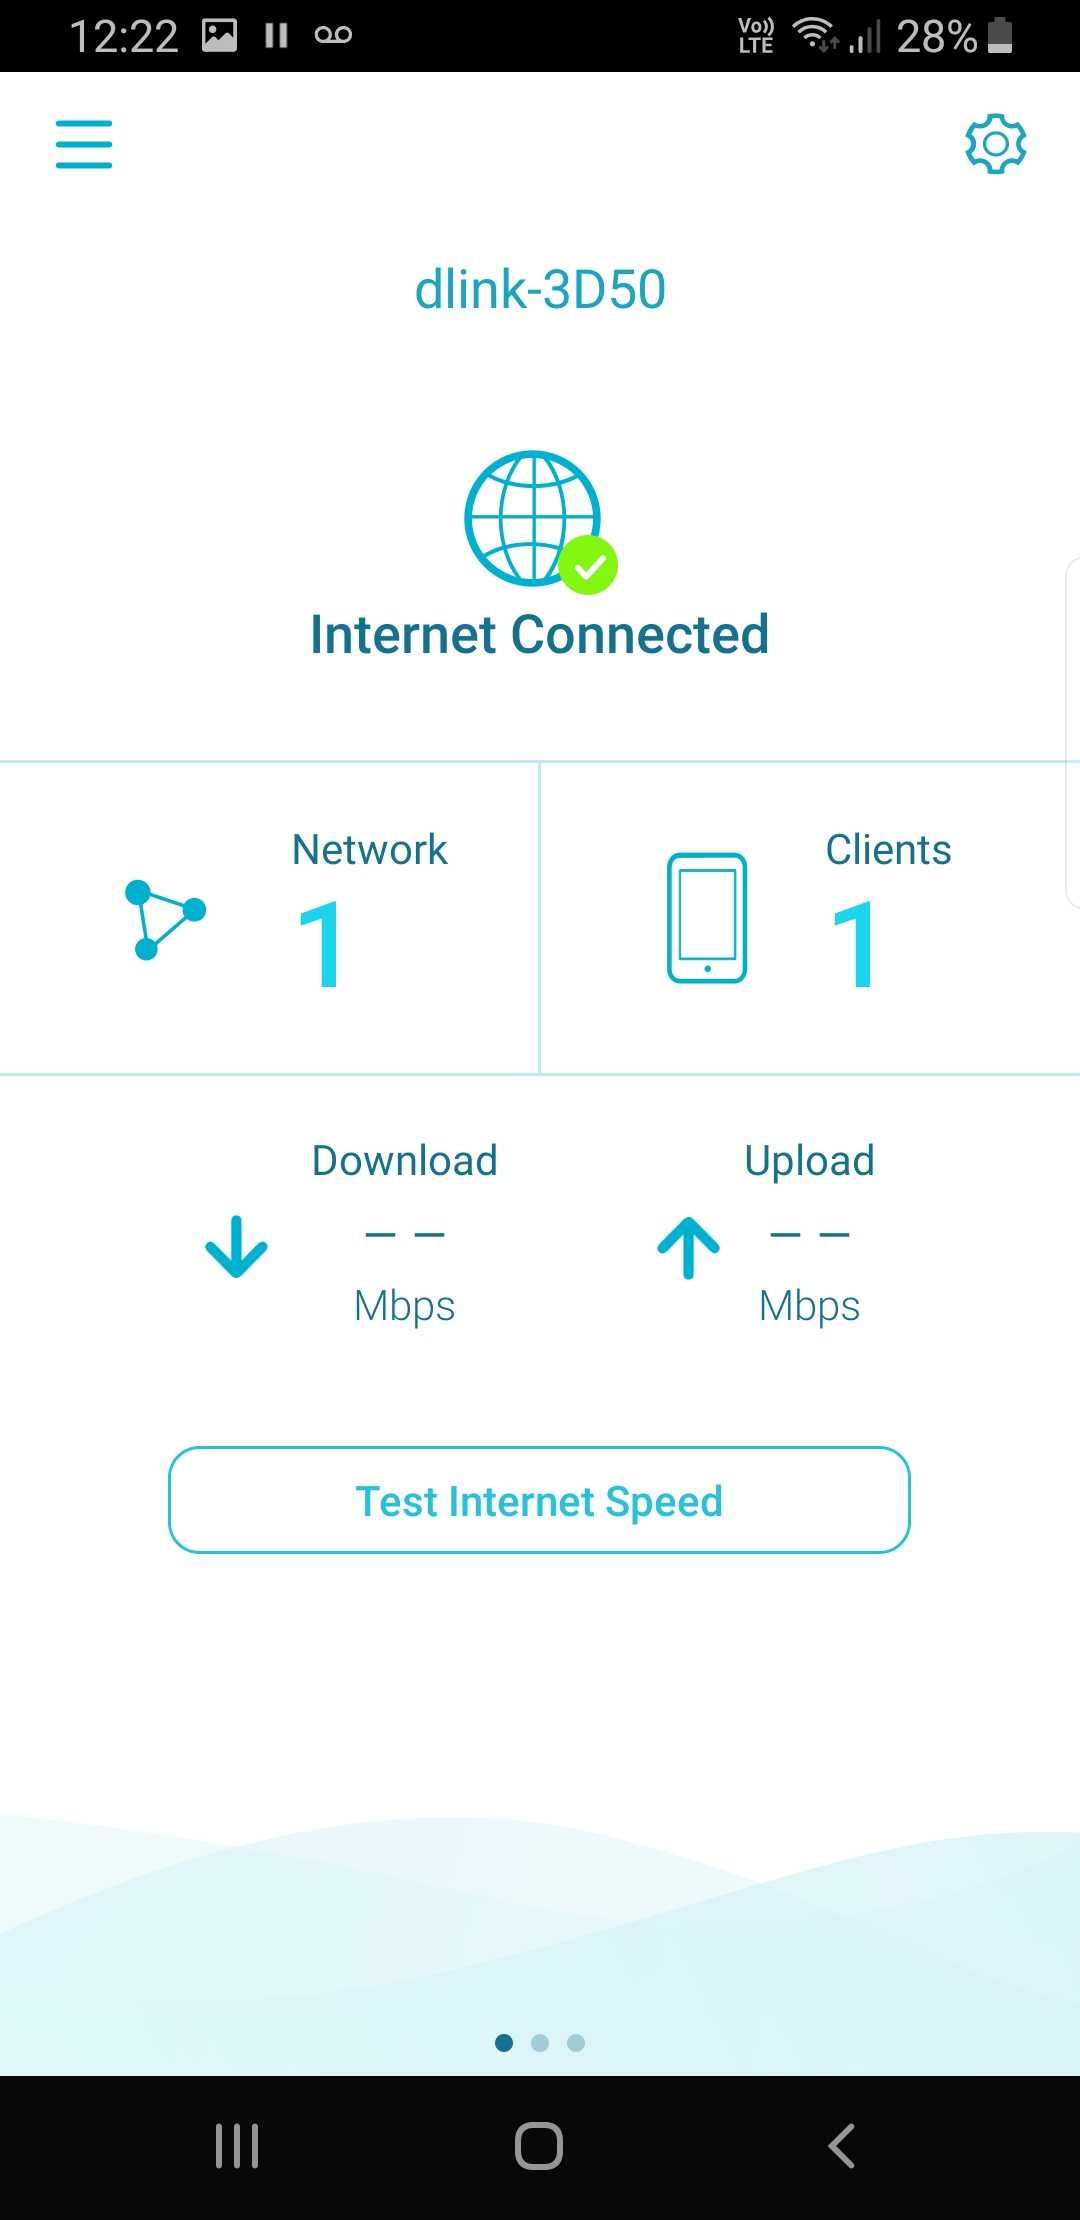
You can use the D-Link Wi-Fi app to keep tabs on your network, make changes to scheduling, stop unexpected connections, and much more.

Keep Your D-Link Router and Your Home Secure

Your D-Link router is easy to setup. There are numerous security options to help keep your D-Link router secure. Follow the steps in this article, and your D-Link router will keep your home network and its devices almost entirely secure.

Router security is serious. So is your Wi-Fi connection speed. With that in mind, check out these tips for boosting your Wi-Fi speed.

Read the full article: How to Secure Your D-Link Wireless Router


Read Full Article

What Is UEFI And How Does It Keep You More Secure?


uefi-motherboard

When you first start up your computer, you’ll see a bunch of text scrolling past on the screen. Most people just ignore this and wait for the Windows login screen to appear. But if you ever need to do troubleshooting or to tweak some settings on your computer, there’s a really useful tool you can access from here called UEFI.

What Is UEFI?

UEFI Security - UEFI

UEFI is a type of firmware that comes with your motherboard. It’s what prepares your system to boot up your operating system, such as Windows. UEFI is a more modern version of an older piece of firmware called BIOS.

To enter UEFI, you hit a designated button on your keyboard while your system is booting up. Which button depends on your hardware, but it’s typically Esc, F2, F10, or Delete. Look in the text that appears on screen when your computer powers on to see which your system requires.

When you hit that button, instead of booting straight into your operating system, your computer will open UEFI. From here, you can make changes to your system such as determining the boot order. That means you can select whether you want your computer to boot from a hard drive, an SSD, or an optical drive first.

You can also make other changes like adjusting the speed of your fans or overclocking your processor. UEFI is very handy for troubleshooting as you can see what hardware is connected to your system. Even if your operating system is corrupted, you can still use UEFI to access your computer.

What’s the Difference Between UEFI and BIOS?

UEFI Security - BIOS
Image credit: Toniperis/Wikimedia Commons

If you’ve used older computers, you might have seen an earlier firmware than UEFI, called BIOS. Like UEFI, BIOS is software which lives on your motherboard and helps prepare your system to boot up its operating system. Also like UEFI, you can use BIOS to make changes to your computer like tweaking the fan speeds or changing the system time and date.

There are some key differences between the two though. The first difference you’ll notice is visual. BIOS is very visually simple, using only a few colors and no graphics. It also doesn’t support the use of a mouse, so you need to use a keyboard to navigate and make changes. UEFI, on the other hand, is more graphically sophisticated with images and many colors, and can be controlled by both keyboard and mouse.

BIOS is also more basic in its functions than UEFI. In BIOS, you can change essential settings of your system like device boot order. In UEFI, you can do much more. UEFI can support functions like remote diagnostics and calibration of fan curves.

It even supports automatic overclocking wizards where you just add information about your processor, select your cooling components, and it will set an overclock for you.

Overall, UEFI is more user-friendly than BIOS. It also generally boots faster, so you won’t have to wait so long for your PC to be ready to use when you turn it on.

Is UEFI More Secure Than BIOS?

UEFI Security - Secure Boot

That brings us to the big question: Is UEFI more secure than BIOS? In general, the answer is yes, due to a function called Secure Boot.

Secure Boot is a part of UEFI which restricts which type of applications can be used at boot to those which are signed. This is a helpful and generally flexible security measure to stop malicious code being run on your machine.

Basically, it stops the machine from booting up an operating system unless it has a recognized key. A recognized key is one that shows where the operating system has come from and ensures that it’s trusted. This means that Secure Boot stops malware from interfering with your computer’s boot process.

Secure Boot was required to be supported in order for a PC to be certified as Windows 8 compatible. So there was a lot of interest focused on the Secure Boot feature when Windows 8 was released in 2012.

This caused a lot of controversy when it was first announced. People thought that UEFI was Microsoft software (it’s not) and that UEFI would prevent users from loading other operating systems like Linux (it doesn’t).

At first, there were real concerns about how Secure Boot could interfere with the installation of Linux systems. But Linux distributions have found ways to work with Secure Boot, and now Ubuntu, Fedora, Red Hat Enterprise Linux, and openSUSE all support Secure Boot without any problems.

UEFI Does Have Security Risks

UEFI Security - Malware

Unfortunately, no piece of software is free for security threats; the same is true for UEFI. Hackers have targeted UEFI with malware in the past.

One example was detailed in a report by ESET Research in 2018. There is a piece of malware called Sednit, or also known as APT28, Sofacy, Strontium, or Fancy Bear, which has been around since at least 2004. And there’s another trojan built to attack anti-theft software called LoJack, which is called LoJax. When used together, Sednit and LoJax can target UEFI and BIOS. These tools can spy on UEFI firmware and in some cases could even overwrite system memory. That allows hackers to install a malicious version of UEFI so they can access the system and spy on the contents or make changes.

The scary thing about this hack is that it continues to work even if Windows is re-installed. Because it attacks the UEFI instead of the operating system, it can’t be removed by wiping Windows. It can even survive having a system’s hard drive replaced. This is because the malware lives on the motherboard and not on the hard drive.

Malware which targets UEFI is not only hard to remove, it’s also hard to spot. Users may have no idea that their systems have been infected. Although attacks on UEFI are relatively rare, it’s worth being aware that they can happen.

Learn More About UEFI and BIOS

Despite some controversies related to its use in Windows 8, UEFI is a more useful and more secure alternative to BIOS. Through the Secure Boot function you can ensure that only approved operating systems can run on your machine. However, there are some security vulnerabilities which can still affect UEFI.

We’ve only scratched the surface here of all the things that you can do with UEFI and BIOS. To learn more about how to access BIOS and how to use it, see our guide on how to enter the BIOS on Windows 10 and earlier versions of Windows too.

Read the full article: What Is UEFI And How Does It Keep You More Secure?


Read Full Article

Novoresume Helps You Craft a Perfect Resume in No Time


upload-resume-linkedin

Did your last resume pass the six-second test? This well-cited eye-tracking study explains the importance of resume design.

You have six seconds to make your resume stand out. And this may need six days of work—either to fix the layout of your old resume or make a new one from scratch. A professional online resume builder can help you slash the time down to an hour or less.

Novoresume is the automatic, web-based resume builder you should try. It helps you create aesthetic resumes and cover letters that can convince any recruiter.

Plan a Professional Resume

Resume Templates on Novoresume

Novoresume holds your hand through the steps necessary to design a modern resume, CV, or cover letter. But first, you have to register on the site and choose from the two plans on offer.

The Basic plan is free. You can use it to go under the hood of the service and test the Premium features before you opt for one of the pricing tiers. You can play with the Premium features, but you won’t be able to download the final document in the Basic plan.

Today, we won’t be taking you through a step-by-step resume-designing tutorial.

Instead, let’s focus on the key differences between the Basic and Premium versions of Novoresume so that you can decide which one is better suited for your needs.

What Can You Do for Free on Novoresume?

A resume that’s only one page long is an exercise in restraint. But a typical resume acts as a summary of your key accomplishments. This brief snapshot is suitable for beginners, or someone with under five years of experience.

The Basic plan allows you to use single-page resume templates and download one finished resume for free. All resumes and cover page templates on the service are made by professional graphic designers based on recommendations from recruiters.

Fill in your content and download them as PDF files to maintain their uniformity across all devices.

The Basic plan has two key limitations:

  • You cannot move elements around and design your own layouts.
  • You cannot create a matching cover letter that goes with the resume.

What Can You Do With the Premium Version of Novoresume?

Novoresume Resume Builder

The Premium version of Novoresume and its customization options allow you to move away from cookie-cutter templates. Here are some key features:

Build CVs that are up to three pages long. A longer CV allows you to add specialized sections and also highlight special interests and causes you may have taken on.

Pick a template and customize the layout. You can not only pick templates (functional, creative, or simple) but also choose a one or a two-column layout. Choose the right layout that can carry your qualifications, experiences, projects, and interests. Customize it with a choice of colors, fonts, themes, and creative backgrounds. And you can drag and drop the different parts to create your own custom layouts.

Use “My Content” to store reusable data. All sections on the resume are editable. You can store 18 different versions of your data in My Content and bring them in to tailor your resume to each job you apply for.

Heed the content optimizer. The enhancement hints help you improve your resume and get over any designing issues you might have.

Pair it with a cover letter. For every resume template, Novoresume provides a cover letter template. To achieve a consistent application, use the same design for both.

Create resumes in different languages. You can create up to 18 different versions of your resume in each of the four language sets if you are applying to different companies across the globe.

A Better Resume With Novoresume

Novoresume builds your application for you. But use it well and you can grab a few tips on how to craft your own resume on any empty document. The site also features video tutorials and loads of excellent resume samples for ideas.

Just remember that there are some items you should never put on your resume.

Read the full article: Novoresume Helps You Craft a Perfect Resume in No Time


Read Full Article

12 Raspberry Pi Christmas Projects You Can Make in a Day


Expecting a Raspberry Pi for Christmas? Got one (or more) laying around, waiting for some action? Perhaps something a bit Christmas-themed? How about a dozen Raspberry Pi projects that you can make in a day?

But not just any day—each of the 12 days of Christmas!

That’s right: it’s time to show your true love (your Raspberry Pi, that is!) exactly what it means to you. Say thank you to your Raspberry Pi with these 12 top seasonal projects.

1. Start Early for Advent

Start off with some LED candles for Advent. But when does it begin? Interestingly, Advent starts on a different date each year. So why not combine a digital dating system with some LED candles and have them automatically start up on the correct date each year?

Here’s the solution: a bit of code from GitHub and the full steps at the Element14 website. Any model of Raspberry Pi is suitable for this. If you have an old first-generation Raspberry Pi try this to finally get it out of retirement!

2. Christmas Tree Light Show

It’s always good to get the Christmas tree sorted out in good time, too. This Raspberry Pi Christmas Sequencer project uses a Pi to drive Christmas tree lights. A Pi is used rather than an Arduino in order to sync music to the lights.

Full instructions can be found in this Instructable by Osprey22. It’s best set this up with a fake tree, as opposed to a farmed one. This is because the equipment is mounted below the tree, where the water would typically be feeding a natural tree.

Meanwhile, if you want Christmas tree lights powered by your Raspberry Pi but don’t have the skills to construct a light show, consider a budget alternative. The Pi Hut sells a compact 3D Christmas Tree for the Raspberry Pi that simply sits in the GPIO slot!

3. Christmas-Themed Magic Mirror From an Old Laptop

Built a Christmas-themed Raspberry Pi smart mirror

There are many uses for an old laptop. Extracting the display to reuse it for a futuristic “magic” mirror is one of the best. The idea is simple: you build a mirror that not only reflects you, but also shares information.

We built such a device, noting that the toughest part wasn’t with the hardware or the programming, but the frame. As such, our instructions will give you everything you need to get this up and running.

While our version of the project isn’t in the slightest bit seasonal, it shouldn’t take much work to adapt. On top of the obligatory Christmas decorations, you could add information like the NORAD Santa Tracker to the display.

It might even count down the number of shopping days until Christmas!

4. 3D Printed Christmas House

One of the best things about Christmas is the way in which people create seasonal scenes. They might be murals, or displays of towns, covered in snow, perhaps with a train running around.

The video above shows how you can use a Raspberry Pi with such a project. The 3D printed house has been designed in TinkerCAD, as has the Neopixel-illuminated snowman. The house hides a Raspberry Pi and come basic wiring to bring the project to life. Code for the project is written in Python and controls the lights and color of the snowman.

5. Control Your Exterior Christmas Lights

It’s not a real Christmas until you’ve illuminated the neighborhood with your own holiday lights. But what’s the best way of controlling them? A Raspberry Pi comes high on the list; if teamed up with the necessary relays, the GPIO can be used.

You’ll agree that the instructions and video above yield some stunning results. This is the first in a four-part series, which you should follow if you want to enjoy similarly accomplished results. So don’t miss Raspberry Pi Christmas Light Control Part 2, Part 3, and Part 4.

6. Digital Photo Frame Tree Decoration

Most Christmas decorations are pretty bling. Golds, reds, perhaps blues and silvers, depending on preference. Having a color scheme is a great idea… but is it enough? Surely there’s some way to “tech up” the Christmas tree decorations?

As you can see, the answer is “yes” thanks to a digital photo frame approach. This build uses a compact Raspberry Pi display, specifically a TFT from Adafruit, hooked up to a Pi running digital photo frame software.

You might even use this as a Christmas gift, including not just standard photos, but Christmas and other seasonal snaps.

7. Raspberry Pi Fireplace

Live in a flat, or some other property without a chimney? Worried about St Nicholas getting stuck in your boiler or radiator? What you need is a DIY fireplace, powered by a Raspberry Pi and some Neopixel LED strips.

This LED fireplace is a great example of how you can use a Raspberry Pi to completely change your circumstances. While it requires some woodwork, setting up the Pi with the LED strips is relatively straightforward.

You might even add a sound loop of some burning logs to complete the effect. Just don’t expect your home to get any warmer…

8. Christmas Songs When You Enter the Room

Nothing says Christmas more in the 21st century than a collection of seasonal music dating back to the 1950s. Prefer Rockin’ Around the Christmas Tree or All I Want for Christmas Is You? Whatever your favorite, your Raspberry Pi can be the herald of season’s greetings. We previously showed how to build a music player that activates as soon as you enter the room.

So, why not adapt this? Instead of playing your own theme tune, use the Raspberry Pi to play a favorite Christmas song? It could be a popular hit, or a Christmas carol, or it might simply be Jingle Bells. Just make sure your choice sets the season mood!

9. Smart Gingerbread House

YouTuber Estafannie De la Garza has hit a home run with this project, which although complex, looks fantastic. Combining a Raspberry Pi and Arduino the smart gingerbread house is controlled via a web page hosted on the Pi. Inside, you’ll find with servos, lights, and buzzers, requiring a bit of soldering.

What you get is a solar powered lights and music extravaganza, complete with dancing gingerbread men!

Note, however, that however much you might like gingerbread, this house is built using a glue gun, rather than icing. Also, the sensors in the build take up some key positions inside and out, so be careful with your candy.

10. Home Automate Your Christmas Tree

Who’s the most useful member of your household? We’re willing to bet it’s Alexa, and with the right software you can connect the service to your Raspberry Pi.

When it comes to Christmas decorations, all you need are some NeoPixels (enough to decorate your tree) and jumper wires.

Ordering Alexa to switch on or alter the brightness of your lights is a great bit of home automation. Better still this project will run with a Raspberry Pi Zero W. Find out more by checking the full instructions on Alex Ellis’s site.

As the builds go on this page, this is probably the simplest.

11. Santa Detector

Catch a glimpse of Santa Claus this Christmas!

Need to catch a benevolent old man delivering presents? Rather you weren’t caught out of bed when he turns up? Whatever the reason, it makes sense to have a Santa Clause detector to hand.

Using motion sensors (passive IR), a Raspberry Pi 2 (or later), and speakers or headphones, this by the official Raspberry Pi website can spot Santa approaching. It features an alarm, a Santa sprite, and the challenge to add more effects and notifications when Father Christmas arrives.

12. Christmas Photo Booth

Christmas is here, which means it’s time to party! One way to retain the wonderful memories that you’re about to make is to construct a photo booth. Forget about smartphone cameras and use your Raspberry Pi instead.

Perhaps the most complicated build on this page, you’ll need to prepare in advance. 3D printed components are required for this, and you might like to construct a temporary background for your photo booth. Spice things up with some Christmas masks and accessories, or a snazzy jumper.

You’ll find the full details for this build at Makezine.com However, you might combine it with this, which produces printed photos via a thermal printer:

All Together Now!

With so many builds you can make in a day, it makes sense to start from the first day of Christmas and work through to the twelfth, building one at a time. At the very least, it will be a challenge. But will you accept?

While you think about it, perhaps now is the time to have a singalong:

On the twelfth day of Christmas, my true love sent to me:

  1. A Christmas photo booth
  2. One Santa detector
  3. An automated Christmas tree
  4. One smart gingerbread house
  5. Christmas songs when I enter
  6. A sizzling Raspberry Pi fireplace
  7. Custom digital photo frame tree decorations
  8. And control your exterior Christmas lights with a Raspberry Pi
  9. RetroPie gaming station
  10. Christmas magic mirror
  11. Christmas tree light show
  12. And some automated advent candles

What do you think? Are you ready to start, or do you have your own Raspberry Pi Christmas project lined up?

Want more Raspberry Pi ideas? Try out these weird Raspberry Pi projects.

Read the full article: 12 Raspberry Pi Christmas Projects You Can Make in a Day


Read Full Article

5 Fascinating Search Engines That Search for Faces


A face isn’t quite as unique and ageless as a fingerprint, but it’s easily captured and searched. Facial recognition, in combination with data from surveillance cameras or online profiles, is a powerful tool in finding people and tracking their every step. On the entertaining end of the spectrum, a face search can reveal your online (celebrity) lookalikes or your age.

Here are three face recognition search engines that may give you a thrill. Let’s see what they reveal about you or your friends.

1. Google Images Search: Reverse Face Search

Did you know that you could search Google by images? Rather than a keyword, you can use an image to search for similar images.

Click the camera icon to search by image. You can either paste the image URL or upload an image and Google will find similar images.

demonstrating Google image search

Moreover, you can make Google search for faces only by adding a small bit of code.

When you go to Google Images Search, enter your query, hit Enter, and then add “&imgtype=face” (without the quotes of course), either to the end of the search URL or right before another string starting with &. This will further improve the results of your face-related search.

Below is a before and after example that you can try for yourself:

Search a specific image term on Google

Google also offers its face recognition in Google Photos.

2. PicTriev: Face Recognition

PicTriev goes one step further by actually searching for similar faces. Unfortunately, the feature is limited to lookalike celebrities.

What you do is add the URL or upload a photo in JPG or JPEG format, with a size no larger than 200 KB, and the search engine will return matching celebrity images found online.

For demonstration purposes, I used my own headshot. While PicTriev correctly identified me as overwhelmingly female, the number one match was Jason Clarke. The age estimation of 30, however, is very flattering.

PicTriev face recognition

It works much better if you search for a celebrity image.

PicTriev also lets you compare the similarity of two faces or estimate whether photos of two faces are the same person. Click the meter icon on the top right, upload two photos, select similarity or identity, and let PicTriev do its calculations.

PicTriev facial match

Before you add photos, be sure to follow the instructions on formatting for the best results.

3. TinEye: Reverse Image Search

TinEye reverse image search engine works for faces.

TinEye’s reverse image search works almost like Google. You can upload an image or paste a URL and search for it. TinEye does not support any more search operators, making it both simpler and basic.

In my test, TinEye found three results, one of which Google had not included because the site died years ago. Also, it missed a newer result that its big brother had picked up. To me, this indicates that TinEye’s search index is largely outdated.

Unlike Google, TinEye links directly to the pages where it found the images and it skips similar images.

4. PimEyes: Face Search

Similar to Google’s reverse face search, PimEyes uses images and face recognition to search for similar faces on over 10 million websites. The demos using celebrity faces like Angelina Jolie or Zac Efron look promising.

For example, you can search for Jennifer Aniston’s face using four different photos at once. PimEyes will find the original photos, as well as other shots of Aniston.

Curiously, while the app does find the original pictures used for the search, the similarity is only scored at around 70%. Shouldn’t it be closer to 100%? Or does the algorithm take image resolution, size, brightness, and other digital alternations into account?

PimEyes facial matching

I tried the service myself, providing PimEyes with three different photos of me to analyze. The GIF below illustrates the process.

PimEyes analyses photos

There are other photos of me to be found online, but PimEyes didn’t spot them. The best it could find was someone else’s face with a 62% similarity. Apparently, my pictures do not appear on one of the 10 million sites analyzed by PimEyes.

Note that PimEyes offers a 24 hour deal that unlocks access to its premium search results. But given my questionable results, I would not recommend paying for this service.

5. Betaface: Facial Recognition Demo

Betaface offers a facial recognition search similar to PicTriev’s photo identification. You can upload an image or send the image URL and the face search engine will isolate and characterize all the faces it can identify in the photo.

Betaface photo metadata

Next, you can compare faces (with other images you uploaded), search celebrities, or search Wikipedia for each recognized face. The results will appear in the Face recognition matches table.

Betadata face recognition matches

This tool is useful for uploading and comparing photos in bulk. In addition to classifying faces based on 101 pro facial points, you can also enable extended geometric and color measurements, as well as a “best face only” feature. Both of these slow down the processing, but will increase the quality of your matches.

Bonus: How-Old.net: How Old Do You Look?

A profile picture with an age detection.

This tool uses a photo to guess the subject’s age. Microsoft built How-Old.net to showcase its machine learning APIs. What’s more fascinating is what Microsoft learned through this experiment. Apparently, wearing a hat can make you look younger, while glasses will make you look older, and losing your beard can also shave off some years.

What Does Your Face Reveal?

Face recognition and search tools have a range of useful applications. Not only can they help the police identify suspects from security camera footage. They can also help professional photographers or media companies index visual material and build large and easy to search archives. Moreover, face recognition can replace passwords and keys.

But there’s a dark side to every tool. Not too long ago, the Facezam viral marketing scam highlighted what face recognition could do to your privacy. The creators of the app claimed that—within seconds—you could find anyone’s Facebook profile by uploading a picture of their face. Essentially, FindFace for Facebook.

While such an app violates Facebook’s privacy policies, Facebook itself uses facial recognition powered search to identify people in photos (unless you disabled the feature). And presumably, Facebook’s face search engine is better than the FBI’s identification tool. Why? Because you’ve been voluntarily stuffing Facebook’s database with a huge variety of photos, all helping its AI improve faster than the FBI could ever dream of. And it’s all legal. You can’t always hide your face, but you can protect your privacy online.

If you have an iPhone, check out these reverse image search tools for more revealing discoveries.

Image Credit: Zapp2Photo/Shutterstock

Read the full article: 5 Fascinating Search Engines That Search for Faces


Read Full Article

Kugoo ES2: This is the Electric Scooter You’ve Been Looking For


kugoo es2 electric scooter featured
Our verdict of the Kugoo ES2 Electric Scooter:
Enjoy a smooth, safe, zero-emissions ride and without the feeling that you're riding a child's toy. But it's bulky and heavy, so give it a miss if you're going to be carrying it up and down stairs.
910

I’ve never ridden a scooter before, much less an electric one that can hurtle along at 25km/h. So you can understand my trepidation going into this review. It turns out that I had nothing to worry about: the Kugoo ES2 is like the SUV of electric scooters. It handles itself admirably, weighs an absolute ton, and makes the rider feel as safe as humanly possible.

The Kugoo ES2 is available now from GeekBuying.com for less than $400 (use the coupon code GKB226S to get it for $367 for a limited time!)

We think it’s a bargain, but read on to find out more, and at the end of this review, we have one to giveaway to one lucky reader!

Kugoo ES2 Specs and Features

  • 350W motor
  • 7.5Ah battery (not user replaceable)
  • Fixed height handlebar
  • Rear disc brake and front e-brake
  • Cruise control
  • Maximum speed 25kh/h (15mph)
  • Three speed modes
  • Range: 25km (15 miles)
  • Carrying capacity: 220 pounds (100kg)
  • Weight: 33 pounds (15kg)
  • Size when folded: 44 x 13 x 17 inches (112 x 33 x 43 cm)

The biggest downside to the Kugoo ES2 is the sheer weight, compromising mainly of the thick, sturdy aluminum alloy frame, and a massive 7.5Ah battery underneath the stand. On the flip side, it feels incredibly solid and well built. The weight alone results in greater stability.

kugoo es2 folded up
Even when folded, it’s still awkward to carry.

For reference, I stand 185cm tall and weigh around 95kg, so I’m at the top end of the stated capacity. The fixed height handlebar seemed to be perfect for myself and other adults that tried it. Those of you who are smaller in stature might be better off looking at the Kugoo S1 though, which is adjustable.

riding the kugoo es2

Safety and Offroad

Featuring a front shock absorber and 8.5 inch solid honeycomb-patterned tyres, the Kugoo ES2 offers a smooth ride on your typical urban terrain. It isn’t designed for offroading, but that didn’t stop me from testing it anyway. On compacted gravel and dry dirt roads, it handled admirably, though you can certainly feel the bumps. On deeper gravel, it simply can’t push through. Overall, I was really impressed with how it handled the variety of terrain around my little town, including the unadopted dirt road that we live on.

kugoo es2 honeycomb wheels
The honeycomb solid wheels provide a comfy ride but struggled in deep gravel.

The biggest surprise was simply how stable it felt. You won’t need any training, and even from literally zero experience, you’ll be off and away in no time. The app allows you to set either a zero-start for minimum effort, or push start if you’re worried. Being quite lazy, I left it on zero-start, and it felt quite safe. It’s only at low speeds that you might wobble or put your foot out for safety. Anything above 3km/h will naturally stabilize with no input from you.

kugoo es2 on tarmac
The Kugoo ES2 offers a smooth ride over your average urban surfaces.

The controls are simple, but I’d suggest leaving the Kugoo ES2 on beginner speed mode until you’re used to the braking and cruise control. The thumb-controlled lever on the left side controls the front e-brake, but you also have a physical disc brake on the rear wheel.

kugoo es2 disc brake
The inclusion of a physical disc brake makes this safer than most e-scooters.

Generally, you’ll want to use both. At higher speeds or downhill, you should use mainly the rear brake. Using the front e-brake at higher speeds could see you heading straight over the handlebars.

kugoo es2 in use downhill and braking
Use both the front e-brake and rear disc brake when going at speeds or downhill to avoid going over the handlebars!

Pushing down on the right accelerator and maintaining the same speed for six seconds will set the cruise control. The ES2 will beep to let you know. Using the rear disc brake or only lightly applying the e-brake will not cancel cruise control, so you may find yourself lurching forwards as the motor kicks in again. Be sure to cancel the cruise control by pushing the e-brake dial all the way down.

Speed Testing

Being on the larger size meant I wasn’t quite able to achieve the top speed, achieving a maximum of 21km/h on flat road terrain. However, that was much faster than I would be comfortable with for daily use anyway.

kugoo es2 putting on helmet
Safety first, boys and girls!

The same was also true of the stated range: I got about 12.5 miles (20km) out of a single charge. This is to be expected since heavier things take more energy to move!

Night Usage

Press twice on the power button to activate the bright front headlight and rear light. I found this to be more than enough to light the way down our unlit dirt path, or to be easily visible on your averagely lit street.

When powered on the base of the scooter also features a strip of blue LEDs, which can’t be turned off. At night the effect is pleasing but somewhat pointless.

kugoo es2 LCD display screen
Even in daylight the LCD screen is easily visible. A powerful headlight beam allows for safe night rides.

Why Does It Have Bluetooth?

Situated just beneath the LCD screen is a rubber cover that opens to reveal a USB port, into which you can plug your phone to charge while riding. There’s no mount included though, so if you want to use GPS navigation you’ll need to source your own method of securing it to the handlebars.

kugoo es2 usb port
A USB port allows you to keep your phone charged. But you’ll have to figure out how to mount it yourself.

The Kugoo ES2 is also equipped with Bluetooth, and an accompanying app which offers navigation and a simple heads-up display. It allows you to adjust a few settings (zero effort or push-start, metric or imperial speed), and run some self-check diagnostics. Other than for initial setup I see no reason to use it. The LCD screen is clear and displays all the information you could need, and for short local journeys, you probably don’t need GPS.

kugoo es2 app settings

The Legal Situation

For my fellow UK folk who may be considering buying the Kugoo ES2–or any electric scooter–there’s something you should know first. Electric scooters aren’t allowed on the road as they aren’t licensed; they aren’t allowed on bike lanes because they don’t have pedals; and they aren’t allowed on the pavement because they’re motorized. In the eyes of the UK law at least, electric scooters just don’t exist. That makes riding one by default illegal anywhere other than private land. The same is true of Segways, and those insipid “hoverboards” that don’t actually do anything that even remotely resembles the act of hovering.

If caught using one, you may be fined up to £300, or have the device confiscated. However, this is rare, and only really seems to be happening in London. I understand the legal situation is similar in New York, though less strictly enforced. Other urban centers around the world have embraced these remarkable zero-emissions technologies, but like most things, the UK lags behind.

While I fully expect the laws to be updated within the next year or two, for now you should be aware of the risks.

Is The Kugoo ES2 The Electric Scooter for You?

If you’re a grown adult and want an electric scooter that won’t make you look like you’re riding a child’s toy, the Kugoo ES2 is it. It’s fast enough for anyone, and will you get from A to B with zero emissions and not a single bead of sweat. Use the coupon code GKB226S to get yours for $367 (until December 14th, so be quick!)

But even when folded, the Kugoo ES2 is awkward and heavy to carry. The benefit of riding an eScooter is that it takes absolutely zero effort, unlike a bicycle which may leave you drenched in sweat by the time you get to your destination. If you need to travel up and down three flights of stairs at either end of your journey, the weight of the Kugoo ES2 may make it unsuitable. My wife just couldn’t carry it. If you need something lighter and more portable, check out the Kugoo S1 model instead (which you can also grab a bargain for with the code GKB223S, bringing it down to $285).


Enter the Competition!

Kugoo ES2 Electric Scooter Giveaway

Read the full article: Kugoo ES2: This is the Electric Scooter You’ve Been Looking For


Read Full Article

A Gift Guide for the Ultimate PlayStation 4 Fan


ps4-gifts

Have someone in your life who loves playing video games on their PS4, but don’t know much about gaming yourself?

If so, here’s a handy list of gifts they’re sure to love, at various price points to suit all gift situations.

1. Pandaren Thumb Stick Grips

Pandaren Thumb Stick Grips Pandaren Thumb Stick Grips Buy Now On Amazon $6.98

The DualShock 4 is a great controller, but your thumbs can start slipping if they sweat during longer play sessions. You can improve this with analog stick covers, which serve two purposes: they help protect the original rubber and offer improved grip.

Otherwise, these grips are worth a try just for improving your skills. For most players, we recommend these Pandaren Thumb Grips. They’re inexpensive, work on any controller, and come in a pack of 16.

2. MATEIN 15-Foot Micro-USB Cable

MATEIN 15 Foot Micro-USB Cable MATEIN 15 Foot Micro-USB Cable Buy Now On Amazon $7.99

Although the DualShock 4 controller has a rechargeable battery, the battery life isn’t great. Make recharges less frequent by picking up an extra-long cable. That way, you can charge and play indefinitely without having to sit closer to the system.

This 15-Foot Micro-USB Cable from MATEIN does the job for just a few dollars.

3. Prodico PS4 Gamepad Keyboard

Prodico PS4 Gamepad Keyboard Prodico PS4 Gamepad Keyboard Buy Now On Amazon $15.99

Console players don’t typically use a mouse and keyboard to control games, but a wireless keyboard accessory can still be helpful for some PS4 owners. Anyone who sends a lot of messages, browses the web, or uses their system as a media player will really appreciate the Prodico PS4 Gamepad Keyboard attachment for the PS4 controller.

Without it, you have to manually enter every letter using the PS4’s on-screen keyboard, which is tedious. Prodico’s PS4 keyboard is an inexpensive way to keep a full physical keyboard close at hand.

4. BEBONCOOL PS4 Controller Charger Dock

BEBONCOOL PS4 Controller Charger Dock BEBONCOOL PS4 Controller Charger Dock Buy Now On Amazon $13.99

As mentioned before, the PS4 controller doesn’t have great battery life, so it’s smart to charge up whenever you can. Since the PS4 only has a few USB ports and charging multiple controllers is a pain, a charging station is the perfect solution.

You can plug this BEBONCOOL PS4 Controller Charger Dock into a wall or computer (saving you a USB slot) and charge up to two controllers. The stand is small, so you don’t have to worry about it taking up lots of room, and the unit lights up, letting you know when they’re done. A charging dock is a must-have for anyone with more than one controller.

5. PlayStation Plus 12 Month Membership

PlayStation Plus 12 Month Membership PlayStation Plus 12 Month Membership Buy Now On Amazon $59.99

Every PS4 owner should subscribe to PlayStation Plus. The service includes free games, frequent discounts, cloud storage, and exclusive game trials. On PS4, it’s also required for online multiplayer games, but all the other benefits mean it’s more than worth it.

Giving a PlayStation Plus 12 Month Membership renewal as a gift is great because the recipient doesn’t have to worry about paying for another year themselves. Plus, membership stacks and codes don’t expire, so don’t be afraid to buy a subscription no matter how long they have left. Since this arrives as a digital code, it also makes a great gift for far-away friends.

6. PlayStation 4 Camera

PlayStation 4 Camera PlayStation 4 Camera Buy Now On Amazon $47.95

The PlayStation 4 Camera isn’t necessary for using the PS4 outside of PlayStation VR. However, the Camera is nonetheless a neat toy. It allows you to broadcast video of yourself when streaming, log into the PS4 with your face, and sync with the DualShock 4’s light bar for tracking motion.

It’s a good idea to know your audience before buying this—a diehard shooter fan probably won’t want it. But for kids or families, the PS4 Camera could be a smash hit.

7. DualShock 4 Wireless Controller

DualShock 4 Wireless Controller DualShock 4 Wireless Controller Buy Now On Amazon $37.99

For everything from dead batteries to unexpected visits from friends, it never hurts to keep an extra controller around. Since they’re roughly the same price as a game, a PS4 owner might not want to pay for one themselves, but will appreciate receiving one as a gift.

You can get your giftee another DualShock 4 Wireless Controller in a variety of colors, including black, white, red, and blue.

8. Collective Minds Strike Pack F.P.S. Dominator

Collective Minds Strike Pack F.P.S. Dominator Collective Minds Strike Pack F.P.S. Dominator Buy Now On Amazon $33.65

“Elite” controllers for the PS4 are ridiculously expensive. But with an adapter, you can supercharge any standard PS4 controller without paying much. The Collective Minds Strike Pack F.P.S. Dominator easily snaps onto any DualShock 4.

It provides two paddles for extra control, to which you can hot-swap any buttons you’d like. The included 10-foot USB cable is necessary when you want to use the pack, and makes sure you don’t have to worry about charging the controller. Plus, the pack even includes mods if your player wants to bend the rules a bit.

It’s aimed at first-person shooter players, but anyone who could benefit from an enhanced paddle-enabled controller will appreciate it.

9. HyperX Cloud Alpha Gaming Headset

HyperX Cloud Alpha Gaming Headset HyperX Cloud Alpha Gaming Headset Buy Now On Amazon $84.99

The PS4 includes a basic headset for voice chat, but it’s pretty clunky. You can choose from a ton of gaming headsets to upgrade it; we think the HyperX Cloud Alpha Gaming Headset offers great bang for your buck.

Its powerful drivers let you hear every bit of game audio, and it packs a removable boom mic that’s much better than the PS4’s stock mic. And the included cables let you use it with your computer or any device with a headphone jack. Plus, it offers a great music listening profile.

10. WD 2TB Elements Portable External Hard Drive

WD 2TB Elements Portable External Hard Drive WD 2TB Elements Portable External Hard Drive Buy Now On Amazon $56.95

Modern games take up a ton of space, so most PS4 players know the frustration of running low on hard drive storage. The WD 2TB Element Portable External Hard Drive offers tons of extra space to keep plenty of games installed.

This particular drive has a slim profile, so it sits unobtrusively on the PS4. If you’re buying for someone who’s had a PS4 for a long time, this will be a hit gift.

11. PlayStation VR Bundle

PlayStation VR Bundle PlayStation VR Bundle Buy Now On Amazon $335.99

PlayStation VR works with every PS4 and is a great way to experience true virtual reality without having a powerful PC. While it’s still not cheap, the PlayStation VR Bundle would make a great gift for anyone who’s curious about VR and hasn’t dived in yet.

This PS VR bundle includes everything you need to get started, including the headset, PS4 Camera, two PlayStation Move controllers, and a few games.

12. Paladone PlayStation Metal Drink Coasters

Paladone PlayStation Metal Drink Coasters Paladone PlayStation Metal Drink Coasters Buy Now On Amazon $9.94

Here’s something a bit different. This four-pack of Paladone PlayStation Metal Drink Coasters lets PS4 fans protect their coffee tables while showing off their love for gaming. As you’d expect, the four pieces correspond to the four face buttons on the PS4 controller: X, square, circle, and triangle.

It’s an inexpensive gift and one that they can enjoy even when the PS4 eventually becomes obsolete.

13. PlayStation Store Gift Card

PlayStation Store Gift Card PlayStation Store Gift Card Buy Now On Amazon $50.00

If you’re totally unsure of what someone might want, go with a PlayStation Store Gift Card. Available in several denominations, including $10, $20, and $50, these cards let anyone with a PS4 pick from a wide variety of games, downloadable content (DLC), and other content.

They won’t have to use a credit card to add funds, and the money never expires, so they can even save it for a sale. One of the above gifts is a more personal choice, but we doubt anybody would be upset at getting what is essentially free money.

If you know the person well, you can pick out an individual game for them instead. But in most cases, a gift card is safer.

‘Tis the Season for PlayStation 4 Gifts

Even if you’ve never touched a video game controller before, you can choose from a variety of great gifts for the PS4 owner in your life. No matter your budget, one of these choices will make someone’s gaming life better this holiday season.

If you’re also buying for someone who plays games on other platforms, check out our general gift guide for gamers.

Image Credit: Mike Flippo/Shutterstock

Read the full article: A Gift Guide for the Ultimate PlayStation 4 Fan


Read Full Article

The Dangers of iPhone Spyware


Nearly all smartphone spyware promises to log everything a phone does while remaining undetectable. A compromised device is traceable via GPS, can have its incoming and outgoing text messages and call logs stolen, and even have remote access to photos, videos, and browser history.

Installing spyware on an iPhone was once no mean feat. Apple’s stringent security settings and iOS architecture made installing spyware difficult. That hasn’t changed—but spyware developers have learned how to circumvent many of these iOS spyware defense mechanisms.

Think someone has compromised your iPhone? Wondering how to detect iPhone spyware? Here’s what you need to know.

Is There a Legitimate Use for Spyware?

Spy software, by its very nature, is designed to snoop on people. It is for this reason that anyone reading this who is contemplating installing such software probably doesn’t care what I have to say about any aspect of doing so. If you’re already thinking about doing this, you’ve probably already ethically justified the practice in your head.

Whatever your reasoning for doing so, it’s always worth considering how you would feel if someone did the same to you.

ios spyware xnspy home page

Most spy software is marketed in a very broad way. Not only is it advertised to snoopers who want to track the location of an individual, or spy on someone’s smartphone usage but it’s also marketed as a legitimate security tool. This is ethically questionable at best, and a massive breach of privacy at worst.

Unfortunately, we can’t change the minds of those who are already engaged in the practice, but we can try to redress the balance for those drawn in by dishonest marketers.

Parents should reconsider using spyware to trace their children. There are free and safe ways to share the location from an iPhone (and other iDevices), which you can find at the bottom of this article.

At times, spyware marketing targets employers. Employers should not use spyware to keep tabs on your workforce. If you want to use a Mobile Device Management (MDM) policy on your employee’s hardware, don’t use a BYOD policy alongside it.

There is no doubt MDM policies are important. But a personal device should remain private and installing MDM software compromises device privacy.

Is It Difficult to Install Spyware on an iPhone?

For a long time, no spyware in the world could do all it claims without voiding the target iPhone’s warranty. That includes spying on any activity, tracing any location, uploading video and camera images, and so on.

Parents installing iPhone spyware void the warranty on their kid’s devices. Paranoid spouses and partners invalidate their other halves’ iPhone warranty, and the same goes for employers and so on.

“Unauthorized modification of iOS is a violation of the iOS end-user software license agreement and because of this, Apple may deny service for an iPhone, iPad, or iPod touch that has installed any unauthorized software.”

That is because the most potent forms of iPhone spyware require a jailbreak before allowing access to the full gamut of private data. Not all legal interpretations of jailbreaking and warranty provisions agree with Apple’s interpretation. But if something happens to the device while jailbroken, Apple can use that against you.

Jailbreaking will also void any AppleCare after-sales warranty. Jailbreaking is fine if it’s your iPhone and you understand the risks involved in doing so. Even a jailbreak gone wrong is unlikely to “brick” your iPhone. But jailbreaking someone else’s device without their knowledge isn’t very nice.

iPhone Jailbreaking Spyware Installation

In comparison to Android, installing iPhone spyware is difficult. Apple takes a commendable hardline approach to security and privacy. The iPhone isn’t designed to run non-Apple software which is seen as a security violation. Tampering with system-level software isn’t illegal, but Apple can and will detect any changes, even if you take your device in for a basic repair.

flexispy ios spyware

Whereas, Android does things differently. Unchecking a box in the Settings allows the installation of non-Google Play apps. The process is instantly reversible, too, but allows those apps to remain.

Jailbreaking involves loading custom firmware onto the iPhone. Jailbreaking allows greater freedom on the device, allowing users to run unsigned software. The most advanced spyware is always unsigned, for two reasons: the spyware would breach iOS permissions, and Apple would never allow that level of spyware on the App Store in the first place.

Is Jailbreaking Easy or Quick?

In the early days of jailbreaking, new vulnerabilities were found frequently. It was relatively easy to jailbreak iOS, allowing for the installation of custom apps (and in this case, spyware). It is possible to jailbreak an older iOS device in minutes, with a little preparation.

More recent versions of iOS are more secure and have taken much longer for jailbreak developers to crack. At the time of writing, jailbreaks exist for iDevices running up to iOS 12.4. The jailbreak process is remarkably quick, too. The latest jailbreak method (at the time of writing) takes a couple of minutes to complete and doesn’t require you to connect the iPhone to a computer at any point.

There was a long period during which jailbreakers could not find a new vulnerability to exploit. Installing and updating the most invasive forms of spyware during that period was difficult. Unfortunately, through Apple’s internal incompetence, iOS version 12.4 introduced a vulnerability that jailbreakers pounced upon, quickly releasing a new option.

Are Unsigned iOS Apps Safe?

Unsigned apps can potentially include malware. If the root SSH password remains unchanged once the jailbreak is complete, malware could run riot on your phone. With no Apple guardians to oversee software, you must rely on third-party developers to be the judge and jury. If you think about it, spy software is malware marketed as valid software.

Jailbroken iPhones and other iOS devices can sometimes have problems running legitimate App Store apps. Developers have ways of detecting a jailbreak and can now prevent jailbroken devices from using their services. One example would be DIRECTV which delivers streaming video and another reported app is Skype for iOS.

Many banking apps are also restricted for obvious reasons, as is PayPal. Getting these apps working again involves playing a game of cat and mouse between developers and the jailbreak community.

Jailbreak-Free iPhone Spyware

The period of time where there was no option to jailbreak the latest iOS version sent spies toward different spyware options. A raft of jailbreak-free spyware apps are now available. The jailbreak-free iPhone spyware apps cannot provide the same level of data as spyware installed using a jailbreak exploit.

mspy ios spyware

Jailbreak-free iPhone spyware uses the iCloud credentials of the victim and exploits the data found there. The spyware app can then use integrated iCloud services such as Find My iPhone to track the target device, or read through the victim’s iMessage history without alerting anyone. The spy is not only violating the privacy of the target, but they are also handing over the password to the target’s entire Apple identity

How to Detect iPhone Spyware

There is no guarantee you will find evidence of the iPhone spy software. As you might expect, developers design spyware to remain hidden from view and to operate without leaving a trace.

Instead, you are more likely to encounter other issues with your iPhone relating to spyware. For example, you might find the evidence of a jailbreak, rather than a spyware app. You might also note your device using more battery, or your data allowance drops faster than usual.

The biggest telltale sign is the Cydia app. The Cydia app installs during the jailbreak process and is the portal to jailbroken unsigned apps and unofficial iOS tweaks. Even if the spy hides the Cydia from the home screen, you should still find it using the iOS home screen search function.

cydia-search

There is no guarantee of finding Cydia, and the careful snooper will probably try all they can to hide any signs of a jailbreak. Other apps to search for that might suggest a jailbreak include Installer, Icy, SBSettings, Absinthe, and Installous. Similarly, installing an app like PayPal (mentioned above) might reveal an issue if the app refuses to run.

To find out more methods for spotting iPhone spyware, check out how to protect yourself from illegal spying of all kinds.

How to Remove iPhone Spyware

Jailbreaking is a game of cat and mouse between Apple and the jailbreak community. Keeping your iDevice up to date and performing all iOS updates reduces the chance of installing the most invasive forms of iPhone spyware.

Apple is quick to patch security vulnerabilities and jailbreak exploits. Rolling your iPhone back to an older firmware version is rarely an option. As such, even if someone has jailbroken your iPhone, reversing the issue is simple.

If you suspect spyware is on your iPhone, a factory reset is the easiest option to restore your device—and your privacy. Even though Apple keeps track of the unique identification numbers (UDIDs) of jailbroken devices via the App Store, it seems restoring your phone “as new” removes all traces of the jailbreak.

iphone xs restore iphone itunes

To restore your iPhone on a macOS or Windows PC, first launch iTunes. Then, head to Summary > Restore iPhone. You can opt to Back Up Now before the firmware restore process begins, which will save your personal data.

If you do choose to backup and restore, there’s a chance some evidence of the jailbreak will remain, but the jailbreak itself will be gone. If your phone needs attention from Apple (either as part of a 12-month warranty or the extended AppleCare package) an Apple technician may refuse you service if they detect evidence of a jailbreak.

Should Parents Install Spyware on Their Kids iPhone?

There are two easy to use iPhone spyware alternatives for concerned parents.

Find My Friends works across Apple devices and uses Apple IDs to connect friends and family. By authorizing a friend or family member to view your location in Find My Friends, they will be able to see where you are whenever they like. If you have young children you can enable location sharing within Find My Friends, then use iOS restrictions to prevent changes to Location Services.

The Find My Friends app works best with the consent of the user. You can use Find My Friends as an opportunity to establish a system of trust with your children. The app will not record messages, phone calls, or camera activity because it is not spyware. It is a tool for staying in touch that you can also use to open a personal safety dialogue with your kids.

find my phone

The second way to share location between iOS devices is via the Messages app. Simply open a conversation on the device, hit the “i” button in the top-right corner, and hit Share My Location or Send My Current Location. You can choose to do so for an hour, for a day, or indefinitely. You can then stay in touch by opening the same conversation on another device and hitting the “i” button.

iPhone Spyware Is Invasive and Dangerous

iPhone spyware is dangerous, for a multitude of reasons, including data theft, malware, fraudsters, and more. It’s also a lesson in ethics and trust between you and your kids; it might lead to a conversation with your employer regarding personal space and respect.

Remember, spyware isn’t the only iOS security issue you should know about. Despite a superior security record, your iPhone is still susceptible to malware and other vulnerabilities.

Read the full article: The Dangers of iPhone Spyware


Read Full Article