For Netflix, user reviews are a thing of the past. The streaming service is deleting all previously written user reviews and preventing users from writing new reviews. Whatever the reason, it’s clear that Netflix no longer cares what you think.
In March 2017, Netflix ditched its five-star ratings in favor of a simple thumbs-up/thumbs-down system. Instead of scoring a movie or TV show out of five you have the binary choice of saying whether you like it or not. And now Netflix is ditching user reviews.
Reviewing Netflix’ Decision to Ditch Reviews
As first reported by CNET, Netflix recently emailed users to inform them user reviews are going away. Users who have contributed a review within the past year have been notified that “this feature will be retired on July 30th due to declining usage.”
User reviews will be available until July 30th, at which point they will all be scrubbed. Along with users’ ability to leave new reviews. While this won’t bother the majority of Netflix users, those who regularly wrote reviews are rather annoyed by it all.
Hey @netflix, no need to go all alternative facts on this. You eliminated bylines and star ratings, and emphasized your own recommendations. So yeah, usage declined. Own it. It's ok; there are other sources for movie reviews.
Regular reviewers have taken issue with the explanation that this was all down to “declining usage”. User reviews for content were difficult to find and limited to the desktop version of Netflix. So it’s no wonder hardly anyone bothered.
One explanation for this change is negative reviews being written about Netflix Originals. Because while shows like Stranger Things and The Crown have enjoyed critical acclaim, other Netflix Originals have garnered mixed reviews. Including Netflix’ Marvel shows.
Your Opinions No Longer Matter to Netflix
Netflix is in the fortunate position of not actually having to worry about ratings. As long as people are choosing to pay for Netflix every month the company can keep on experimenting with a range of content. And in that context, your opinions don’t matter.
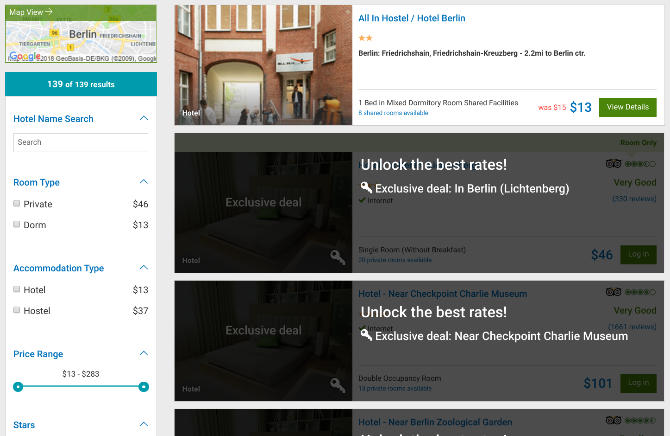
When you’re traveling on a budget, your biggest expenditure ends up being the roof over your head every night. These smart sites, apps, and extensions ensure you spend as little as possible on accommodation and even get it for free in some cases.
You probably already know about Booking.com, Google’s hotel finder, and the other great hotel search engines out there. But the deals you find on those aren’t always the best price. So before you book your next travel night, check out these tools.
When you book a hotel, it’s available at a certain price. But often, hotels will discount the same type of room after you’ve already booked. Service tracks such discounts and ensures you get the same deal saving you money in the process.
You don’t have to do anything to get these discounts. Service tracks the booking automatically and re-books your room at the new price. It’s the simplest way to save money even after you have already booked, ensuring you get the best price or something even better.
Service also does this for airlines, saving you money on canceled or delayed flights. Yup, you can finally make the airline pay you for that inconvenience. Service charges 30% of all the money it saves for you, which is a pretty good deal since it’s making you money anyway.
Worldpackers (Web): Work in Exchange for Free Accommodation
Worldpackers is the best way to get free accommodation during your travels. In exchange, you will be doing some small jobs to help out the people giving you a room. Simple, eh?
Go to the site and search for the city you are visiting. You’ll get a list of all the types of jobs and accommodation available, based on the types of skills you want to use, like labor, teaching English, etc. Each listing clearly states how many hours a day or week you will be working and what your duties are. The listing will also state the kind of free stay you get, and any bonuses like free meals, days off, transport, and other perks.
Apply for the jobs you like and cross your fingers. You might soon be staying for free and even getting your meals while touring the new city in your non-work hours.
Worldpackers also lets you work with NGOs and other outfits with a social cause, again giving you free stay in return. So not only do you get free stay, but you’ll also be doing things for a good cause.
You can get a lot of free and discounted stuff with a .edu email address or a student ID card, so why should hotels and hostels be any different? Student Universe shows you places with an extra discount for students aged 26 or less.
While the site is best known for great flight deals, it also has partners in the hotel industry who offer discounts to students. For all you know, you might get a decent room at the same price as a bed in a hostel’s dormitory. And sure, you also get to see hostel options along with the hotel partner deals.
The site is best used by registering for an account with your school’s email address. In case you don’t have any .edu email address, you might not be able to get many of the benefits of their partner programs.
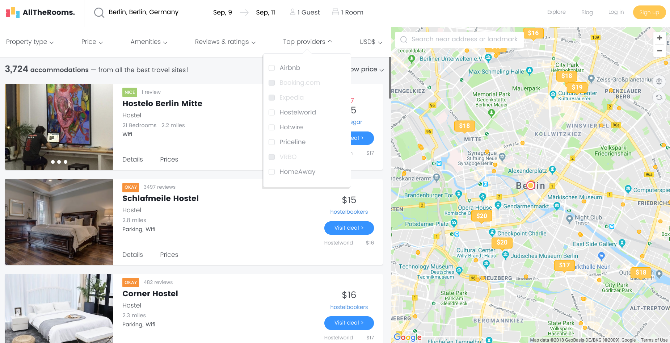
All The Rooms (Web): Search AirBnB and Hotels in the Same Site
Most hotel and hostel search engines don’t include AirBnB listings in their results. That’s a bit silly because you can get some major benefits from booking AirBnB over hotels. All The Rooms is the best search engine to look for hotels alongside AirBnB listings.
This is an aggregator site, searching for results from Booking.com, Expedia, Hotwire, Priceline, HomeAway, Hostelworld, VRBO, and AirBnB. So you get accommodation options of all sorts, from a bed in a dormitory to a lovely homestay. Using the site is as simple as any other, where you only need to add your travel dates and destination. You can filter the results to add essential features and sort the listings.
You don’t actually make any bookings through All The Rooms, which is the only inconvenience of the site. You’ll usually have to visit the original booking for that. That’s why I wouldn’t advise making an account at All The Rooms, it’s quite pointless.
Gopher (Chrome): Price Comparison to Find Better Deals
One of the best ways to save money on a hotel deal is to book it directly from the hotel’s own website, and request a discount if possible. Gopher, an extension for Google Chrome, does that automatically for you in the background through its price comparison engine.
When you see the final price before booking your hotel on a site like Booking.com, Gopher will jump into action and check that hotel’s own website. If there’s a better deal on the original site (and there often is), you will get an alert and be taken there directly. You can end up saving quite a bit of money in the process.
To get an idea of the savings, go to Gopher’s deals page to see recent bookings made with the app. Gopher also has a cashback reward program, but only use it if you don’t plan on using the cash back rewards of any other loyalty program you belong to. You can’t double dip.
Staying in Hotels? Protect Your Data
Just as you should be a little vigilant about your luggage and valuables in a hotel, you also need to be vigilant about your data’s security. In fact, hotels have a lot of information about you and can easily leak that and more if you aren’t careful. Here are the potential risks to your personal data when you’re staying at a hotel, and what you can do about it.
Bots, your days of tweeting politically divisive nonsense might be numbered. The Washington Post reported Friday that in the last few months the company has aggressively suspended accounts in an effort to stem the spread of disinformation running rampant on its platform.
The Washington Post reports that Twitter suspended as many as 70 million accounts between May and June of this year, with no signs of slowing down in July. According to data obtained by the Post, the platform suspended 13 million accounts during a weeklong spike of bot banning activity in mid-May.
Sources tell the Post that the uptick in suspensions is tied to the company’s efforts to comply with scrutiny from the Congressional investigation into Russian disinformation on social platforms. The report adds that Twitter investigates bots and other fake accounts through an internal project known as “Operation Megaphone” through which it buys suspicious accounts and then investigates their connections.
Twitter declined to provide additional information about the Washington Post report but pointed us to a blog post from last week in which it disclosed other numbers related to its bot hunting efforts. In May of 2018, Twitter identified more than 9.9 million suspicious accounts — triple its efforts in late 2017.
Chart via Twitter
When Twitter identifies an account that it deems suspicious it then “challenges” that account, giving legitimate Twitter users an opportunity to prove their sentience by confirming a phone number. When an account fails this test it gets the boot, while accounts that pass are reinstated.
As Twitter noted in its recent blog post, bots can make users look good by artificially inflating follower counts.
“As a result of these improvements, some people may notice their own account metrics change more regularly,” Twitter warned. The company noted that cracking down on fake accounts means that “malicious actors” won’t be able to promote their own content and accounts as easily by inflating their own numbers. Kicking users off a platform, fake or not, is a risk for a company that regularly reports its monthly active users, though only a temporary one.
As the report notes, at least one insider expects Twitter’s Q2 active user numbers to dip, reflecting its shift in enforcement. Still, any temporary user number setback would prove nominal for a platform that should focus on healthy user growth. Facebook is facing a similar reckoning as a result of the Russian bot scandal, as the company anticipates user engagement stats to dip as it moves to emphasize quality user experiences over juiced up quarterly numbers. In both cases, it’s a worthy tradeoff.
Starting out with the Raspberry Pi can be an exciting experience. It’s never been easier for a beginner to get started with both coding and DIY electronics.
One easy project is to make a simple circuit with two LEDs and control one of them using code. Here’s how to do it!
Required Components
Before starting, you’ll need to make sure you have an operating system on your Pi. Installing Raspbian via NOOBS is by far the quickest way to get going.
Boot up your Pi, and attach it to a screen, mouse, and keyboard like a regular desktop computer. Alternatively, you can connect to your Pi via SSH to save the clutter of extra wires. We will cover how to control LEDs whichever method you choose.
Once you are sure the Raspberry Pi is booting up correctly, turn it off again while you build your circuit, to avoid damaging your Pi.
Along with your Raspberry Pi, you will need:
A breadboard
2 x LEDs
2 x resistors (anything from 220 Ohm to 1 kOhm)
Hookup cables
If you got your Raspberry Pi with a starter kit, you will likely already have everything on this list. Now let’s build our circuit.
A Simple LED Circuit
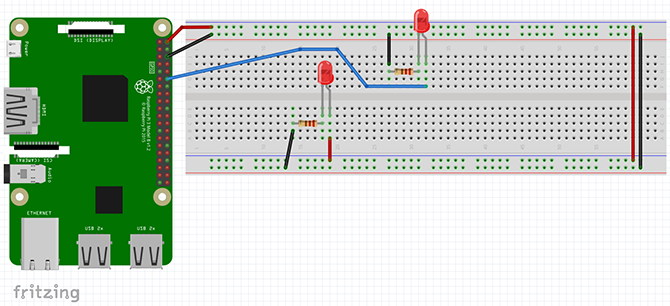
Set up your components as shown in this Fritzing diagram:
This circuit does two things. The 5v and GND pins of the Pi attach to the Power Rails of the breadboard.
Note: To get a better idea of what the breadboard is and how it works, take a look at our breadboard crash course.
The two power rails are linked at the end, and a line runs from the positive power rail into the positive (anode) side of the bottom LED. The negative side of the LED is attached to a resistor, which is connected back to the GND power line.
The top LED is wired up differently. A line runs from pin 12 (GPIO18) of the Raspberry Pi into the positive side of the LED, which runs through the resistor and back into the GND rail. Pin 12 is also GPIO18, as confusing as that sounds, our guide to Raspberry Pi GPIO pins will help clear things up!
It isn’t important which way round you set up the resistors, but it is essential to get the LEDs the right way round. Luckily, it is easy to tell which side is which:
Once you have everything set up it should look something like this:
Note that I am using an external Wi-Fi dongle here, it’s only needed if you suffer from the curse of the weak Wi-Fi!
Make sure everything is set up correctly, then boot up your Raspberry Pi. The LED attached directly to the 5v pin should turn on immediately. The other LED is the one you will control from code.
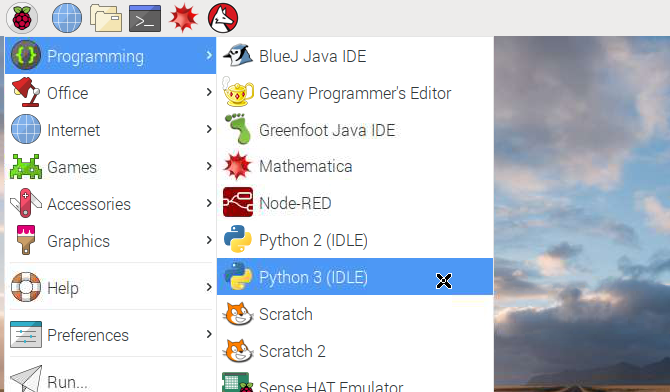
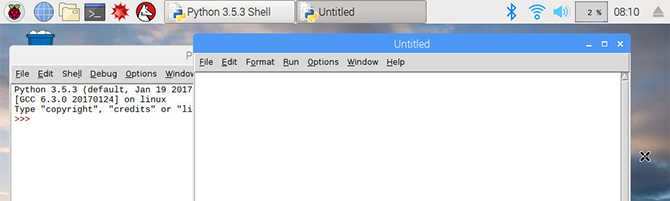
Method 1: Python via IDLE
If you are using your Raspberry Pi in desktop mode, open the applications menu in the top left of your screen, and navigate to Programming > Python 3 (IDLE). This will open the Python shell. If you are using SSH mode, instructions are provided later in the article.
The Raspbian operating system comes with Python already installed. Python is a perfect programming language for beginners, and there are many great websites out there to help you get started. We will create a short Python together, though if you’d rather grab the finished script you can copy the code from Pastebin.
You could program directly into the shell, but it would be nice to create a program you can save and use again. Open a new file by clicking File > New File.
You are going to create a simple blink sketch which will turn the LED on and off. To begin, you need to import the RPi.GPIO and time modules.
import RPi.GPIO as GPIO
import time
Importing as GPIO saves you from typing RPi.GPIO every time, and you will need the time module for the delays between the LED turning on and off. Now, set up the GPIO pin.
Set up the GPIO pins to use BOARD numbering and set GPIO warnings to false. Don’t worry if you do not understand this at this stage! Next, set your ledPin to be pin 12 (GPIO18) of your Pi. Finally, set up the ledPin to OUTPUT. Now the pin is ready to control the LED.
Making the LED Light Flash
By creating a for loop, you can control the number of times the LED flashes. Enter the following code, making sure to indent it the same way.
for i in range(5):
        print("LED turning on.")
        GPIO.output(ledPin, GPIO.HIGH)
        time.sleep(0.5)
        print("LED turning off.")
        GPIO.output(ledPin, GPIO.LOW)
        time.sleep(0.5)
This for loop runs five times, and each time it will print to the Python Shell what it is doing, before changing pin 12 to HIGH, turning the LED on, then LOW, turning the pin off. The program then quits automatically.
Save your program, and then select Run > Run Module from the editor menu. Your LED should flash five times!
Congratulations! You have created your first GPIO program!
Method 2: Python via SSH and Nano
If you have connected to your Raspberry Pi via SSH, you can create this program from the command line. Create a new script in Nano by typing:
sudo nano blink.py
This will open up a new file in the Nano editor called blink.py. Enter the same code as above, making sure to indent everything correctly, and save the program by pressing Ctrl-X. This triggers a save prompt at the bottom of the screen.
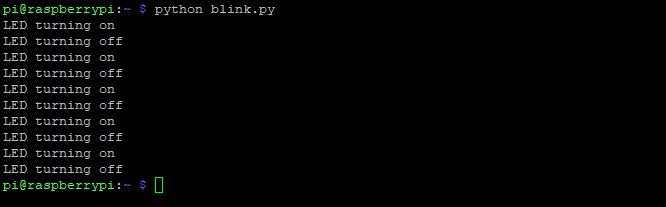
Type y to save it, and enter to confirm the filename. This will bring you back to the command line. You can run your program using the Python command:
python blink.py
You should see the LED flash and the print function on the screen.
Dive Deeper With More Raspberry Pi Projects
Learning how to control LEDs using code is an important first step in your DIY education. This level of coding is all that you need for many Raspberry Pi beginner projects.
As well as being great for homemade electronics, the Raspberry Pi is capable of a vast array of different things, and working through our awesome Raspberry Pi guide will help you get to grips with the many uses of these tiny computers.