30 March 2019

EC Weekly: Gaming, crypto, shipping and the multiple future strategies of tech


Niantic EC-1

Greg Kumparak published the first part of his planned four part EC-1 series on Niantic yesterday, focusing on the founding story of the AR/gaming unicorn from Keyhole and Google Earth to a complicated spinout from Alphabet. Lots of great nuggets on how companies get formed and built, but one I particularly enjoyed was this one:

Like most companies, Google doesn’t like when employees leave. Especially employees who ran key parts of the company for years. Leaving means competition. Leaving means potential opportunities lost.

John [Hanke, CEO of Niantic] eventually sat down with Larry Page to figure out what it’d take to keep him within Google. They talked about John’s interest in augmented reality. They talked about a book called Freedom™ by David Suarez, which centers around an out-of-control AI that taps a network of real-world operatives to control the world (the earliest hints of Niantic’s first game, Ingress, already sneaking in here years before it’s made.)

John wanted to take his interest in AR and his background in maps and gaming and mash them all up and see what it could look like. Larry wanted it to happen within Google.

What I loved is that Eliot Peper wrote a piece for Extra Crunch just a few weeks ago about the importance of speculative fiction in the creation of startups, and also gave a guide on just what books he recommends to find your next startup.

Expect Part 2 of the Niantic EC-1 to drop early next week as we do a rolling release.

Game streaming is the new battlefield among tech giants

Bryce Durbin / TechCrunch

Game streaming is quickly becoming one of the most important strategic arenas for owning users, with offerings from all major tech and gaming companies. Devin Coldewey provided a comprehensive strategic overview of the stakes involved this week, and why so much money is being poured into a technology that until now seemed impossible due to bandwidth and latency. It’s like Super Smash Bros: Tech Melee edition:

Google and Amazon bring cloud-native infrastructure and familiarity online, but is that enough to compete with the gaming know-how of Microsoft, with its own cloud clout, or Sony, which made strategic streaming acquisitions and has a service up and running already? What of the third parties like Nvidia and Valve, publishers and storefronts that may leverage consumer trust and existing games libraries to jump start a rival? It’s a wide-open field, all right.

Plus, in case you missed our live conference call, you can read the transcript of Lucas Matney and Eric Peckham talking shop from GDC.

Crypto 2.0

Andrey Suslov via Getty Images

Yes, yes, there is a crypto winter, for sure. But this is precisely the time that all the real product development and engineering work is going to take place. Longtime TechCrunch columnist Jon Evans dives into some of the most promising veins of the next-generation of blockchain and crypto technology, finding much to be excited about:

It may seem strange that, even as the public cryptocurrency frenzy of 2017-18 dies down, we seem to be in the midst of a Cambrian explosion of blockchain advances, initiatives, and iterations. But it seems that now that (some of) the get-rich-quick scam artists have been filtered away, the true believers and technical devotees can get back to work building what they believe to be the future.

Is it? Well, maybe not the future, but very possibly a nontrivial part of it. As I’ve argued before, though, cryptocurrencies and decentralized apps don’t need to conquer the mainstream and replace the existing tech megacorporates to succeed, any more than Linux had to destroy Microsoft in order to become enormously influential. All they have to do is provide a viable alternative in other to keep government and fiat currencies somewhat honest. I’m pleased to report that we’re noticeably closer to that state of affairs than we were a year ago.

How to not announce your startup (and avoid prison time)

Henrik Sorensen via Getty Images

I’ve been doing a lot of research around the new culture of Form D filings for the past few months. Those threads finally came together this week in a comprehensive overview of how startups are now filing their rounds with the SEC:

Here’s the secret about Form D filings today: the norms in Silicon Valley have changed, and Form D filings are often filed late, not at all, and many startups are advised to lie low in the hopes of avoiding stricter SEC scrutiny. What was once a fait accompli is now a deliberative process, with important decision points for founders.

Extra Crunch contacted about two dozen startup attorneys, from the biggest firms in the industry to the one-person shops with a shingle out front. Getting straight answers here has been tough, if only because no lawyer really wants to say out loud that they actively recommend their clients violate government regulations (there is that whole law license thing, which apparently lawyers care about).

The ethics of internet culture

Alexander Spatari via Getty Images

Our resident technology ethicist and humanist Greg Epstein interviewed The Atlantic correspondent Taylor Lorenz about the challenges laden with social platforms and their effects on youth culture. Far from a Manichaean view of these tools, Lorenz provides distinctive nuance, serving the good with the trenchant criticism. Lorenz from the interview:

I would say Instagram is just like a microcosm of the broader Internet in a lot of ways. Yes, there is toxic, problematic and awful stuff. There’s also a lot of positive amazing stuff. I actually tend to focus my writing mostly on the more positive things. I write about how people use any social platform, but it ends up being a lot about Instagram because most [young] people are on Instagram, to create and to connect with people.

Like all social platforms, there is a fair amount of misinformation, Nazis, things like that. Those people are always going to be on every platform and they’re going to try to exploit it. I think it’s the job of the platform to police this type of stuff. Instagram has done a better job of mitigating that type of bad content compared to YouTube and Facebook. It’s still there; you can never completely eliminate it.

Improving web accessibility

The original simplicity of the textual web has given way to much richer media content, but that transition hasn’t always been easy for users who rely on screen readers and other technologies to access one of humanity’s most important learning and knowledge resources. Accessibility consultant Beth Franssen walked Extra Crunch through the latest developments on how to make accessibility work again before lawsuits proliferate:

The Americans with Disabilities Act (ADA) requires US businesses that serve the public to provide equal access and accommodations to everyone, whether through a physical building or a digital experience. Just as stores provide ramps as well as stairs, websites need to accommodate people with varying abilities, from movement disorders to visual and auditory impairments. The number of website accessibility lawsuits raised against private companies more than doubled last year. A single plaintiff won $100K in a similar ADA lawsuit in 2017.

Shipping and logistics is getting a tech makeover

Our guest writer John Eden discusses the two forces that are reshaping shipping and logistics:

… technology is not the only force driving change. Regulators are taking a fresh look at the lives of workers in the gig economy, often concluding that many folks classified as independent contractors ought to be treated as employees. As we will see, this is causing a sharp uptick in the creation of small-motor carriers. At the same time, oddly enough, driver scarcity is forcing innovators in the shipping and logistics space to think very hard about how to entice new drivers into the market.

A Tale of Two (other) Transcripts

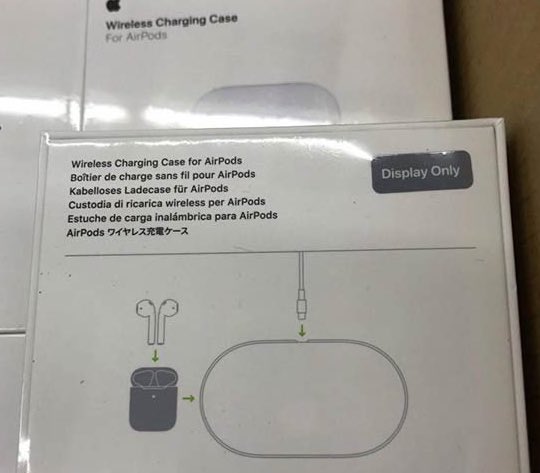
If you missed our other live conference call this week with TechCrunch editor-in-chief Matthew Panzarino on all the announcements out of Apple’s big launch event this week, do be sure to take a read.

We are also trialing a new experiment — using feedback from Extra Crunch members — to transcript some popular Silicon Valley podcasts as a member benefit. This week, we published an episode of ‘This is Your Life in Silicon Valley’ interviewing Oakland mayor Libby Schaaf.

Our next Verified Expert

Eric Eldon published our next Verified Expert attorney, this time Cooley LLP lawyer Mike Lincoln.


Read Full Article

How to Host a WordPress Site on Raspberry Pi


wordpress-host-raspberry-pi

If you want the most hassle-free WordPress experience, a managed WordPress host like WP Engine handles all the setup and support so you can focus on your content. It’s what we use to run our own sister sites.

But if you don’t have any funds, or just want to flex your DIY skills, then you can use a Raspberry Pi for your WordPress site.

Here’s how to set up Apache, MySQL, and PHP on your Raspberry Pi and host websites, both locally and on the web.

Why Use WordPress?

If you’re looking for a way to host a website with the minimum of fuss, WordPress isn’t the obvious solution. We’ve already looked at how to configure the Raspberry Pi to host a static or dynamic website (that is, one that relies on standard, prewritten pages, or a site that uses a database to populate pages).

But if you really need to use WordPress, or you’re developing a theme or plugins for a WordPress site, then having a Raspberry Pi with the blogging platform installed and ready to use is a great option.

Which Raspberry Pi Should You Use?

Raspberry Pi 3 and Raspberry Pi 3B+

To install WordPress on a Raspberry Pi, you’ll need to set it up as a LAMP server. With Linux, Apache, MySQL, and PHP installed, your Pi will then be able to handle WordPress (and other website software).

Several models of Raspberry Pi are available. You might have one, several, or none. But which one is the most suitable for running WordPress?

Happily, any version of the Raspberry Pi can be used to host a WordPress site. However, for the best results, we recommend you use a Raspberry Pi 2 or later. Additionally, ensure you’re using a larger SD card—at least 16GB—as storage space is a key requirement for web servers. (Also consider some external storage for the Pi!)

The rest of this tutorial assumes that your Raspberry Pi is powered on and connected to your local network. You should also have SSH configured, for remote command line access.

Step 1: Set Up Apache Web Server

Start off by installing the Apache web server. This is software that lets you serve any type of webpage to any browser. It’s all you need to serve a HTML page, static or dynamically created with PHP.

sudo apt install apache2 -y

Once installed, Apache will drop a test HTML file into the web folder on your Pi. You should test this from another computer (or smartphone) on your network. You’ll need to enter the IP address of the Pi in the address bar of your browser. If you’re using SSH, you’ll know this already; otherwise, enter:

hostname -I

This displays the IP address of your Raspberry Pi. The page you see should be something like this:

Apache server installed on Raspberry Pi

You can also check the web page works from your Raspberry Pi using the http://localhost address.

Step 2: Install PHP on Raspberry Pi

Next, it’s time to install PHP. This is a software pre-processor that enables the serving of server-generated web pages rather than static HTML pages. While an HTML page might be written in its entirety, a PHP page will feature calls to other pages, and the database, to populate it with content.

While other server-side platforms are available (such as ASP), PHP is vital here as it is required for WordPress because WordPress itself is written in PHP.

Install with:

sudo apt install php -y

Once this is done, you should test that PHP works. Change directory to /var/www/html/ like this:

cd /var/www/html/

Here, delete the index.html file (the web page you viewed earlier):

sudo rm index.html

Next, create a new file called index.php (nano is installed by default):

sudo nano index.php

Here, add any (or all) of the following code:

<?php echo "hello world"; ?>
<?php echo date('Y-m-d H:i:s'); ?>
<?php phpinfo(); ?>

In order, these commands display:

  • The phrase “hello world”
  • The current date and time
  • PHP info for the installation

Save the file, then restart Apache:

sudo service apache2 restart

Refresh the page to see the results.

PHP installed and working on Raspberry Pi

PHP and Apache are both working. Now it’s time to install the database software, MySQL.

Step 3: Install MySQL on Raspberry Pi

WordPress (and other dynamically generated website software) requires a database in order to store the content, links to images, and manage user access (among many other things). This project uses a fork of MySQL called MariaDB:

sudo apt install mysql-server php-mysql -y

Once this is installed, you will once again need to restart Apache:

sudo service apache2 restart

As noted, other database options are available for this type of project. However, for the best results, especially if this is your first time configuring a web server, stick with MySQL.

Step 4: Install WordPress on Raspberry Pi

To install WordPress, you’ll first need to install it. Before doing this, however, delete the contents of the /html/ directory:

cd /var/www/html/
sudo rm *

The asterisk wildcard (*) deletes everything in the directory thanks to the rm (remove) command.

Download WordPress with wget

Next, use wget to download the latest version of WordPress:

sudo wget http://wordpress.org/latest.tar.gz

Once downloaded, extract the contents:

sudo tar xzf latest.tar.gz

The wordpress directory should be created, but you want the contents of it in html. While you might move these manually using the desktop user interface, it’s simple to do this from the command line:

sudo mv wordpress/* .

Be sure to include the space and period at the end, which refer to the current directory!

Enter ls to confirm the directory is full of WordPress folders and PHP files:

Move the contents of the WordPress directory

Before proceeding, tidy things up a bit, discarding the downloaded file and the wordpress directory:

sudo rm -rf wordpress latest.tar.gz

Next, set the Apache user as the owner of the directory:

sudo chown -R www-data: .

Step 5: Configure MySQL

To set up the database, you’ll first need to run the installation command:

sudo mysql_secure_installation

You’ll shortly be prompted to set a root password. Follow the onscreen instructions, making sure you keep a note of the password, as it will be required later.

Once this is one, the following prompts will appear:

  • Remove anonymous users
  • Disallow root login remotely
  • Remove test database and access to it
  • Reload privilege tables now

For each of these, tap Y to confirm. When done, the “All done!” message will be displayed.

Step 6: Create the WordPress Database

To install WordPress, you’ll first need to configure the database. Begin by running the mysql command, entering the password from earlier.

sudo mysql -uroot -p

This opens the MariaDB monitor. At the prompt, create the database:

create database wordpress;

Note how all commands within the MariaDB monitor end with a “;”. Next, the root user needs database privileges. Use your own password in place of PASSWORD.

GRANT ALL PRIVILEGES ON wordpress.* TO 'root'@'localhost' IDENTIFIED BY 'PASSWORD';

Follow this by flushing previous database privileges:

FLUSH PRIVILEGES;

Exit the MariaDB database management tool with Ctrl + D.

Step 7: Install and Configure WordPress

Installing WordPress is simple; if you’ve already done it on an existing website, you should know what to do.

Open the website in your browser (as described above). You should see the WordPress Setup screen. Select your language, then Continue, and make a note of what is required: the database name, username, password, host, and the table prefix (this is for the database tables).

If you made it this far, you should have named the database “wordpress”, and have a note of the password. The Username is root, and the host localhost. The Table Prefix is wp_.

Click Submit, then Run the install, and input the Site Title, along with the Username, and Password for your administrator account. Click Install WordPress, and wait as WordPress is (quickly) set up.

To login to your WordPress installation, go to http://localhost/wp-admin.

Installed WordPress site on a Raspberry Pi

At this stage, you have a site you can start using. Our guide to getting started with WordPress will help here. Don’t forget to choose a theme, and a few useful plugins. You’ll also need a method to access the site from the internet.

Access Your WordPress Site From the Internet

As things stand, you’ll probably only be able to access the site from within your home network. To change this, you’ll need a static IP address, and manage port forwarding from your router to your Raspberry Pi.

Static IP addresses are expensive, however, but you can use a dynamic DNS provider instead. This basically links a custom URL to your Raspberry Pi, although such services are often paid. Check our list of the best dynamic DNS providers for full details.

If you run into problems with blank white pages or a 500 internal server error in WordPress, take a look at our helpful guide.

Host a WordPress Site on Raspberry Pi: Success!

You’re all done now, and a WordPress site is running on your Raspberry Pi. As long as the computer remains powered up, the site will continue to be accessible. The process is straightforward too, requiring you to simply:

  • Install Apache, PHP, and MySQL
  • Download and install WordPress
  • Configure the MySQL database
  • Create your WordPress database
  • Configure WordPress
  • Launch the site and access it locally or via the web

If all of this was a bit overwhelming, we don’t blame you. That’s why we recommend using WP Engine to host WordPress sites with zero hassle. They manage all administrative issues so you can focus on your content.

Keep refining your WordPress knowledge with our guide to featured thumbnails and images sizes in WordPress.

Read the full article: How to Host a WordPress Site on Raspberry Pi


Read Full Article

Want to Learn Basic Coding? Try 5 Bite-Sized Coding Apps in Your Spare Time

Apple Finally Cancels AirPower Wireless Charging Mat

The Best WordPress Hosting Providers


wordpress-hosting

WordPress is the world’s most popular web-based content management system (CMS). It powers more than 30 percent of the internet’s top 10 million sites.

The WordPress software (which you shouldn’t confuse with WordPress.com hosting) is open source, incredibly easy to set up, and entirely free to use. All you need is a domain name and a web hosting plan.

Here are the best WordPress hosting providers.

1. WP Engine

If you have no web administration experience, you should look into managed WordPress Hosting rather than setting up WordPress yourself on shared web hosting.

Typically, managed WordPress hosting is more expensive than shared hosting, but it’s worth it for the extra level of support you receive. If you’re not technically inclined and would rather focus on producing content rather than managing the backend needs of a website, a managed WordPress hosting plan is right for you.

With managed WordPress hosting, the provider manages all the behind-the-scenes stuff, including security, speed optimization, updates, and backups. The security support is perhaps the most important, as it’s easy to overlook when you start a new website.

For managed WordPress hosting, we truly believe WP Engine is the best. The basic Startup plan costs $35/month for 1 site up to 25,000 monthly visits, plus included goodies like the Genesis Framework, 35+ StudioPress themes, staging environments, global CDN, free SSL certificates, and 24/7 chat support.

2. InMotion Hosting

InMotion monthly costs

Unusually, InMotion Hosting offers six dedicated WordPress hosting plans. Most companies only offer a couple.

The cheapest plan is WP-1000S. It will set you back $8.99/month and is suitable for up to 20,000 monthly visitors. It includes unlimited bandwidth, unlimited email accounts, and 40GB of SSD storage space.

At the other end of the scale is the WP-6000S plan. It costs $119.99/month and is suitable for up to 1.2 million monthly page views.

The three most expensive plans all include a dedicated IP address and a free subscription to Jetpack Professional. (Get up to 50% off using this link!)

Regardless of which plan you choose, WordPress comes preinstalled; you won’t need to fiddle with third-party installers. You can also decide whether you want to optimize your site for traffic from either the eastern or western hemisphere.

InMotion’s uptime runs at 99.97 percent. Its average load time is 752ms.

3. Bluehost

Bluehost monthly costs

Bluehost is arguably the most recognizable name in the world of WordPress web hosting; the company has been around since 1996. Indeed, WordPress actively recommends Bluehost on its site and has done since 2005. We’ve also covered how to start using Bluehost.

If you’re creating a website for the first time, you probably won’t have much traffic to start with. In that case, the company’s shared hosting plan will suffice. It offers 50GB of space, unmetered bandwidth, and five email accounts. Bluehost has an average uptime of >99.99 percent and average load times of 419ms.

The plan costs $7.99/month. However, significant discounts are available for new customers, making it one of the cheapest WordPress hosting plans. (Get up to 63% off using this link!)

If you need something with a bit more power, check out the VPS (virtual private server) plans. For $19.99/month, you get 2GB of RAM, 30GB of SSD storage, two cores, and free SSL.

4. WordPlus

WordPlus homepage

None of the big companies offer free WordPress hosting, but that doesn’t mean there aren’t free web hosting services out there.

Of course, you could just head to WordPress.com. Its servers are powerful enough to handle any traffic you throw at it. But there are some trade-offs—for example, you can only install your own plugins and run Jetpack if you pay a monthly fee. The free version is limited to 3GB of space, and you cannot display your own ads.

Instead, check out WordPlus. The free flavor gives you 128MB of SSD space, unlimited bandwidth, free SSL, free CDN, and access to cPanel. You can also use all WordPress’ best plugins.

If that doesn’t cover your needs, other popular free WordPress hosting providers include 000webhost, HostAwesome, and Byet. The four providers all have very different features and capabilities, so make sure you do your research before choosing.

5. SiteGround

SiteGround monthly costs

If you’d like a managed WordPress hosting plan that isn’t WP Engine for whatever reason, check out SiteGround. With 99.98 percent uptime and a load time of 722ms, it’s one of the best performing hosts out there.

Its cheapest managed WordPress hosting plan—called StartUp—costs $11.95/month and is suitable for 10,000 monthly visits and offers 10GB of space.

However, while SiteGround is great for small sites, you may eventually outgrow it. If you plan for your site to make it big in the future and you want to avoid the hassle of migrating, you may want to start with a more scalable hosting provider from the get-go.

6. A2 Hosting

A2 hosting monthly costs

A2 Hosting is a company I can personally vouch for. I use it to host four websites and have never had any issues.

When I first migrated to A2 Hosting from my previous provider, the company was quick to resolve technical issues that arose from the transfer, even though it later transpired that the problems were caused by the old host and were not of A2’s making.

Since then, every time I have opened a support ticket, A2 has responded quickly and accurately. I’ve lost track of the number of times the reps on the company’s 24/7 live chat have solved my issues in the middle of the night.

Regarding plans, A2 offers shared hosting, VPS hosting, and dedicated hosting. The entry-level shared hosting plan includes 25 email addresses, a 2.1 GHz core, five databases, and a server with a guaranteed 64GB of RAM. Regardless of which plan you pick, you can easily install WordPress using Softaculous.

Interestingly, A2 Hosting has compiled two of its own WordPress plugins that are worth using. A2 Fixed W3 Total Cache is a tweaked version of the popular W3 Total Cache plugin, while A2 Optimized WP offers performance improvements such as minifying files and pages, GZIP compression, image compression, and security improvements.

Finally, with an uptime of 99.90 percent and an average load time of 413ms, A2 Hosting is unquestionably one of the best WordPress hosting providers out there.

7. GoDaddy

godaddy monthly costs

Another managed WordPress hosting provider worth considering is GoDaddy.

The company is more commonly associated with domain names rather than hosting plans, but its managed plan can comfortably compete with other companies’ offerings on both price and features.

The cheapest GoDaddy WordPress hosting plan costs $8.99/month. It is suitable for up to 25,000 visitors/month. It offers 10GB of storage and 99.99 percent uptime.

Because the plan is managed, you can expect nightly backups, automatic malware scanning and removal, a staging environment to test changes, and automatic DDoS protection.

8. HostGator

Hostgator monthly costs

Our final recommendation is HostGator. Like Bluehost, it’s a well-established name in the industry and supports more than 10 million sites.

The entry-level cloud plan $9.95/month. You will get two CPU cores, 2GB of RAM, free SSL, and unlimited bandwidth and storage. It can handle 100,000 visits/month.

If you need more power, check out the Business plan instead. For $22.95/month, you will get 6GB of RAM, six CPU cores, and a dedicated IP address. You can also have an unlimited number of parked domains. It’s suitable for 500,000 visits/month.

Lastly, HostGator has some of the most impressive performance stats in this list. It boasts an uptime of 99.96 percent and a load time of 462ms.

9. Kinsta

Kinsta app dashbaord

Kinsta offers managed WordPress hosting on the Google Cloud Platform.

Some of its best features include a free content delivery network from KeyCDN, free SSL certificates through Let’s Encrypt, HTTPS support, a daily backup service, and SSH support for sysadmin tasks.

And if you’re migrating an existing site from an old provider, you don’t need to worry. Kinsta offers a free migration service for new accounts.

Several plans are available. The cheapest is the Starter package. It costs $30/month. If you need a bit more power, consider buying the Pro plan for $60/month.

We have reviewed Kinsta in detail if you would like to learn more.

Making the Right WordPress Hosting Choice

The world of WordPress hosting is a competitive place. There is not a great deal of difference between any of the mainstream providers; they all offer similar features for a similar price.

The biggest decision you need to make is whether to buy managed WordPress hosting or regular hosting. Your level of technical expertise and willingness to learn should guide your thought process.

When in doubt, managed WordPress hosting is the way to go to minimize headaches. That’s why we recommend WP Engine, which we use ourselves to run our sister sites.

Read the full article: The Best WordPress Hosting Providers


Read Full Article

How to Manage Years of Browser Bookmarks: 5 Steps to Tidiness


If you’ve used the web for any amount of time, you’ve probably built up a huge collection of bookmarks. It’s easy to fill up your bookmarks bar with your most-visited sites, and before long you’ll have an overflowing list of favorite pages that are impossible to navigate.

Now is the time to sit down and make your bookmarks more manageable. Let’s look at a process containing tools and tips to clean up, organize, and manage your bookmarks so they’re no longer a nightmare.

Step 1: Remove Dead and Duplicate Bookmarks

There’s not much point keeping bookmarks to dead links or two links that go to the same page. Over time, pages break, get redirected, or disappear entirely. Before you worry about managing anything, first clean up the clutter.

A free tool for Windows called AM-DeadLink will help here. It scans all your bookmarks and lets you know which ones are dead, redirected, and similar. The tool is compatible with Chrome, Firefox, Opera, Vivaldi, and Internet Explorer. To check Edge or other bookmarks, you can either export them to an HTML file or import them into a supported browser.

Open the software and select your browser from the dropdown at the top-left. You’ll see a list of your bookmarks, with the total number at the bottom. Click the green Check button to scan for broken links. Because it needs to check the connection to each website, this can take a few minutes if you have thousands of bookmarks.

AM Deadlink Bookmark Checker

Once it’s done, you’ll see the Status of each bookmark. OK means it’s all-clear, while redirected, OK means the link is still alive but it’s moved. You may want to replace that bookmark link with the latest URL for optimal performance.

The error, redirected, file not found and other red fields represent dead links. For ease of checking, you can click the Sort button (next to the red Abort button) to show all broken links at the top. Next to this is a duplicate checker that will scan for duplicates.

Unfortunately, AM-DeadLink won’t delete any bookmarks for you. You’ll need to perform any needed work manually.

Finally, if you find that an important link is now broken, you can use the Wayback Machine to see what it looked like in the past. Just enter the URL and you can (hopefully) travel back in time.

Step 2: Sync Your Bookmarks

There’s no reason to rebuild your bookmarks collection from scratch on all your devices. All major browsers have built-in syncing features that let you access your favorites on other computers and your phone.

To use them, follow these basic steps for the most popular browsers:

  • Chrome: Open Chrome’s Settings and sign into your Google account using the People pane at the top of the screen if you aren’t already. Make sure you’ve chosen to sync bookmarks in the Sync menu, then sign into your Google account in Chrome on your other devices.
  • Firefox: Go to Firefox’s Options and choose Firefox Account. Sign in, make sure you’ve synced your Bookmarks, then do the same on your other devices. See our guide to Firefox Sync for more info.
  • Opera: Open Settings and browse to the Synchronization section. Here, sign in with an Opera account and choose to sync your bookmarks. Then sign in on your other devices.

Chrome Sync Overview

Step 3: Back Up and Import Bookmarks

Xmarks was a popular service for syncing your bookmarks between browsers. While it shut down in 2018, it’s not as necessary any more thanks to the syncing features mentioned above. (We have checked out Xmarks alternatives in case you still need this functionality.)

However, you can still manually export and import bookmarks to move them between browsers. Doing so also lets you back up your bookmarks to an HTML file. This is important because syncing services aren’t proper backups.

Even if you don’t want to move bookmarks to another browser, you should take a moment to export them. Keep the resulting HTML file somewhere safe so you can restore your bookmarks if something ever goes wrong.

Here’s how to export and import bookmarks in the major browsers:

  • Chrome Go to Menu > Bookmarks > Bookmark manager or use the Ctrl + Shift + O shortcut. At the top-right, click the three-dot button and choose Export bookmarks to save them as an HTML file. Import bookmarks will allow you to bring in an HTML file exported from another browser.
  • Firefox: Open Menu > Library > Bookmarks > Show all bookmarks or press Ctrl + Shift + B. Click the Important and Backup and choose Export bookmarks to HTML or Import bookmarks from HTML. The Backup and Restore options let you work with JSON files instead.
  • Opera: Click Bookmarks on the sidebar, then hit the Import/Export button. Here you can both import and export via HTML files.
  • Edge: Visit Menu > Settings and click the Import or export button.
  • Internet Explorer: Click the Star icon at the top-right to open Favorites, then click the arrow next to Add to favorites to open a dropdown menu. Here, choose Import and export and follow the steps.

Firefox Bookmarks Backup

Step 4: Put Your Favorite Icons on the Bookmarks Bar

Now that you’ve gotten rid of clutter and backed up your bookmarks, you can move onto the fun part: making them actually useful.

The bookmarks toolbar is the most convenient place for the bookmarks you use all the time, so it makes sense to optimize it. Use your browser’s bookmark manager (or drag-and-drop) to place your favorite bookmarks on the bar.

From there, you can utilize a little tip: deleting the Name field will keep only the favicon and allow you to store more icons on your bookmarks bar.

Bookmarks Toolbar Icons

If you have bookmarks to several pages on one website, you can add one letter to each to differentiate them without taking up too much space. Those who need access to even more bookmarks can create folders on the bookmarks toolbar.

Step 5: Organize and Tag the Rest of Your Bookmarks

Once you have quick access to your top sites, the rest of the work lies in organizing them. How you do this depends on what you find most useful, but in general, you should make good use of folders.

You could create a hierarchy of folders for the different kinds of sites you bookmark. Maybe you keep everything related to music in one folder, pages related to news in another folder, and similar. Don’t forget that you can nest folders inside folders, so you could divide by music genres, for example.

In Firefox, you can also use tags to further categorize your bookmarks. Because a bookmark can have multiple tags, you can easily browse the tags for all related pages. It’s a great tool if you want to get really granular.

Firefox Bookmark Tags

By the way, don’t forget that services like Pocket can be better than creating bookmarks for every site you want to check out. Use Pocket for storing interesting content for later and reserve bookmarks for sites you’ve visited and want to find again in the future.

Cleaner Bookmarks = Cleaner Browsing

We’ve gone through several practical steps to organize your browser bookmarks. After cleaning up dead links and those you no longer use, syncing them to other devices and backing them up, and organizing them, your bookmarks list will no longer be a horrific sight.

After all, the feature is all about providing easy access to the sites you love, so you should make sure your setup works for you. For an even deeper dive, check out our guide to managing bookmarks in Firefox.

Read the full article: How to Manage Years of Browser Bookmarks: 5 Steps to Tidiness


Read Full Article

Canon Reveals IVY CLIQ+ and CLIQ Instant-Print Cameras


Canon has just unveiled two new instant digital cameras, the CLIQ and CLIQ+, which goes along with the trend of instant-print digital cameras making a comeback.

The company’s take on instant cameras seems quite cool, and both models have some solid features that make them stand out in the crowded instant camera space. They also come in with very reasonable price tags, making them accessible for anyone.

The two cameras are Canon’s followup to the IVY printer, which had similar printing features but lacked the ability to take photos directly on the device.

Canon IVY CLIQ and CLIQ+ Features

Both cameras feature relatively low resolutions in terms of megapixels, which makes sense, as they’re targeted at buyers looking for quick prints, not high-resolution digital photos. The CLIQ features a five-megapixel lens, while the more expensive CLIQ+ comes with an eight-megapixel camera.

Using the Ivy application, photographers can add borders, filters, and text to their images before they print them. However, only the CLIQ+ has support for Bluetooth, so you’ll need to get the more expensive camera if you want to take advantage of this feature.

Another characteristic of the CLIQ+ is a selfie mirror with LED lights that’ll help create the best selfie photos possible. The cheaper CLIQ also features a selfie mirror, but it lacks the built-in LED lights.

Both cameras are able to print either 2×2 or 2×3 photos using ZINK Zero Ink Technology. With this type of printer, the ink is actually in the paper, meaning there’s no need to install and change ink cartridges on the camera/printer.

An important thing to note is that neither camera features a screen for reviewing images, so with the CLIQ, you’ll be printing them blindly unless you use the SD card to transfer them to a PC before printing.

Canon IVY Devices Price and Release Date

Canon intends to release both cameras sometime in April of this year. The company says the suggested retail price of the CLIQ will be $99.99, and the CLIQ+ will sell for $159.99. Both models include 10 sheets of 2×3 photo paper to get you started.

Of course, an instant camera isn’t for everyone, which is why you should check out our article on why you should go with a mirrorless camera over a DSLR.

Read the full article: Canon Reveals IVY CLIQ+ and CLIQ Instant-Print Cameras


Read Full Article

The Best Smartphone Camera: Google Pixel, Apple iPhone, OnePlus, and More

Remote workers and nomads represent the next tech hub


Amid calls for a dozen different global cities to replace Silicon Valley — Austin, Beijing, London, New York — nobody has yet nominated “nowhere.” But it’s now a possibility.

There are two trends to unpack here. The first is startups that are fully, or almost fully, remote, with employees distributed around the world. There’s a growing list of significant companies in this category: Automattic, Buffer, GitLab, Invision, Toptal and Zapier all have from 100 to nearly 1,000 remote employees.

The second trend is nomadic founders with no fixed location. For a generation of founders, moving to Silicon Valley was de rigueur. Later, the emergence of accelerators and investors worldwide allowed a wider range of potential home bases. But now there’s a third wave: a culture of traveling with its own, growing support networks and best practices.

You don’t have to look far to find startup gurus and VCs who strongly advise against being remote, much less a nomad. The basic reasoning is simple: Not having a location doesn’t add anything, so why do it? Startups are fragile, so it’s best to avoid any work practice that could disrupt delicate growth cycles.


Read Full Article

Apple sells wireless charging AirPods, cancels charger days later


“Works with AirPower mat”. Apparently not. Looks like Apple doesn’t treat customers with the same “high standard” of care it apparently reserves for its hardware quality. 9 days after launching its $199 wireless charging AirPods headphones touting compatibility with the forthcoming Apple AirPower inductive charger mat, Apple has just scrapped AirPower entirely. It’s an uncharacteristically sloppy move for the “it just works” company. This time it didn’t.

Apple clearly knew AirPower was borked before launching the new AirPods wireless charging case on March 20th. Failing to be transparent about that is an abuse of customer trust. That’s especially damaging for a company constantly asking us to pre-order new products and that’s known for planned obsolescence. It should really find some way to make it up to people, especially given it has $245 billion in cash on hand.

TechCrunch broke the news of AirPower’s demise. “After much effort, we’ve concluded AirPower will not achieve our high standards and we have cancelled the project. We apologize to those customers who were looking forward to this launch. We continue to believe that the future is wireless and are committed to push the wireless experience forward,” said Dan Riccio, Apple’s senior vice president of Hardware Engineering in an emailed statement today.

That comes as a pretty sour surprise for people who bought the $199 wireless charging AirPods that mention AirPower compatability or the $79 standalone charging case with a full-on diagram of how to use AirPower drawn on the box.

Apple first announced the AirPower mat in 2017 saying it would arrive the next year along with a wireless charging case for AirPods. But when the new AirPods launched March 20th with no mention of AirPower in the press release, suspicions mounted. Now we know Apple was concerned about devices overheating, so it decided not to ship what could become the next Galaxy Note 7 fire hazard.

The new AirPods with wireless charging case even had a diagram of AirPower on the box. Image via Ryan Jones

There are plenty of other charging mats that work with AirPods, and maybe Apple will release a future iPhone or MacBook that can wireleslly pass power to the pods. But anyone hoping to avoid janky third-party brands and keep it in the Apple family is out of luck for now.

Luckily, some who bought the new AirPods with wireless charging case are still eligible for a refund. But if you got yours personalized with an engraving (I had my phone number laser-etched on since I constantly lose them), there are no refunds allowed. And then there are all the people who bought Apple Watches, or iPhone 8 or later models who were anxiously awaiting AirPower. We’ve asked Apple if it will grant any return exceptions.

Combined with the disastrously fragile keyboards on new MacBooks and Apple’s recent vaporware services event where it announced Apple Card, TV+, and Arcade despite them being months from launch, the world’s cash-richest company looks like a mess. Apple risks looking us unreliable as Android if it can’t get its act together.


Read Full Article