27 June 2019

Daily Crunch: Reddit quarantines Trump-focused community


It’s NEWSLETTER TIME get pumped! I know I am – it’s my first Daily Crunch in over a year. That’s right, your friendly neighborhood Anthony Ha is otherwise occupied today so I’m back to deliver this baby to you, devoted readers. And there’s news: Plenty o’ News.

1. Reddit puts r/The_Donald in a corner

Reddit has long had an uncomfortable relationship with one of its communities, a subreddit called r/The_Donald which focuses on all things related to the current U.S. President (still seems like a totally crazy thing to say).

quarantined

The so-called ‘front page of the Internet’ has finally had enough – or at least, the stage before truly ‘enough.’ It’s quarantined r/The_Donald, meaning that its content won’t ooze beyond the community into the rest of Reddit’s multi-community surfaces. So you have to choose to wallow in that filth, going in eyes wide open.

2. Apple makes a key chip talent hire

Apple loves using its own chips in its products, and keeps adding more chips all the time to handle things like on-device security and wireless connections with accessories. Now it’s brought on a leading ARM chip designer, which is obviously fuelling speculation that Apple could replace Intel with its own ARM-based processors to power next-generation Macs.

3. Live stream selling app expands to in-person sales

NTWRK is a weird hybrid of QVC and HQ Trivia, with people selling you stuff via live stream. The app is now expanding into physical events, which I guess will resemble flash sales mixed crossed with concerts?

4. Station F is launching a co-living space for startups

Station F is a gigantic co-working space in Paris that seemed like an unlikely proposition when it was first revealed. It got made and has been operating for years now, however. So maybe there’s a chance that its new ‘Flatmates’ co-living space, which can house up to 600 people in shared apartment arrangements, can do the same.

5. Amazon debuts counter pick-up at Rite Aid

Amazon is introducing a new counter pick-up service for packages at stores in the U.S, starting with 100 Rite Aid locations. Amazon has hollowed out the bodies of its retail hosts and is now parasitically using their corpses to propagate.

6. TripActions raises $250M and is now valued at $4B

That’s four unicorns stacked atop one another, if you’re counting. TripActions is an enterprise booking platform, which is big business, and if it’s at all an improvement over the various legacy ones I’ve used over the years, then it’s probably worth that high value assessment.

7. Volkswagen launches all-electric car sharing

A car sharing network made up of only electric vehicles?! Now there’s one from Volkswagen, called WeShare. It’s only live in Berlin as of today, and it probably isn’t destined for U.S. shores anytime soon, but it’s definitely a sign of the times.


Read Full Article

Chronicle, X’s security moonshot, moves to Google Cloud


Google Cloud today announced that Chronicle, the enterprise security company Google’s parent company Alphabet incubated under its X “moonshot factory,” is moving to Google Cloud and becoming part of Google’s security portfolio.

Chronicle officially launched out of X in January 2018, when it became an independent company under the Alphabet umbrella. Stephen Gillett, who was previously the COO of security company Symantec, became its CEO.

Spinning out Chronicle instead of bringing it to Google Cloud always seemed like an odd move. It was likely meant to see if its products, including malware and virus scanning service VirusTotal and its enterprise security intelligence and analytics platform, could stand on their own. It’s unclear how well Chronicle did in the market, but given Google’s focus on growing its cloud business, it seems like a logical move to now integrate Chronicle into Google Cloud.

“Chronicle’s products and engineering team complement what Google Cloud offers,” Google Cloud CEO Thomas Kurian writes today, “Chronicle’s VirusTotal malware intelligence services will be a powerful addition to the pool of threat data informing Google Cloud offerings, and will continue to support applications running on our platforms.”

He also notes that the team saw that both Chronicle and Google Cloud were already on a trajectory that saw them converge on the same kind of solutions.

He expects to see a full integration of Chronicle’s security tools into Google Cloud by this fall.


Read Full Article

Google Maps can now predict how crowded your bus or train will be


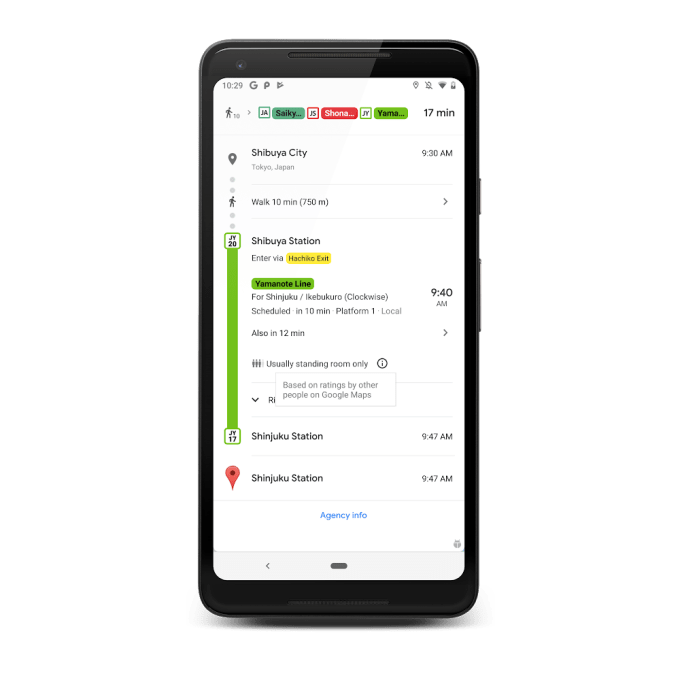
Google Maps just got a lot more useful for commuters. The company today announced a pair of updates for its mapping application — one that will offer live traffic delays for buses in the cities where it didn’t already provide real-time updates, and another that will tell you how crowded your bus, train, or subway car will be.

The latter is perhaps the more interesting of the two, as it represents a new prediction technique Google has been perfecting for over half a year. Starting in October, the company began to ask Google Maps users to rate their journey if they had traveled during peak commuting hours of 6 am to 10 am. Google asked about how many seats were available or if it was standing room only, in order to identify which lines had the highest number of crowdedness reports.

tokyo crowdedness framed.max 1000x1000

Over time, it was able to model this data into a new prediction capability designed to tell transit riders how packed their bus or train would be.

It also used this data to create rankings of the most crowded routes and stops around the world.

Buenos Aires and Sao Paulo dominated the rankings for the most-crowded transit lines, as each city had 3 lines in the top 10. Meanwhile, New York’s L train is the only one in the U.S. to rank in the top 10.

This isn’t the first time Google has used its massive Maps footprint to make predictions about crowds. The company had already introduced similar features for predicting the size of the crowd at restaurants and other retail locations.

In addition, Google today expanded its ability to alert bus riders to delays.

ETTs

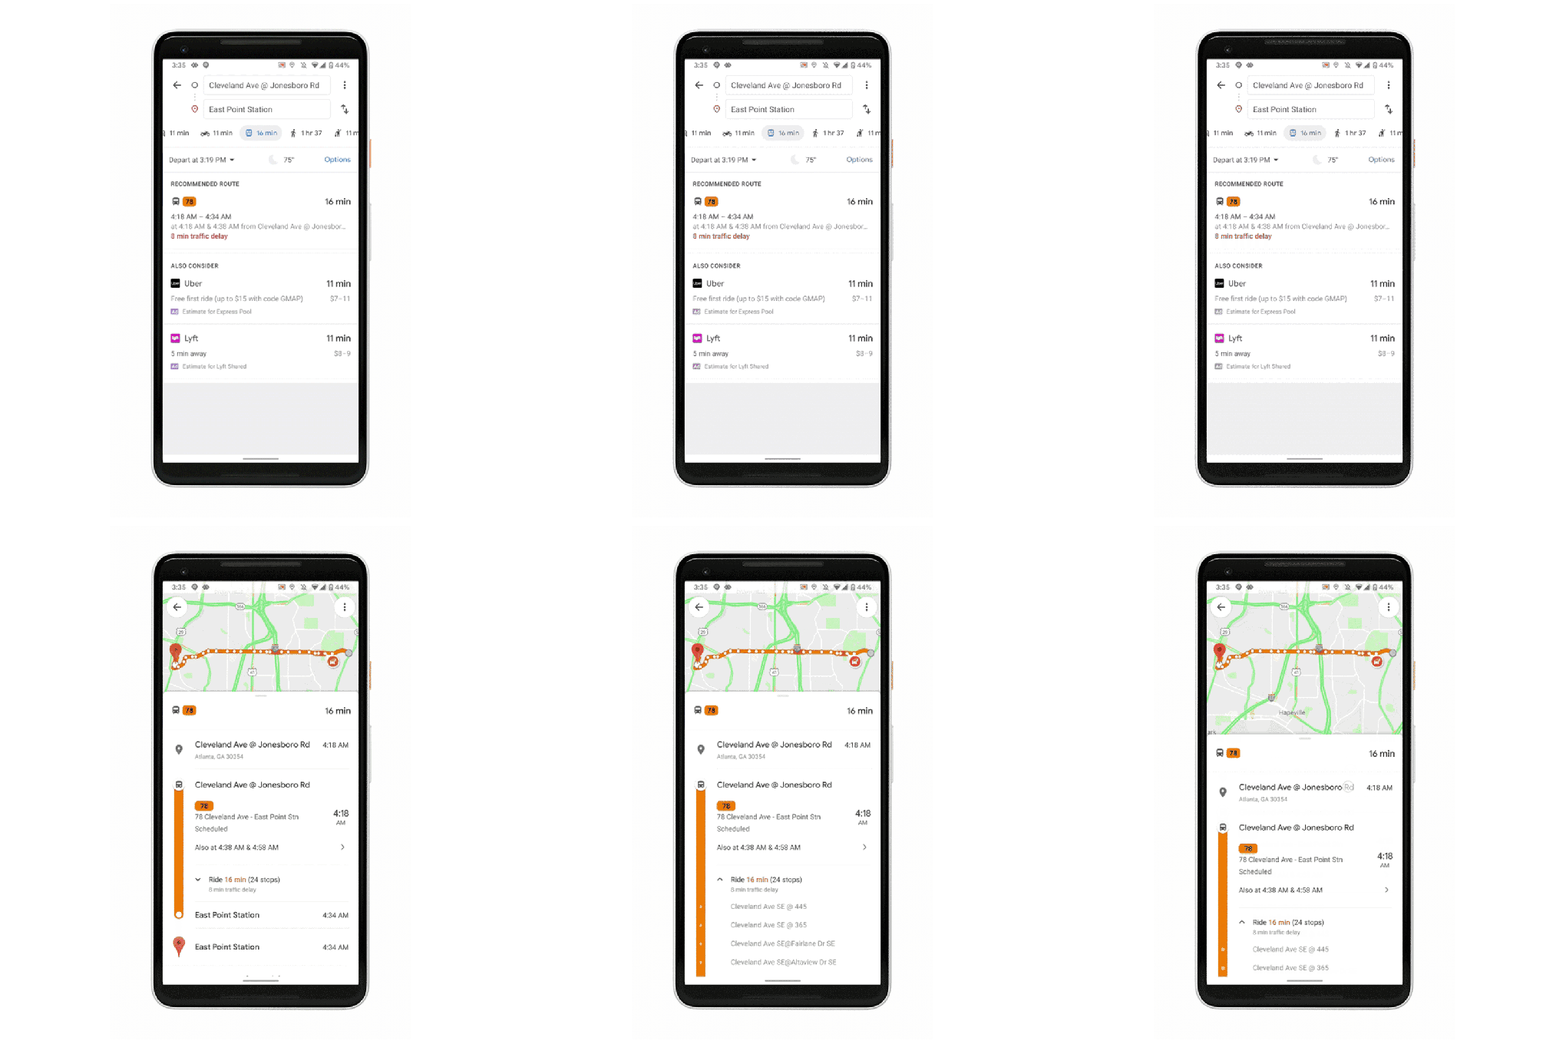
In December 2017, the company began offering real-time information provided by local transit agencies to transit riders. But this data wasn’t available in all cities. To address the problem, Google is launching live traffic delays in those markets where the information has been lacking — like Atlanta, GA.

To make its predictions, Google is combining the bus route details with the data it’s collecting from users who have consented to anonymized data sharing. This is the same data collection mechanism it uses to predict the crowds at local businesses today. Essentially, the company is turning Google Maps into a powerful tool to understand the movement of people in the world. But many users may not know they’ve been opted into this data-sharing by default. In fact, they probably will think the transit data is coming from the city — not from the app installed on their phone and millions of others.

In any event, users will now be able to see the bus delays, how long the delay will be, and adjusted travel times based on these live conditions.

Google says the new features are rolling out on Google Maps in nearly 200 cities worldwide on both Android and iOS today.


Read Full Article

Mozilla previews a redesigned and faster Firefox for Android


Mozilla today announced the first preview of a redesigned version of Firefox for Android that promises to be up to two times faster. The new version also introduces an easier to use and rather minimalist user interface, as well as support for collections, Mozilla’s new take on bookmarks. The new browser also features Firefox’s tracking protection, which is on by default. Over time, this preview will become the default Firefox for Android.

A few years ago, with Quantum, the Firefox team make a number of under-the-hood improvements to the browser’s core backend technologies. Now, it is doing something similar with GeckoView, Mozilla’s browser engine for Android. Implementing the technology the team developed for this in the browser now “paves the way for a complete makeover of the mobile Firefox experience,” the organization writes in today’s announcement.

“While all other major Android browsers today are based on Blink and therefore reflective of Google’s decisions about mobile, Firefox’s GeckoView engine ensures us and our users independence,” says the Firefox team. “Building Firefox for Android on GeckoView also results in greater flexibility in terms of the types of privacy and security features we can offer our mobile users.”

An early version of Firefox with GeckoView is now available for testing on Android under the Firefox Preview moniker. Mozilla notes that the user experience will sill change quite a bit before it is final.

Screenshot 20190627 081245When you first launch it, Preview opens up a new default experience that lets you sign in to a Firefox account, decide on whether you want a light or dark theme (or have the system switch automatically depending on the time of day), turn on privacy features and more.

One feature I really appreciate is that, by default, the preview puts the URL bar at the bottom of the screen, so that it’s within easy reach of your thumb. If you swipe up on the URL bar, you get both a share and bookmark icon, too. That takes some getting used to but quickly becomes second nature.

I haven’t run any formal benchmarks, but the preview definitely feels significantly snappier and smoother than any previews Firefox version on Android, up to the point where I wouldn’t hesitate to make it my default browser on mobile, especially given its built-in privacy features. I haven’t run into any hard crashes so far either, but this is obviously a beta version, so your mileage may vary.

For the rest of the year, the team will focus on optimizing the preview for all Android devices, but for now, it’s already worth a look if you’re looking to play with a new mobile browser on your Android device and not afraid of the occasional bug.

image004


Read Full Article

We’re talking Kubernetes at TC Sessions: Enterprise with Google’s Aparna Sinha and VMware’s Craig McLuckie


Over the past five years, Kubernetes has grown from a project inside of Google to an open source powerhouse with an ecosystem of products and services, attracting billions of dollars in venture investment. In fact, we’ve already seen some successful exits, including one from one of our panelists.

On September 5th at TC Sessions: Enterprise, we’re going to be discussing the rise of Kubernetes with two industry veterans. For starters we have Aparna Sinha, director of product management for Kubernetes and the newly announced Anthos product. Sinha was in charge of several early Kubernetes releases and has worked on the Kubernetes team at Google since 2016. Prior to joining Google, she had 15 years experience in enterprise software settings.

Craig McLuckie will also be joining the conversation. He’s one of the original developers of Kubernetes at Google. He went on to found his own Kubernetes startup, Heptio, with Joe Beda, another Google Kubernetes alum. They sold the company to VMware last year for $505 million after raising $33.5 million, according to Crunchbase data.

The two bring a vast reservoir of knowledge and will be discussing the history of Kubernetes, why Google decided to open source it and how it came to grow so quickly. Two other Kubernetes luminaries will be joining them. We’ll have more about them in another post soon.

Kubernetes is a container orchestration engine. Instead of developing large monolithic applications that sit on virtual machines, containers run a small part of the application. As the components get smaller, it requires an orchestration layer to deliver the containers when needed and make them go away when they are not longer required. Kubernetes acts as the orchestra leader.

As Kubernetes, containerization and the cloud-native ethos it encompasses has grown, it has helped drive the enterprise shift to the cloud in general. If you can write your code once, and use it in the cloud or on prem, it means you don’t have to manage applications using different tool sets and that has had broad appeal for enterprises making the shift to the cloud.

TC Sessions: Enterprise (September 5 at San Francisco’s Yerba Buena Center) will take on the big challenges and promise facing enterprise companies today. TechCrunch’s editors will bring to the stage founders and leaders from established and emerging companies to address rising questions, like the promised revolution from machine learning and AI, intelligent marketing automation and the inevitability of the cloud, as well as the outer reaches of technology, like quantum computing and blockchain.

Tickets are now available for purchase on our website at the early-bird rate of $395; student tickets are just $245.

Student tickets are just $245 – grab them here.

We have a limited number of Startup Demo Packages available for $2,000, which includes four tickets to attend the event.

For each ticket purchased for TC Sessions: Enterprise, you will also be registered for a complimentary Expo Only pass to TechCrunch Disrupt SF on October 2-4.


Read Full Article

Denver and Providence are next up for Verizon’s 5G roll out


There’s going to be a point in the not so distant future when the addition of new 5G cities won’t be news. After several years of hype, however, we’re still not quite there. The 5G picture is set to be quite different by year’s end, but for now, the big network war is one of inches.

Verizon (our boss’s boss’s boss) is flipping the switch in Denver today. The mile-high city is going ultra wideband this week, followed by Providence, Rhode Island on Monday July 1.

As for the devices that can actually access those speeds — that, too, is fairly limited. The list currently includes the LG V50, the Moto Z (plus 5G mod) and Samsung Galaxy S10 5G. That scant three puts the company in contention for most 5G handsets at the moment.

The addition of Providence and Denver brings the list up to four, along with Chicago and Minneapolis. Verizon is promising a full 30 cities by year’s end. The carrier says subscribers can expect spreads to top out at around 1.5 Gbps, with average download speeds at around 450 Mbps.

Coverage will be consented in specific neighborhoods from the sound of it, meaning handsets will likely jump back and forth between 5G and LTE. Here are the specifics on that,

In Denver, Verizon 5G Ultra Wideband service will initially be concentrated in areas of Highlands, South of 37th between Tejon and Navajo Streets. Coverage can also be found throughout LoDo and around Coors Field. Businesses and consumers will also have 5G Ultra Wideband service in the Central Business District around popular landmarks like the Denver Center for the Performing Arts, Sculpture Park, and outside Paramount Theatre. Areas of Capitol Hill and Northern Sections of The Denver Tech Center will also have Verizon 5G Ultra Wideband service.
In Providence, Verizon business and consumer customers will initially see 5G Ultra Wideband service in parts of College Hill, Federal Hill, Mt. Hope, and around landmarks like Brown University (Erickson Athletic Complex, Wriston Quadrangle), Rhode Island School of Design and Providence College.


Read Full Article

How to Use Evernote’s Secrets to Remember Everything


evernote-secrets

When Evernote founder Stepan Pachikov first launched the note-taking app, it’s aim was to help us “Remember Everything”. With over 225 million users worldwide, it’s a modern problem that needed solving, and Evernote’s doing a good job.

However, I recently caught myself flicking through my older Evernote notes. Some were only a year or two old, but I could barely remember saving them. There were heavily highlighted articles I couldn’t recall reading, and notes from books I’d forgotten I’d ever read.

The Problem: Memory and Recall

So much time had gone into consuming and meticulously organizing information, yet I retained close to none of it.

So, I found a simple workaround that you can easily replicate. The two immediate benefits of this Evernote workflow are:

  1. The most important information will stay on top of your mind.
  2. You won’t waste time on interesting and important information, only to forget it soon after.

Interested? Follow these steps, and you’ll have the same system set up in no time. All you need is an Evernote account, a to-do list, app or calendar that can send you recurring reminders.

1. Create a Tag For Content You Want to Revisit

The first thing to do is to create a new tag so you can label your important content, and then easily find it again.

For this purpose, tags are better than notebooks, because you can label content without needing to actually move it around within your Evernote account.

To create a new tag, open Evernote. In the left hand menu, select Tags > New Tag, and give the new tag a relevant name such as “Content Revisit”, and hit Enter.

Evernote New Tag

2. Save The Tag as a Shortcut

Now click and drag your new tag into the shortcuts section of the left-hand menu. This way it’ll just take a single click to get straight to the notes you need to revisit.

3. Tag Your Important Notes

Now for the time-consuming part (depending on how many notes you have in your account). Go through your Evernote notes, and tag the important ones—those you’d like to regularly revisit—with your new tag.

Tagging in Evernote

As you can see above, adding my own Content Revisit tag fits in seamlessly with my existing tagged and organized Evernote taxonomy which I’ve written about before.

When working your way through your notes, use your new tag only for the most important notes you’ve saved. You’re unlikely to need to revisit receipts and photocopies of documents you’ve saved, so don’t waste your new tag on these. You do not want to be overwhelmed with the number of notes you need to revisit.

Although this may take a while, you only have to do this once. After this step, whenever you add a new note to Evernote that you deem important enough, tag it with your revisit tag there and then. Before long, this will become a habit, and keeping on top of your new system will take no time at all.

4. Set a Reminder to Revisit Your Notes

You now need to make sure you actually revisit these important notes. The best way to do this is to set a reminder, so you can make it a part of your schedule.

Evernote does have a built-in reminder feature for Premium users, but this only works for individual tags, so it’s not useful in this scenario.

Instead, if you use a to-do list app that has a “reminder” feature for recurring tasks, create a recurring task for revisiting your Evernote notes. I use Todoist for this, but there are plenty of other To-do list apps out there

Todoist recurring tasks

If you don’t use a to-do list app, set up a recurring event on your calendar to repeat, every day, week, or every month, for example.

Google Calendar Recurring Event

Whichever method you use, make sure that you will actually see these notifications, so you’re prompted to actually revisit your notes!

5. Start Revisiting Your Notes

When it comes time to revisit your Evernote notes, all you have to do is open Evernote, click on your Content Revisit shortcut, then sort your notes By Date Edited > Least Recent to Most Recent.

Sorting Evernote Notes

Sorting your notes by least recent to most recent means the articles you’ve not revisited in the longest time will appear at the top of your revisit list.

Now, start working your way through your important notes one at a time, starting at the top of the list.

How you do this is up to you. Read them in full. Skim over them. Read the highlights. You don’t need to go through all your notes in one go. You might choose to revisit just one note per day. Maybe 10 minutes per week. Or 20 minutes per month. Whatever works for you.

At this point, I’d recommend adding today’s date to the top of each note after you’ve revisited it. Making a small edit like this ensures Evernote will sort the notes correctly next time around. When you move on to the next note, the note you previously revisited will automatically move to the bottom of the list ready to be revisited again in the future.

If you come across a note you no longer need to revisit, remove the Content Revisit tag. If a note is completely obsolete, delete it.

6. Rinse and Repeat

It’s as simple as that. By keeping on top of this simple routine, and developing it as a habit, all that important and insightful content you’ve been saving will stay top of your mind far more than it would otherwise.

An Alternative Option

There is another solution that works pretty well, too. RandomNote is a free web app that displays a random note from a specific notebook in your Evernote account.

If you decided to save all of the notes you want to revisit into a separate Notebook (which, as I’ve mentioned, has drawbacks) this could be pretty useful. However, as I recommend using tags over notebooks, this solution has limited use, though you should be aware of it as an option, just in case.

One additional use for RandomNote is to use the service occasionally to display random notes from across your Evernote account so you can delete these which are no longer relevant. This is an efficient way to help you keep all those various notes current.

Keeping Evernote Useful

The purpose of everything mentioned in this article is to help you actually get some use out of the information you save to Evernote (after all, Evernote has a ton of uses), rather than letting it sit their idly.

Being able to revisit important information is a vital part of this. As is deleting outdated content. And with the simple system described above, this should be easily accomplished. But remember. The more you use and rely on Evernote, the more important it is to keep your Evernote account secure and backed up.

Read the full article: How to Use Evernote’s Secrets to Remember Everything


Read Full Article

Why Everyone Should Try the Raspberry Pi 4: New Features and Impressive Specs


The new Raspberry Pi 4 has been released, but do you need to upgrade? Does it really offer much more than the previous Raspberry Pi 3B+, or should you keep your hand in your pocket?

Well, the Raspberry Pi 4 represents perhaps the most significant upgrade on a previous version since the Raspberry Pi 2. Here’s what you need to know about the Raspberry Pi 4.

The Long-Rumored Raspberry Pi 4

Released on June 24, 2019 the Raspberry Pi 4’s existence had been treated with various non-denial denials. While a fourth revision of the credit card-sized computer was somewhat inevitable, the summer release was not expected. Most previous Raspberry Pi models had been released in February or other winter months.

Announced on Twitter on the day of release, the Raspberry Pi 4 is available alongside a range of new accessories. Some of these are necessary as some physical changes have been made to the latest revision.

While the hardware specification has been significantly upgraded, perhaps the most important thing to know about the Raspberry Pi 4 is that three versions have been released. These ship with differing RAM capacities:

  1. The 1GB Raspberry Pi 4 is $35
  2. For $45 you can double this to 2GB
  3. Or you can boost it to 4GB for $55

As you can see, the Raspberry Pi 4 remains cheap to buy.

Impressive Raspberry Pi 4 Specs

As ever, the main reason to buy the latest Raspberry Pi model is the improved system specification. Here’s what you’ll find:

  • 1.5GHz 64-bit quad-core ARM Cortex-A72 CPU (ARM v8, BCM2837)
  • 1GB, 2GB, or 4GB RAM (LPDDR4)
  • On-board wireless LAN (dual-band 802.11 b/g/n/ac)
  • On-board Bluetooth 5.0, low-energy (BLE)
  • 2x USB 3.0 ports
  • 2x USB 2.0 ports
  • Gigabit Ethernet
  • Power-over-Ethernet (this will require a PoE HAT)
  • 40-pin GPIO header
  • 2× micro-HDMI ports (up to 4Kp60 supported)
  • H.265 (4Kp60 decode)
  • H.264 (1080p60 decode, 1080p30 encode)
  • OpenGL ES, 3.0 graphics
  • DSI display port
  • CSI camera port
  • Combined 3.5mm analog audio and composite video jack
  • Micro-SD card slot
  • USB-C power

At first glance this might not seem a huge upgrade. However, several significant developments have been made to the Raspberry Pi 4 beyond the choice of RAM volumes.

What the Raspberry Pi 4 Specs Mean

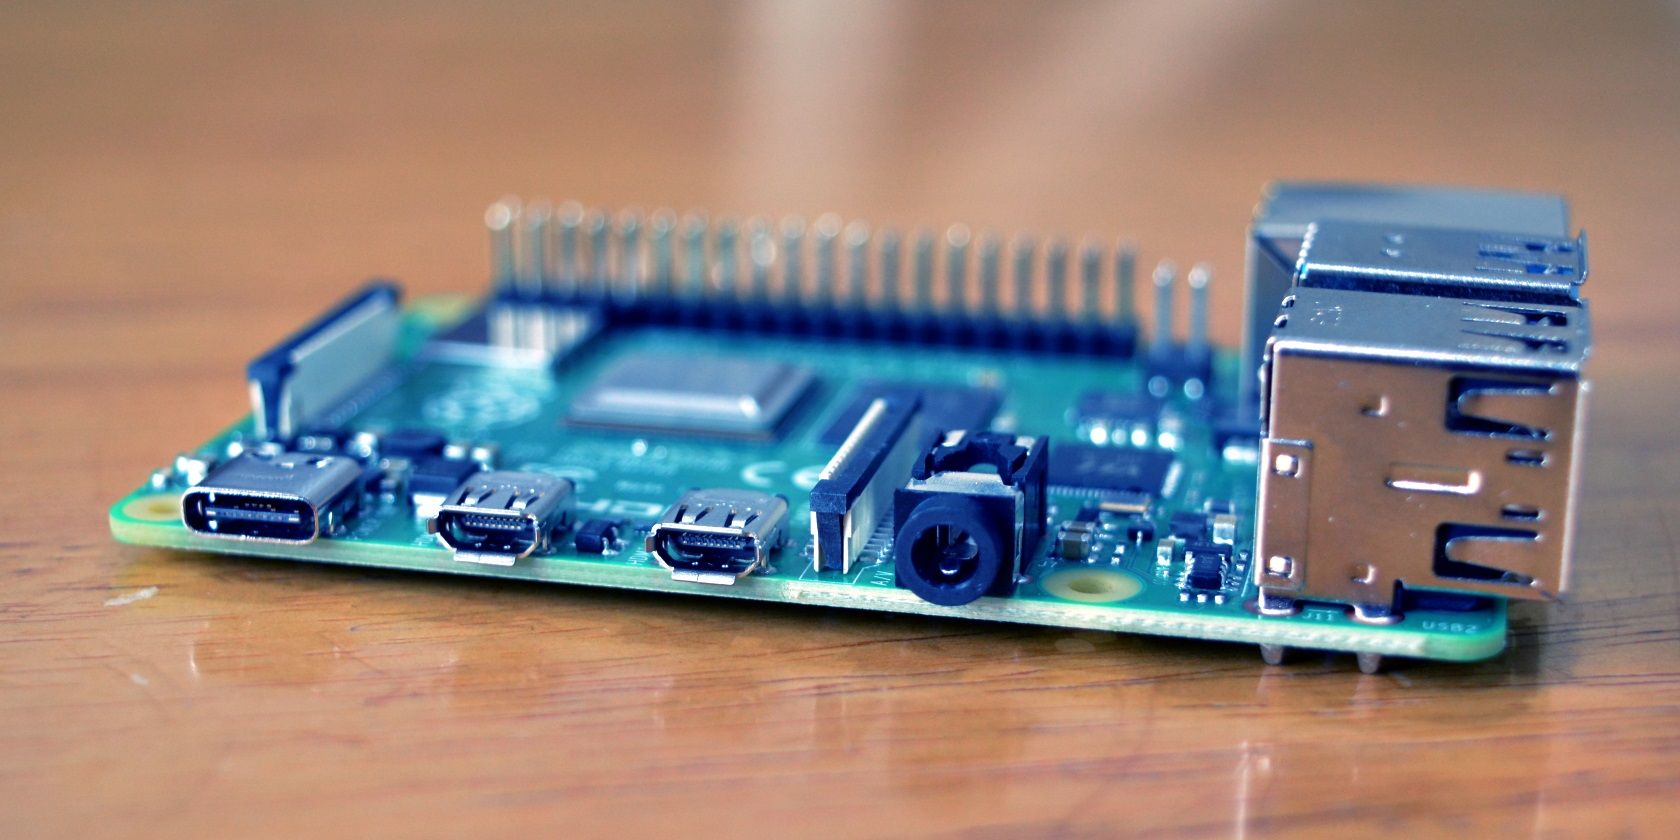
Perhaps the most significant in terms of every day use is the new USB-C power connector. Its inclusion ensures an additional 500mA, providing 1.2A for USB devices. There is also the provision of two USB 3.0 ports alongside two USB 2.0 ports. The potential for high speed USB devices to be connected to the Raspberry Pi 4 is exciting. The USB-C connector also supports OTG, allowing you to connect the Pi directly to your PC’s USB port and access the device locally.

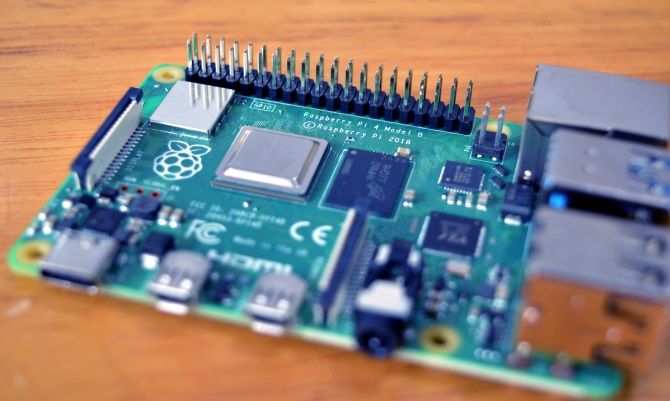
Raspberry Pi 4 board

In previous models with on-board LAN, the Ethernet port was on the USB hub. This reduced the speed of the port, but this time around, the Ethernet port is full Gigabyte, ensuring superior speed. As with previous models, the Raspberry Pi 4 has built in wireless networking (dual-band 802.11 b/g/n/ac) and Bluetooth 5.0 BLE support.

The new Raspberry Pi also has a new processor. A 1.5GHz 64-bit quad-core ARM Cortex-A72 CPU (ARM v8) sits on the BCM2837 SoC (System-on-Chip) marking a significant move away from previous generations of Raspberry Pi.

USB ports on the Raspberry Pi 4

Finally, the Raspberry Pi 4 has a pair of micro-HDMI ports rather than the standard single HDMI port. These support 4K, offering the prospect of super HD video for media streaming projects, not to mention dual monitor projects. A 4K smart mirror, perhaps?

As you’ve probably noticed, the new hardware specification puts it closer to higher spec hobbyist devices such as the Odroid.

Raspberry Pi 4 Accessories and Compatibility

If you already own one or more Raspberry Pi computers, you might be thinking you can save money on accessories. After all, these credit card-sized computers are all the same, right?

Well, yes… usually. In many cases, you can swap Raspberry Pi model B boards (the usual type of Pi) between enclosures and exchange various other accessories. But as we’ve already seen, there is a new power connector, which means you’ll need to buy a new suitable adaptor (or at least buy a USB-C to USB-C cable for an existing PSU).

Raspberry Pi 4 is the most powerful yet

While you shouldn’t need to upgrade your microSD card you will need a new case for the Raspberry Pi 4. The new micro-HDMI ports and USB-C power connector have resulted in a slightly revised profile. Most cases won’t support the Pi 4; forcing the computer into an unsuitable case is dangerous.

Although a handheld rotary tool can alter the design of your existing Raspberry Pi enclosure, buying a replacement is recommended.

Raspbian Buster Brings New Features

Another important aspect of the Raspberry Pi 4’s release is the arrival of Raspbian Buster. This is based on Debian 10 Buster, set for release later in 2019.

Buster features an improved desktop user interface, the Chromium 74 browser, and a new Mesa V3D video driver. This is an open source driver that reduces closed-source code in Raspbian by around 50%. Benefits of the driver include running 3D applications on the desktop.

You don’t need a Raspberry Pi 4 to try Rasbian Buster. It’s available to download now in full and lite forms, as well as part of the NOOBS easy installation tool.

How Raspberry Pi 4 Can Improve Your Projects

The obvious power improvements available with the Raspberry Pi 4 mean that all your projects should benefit. Some examples:

  • A Kodi-based media center will have the benefit of 4K output and faster networking.
  • Your retro gaming suite has the potential to run games that were previously beyond the Pi’s power.
  • If the Raspberry Pi 3 B+ wasn’t quite fast enough as a desktop replacement, the Raspberry Pi 4 is faster.
  • While crypto coin mining might not be the best use for a Raspberry Pi, the Pi 4’s superior spec could enhance this.
  • Server projects will also benefit. Online games, web servers, and even NAS boxes can be upgraded with the Raspberry Pi 4.

If you’re using or planning any of these projects, the Raspberry Pi 4 should top your list of hardware options.

Ready to use your new Raspberry Pi 4? Time to find out how it handles some of the best uses for a Raspberry Pi.

Choose the Raspberry Pi That Best Suits You

An interesting thing about the Raspberry Pi range is that almost every model remains in production. This means that there is a specific device that can suit your needs, whether a top-end Raspberry Pi 4, a compact Raspberry Pi Zero W, or a low-spec Raspberry Pi A+.

For the widest selection of projects, choose the Raspberry Pi 4. It’s easily the best version yet, revolutionising not just the hobbyist PCB market once again, but also potentially disrupting the budget PC sector.

For everything else, find the Raspberry Pi that best fits your needs with our guide to Raspberry Pi boards.

Read the full article: Why Everyone Should Try the Raspberry Pi 4: New Features and Impressive Specs


Read Full Article

Finder’s Quick Actions Complete Mac Tasks in One Click


finder-quick-actions

If you want to rotate or annotate a photo on your Mac, you don’t need to open Preview or any other image-editing app. Finder’s Quick Actions feature gives you an efficient way to manage such simple tasks in a snap.

Let’s see what you can do with Finder’s preset Quick Actions and how to come up with custom ones yourself.

What Are Quick Actions and How to Use Them

Quick Actions are one of the best new features of macOS Mojave. They’re simple one-click buttons to help you take care of certain common tasks when you select a file or a folder in Finder.

You’ll see Quick Action buttons only if you have enabled the Preview sidebar in Finder. The sidebar appears automatically in the Gallery view, but you might have to enable it manually in other views. That’s easy to do—simply click View > Show Preview.

Now, select any of your files in Finder to see Quick Actions in the sidebar. If you’ve chosen an image file, you’ll see Rotate and Markup below the file preview.

Quick Action buttons for selected Finder item

Click on the first Quick Action (Rotate) to rotate the selected image to the left, right there in Finder.

If you click on Markup, you’ll see a popout preview of the image with the Markup Toolbar from the Preview app at the top. Feel free to make edits to the image from this window and hit the Done toolbar button to save the changes.

Markup Toolbar from Preview in popout generated by Markup Quick Action

You’ll then see a new button—Open with Preview—show up in the same spot. Click on that to open the image in the Preview app if you want to make further edits to the image. Otherwise, hit the Esc key to force the popout box to recede into the background, like a Quick Look preview does.

The Quick Actions that show up in the sidebar vary depending on the type of file you’ve selected. For example, you’ll see a Trim option for certain video files. For images, you’ll also see a Create PDF option—if this is not visible, click on the More button next to Rotate and Markup.

By the way, Quick Actions are also available via the context menu or right-click menu for the Finder item you’ve selected.

How to Create Custom Quick Actions

By default, Finder has just a few Quick Actions, which is not that impressive. What’s great, though, is that you can create so many more. All you need is a little know-how of Automator, the automation app built into macOS.

Learning the basics of Automator is easy with these sample Automator workflows. The basic Quick Action we’re going to create next will also help.

Custom Quick Action: Convert to JPG

If you often convert images to the JPG format to keep the file size low, a “convert to JPG” Quick Action can save you some time. Let’s create that using Automator.

To begin, open the Automator app, select Quick Action as your document or workflow type, and click on the Choose button. (Since Quick Actions aren’t available on pre-Mojave systems, this particular document type also won’t appear.)

Choose document type dialog box in Automator

Now, you’ll see Automator’s standard three-column view. The third column is where you build a custom workflow to trigger a series of actions in a few clicks.

Meanwhile, the second column gives you a library of actions to pick from, and the first divides these actions into logical categories. (Look for the small panel below the first and second columns for a description of the selected action.)

Default three-column view in Automator

To be clear, in our example, we’re going to create a one-click Quick Action workflow to convert a selected Finder image in any format to a JPG image.

Steps to Create the Workflow

Let’s start with the third column—from the Workflow receives current dropdown menu, select image files. Now, use the search box above the second column to look for this action: Change Type of Images. Drag this action to the third column.

Automator then asks you if you also want to add a Copy Finder Items action to preserve a copy of your original image. Click on the Add button to agree to this and proceed.

Next, select the JPEG option from the To Type dropdown menu for your chosen action in the third column. With this tweak, you’re specifying that you want the image type for the input image to change to JPG.

Automator workflow to create Quick Action button to convert images to JPG

Now it’s time to save this workflow—click on File > Save, add a suitable name for the Quick Action, and hit the Save button. You should now see the Quick Action listed under the More menu for Quick Actions in Finder.

To see if it works, select a PNG image in Finder and click on the Convert to JPG Quick Action. The image file should instantly turn into a JPG file and a copy of the original PNG file should appear on your desktop.

Convert to JPG custom Quick Action in Finder

What Can You Create Quick Actions For?

Now that you know how to create custom Quick Actions, which ones will come in handy? We have a few ideas for you. You can create Quick Actions to:

  • Resize images to standard sizes.
  • Create archives.
  • Watermark documents.
  • Switch to customized folder views.
  • Split PDFs.
  • Add photos to specific albums.
  • Sort files differently.

Third-party apps also bring their own set of Quick Actions to the mix, so keep an eye out for those. You can toggle the visibility of Quick Actions from System Preferences > Extensions > Finder.

Toggle visibility of Quick Actions in Finder from System Preferences on macOS

There’s a Lot More to Explore in Finder

From Quick Actions and Quick Look, to tags and smart folders, Finder has many useful bits and pieces tucked away in every corner. You’ll discover quite a few of them in the Finder tips we’ve shared before.

Why not learn about Finder shortcuts next? Or how about picking up a few search tricks to locate recently used files on your Mac?

Read the full article: Finder’s Quick Actions Complete Mac Tasks in One Click


Read Full Article

Save up to 83% on These Google-Powered Devices While Stocks Last


When it comes to portable devices, we all want something powerful yet easy to use. Windows machines have their place, but you might want something a little more nimble — and less likely to crash. Whether you want to write up reports or play games at the weekend, Android has you covered. These Google-powered devices at MakeUseOf Deals should cover your needs, now at sharply discounted prices while stocks last.

Samsung Galaxy Tab 4

With a bright 8-inch touchscreen display and built-in LTE connectivity, this Samsung tablet is perfect for browsing, gaming and binge-watching. It weighs under 12 ounces, and the generous 4,450 mAh battery gives you up to 13 hours of usage on Wi-Fi.

The Galaxy Tab 4 has 16GB of internal storage for apps and media. However, you can expand that to 64GB via the microSD card slot.

You can grab a refurbished Galaxy Tab 4 now on AT&T for $124.99, saving over $275 on the original price.

Samsung Galaxy View

Sometimes, size does matter. If you want more screen space for watching Netflix and editing photos, the Galaxy View is the Samsung tablet you need.

This beautiful beast has a huge 18.4-inch 1080p HD touchscreen that delivers a crisp picture. The Galaxy View also has powerful built-in speakers — ideal for movie soundtracks and listening to Spotify. You can browse for eight hours on a full charge, with an octo-core processor providing excellent performance.

You can get a refurbished Samsung Galaxy View now for $449, with 64GB of storage and LTE from AT&T — that’s 43% off.

Samsung Chromebook 11.6″

If you regularly need to write reports or answer emails, the Samsung Chromebook might better suit your needs.

This lightweight laptop runs on Chrome OS, meaning you get the power of Google at your fingertips. The experience is fast and safe, with built-in security and antivirus protection. In addition, you can install your favorite Android apps for offline use.

This model has a zippy 1.7GHz CPU, 2GB of RAM, and 16GB of internal storage — ample for most online tasks. It also has a webcam for video calling, and the HDMI port lets you work on an external monitor.

The most impressive part? You can get a refurbished Samsung Chromebook now for just $99.99, saving $500 on the original price.

Like this deal? Check out Vault — you’ll get four premium tools, including NordVPN and Dashlane, to supercharge your online security. Try it free for 14 days now!

Prices are subject to change.

Read the full article: Save up to 83% on These Google-Powered Devices While Stocks Last


Read Full Article

Grab raises more money — again


Southeast Asia’s highest-capitalized startup is sitting on even more money from investors today after ride-hailing Grab announced it has raised $300 million from Invesco.

The deal is part of Singapore-based Grab’s ongoing — feels-like-ever-lasting — Series H round which was started last June via a $1 billion capital injection from Toyota.

The round swelled to $4.5 billion thanks to contributions from a range of partners throughout 2018 and early 2019, then Grab said in April that it would add a further $2 billion to reach a $6.5 billion close before this year is out. This investment from Invesco is the first piece of that newest tranche to be announced, but there’s plenty happening under the surface, including a potential investment from PayPal, Ant Financial and others in a spinout of Grab’s financial services.

Grab declined to comment on the status of its Series H, and how much it has raised for the round so far.

Getting back to today’s news and, despite a relatively dry-looking announcement, there is an interesting takeaway to be found here.

Yes, this isn’t a SoftBank Vision Fund sized round — that $1.5 billion deal closed earlier this year — and it lacks the strategic significance of investments from backers like Toyota, Booking.com or Microsoft, but it does represent a doubling down on Grab from Invesco.

The firm merged with emerging market-focused fund Oppenheimer back in May. Oppenheimer — which has close to $40 billion in assets under management for its developing market fund alone — was among the participants in an initial $2 billion raise for that Series H, and now the merged entity is coming back to increase its position.

That first deal (from Oppenheimer) was $403 million, Grab said, so this new addition takes its spend on Grab to over $700 million. It also comes at an interesting time for the firm, which is reported to have reorganized its management team following the completion of the merger.

Based on that clearing of the decks/realignment, the decision to double down on Grab is a positive validation for the ride-hailing company. While it might not be a household name to those outside financial markets, Grab president Ming Maa played up Invesco as “one of the smartest investors in developing markets” in a statement released alongside news of the investment.

Grab acquired Uber’s regional business last year to become Southeast Asia’s undisputed ride-hailing leader, but it perhaps didn’t reckon on its local rival Go-Jek mounting a bid to finally expand its service regionally.

Having built a strong presence in Indonesia — where it pioneered ‘super app’ concepts like services on-demand and payments in the context of ride-hailing — Go-Jek has since expanded into Vietnam, Thailand and Singapore, with the Philippines also in its sights. Those moves were fuelled by investment from the likes of Tencent, Google and Warburg Pincus. As it seeks to go further and deeper in those markets, Go-Jek is currently raising a round for growth that is expected to reach $2 billion, half of which it said it had secured in January.

That accumulation of cash seemed to spark a call to arms for Grab, which turned its Series H into a gargantuan rolling round after increasing the overall round target first to $5 billion and then to $6.5 billion.

Uber may have decided to leave Southeast Asia, but the ride-hailing industry in the region is still as fascinating as ever.


Read Full Article

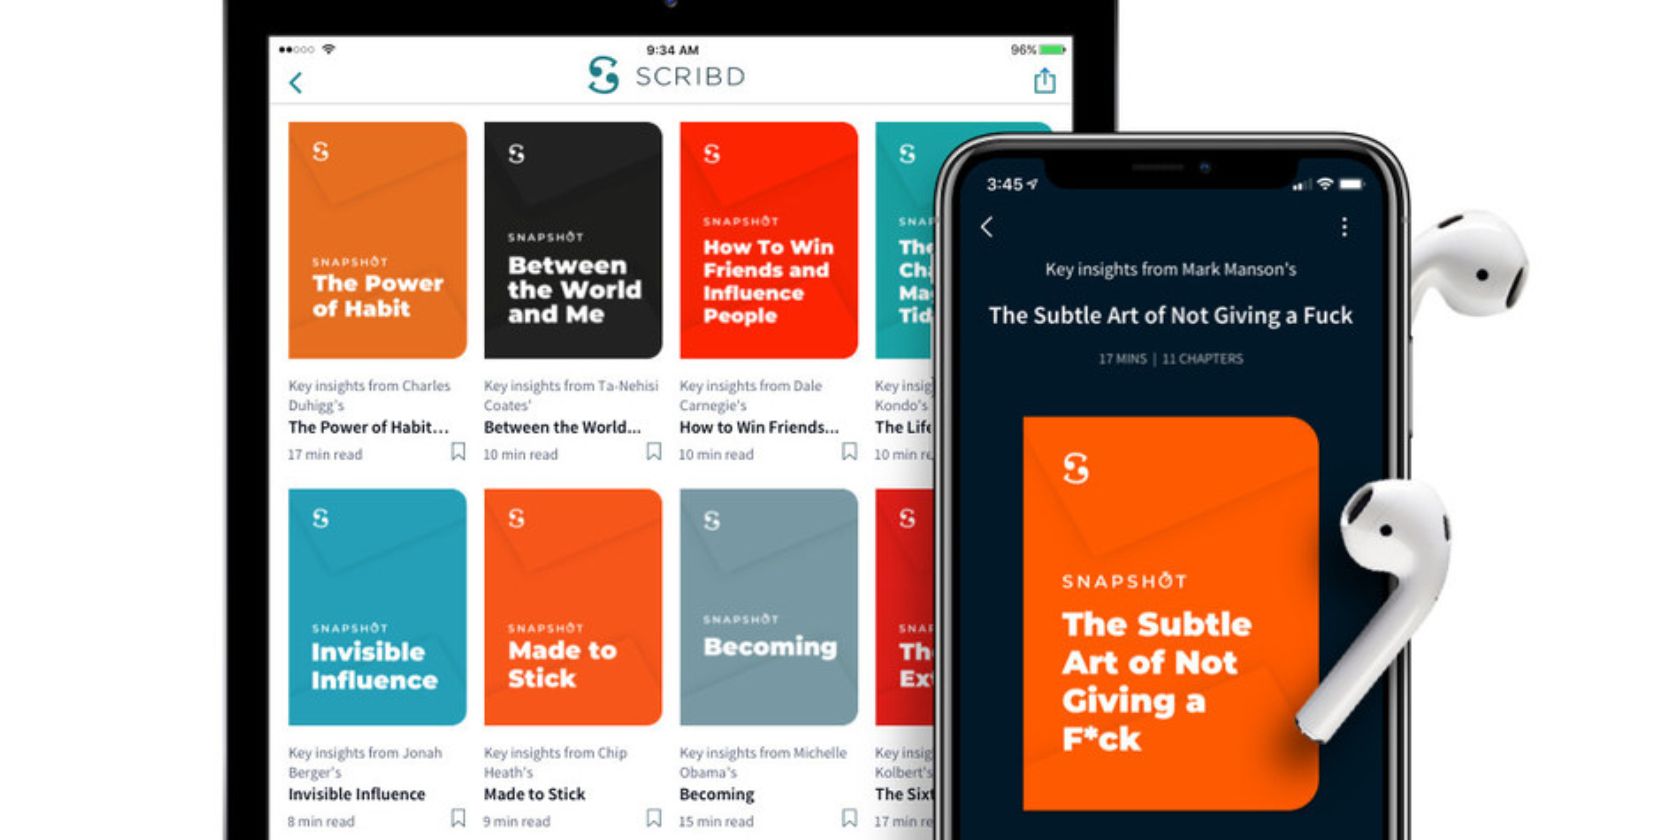
Scribd Snapshots Offer Bite-Sized Book Previews


Scribd has launched a new content offering called Snapshots. Scribd Snapshots offer curated previews of nonfiction books. The idea being to help Scribd subscribers decide whether they want to read a book in full, or whether the highlights are enough.

Scribd Launches Snapshots of Nonfiction Books

Scribd introduces Snapshots in a post on the Scribd Blog. The company describes Snapshots as “the literary equivalent of a movie trailer”. And that’s a perfect description for the feature designed to help readers discover nonfiction books on Scribd.

Snapshots are previews that offer the “key insights of a book in about 15 minutes”. Snapshots are original content “created by Scribd’s in-house editorial content team”. So, while they describe what’s in the book, they don’t quote authors directly.

Trip Adler, CEO of Scribd, said:

“We’re always looking for ways to improve content discovery on Scribd; with Snapshots, we’re going beyond recommendations and providing key insights that get readers excited about books they may not have considered reading otherwise.”

“By providing quick, snackable previews of top nonfiction books, Snapshots can help publishers and authors to get their titles in front of large audiences who are likely to enjoy them.”

Scribd’s intention with Snapshots is to help you decide which books to read in full. However, if you haven’t got the time and inclination to read 50+ books in a year, you could use Snapshots in order to pretend that you read more than you actually do.

MakeUseOf Recommends More Books Worth Reading

Scribd Snapshots originally launched in beta earlier this year. And now, after receiving a positive reception from readers, Scribd has launched the content offering in full. There are currently 500 Snapshots available, with many more planned for the future.

With so many books released each and every year, Scribed Snapshots is a fantastic idea. Unfortunately, Snapshots are only available to Scribd subscribers. Everyone else should check out the best books released in 2019 and the best books for geeks to read in 2019.

Read the full article: Scribd Snapshots Offer Bite-Sized Book Previews


Read Full Article

You Can Now Learn Arabic Using Duolingo


Duolingo has launched a new language course, and this one is designed to help you learn to speak Arabic. This isn’t meant for beginners, but language learners keen to broaden their horizons can now learn (or try to learn) Arabic using Duolingo.

Duolingo Helps You Learn to Speak Arabic

Duolingo has focused specifically on Modern Standard Arabic, which is the version most widely understood by people who speak Arabic. By following the course, you’ll learn to speak conversational Arabic, which is less formal than written Arabic.

Duolingo’s Arabic course will focus on three different aspects of the language:

Grammar: To help English speakers understand the language Duolingo has “constructed sentences so that they communicate enough context to make the grammatical differences between Arabic and English clear.”

Alphabet: Duolingo has structured the course to teach the Arabic alphabet methodically, introducing a few letters at a time in order to give learners ample opportunity to learn those before introducing more.

Phonetics: Every unit of the course has phonetic exercises, giving learners plenty of opportunity to learn the sounds of Arabic. These exercises will test learners’ ability to discriminate one sound from another sound.

You can start learning Arabic on Duolingo right now on the web, on Android, and on iOS. Duolingo is completely free to use, but you can pay for Duolingo Plus in order to remove the ads and be able to carry on learning languages while offline.

What Makes Learning Arabic So Difficult?

If you’re new to learning languages we don’t recommend starting with Arabic. Alongside Japanese, Chinese, and Korean, it’s one of the most difficult languages for westerners to learn. Duolingo explains why Arabic is a difficult language to learn on Making Duolingo.

However, budding polyglots who want to experience a challenge should definitely try learning Arabic on Duolingo. With people in 25 countries able to speak Arabic, even knowing a few key words and phrases could help travellers communicate with the locals.

You Can Even Learn to Speak High Valyrian

Duolingo offers courses in dozens of different languages, including Spanish, French, German, Italian, Dutch, Japanese, Russian, and Hindi. And since April 2019, just in time for the end of Game of Thrones, Duolingo launched a course in High Valyrian.

Read the full article: You Can Now Learn Arabic Using Duolingo


Read Full Article

5 Awesome Linux Laptops You Can Buy Right Now


The best Linux laptops run smoothly—an experience that isn’t guaranteed when you install Linux on random computers. That’s because Linux can be customized for the hardware that it’s installed on.

This article lists the best Linux laptops that come with the open-source operating system preinstalled by the manufacturer.

Why Should You Buy a Linux Laptop?

Linux is an open-source operating system that you can install yourself on nearly any computer. So, why would you want to buy a specific Linux laptop instead?

Many laptops advertised as Linux devices normally come with Windows installed but have been tested and certified for some kind of Linux flavor. However, the devices in this list are purpose built with Linux in mind. This means that they will often run faster, smoother, and integrate better with the hardware than if you were to install Linux yourself.

There’s one downside to buying from small manufacturers: most purpose-built Linux laptops cost slightly more than those with Windows. Part of the reason Linux devices tend to cost more is that boutique manufacturers produce small numbers of product, which makes per-device costs more expensive. The exception to this rule is Dell, which actually reduces prices when you choose Linux over Windows.

Best Linux Laptop for Privacy:
Purism Librem 13

Librem 13 Laptop Product Image

  • Starting price: $1,400
  • CPU: Core i7-7500U
  • GPU: Intel HD Graphics 620
  • RAM: 8GB to 32GB
  • Hard drive: 500GB HDD to 1TB NVMe SSD
  • Linux version: PureOS
  • Screen: 13.3-inch matte 1080p IPS

Purism’s Librem 13 is one of the best Linux laptops on the market for privacy. The crowd-funded company makes several laptops ranging in price from $1,300 to well over $2,000. All Purism computers include a customized version of Linux known as PureOS. PureOS is based on Ubuntu, but with privacy and security modifications.

The Librem 13 laptop comes with a Kaby Lake processor and custom privacy and security modifications. Unlike most of the other Linux laptops, it comes with an open-source BIOS called Coreboot. It also features two physical buttons that disable the microphone and camera as well as all wireless features. In addition, it’s constructed from a black aluminum unibody chassis.

If you’re interested and want to find out more before making a purchase, check out our review of the Purism Librem 13.

Best Portable Linux Laptop:
System76 Oryx Pro

System76 Oryx Pro Product Image

  • Starting price: $1,700
  • CPU: Intel Core i7-9750H (9th generation)
  • GPU: Nvidia GTX 2060, GTX 2070, or GTX 2080
  • RAM: 32GB to 64GB of variable refresh speeds
  • Hard drive: 2 x M.2 NVMe SSDs (8TB maximum)
  • Linux version: Ubuntu or Pop!_OS
  • Screen: 16.1-inch or 17.3-inch FHD, matte finish

System76 is one of the most well known Linux laptop manufacturers. Based out of Denver, Colorado, the company produces a range of desktop and laptop devices. They also happen to make one of the best overall Linux laptops—the System76 Oryx Pro.

In 2019, System76 introduced the Oryx Pro; a thin, high-performance notebook. The Oryx Pro’s specifications come closer to a workstation in power but in a slimmer and more portable package. But that performance improvement comes with a price. It costs a considerable amount of money.

Even so, the laptop packs a high-end 9th generation Intel processor which does not suffer from the performance problems associated with the security mitigations that damage performance on older Intel processors. It also includes a Turing GPU, which means its Tensor cores assist developers in creating machine learning algorithms.

The company made its name in Ubuntu-based devices, but they now develop their own Linux operating system. While it is based on Ubuntu, it looks a lot like a mashup of Google’s Material Design and GNOME. However, while customizing your Oryx Pro at checkout, you can choose Ubuntu instead if you’d prefer.

Most Affordable Linux Laptop:
ZaReason UltraLap 6440 i7

ZaReason UltraLap 6440 Product Im age

  • Starting price: $1,000
  • CPU: Intel i7-8550U
  • GPU: Intel UHD 620
  • RAM: 4GB to 32GB DDR4-2133
  • Hard drive: 120GB M.2 SSD to 2TB NVMe SSD
  • Linux version: any version of Linux
  • Screen: 14-inch FHD Backlit LCD

The ZaReason UltraLap 6440 i7 is the perfect Linux laptop if you are on the lookout for something customizable and affordable. The device comes equipped with an Intel i7-8550U CPU and can support up to 32GB of DDR4 RAM. While the starting price of $1,000 only includes the baseline specifications, even that amounts to a powerful Linux laptop.

One of the UltraLap 6440 i7’s strengths is its customization. Unlike many other manufacturers, ZaReason will preinstall any Linux distro you choose. During checkout, the dropdown recommends the most popular Linux installations, but you are free to choose any you wish by specifying your selection in the customer notes.

Best Linux Laptop for Performance:
Dell Precision 5520

Dell Precision 5520 Product Image

  • Starting price: $1,480
  • CPU: Intel Core i7-6820HQ
  • GPU: Nvidia Quadro M1200
  • RAM: 8GB to 32GB of DDR4 RAM
  • Hard drive: 500GB SATA HDD to 1TB M.2 SSD
  • Linux version: Ubuntu 16.04
  • Screen: 15-inch 4K Ultra HD InfinityEdge Display

Dell is one of the few mainstream laptop manufacturers to offer Ubuntu as a discounted alternative to Windows 10. That means that many Dell laptops can be configured at checkout as Linux laptops instead. If you’re looking for a high-performance Linux laptop, the Dell Precision 5520 might be what you’re after.

The Precision 5520 can be configured to ship with Ubuntu 16.04 preinstalled, and it even reduces the price of the standard Windows-based model by $100. The laptop comes with the Intel Core i7-6820HQ CPU and can support up to 32GB of DDR4 RAM. Storage configurations start at a 500GB SATA HD and range up to a 1TB M.2 SSD.

While many Linux laptops have reasonable displays, the Precision 5520 comes with an Ultra HD 4K InfinityEdge display. This makes it ideal for creatives looking to do editing work, or even those of us wanting to watch videos at high resolution. Overall, the Precision 5520 offers the best value out of all the Linux laptops mentioned here.

Best Premium Linux Laptop:
Dell XPS 13 Developer Edition

dell-xps-13

  • Starting Price: $850
  • CPU: Intel Core i3-8145U
  • RAM: 4GB DDR3
  • Hard drive: 128GB M.2 SSD
  • Linux version: Ubuntu 18.04
  • Screen size: 13.3-inch FHD InfinityEdge Display

The Dell XPS 13 Developer Edition employs a combination of aluminum and carbon fiber in its clamshell design. The combination of light, high-durability materials allows the XPS to weigh in at just 2.7 pounds. As with other Dell models, the XPS 13 is available as a Windows laptop, but can also be modified to come with Ubuntu 18.04 preinstalled instead.

While prices for the laptop start at $850, by adding additional features and hardware, you can easily configure the XPS 13 Developer Edition to cost almost $2,000. By any measure, it one of the most premium Linux laptops on the market.

Should You Buy a Linux Laptop?

If you’re looking for a new laptop, and just want to run a few Linux apps, consider buying a Chromebook or a Windows laptop. Both operating systems are now compatible with Linux apps and services. If you only intend to use Linux on occasion, this might be the best option for you.

However, if you need the highest level of security and privacy, a Linux laptop is for you. There are many Linux laptops on the market—some are customizable, while others are focused on performance and privacy. If you’d rather a Linux laptop that didn’t break the bank, you might want to check out the best cheap Linux laptops instead.

Read the full article: 5 Awesome Linux Laptops You Can Buy Right Now


Read Full Article

10 Advanced Google Forms Tips and Tricks


If Google Forms is not yet your go-to form maker, it’s time for us to change your mind. There are a lot of powerful tools hidden away in places you may not find unless you know what you’re looking for. We’re here to make sure you know some advanced Google Forms tips and tricks.

Unlock the "Essential Google Drive Keyboard Shortcuts" cheat sheet now!

This will sign you up to our newsletter

Enter your Email

1. Choose Your Response Destination

If you’re a moderate user of Google Forms, you probably already know that you can choose between storing your results as a spreadsheet or keeping them within the form. However, you may not know which one to choose or why.

You can choose your results destination by clicking the More (three-dot icon) button and picking Select Response Destination. Then either create a new spreadsheet or add the responses as another tab to an existing spreadsheet.

Select Response Destination Google Forms

If you want to quickly send your responses to a spreadsheet, you can also click the green Create Spreadsheet button. Or to download right to your computer, Select More > Download responses (.csv).

If you decide to create a new spreadsheet, it will reside in Google Sheets with the name you assign or the default which is the form name. If you choose to add to an existing spreadsheet, you’ll pick the one you want in the pop-up window for Google Sheets.

Using a spreadsheet to store results is ideal if you want to manipulate the data. You might prefer to keep the results in forms though if you are expecting more than 400,000 responses as that’s the limit of rows in a regular Google Sheets spreadsheet.

Regardless of which destination you choose, you can always go to Responses > Summary to get a more visual view of the results, which is perfect if most of your questions are multiple choice or can be graphed in some way.

2. Receive Notification for Submissions

If you would like to receive email notifications when someone submits your form, you can set this up in just two clicks.

Click the More (three-dot icon) button on the Responses tab and pick Get email notifications for new responses. The email address you will receive responses to is the address for the account you use to log into Google Forms.

Get Notifications for Responses Google Forms

3. Insert Google Forms Multiple Pages

In order to spruce up your form and make it seem more manageable to respondents, it’s possible to add multiple pages by inserting sections.

Go to the last block on your page and click the Add Section button from the toolbar. You can assign a header and description to each page, which allows you to clearly separate questions of a certain kind or for a specific type of respondent.

Add Section for Multiple Pages Google Forms

4. Embed an iFrame of Your Form

If you want to use Google Forms to create a contact form for your website or for some other purpose where it’s useful to embed the form as an iFrame, it’s easy to do so.

Click Send on the top right of the form page. Then, click the Embed icon, adjust the width and height of your iFrame if you like, and click Copy. You can then paste the code where you need it.

Get Embed Code Google Forms

5. Create an Auto-Grading Quiz

For teachers, an auto-grading quiz in Google Forms is a really easy way to save some time. On your main Google Forms page, click Template gallery at the top. Scroll down and under Education, pick Blank Quiz.

Click Add Question from the toolbar, enter the question, and click Answer Key to provide the correct answer and point value for the question. When your respondents finish the quiz, they will see an option to View Score. This shows them all questions answered, marked as correct or incorrect, and the points they received.

Auto-Grading Quiz Results Google Forms

6. Turn a Form Into a Quiz

If you create a form that you want to use later as an auto-grading quiz, this is simple. On the form page, click the Settings (gear icon) button on the top right. Select the Quizzes tab and turn on the toggle for Make this a quiz and click Save.

Make Form Into A Quiz Google Forms

You can then go to the form and insert the answer keys and point values just like if you created the quiz from the start.

7. Obtain a Pre-Filled Link

You might want to pre-fill some answers on a form for your respondents. For example, you could use this to jumpstart a contact form on your website. Click More on the top right of the form page (next to Send) and then select Get pre-filled link. Next, just fill the form out as you would like the respondents to do for any given question and click Get Link.

You’ll then see on the bottom left that your link is ready, just click Copy Link and then paste it where you want to share it.

Get Link Auto-Filled Form Google Forms

8. Adjust Defaults for Emails, Required Questions, and Point Values

If you plan to create forms down the road and always want to collect email addresses, you can mark a setting to make this a default. In addition, if you intend to make all questions required or use the same point value for quiz questions, you can set these defaults as well.

Click More on the top right of the form page (next to Send) and then select Preferences. Now in the pop-up window, mark the checkboxes for any or all of these options. This is a great time-saver if you plan to use the same settings on forms moving forward.

Change Default Settings Google Forms

9. Add Logic Branching

Logic branching is a fancy way of saying that your respondent will go to a particular page based on the answer they give. For instance, if you say you’re Australian, the questions will relate to Australian regions. If you choose a certain age range as an answer, you could have age-appropriate questions afterward.

You can use this for any question where the user can give one answer from a choice of set answers. Click the More (three-dot icon) button for the question and pick Go to section based on answer.

Then select where you want to direct your respondent from the dropdown box. You can also have them submit the form instead of sending them to a new section.

Logic Branching Google Forms

10. Use Scripting

There are no scripts for the forms per se, but there are ways to use scripting if you like. Select the Settings (gear icon) button on the top right of the form page and choose Script editor. You’ll start with a clean slate in a new tab where you can enter your script. Just click File > Save when you finish.

Open Script Editor Google Forms

For some Google Forms script examples and help, head over to the Google Apps Script page for developers.

Looking for More Google Forms Help?

These Google Forms tips and tricks are just the tip of the iceberg. We’ve also covered how to use Google Forms for your business and we have a guide that might just be the best guide to Google Forms you’ll find.

Read the full article: 10 Advanced Google Forms Tips and Tricks


Read Full Article