If you want to process your emails faster, spend less time in Excel, boost your markdown skills, improve your workflows in Microsoft Word, and more, this free cheat sheet bundle is for you!
With this download, you’ll receive eight free, printable cheat sheets from MakeUseOf to help rocket your productivity.
These cheat sheets will provide you with all the must-know keyboard shortcuts, formulas, elements, and commands to make the most of your favorite apps and programs.
For the first time in more than half a decade, Facebook wants to inform you that it owns Instagram, the hyper-popular rival social networking app it acquired for a $1BN steal back in 2012.
Facebook is adding its own brand name alongside the other two — in the following format: ‘Instagram from Facebook’; ‘WhatsApp from Facebook.’
The cheap perfume style rebranding was first reported byThe Informationwhich cites three people familiar with the matter who told it employees for the two apps were recently notified internally of the plan to rebrand.
“The move to add Facebook’s name to the apps has been met with surprise and confusion internally, reflecting the autonomy that the units have operated under,” it said. Although it also reported that CEO Mark Zuckerberg has also been frustrated that Facebook doesn’t get more credit for the growth of Instagram and WhatsApp.
So it sounds like Facebook may be hoping for a little reverse osmosis brand-washing — aka leveraging the popularity of its cleaner social apps to detoxify the scandal-hit mothership.
Not that Facebook is saying anything like that publicly, of course.
In a statement to The Information confirming the rebranding it explained it thus: “We want to be clearer about the products and services that are part of Facebook.”
The rebranding also comes at a time when Facebook is facing at least two antitrustinvestigations on its home turf — where calls for Facebook and other big tech giants to be broken up are now a regular feature of the campaign trail…
We can only surmise the legal advice Facebook must be receiving vis-a-vis what it should do to try to close down break up arguments that could deprive it of its pair of golden growth geese.
Arguments such as the fact most Instagram (and WhatsApp) users don’t even know they’re using a Facebook-owned app. Hence, as things stand, it would be pretty difficult for Facebook’s lawyers to successfully argue Instagram and WhatsApp users would be harmed if the apps were cut free by a break-up order.
But now — with the clumsy ‘from Facebook’ construction — Facebook can at least try to make a case that users are in a knowing relationship with Facebook in which they willingly, even if not lovingly, place their eyeballs in Zuckerberg’s bucket.
In which case Facebook is not telling you the Instagram user that it owns Instagram for your benefit. Not even slightly.
Note, for example, the use of the comparative adjective “clearer” in Facebook’s statement to explain its intent for the rebranding — rather than a simple statement: ‘we want to be clear’.
It’s definitely not saying it’s going to individually broadcast its ownership of Instagram and WhatsApp to each and every user on those networks. More like it’s going to try to creep the Facebook brand in. Which is far more in corporate character.
At the time of writing a five day old update of of Instagram’s iOS app already features the new construction — although it looks far more dark pattern than splashy rebrand, with just the faintest whisker of grey text at the base of the screen to disclose that you’re about to be sucked into the Facebook empire (vs a giant big blue ‘Create new account’ button winking to be tapped up top… )
Here’s the landing screen — with the new branding. Blink and you’ll miss it…
So not full disclosure then. More like just an easily overlooked dab of the legal stuff — to try to manage antitrust risk vs the risk of Facebook brand toxicity poisoning the (cleaner) wells of Instagram and WhatsApp.
There are signs the company is experimenting in some extremely dilute cross-brand-washing too.
The iOS app description for Instagram includes the new branding — tagged to an ad style slogan that gushes: “Bringing you closer to the people and things you love.” But, frankly, who reads app descriptions?
Up until pretty recently, both Instagram and WhatsApp had a degree of independence from their rapacious corporate parent — granted brand and operational independence under the original acquisition terms and leadership of their original founders.
Facebook is also busy working on entangling the backends of its three networks — under a claimed ‘pivot to privacy‘ which it announced earlier this year.
This also appears intended to try to put regulators off by making breaking up Facebook much harder than it would be if you could just split it along existing app lines. Theories of user harm potentially get more complicated if you can demonstrate cross-platform chatter.
The accompanying 3,000+ word screed from Zuckerberg introduced the singular notion of “the Facebook network”; aka one pool for users to splash in, three differently colored slides to funnel you in there.
“In a few years, I expect future versions of Messenger and WhatsApp to become the main ways people communicate on the Facebook network,” he wrote. “If this evolution is successful, interacting with your friends and family across the Facebook network will become a fundamentally more private experience.”
The ‘from Facebook’ rebranding thus looks like just a little light covering fire for the really grand dodge Facebook is hoping to pull off as the break-up bullet speeds down the pipe: Aka Entangling its core businesses at the infrastructure level.
From three networks to one massive Facebook-owned user data pool.
One network to rule them all, one network to find them, One network to bring them all, and in the regulatory darkness bind them
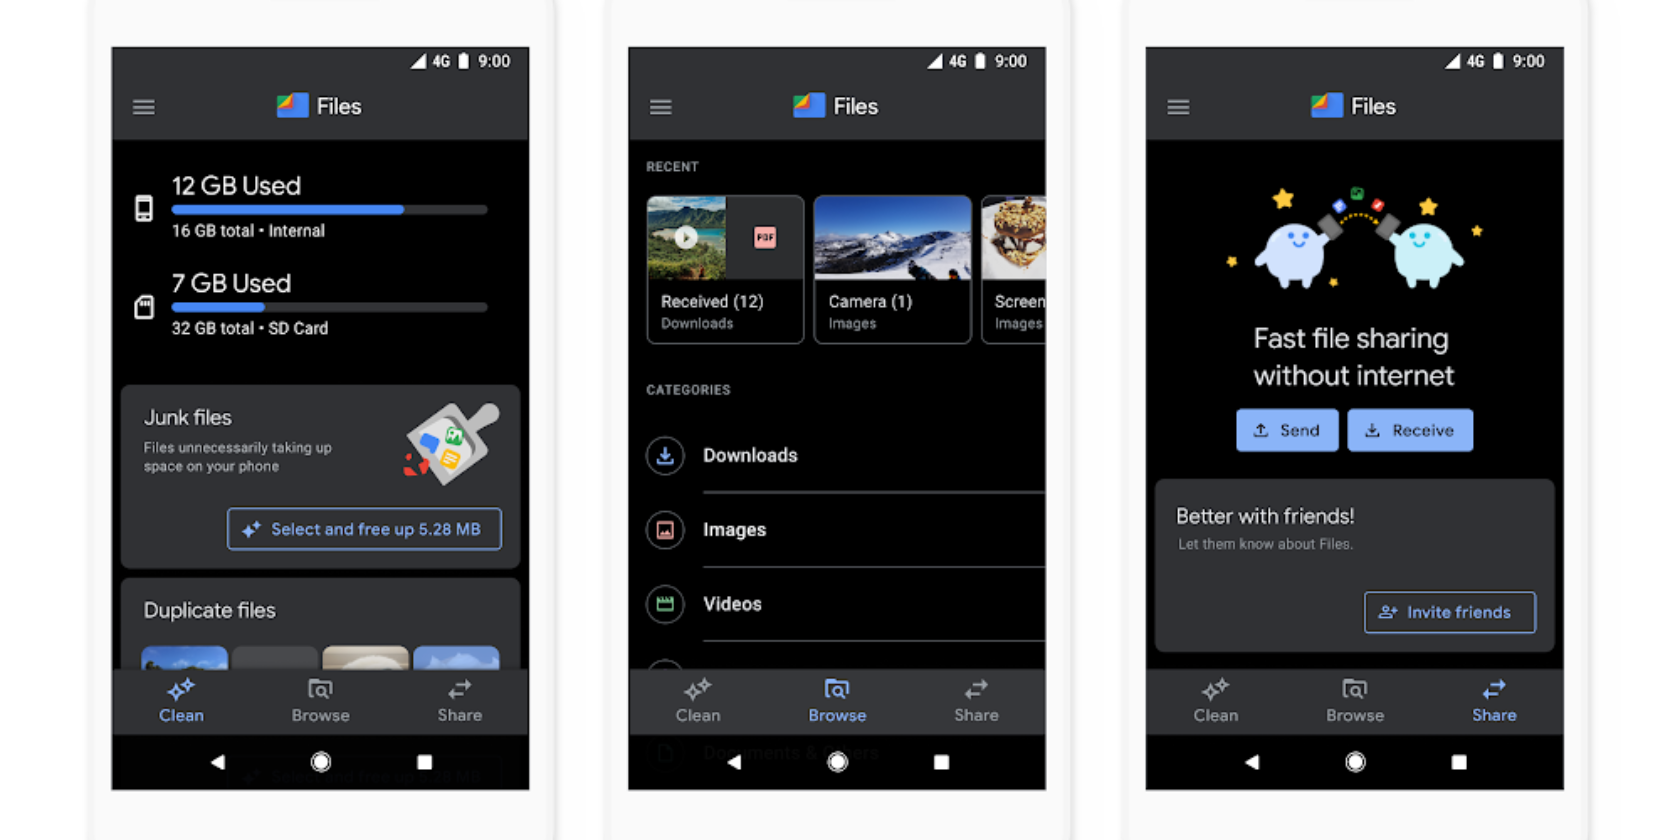
Google has upgraded its Files app, adding two new features. The first is a new set of controls making it easier to play your local media offline. The second is a new all-black dark theme which should reduce eye strain and preserve your phone’s battery life.
What Is Google Files and How Does It Work?
Google Files, which was launched as Files Go in November 2017, is primarily designed to free up space on your phone. However, it now does so much more, including helping you find files faster, share your files offline, and back up your files to the cloud.
According to The Keyword, 100 million people now use Google’s Files app every month. And while Google Files was built with people in developing countries (who suffer from low phone storage) in mind, the app has proved a hit with Android users around the world.
Google Adds New Features to the Files App
The popularity of Files has encouraged Google to add new features to the app. The latest being a new all-black dark theme and a new set of media controls. Neither of these are mind-blowing additions, but they make it more worthy of downloading and installing.
The new all-black dark theme does exactly what it says on the tin. Once you install it, the app turns black, with the text picked out in white and pale blue. Google claims this can both help reduce the chance of eye strain and preserve your phone’s battery life.
The new media controls include Skip, Rewind, and Fast-Forward. And these enable you to play your media files—music and/or videos—offline using the Google Files app. Which could be useful for people unwilling or unable to use a streaming app.
Google Files is an extremely useful app to have installed on your phone. Especially for those people with a lack of storage. And with these new features—as minor as they may be in the big scheme of things—Google has just made its Files app even better.
Given the increasing understanding of how staring at a screen all day is affecting us all, most apps now offer dark modes or dark themes. And this includes the popular web browsers. So, with that in mind, here’s how to enable dark mode in your web browser.
Adobe Lightroom is the default photo management and editing app for many photographers. But where you could once buy the program and use it for as long as you wanted, it’s now only available through a subscription. Which is a model that doesn’t work for everyone.
What are the best Lightroom alternatives? Can you get the best features of Adobe Lightroom free of charge, or at least for just a single, one-off price? Here are your best options.
The Best Lightroom Alternatives in 2019
Adobe Lightroom isn’t for everyone. So, if you’re searching for another option, here are the best Lightroom alternatives in 2019.
1. Capture One Pro
Capture One Pro is the closest thing to a direct replacement for Lightroom, although the starting price of $299 makes it a tool for professionals and very serious hobbyists only.
The feature set is impressive. You can migrate your catalogs over from Lightroom. There’s support for RAW files from more than 400 cameras. The editing tools are comprehensive, and presented in a very visually appealing manner. And there are lots of pro-level functions, including support for tethered shooting, with live view.
Capture One Pro is likely to be overkill for many users. But there is a trial available, so you can easily test it out for yourself.
Available for: Windows, Mac
More Information:PhaseOne ($299, Free trial available)
2. DarkTable
At the opposite end of the spectrum to Capture One, there’s DarkTable. It’s free and open source, but still replicates the core functionality of Lightroom.
DarkTable offers detailed asset management and decent editing options. Its RAW processing support for over 400 cameras is well regarded by its users. It also includes tools that have been omitted from Lightroom CC, including split toning and curves adjustments.
On the downside, DarkTable’s interface lacks the finesse of its commercial counterparts.
Long before Lightroom, Bridge + Photoshop was the setup of choice for many photographers. Adobe Bridge is the asset management part of that combination.
It’s still available, it’s still a good Lightroom alternative, and it’s one of the best free Adobe apps you can use. You need an Adobe account to download it, but a basic, non-paid account is fine.
Bridge handles all your cataloging needs. You can organize your images into folders and collections, add star ratings, apply keywords, view metadata, and so on.
Adobe Camera Raw isn’t included in the free version, so you do need to add your own RAW processor if you’re shooting RAW. You also need to add your own editing app—GIMP is a great free Photoshop alternative, or take a look at Affinity Photo as an affordable paid option.
Formerly called OpticsPro, PhotoLab is a pro-level image editing app that competes with Capture One and comes at a similar price to Lightroom 6. The feature set is comparable, too, with the inclusion of full asset management, so you can import and organize your images. This was missing in the old version of the software.
The editing features from Lightroom are all in place, and it’s easy to use and very responsive. The noise reduction capabilities in particular are highly rated. On top of that are some basic local adjustment tools, and RAW support extends to 400 cameras. It all adds up to a quality tool and is a viable alternative to Lightroom for most users.
Available for: Windows, Mac
More Information:DxO ($99–$149, Free trial available)
5. RawTherapee
RawTherapee is primarily a standalone RAW processor with wide camera support. It’s as much an alternative to Adobe Camera Raw as Lightroom, but with some basic digital asset management features it’s still worth considering.
RawTherapee won’t import your images and sort them into folders for you—you need to do that some other way. But once they’re there you can apply colors and ratings to help keep track of your best images.
The RAW capability has a strong reputation among the enthusiast crowd. This is especially true for users of Fuji cameras, which produce notoriously challenging RAW files. There is a certain learning curve to the app, but it rewards the time you put in.
Luminar is one of the most affordable Lightroom alternatives, but that doesn’t make it light on features. It includes AI tools that recognize the content of your images, and allow you to make selective adjustments far more easily. You can change the exposure of the sky, for instance, without touching the people in the foreground.
There are bags of filters, powerful sharpening options, ways to reduce noise in your photos, and most of the retouching tools you’d expect from Lightroom. The Gallery lets you import, organize, and manage a large library of photos, too. It’s a great app and well worth a look.
ON1 Photo RAW is a relative newcomer to the market. It combines the best of Lightroom—cataloging and organization tools plus fast RAW processing—with a few concepts from Photoshop, including layer support. This enables you to composite images together in a way you cannot do in other Lightroom alternatives.
It’s fast, and has strengths in making local adjustments and working with effects and filters. But it does suffer a little from a cluttered interface that hides important tools while also causing you to rethink your workflow.
ACDSee Photo Studio Professional is a Windows program that has clearly got Lightroom in its sights. Priced at $99.99, it has all the main features of Adobe’s app, plus some extras of its own.
You get comprehensive cataloging and organizing tools, and a thorough RAW editing mode with support for more than 500 cameras. But you also get things like a Liquify tool that enables you to retouch photos by moving groups of pixels without altering them. You’d normally have to switch to Photoshop for that.
Available for: Windows
More Information:ACDSee ($99, Free trial available)
9. Apple Photos
Finally, what of Apple and Google’s Photo apps? The chances are you are already use either of them on your phone. Can they give you the best features of Lightroom for free?
Apple Photos is very good for photo management, and it plays nicely with your third-party editor of choice. The addition of tools like a tone curve and definition slider have made it easier to get the kinds of results you’d expect from Lightroom. RAW support is built into macOS, so the app works with a large number of cameras.
Photos includes cloud storage for all your images. See our guide on how to use iCloud Photos to learn how to get the most from that.
Google Photos is entirely cloud-based, and runs in the browser on your desktop. That may make it a total non-starter for you. But the processing capabilities are excellent. It benefits from the technologies carried over from apps like Snapseed, as well as from Google’s machine learning algorithms. It also has some limited support for RAW files.
Google is great for organizing your shots. You don’t need to worry about adding keywords, as it automatically identifies things in your shots and produces them upon a simple search. It isn’t so good for managing big shoots, though.
Lightroom got to the top for a reason. Whatever quirks it may have, it is the best at what it does. But the competition is catching up. If you don’t want to pay for a Lightroom subscription, you’ve got some fantastic options that you can either pay for outright or get for free.
One of the main considerations when picking your Lightroom alternative is how good the RAW processing is. Not all apps are as good as one another in this regard, and some will produce better results with certain cameras than others.
For this reason, you should definitely download and test the trial versions where they’re available. See how they well fit both your gear and your workflow.
You don’t need shiny new apps and websites to organize your life. All you need is the trusty spreadsheet. If you have a Google account, you can use Google Sheets for the job.
With Google Sheet’s sharing features and solid, easy-to-use templates, you can stay on top of your budget, schedule, to-do list, and more. Let’s see how to get organized with Google Sheets.
Why Google Sheets?
Let’s explore what makes Google Sheets such a solid proposition to organize all aspects of your life.
You can start with a free template. Google Sheets has a template gallery, so there’s no need to reinvent the wheel or figure out spreadsheet formulas if that’s not your thing. If you’re striving for simplicity, stick with Google’s spreadsheet templates. We’ll show you how to access them as we move on. For more template choices, see how to find the best Google Sheets templates.
You can share and collaborate on files. Whether you’re using Google Sheets for personal or work purposes, you can easily share everything with your family or colleagues.
You get real-time updates. Thanks to these, you can view any changes to a Google Sheets file as they’re being made.
You avoid duplicates. With the ability to work on a single master document and go back in time to older versions of the same, you’ll find it easier to avoid the confusing mess of duplicates.
You can generate reports. If you’re a visual thinker or if you just like to get a general overview of what you’re doing, you’ll appreciate the option to create reports, charts, and other visualizations out of your Google Sheets data. You’ll also find this feature in Microsoft Excel, but it’s worth noting here too.
You save time with automation. Like with Excel, you can create dropdown menus in cells for repeating items, change the appearance of cells with conditional formatting, and use formulas to generate data automatically.
Of course, all this advice comes with the understanding that you’re placing personal information in the cloud and where you may also be granting third parties access to your personal data.
Google Sheets vs. Microsoft Excel
There are plenty of reasons to opt for Google Sheets over Excel, and vice versa. But if you find that Excel is the better fit, you can still use the following ideas in your quest for spreadsheet perfection.
Do you find Excel spreadsheet templates more detailed and more suitable for your needs? Feel free to import and use them in Google Sheets!
How to Access Google Sheets Templates
Want to use one of the default Google Sheets templates? Here are a few ways to access them:
Via Google Drive: Click on the New button in the sidebar, hover over the arrow next to Google Sheets in the menu that appears, and then click on From a template.
Via Google Sheets: Hover over the plus button at the bottom right of the window and then click on the Choose template button that appears above the first button.
From an active Google Sheets spreadsheet: Click on File > New > From template.
Get Your Expenses Under Control With Google Sheets
Spreadsheets were made for budgets. Whether you’re tracking monthly or yearly expenses, Google Sheets has you covered.
With a few spreadsheet formulas, it’s easy to calculate automatically how much you earn and how much you spend to understand where your money goes every month. Start with the Monthly budget and Annual budget templates from the Personal section of Google Templates.
In the monthly budget template, you’ll find two sheets: one is a summary that uses formulas to calculate your expenses and income, and the other is for logging credits and debits.
While using this spreadsheet, ensure that you edit only the cells highlighted in pink:
In the Summary sheet, customize your planned expenses and their categories, and your planned income and their types.
Add expenses and income to the Transactions sheet. As you add items here, Sheets automatically updates the Summary sheet with the relevant data.
The monthly budget spreadsheet is a great way to see at a glance if you’re exceeding your budget for any given month, and in which category.
At the end of each month you can add your monthly numbers to the annual budget spreadsheet. Let’s explore this sheet further:
To begin with, you’ll need to enter your starting savings balance in the Setup sheet.
In the Expenses sheet, fill in your monthly expenditure for each category.
In the Income sheet, enter your monthly income for each type.
Be sure to leave the Summary sheet alone. Sheets will automatically populate it with the right data based on the expenses and income you’ve added. This sheet includes a line graph to give you a clear idea of your finances over the year.
You can use everything from whiteboards and fancy paper notebooks to mobile apps and browser-based tools to track your tasks. And if you prefer simple to-do list tools, Google Sheets is a great choice.
Google’s To-do list template is again a straightforward option. It consists of only three columns: a checkbox column to mark tasks as complete, a date column for scheduling tasks, and a third column for adding task details. (You can choose to insert columns for priority statuses and due dates.)
When you mark a task as complete, Sheets crosses it out automatically, but keeps it on the list.
Want to change the formatting for completed tasks? That’s possible. You can, for example, change the text or fill color for specific cells using the conditional formatting feature in Google Sheets.
If your to-do list is getting too cluttered, right-click rows and select Hide Row to dismiss completed items without deleting them. Can’t see the hide option? You might have right-clicked on a cell in the row instead of the row itself. Try again, but this time right-click on the row number. That should do the trick.
Given the collaborative nature of Google Sheets, you can also create a column to mark ownership of tasks. This lets team members know what everyone else is working on.
Get Your Time Back With Google Sheets
While you could use a dedicated app or Google Calendar for planning and tracking your daily schedule, it’s worth giving Google Sheets a shot. That’ll ensure you have one less app to deal with, which is always a desired goal when simplicity is a priority.
Go with the Schedule template for a head start in managing your most important currency—time.
This Google Sheets daily planner gives you an easy way to log your daily appointments and tasks. You could even do away with your to-do list by tying your daily tasks down to specific blocks of time. This approach is popular as time blocking and many consider it a secret weapon for better focus.
Another way you can figure out where your time goes is through a time sheet. After all, observing how you spend each hour of your day is a good way to understand whether you’re using your time wisely.
Log how many hours you spend on projects, tasks, chores, and more with Google’s Weekly time sheet template. It includes two sheets.
The first sheet contains four sample projects with a weekly time frame and the hours logged for each day. You can replace the existing data with your own and add more rows if you have more projects going to track.
The second sheet gives you a bird’s eye view of how much time you’re spending on each project per week and how many hours you’re working per day.
Rule Your Life With Spreadsheets
We’ve covered the most common aspects of your life that you can organize with Google Sheets. You don’t have to stop there! Get creative and set up spreadsheets to manage other areas of your life. For example, with Google Sheets you can:
Get organized for your next trip with Google’s Travel planner template and Vertex42’s Travel Budget Worksheet.
Plan every aspect of your wedding, right from schedules and budgets to guest lists and invites with Google Sheets’ mammoth Wedding planner template. You can even repurpose the template to plan other kinds of events including birthday parties and fundraisers.
Need to create a pro/con list à la Rory Gilmore? Google has you covered there with a Pros and cons template.
If you’re trying to be mindful of what you eat, use Vertex42’s Meal Planner or Food Diary. Couple that with a Weight Loss chart if you aim to lose a few pounds.
Use a Chore Chart to organize your household work.
If you take one look at Google’s template gallery or Vertex42’s template list, you’ll realize just how much more you could do to get organized with nothing but a simple spreadsheet.