30 September 2015

How to do Reverse Image Search on your Mobile Phone


The Reverse Image Search option in Google Images can help you quickly discover related images from around the web. Upload a photograph from your desktop to Google Images and it will show you similar images used on other websites and also different sizes of the same photo almost instantly.

Journalists can use the reverse search option to find the original source of an image and also know about the approximate date when the picture was first published on the Internet. Photographers can use ‘search by image’ feature to know about other websites that are using their photographs.

Reverse Image Search on Mobile Devices

The little problem is that ‘search by image’ is only available on desktop computers and not on mobile devices and tablets. Thus, if a friend has sent you an image on WhatsApp or Facebook that you’d like to verify, you’ll have to first transfer the photograph to a desktop in order to perform a reverse search. Too much work, right?

Not anymore. I wrote a little web app that lets you perform reverse searches on a mobile browser as well. Go to http://ift.tt/1O1Mghz on your mobile phone, click the “Select Image” button and choose an image from the photo gallery of your phone. Next click “Search” and it will upload your photo to Google Images much like the desktop version.

Find related images with Google Images on a mobile device.

Find related images with Google Images on a mobile device.

I’ve tested the search app on Chrome for Android and Safari for iPad but it should work on most other devices since it uses the standard HTML5 File System APIs. Internally, it takes your image file, converts it to Base64 (data URI) and submit the encoded image as HTTP POST request to Google Image. The browser then automatically redirects to the search page.

Also see: Find out where a picture was taken

There’s another workaround as well that will let you use the official Google Image Search website for reverse search on a mobile device. Open the Chrome browser on Android and under settings, choose “Request Desktop Site.” Now open images.google.com and you should see the Camera icon to upload an image for searching.
The story, How to do Reverse Image Search on your Mobile Phone, was originally published at Digital Inspiration by Amit Agarwal on 30/09/2015 under Google Images, Images, Internet.

24 September 2015

How to Change a Picture’s Date in Google Photos


Casey Smith uploaded a bunch of scanned images on Google Photos but they are showing the date when the scan was made and not when the pictures were captured. She writes: “Do you have any recommendation on how to re-date pictures that are not appropriately dated? I have a ridiculous amount of photos that are dated as of the date I added them to Google Pictures as opposed to the date they were actually taken. It’s driving me nuts. Any advise?”

There are two ways to deal with the problem. You can either change the date of photos before uploading them to Google Photos or do it after the photos are uploaded. The former option is recommended since it will let you modify the date and time of multiple photos in one go while the latter option would allow you to edit the timestamp of one image at a time.

Both Windows Photos Gallery and Apple Photos for Mac OS X allow you to easily edit a photo’s date and time. Open Photo Gallery on Windows, select one or more pictures by holding the CTRL key, click the date in the Info panel and choose the correct date from the calendar. In the case of Apple Photos, select one or more photos and videos from the gallery and choose “Adjust Date and Time” from the Image menu.

Alternatively, you can use a more powerful command like tool like ExifTool (available for both Mac and Windows) that can “shift” the date and time associated with images by a fixed amount. This is useful if you have taken pictures with a digital camera that had an incorrect time when the photos were taken so the dates can be shifted relatively.

If you’ve already uploaded the pictures on Google Photos, you can still edit the timestamp but you can only do that one image at a time. Also, the date editing option is only available on the Google Photos website and not inside their iPhone or Android apps (yet).

Google Photos - Change Date and Time

Go to photos.google.com and click on any photo. Next click the “i” icon to open the Info page and then click the pencil icon next to the date to modify the date and time of that photo. Tedious but works.

If you are to edit the date of multiple photos that are already on Google Photos, a less time-consuming option would be that you download them all to the desktop, delete the copy from Google Photos, empty the bin, edit the dates of images on the desktop and re-upload them to the Google Photos website.

And you would still need a desktop based photo editing program to add or edit the geolocation data since Google Photos doesn’t support that yet.

Also see: How to Edit the EXIF Data of Photos


The story, How to Change a Picture’s Date in Google Photos, was originally published at Digital Inspiration by Amit Agarwal on 23/09/2015 under Image Editing, Images, Internet.

16 September 2015

Find Out How Much Traffic a Website Gets


Would you like to know how much traffic (or page views) other websites in your niche are getting for competitive analyis? While it will be difficult for any third-party to accurately measure the traffic of a site, there are a bunch of traffic estimation services that can give you a better understanding of the popularity of a website. Here’s a list:

1. Alexa – Enter the website’s domain and Alexa will reveal the ranking of that website based on a combined measure of unique visitors and page views. The rank isn’t based on a site’s traffic alone but is relative to the traffic of all other sites that are monitored by Alexa. Webmasters are often skeptical of Alexa number but they the rank is still a good indicator of a website’s popularity over time.

2. Compete – You can use Compete to estimate the total US traffic (unique visitors) for nearly every site on the web. Compete uses data from ISPs, their own toolbar and other data sources to measure the traffic. It offers other metrics like Page Views, average stay duration, demographics, etc. but these are only available to paid users.

3. Similar Web – It started out as a tool for finding similar sites but now offers a range of data including traffic analysis in a clean interface. You get to know the site’s traffic over time, the countries that are sending the most traffic, what search keywords are bringing the organic referrals, how much time users are spending on a site and so on. The traffic reports can be downloaded as PDF files for archiving.

4. SEM Rush – It offers plenty of information around search (organic) traffic for any website. Put in the website URL and you’ll instantly know how the site has fared in organic search over time. The data can be split by country, you get to know which sites are sending traffic and also the keywords that are bringing the most visitors. Open Site Explorer is another popular tool in this category.

5. QuantCast – Like Compete, you can use QuantCast to determine how many people have visited a selected site during a give period from desktop or mobile phone. For sites that have implemented the QuantCast tags, you get more accurate metrics including visitor demographics, traffic by country, and the split in mobile and desktop traffic.

Also see: Know Everything About a Web Site

Website Traffic Chart

Find Website Traffic with Google AdWords

Few years ago, Google Ad Planner and Google Trends for Websites were the go-to tools for estimating a site’s traffic but they have since been discontinued. You can however still use the Display Planner tool inside Google AdWords to get a good idea of a site’s traffic and demographics. Here’s how:

Go to Display Planner and sign-in with your Google Account. You need not be an AdWords advertiser to use this tool.

Next put the site’s domain in the search box, set the Campaign targeting to United States (or remove geographic targeting to see global traffic) and click “Get Placement Ideas.” Google will now show you the average impressions per week for that domain and if you multiply that number by 4, you get a good estimate of the site’s monthly traffic (hits).


The story, Find Out How Much Traffic a Website Gets, was originally published at Digital Inspiration by Amit Agarwal on 16/09/2015 under SEO, Internet.

Download Mac Apps and OS X Updates Once for Installing on Multiple Computers


Mac OS X updates are huge with the installation files running into several gigabytes. The same is true for Mac apps like iMovie or Microsoft Office that have massive installers. The problem is compounded when you own multiple Mac computers and you need to upgrade them all to the latest OS X update. It will not just take too much time but you may end up consuming your monthly download bandwidth.

A simple and obvious workaround to the problem is that you download the installer files on one Mac machine and then transfer the downloaded apps to all your other systems through AirDrop or WiFi. The Apple website says that “Apps [downloaded] from the Mac App Store may be used on any Macs that you own or control for your personal use.” This is however easier said than done.

Installing Mac OS X on Multiple Macs

You download a 5 GB Mac OS X installer from the App Store, the machine restarts, your system is upgraded to Mac OS X Yosemite or El Capitan but wait, where has the installer disappeared? Your Mac, in a bid to save space, deletes the original installer automatically after the upgrade and thus you cannot reuse it on other machines.

To get around the problem, after the installer has downloaded, quit the installation routine and do not restart the machine. Go to the ~/Applications folder on your Mac, find the installer file and Option+Drag it to another folder like ~/Downloads to make a copy that will stay even after the machine is restarted.

For minor updates, like OS X 10.10.8 or 10.10.9 updates, Apple releases standalone installers as .dmg files that you can download once and install on multiple machines. The releases are available as incremental updates (containing only changed files) or combo updates (all changed files since the last major release).

A simple Google search for “download mac ox x 10.10. combo” will reveal the direct download links for the .dmg files on the Apple support website.

Mac App Store Download Folder

Installing Mac Apps from App Store

In the case of apps downloaded from the Mac App Store, you’ll find the .app files in your /Applications or /Users/username/Applications folder that you can easily copy to your other Mac machines. Internally though, the App Store downloads the installer as a package file (with a .pkg extension) and this will not reside in the Applications folder but in a separate hidden folder.

You can grab these Installer Package files and install the same Mac app on other machines without having to download it again thus saving data. To get started, open terminal on your Mac and run the following command to know where the App Store has downloaded the installer files:

defaults write com.apple.appstore ShowDebugMenu -bool true

Now open the Mac App Store app and you’ll see a new Debug menu (see screenshot). Click the “Show Download Folder” menu and it will open the location of the download folder inside Finder where the Mac apps are temporarily download. You can find the .pkg files inside one of the sub folders that you copy to your other Mac systems via Airdrop.

[Bonus Tip] If you are upgrading to a new version of Mac OS X, like the upcoming El Capitan, press Cmd+L at the installation screen and it will open the installation log so you know what’s exactly happening behind the scene.
The story, Download Mac Apps and OS X Updates Once for Installing on Multiple Computers, was originally published at Digital Inspiration by Amit Agarwal on 16/09/2015 under Apple Mac, Software.

14 September 2015

How to Print Multiple Gmail Messages in one go


John Q. Public is an attorney at a law firm and, as part of an ongoing litigation, the court has asked their clients to produce hundreds of email conversations associated with a case as hard copies. They are using Gmail with Google Apps and all the emails are safely stored in the mailbox but how to automatically print them all on paper?

Gmail doesn’t offer an option to print multiple email threads in a batch but that feature is available in Microsoft Outlook, the desktop program. You can import Gmail emails into Outlook, select several messages and then hit the Print button. Outlook will group all the selected email messages into a single PDF file or you can send them directly to any connected printer.

Bulk Gmail Printing
There’s an alternate approach as well. You can select multiple emails in Gmail and apply a common label. Next use an add-on to save these emails as neatly-formatted PDF files into your Google Drive. Once the PDFs are ready, you can either print them through Google Cloud Print or download the PDF files to the desktop and print to the local printer.

Here’s a step by step guide on how to print email messages and attachments in Gmail in bulk:

  1. Go to Gmail, select one or more email threads and apply a common label (like To Print) to all the selected email threads.
  2. Go to Google Drive and create a folder, say Gmail Files, where the selected Gmail messages would be stored as PDFs.
  3. Download and install the Save Emails add-on for Google Sheets.
  4. Inside the Google Sheet, go to Add-ons > Save Emails and Attachments > Create New Rule. Here select the Print Gmail label from the dropdown and then select your Google Drive folder.

Click the Create Rule button button and the add-on will save your marked Gmail emails into Google Drive every hour. Or you can go to the Manage Rules menu and run a rule manually to immediately save the marked email threads (including attachments) into Drive.

Print Gmail
Once all the emails have been saved, right-click the “Gmail Files” folder in Google Drive, and choose Download to save all emails to your desktop. And now you can send them all the emails to the printer with the simple Ctrl+P or (Cmd+P on Mac) keyboard shortcut.

Also see: How to Edit PDF Files


The story, How to Print Multiple Gmail Messages in one go, was originally published at Digital Inspiration by Amit Agarwal on 14/09/2015 under GMail, PDF, Print, Internet.

How to Hide AdSense Ads on your Website


Google AdSense supports Responsive Ads which means that the size of AdSense ads on your website will automatically change based on the visitor’s device. Thus, if they are viewing your pages on a desktop computer, they may be served the bigger 728×90 leaderboard while the same ad unit may serve a smaller 468×60 banner to visitors who are on a tablet.

There’s no need to change the code as the AdSense script smartly detects the browser’s width and serves the right size accordingly.

Now consider a slightly different scenario where, instead of showing a smaller sized ad, you would like to completely hide the AdSense ad if the screen width is less than ‘n’ pixels. For instance, you may have a 160×600 px Skyscraper unit in your website’s sidebar but it should be displayed only when the site is being viewed on a desktop computer and not on a mobile phone.

There are two ways to achieve this. You can either write a CSS media query that will completely hide the sidebar on a mobile phone and thus the included AdSense ad will also be hidden from the visitor. This will however be against AdSense program policies because the AdSense ad will still be rendered on the visitor’s screen though hidden from view.

How to Hide AdSense Ads with CSS Media Queries

What we therefore need is a mechanism where the the AdSense ad is itself ‘blocked’ from rendering on a small screen. This is also possible with CSS media queries but the big difference is that we need to apply the CSS rules to the ad element and not the parent container (which in our case is the sidebar). Let me explain:

AdSense Ad Code

What you see above is a standard AdSense code snippet that will render a 160×600 pixels ad unit. The size (height and width) of the ad is specified as an inline style.

If you copy-paste the above ad unit as is into your website, it will always download and render the ad irrespective of the visitor’s screen size. If you however need to prevent the AdSense ad from showing on small screens, we need to make a few “officially permitted” changes to the default code.

The modified code will look something like this:

Hide AdSense Ads

If you carefully notice the two snippets, you’ll find that we’ve added a new class sidebar_ads (you can give it any name) to the default AdSense snippet. Next we’ve added a media query that will hide all elements of this class if the screen width is less than 480 pixels. That’t it.

With this approach, no ad requests is made to the Google server and thus no ad is shown to the visitor. The ad area will be hidden and the content below will get pushed up leaving no whitespace, just as you’d like it to be.


The story, How to Hide AdSense Ads on your Website, was originally published at Digital Inspiration by Amit Agarwal on 14/09/2015 under Google AdSense, Internet.

08 September 2015

How to Read your Android Battery Graph


Your Android mobile phone includes a built-in app to help you visually monitor the battery usage pattern. Go to Settings > Battery (the app’s location may vary for your version of Android) and you’ll see a history graph detailing which apps have been consuming the most battery power and how long you can use the device before the battery is completely drained off.

If you observe the Android battery graph more closely, you’ll find some other interesting details as well. For instance, you’ll know the pattern of your mobile signal strength, how often apps running in the background ‘wake up’ your sleeping device and so on.

Android Battery Graph

This is the main battery graph and is easy to interpret. If there are any breaks, it indicates that the device was powered off during that period. If there are any red or yellow lines over the graph, it indicates that the charge was critically low during that period. The gray area represents the approximate remaining charge.

Related Tip: Do not let your phone’s battery charge dip the below the 10% mark as that will affect your phone’s battery life in the long run.

If you tap the battery history graph, it will provide a more detailed breakdown of the battery usage and charge times as shown in the screenshot below.

Android Battery - Signal Colors

The colored bars in the Mobile Network Signal indicate the strength of signal (or number of cellular bars). The dark green bars indicate strong signal (full bars), light green is a good signal, yellow means a weak connection (3 bars or less) while the red bars indicate ‘scanning’ mode meaning the device is searching for a network signal.

If your device is in airplane mode, or when you are out of coverage area, the network signal block will be blank (white or, for some models, black).

The Wi-Fi block indicates the time when the radio was turned on though the device may not be actually connected to a Wi-Fi network. The colored strips for charging indicate the time when your Android phone was connected to the charger. The ascending slopes in the battery graph is also an indicator of the charging time.

The colored blocks in the Awake bar represent background apps that may be running even while the screen is off. For instance, your mail app periodically checks for new email even while the phone is in ‘sleep’ mode. If you notice any extended ‘awake’ blocks, it means that some battery-draining apps are keeping your phone active and should be uninstalled.

The GPS line indicates the duration when the GPS receiver is powered on and some app or system service tried to use GPS to determine your exact location. Finally, the ‘Screen On’ bar indicates the actual usage time when the screen was turned on and not in standby mode.

Also see: How Websites Detect your Battery Level


The story, How to Read your Android Battery Graph, was originally published at Digital Inspiration by Amit Agarwal on 08/09/2015 under Android, Gadgets.

07 September 2015

The Best Google Font Combinations That Look Good Together


Whether you are creating a website, writing your resume or designing a presentation, the kind of fonts or typeface you choose can make a notable difference. The Google Fonts directory offers a myriad of choices but how do you pick the correct font for your digital projects? Should you go for Serif fonts or Sans Serif or a combination of serifs and sans serifs?

Typography is an art and with 100s of fonts available, it is obviously difficult for non-designers to find that perfect font combination. Need help? Here are some useful font pairing websites where type masters have already done the hard work and all you can do is follow their recommendations to pick the most elegant and gorgeous Google fonts for your web and print projects.

1. Beautiful Web Type (hellohappy.org) – Chad Mazzola has created a beautiful showcase of high-quality typefaces from the Google Fonts website. You’ll discover some creative usage of fonts here though they haven’t updated the site for quite some time.

Beautiful Web Type

2. Typ.io (typ.io) – If the body text of my website is set in Roboto, what font should I use for headings? Typ.io offers a visual list of beautiful websites that using similar font families and helps you pick the perfect matching pair based on the typography of other websites.

3. Google Type (femmebot.github.io) – Laurel O’Brien’s typography project uses Google Fonts to stylize tales from Aesop’s Fables. This is a great reference source for finding elegant font pairs and is regularly updated as well.

Google Typography

4. Palet Tab (palettab.com) – A Google Chrome extension that inspires you with a fresh font and color combination from Google Fonts each time you open a new tab in Chrome.

5. 100 Days of Fonts (100daysoffonts.com) – Each single day, for 100 days, designer Do-Hee Kim picked a unique and beautiful Google Fonts pair and all her work in now showcased in this single-page website. If you need inspiration for fonts, look no further.

100 Days of Google Fonts

6. Font Pair (fontpair.co) – Another well-designed resources for finding Google Fonts that go well together. The paired fonts can be downloaded as zip files which is handy in case you want to use the fonts with your PowerPoint presentation on the local computer.

7. Font Blender (http://ift.tt/1JMLOPf) – If you are wondering how a set of Google Fonts will look with your text, Font Blender can help. The web app allows you to preview Google Fonts in the browser and you have the option to experiment with the font size and line height as well.

8. Type Genius (typegenius.com) – Choose a starter web font and Type Genius will recommend a list of other matching fonts that will make a good combination. Like Typ.io, this website too makes suggestions based on font combinations of other beautiful websites. Designed by Waveney Hudlin.

Google Type Genius

9. Type Inspiration (typespiration.com) – A creative showcase of text blocks stylized using Google Fonts. The CSS snippets are included making it easy for you to replicate the style in your web design.

10. Font Face Ninja (fontface.ninja) – A browser extension for Google Chrome and Safari browsers that will help you recognize the font used on any website. You even have the option to download the font files through the Ninja add-on but please check the associated license.

Also see: How to Reduce Google Fonts Size


The story, The Best Google Font Combinations That Look Good Together, was originally published at Digital Inspiration by Amit Agarwal on 07/09/2015 under Fonts, Internet.

04 September 2015

Google Photos and Free Storage


There's something I don't understand about the new Google Photos. The settings page lets you choose between uploading high quality photos and videos for free, at reduced sizes (16MP or less for photos, Full HD or less for videos) or uploading original photos and videos at full resolution, but that counts against your quota.


This doesn't make sense. Google+ Photos had a different policy: "Only photos over 2048x2048 pixels and videos longer than 15 minutes count toward your storage limit." Google+ even had a setting that resized your photos to 2048x2048 or less, so they stayed under the free storage limit.

Google's new policy doesn't seem fair to those who pick the "original" option. If you upload photos that are 16 MP or less or videos that are 1080p or less, you should be able to store them for free, regardless of the Google Photos setting you choose. The distinction between "high quality" and "original" should only be made for photos and videos that don't fall under Google's limitations.

Google Drive Bonus Storage Is Expiring


2 years ago, Google offered 10 GB of free storage for installing the Quickoffice app for Android or iOS. Unfortunately, Google's bonus storage is about to expire.

"We wanted to let you know that you have bonus Google Drive storage expiring on Oct 3 2015. While this bonus period is coming to an end, you can always purchase additional storage," informs Google. "Rest assured that your files in Google Drive remain safe and accessible by you and the people you've shared them with. You just won't be able to add or sync any files unless you are using less than your current available storage or you've purchased additional storage."


Basically, Google won't delete your files, but you'll have to delete some of them or purchase more storage if you actually used the 10 GB bonus storage. Since the storage is shared between Gmail, Google Photos and Google Drive, all of these services are affected and you can also delete Gmail messages with large attachments or photos and videos from Google Photos that use your Google storage. Here's how to find Gmail messages with big attachments and a list of Google Drive files sorted by size.

More About Google's New Visual Identity


Google Design's site has an interesting article about Google's new identity. Google's designers started by "distilling the essence of the brand down to its core" and built 3 elements that work on any platform: a sans serif logotype, the dynamic dots that respond to users and a compact version of the Google logo.


Some people said that Google's new logo is childish and it really is. "The Google logo has always had a simple, friendly, and approachable style. We wanted to retain these qualities by combining the mathematical purity of geometric forms with the childlike simplicity of schoolbook letter printing. Our new logotype is set in a custom, geometric sans-serif typeface and maintains the multi-colored playfulness and rotated ‘e’ of our previous mark—a reminder that we’ll always be a bit unconventional," mention Google's designers.

The dots are an interesting way to convey the full Google logo in a Material Design approach. "The Google dots are a dynamic and perpetually moving state of the logo. They represent Google's intelligence at work and indicate when Google is working for you. We consider these unique, magic moments. A full range of expressions were developed including listening, thinking, replying, incomprehension, and confirmation."


Google now uses pixel-perfect SVGs for base assets and generates thousands of vector-based variants. For example, there's a version of the logo that's optimized for low-bandwidth connections and is only 305 bytes. Google's old approach was to serve a text-based approximation of the logo.

{ Thanks, Brendan Early. }

03 September 2015

Templates, Insights and Dictation in Google Docs


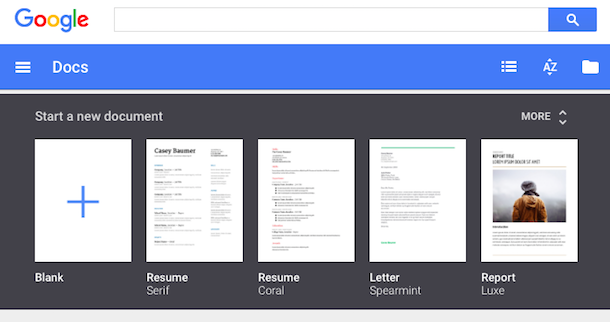
Google's standalone web apps for Docs, Sheets and Slides now show a list of templates you can choose to quickly create a document, spreadsheet or presentation. For example, Google Docs shows templates for resumes, reports, letters and you can expand the list to see even more templates (essays, class notes, project proposals, meeting notes, brochures, newsletters).


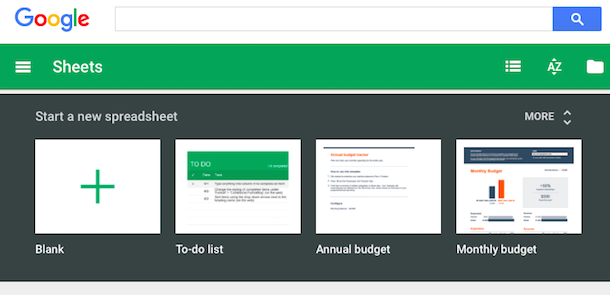
Google Sheets has templates for to-do lists, budgets, calendars, schedules, invoices, time sheets and more.


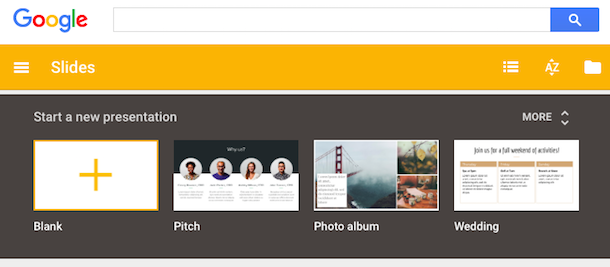
Google Slides also has a few templates for photo albums, pitches, status reports, lesson plans, portfolios, weddings, party invites and more.


Another new feature lets you get insights on a spreadsheet by simply selecting a range of cells and clicking Explore. This feature works in the desktop web app and the Android app and it shows trends, patterns and even charts for the data you've selected. It's surprisingly useful.


Google Docs now shows the new changes in a collaborative document. "If there are new changes, click the New changes button to the right of the Help menu. You can also click the File menu > See new changes."

Voice typing lets you dictate a text in Google Docs for desktop, but only if you use Chrome. Activate this feature from the Tools menu and speak in one of the 40 supported languages. You can say "period", "comma", "question mark", "exclamation mark", "new line", "new paragraph" to add punctuation to your text.


You can customize your forms by picking a theme or adding a photo. Google chooses the right color palette to match your photo. Insert images and YouTube videos to illustrate your questions.


{ Via Google Docs Blog. Thanks, Brendan and Jérôme. }

02 September 2015

Updated Mobile UI for Google's Related Searches


Google Mobile Search has a new interface for related searches. Google usually shows up to 8 related searches at the bottom of the search results pages, but now the list looks different: there's a table with white rows and small arrows next to each related query.


Click a related search and you can see the search results for that query and even more related searches. You can start with a generic query like [nightingale] and create a more specific query by only clicking on related searches. For example, you can find searches like [sound of a nightingale singing], [Yanni nightingale live] or [how do you become a nightingale in Skyrim?].

Google's New Colorful Favicon


Google has a new logo, but it also has a new favicon. It's now a capital G that uses the four Google colors: blue, red, yellow and green.

Here's a screenshot that shows the old favicon launched in 2012 and the new one:

This is the new favicon, which is also used as an icon for Google Search:

You can find it in Google's app launcher and soon in Chrome's app launcher and in Android, as an icon for the Google Search app.