17 December 2019

Google details its approach to cloud-native security


Over the years, Google’s various whitepapers, detailing how the company solves specific problems at scale, have regularly spawned new startup ecosystems and changed how other enterprises think about scaling their own tools. Today, the company is publishing a new security whitepaper that details how it keeps it cloud-native architecture safe.

The name, BeyondProd, already indicates that this is an extension of the BeyondCorp zero trust system the company first introduced a few years ago. While BeyondCorp is about shifting security away from VPNs and firewalls on the perimeter to the individual users and devices, BeyondProd focuses on Google’s zero trust approach to how it connects machines, workloads and services.

Unsurprisingly, BeyondProd is based on pretty much the same principles as BeyondCorp, including network protection at the end, no mutual trust between services, trusted machines running known code, automated and standardized change rollout, and isolated workloads. All of this, of course, focuses on securing cloud-native application that generally communicate over APIs and run on modern infrastructure.

“Altogether, these controls mean that containers and the microservices running inside can be deployed, communicate with each other, and run next to each other, securely; without burdening individual microservice developers with the security and implementation details of the underlying infrastructure,” Google explains.

Google, of course, notes that it is making all of these features available to developers through its own services like GKE and Anthos, its hybrid cloud platform. In addition, though, the company also stresses that a lot of its open-source tools also allow enterprises to build systems that adhere to the same platforms, including the likes of Envoy, Istio, gVisor and others.

“n the same way that BeyondCorp helped us to evolve beyond a perimeter-based security model, BeyondProd represents a similar leap forward in our approach to production security,” Google says. “By applying the security principles in the BeyondProd model to your own cloud-native infrastructure, you can benefit from our experience, to strengthen the deployment of your workloads, how your their communications are secured, and how they affect other workloads.”

You can read the full whitepaper here.


Read Full Article

Your body was forged in the spectacular death of stars | Enrico Ramirez-Ruiz

Your body was forged in the spectacular death of stars | Enrico Ramirez-Ruiz

We are all connected by the spectacular birth, death and rebirth of stars, says astrophysicist Enrico Ramirez-Ruiz. Journey through the cosmic history of the universe as Ramirez-Ruiz explains how supernovas forged the elements of life to create everything from the air you breathe to the very atoms that make you.

Click the above link to download the TED talk.

Anyscale, from the creators of the Ray distributed computing project, launches with $20.6M led by A16Z


Open source has become a critical building block of modern software, and today a new startup is coming out of stealth to capitalise on one of the newer frontiers in open source: using it to build and manage distributed application environments, an approach being used increasingly to handle large computing projects, such as those involving artificial intelligence or scientific or other complex calculations.

Anyscale, a startup founded by the same team that built the Project Ray open source distributed programming framework out of UC Berkeley — Robert Nishihara, Philipp Moritz, and Ion Stoica, and Berkeley professor Michael I. Jordan — has raised $20.6 million in a Series A round of funding led by Andreessen Horowitz, with participation also from NEA, Intel Capital, Ant Financial, Amplify Partners, 11.2 Capital, and The House Fund.

The company plans to use the money to build out its first commercial products — details of which are still being kept under wraps but will more generally include the ability to easily scale out a computing project from one laptop to a cluster of machines; and a group of libraries and applications to manage projects. These are expected to launch next year.

“Right now we are focused on making Ray a standard fo building applications,” said Stoica in an interview. “The company will build tools and a runtime platform for Ray. So, if you want to run a Ray application securely and with high performance then you will use our product.”

The funding is partly strategic: Intel is one of the big companies that has been using Ray for its own computing projects, alongside Amazon, Microsoft and Ant Financial.

“Intel IT has been leveraging Ray to scale Python workloads with minimal code modifications,” said Moty Fania, Principal Engineer and Chief Technology Officer for Intel IT’s Enterprise and Platform Group, in a statement. “With the implementation into Intel’s manufacturing and testing processes, we have found that Ray helps increase the speed and scale of our hyperparameter selection techniques and auto modeling processes used for creating personalized chip tests. For us, this has resulted in reduced costs, additional capacity and improved quality.”

With a impressive user list like this for the free-to-use Ray, you might ask yourself, what is the purpose of Anyscale? As Stoica and Nishihara explained, the idea will be to create simpler and easier ways to implement Ray, to make it usable whether you’re one of the Amazons of the world, or a more modest, and possibly less tech-centric operation.

“We see that this will be valuable mostly for companies who do not have engineering experts,” Stoica said.

The problem that Anyscale is solving is a central one to the future of large-scale, involved computing projects: there are an increasing array of problems that are being tackled with computing solutions, but as the complexity of the work involved increases, there is a limit to how much work a single machine (even a big one) can handle. (Indeed, Anyscale cites IDC figures estimating that the amount of data created and copied annually will reach 175 zettabytes by 2025.)

While one day there may be quantum-computing machines that can run efficiently and at scale to address these kinds of tasks, today this isn’t a realistic option, and so distributed computing has emerged as a solution.

Ray was devised as a standard to use to implement distributed computing environments, but on its own it’s too technical for the uninitiated to use.

“Imagine you’re a biologist,” added Nishihara. “You can write a simple program and run it at a large scale, but to do that successfully you need not only to be a biology expert but a computing expert. That’s just way too high a barrier.”

The people behind Anyscale (and Ray) have a long and very credible list of other work behind them already that speaks to the opportunities that are being spotted here. Stoica, for example, was also the co-founder of Databricks, Conviva and one of the original developers of Apach Spark.

“I worked on Databricks with Ion and that’s how it started,” Andreessen Horowitz co-founder Ben Horowitz said in an interview. He added that the firm has been a regular investor into projects coming out of UC Berkeley. Ray and more specifically Anyscale is notable for its relevance to today’s computing needs.

“With Ray it was a very attractive project because of the open source metrics but also because of the issue it addresses,” he said.

“We’ve been grappling with Moore’s Law being over, but more interestingly, it’s inadequate for things like artificial intelligence applications,” where increasing computing power is needed that outstrips what any single machine can do. “You have to be able to deal with distributed computing ,but the problem for everyone but Google is that distributed computing is hard, so we have been looking for a solution.”


Read Full Article

Google has fired another worker-activist


Google has fired another worker-activist, Kathryn Spiers. Spier, who worked on the platform security team, was generally tasked with writing code for browser notifications to automatically notify employees or guidelines and company policies while surfing the web.

According to Spiers, Google fired her because she created a browser notification to educate her colleagues about their labor rights. What prompted Spiers to create the tool was the news of Google working with a union-busting firm, as well as Google’s alleged retaliation against employees for organizing.

The notification read, “Googlers have the right to participate in protected concerted activities.”

“Over my time at Google, I saw people go from full trust in Google — always giving them the benefit of the doubt — to [Google] using blanket excuses to target workers.” Spiers told TechCrunch. “The company has lost that sentiment from workers, and have repeatedly taken actions to reduce trust in Google, and as I said in my blog, ‘A less transparent Google is a less trustworthy Google.'”

In response to Spier’s browser tool, Google allegedly suspended Spiers without warning. This happened the same day Google fired the Thanksgiving Four, who say Google fired them for organizing. Spiers says Google interrogated her three separate times about organizing activities and if she had any intention to disrupt the workplace.

“The interrogations were extremely aggressive and illegal,” she wrote on Medium. “They wouldn’t let me consult with anyone, including a lawyer, and relentlessly pressured me to incriminate myself and any coworkers I had talked to about exercising my rights at work.”

Fast forward to Friday, December 13 and Google terminated her for violating the company’s security policies.

“We dismissed an employee who abused privileged access to modify an internal security tool,” a Google spokesperson told TechCrunch. “This was a serious violation.”

Now, Spier is working with a lawyer to file an unfair labor practice claim. In the claim filed with National Labor Relations Board, her lawyers states that Google’s interrogation and termination of her “was done to attempt to quell Spiers and other employees from asserting their right to engage in concerted protected activities.”

As she outlined on Medium, other Google employees have modified code to make their jobs easier, and to share hobbies or interests. She also pointed to how, during the walkouts last year, someone changed the default desktop wallpaper to the Linux penguin holding a protest sign.

“The company has never reacted aggressively in response to a notification such as this in the past,” Spier wrote. “It’s always been a celebrated part of the culture.”

Kathryn Spier

This all comes after the Thanksgiving Four filed a complaint with the National Labor Relations Board, arguing Google fired them for organizing, which is a protected activity. In November, Google put Rebecca Rivers and Laurence Berland on leave for allegedly violating company policies. At the time, Google said one had searched for and shared confidential documents that were not pertinent to their job, and one had looked at the individual calendars of some staffers. Following a protest in support of the two, Rivers and Berland, along with two other employees, were fired.

The Thanksgiving Four all organized around a variety of topics, including Google’s treatment of its temporary, vendor and contractor workers, Google’s alleged retaliation against employees who organized, the company’s work with Customs and Border Protection and more.

Spier similarly organized around a variety of issues. In her first week at Google, she signed the letter demanding Google not renew its military drone contract. She has also organized around Google’s relationship with CBP.

“Google should not be helping CBP enforce racist and xenophobic immigration policy,” Spier said. “I posted some comments internal to Google about its relationship with CBP, which were removed by the community moderation team.”

Since the walkout last year, a number of employees have reported retaliation from Google in light of organizing. Meredith Whittaker and Claire Stapleton, two key organizers of the walkouts, reported retaliation. Both Whittaker and Stapleton have since left Google on their own terms.


Read Full Article

Get Quick Access to Useful Settings With One Switch Menu Bar App for Mac


Recent editions of macOS have added some great features, such as Dark Mode and True Tone. The problem is, many of these options are hidden within Preferences. If you would like to take control of your Mac without disrupting your workflow, One Switch is an essential upgrade. This neat app hangs out in the Menu Bar, providing quick access to 12 useful settings. You can download it now for just $2.99 via MakeUseOf Deals.

Quick Access

If you need to change your settings frequently, you could leave Preferences open all day. However, this wastes working memory and adds clutter to your desktop.

One Switch offers a much smarter solution. This app lives in the Menu Bar, appearing as a small icon. When you open the app, you get a sleek dropdown menu of toggle-style options.

With a couple of clicks, you can easily change the resolution of your display, reveal hidden files, or force your Mac to stay awake. The app also allows you to hide desktop icons, start your screen saver, activate Dark Mode, connect headphones (e.g AirPods), activate Night Shift, sleep the display, and more.

Now Just $2.99

One Switch is normally priced at $7.99, but you can get this little app now for just $2.99.

Read the full article: Get Quick Access to Useful Settings With One Switch Menu Bar App for Mac


Read Full Article

6 Sites to Learn How to Prepare for a Job Interview and Impress Bosses


Sites to Learn How to Prepare for a Job Interview and Impress Bosses

Job interviews can be nerve-wracking. But these sites will ensure you are well-prepared with tips and techniques to impress your potential employers and land that gig.

There are multiple doubts and questions floating in your head before a big job interview. What should you wear, how should your body language be, what will they ask and how will you answer? A great resume will only get you through the door, but then it’s all on the interview.

From experienced recruiters offering sound advice to apps that help you prepare for what to expect, check out these best websites to prepare for your job interview.

1. The Interview Guys (Web): Best Tips and Tricks for Interviews

The Interview Guys offer tips and techniques on how to ace a job interview

Jeff and Mike, known collectively as The Interview Guys, offer a wide range of advice about anything and everything related to cracking a job interview. They also have other articles about job searching, resumes, and career advice, but forget about those and jump straight to the interview section.

You’ll find generic advice about any type of interview, as well as tips and techniques for specific jobs like sales, product management, or marketing. They have dedicated answers for each popular interview question, like “what are you proud about” or “what is your greatest weakness?”

Apart from their website, you should check out The Interview Guys YouTube channel. It’s a lot of the same advice from the articles but told in a fun and engaging way through animated cartoons voiced by Jeff and Mike.

2. Interview Workbook (PDF): Step-by-Step Guide and Workbook

University of Manitoba's Interview Workbook and Guide

The University of Manitoba in Canada created an interview workbook for its staff use but published it for free online. It’s one of the best ebooks to learn about every aspect of an interview and put your knowledge into practice so you are thoroughly prepared.

The guide breaks down the interview process into seven steps: research, matching skills to the position, anticipating and practicing questions, preparing questions to ask there, the actual interview process, following up after the interview, and salary negotiation. It’s worth your time to read every part of this, which is beautifully broken up with tables, graphics, and tips, all in easy-to-understand language.

The end of the PDF is the workbook, which is the best part of it. You should definitely print and fill the entire workbook, which takes you step-by-step through the process of deconstructing your interview. Take a pen and go through it, it is the best way to prepare for an interview.

Download: Interview Workbook by University of Manitoba (PDF)

3. Pathrise’s Job Guides (Web): Interview Process at 200+ Top Companies

Pathrise cheatsheets for how 200+ top companies conduct job interviews

Are you interviewing at a large corporation like Apple or Google? The interview process at top companies is often more grueling than at a smaller firm. And many smaller offices like to imitate the process of bigger ones. Pathrise has compiled the interview process at 200+ top companies so you know what to expect.

The list includes names like Amazon, Apple, Google, Microsoft, Facebook, Netflix, 23andme, Dell, Electronic Arts, Siemens, and Uber. Click a company that most closely matches what you’re interviewing for. The job interview information is broken into a few broad categories: inside scoop, interview process, interview questions. You’ll also get some information about the company and office photos, median salaries, and hiring categories.

The Inside Scoop section is particularly interesting if you’re looking for a job there. By understanding what recruiters at the company look for, you can tailor your resume and prepare for your interview accordingly. Interview Questions are broken down into the type of job you’re looking for, from developer to product manager.

4. HireFunnel’s Question Bank (Web): Most Likely Questions for Any Job Interview

Hirefunnel's Question Bank with job interview questions for common job postings

HireFunnel is a video interview service for HR managers. By talking to recruiters and users, the service has now developed a database of questions for recruiters to ask potential candidates. But as a candidate, you can turn the tables and still use this to prepare for your interview.

The question bank has over 300 common questions, divided by the type of role you’re interviewing for. It spans copywriting, sales, management, engineering, and other common job profiles. The questions for each will vary depending on the type of experience you have.

There aren’t any ideal answers to the questions here. Instead, simply add all of these to your workbook to prepare for the interview. Chances are, after this, you won’t be surprised by anything your interviewer throws at you.

5. Culture Queries (Web): What to Ask Your Interviewer

Culture Queries guides for jobseekers

At the end of an interview, the recruiter will likely ask, “So, do you have any questions for us?” It’s good to look engaged at this point and ask a few questions. Culture Queries helps you figure out what to ask and how to ask it so that you can find out more information about the company without appearing nosy or intrusive.

Select multiple tags from six core fields: daily routines, team values, personal health, engineering, career growth, and strategy. Based on what you pick, Culture Queries will give you a few ideal questions, and explain how they tell you what you want to know.

For example, instead of asking “is there work/life balance”, ask “how responsive are people to emails over the weekends and after 6pm?” An interviewer might misinterpret the former to think you are not willing to work hard. The latter assumes your keenness to work while learning about what the company expects of its employees.

6. Interview School (Web): Try a Mock Video Interview With AI

Interview School lets you conduct a mock video interview assessed by artificial intelligence

Artificial intelligence powers so much of the world around us today, so why should interviews be any different? Practice a mock video interview at Interview School, which is then rated by artificial intelligence.

The free version includes a basic video interview, based on the 10 most common interview questions. Before each question, you have five seconds to think about your answer, and then you speak into the camera. The app records your entire interview, and then the AI analyzes it. You can also review it yourself.

Look, we can spend hours debating about the veracity and legitimacy of the AI’s assessment, but let’s put that on the backburner. For now, you’re getting a free mock interview on video, and you can play it back to see how you did.

If you like this, check out these other great mock interview websites to practice your skills.

Prepare for Soft Skills Questions

Interviewers ask two types of questions: hard skills and soft skills. Hard skills test whether your technical expertise will meet the job requirements. But most recruiters are checking more for whether your soft skills fit the work environment.

Jobs are about working with people. So the interviewer is checking how you’d do with leadership roles, handle a problem, and so on. It’s important to prepare for your interview by sharpening soft skills questions.

Read the full article: 6 Sites to Learn How to Prepare for a Job Interview and Impress Bosses


Read Full Article

Ground vs Air


Ground vs Air

Photoshop for iPad Adds the Select Subject Tool


Adobe has updated Photoshop for iPad, adding the Select Subject tool. This works exactly the same way on iPad as it does on desktop, and produces the same results. Adobe has also improved the way cloud documents are handled, and tweaked the user interface.

Unlock the free "iPhone and iPad Shortcuts" cheat sheet now!

This will sign you up to our newsletter

Enter your Email

Photoshop for iPad Launched to Bad Reviews

In November 2019, Adobe released Photoshop for iPad. Fans of Photoshop were quick to complain, with negative reviews pouring in. Most of the criticism stemmed from missing features from the iPad version that users have got used to using on the desktop version.

At the time, Adobe made it clear that v1 was “just the beginning of our journey to expand Photoshop to devices”. And that it’s “focused on compositing, basic retouching, and masking, common tasks and workflows that […] will be useful for most Photoshop users.”

Photoshop for iPad Updated With Select Subject

Now, Photoshop for iPad has received its first major update. As detailed in a post on the Adobe Blog, the headline feature is the addition of Select Subject. In a nutshell, this allows you to select the subject of a photo with one tap of the screen.

Select Subject uses AI machine learning technology to automatically select the subject in a photo. This only requires one tap, with “no additional selections or fine-tuning enhancements” required. While it isn’t always perfect, it works well in most cases.

Adobe is also rolling out “major performance improvements to the upload and download experience of cloud documents.” These enhancements are already live for “PSDs of 75mb and larger, with “speed improvements for smaller files” next in line.

Lastly, this update to Photoshop for iPad includes “a host of improvements to the user interface to make it more consistent and easier to use, along with some key usability improvements related to layer and layer adjustment controls and text entry.”

Other Things to Try Perfecting in Adobe Photoshop

While it will take time for Photoshop for iPad to match the desktop version, this is a step in the right direction. Still, if you’re still using the desktop version, here’s how to use the blending mode in Photoshop and how to properly resize images in Photoshop.

Read the full article: Photoshop for iPad Adds the Select Subject Tool


Read Full Article

Vudu’s Rental Redo Lets You Cancel Movie Rentals


If you rent a movie from Vudu the company is now offering you the chance to change your mind about it. Rental Redo means that you can get your money back on a movie rental as long as you stop watching it within the first 30 minutes. Which is a cracking deal.

Vudu Offers Money Back on Movie Rentals

Vudu announced Rental Redo in a post on the Vudu Blog. The company describes Rental Redo as “just like having a gift receipt for your movie”. This is because “if you decide your rental is not for you within the first 30 minutes, Vudu will give you a redo.

A redo in this context is “a credit equal to the price of the rental”. And all you need to do to claim it is stop watching the film within the first 30 minutes. Then, call or email Vudu’s Customer Care team, who will credit your account within 24 hours.

Rental Redo isn’t available for movies you have already downloaded. This is because Vudu wouldn’t be able to stop you watching a movie you’ve downloaded, even if you did request a refund. And Vudu isn’t dumb enough to leave such an obvious loophole open.

Vudu is offering other sweeteners for the holidays. Its Low Price Promise means Vudu will credit the difference if you find a movie available to rent cheaper elsewhere. It’s also offering Weekly Rental Deals, starting with 50 percent off your next rental.

The Best Places to Rent Movies Online

Rental Redo is a great idea. After all, a trailer can trick you into thinking a movie is better than it actually is. This way, you can change your mind if and when you realize you’ve been suckered in. Which should give Vudu an edge over the competition.

Even before it offered Rental Redo, Vudu made it onto our list of the best places to rent movies online. We have also previously explained what Vudu is and how it works. So you should have all of the information you need to get started streaming your favorite flicks.

Read the full article: Vudu’s Rental Redo Lets You Cancel Movie Rentals


Read Full Article

How to Sync an Xbox One Controller


Wireless controllers are convenient, but connecting them can be a bit confusing. If you’re wondering how to connect an Xbox One controller to your console, you’ve come to the right place.

Whether you have bought a new controller and need to sync it to your Xbox One or have brought your controller over to a friend’s Xbox, it isn’t difficult to pair your Xbox One controller. 

In this article we show you how to sync a controller to each model of the Xbox One, as well as a few tips if this doesn’t work for any reason.

How to Sync an Xbox One Controller to Your Console Wirelessly

  1. Turn on the Xbox One you want to sync with by pressing the Xbox button on the front of the system.
  2. Next, turn on your controller by holding the Xbox button for a moment. The Xbox button will flash, indicating that it’s looking for a console to sync with.
  3. Press and release the Bind button on your console.
    • On the Xbox One X and Xbox One S, you’ll find this small circular button at the bottom-right of your system, under the power button.
    • For the original model Xbox One, the button is on the left side of the console, right around the corner from the disc slot.
  4. After pressing the button on your console, press and hold the small circular Bind button on top of your controller. The Xbox button should flash a few times, then stay solid once connected.

How to Pair Your Xbox One Controller Using a Cable

If you’d rather, you can also use a micro-USB cable to pair your Xbox One controller and console.

Simply plug the cable into a USB port on Xbox, then connect the other end to your controller. Once they’re connected, press and hold the Xbox button on the controller to sync them. You can disconnect the cable to use the controller wirelessly after the syncing completes.

Xbox-One-Controller-Connected-Cable

How to Sync an Xbox Controller to Your PC

We’ve written a full guide explaining how to connect your Xbox One controller to a Windows PC. Follow those steps to use your existing controller with your favorite PC games.

Can’t Connect Your Xbox One Controller?

The above steps should sync your Xbox controller and console in most cases. But if pairing doesn’t work, try these tips:

  • Try replacing the batteries in the controller. If you use the Xbox One Play and Charge Kit for rechargeable batteries, make sure your controller is charged.
  • Keep the controller close to the console when you sync it. The wireless connection between your console and controller has a range of about 20-30 feet.
  • Turn off any other wireless devices (like microwaves or laptops) that are close to the Xbox and controller to reduce interference.
  • Fully restart your console by holding the Xbox button on the front of the system for about 10 seconds. Disconnect the power cable for at least 30 seconds, then reconnect it and turn on your system again.
  • Remember that you can only have eight controllers connected to the system at once.

When you press the Xbox button on your controller, it tries to connect to the system it was last paired to. If you have multiple Xbox One consoles, your controller thus might be connecting to another system as soon as you turn it on.

Try fully shutting down and unplugging any other Xbox One systems in your vicinity to avoid this overlap. This also applies when you’re trying to connect an Xbox One controller to a PC when the controller is already paired with your nearby console.

Still Having Trouble? Try Fixing Your Xbox Controller

Now you know the methods to pair your Xbox One controller with any model of the console. It’s not difficult, so if you run into a problem, you may have an issue with your controller.

In that case, take a look at our troubleshooting guide for the Xbox One controller. These tips will help you fix your controller when something goes wrong.

Read the full article: How to Sync an Xbox One Controller


Read Full Article

4 Myths and Misconceptions About RAM You Need to Stop Believing


ram-myths

RAM (random access memory) is one of the basic components of a computer or a smartphone. But a lot of misconceptions are floating about, like whether you can mix RAM size or brands. Let’s bust some myths about RAM.

The job of RAM is to remember computations for a limited amount of time, so that your processor does not need to redo those computations each time. But there are misconceptions about using different sizes of RAM together—does RAM have to match? In this article, we’ll attempt to answer them all.

1. “You Can’t Mix RAM Size.”

Can you mix RAM size? Yes.

Generally, most laptops or computers come with two slots for RAM sticks, and sometimes more. And there’s a prevailing misconception that you can’t use different RAM size together, or mix RAM brands. That’s not true. Can you mix RAM size? Yes. But it might not be best for performance.

It is advisable to use RAM sticks by the same manufacturer, of the same size, and of the same frequency. But there’s a simple reason behind why mixing RAM sizes is usually not the best way. RAM has several components that all come together to make it perform well.

For two different size RAM sticks to perform optimally together, they need to use the same voltage and their respective controllers should play well with each other and the motherboard. That’s why it’s best to use the same model in all slots.

However, this doesn’t mean you can’t use different size RAM sticks together. For example, if your first stick is 4GB, you can still add a new 8GB stick. Once you switch on dual channel mode (also called flex mode), it will perform as two 4GB sticks running side by side in optimal performance.

The remaining 4GB of the new stick will run in single channel mode. Overall, it’s not as fast as using two sticks of the same size, but it’s still faster than what you had before.

It’s the same with frequency or speed. Your RAM sticks will work together at the frequency of the lower stick, by default. So do RAM sticks have to match? No, but it’s better if they do.

2. “I Don’t Need More RAM”

More RAM is better, even if you use different size RAM together

“This amount of RAM is enough to run the software, you don’t need any more,” is common advice you’ll find. Yes, it might be enough to run apps, but that doesn’t mean it can’t be faster. More RAM does help, even if you use different size RAM together. And that’s because of how programs are made.

Most developers write their programs in a way where the app requests for a certain percentage of the RAM available. So if you have more RAM installed, the same requested percentage will mean more size for the program.

Just because you’re using only 60 percent (or any small percentage) of your total RAM capacity, it doesn’t mean you don’t need more RAM. Your regular tasks might only request 60 percent of RAM, saving the rest for other tasks that you might start in the future.

As a general thumb rule for computers, for regular users, 4GB is the minimum and 8GB is the recommended size for best performance. Gamers, PC enthusiasts, and professionals who work with graphics, video or sound should look for 16GB.

In Android phones, Android Authority ran an experiment to estimate ideal RAM requirements. They advise about 2.5GB for regular users, 3GB for social users, and 5GB for gamers.

3. “RAM Size Is All That Matters”

Faster RAM is better, but be careful of mismatched RAM speed and motherboard speed when buying faster RAM

You probably know how much RAM your phone or PC has. And when someone says they have more RAM in their PC, you automatically assume their system runs faster. But that’s not necessarily true. The capacity or size of the RAM isn’t all that matters.

Among the determining factors of RAM performance are speed and frequency. Like with a CPU, RAM has clock speeds. The higher the clock speed, the more functions it can perform in a second. You’ll often find RAM sticks with 2400 MHz or 3000 MHz frequency.

However, be careful of mismatched RAM here. If the RAM runs at 2000 MHz frequency but your motherboard supports only 1333 MHz, you aren’t going to get that speed boost. So buy RAM based on your motherboard’s capacity.

Generally speaking, the regular computer user won’t see much of a difference between 8GB and 16GB of RAM. However, changing it to a faster RAM of the same 8GB can lead to a significant boost. Depending on how you use your machine, you should figure out which is more important for you, faster RAM or more RAM?

4. “You Should Clear RAM to Improve Speed”

Don't use memory cleaner apps on Android or PC, they don't make RAM faster

This is the most frustrating and persistent myth about how memory works. It’s one of the misconceptions that came out out of an influx of “RAM booster” or “memory optimizer” software. If your RAM is full, that’s a good thing! Don’t clear RAM, it doesn’t improve speed.

The job of RAM isn’t to sit empty. In fact, your operating system and your software should be using up every little bit of RAM available. Freeing up RAM with one of those booster programs does nothing. If anything, it might actually slow down your system, since “freeing up” means you are removing certain computations from the RAM’s memory.

RAM or memory isn’t the same as a hard drive or storage! RAM auto-adjusts itself. If you have 4GB of RAM, then it is constantly writing, erasing, and rewriting data in those 4GB. And all of that is data which you don’t want to store for posterity. “Storage” is what your hard drive does, and it doesn’t auto-adjust.

In a nutshell, having free space on your hard drive is a good thing, but having free space on your RAM is a bad thing.

Please don’t use memory cleaning apps, they do more harm than good. Instead, if you’re facing a problem, try these Android memory management tips for low RAM.

RAM Works Differently on Macs and iPhones

Apple has a different approach to RAM than PCs and Android phones, so a lot of the above rules go out the window. But don’t worry, we have excellent guides to explain the differences.

The iPhone’s base architecture is much different from Android. That’s why you won’t find Apple talking about how much RAM its iPhones have, while they’re still as fast as the best Android phones. We have a quick explanation of why iPhones use less RAM than Android phones.

On Macs, you can’t easily replace or upgrade RAM like with a PC. You need to know if your Mac can accept an upgrade and pick the right components. Check out our guide on how to upgrade RAM on your Mac to know more.

Learn More About RAM

By now you should understand that while it is okay to mix and match RAM types, you’ll face some limitations. But what is RAM and how does it work? Why are modules different and why do RAM speeds differ?

Our quick and dirty guide to understanding RAM can answer most questions.

Read the full article: 4 Myths and Misconceptions About RAM You Need to Stop Believing


Read Full Article

The Best Printer for Home Use With Cheap Ink


best-printer-home-use

No one likes to spend money on a printer. It’s one of the most mundane pieces of tech in any household.

As such, it’s tempting to opt for a model at the cheaper end of the price spectrum. After all, regular printed text all looks the same to most people, right? No one would know whether your printer was top-of-the-range or plucked out of the bargain basement.

The Price of Printer Ink

Unfortunately, unlike most pieces of tech, choosing a new printer isn’t as simple as finding the right balance between price and features. You’ve also got to factor in the price of replacement ink cartridges. Cheap printers could end up costing you a lot more, in the long run, thanks to costly refills.

Worse still, it’s not just printing pages that use your ink. Cleaning printheads and other printer maintenance tasks use a significant amount, especially if your printer sits idle for long periods between sessions. Some reports claim maintenance tasks alone could cost you more than $100 per year.

This reality makes manufacturer guidelines for ink mileage inaccurate. They are based on bulk printing, i.e. when you print dozens of sheets in one go. If, like most home users, you print a couple of sheets here and there every month, your ink will not go as far as the claims suggest.

So which are the best printers for home use with cheap ink? Keep reading to find out.

1. Epson Expression ET-3700 EcoTank

Epson Expression ET-3700 EcoTank Epson Expression ET-3700 EcoTank Buy Now On Amazon $347.88

Our first pick doesn’t use traditional ink cartridges. Instead, it relies on refillable ink wells. The upfront price of the Epson Expression ET-3700 EcoTank isn’t cheap, but it ships with enough ink for two years of heavy usage—it’s good for 14,000 black pages or 11,200 color pages. According to the manufacturer, that’s roughly equivalent to 30 regular ink cartridges.

And even when the time comes to refill, you can expect to save around 80 percent when compared to regular cartridges for the same amount of output. Other important features include a 150-sheet paper tray, support for two-sided printing, borderless printing, a print speed of 15 black or eight color pages per minute, and a 2.4-inch color screen. Sadly, the printer does not have a fax feature, meaning it might not be suitable for people who work from home.

2. Canon Pixma TS8320

Canon Pixma TS8320 Canon Pixma TS8320 Buy Now On Amazon

If the high price of the Epson Expression ET-3700 EcoTank is off-putting, check out the Canon Pixma TS8320 instead. One of the most critical aspects of making sure you get the most value out of your ink is buying a unit with four separate cartridges (black, cyan, magenta, and yellow). In this regard, the Pixma TS8320 delivers.

It costs about six cents for a page of black text, 17 cents for a sheet of graphics, 40 cents for a 4 x 6 photo, and $1.25 for an 8 x 10 photo. Aside from ink cost, you can enjoy duplex printing, an LCD screen, and wireless connectivity. Like the Epson model, it does not support faxing. Unusually for a printer, it’s also available in three colors, making it ideal for anyone who wants their device to blend in with their room.

3. Epson Expression ET-2650 EcoTank

Epson Expression ET-2650 EcoTank Epson Expression ET-2650 EcoTank Buy Now On Amazon $269.99

The Epson Expression ET-2650 EcoTank is a cheaper version of the previously discussed ET-3700 model. Like it’s big brother, the printer does not use ink cartridges. Aside from price, the most significant difference between the ET-2650 and the ET-3700 is the size of the ink wells.

It can produce 4,000 black pages or 6,500 color pages off a single refill. Replacement black ink will cost you no more than $10. The colors run a couple of dollars more expensive. Bottom line? The Epson Expression ET-2650 is possibly the best printer for home use with cheap ink.

4. Brother MFC-J6930DW

Brother MFC-J6930DW Brother MFC-J6930DW Buy Now On Amazon $287.69

If you want to print cheap photos, the Brother MFC-J6930DW is the way to go. Estimates suggest it costs about 35 cents per 4 x 6 photo, which is less than most other models. The printer is also suited to heavy use in a small office or home business thanks to its 500-sheet paper tray. Regular cartridges will produce 550 black and 550 color sheets before running out.

Brother also offers Super High Yield cartridges. They’ll produce 3,000 black sheets and 1,500 color sheets. The unit can print 22 pages per minute and includes a 3.7-inch touchscreen display. The printer is compatible with Apple AirPrint, which is a great way to print when you’re out of the house.

Interestingly, the Brother MFC-J6930DW is also Amazon Dash-enabled. If you live in a supported market, Amazon will monitor your remaining ink levels and automatically order replacements when you start to run dry.

5. Brother HL-L2350DW

Brother HL-L2350DW Brother HL-L2350DW Buy Now On Amazon $99.99

A sad truth of inkjet printers is that they are prone to printhead failures. Over time, the nozzles become blocked with dried ink—especially if you don’t print very frequently. At best, you’ll eat through a ton of ink just to get them operational again. At worst, you’ll need to buy an entirely new printer.

Laser printers don’t suffer from such issues. Better yet, they also tend to have a cheaper cost per printed page than their inkjet counterparts. Laser printers are also much faster. As it’s a laser printer, the Brother HL-L2350DW uses toner rather than regular ink. A single toner refill should last for two years based on normal home use. A printed page costs 3.5 cents.

The major downside of the Brother HL-L2350DW is that is can only print in black and white. However, depending on your use case, it might be adequate. Other features include duplex printing, a 250-sheet paper tray, wireless printing, and Amazon Dash toner replenishment.

Printer Ink: More Expensive Than Champagne?!

By the ounce, printer ink is more expensive than a high-end bottle of champagne. As such, the cost is not something you should take lightly. Before buying a new printer, you need to think about how much you’re going to use it and how much it could cost you over the course of a year.

If you print on your Mac, check out our tutorial on setting up and using printers on Mac. As a supplement, you might also look at the best label makers.

Read the full article: The Best Printer for Home Use With Cheap Ink


Read Full Article

You Can Now Upload Live Photos to Twitter as GIFs


Twitter has added support for Apple’s Live Photos. Finally. Previously, Live Photos uploaded to Twitter have been displayed as still photographs. However, by pressing one extra button, you can now upload Live Photos to Twitter as GIFs instead.

What Are Apple’s Live Photos?

In 2015, alongside the iPhone 6s, Apple introduced Live Photos. Every iPhone released since then has been able to capture Live Photos. Live Photos are moving pictures, with video and audio captured for 1.5 seconds either side of you pressing the shutter button.

The result is a moving picture similar to those seen in the Harry Potter series. And once you capture Live Photos you have a number of options of what to do with it. Including keeping it as-is, saving it as a still photo, or converting it into a GIF.

How to Upload Live Photos as GIFs on Twitter

The problem with Live Photos is that most platforms don’t support them. So, with the exception of Facebook, which supports Live Photos, you either have to share Live Photos as still images or turn them into GIFs before sharing them outside of the Apple ecosystem.

Twitter hasn’t even offered the option to convert Live Photos into GIFs until now. So, you have either had to convert your Live Photos into GIFs using a dedicated app or just upload them as still images. However, Twitter has now seen the Live Photos light.

It’s now extremely easy to post a Live Photo as a GIF to Twitter. Just open the Twitter app on your iOS device, click the Compose icon, select a photo from your camera roll, then tap the GIF button in the bottom-left corner of your Live Photo. It will then post as a GIF.

How to Capture, Share, and Edit Live Photos

If this has piqued your interest in Live Photos, here’s everything you need to know about Live Photos. This article shows you how to capture, share, and edit Live Photos on your iPhone. And once you’re happy with one you can now upload it to Twitter as a GIF.

Read the full article: You Can Now Upload Live Photos to Twitter as GIFs


Read Full Article

4 Nifty Things Your Apple EarPods Headphones Can Do


apple-earpods-review

From talking on the phone to fast-forwarding music, there are a lot of different tasks you can accomplish with Apple’s wired iPhone headphones. The center button makes it easy to control phone calls, music, podcasts, Siri, and more.

All you need to do is learn how to use them effectively, and we’re here to show you.

The Controls on Your Apple Headphones

Apple EarPods with remote control

The basic Apple earbuds, also known as EarPods, are white headphones that come free with every iPhone, iPad, or iPod. They aren’t as exciting as a pair of wireless AirPods, but you never need to worry about charging them and they actually give you more control over your audio.

Depending on the device they came with, your Apple headphones connect using a 3.5mm headphone jack or a Lightning connector. Either way, you can find the headphone controls attached to the wire beneath the right EarPod.

There are three buttons on the front of the controls:

  • Volume up
  • Volume down
  • Center button

The volume buttons are pretty simple; use them to adjust the sound level of whatever you’re currently listening to. In contrast, the center button offers lots of different functions depending on how often you click it and the app you’re in.

You might be wondering where the microphone is for your iPhone headphones. On the back of the control section is a microphone icon, indicating a built-in mic. This whole section hangs around mouth height, making it perfect for taking phone calls, recording memos, or commanding Siri without lifting up your iPhone.

1. Control Phone Calls With Your Headphones

Send to Voicemail button with incoming call on iPhone

When you’re expecting to talk on the phone, make your life easier and plug your headphones in beforehand. Thanks to the built-in microphone, you can talk hands-free without needing to hold your iPhone up to your mouth.

Here’s how to talk on a phone call using your iPhone headphones:

  • Answer a call: Click the center button while your iPhone is ringing to answer it.
  • End a call: Click the center button while talking on your iPhone to end the call.
  • Decline a call: Hold the center button while your iPhone is ringing to send it to voicemail. Make sure to keep holding the center button until you hear two beeps.
  • Put a call on hold: If someone else calls while you’re already on the phone, click the center button to answer the new call and put your current one on hold.
  • Switch between calls: When you’ve got multiple active calls, click the center button to place your current call on hold and switch to the next one.
  • End multiple calls: When you’ve got multiple active calls, hold the center button to end your current call and switch to the next one.

2. Control Music and Video With Your Headphones

Play controls from Apple Music app on iPhone

When you listen to music, podcasts, audiobooks, or videos on your device you can control playback using the center button on your EarPods.

Here’s how to control audio using Apple’s wired iPhone headphones:

  • Play/Pause: Click the center button to play or pause the music, podcast, audiobook, or video.
  • Skip forward: Double-click the center button to skip to the next song, jump 15 seconds forward on your podcast or audiobook, or skip to the next chapter in a movie.
  • Fast-forward: Double-click and hold the center button to fast forward your song, podcast, audiobook, or video.
  • Skip backward: Triple-click the center button to skip back to the previous song, jump 15 seconds backward on your podcast or audiobook, or go back to the previous chapter in a movie.
  • Rewind: Triple-click and hold the center button to rewind your song, podcast, audiobook, or video.

3. Activate Siri With Your Headphones

Siri Soundwave from iPhone

To use “Hey Siri,” you need Apple’s wireless AirPods or AirPods Pro. But you can still activate Siri manually with the white headphones included in the box of your device. Thanks to the mic, you can give hands-free commands to Siri as well.

You can also follow these same instructions to use Voice Control instead of Siri, depending on your device settings.

Here’s how to talk to Siri or Voice Control from your Apple headphones:

  • Activate Siri: Click and hold the center button until you hear two beeps, then start talking to Siri.
  • Deactivate Siri: Click the center button to stop speaking to Siri.

4. Control the Camera With Your Headphones

Camera shutter button from iPhone

It was once possible to control the camera on your iPhone, iPad, or iPod touch using the center button on your headphones. This made it easier to take better photos on your iPhone because you could snap a picture without touching the device.

Unfortunately, Apple removed this feature in later software updates. In case it ever comes back, here’s how to use it:

  • Capture a photo: Open the camera on your device and click the center button.
  • Start/Stop recording: Open the video camera on your device and click the center button.

Audio Quality on Apple’s Headphones

Apple’s wired headphones have received a lot of criticism over the years for poor sound quality. Considering they come free with most of Apple’s devices, they really aren’t that bad, especially since you get a built-in microphone and extensive controls with them.

That said, if sound quality is important to you, there are better wired headphones on the market. Many of them offer improved isolation, a more balanced response, and even noise cancellation. But none of them come free with your iPhone.

If you’re looking for wireless headphones, consider Apple’s AirPods or AirPods Pro instead. They aren’t the cheapest options available and don’t have as many controls as Apple’s wired headphones, but they work like magic with your Apple devices.

Use Your Headphone Controls With Other Devices

You aren’t limited to using the controls on your Apple headphones with the device they came with. In fact, plug them into any laptop, smartphone, or tablet and you can use most of the controls in exactly the same way: adjust the volume, pause music, rewind, and more.

Of course, those with EarPods that use a Lightning connector can only plug them into mobile Apple devices. If you’re looking to upgrade, there are tons of alternative Lightning connector headphones you might want to consider as a step up from the free Apple ones.

Read the full article: 4 Nifty Things Your Apple EarPods Headphones Can Do


Read Full Article

Brilliant’s Interactive Courses Provide a Lifetime of Learning


Brilliant Sponsored Featured

Improving learning outcomes for students and professionals requires effort on multiple fronts. One major part is helping learners to take a more active role in the learning process. Unfortunately, many learners try to address this challenge only through narrow learning activities to memorize formulas, followed by rushed studying (cramming) for an exam or presentation.

This approach minimizes continuity in the knowledge-acquiring process, reduces interest, and harms the lasting effects of learning. Brilliant offers interactive, online learning courses in mathematics, science, and computer science to develop an interest in active learning.

Let’s look at the courses offered by Brilliant that can help you become a better learner and problem solver.

Why Brilliant?

First, let’s look at some of the great advantages Brilliant offers:

  1. Brilliant helps you learn by doing. Its courses guide you through problem-solving strategies with interactive learning techniques to harness interest and curiosity.
  2. There are a wide variety of courses for students, professionals, job aspirants, and other groups. These include foundational and advanced mathematics, basic and advanced science, computer science, data structures, machine learning, and more.
  3. You can get started with Brilliant irrespective of age, skill level, or profession. If you’re a beginner, you can enroll in a basic course, or dive right into intermediate and advanced courses if you’re ready. Brilliant is for ambitious and curious people ages 13 and above.
  4. The courses are carefully designed with efforts from dedicated educators and lifelong learners from respected universities, including MIT, Caltech, Duke, Stanford, Cambridge, and other schools. Head to the lead educators and course contributors page for details.

In addition to the website, you can also learn on the go by downloading the Brilliant app for iOS or Android.

Getting Started With Brilliant

When you first sign up for Brilliant, you can pick from any number of courses. If you don’t know where to start, check out the topics listed under popular courses. Alternatively, you can browse all the 60+ courses by subject.

The Courses section takes a guided problem-solving based approach to any subject. Instead of the standard lecture-based delivery, you’ll learn both the practical and fundamental aspects of your chosen topic.

For example, in the Computer Science Fundamentals course, Brilliant will teach you how to think like a computer scientist. It starts with the very basics, including drag-and-drop programming a delivery drone. There’s no experience required!

learn computer science with Brilliant

The Today section always has something new. It comes with new Daily Challenges, which consist of one math/logic and one science/engineering problem every day. By turning on daily reminders, students and professionals can take advantage of this to keep learning incrementally and make it a habit.

Daily challenge in Brilliant

How Are Brilliant Courses Designed?

Once you’ve selected a course, start from the beginning. Each lecture breaks down the material in easy-to-digest explorations. Within each exploration are fun quizzes to get hands-on with subject matter. The questions are sometimes tricky and put your critical thinking to the test.

If you choose a wrong answer, click the Show explanation button to show the answer and get an explanation of the solution with detailed examples. By working through the quizzes, you are building up your problem-solving skills.

The courses are made with industry best practices in mind. In the computer science courses, the built-in code editor helps you learn how a particular programming language works and practice it simultaneously.

learn the flow of programming with Brilliant

We also found the Logic course especially interesting. It consists of puzzles with truth-teller riddles, logical fallacies, machine logic, and game theory. The puzzles become more difficult after each chapter, challenging your critical thinking skills.

As you learn, you’ll follow a natural progression. Brilliant guides you through your learning journey by providing information on the prerequisites for the course you are planning to take. You can also view next steps for you to expand your learning on a specific topic. This helps you make sure you’re always at the right level for what you want to learn.

Courses for Students, Job Aspirants, Professionals, and Lifelong Learners

Brilliant help students move from basic to graduate levels developing a deep foundation in key concepts. The elementary step is an important stage because students must learn and develop problem-solving skills from the beginning. Examples of these courses include:

  • Logic and Deduction: Starts with puzzles and mind-bending challenges. You’ll learn how to apply the basics of logical reasoning and problem solving in practice with fun riddles.
  • Mathematics: The essential course for mastering algebra, geometry, logic, and number theory. Instead of memorizing formulas, Brilliant will use diagrams and words to explore the essence of frameworks, not formulas. Going forward, you’ll learn the foundations of equations, rates, ratios, and sequences.
  • Statistics and Probability: Learn the basics of statistics with real-life examples. With the probability course, you can analyze probabilistic scenarios. The applied probability course will help you understand the fundamentals through games, sports, economics, and science.

For professionals, Brilliant helps build the problem-solving skills and confidence necessary for job interviews and a successful career. Below are a few examples of these courses:

  • Data Structures: An essential course for aspiring computer scientists or programmers. You’ll start with the basics like arrays and sorting, then progress towards complex data types, structures, and algorithms.
  • Programming With Python: In this course, you’ll learn the basic concepts of variables, control flow, and simulation. These principles apply to games, data visualization, and machine learning.
  • Machine Learning: This course develops the fundamental basis needed to understand the problem of classification and estimation. You’ll learn the techniques to analyze big data and explore them to automatically extract patterns in real-world problems.
  • Quantum Computing: This course is made in collaboration with Microsoft and Google. You can explore Brilliant’s quantum circuit simulator, and even simulate a quantum computer directly in the browser or in the app.

Maybe you’re a lifelong learner who’s curious about the world or want to keep your mind sharp. Some of these courses will appeal to you:

  • Search Engines: Have you ever wondered how Google and other search engines work? Dive into this course to explore the ideas behind search technology and even how to build your own search index.
  • Astronomy: Looking up at the night sky is enough to make anyone gasp in wonder. In this course, you’ll learn fascinating information about the universe and understand the life of a star.
  • Physics of the Everyday: What happens when you flush a toilet? How do BMX bikers use physics to master their sport? Learn about these and other everyday applications of physics in this course.

Brilliant Premium Makes a Great Gift

Brilliant is a fun way to nurture curiosity, build confidence, and develop problem-solving skills crucial to students, job aspirants, and professionals.

If you’re ready to take your learning further, the premium subscription is for you. It includes access to all courses, an archive of every daily challenge, additional practice sessions, and the ability to save courses on your device. Brilliant Premium is a perfect gift to help your students learn effectively, shape your career, and nurture your skills in the competitive job sector.

gift Brilliant premium

To get started, sign up for the seven-day free trial and check out the courses; we think you’ll be pleased. Head to the Give Brilliant Premium page for more details—the first 200 readers who sign up with our special link will enjoy 20% off an annual subscription!

Read the full article: Brilliant’s Interactive Courses Provide a Lifetime of Learning


Read Full Article

How to Reset Your Xbox One or Xbox 360


Do you need to reset your Xbox One or Xbox 360 console? Perhaps you’re planning to sell your system and want to remove your personal data from it. Or maybe you’ve had an issue with your system and need to troubleshoot the problem.

In this article we cover how to reset your Xbox One and Xbox 360, and look at the differences between the various options.

Defining Soft Reset, Hard Reset, and Factory Reset

Before we look at how to reset your Xbox One, you should understand the different types of system resets:

  • A soft reset, also known as restarting, is simply powering down your console and turning it on again. It does not erase any data.
  • A hard reset occurs when you forcibly shut down the console, which is akin to pulling the plug. This also does not remove any of your personal data.
  • Finally, a Factory reset removes all data from your system and resets it back to its original state. This is the most drastic measure.

Let’s look at how to perform each of these resets on your Xbox One and Xbox 360.

How to Soft Reset Your Xbox One

A soft reset is a common troubleshooting step for minor issues, such as being unable to get your Xbox online.

To perform a soft reset, press and hold the Xbox button on your controller for a few moments. In the menu that appears, choose Restart console. This will fully shut down your Xbox and turn it back on.

Xbox One Restart Console

On this menu, you’ll also see an option to Turn console off. However, if you have your Xbox One in Instant-on mode, selecting this will put the console into a “sleep mode” state instead of turning it off.

You can change this setting by going to System > Settings > General > Power mode & startup and switching to Energy-saving mode. In most cases, though, we recommend keeping Instant-on mode enabled for convenience. You can always restart using the menu above.

How to Hard Reset Your Xbox One

Next, let’s look at how an Xbox One hard reset works. Like a PC, it’s a good idea to do a full shutdown every once in a while to keep everything running smoothly. This also comes in handy when your Xbox One is frozen.

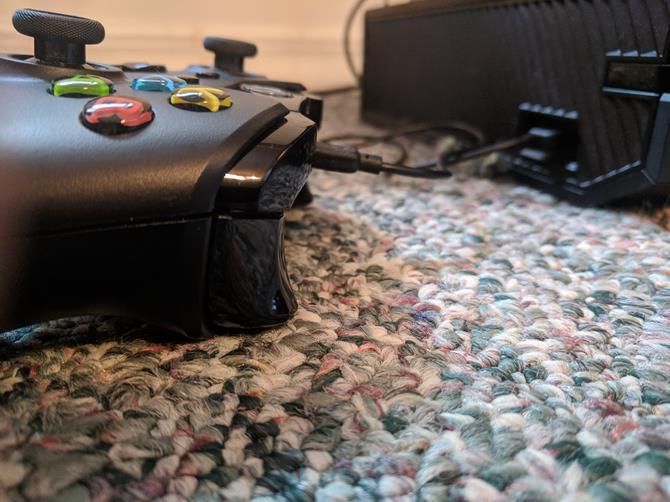
To perform a hard reset on your Xbox One, press and hold the Xbox button on the front of the console for about 10 seconds. This will fully shut the system down. To make sure it clears out all caches, you can also unplug the power cable for about 30 seconds, then plug it back in before turning your system back on.

Xbox One X system front

If your Xbox One is completely locked up and won’t respond to your touch on the front button, you can also force it to shut down by pulling the power cable. You should only do this as a last resort, however, as suddenly losing power isn’t good for any computer.

How to Factory Reset Your Xbox One

The above two methods are quick troubleshooting steps to keep your Xbox One running smoothly. Now we look at the most drastic method: performing a full factory reset to erase all data. Your console will return to its out-of-the-box state after this, so make sure you’ve backed up anything important.

To reset your Xbox One to factory defaults, follow these steps:

  1. On the home screen, press the Xbox button to open the Xbox Guide.
  2. Use RB to scroll over to the System tab on the right, and select Settings.

    Xbox One Open Settings

  3. Choose the System tab from the left sidebar.
  4. Here, open the Console info menu option.

    Xbox One Console Info Menu

  5. Finally, choose the Reset console entry. You’ll see two options:
    • Reset and remove everything: Deletes everything on the console and resets it to factory defaults. You’ll lose accounts, save data, settings, and all games. This is the best choice when you’re giving away your console.
    • Reset and keep my games & apps: This will reset the Xbox One operating system, but won’t touch any installed games or apps. If you’re performing a reset to troubleshoot an issue, you should use this first so you don’t lose saved data or have to re-download huge games.

      Should you continue to have issues, you may have a corrupted game and need to perform a full reset.

      Xbox One Factory Reset

  6. Your Xbox will start the reset once you’ve selected an option.

Note that the second option will still delete your accounts, save data, and settings. Your Xbox syncs information like saved data to Xbox Live when it’s connected. If your console hasn’t been online for a while, you should make sure you protect your game saves before resetting.

Factory Reset Your Xbox One With a Flash Drive

In cases where you can’t access the Settings menu on your Xbox or don’t see anything on your screen, you can perform a factory reset on the Xbox One using a USB drive. This is much less convenient, so we only recommend using this method if it’s absolutely necessary.

Prepare the Flash Drive

windows disk format options

First, you’ll need a USB drive that’s at least 4GB. You’ll need to format the USB drive as NTFS before proceeding. Most flash drives do not ship in this format, so make sure you do this first.

After that’s done, download Xbox One Restore Factory Defaults from Microsoft, which is a ZIP file. Unzip its contents, then copy the $SystemUpdate file to the root directory of the flash drive. For the best results, according to Microsoft, you shouldn’t have any other files on the drive. Once it copies, remove the drive from your PC.

Running the Reset on Your Xbox One

If you have a network cable plugged into your Xbox One, remove it. Next, fully shut down your console by holding the Xbox button on the system face, as described above. Once it’s powered off, unplug the power cord and wait 30 seconds before plugging it back in.

Continuing on, plug the USB drive into the console. Now, you need to tell the Xbox One to check for the USB drive when it boots up. To do this, hold both the Bind and Eject buttons on the console, then press the Xbox button on the front of the console.

Xbox One Bind Eject Buttons

On the original model Xbox One, the Bind button is on the left side of the console. If you have an Xbox One S or Xbox One X, the Bind button is underneath the Xbox button. The Xbox One S All-Digital Edition does not have an Eject button, so if you have that system, hold only the Bind button.

Completing the USB Reset

After you press the Xbox button to turn the system on, continue holding Bind and Eject for 10-15 seconds. Listen for two power tones while you do this; you can release the buttons after you hear the second sound. If you don’t hear two tones within 15 seconds, or you hear a power-down sound, the process has failed.

When the console restarts, you can remove your flash drive. After it completes the process, your Xbox One will be completely reset.

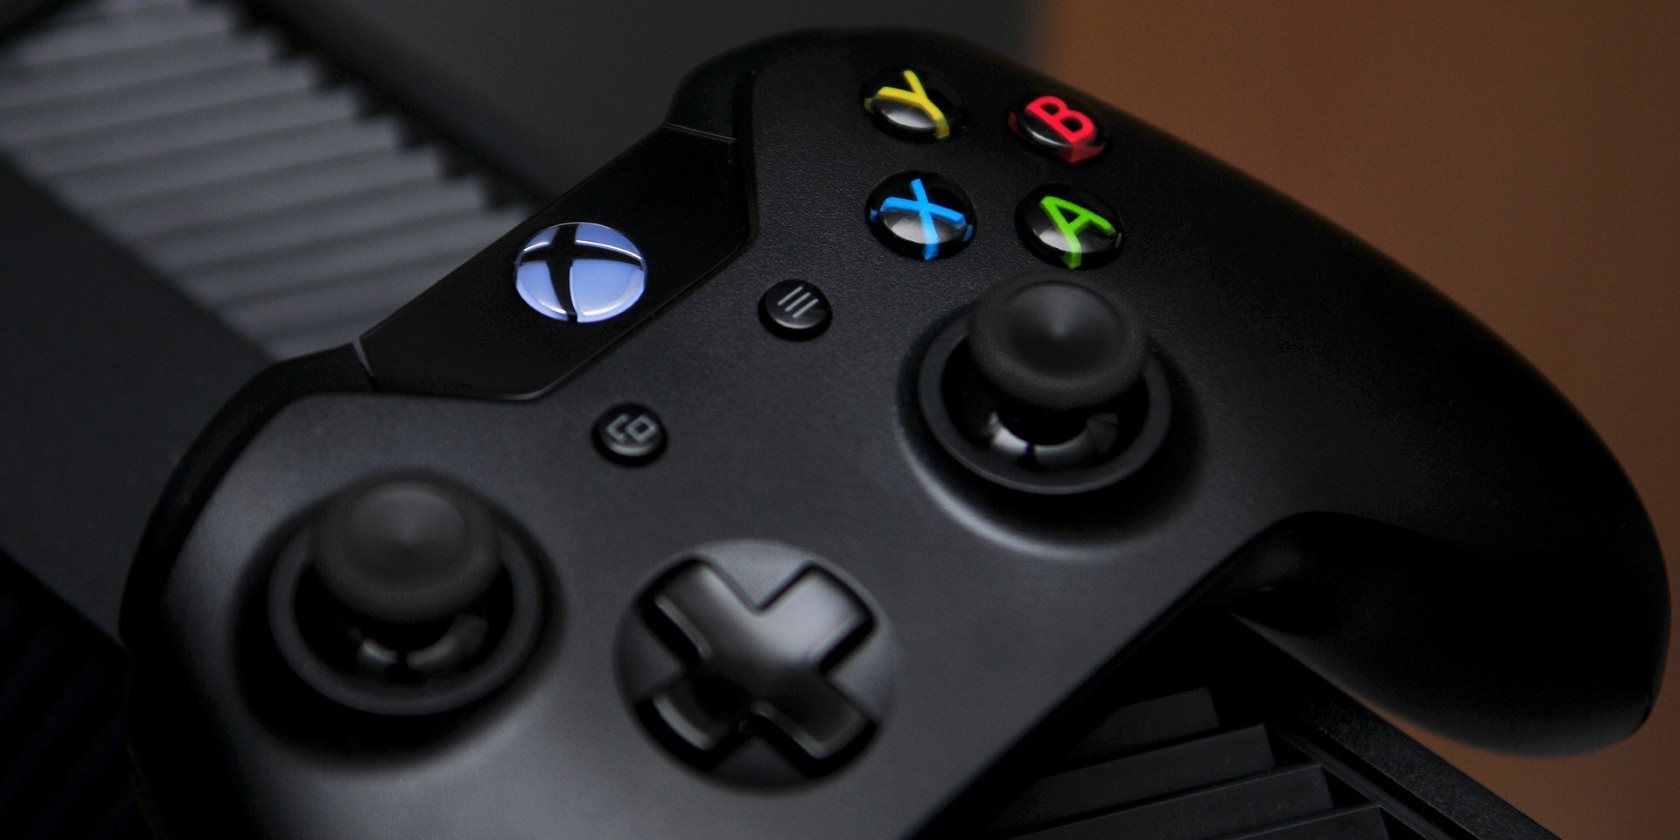
How to Reset an Xbox One Controller

If you run into problems with your Xbox One controller instead of the console itself, you can turn off the controller too. Press and hold the Xbox button on the controller for several seconds to shut it down. You can turn it back on by pressing the Xbox button again.

See our troubleshooting guide for Xbox One controllers if you still have problems after this.

How to Soft/Hard Reset Your Xbox 360

Unlike the Xbox One, the Xbox 360 doesn’t have a dedicated “sleep mode.” Thus, when you want to soft reset your Xbox 360, you can do so in basically the same way as an Xbox One without worrying about whether it has fully shut down.

To restart your Xbox 360, press and hold the Xbox button on your controller for a few seconds. In the menu that appears, choose Turn off console and give it a moment to shut down. If you want to make sure it fully shuts down, remove the power cable for a minute before turning the system back on.

In case your Xbox 360 is frozen, you can hold the power button on the console for several seconds to perform a hard shutdown. Like the Xbox One, pulling the plug is also an option, but only as a last resort.

How to Factory Reset Your Xbox 360

If you want to completely erase everything on your Xbox 360, follow these steps. Make sure you’ve backed up any data that you don’t want to lose beforehand.

  1. Scroll over to Settings on the home screen.
  2. Select the System entry and choose Console Settings.
  3. Scroll down to System Info and select it.
  4. Note the Console Serial Number shown here, as you’ll need it in a moment.
  5. Jump back to the System Settings menu and choose Storage.
  6. Select the Hard Drive entry that’s connected to your Xbox 360.
  7. Choose Format. Confirm the operation, then your Xbox will ask you to enter the serial number that you copied down a moment ago.
  8. Once you enter the serial number, your Xbox will perform a factory reset.

Xbox Resets Made Easy

As we’ve demonstrated, it isn’t difficult to reset your Xbox One or Xbox 360. Just make sure that you have everything important backed up, since you can’t undo this once you make a decision. Backing up data to Xbox Live is an easy option, but you can also move some files to an external device like a flash drive.

Are you running out of space on your Xbox One? Then take a look at our guide to Xbox One external hard drives to find out everything you need to know.

Image Credit: ampolsonthong/Depositphotos

Read the full article: How to Reset Your Xbox One or Xbox 360


Read Full Article