14 March 2020

This Week in Apps: WWDC goes online, coronavirus leads to more cancellations, sneaky spy apps exposed


Welcome back to This Week in Apps, the Extra Crunch series that recaps the latest OS news, the applications they support and the money that flows through it all.

The app industry is as hot as ever, with a record 204 billion downloads in 2019 and $120 billion in consumer spending in 2019, according to App Annie’s recently released “State of Mobile” annual report. People are now spending 3 hours and 40 minutes per day using apps, rivaling TV. Apps aren’t just a way to pass idle hours — they’re a big business. In 2019, mobile-first companies had a combined $544 billion valuation, 6.5x higher than those without a mobile focus.

In this Extra Crunch series, we help you keep up with the latest news from the world of apps, delivered on a weekly basis.

This week we’re taking a look at several stories related to the coronavirus outbreak, including the cancellation of WWDC in San Jose, as well as other app industry events that are going online. We’re also discussing the iOS 14 leak, the exposure of Sensor Tower’s app network, a potential ban on TikTok for government workers and more.

Coronavirus Special Coverage

The impacts of the COVID-19 pandemic are continuing to play out on app stores and across the industry. This week, we’re leading with these stories followed by the other — and yes, still important — news.

Apple finally cancels its WWDC event in San Jose

Future-Proof Your Career With This FREE Ebook (Worth $16)


A lifelong career doesn’t exist anymore. In fact, “People entering the workforce today will have an estimated 17 employers and five careers in their lifetimes—and already many existing roles are being automated away, with many more to follow”.

These trends mean that more and more people will enter the freelancing world or the gig-work economy. This comes with certain freedoms. But it also brings its own challenges.

Given that no profession or industry is immune to these trends, how can you future-proof your own career?

In this free copy of Career Leap, worth $16, Michelle Gibbings answers these questions, showing you “what you need to know, how you need to change and how you can prepare for the inevitable tides of change.”

Download Career Leap for Free

Career Leap Free Ebook

The 10-step framework set out in this book will help you reinvent your career for the 21st Century. Inside, you will learn how to:

  • Future-proof your career with the new laws for success.
  • Undertake a health check of your career and make deliberate career choices.
  • Design, build, and execute your influence and career strategy.
  • Be equipped to take control and leap ahead with your career.

Want to download your free copy? Simply click here to download Career Leap from TradePub. You will have to complete a short form to access the ebook, but it’s well worth it!

Note: This free offer expires 24 March 2020. 

Read the full article: Future-Proof Your Career With This FREE Ebook (Worth $16)


Read Full Article

5 Free and Modern Online Image Editors to Replace Clunky Programs & Apps


Modern Online Image Editors

You don’t need to download software like Photoshop for basic photo editing. Everything you need can be found in your browser with these five free online image editors.

There are a few cool one-click photo enhancement websites, but sometimes, you need to do more. Whether you need to edit images in large batches, remove backgrounds from GIFs, or just add filters and stickers, there’s a simple and excellent online image editor for that.

Oh, and let’s also revisit a new version of one of the most popular photo editors ever.

1. Photostack (Web, Android): Batch Resize Images, Add Watermarks

Batch resize images and add watermarks with Photostack

Photostack would be a truly useful tool for bloggers, influencers, social media marketers, and anyone else who works with many images online regularly. This app does a few things and does it perfectly.

You can upload images through your hard drive, through Dropbox, or add links. Once the image batch is set, there are three things the app lets you do:

  1. Resize by width: You don’t need to worry about the height of the image. Simply put the width you want it to be, and Photostack will resize and scale.
  2. Add a watermark: You’ll need to upload the watermark to Photostack, where you can choose the position as well as set the size and opacity.
  3. File format and name: You can export all these images in JPEG, PNG, or WebP. You can also set a file name, and Photostack will add numbers with space in between the name and number.

You can download the images in a zip file or as separate files. Photostack also lets you remove EXIF data in the editing process. The app also works offline once you’ve opened it, and has a mobile version too.

Download: Photostack for Android (Free)

2. Doka Photo (Web): Easy, Free, Fast Image Editor with Filters and Markup

Doka Photo is an easy, free, and fast online image editor to use in browsers

There are a lot of free online photo editors to make an image look exactly like you want it to. I find myself going back to Doka photo editor often because it’s free, easy, and fast while offering most of the features I need.

It feels like a lot of the tools you are accustomed to using with apps like Instagram. Once you upload an image to Doka, you can crop, rotate, flip, and resize it. You can alter its colors (brightness, contrast, exposure, and saturation). You can add different filters. And you can markup the image with arrows, text, squares, circles, or by drawing on it.

The controls are easy, as is customization for each element. For example, if you draw an arrow, you can change it to double-headed, change its thickness, and so on. Doka doesn’t do anything fancy, but it does the basics really well.

3. Unscreen (Web): Remove Backgrounds from GIFs and Videos

Unscreen's smart AI removes backgrounds from GIFs and videos

It’s shocking what artificial intelligence can do these days. A short while ago, removing backgrounds from a simple photo required a good designer. Now Unscreen uses AI to remove backgrounds from GIFs and videos with astonishing ease.

You can upload a video or a GIF, or copy-paste links directly. Unscreen even has an easy option to search Giphy for the right GIF. Once you select or upload what you want, the AI goes to work. It’ll identify one foreground element and remove all background elements. You can’t choose what it sees as foreground and background though.

After removing the background, you’re ready to alter the GIF or video. You can keep the background transparent, add a solid color, or add a different image or moving video from the gallery. You can’t upload a custom background yet.

Unscreen works only on animated images and videos, so you can’t work with photos on it. But you don’t need Photoshop for that, there are several other easy ways to remove backgrounds from images.

4. Pixi Worker (Web): Easily Add Text, Stickers, Shapes to Photos

Pixi Worker image editor adds stickers, texts, speech bubbles, and other shapes to photos

If you want to make alterations to images like adding stickers, speech bubbles, and so on, Pixi Worker is an excellent online photo editor. It is much easier to operate than others and has more customization too.

Apart from drawing on the image, you can add text, shapes, stickers, and frames. The number of options in each is remarkable. For example, you can choose from a large collection of fonts that you won’t find in other apps. When you’re adding stickers, you can choose between emoticons, speech bubbles, doodles, landmarks, and other elements.

With such a large variety, you can get more creative with how you markup images. Along with that, Pixi Worker has all the usual image editing tools you would expect. You can crop images, resize them, change colors, and so on. The only markup tool Pixi Worker misses is watermarking.

5. Pixlr X and Pixlr E (Web): All-New Versions of Popular Image Editor

The new Pixlr X and Pixlr E are amazing online image editing apps that don't need Flash

For the longest time, Pixlr was the gold standard of online image editors. But then it was bought by Autodesk and the web dumped Adobe Flash, making it obsolete. Well, now the original developer is back in charge and has rewritten the photo editor in Canvas/WebGL to make it leaner, faster, and better than ever before.

It now comes in two avatars: Pixlr X and Pixlr E. Both versions work in any modern browser and have many of the same tools. They look modern and have all the features that any image editor should have. In both versions, you can search Unsplash for stock images or upload your own pictures from the hard drive or a URL.

Pixlr X is better suited for regular users who want basic tools and a lot of help, like a handy “auto-fix” button for optimal lighting of the photo. It has a sparse toolbar too. Pixlr E adds a few more tools, like layers, lasso and brush tool, a history pane, cloning, and so on. Try both the tools and see which one you like more, they’re free anyway.

Also, both Pixlr X and Pixlr E work perfectly in mobile browsers, in case you need a robust image editing app on your smartphone.

Replace Photoshop With Web Apps

These aren’t the only image editing web apps, and in fact, there are several we have covered already. Pixlr E comes close as a great alternative for Adobe Photoshop, but there are perhaps even better tools for it.

So, go ahead and try these free online replacements for Photoshop, especially Photopea.

Read the full article: 5 Free and Modern Online Image Editors to Replace Clunky Programs & Apps


Read Full Article

How to Organize Your Photos on iPhone


iphone-photo-management

Few mobile devices offer you better photo quality than the iPhone. From its high-pixel resolution to the ease of syncing photos across all Apple products, Apple’s smartphone cameras are usually the number-one choice for capturing images.

Unfortunately—because it’s so easy to take good pictures—that also means you’ll end up with a lot of them. If you have thousands of pictures and you’re running out of space, here’s how to organize photos on your iPhone using several different methods.

Before You Begin: Some General Space-Saving Tips

Save Space on Your iPhone iCloud Photos

While we’re definitely going to break down the specific ways that you can organize your photos, we also wanted to give you a few space-saving tips to start:

  1. Always review your photos. It’s easy to take a few photos and forget about them, but those “few photos” can add up. To avoid a future backlog, get into the habit of looking over your photos after you’ve shot them. Quickly decide on which ones to delete.
  2. Don’t keep near-duplicate photos. Taking a bunch of photos back-to-back is a good way to give yourself a lot of options, but if the photos are nearly identical, you don’t need all of them. Get in the habit of deleting redundant copies to reduce photo storage clutter.
  3. Optimize your iPhone storage. On your iPhone under Settings > Photos, you’ll see an option called iCloud Photos. If you turn this setting on, your phone will automatically upload and store your full-sized photos in your iCloud account.

Now that you know about the different ways you can save some space, let’s talk about organizing your images in more detail.

1. How to Organize Photos on Your iPhone by Date

Every time you take a picture, a small piece of metadata is attached to that image. Part of this data is the date of capture, which allows you to search and organize your photos by date.

To organize iPhone photos by the date taken:

  1. Open the default Photos app and tap on the Search icon.
  2. In the search bar, type in a month or event. In this case, I chose “July.”
  3. When you type “July,” your phone will pull up all the photos that you took in that month. From there, you can narrow down your selection further.
  4. For instance, you might search for all the photos you took in July of 2016.

Another great feature about searching and organizing your photos by date is that the iPhone recognizes the content inside those pictures.

For example, I can narrow my search results again by using the tag “mountain.” This will pull up all the pictures of mountains that you took during July 2016.

2. How to Organize Photos on Your iPhone by Name

The next best way to organize photos on your iPhone is by name. This is a really handy method to find pictures of you or your friends.

Modern iPhones contain facial-recognition software. When you upload a picture, your phone will automatically detect and recognize different faces. It will then designate each of these unique faces as a “person.” Using this, Photos will group pictures of that person together, regardless of date or event.

However, organizing your photos by name requires a bit of setup. Here’s how to do it:

  1. First, go into the Photos app and tap Search.
  2. Under People, you’ll see a bunch of circles with faces in them. Select one of those faces and you’ll see a directory of all the pictures that contain that person.
  3. You might also see a line that says Unnamed Person next to that person’s circle.
    1. To name them, tap on Unnamed Person > Add Name. Type their name in. Then tap Next > Done.

After you name that person, all photos with their face will automatically be tagged and searchable by their name.

If you go into the Albums section of the Photos app, you’ll also see that your device automatically creates an album for this person under People & Places.

3. How to Organize Photos on Your iPhone by Location

Another really great way to organize your iPhone photos is by location. Like the previous organization method, however, this one requires some work to get ready.

When you take a picture with your iPhone, the picture’s metadata automatically records the location of your photo—so long as you have Location Services turned on for your camera.

To turn on Location Services:

  1. Open the Settings app.
  2. Scroll down to Privacy.
  3. Choose Location Services > Camera.
  4. Once you’re on Camera, tap Allow Location Access While Using the App.

Now that this setting is turned on, your iPhone will automatically geotag new images. It will then sort these location-based photos into a pre-made album.

To view your pictures:

  1. Go to the Photos app.
  2. Under Albums > People & Places, tap on Places.
  3. On the map, tap on the thumbnail of the place that you want to view. You’ll see all the pictures from that location.

4. How to Organize Photos on Your iPhone Into Albums

Now let’s say you want to organize your photos into albums. This is the most straightforward method that people use to arrange their pictures, as it’s a good way to group photos that span multiple locations, dates, people, or events.

Basically, manual albums are good for anything that your iPhone can’t automatically sort on its own.

To create a new photo album:

  1. Launch the Photos app and tap on Albums.
  2. In the top-left corner of the screen, tap on the Plus (+) sign.
  3. Choose New Album.
  4. Once you tap New Album, you’ll be prompted to name the album. After you name it, choose Save.
  5. Once the album is named, you can begin adding photos.

If there are photos on your phone that you forgot to add to the album:

  1. Go to your Albums section. Tap on Recents or My Photo Stream.
  2. Tap Select in the top-right corner.
  3. Select the photos that you want to add.
  4. Tap on the upward-facing arrow, located in the bottom-left corner of your screen.
  5. Select Add to Album. Choose the album you want to add these photos to.

From here on—whenever you need to find photos from a multi-day event—you should be able to go into your Photos app and view the appropriate album.

5. How to Organize Your iPhone Photos on Your Computer

Organize Photos on iPhone on Computer

There is yet another way that you can organize your iPhone photos: through your iMac or MacBook computer.

If you have the latest version of macOS installed on your computer, you should have a built-in utilities app called Photos. This app corresponds with your iPhone’s Photos app.

When you upload pictures from your iPhone to your computer, the app should work in a very similar manner. Once again:

  • The Photos app allows you to sort through your photos by People, Places, and date.
  • You can tag people’s faces to organize their photos by name.

To learn more about this app, check out our starter tips for managing your Mac photo library.

Better Organize Photos on Your iPhone

With a couple quick tips and tricks, you’ll be well on your way to organizing photos on your iPhone. Like Google Photos, Apple’s built-in Photos app is an incredibly powerful tool, and one you should take advantage of.

There is another way you should organize and clean up space on your iPhone: deleting duplicate images. Here’s how to delete duplicate photos on your iPhone using free or nearly free apps.

Read the full article: How to Organize Your Photos on iPhone


Read Full Article

The 6 Best Mac Window Management Tools


mac-window-management

Managing multiple windows on your Mac is a cumbersome task. Since they tend to overlap, your display quickly gets cluttered and takes up valuable workspace. Unfortunately, the built-in window manager does not offer many features to solve this problem.

“Mac window manager” is a name given to a group of apps that let you organize and resize windows with built-in shortcuts, mouse clicks, and gestures. We’ll show you some of the best window management apps for Mac to keep your desktop organized.

1. Magnet

Magnet window manager for Mac

Magnet is a simple app to organize and manage windows by snapping them to different positions on the screen. Window snapping is possible through drag-and-drop, keyboard shortcuts, and the app’s menu. This arrangement eliminates the need for app switching and offers more workspace efficiency.

To get started, drag your window to a particular position or use the customizable shortcuts to perform the task. By dragging them to your screen edges, the windows arrange themselves into horizontal or vertical halves. And when you drag them to the corner, they occupy a quarter of the screen.

What Does Magnet Offer You?

  • You can snap four windows in each corner of your screen, and even restore them to the original position.
  • It supports up to six external displays with different orientations. With shortcuts, you can quickly move your windows between the screens.
  • You can maximize a window without losing access to the menu bar and Dock. This is useful when you want to access the application menu all the time.
  • Magnet lets you choose certain apps that ignore window snapping. For example, apps built with the Electron framework don’t work well, so you should exclude them.

Download: Magnet ($1.99)

2. BetterSnapTool

bettersnaptool customizable window management app

BetterSnapTool is a fully-featured customizable window organizer for Mac. The app lets you instantly change the position and size of your windows by dragging them to the top, left, or right edges, as well as the four corners of your desktop.

To do so, open the app menu and choose Change Window Position/Size. Alternatively, assign a shortcut to snap the windows in your desired position. While snapping, it’ll show you a preview of how the alignment will look on the screen. The options listed in the snap locations are customizable, so you can disable ones you’ll never use.

Unique Features of BetterSnapTool

  • Offers limitless resizing and snap area options. Just define a specific window size and a snap recognition area. Professionals who need windows in a pre-defined template will love this.
  • You can use Desktop Spaces and BetterSnapTool together. Just set the proper window edge delay between them to make it work.
  • Set resizing options for the window control buttons when you right-click or middle-click with your mouse; go to Preferences > Extras to configure it as you like.
  • Move and resize inactive windows with a modifier key. Head to Preferences > Extras to set the special key.

Download: BetterSnapTool ($2.99)

3. HazeOver

hazeover distraction dimmer tool

Having lots of open windows can be distracting, especially when you’re trying to focus on a particular task. HazeOver is a distraction dimmer that highlights the active window and masks the ones in the background.

It puts you in control of configuring the hazing intensity and speed to your liking. To begin, go to Preferences > General and rotate the wheel to tweak the dimming percentage. Alternatively, set up a hotkey and trackpad gesture to control the intensity in 20 percent increments.

HazeOver’s Top Features

  • Configure the effect intensity from a soft, light dim to powerful black that will definitely reduce distractions.
  • Choose whether you wish to highlight only one or all the open windows of any app. You can even tweak the dimness animation through the Advanced tab.
  • Tweak the hazing intensity across multiple displays. You can either highlight only the front windows or dim all the windows on any screen.

Download: HazeOver ($1.99, free trial available)

4. Amethyst

As you probably know, your windows can overlap with each other. A tiling window manager app organizes the apps on your desktop into non-overlapping tiles. It does this by putting your apps side-by-side, in rows, or using similar means. In this way, you can utilize your workspace with maximum efficiency.

Amethyst is a tiling window manager that automatically positions your windows according to the one of its predefined layouts (explained on Amethyst’s GitHub page). It lets you move, focus, or cycle through them with the press of a hotkey. F

For example, in the Tall layout (Alt + Shift + A), the main window is on the left side while auxiliary ones stack vertically on the right.

Key Features of Amethyst

  • A wide number of layouts: Tall, Wide, 3 Column-Middle, Column, Full Screen, and more that you can access with the built-in hotkeys. The layout decides how to position the windows per your needs.
  • Each layout lets you modify the window size (Alt + Shift + L), cycle through the windows (Alt + Shift + J), change window position, and more.
  • Since it has so many shortcuts, you can customize your Mac keyboard to set up a modifier key that will help ease the learning curve with Amethyst.

Download: Amethyst (Free)

5. Mosaic

In day-to-day tasks, you might prefer setting up specific window arrangement for every scenario. But when you use too many apps, maintaining a consistent group of windows on the desktop becomes difficult. That’s where the Mosaic window management app for Mac can help.

It not only positions your windows, but also helps categorize them so you always have them within reach. To begin with, grab your app window and drag it across the top over any one of the sizing options. You can instead define a hotkey to present a layout picker for any active app, if you prefer.

The Layouts tab provides you complete control over all the possible layouts. Just use the configurable grid to define areas of the screen and set up a shortcut. You can even organize your layouts to suit the way you work through the Groups tab.

What Mosaic Offers

  • Create any number of layouts with a configurable grid and gutter. It’s possible to designate apps in their own space without needing to swipe through Spaces.
  • You can make a three-section configurable custom layout of apps. With layout groups, organize them further to suit specific workflows.
  • Using the Touch Bar, all layouts are available at your fingertips. You don’t have to remember any shortcuts or define a modifier key.
  • The handy Mosaic Remote app makes all your layouts available on iOS. With a tap, you can switch between the layouts on your Mac.
  • Choose from Standard or Pro versions depending on your needs.

Download: Mosaic ($13 for Standard, $33 for Pro, free trial available)

6. Moom

moom versatile window manager for Mac

Moom is a customizable window manager that lets you quickly move and zoom your windows around the screen. To get started, hover the mouse over any green zoom button and choose your desired position with a popup palette. You can also drag a window to an edge or corner of the screen.

After a few seconds, it will show a preview displaying the size and location of the dragged window. The app also lets you configure a hotkey to trigger the Moom logo. With the keyboard-mode only custom commands, you get to control the position of your windows anywhere on the screen.

Unique Features of Moom

  • When you press the Alt key while hovering over the green icon, you’ll get several presets to position and zoom your windows.
  • Create and define custom controls through the Customs tab. Set up actions that will resize, move, and snap across multiple displays. This is great for anyone who wants windows with a fixed template.
  • You can save the window layout as a Snapshot. Later on, you can easily activate that layout again and restore the windows to their original position.
  • Chain custom controls together to perform complex window management operations with the press of a hotkey. For example, you can move a window onto another display, then zoom it to full-screen.

Download: Moom ($10, free trial available)

Which Mac Window Manager Should You Choose?

Depending on your needs, you may find it hard to decide between these apps. For example, with Magnet vs. BetterSnapTool, they’re both excellent Mac window management apps with some overlapping attributes. BetterSnapTool offers many unique features—custom snap areas, multiple ways to snap windows, and better integration with Desktop Spaces.

Mosaic and Moom are professional apps that offer customized solutions to window management problems. They’re slightly expensive, but both of them are unique. Mosaic has a bit of a learning curve; you may not be able to pick it up during the trial period.

Easily Switch Between Apps and Windows

There’s a cost that comes with juggling multiple windows. When you leave them as clutter on-screen, it will affect your productivity and cause you to waste time. With these apps, you’ll regain control of unmanageable windows.

Next, you might consider the issue of switching apps. While Cmd + Tab is the default method, it’s not the most efficient way to switch between apps. Have a look at the best apps for jumping between Mac apps and windows for more.

Read the full article: The 6 Best Mac Window Management Tools


Read Full Article

A Quick Guide to macOS Boot Modes and Startup Key Combinations


If you want to put your Mac into recovery mode, boot from a USB stick, or start testing your hardware using Apple’s diagnostic tools, you’ll need to use the right combination of startup keys.

These keyboard shortcuts let you interrupt your Mac’s normal boot process and can even change the way macOS behaves when you log in. Here’s a handy guide to the full range of Mac boot options and startup keys, as well as when you might need to use them.

macOS Boot Modes and Key Combinations

To use these Mac startup commands and launch a specific boot mode, you must first press the power button then immediately press and hold the desired key combination.

On older Macs, you can wait until you hear the boot sound before holding the shortcut. However, new Macs no longer make any sound on startup, so you should hold the key right away.

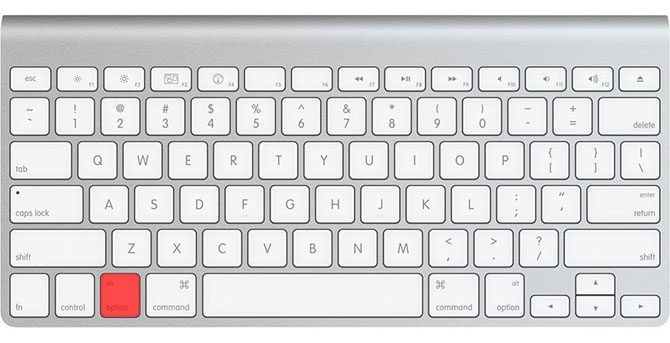
Startup Manager/Boot From USB: Option

Apple Smart Keyboard Option

Apple’s startup manager prevents your Mac from booting the default startup volume. Instead, you’ll get a list of all connected volumes, including USB and external drives. This is particularly useful if you need to boot your Mac from USB or are installing Windows from a USB stick.

On some non-US Mac keyboards, the Option key is not labeled as such. In this case, it’s the Alt key that you’re looking for.

Safe Mode: Shift

Apple Smart Keyboard Shift

If your Mac needs troubleshooting for startup problems, Safe Mode (also known as safe boot) is a good step to try. It forces your computer to load only the bare essentials it needs to start the operating system. Your startup disk will check for errors and make repairs, and only use the required kernel extensions.

This mode also prevents the startup and login items from opening when your Mac starts up. It disables custom user-installed fonts and clears a number of macOS system caches too.

Apple Hardware Test/Apple Diagnostics: D

Apple Smart Keyboard D

Depending on the age of your Mac, it either comes with Apple Hardware Test or Apple Diagnostics. These are troubleshooting tools that will identify Mac hardware problems, so you can attempt to fix or decide it’s time to replace your machine.

While these tests look for hardware issues, they don’t offer a huge amount of information about the problem. This can make it hard to attempt a fix. If you’re feeling brave and want more information, you’ll need to use Apple Service Diagnostics instead.

Variation: You can also use Option + D to start the test from the internet. This is ideal if you have problems with your hard drive or recovery partition.

Reset PRAM/NVRAM: Cmd + Option + P + R

Apple Smart Keyboard Command Option P R

Parameter RAM, also known as nonvolatile RAM, holds information about your computer’s current configuration. This includes the date and time, volume, desktop settings, and so on. Occasionally you’ll run into issues related to sound, mouse scrolling, or keyboard that require a PRAM/NVRAM reset.

This is one of the most useful Mac troubleshooting commands. Shut down your Mac, power it up, then immediately hit the key combination above. Wait till your Mac reboots again, then let go of the combination. Read more about PRAM and how it affects your Mac if you’re curious.

Reset SMC: Shift + Control + Option

Apple Smart Keyboard Shift Control Option

The System Management Controller (SMC) is a chip on Intel-based Macs that controls aspects like fan speeds, power management, and more. Most Apple computers use the combination of keys provided above, but some models require you to remove batteries or unplug the power cord instead.

Recovery Mode: Cmd + R

Apple Smart Keyboard Command R

Recovery mode is your ticket to solving many macOS problems from a friendly environment. The recovery partition is a separate part of macOS and you can use it to repair disks using Disk Utility, access the Terminal, and restore your Mac by reinstalling macOS.

Variation: You can also hold Cmd + Option + R to start internet Recovery mode, which downloads the necessary tools from the internet first. This is ideal if you need to restore your recovery partition.
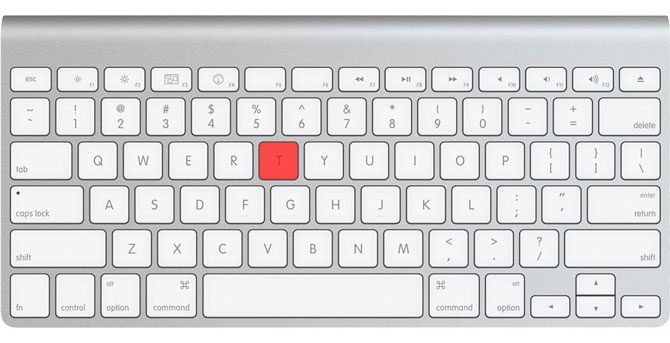
Target Disk Mode: T

Apple Smart Keyboard T

If you want to transfer files from one Mac’s hard drive to another, Target Disk mode makes it simple. By starting a Mac in Target Disk mode, you can connect it to another Mac and easily copy files to and from the drives.

In essence, it turns your Mac into a hard drive enclosure. The only snag is that you’ll need to use the right cable for the job. Apple’s guidelines state that you can use:

  • Thunderbolt 3 (USB-C): iMac Pro/iMac 2017, MacBook Pro 2016, and later
  • USB-C: MacBook 2015 and later
  • Thunderbolt 2
  • FireWire

You can’t use USB-A to USB-A cables, an Apple USB-C charging cable, or regular old Mini DisplayPort cables. Confused? Check out our full guide to USB-C, Thunderbolt 3, and Mac compatibility.

Single User Mode: Cmd + S

Apple Smart Keyboard CMD S

Single User mode boots your Mac into a minimal text-based environment with no GUI and no drive volumes mounted on startup. You’ll only have access to a Unix prompt, into which you’ll need to type commands.

This mode allows you to fix problems with a Mac that refuses to start. You can attempt to repair the disk, copy files from one volume to another, or force optical media to eject—but you’ll need to know the right commands to do so.

Verbose Mode: Cmd + V

Apple Smart Keyboard Cmd V

Verbose mode, as the name suggests, replaces your Mac’s default startup graphics with a detailed status report of exactly what’s happening when your computer starts up. It doesn’t restrict anything from loading like Safe mode, nor does it boot into a command line environment like Single User mode.

Instead, Verbose mode is perfect for those instances when your Mac hangs on boot. You can see exactly what interrupts the boot process and hopefully take steps to remedy it.

For example, many boot problems are related to third-party kernel extensions. Verbose mode may highlight the problem extension, allowing you to reboot in Safe mode, remove the offending item, then boot as normal and try again.

Boot From Optical (CD/DVD) Media: C

Apple Smart Keyboard C

Is your Mac old enough to have an optical drive? If so, you can create CD or DVD images for installing macOS or other operating systems like Linux and Windows.

Holding C while your computer boots forces macOS to ignore your startup volume in favor of bootable optical media instead.

Eject Optical Media: Eject, F12, or Mouse/Trackpad

Apple Smart Keyboard Eject

Got a CD or DVD stuck in your Mac? Trying to boot from the wrong optical volume? Turn on your Mac and immediately press and hold Eject, F12, or your mouse/trackpad button until your computer spits out the disc.

Boot From NetBoot Service: N

Apple Smart Keyboard N

NetBoot allows system admins to boot client computers from a network image, which isn’t something most home users will ever need to do. This allows companies to customize macOS to their liking and create custom images for specific users, then deploy them network-wide without modifying every machine.

Variation: You can also use Option + N to specify the default image, rather than a custom image designed for specific users or hardware.

macOS Login Key Combinations

The following combinations change the way login works on your Mac.

Disable Automatic Login: Left Shift

Apple Smart Keyboard Left Shift

If you’ve set your Mac to log in automatically, you can tell it to ignore this setting by holding Left Shift after the boot screen (a white Apple logo and progress bar) appears.

You’ll be taken to the regular login screen, where you can choose another user account or continue with the guest account.

Prevent Login Items/Previous Windows: Shift

Apple Smart Keyboard Shift

Want to stop all your login items and previous session windows from opening on launch? When you get to the login screen, enter your password as normal then click on the Log In button (or hit Enter). Immediately press and hold the Shift key while your Mac logs in and boots up.

This is perfect if you left some sensitive folders open that you’d like to hide from prying eyes, or to prevent any resource hogs from booting straight away.

Even More macOS Keyboard Shortcuts to Know

These iMac or MacBook startup commands can help you troubleshoot a lot of common problems with both hardware and software. Keep them in mind next time you run into a problem.

Speaking of these, there are many more Mac keyboard shortcuts that often come in handy. We recommend learning them now so you can work more efficiently.

Read the full article: A Quick Guide to macOS Boot Modes and Startup Key Combinations


Read Full Article

Vudu Lists Help You Organize Your Digital Content


Vudu has launched Lists, which help you organize your digital content. Lists are exactly what you’d expect them to be: lists of movies and/or TV shows organized around a theme. All of which should make it easier to find the content you want when you want it.

How Vudu’s New Lists Feature Works

If you’re new to Vudu, you should read our beginner’s guide to Vudu. However, Vudu, which lets you buy or rent movies and TV shows, has now launched a new feature called Lists. This is designed to make the on-demand streaming service even better for customers.

Vudu sees Lists as a way of putting customers in control and providing them with “the best possible user experience”. In a nutshell, Lists allows Vudu users to organize their digital content as they see fit. And there are a number of ways to do so.

With Vudu Lists you could:

  • Create a list called “Date Night” full of movies for chilling on the sofa.
  • Create a list called “Family Movies” full of films suitable for the whole family.
  • Create a list called “Superheroes” full of your favorite Marvel and DC titles.
  • Create a list called “My Wishlist” full of movies and TV shows you haven’t seen.

You can create a list about anything, and then populate that list with movies and TV shows. You can create as many lists as you want, and add titles that you own and even those you don’t own. The latter acting as a kind of wishlist function.

How to Create Vudu Lists

To create a list on Vudu, open the My Vudu menu, and look for Lists. Then, click Create New List, and add the titles you want to add to that list. You can add multiple titles at once, and add the same title to multiple lists.

Once you have created your lists you can then reorder them as you see fit, and as many times as you want. Which means that you can create a list called “Star Wars” and decide the best order to watch the Star Wars movies in. And no one can tell you you’re wrong!

Read the full article: Vudu Lists Help You Organize Your Digital Content


Read Full Article

What Is a USB Hub? 3 Reasons Why You Need One


usb-hub-need

Many gadgets in our daily lives need a USB connection in some way or another, and a USB hub is useful for keeping everything organized. But what is a USB hub, and should you get one?

Let’s explore the uses of a USB hub and why you might—or might not—want one.

What Is a USB Hub?

Full USB hub plugged into a laptop
Image Credit: Mirage3/Depositphotos

A USB hub is a handy way of adding additional USB ports to a setup. They’re the USB version of a regular plug extension lead, converting a single USB socket into a hub of them. You plug it into your computer, then use the additional ports to use mice, keyboards, and other USB devices all from a single port.

Much like extension leads, USB hubs also have limitations. You can’t load too many power-hungry devices onto it, else difficulties arise. However, if you want to use a keyboard, mouse, and a phone charger on one USB port, a hub can achieve this.

Reasons Why You Might Need a USB Hub

Now that we’ve explored what a USB hub is used for, let’s explore some use-cases where you might want to grab one.

1. You Want to Increase the Number of USB Ports on a Laptop

While there are some laptops out there that come with a bunch of USB ports, many only have two. This restrictive number of ports really isn’t great in our current USB-saturated landscape. If you use a USB keyboard and mouse, you don’t have any spare ports to charge devices, hook up an external hard drive, or connect a printer.

Of course, this may be fine depending on what you do with your laptop. If you’re always on the move and you don’t need a mouse or a keyboard, you won’t have this problem. Maybe you’ll just need to charge your iPad and use an external hard drive or a two-factor authentication key.

However, if you use a laptop as your primary computer, or regularly do more than just sending emails and writing while you travel, a small USB hub might be a really useful tool.

2. You Want to Charge a Multitude of Devices on One Port

A USB hub is great for charging a number of different devices at once. While unpowered USB hubs need to be plugged into your computer to do that, powered hubs instead use the mains. This lets you charge as many devices as you like, regardless of if your computer is on or not.

USB hubs are the perfect companion for someone with lots of power-hungry USB devices. From phones to tablets to desk gadgets, a USB hub can meet the needs of any gadget that needs USB power. It’s also convenient that you don’t need to hunt for a spare mains plug; just plug everything into the same hub.

3. You Want to Move a Lot of Data Between USB Devices

This is one of the rarer kinds of USB hub uses, but it’s still very valid. If you find yourself in the situation of needing to move a lot of data between a bunch of different devices, a USB hub can be very useful.

If you want to back up photos from your computer, tether your mobile phone to use cellular data on your PC, download images from your camera, print some documents, and upload music to your iPad, a high-quality USB hub can help you do all of that at the same time.

Again, this admittedly isn’t a common situation for most people, and it would only warrant a USB hub if it happens on a regular basis. However, if you do find yourself moving data like this a lot, investing in a USB hub is going to make your life easier.

Reasons Why You Might Not Need a USB Hub

USB hubs are useful, but they’re not for everyone. There are instances where you’re better off saving your money or taking a different approach to solving the problem.

1. Don’t Get a Hub If You’re All Wireless

A lot of devices have made the move to wireless connections. You can now find Bluetooth-enabled keyboards and mice, while printers, scanners, and external hard drives can live on your Wi-Fi network. While there are some good arguments against using Bluetooth devices, wireless connections are very convenient.

As such, if you hate wires and plugs and want everything to connect wirelessly, you may not need a USB hub. If you’re only using your USB ports for two-factor authentication keys or memory sticks, a hub may be overkill for your use case.

2. Don’t Get a Hub If You Have Extra Ports Hiding on Your Hardware

Many monitors now come with USB ports for connecting and powering devices. If you can use an HDMI port to connect it to your computer, you’ll be getting a port or two (or more) without taking up any of the USB space that’s provided by your computer.

Routers often have a number of USB ports as well, and these can be used to connect some devices. This works best when you’re connecting something you don’t need to access very often or if your router is close to your computer, so it might not work for everyone. Despite this, it’s another good option.

3. Don’t Get a Hub If Something Else Can Do a Better Job

Imagine you have two plug sockets next to your bed. Your USB charging plug uses one socket, and a bedside lamp uses the other. You want your phone and your fitness tracker by your bed, so you can quickly grab them in the morning. However, you want to charge both devices overnight on one socket without swapping the cable.

While a USB hub can help, a USB mains adapter is even more useful. These adapters are like a USB hub, except they also have a standard plug socket on them. In the above example, you can purchase a USB adapter with two USB ports on it. That way, a single plug socket can accommodate the lamp, phone, and fitness tracker at the same time. Some even have surge protection built-in to protect your devices from electrical spikes.

A power strip with additional USB plugs
Image Credit: denisds/Depositphotos

If you want to dream bigger, you can even get plug extenders with USB plugs installed on them. This makes for a great balance between your USB devices and your household appliances; just be sure not to overload it!

You can also get plug socket wall fittings with USB ports built-in. If you want to do some home renovating and need more USB ports, this is a great way to expand your charging options.

Getting the Most Out Of Your USB Ports

Technology enthusiasts and gadget fans need as many USB sockets as they can muster, but some computers and laptops have a fairly low number of them. If you’re always unplugging devices to make room for others, the USB hub is a fantastic companion. Still, they’re not perfect; in some situations, there are solutions that work better for you.

If you want to make the best use out of your USB ports, why not check out these uses for a USB stick you didn’t know about?

Read the full article: What Is a USB Hub? 3 Reasons Why You Need One


Read Full Article