19 November 2018

11 Reasons Why You Should Be Using a VPN


reasons-use-vpn

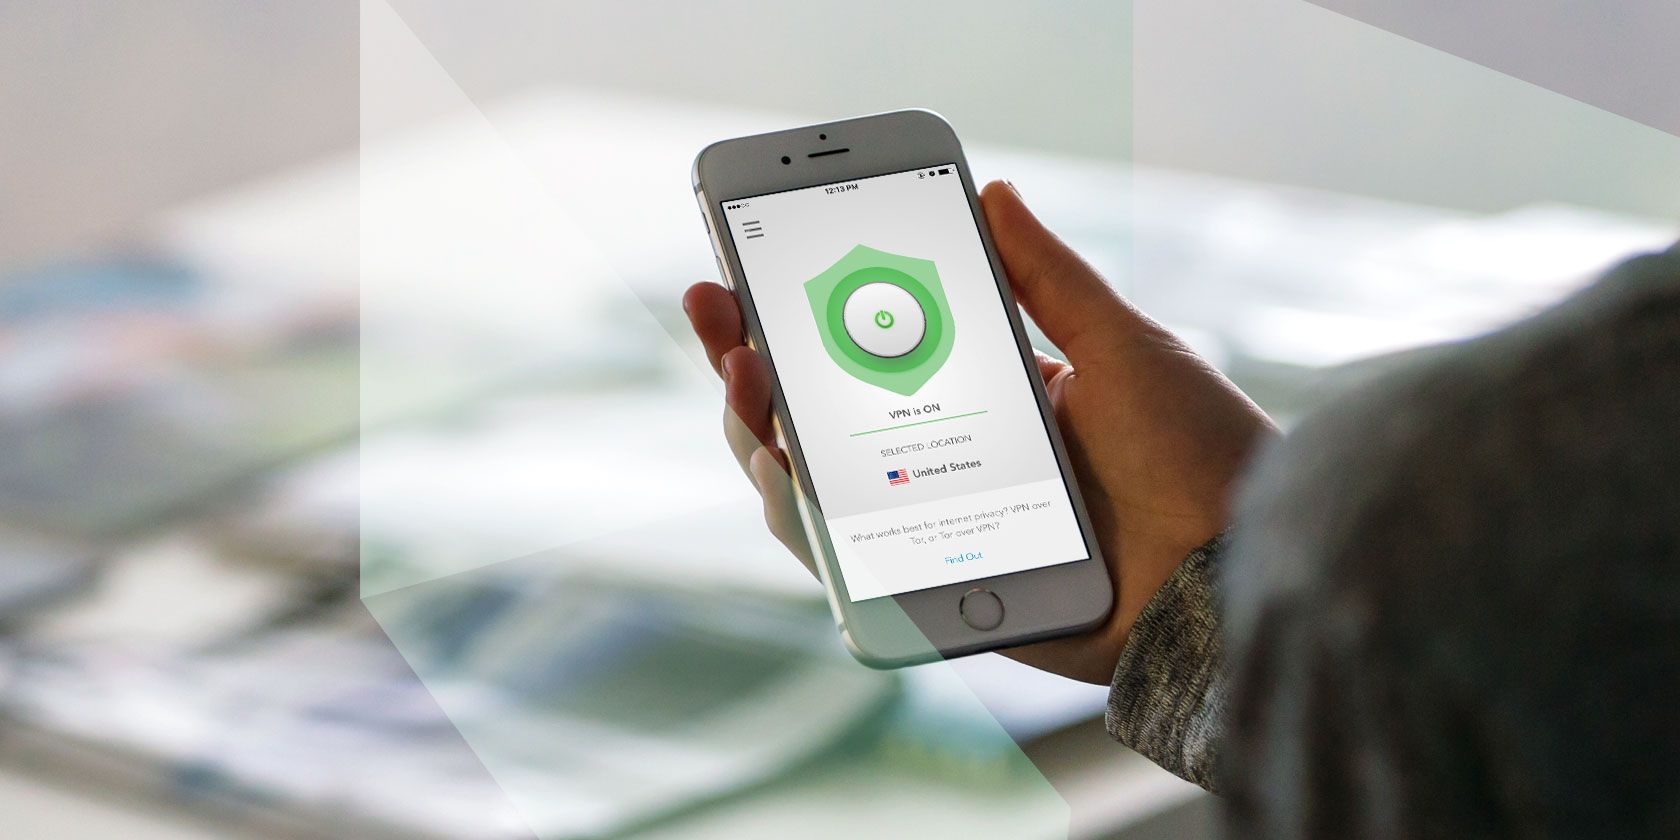
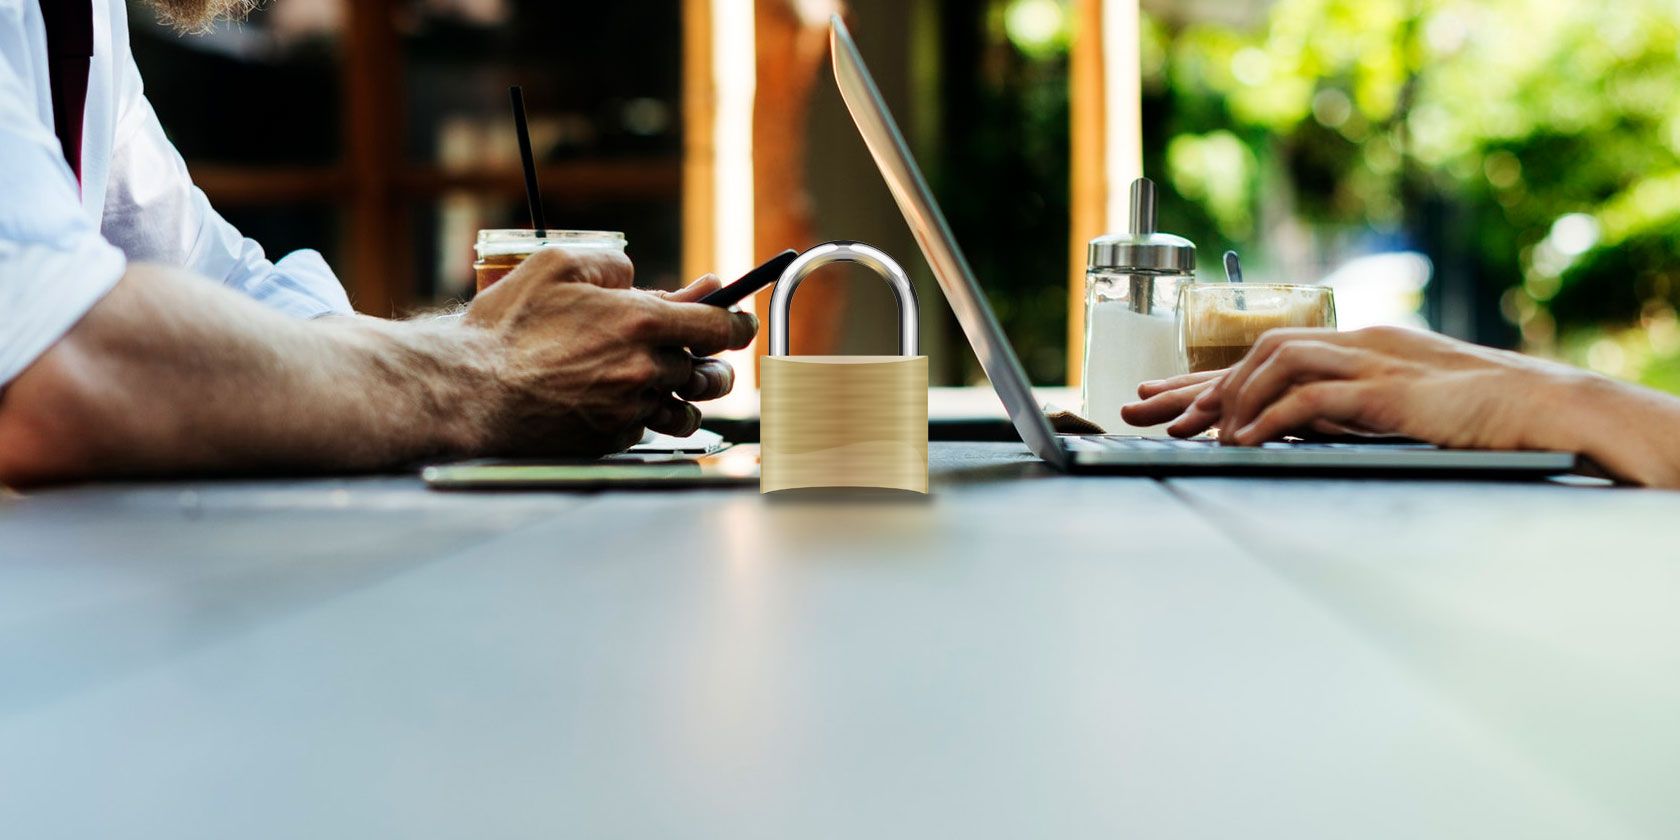
Virtual private networks (VPNs) are affordable, easy to use, and a vital component in your PC and smartphone set up. Along with a firewall and antivirus/anti-malware solution, you should have a VPN installed to keep every moment you spend online completely private.

That overarching summary covers just why you should be using a VPN. If you’re looking for a great VPN service, we recommend ExpressVPN (get three FREE months when you sign up for one year using this link).

What Is a VPN and What Does It Do?

Have you ever been concerned about how private your online activity is? Worried about advertising trackers? Perhaps you’re trying to access web pages that are banned by your internet Service Provider (ISP) or government? Or maybe you just want to watch movies on Netflix that aren’t available in your region.

Using a VPN has many benefits, but what is one, exactly?

Different types of VPN are available. It’s possible to set one up at home between two devices; your employer might offer a VPN for remote working. But if you want to enhance your privacy, avoid censorship, and watch what you want on Netflix, then you’ll need to subscribe to a VPN service.

Offering an encrypted connection between your computer and a server situated in any potentially hundreds of locations, a VPN enables you to circumvent various location-based restrictions on your web browsing.

Meanwhile, the encryption protects your activity from commercial surveillance with ad trackers. When used over a public wireless network, a VPN can even protect your data from cybercriminals. And because your activity is anonymized, websites typically cannot track your visits (unless you sign into an account).

Here are several reasons why you should be using a VPN.

1. Browse the Web Securely on Public Wi-Fi

Stay safe on public Wi-Fi with a VPN

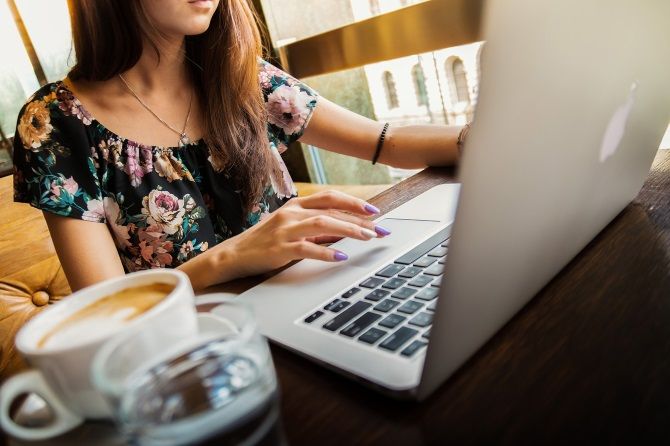
You’re out shopping, stopping for coffee somewhere, or you’ve just booked into a hotel. You notice there is free Wi-Fi. The common reaction is to get online quickly, and start browsing the web, checking social networks, email… you know how it goes.

The problem is that this is an extremely risky activity without a VPN:

  1. Your browsing is unencrypted, and unencrypted radio waves can be picked up by anyone.
  2. Malware from one laptop in the coffee shop could find its way to your device via the router.
  3. The free Wi-Fi on offer could be a trap—a fake internet connection operating as the pleasant face of a phishing scam.

Bear in mind also that legitimate free public Wi-Fi invariably demands person information from your for signing up. This is data that can be used to track you, and far from private.

Our guide to the dangers of public Wi-Fi explains the risks in more detail.

With a VPN installed, you overcome all three of these problems. In short, a VPN installed on your laptop, tablet or smartphone enables you to use public Wi-Fi securely.

2. Beat Location-Based Streaming Restrictions

BBC iPlayer restrictions can be circumvented with a good VPN

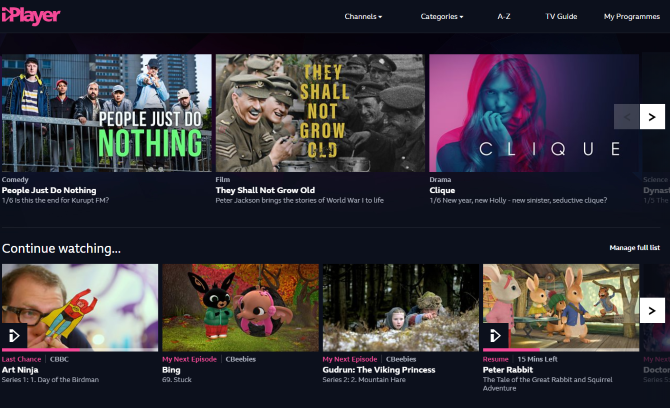
Where are you in the world? Do you want to watch something on BBC iPlayer? Perhaps you’re in the UK and want to catch the latest streamed releases on the US version of Netflix?

Either way, location-based restrictions prevent you from doing that. While you can employ a browser-based proxy tool to fool the service into thinking you’re in a different country, these can often result in slow data streaming.

Instead, you can employ a VPN and specify a “local” server. Most VPNs typically have dozens, if not hundreds of servers, that you can securely connect to and route data via. These servers are based around the world, so a computer in New York could connect to a server in the UK and catch the latest episode of Doctor Who the night it goes out via BBC iPlayer.

3. Defeat Oppressive Government Censorship

Governments have the power to prevent you from accessing websites that you might need to use. Perhaps you live in an oppressive state, where certain materials or services are unavailable to you and your countrymen.

Perhaps you need to communicate with the outside world, a message from an uprising, maybe.

A VPN can be used to access the materials and services you need to use without any security apparatus being made aware. The data is encrypted, which means that every online action is private.

They cannot be read.

If you are based in an oppressive regime, incidentally, you should look at Streisand, a tool that can be used to create a VPN server—plus instructions—allowing friends and families to access the web beyond the eye of the censors.

4. Save Money Shopping Online

Shop online safely with a VPN

Amazing as it might seem, some online stores will display different prices for the same item, based on which country you’re browsing from. This could be anything from a handbag, shoes, new car, or even hotel rooms.

This is clearly unacceptable for a consumer to have to contend with. The solution, therefore, is to search for prices carefully, methodically switch VPN servers with each attempt, until the lowest price can be found!

It might take a bit longer, but if we’re talking about saving hundreds of dollars (if not more) then it will be worth the effort.

5. How to Save Money on Flights With a VPN

A VPN can help save money when booking a flight

It isn’t just accommodation in other cities that you can save money on with a VPN. Airfares can also be cheaper if bought from a different country. While the departure and destination locations remain the same, the country that you view the ticket vendor’s website from can be changed using a VPN.

In one example, prices for the same plane ticket were cheaper via a Norwegian IP address than via a Malaysian IP.

Given the cost of airfares, spending a few minutes looking for significant savings is well worth your time. See our look at saving flight costs with a VPN for details.

6. Automatically Encrypt Everything

This might seem like something from some cybercrime movie or TV show, but a VPN client on your PC or mobile really can encrypt the data you exchange with remote websites and servers.

Indeed, any online activity you conduct with a VPN app running and connected to a server will be encrypted.

In effect, a secure, private tunnel is created for you to send your data through. This is how public Wi-Fi can be made safe and how data and browsing activity can be kept from the eyes of government censors.

Every VPN service offers a client app. Through this, you choose the server you wish to use, and connect to it. All internet activity is routed via the virtual private network, ensuring privacy and security. Even if your data is intercepted, it will mean nothing to the hacker.

7. Improve Online Gaming Speeds

Play Civilization VI against other players online

Whether you’re exploring some crazy fantasy realm in an MMORPG, fighting Nazis in the latest online FPS, or just waiting for your opponent to take his or her next turn in Civilization online, there’s a very strong chance that your ISP is throttling online gaming data.

It’s not fair and is usually done to offer a uniform service to all users. But how can you overcome this? Well, a VPN can be used to disguise the fact that you’re playing games online.

However, this tip comes with a caveat. You need to make sure that the VPN server you’re using is nearby, and capable of handling the load. (Most VPN clients will show how busy your chosen server is at any time). Otherwise, you could face speed and bandwidth issues, making the exercise a little pointless!

8. Enjoy Private and Secure Voice Chat

A VPN can keep video and voice chat secure

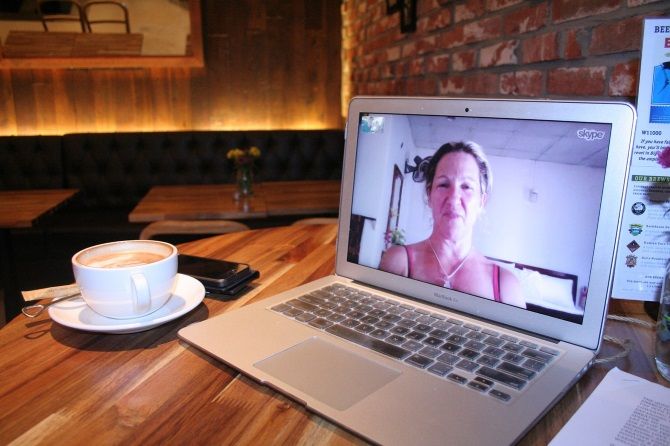
Do you want your online conversations to be overheard? While some chat apps have encryption built in (such as WhatsApp), voice-over-IP (VOIP) apps don’t generally come with this feature.

A VPN can deal with this, however. If you’re using Skype, or Google Hangouts chat, enabling your VPN will ensure that any online conversation is kept between you and other parties. Connected to the point on censorship, above, this will prove particularly valuable if you live under an oppressive regime.

Note that any speed reductions imposed by the VPN can cause Skype to drop calls it considers to be “low” quality. This happened to me recently, so unless you’re talking about something of considerable sensitivity, it’s probably best to leave your VPN disabled for Skype chats.

Or simply use another service entirely.

9. Complete Sensitive Research Without Interference

Many types of research can be considered “sensitive”. Following on from some earlier points, if you have an oppressive government, researching their activity may well attract attention. As might looking up censored material or movies.

Conversely, if you’re in business, and you wish to assess the quality of your competitors, then keeping your activity private will stop them from catching on.

With a VPN installed and activated, you can protect yourself from observation. It’s worth selecting a server in a distant, safe location, however. If you’re concerned about what information a VPN keeps, our look at VPN logging should give you the answers.

10. Use a VPN for Torrents (Keep Your Activity Private)

Torrent safely with a VPN

While BitTorrent peer-to-peer networking has been identified as a leading means of software piracy and copyright theft, the truth is that it is so widely used by legitimate services that it cannot be banned.

Online games use P2P networking to download updates; as does Windows 10. But whether you’re torrenting legitimately or not, you should be able to do so with privacy and security. Tools like PeerGuardian are supposed to keep your torrent shares safe but can have the effect of slowing things down.

With a VPN installed, you can keep your torrents private. Different VPNs have their own rules with regard to BitTorrent, and you might find that a service specifically catering to BitTorrent users is more suitable for you than a general VPN.

However, this will not protect you from torrents hiding worms, and other malware types. To protect yourself here, make sure you are using a good-quality antivirus suite.

11. Completely Private Collaboration

Often used for collaboration, cloud drives and group chat tools can be the target of hackers, copyright thieves, and even agencies engaged in industrial espionage. It is a relief, therefore, that a VPN can be employed to encrypt your data communications and protect against these risks.

In terms of collaboration, however, it is important to ensure that the other members of your team are also using a VPN!

This even includes connecting to your email inbox (encrypted email clients are also available and social networks, even your cloud drives.

Do You Need a VPN? Yes!

If you’re even slightly concerned about the way you can be tracked online, or want to watch TV from overseas, then you should be seriously considering a VPN.

A VPN goes beyond protecting your online gaming and video streaming, however. It surpasses torrent privacy and transcends censorship. In short, everything you do online can be made private thanks to a VPN.

Need a VPN? Check out our recommended VPN provider, ExpressVPN (get three FREE months when you sign up for one year using this link).

Read the full article: 11 Reasons Why You Should Be Using a VPN


Read Full Article

A Quick Guide to Using a Mac for Windows Users


mac-windows

Most Windows users will probably come into contact with macOS at some point. But maybe you’ve never used it before. While macOS is designed with user-friendliness in mind, it can still be daunting when first starting out.

So here’s a guide to the basics of using a Mac for first-timers coming from Windows.

Mac vs. Windows: Basic Differences

macOS Dock

macOS doesn’t have a Start menu (or screen), but instead uses a Dock that (by default) runs along the bottom edge of the screen. Applications appear on the left side, with folders and minimized windows on the right. Applications that are already running have a dot next to them, as you can see in the screenshot above.

At the top of the screen is the menu bar. This is where you’ll always find the familiar File, Edit, View (and so on) menus for any active app. Most functions of the Windows System Tray can be found in the top-right corner of the menu bar, such as the battery level, clock, and network options.

Search for Anything Using Spotlight

macOS has an excellent search engine called Spotlight. If you’re wondering where something is, all you need to do is search for it. Hit Cmd + Space to reveal Spotlight or click the magnifying glass icon in the top-right corner.

macOS Spotlight

Type whatever it is you’re looking for—maybe an app, document name, or system setting—and let macOS find it for you. You can also use this dialog to perform simple math, convert currency and other units of measurement, and use natural language processing in your search.

Spotlight Search on macOS

Once you’ve found what you’re looking for, you can reveal its location in Finder by holding the Cmd key while clicking it, or by hitting Cmd + Enter.

Keyboard and Mouse Nuances

The Command key performs many of the tasks the Windows key does on Microsoft keyboards. Option is equivalent to Alt and there’s no backspace key—just Delete (which behaves like a Windows backspace). Hold the Fn key and press Delete to erase characters in front of the cursor.

If you’re used to a non-US keyboard, you’ll have to adjust to the @ symbol now being above the number 2. Instead of using Alt + Tab to cycle apps, macOS uses Cmd + Tab.

macOS features right-clicking just like Windows. If you’re using a mouse, it’s in the same spot as usual. When using a MacBook or Magic Trackpad, you can use a two-finger click (ensure two fingers are making contact and click with one) or hold the Control key while clicking.

MacBook and Magic Trackpad users also have a large number of macOS gestures to master. Scroll with a two-finger swipe, and reveal the desktop by swiping outwards with four or more fingers.

If you’re confused, don’t worry. Head to System Preferences > Trackpad (search for it, or use the System Preferences shortcut in the Dock). Here you’ll find a customizable list of gestures, including handy videos to demonstrate what each does.

macOS Trackpad Settings

If you have a Magic Trackpad 2 or recent MacBook with a Force Touch trackpad, you can use Force Touch shortcuts to get even more gesture control over your Mac.

Finder, Files, and USB Drives

macOS Finder

Finder is the Mac equivalent of the Windows File Explorer. Access it by clicking the smiley-face icon at the far left of the Dock. You can conduct searches here and use macOS tags to organize your files. Open new tabs with a Cmd + Double-Click.

Copy and paste works just like it does on Windows, except you’ll use Cmd + C for copy and Cmd + V for paste. On a Mac, there’s no way to “cut” a file. You have to copy it first, then hold the Option key while pasting which will “move” the selected file. If you want to rename a file or folder, select it then hit the Return key.

Finder uses a sidebar (View > Sidebar in the menu bar) to access often-used locations. These include Downloads, Documents, and any folders you manually drag into this area too. You can also use Spotlight to search for and jump straight to a folder if you want.

You’ll find external media like USB drives, SD cards, and external hard drives further down this sidebar as well as on the Desktop. This is where you’ll find network locations and optical drives too. If you have any problems writing to a USB drive, it may be formatted as NTFS, which your Mac is unable to write to by default.

Applications and Settings

Launch apps by clicking on their Dock icons or search for them using Spotlight. Head to the Applications folder to view a full list of apps on your system. Drag an icon to the Dock to pin it there. To get rid of it, drag it out of the Dock till you see the Remove prompt and let go.

The three buttons in the top-left of every window are close (red), minimize (yellow) and full-screen (green). You can use Split View to work on two full-screen windows by clicking and holding the green button, then clicking a side of the screen.

macOS Window Controls

When you close a window (Cmd + W) on a Mac using the red button, the app usually stays open. You can see this by locating the dot under the app’s icon in the Dock. To fully quit an application, use the keyboard shortcut (Cmd + Q) or right-click its icon in the Dock and choose Quit.

macOS Dock Application

Holding the Option key will allow you to Force Quit an unresponsive app. You can also launch Activity Monitor (search for it), the macOS equivalent of the Task Manager. Learn more about killing and controlling problematic processes with Activity Monitor.

If you need to configure network access, access system settings, or simply change your wallpaper, you’ll find everything under System Preferences (via the dock or Spotlight).

A Few Advanced Mac Tips

macOS includes many apps as part of the core operating system. You can launch any of them by searching Spotlight. TextEdit is the Mac’s equivalent of Wordpad or Notepad, since it’s a rich text (RTF) editor. You can convert TextEdit documents to plaintext under Format > Make Plain Text.

Terminal is the closest equivalent of the Command Prompt. It allows you to execute Bash commands like you would on Linux. Siri is Apple’s digital assistant, like Cortana. Hold Cmd + Space and then tell Siri what you want. You can use Siri on macOS to find files, ask about the weather, and more.

macOS Terminal

You can delete files by dragging them to the Trash can in the Dock, or hitting Cmd + Delete on a selected file. To skip the Trash entirely, hit Cmd + Option + Delete to permanently delete a file.

While macOS comes with virtually everything you need to get started, check out our collection of the best Mac software too.

And How Do I Turn Off My Mac?

You’ll find options for shutting down, restarting, and logging out under the Apple menu in the top-left corner.

Hopefully these tips provide you with enough familiarity to get around in macOS. For a much more comprehensive overview, check out our complete beginner’s guide to macOS. You should also download and print our macOS cheat sheet for a handy keyboard shortcut reference.

Read the full article: A Quick Guide to Using a Mac for Windows Users


Read Full Article

Remembering Stan Lee: 12 Films to Watch Online


stanlee-movies

Stan “The Man” Lee, co-creator of characters like Spider-Man, Black Panther, and Thor, passed away on November 12, 2018. But his legacy will live on for many decades to come.

Speaking in 2015, Stan Lee told The Washington Post:

“Entertainment is one of the most important things in people’s lives. Without it, they might go off the deep end. I feel that if you’re able to entertain people, you’re doing a good thing.”

And Stan certainly did just that. As a tribute to the great man, here are several films that are all available to buy or rent online that you can watch to celebrate the life and times of Stan Lee.

1. The Avengers

Where to Watch: Amazon Video | YouTube | Google Play | iTunes

The Marvel Cinematic Universe (MCU) materialized in 2008 with Iron Man. In true Marvel fashion, it didn’t take long for the heroes of this shared space to meet and butt heads.

In his cameo towards the end of this first Avengers film, Lee casts doubt on whether superheroes were actually in the city. But the movie is a perfect example of Stan’s wonderfully-fleshed-out universe, and proves that you can find heroes wherever you are.

The Avengers can even teach you about the importance of online security.

2. Big Hero 6

Where to Watch: Amazon Video | YouTube | Google Play | iTunes

Disney’s acclaimed 2014 movie was based on an obscure Marvel comic from 1998. As such, Stan made his animated cinematic debut in an after-credits sequence. He reprised the part of Fred’s father in the subsequent Big Hero 6 series.

This is far from Stan’s first animated role, however. He’s played himself or new characters in TV shows like Spider-Man: The Animated Series (1994-98), The Super Hero Squad Show (2009-11), and Hulk and the Agents of S.M.A.S.H. (2013-15). Let’s not forget The Simpsons too.

3. Mallrats

Where to Watch: Amazon Video | YouTube | Google Play | iTunes

In what’ is probably his most substantial acting role, Stan acts as a relationship adviser to protagonist, Brodie (Jason Lee). Lee had a lot of fun filming the part, once calling it his favorite role, and it’s something of a forerunner to his MCU cameos.

Mallrats is also notable for its director, Kevin Smith, who wrote the sublime Guardian Devil arc which relaunched Daredevil for Marvel in 1998.

4. Jay and Silent Bob’s Super Groovy Cartoon Movie

Where to Watch: Amazon Video | YouTube | Google Play | iTunes

Lee’s association with Smith continued with this 2013 animated sequel to Jay and Silent Bob Strike Back (2001). Riffing off Samuel L. Jackson’s MCU debut as Nick Fury, Stan is shown talking to the titular characters about the Avengers Initiative.

Perhaps due to his Mallrats persona, Lee has a history of being a ladies’ man on-film. He was a “class-A pervert” in Guardians of the Galaxy (2014), an adult film star in Entourage (2010), and a strip club DJ in Deadpool (2016).

5. X-Men: Apocalypse

Where to Watch: Amazon Video | YouTube | Google Play | iTunes

Stan wasn’t actually a ladies’ man, marrying Joan in 1947. The pair lived happily together for 69 years until Joan sadly died in 2017, at the age of 95, in 2017. However, without her, the Marvel Universe (MU) would be a very different place. She’s credited with inspiring Stan to create the Fantastic Four, giving birth to Marvel as we know it.

Joan played Madame Web in Spider-Man: The Animated Series, an entity who acted as a guide for Peter Parker. But in 2016’s X-Men: Apocalypse, she makes a proper cameo, watching, alongside Stan, as En Sabah Nur rids the planet of nuclear weapons.

Though not part of the MCU (yet), the X-Men have a huge following. Here are a few websites all X-Men fans need to check out.

6. Avengers: Age of Ultron

Where to Watch: Amazon Video | YouTube | Google Play | iTunes

It’s no surprise that the man who wrote “with great power, there must also come great responsibility” is good with catchphrases. And he has so many of them. In the Avengers sequel, he tries Asgardian mead and is soon carted off, drunkenly muttering “Excelsior!”

In our review of Avengers: Age of Ultron we had mixed views. But Lee claimed this was his favorite cameo; it nicely sums up his tongue-in-cheek, optimistic outlook on life.

In 2014 he told Playboy:

“[Excelsior is] an old word that means ‘upward and onward to greater glory’. It’s on the seal of the state of New York. Keep moving forward, and if it’s time to go, it’s time. Nothing lasts forever.”

7. The Trial of the Incredible Hulk

Where to Watch: Amazon Video | iTunes

This is a TV movie spin-off of the popular Hulk series (1978-82) starring Bill Bixby and Lou Ferrigno. Lee was normally the narrator of the television show, but can be seen here on the jury. The movie was supposed to be a backdoor pilot for Daredevil, though it ultimately failed to materialize.

Meanwhile if you want to see the Hulk’s co-creator, Jack Kirby, check out the Season 2 episode, “No Escape”. Kirby appropriately plays a sketch artist.

8. The Ambulance

Where to Watch: iTunes

You have to go back to 1990 to find Stan’s first cinematic cameo. And no, it wasn’t even in a Marvel film.

The Ambulance is an obscure movie starring Eric Roberts as a comic book artist searching for the missing Cheryl (Janine Turner). Roberts’ boss? Stan Lee, of course! It’s not a massive cameo, but fans will get a kick out of spotting decals, prints, and standees of famous creations like the Hobgoblin, Wolverine, and Bullseye.

9. Fantastic Four (2005)

Where to Watch: Amazon Video | YouTube | Google Play | iTunes

20th Century Fox’s Fantastic Four attempts are far from popular, but the original—starring Chris Evans, pre-Captain America, as the Human Torch—is an important milestone for Stan.

This is the first time he plays a character he’s actually created. Lee portrays Willie Lumpkin, the postman at the Baxter Building. Lumpkin debuted in a 1960 syndicated strip, but quickly graduated to the MU in Fantastic Four #11 (1963). He’s yet to make his MCU entrance…

10. Spider-Man 3

Where to Watch: Amazon Video | YouTube | Google Play | iTunes

Lee’s cameos in the first two Spiderman films from Sam Raimi were pretty lacklustre. Thankfully, he rounds the trilogy off with the perfect sentiment: “You know, I guess one person can make a difference. Nuff said.”

11. With Great Power: The Stan Lee Story

Where to Watch: Amazon Video | iTunes

If you want to learn more about the man himself, this is a perfect place to start.

Released in 2010, this documentary is a tremendous celebration of his life, uncovering the true stories behind a legend. It features interviews and archive footage of many celebrity fans and associates, including Ringo Starr, Patrick Stewart, and Eva Mendes.

Comic book aficionados will also recognize names like Roy Thomas, John Romita, Frank Miller, and Captain America’s co-creator, Joe Simon.

12. Avengers: Infinity War

Where to Watch: Amazon Video | YouTube | Google Play | iTunes

The most recent Avengers instalment is also the highest ranked Marvel film on IMDb. It’s an incredible movie, and of course, Stan makes an appearance towards the start.

However, this isn’t his final cameo. He has already filmed scenes for Captain Marvel and Avengers 4 (both 2019). He also lends his voice to 2018’s Spider-Man: Into the Spider-Verse and Ralph Breaks The Internet, sequel to Wreck-It Ralph (2012).

We’re hoping he’s still a presence on screen: in Marvel’s Netflix shows, you can often spot Lee’s photo somewhere in the background.

Stan Lee (1922-2018)

Marvel Comics Bundle

We may not see him in many upcoming movies, but Stan Lee’s influence will always be felt—in films, in comics, and even in society itself. The number of people he has inspired cannot be underestimated. Marvel has an incredible history, and due to Lee and his peers, its future is even brighter.

Image Credit: Gage Skidmore/Wikimedia

Read the full article: Remembering Stan Lee: 12 Films to Watch Online


Read Full Article

10 Must-Know Apple Books Tips for Better Reading

You Can Now Watch Free Movies on YouTube (Legally)


YouTube has quietly started offering a selection of free movies, as long as you’re willing to sit through some ads. While the selection of films on offer is initially small, we expect the number, and quality of flicks on offer, to increase over time.

There have always been feature-length movies available on YouTube. However, until now they’ve either been copyright-infringing uploads that have somehow circumvented YouTube’s filters, or legal uploads you can buy or rent for cold, hard cash.

How to Find Free Movies on YouTube

Now, you can watch movies on YouTube completely legally and without paying a penny. YouTube added its first set of free, ad-supported movies in October 2018 without publicizing the fact. But you can find the current crop under the “Free to Watch” category.

At the time of writing YouTube is offering around 100 movies for free. This includes Terminator, Legally Blonde, Rocky, Zookeeper, and Agent Cody Banks. So it’s fair to say there’s some cinematic classics mixed in with some not-so-great family fare.

Rohit Dhawan, director of product management at YouTube, told AdAge, “We saw this opportunity based on user demand, beyond just offering paid movies. Can we do ad-supported movies, free to the user? It also presents a nice opportunity for advertisers.”

It should be noted that this appears to only be available in the U.S. Everywhere else the “Free to Watch” category is empty, and searching for specific films Americans can now opt to watch for free just offers up the price to buy or rent them. Which is disappointing.

Other Free Movie Streaming Sites

YouTube hasn’t disclosed the terms of any deals it has forged to offer these movies for free. However, it’s safe to assume both YouTube and the studios are sharing revenues generated by the ads. And if enough people watch, the selection could grow over time.

YouTube isn’t the only option for free, ad-supported movies. We’ve previously detailed the best free movie streaming sites available online. Which includes The Roku Channel (which is now available on the web), and Vudu’s Movies On Us.

Image Credit: Rego Korosi/Flickr

Read the full article: You Can Now Watch Free Movies on YouTube (Legally)


Read Full Article

3 Impressive Google Docs Scripts to Automate Your Documents


google-docs-scripts

There are many good reasons you should be using cloud-based Google Docs rather than application-based word processing apps like Microsoft Word. One of the most important is that you can create some very useful automations using powerful Google Scripts.

Here are three scripts that let you build a document from user prompts, import Google Analytics into a Google Doc report, and create a document from a Google Sheet file.

1. Use Prompts to Build a Document

If you send out the same email often, an automated document template can really help you save time. This could be something like a monthly sales report to your manager, or weekly updates to colleagues. Anything you write up often can be automated with a document template and a Google Script.

The first step is creating a document template. Doing this is as simple as creating a Google Doc. For the words you’d like to fill in, just surround them with two ## signs, like the example below.

google docs template

Inside this document, you can create a Google Script that runs when the document opens. Your script will prompt you to enter each of the elements that go into the document.

To create your script, click on the Tools menu item, and click on Script editor.

docs script editor

In the editor window, delete the code that’s there and replace it with the following script.

This script will call up prompts when the document opens, create a new document with the name of the sales person and today’s date in the title. Then it’ll fill in the template fields with the information you’ve entered.

function myFunction() {
  // Display a dialog box for each field you need information for.
  
  var ui = DocumentApp.getUi();
  //var response = ui.prompt('Enter Name', 'Enter sales person's name', ui.ButtonSet.OK);
  var nameResponse = ui.prompt('Enter sales persons name');
  var client1Response = ui.prompt('Enter client 1');
  var sales1Response = ui.prompt('Enter sales 1');
  var client2Response = ui.prompt('Enter client 2');
  var sales2Response = ui.prompt('Enter sales 2');
  var client3Response = ui.prompt('Enter client 3');
  var sales3Response = ui.prompt('Enter sales 3');
  var commissionResponse = ui.prompt('Enter commission');
  var date = new Date();
    
  //Make a copy of the template file
  var documentId = DriveApp.getFileById('<your-template-id>').makeCopy().getId();
      
  //Rename the copied file
  DriveApp.getFileById(documentId).setName(nameResponse.getResponseText() + date + ' Sales Report');  
      
  //Get the document body as a variable
  var body = DocumentApp.openById(documentId).getBody();
    
  //Insert the entries into the document
  body.replaceText('##name##', nameResponse.getResponseText());
  body.replaceText('##client1##', client1Response.getResponseText());
  body.replaceText('##sales1##', sales1Response.getResponseText()); 
  body.replaceText('##client2##', client2Response.getResponseText());
  body.replaceText('##sales2##', sales2Response.getResponseText());  
  body.replaceText('##client3##', client3Response.getResponseText());
  body.replaceText('##sales3##', sales3Response.getResponseText());
  body.replaceText('##commission##', commissionResponse.getResponseText());   
}

Replace the document ID code in the script above with the document ID of the template document.

You’ll find this embedded in the URL when you’re editing the template document.

document id

In the Google Script editor window, click the disk icon to save the script.

Next, click on the run icon to test that it works.

When you run the script for the first time, you may need to approve permissions for your Google Account to run the script.

Back in the template document, you’ll see the prompt windows pop up one after the other. Fill in the fields with the data you want to go into the document.

google doc prompts

When you’re done, the script will create a new document in your Google Drive root folder with all of the information you’ve entered filled in.

google docs new document

Finally, you just need to set up the script to run every time you open the template document.

In the Google Script Editor window, click on Edit > Current project’s triggers.

Click on the Add Trigger button in the lower right corner. Make sure Select event type is On open.

on open trigger

Scroll down and click Save, and you’re done.

2. Import Google Analytics Into a Document Report

Whether you own a website, or you work for someone who owns one, a frequent requirement is to measure website traffic and performance and provide it inside a formatted report.

You can use the same template approach as the section above to export website data from Google Analytics and output it to a well-formatted Google Docs report.

First, create a report template just like you did in the previous section. In this example the template will be set up to provide total users, sessions, and pageviews for the past week.

analytics report template

Next, go into the Google Docs Script Editor using the same steps as the previous section.

Enable access to Google Analytics data by following the steps below.

  1. In the script editor window, select Resources, and then Advanced Google services
  2. Click on/off next to Google Analytics API
  3. Below the dialog, click the Google Cloud Platform API Dashboard link
  4. In the Cloud Platform window, click on Enable APIs and Services
  5. Search for Analytics, and click on Analytics API
  6. Click on the Enable button to enable this API for your script
  7. Go back to the script editor window and click OK to close the Advanced Google Services window

analytics api

Now that you’ve enabled integration with the Google Analytics API, you’re ready to automatically create your report.

Paste the following code inside the script editor code window.

function myFunction() {
  var tableId = 'ga:<your-analytics-id>';
  var startDate = getLastNdays(7);   // 1 week ago.
  var endDate = getLastNdays(0);
  var date = new Date();
  
  var results = Analytics.Data.Ga.get(
      tableId,
      startDate,
      endDate,
    'ga:users,ga:sessions,ga:pageviews',
      {'dimensions': 'ga:date'});

  var data = [];
  var totals = results.totalsForAllResults;
    for (metricName in totals) {
      data.push(totals[metricName]);
  }
  
  var users = data[0]

  var sessions = data[1]

  var pageviews = data[2]
  
  // Output to Google Doc.

  //Make a copy of the template file
  var documentId = DriveApp.getFileById('').makeCopy().getId();
  
  //Rename the copied file
  DriveApp.getFileById(documentId).setName(date + ' Website Report');
  
  //Get the document body as a variable
  var body = DocumentApp.openById(documentId).getBody();
  
  //Insert the entries into the document
  body.replaceText('##startdate##', startDate);
  body.replaceText('##enddate##', endDate);
  body.replaceText('##users##', users); 
  body.replaceText('##sessions##', sessions);
  body.replaceText('##pageviews##', pageviews);
}

function getLastNdays(nDaysAgo) {
  var today = new Date();
  var before = new Date();
  before.setDate(today.getDate() - nDaysAgo);
  return Utilities.formatDate(before, 'GMT', 'yyyy-MM-dd');
}

Replace the document ID code in the script above with the document ID of the template document. Also replace the Analytics ID with the ID displayed for your website in Google Analytics.

In the Google Script editor window, click the disk icon to save the script.

Click on the run icon to test that it works.

When you run the script for the first time, you’ll have to approve permissions for your Google Account to run the script.

Running the script will create a new document in your Google Drive root folder with all of the website performance information for the last week filled in.

automated analytics report

Finally, you just need to set up the script to run every week.

In the Google Script Editor window, click on Edit and Current project’s triggers.

Click on the Add Trigger button in the lower right corner. Change Select event source to Time-driven. Change Select type of time based trigger to Week timer.

google scripts weekly trigger

Scroll down and click Save, and your script will run every week and create a new weekly report.

3. Create a Document From a Google Sheet

There are times when you need to transfer information from a spreadsheet into a document, for things like developing reports or logging information.

If you find yourself doing this frequently, you can save time by integrating Google Sheets with Google Docs. For this script, you’re going to use the Google Scripts Editor inside of Google Sheets, since that’s where the data will come from.

First, you’re going to create your template sales document just as you did in the first section of this article, embedding variables surrounded by the ## symbol.

google docs template

The data for these reports will come from your Google Sheets spreadsheet, which may look something like this example.

google sheets data

To create your script, inside of Google Sheets, click on the Tools menu item, and click on Script editor.

Paste the following script in the editor script window.

function myFunction() {
  var date = new Date();

  // Opens SS by its ID
  var ss = SpreadsheetApp.openById("<spreadsheet-document-id>");

  var sheet = ss.getSheetByName('Sam'); // or whatever is the name of the sheet 

  //Make a copy of the template file
  var documentId = DriveApp.getFileById('<template-document-id>').makeCopy().getId();
  
  //Rename the copied file
  DriveApp.getFileById(documentId).setName('Sam ' + date + ' Sales Report');  
  
  //Get the document body as a variable
  var body = DocumentApp.openById(documentId).getBody();

  var range = sheet.getRange("A2:B4");

  body.replaceText('##name##', 'Sam');

  for (var i=1; i<4; i++) {
    cell = range.getCell(i,1);
    client = cell.getValue(); 
    body.replaceText('##client' + i + '##', client);
    cell = range.getCell(i,2);
    sales = cell.getValue();
    body.replaceText('##sales' + i + '##', sales);    
  }
}

Replace the document ID in the script above with the document ID of the template document. Also replace the Google Sheet ID with the ID of your data Google Sheet.

In the Google Script editor window, click the disk icon to save the script.

Click on the run icon to test that it works.

Remember, when you run the script for the first time, you’ll need to approve permissions so it can access your Google Account.

When you run the script, it’ll create a new document in your Google Drive root folder with all of the sales data from the spreadsheet.

sales data document

It’s also possible to cycle through the sheet tabs and create a new sales output document for every sales person on your team.

Why not play around with the script above and see if you can pull this off?

Using Google Scripts and Google Docs

Google Docs seems like a simple word processor, but as you can see when you integrate Google Analytics, it multiplies the functionality of this cloud app.

Templates in Google Docs are a core part of what makes all of this work. You’d be surprised just how much using templates in Google Docs can make everything you do much more efficient. Try them out, and while you’re at it add your own creative Google Script automations as well.

Read the full article: 3 Impressive Google Docs Scripts to Automate Your Documents


Read Full Article

What Is HSTS and How Does It Protect HTTPS From Hackers?


protect-https

You may have made sure that your websites have SSL enabled, and the pretty security padlock in your browser is green. However, you may have forgotten about HTTP’s little security man, HTTP Strict Transport Security (HSTS).

What is HSTS, and how can it help keep your site secure?

What Is HTTPS?

HTTPS relies on HSTS

Hyper Text Transfer Protocol Secure (HTTPS) is a secured version of a website (HTTP). The encryption is enabled using the Secure Sockets Layer (SSL) protocol and is validated with an SSL certificate. When you connect to an HTTPS website, the information transferred between the website and the user is encrypted.

This encryption helps protect you against data theft through Man-in-the-Middle-Attacks (MITM). The added layer of security also slightly helps improve the reputation of your website. In fact, adding an SSL certificate is so easy, that many web hosts will add it to your site by default, for free! That said, HTTPS still has some flaws that HSTS can help fix.

What Is HSTS?

HSTS is a response header that informs a browser that enabled websites can only be accessed via HTTPS. This forces your browser to only being able to access the HTTPS version of the website and any resources on it.

You may not be aware that even though you have set up your SSL certificate correctly and enabled HTTPS for your website, that the HTTP version is still available. This is true even if you have set up forwarding using 301 Permanent Redirection.

Although the HSTS policy has been around for a little while, it was only formally rolled out by Google in July 2016. Which may be why you haven’t heard of it much yet.

Enabling HSTS will stop SSL protocol attacks and cookie hijacking, two additional vulnerabilities in SSL-enabled websites. And in addition to making a website more secure, HSTS will make sites load quicker by removing a step in the loading procedure.

What Is SSL Stripping?

Although HTTPS is a huge improvement from HTTP, it’s not invulnerable to being hacked. SSL stripping is a very common MITM hack for websites that uses redirection to send users from an HTTP to the HTTPS version of their website.

301 (permanent) and 302 (temporary) redirect basically works like this:

  1. A user types google.com in their browser’s address bar.
  2. The browser initially tries to load http://google.com as the default.
  3. “Google.com” is set up with a 301 permanent redirect to https://google.com.
  4. The browser sees the redirect and loads https://google.com instead.

With SSL stripping, the hacker can use the time between step 3 and step 4 to block the redirect request and stop the browser from loading the secure (HTTPS) version of the website. As you are then accessing an unencrypted version of the website, any data you enter can be stolen.

The hacker can also redirect you to a copy of the website you are trying to access, and capture all of your data as you enter it, even if it looks secure.

Google has implemented steps in Chrome to stop some types of redirection. However, enabling HSTS should be something you do by default for all of your websites from now on.

How Does Enabling HSTS Stop SSL Stripping?

Enabling HSTS forces the browser to load the secure version of a website, and ignores any redirect and any other call to open an HTTP connection. This closes the redirection vulnerability that exists with a 301 and 302 redirect.

There is a negative side even to HSTS, and that is that a user’s browser has to see the HSTS header at least once before it can take advantage of it for future visits. This means that they will have to go through the HTTP > HTTPS process at least once, leaving them vulnerable the first time they visit an HSTS-enabled website.

To combat this, Chrome preloads a list of websites that have HSTS enabled. Users can submit HSTS-enabled websites to the preload list themselves if they fit the required (simple) criteria.

HSTS preload check

Websites added to this list will be hardcoded into future versions of Chrome updates. It makes sure that everyone who visits your HSTS enabled websites in updated versions of Chrome will stay secure.

Firefox, Opera, Safari and Internet Explorer have their own HSTS preload list, but they are based on the Chrome list on hstspreload.org.

How to Enable HSTS on Your Website

To enable HSTS on your website you first need to have a valid SSL certificate. If you enable HSTS without one, your site will be unavailable to any visitor, so make sure your website and any subdomains are working over HTTPS before continuing.

Enabling HSTS is pretty easy. You simply need to add a header to the .htaccess file on your site. The header you need to add is:

Strict-Transport-Security: max-age=31536000; includeSubDomains

This adds a one year max age access cookie (what is a cookie?), which includes your website, and any subdomains. Once a browser has accessed the website, it’ll be unable to access the unsecured HTTP version of the website for a year. Make sure that all of the subdomains on this domain are included in the SSL certificate, and have HTTPS enabled. If you forget this, the subdomains won’t be accessible after you save the .htaccess file.

Websites that are missing the includeSubDomains option can expose visitors to privacy leaks by allowing subdomains to manipulate cookies. With includeSubDomains enabled, these cookie-related attacks won’t be possible.

Note: Before adding the one-year max-age, test your entire website with five-minute max-age first using: max-age=300;

Google even recommends that you test your website and its performance (traffic) with a one week, and one month value as well before implementing a two-year max-age.

Five minutes: Strict-Transport-Security: max-age=300; includeSubDomains
One week: Strict-Transport-Security: max-age=604800; includeSubDomains
One month: Strict-Transport-Security: max-age=2592000; includeSubDomains

Making the HSTS Preload List

By now you should be familiar with HSTS and why it is important for your site to use it. Keeping your website visitors safe online should be a key element of your site plan.

To be eligible for the HSTS preload list that Chrome and other browsers use, your website has to meet the following requirements:

  1. Serve a valid SSL certificate.
  2. Redirect from HTTP to HTTPS on the same host, if you are listening on port 80.
  3. Serve all subdomains over HTTPS. In particular, you must support HTTPS for the www.subdomain if a DNS record for that subdomain exists.
  4. Serve an HSTS header on the base domain for HTTPS requests:
    • The max-age must be at least 31536000 seconds (1 year).
    • The includeSubDomains directive must be specified.
    • The preload directive must be specified.
    • If you are serving an additional redirect from your HTTPS site, that redirect must still have the HSTS header (rather than the page it redirects to).

If you want to add your website to the HSTS preload list, make sure you add the required preload tag. The “preload” option signifies that you want your website to be added to Chrome’s HSTS preload list. The response header in .htaccess should then look like this:

Strict-Transport-Security: max-age=63072000; includeSubDomains; preload

We recommend that you add your website to the hstspreload.org. The requirements are pretty easy to meet, and it’ll help protect your website’s visitors, and potentially improve your website’s search engine ranking.

Read the full article: What Is HSTS and How Does It Protect HTTPS From Hackers?


Read Full Article

How to Clean the iPhone’s Charging Port

Now eight parliaments are demanding Zuckerberg answers for Facebook scandals


Facebook’s founder is facing pressure to accept an invite from eight international parliaments, with lawmakers wanting to question him about negative impacts his social network is having on democratic processes globally.

Last week Facebook declined a invitation from five of these parliaments.

The elected representatives of Facebook users want Mark Zuckerberg to answer questions in the wake of a string of data misuse and security scandals attached to his platform. The international parliaments have joined forces — forming a grand committee — to amp up the pressure on Facebook.

The UK-led grand committee said it would meet later this month, representing the interests of some 170 million Facebook users across Argentina, Australia, Canada, Ireland and the UK. But Facebook snubbed that invite.

Today the request has been reissued with an additional three parliaments on board — Brazil, Latvia and Singapore.

In their latest invite letter they also make it clear that Facebook’s founder does not have to attend the hearing in person — which was the excuse the company used to decline the last request for Zuckerberg. (Which was just the latest in a long string of ‘nos’ Facebook’s founder has given the committee.)

“We note that while your letter states that you are ‘not able to be in London’ on 27th, it does not rule out giving evidence per se. Would you be amenable to giving evidence via video link instead?” the grand committee writes now.

We’ve asked Facebook whether Zuckerberg will be able to make time in his schedule to provide evidence remotely — and will update this report with any response. (A company spokesman suggested to us that it’s unlikely to do so.)

Of course Zuckerberg is very busy these days — given the fresh scandals slamming Facebook’s exec team. His political plate is truly heaped.

Last week a New York Times report painted an ugly and chaotic picture of Facebook’s leaders’ response to the political disinformation crisis — which included engaging an external public relations firm which used smear tactics against opponents. (Facebook has since severed ties with the firm.)

The grand committee references this controversy in its latest invitation letter, writing: “We believe that there are important issues to be discussed, and that you are the appropriate person to answer them. Yesterday’s New York Times article raises further questions about how recent data breaches were allegedly dealt with within Facebook.”

The UK’s DCMS committee, which has been spearheading efforts to hold Zuckerberg to account, has spent the best part of this year asking wide-ranging questions about the impact of online disinformation on democratic processes. But it has become increasingly damning in its criticism of Facebook — accusing the company of evasion, equivocation and worse as the months have gone on.

In a preliminary report this summer it also called on the government to act urgently, recommending a levy on social media and stronger laws to prevent social media tools being used to undermine democratic processes.

Although the UK government chose not to leap into action. But even there Facebook’s platform is implicated because Brexit — which was itself sold to voters via the medium of unregulated social media ads (with the Electoral Commission finding earlier this year that the official Vote Leave campaign used Facebook’s funnel to bypass electoral law) — is rather monopolizing ministerial attention these days…

One of the questions committee members are keen to get an answer to from Facebook is who at the company knew in the earliest incidence about the Cambridge Analytica data misuse scandal. In short they want to know where the buck stops. Who should be held accountable — for both the massive data breach and Facebook’s internal handling of it.

And it is very close to getting an answer to that after the UK’s data protection watchdog, the ICO, gave evidence earlier this month — saying it had obtained the distribution list for emails Facebook sent internally about the breach, saying it would pass the list on to the committee.

A spokeswoman for the DCMS committee told us it has yet to receive this information from the ICO.

An ICO spokesperson told us it will not be publishing the list — adding: “At this stage I’m not sure when it will be sent to the committee.”


Read Full Article

Airplanes and Spaceships


Airplanes and Spaceships

Genies brings lifelike avatars to other apps with $10M from celebrities


Genies is emerging as the top competitor to Snapchat’s wildly popular Bitmoji as Facebook, Apple, and Google have been slow to get serious about personalized avatars. Over one million people have customized dozens of traits to build a realistic digital lookalike of themselves from over a million possible permutations.

When Genies launched a year ago after raising $15 million in stealth, it misstepped by trying to show people’s Genies interpreting a few weekly news stories and seasonal moments. Now the startup has figured out users want more control, so it’s shifting its iOS and Android apps to let you chat through your avatar, who acts out keywords and sentiments in reaction to what you type, which you can then share elsewhere. And Genies is launching a software developer kit that charges other apps to let you create avatars and use them for chat, stickers, games, animations, and augmented reality.

Genies’ SDK puts its avatars in other apps

To power these new strategies and usher in what CEO Akash Nigam calls “the next wave of communication through avatars where people feel comfortable expressing themselves”, Genies has raised $10 million more. The party round comes from a wide range of investors from institutional firms like NEA and Tull Co; angels like Tinder’s Sean Rad, Raya’s Jared Morgenstern, and speaker Tony Robbins, athletes like Carmelo Anthony, Kyrie Irving, and Richard Sherman; and musicians including A$AP Rocky, Offset from Migos, The Chainsmokers, and 50 Cent. Some like Offset have even used their Genie to stand in for them brand sponsorships so their avatar poses for photos instead of them.

“We’ve transitioned from being an app to an avatar services company” Nigam tells me. The son of WebMD’s co-founder, Nigam build a string of failed apps while at University Of Pennsylvania with Genies co-founder Evan Rosenbaum before working one called Blend that raised some money. Watching Snapchat-owned Bitmoji stay glued atop the app download charts inspired them to see more opportunity in the avatar space. Genies has had some talent issues, though. Nigam says it fired co-founder and president Matt Geiger, and a source tells me there were company culture issues that led to issues with the content writers it hired to create scenes for Genies to act out. Now it’s getting out of that scripted content creation business to focus on algorithmic suggestions of animations.

Genies in-app chat

The revamped Genies app lets you chat with up to six friends through your avatar. As you type, Genies detects actions, places, things, and emotions, and offers you corresponding animations your avatar acts out with a tap. Given people already have plenty of place to chat, it might be tough to get people to move real conversations inside Genies for more than a quick hit of novelty. But that functionality is also coming to Facebook Messenger, WhatsApp, and iMessage’s keyboards where the expressive animations could naturally augment your threads.

Gucci paid to let Genies users add its luxury clothes to their avatars

With the Genies SDK, the startup is ready to challenge Snapchat’s new Snap Kit that lets apps build Bitmoji into their keyboards. But for $100,000 to $1 million in licensing fees, Genies allows apps to develop much deeper avatar features. Beyond creating keyboard stickers, games can plaster your Genies’ face over your character’s head, and utilities apps can have your Genie act out the weather or celebrate transactions. And since Genies is still taking off, partners can create experiences that feel fresh rather than just a repurposing of Bitmoji’s already-established cartoony avatars. Users spent an average of 19 minutes creating their Genie, so the SDK could add significant engagement to these apps. Genies has also launched its first official brand deal, where Gucci has created a wheel in the Genies creator so you can deck out your mini-you with luxury clothing.

The Avatar Wars (from left): Facebook Avatars, Google Gboard Mini Stickers, Apple Memoji

Despite Bitmoji’s years of success, it’s yet to have a scaled competitor. TechCrunch broke the news that Facebook is working on a “Facebook Avatars” feature but seven months later it’s still not publicly testing and the prototype looks childish. Google’s Gboard just added the ability to create avatars based on a selfie, but they’re bland, low on detail, and far from fun looking. And Apple’s latest mobile operating system lets you create a Memoji, though they too look generic like actual emoji rather than something instantly identifiable as you. By designing avatars that not only look like you but like a cooler version of you, Genies could capture the hearts and faces of millions of teens and the influencers they follow.


Read Full Article

Snap launches a certification program for AR shops to craft branded lenses


Snap has announced a partner program intended to make it easer for brands to get on board with — and pay for — its augmented reality ‘lenses’ by helping advertisers find certified AR shops to craft the digital product placements on their behalf.

The move follows the visual messaging platform opening up lenses, almost a year ago, to outside developers — with the launch of a Lens Studio AR developer tool.

Snap’s lenses use a combination of AR and hyper personalization as their selling strategy — by superimposing branded content directly onto users’ faces and/or around their person. This means the advert becomes all but inescapable (at least to the user’s friends) as branded stuff gets mapped onto and/or injected into their personal content where it can piggyback on social sharing to shoot for viral spread.

At launch, Snap says the global Lens Creative Partner Program has more than 30 certified ‘creators’ listed — with the largest number located in the US, followed by the UK, then Canada and Australia. (A similar number of partner shops are also badged as global.)

Snap says additional regions are being launched in a few weeks, and it says it’s expecting to onboard 100+ creators over the next few months.

Snap Lens Creative Partners program AR shop, Social Snack, with content created for Hasbro

“Today we are announcing the launch of a Lens Creative Partners program specific to building AR Lenses for brands. This group of certified creators spans large agencies and expert individuals who have been building engaging and immersive AR Lenses for Snap,” it writes in a blog post announcing the program.

“To be certified, creators had to be experienced in developing quality AR and complete a rigorous course about the development process, creative best practices, ad policies and buy models of sponsored AR Lenses on Snapchat.”

It’s not as instantly arresting as cat lenses but Snap’s push to expand advertiser interest in paying for the chance to virtually adorn users with branded content — by making it easier to find a tried and tested AR shop to do the work — will probably result in Mr Tibbles wearing a lot more virtual merch on his head in future.

So expect plenty more feline indignity in future.

Snap says that more than one in three of its 186 million daily active users play with AR lenses on the app each day, averaging three minutes each — adding up to a collective 500 years of daily AR play time.

Just think how much quality cat petting time people are missing out on.


Read Full Article

Genies brings lifelike avatars to other apps with $10M from celebrities


Genies is emerging as the top competitor to Snapchat’s wildly popular Bitmoji as Facebook, Apple, and Google have been slow to get serious about personalized avatars. Over one million people have customized dozens of traits to build a realistic digital lookalike of themselves from over a million possible permutations.

When Genies launched a year ago after raising $15 million in stealth, it misstepped by trying to show people’s Genies interpreting a few weekly news stories and seasonal moments. Now the startup has figured out users want more control, so it’s shifting its iOS and Android apps to let you chat through your avatar, who acts out keywords and sentiments in reaction to what you type, which you can then share elsewhere. And Genies is launching an SDK that charges other apps apps to let you create avatars and use them for chat, stickers, games, animations, and augmented reality.

To power these new strategies and usher in what CEO Akash Nigam calls “the next wave of communication through avatars where people feel comfortable expressing themselves”, Genies has raised $10 million more. The party round comes from a wide range of investors from institutional firms like NEA and Tull Co; angels like Tinder’s Sean Rad, Raya’s Jared Morgenstern, and speaker Tony Robbins, athletes like Carmelo Anthony, Kyrie Irving, and Richard Sherman; and musicians including A$AP Rocky, Offset from Migos, The Chainsmokers, and 50 Cent. Some like Offset have even used their Genie to stand in for them brand sponsorships so their avatar poses for photos instead of them.

“We’ve transitioned from being an app to an avatar services company” Nigam tells me. The son of WebMD’s co-founder, Nigam build a string of failed apps before meeting his Genies co-founders through University Of Michigan hackathons. Watching Snapchat-owned Bitmoji stay glued atop the app download charts inspired them to see more opportunity in the avatar space.

With the Genies SDK, the startup is ready to challenge Snapchat’s new Snap Kit that lets apps build Bitmoji into their keyboards. But for $100,000 to $1 million in licensing fees, Genies allows apps to develop much deeper avatar features. Beyond creating keyboard stickers, games can plaster your Genies’ face over your character’s head, and utilities apps can have your Genie act out the weather or celebrate transactions. And since Genies is still taking off, partners can create experiences that feel fresh rather than just a repurposing of Bitmoji’s already-established cartoony avatars. Genies has also launched its first official brand deal, where Gucci has created a wheel in the Genies creator so you can deck out your mini-you with luxury clothing.

The Avatar Wars (from left): Facebook Avatars, Google Gboard Mini Stickers, Apple Memoji

Despite Bitmoji’s years of success, it’s yet to have a scaled competitor. TechCrunch broke the news that Facebook is working on a “Facebook Avatars” feature but seven months later it’s still not publicly testing and the prototype looks childish. Google’s Gboard just added the ability to create avatars based on a selfie, but they’re bland, low on detail, and far from fun looking. And Apple’s latest mobile operating system lets you create a Memoji, though they too look generic like actual emoji rather than something instantly identifiable as you. By designing avatars that not only look like you but like a cooler version of you, Genies could capture the hearts and faces of millions of teens and the influencers they follow.


Read Full Article