The Time Machine tool on macOS is a great way to create backups of your data. Because it’s a native Apple tool, it integrates seamlessly with the operating system. You can set it and forget about it, safe in the knowledge that Time Machine can restore your system in a few minutes if something goes awry.
However, you can’t always forget about it. Sometimes you might see an error message that says your backup is too large for the backup disk.
What can you do? You’ll need to delete some old Time Machine backups to make space for new ones. There is only one correct method for doing so: to use the Time Machine app. Let’s see how to delete backups on your Mac.
How to Delete Time Machine Backups on Your Mac
The only Apple-approved way to remove Time Machine backups is to manage them through the Time Machine app. To delete old backups using Time Machine, use the following instructions:
Connect your backup drive to your computer.
Click on the Time Machine icon in the Menu Bar and select Enter Time Machine.
If you don’t see the icon, navigate to System Preferences > Time Machine and check the Show Time Machine in menu bar box.
Scroll through your backups and select the one you want to delete.
Click on the Gear icon in the Finder window.
Select Delete Backup. If you want to delete all backups of a selected file, choose Delete all backups of X.
Agree with the on-screen confirmation.
Enter your password.
(Note: If you cannot see the gear icon, make sure Finder is active and visit View > Customize Toolbar on the menu bar to add it.)
Warning: Do Not Use Finder to Delete Time Machine Backups
That’s all you have to do when you need to manually erase backups. In normal cases, Time Machine should handle this for you, so it’s not something you need to do often.
In theory, you can also use Finder to delete old backups. However, you should never do this due to macOS’s System Integrity Protection (SIP). This features prevents you (or software) from damaging important parts of the operating system. Because Time Machine contains copies of system files, the SIP feature blocks attempts to delete its contents.
Wondering why your cellular data is so slow? There’s nothing more frustrating than a slow data connection on your phone. Whether you’re trying to watch a video or check Facebook on your phone, you pay for and expect a certain level of speed. When service fails to meet that level, it’s easy to get upset.
In most cases, a slow connection is just temporary, caused by location or network congestion. Other times, it can persist for hours or even days. Before you call your mobile carrier’s technical support, try these simple steps first to see if they fix your slow mobile data issues.
1. Restart Your Phone
This seems like a cliché fix, but it often works. Restarting your phone should fix sluggish cellular data speeds, especially if you haven’t turned it off in a while.
Restarting your phone is simple:
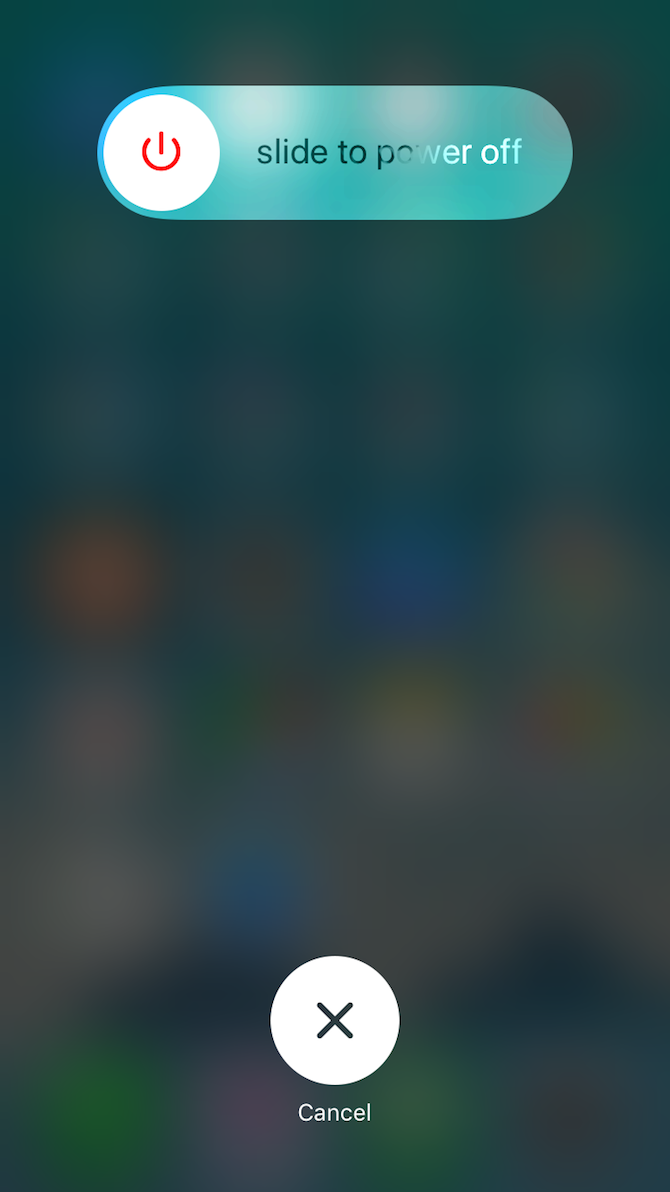
On an iPhone X or newer, press and hold the side button and either volume up or volume down until Slide to Power Off appears. Once you power off your iPhone, hold the side button again to turn it back on.
If you have an iPhone 8 or earlier, simply hold the side button (on the right side of the phone, or the top of older devices) until Slide to Power Off appears on the screen.
For most Android phones, you just need to hold the power button until the power options appear on the screen, then tap Restart.
2. Change Locations
Many factors can result in slow LTE service. These include weather, network congestion, and even solar activity. But chief among these are geography and buildings.
If you’re in a remote area, or there are a lot of natural barriers around you (such as hills, mountains, and valleys), they can affect your signal. The same goes for buildings. You could be in the middle of a heavily populated urban area with full bars, then wonder why your data is so slow when you enter certain structures.
If you’re having speed problems that might have started in a certain location, try moving somewhere else. You may need to leave the building you’re in or drive a few miles away. While this may not be convenient, it’s a good way to troubleshoot your speed issue.
This step is likely something tech support will ask you to do anyway if you call for help.
3. Update and Disable Apps
Sometimes a troublesome app can cause issues by hogging your data connection and slowing it down. In such a case, you’ll want to do a little investigating to see what, if anything, is eating into your speed.
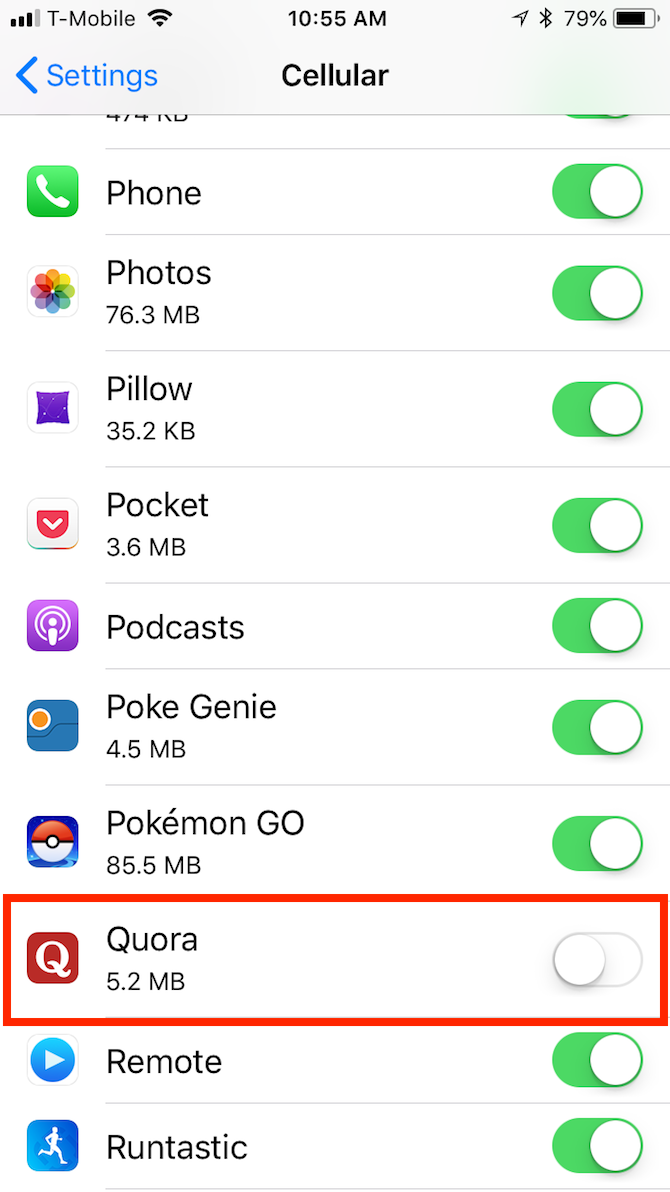
If it turns out there is something amiss, you can disable the app’s access to your cellular data connection or uninstall it.
When your iPhone internet is slow, you can visit Settings > Cellular and disable any app’s access to your cellular data connection.
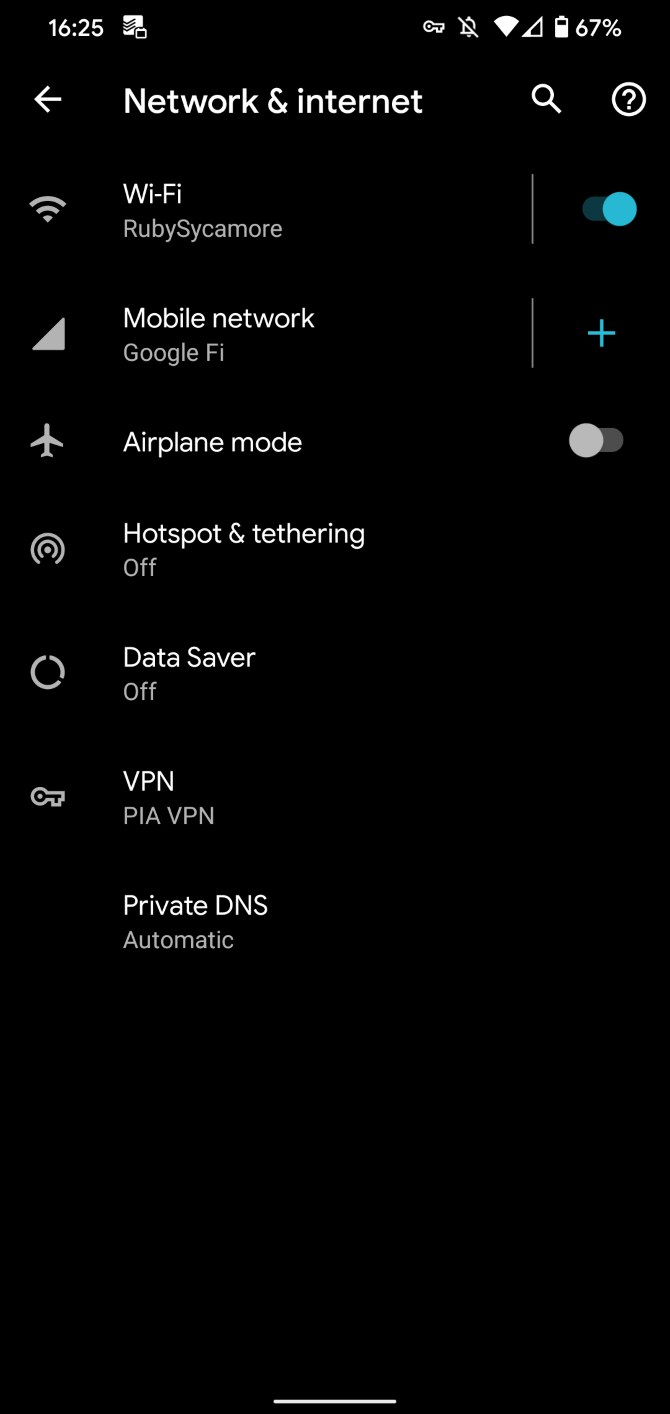
On Android, you’ll find this at Settings > Network & internet > Mobile network > App data usage. Tap an app, then slide the Background data slider off to prevent that app from using data in the background.
You should also check for app updates. App developers publish updates to address bugs all the time, so it could be a simple matter of opening the App Store or Google Play and downloading the fix through an update.
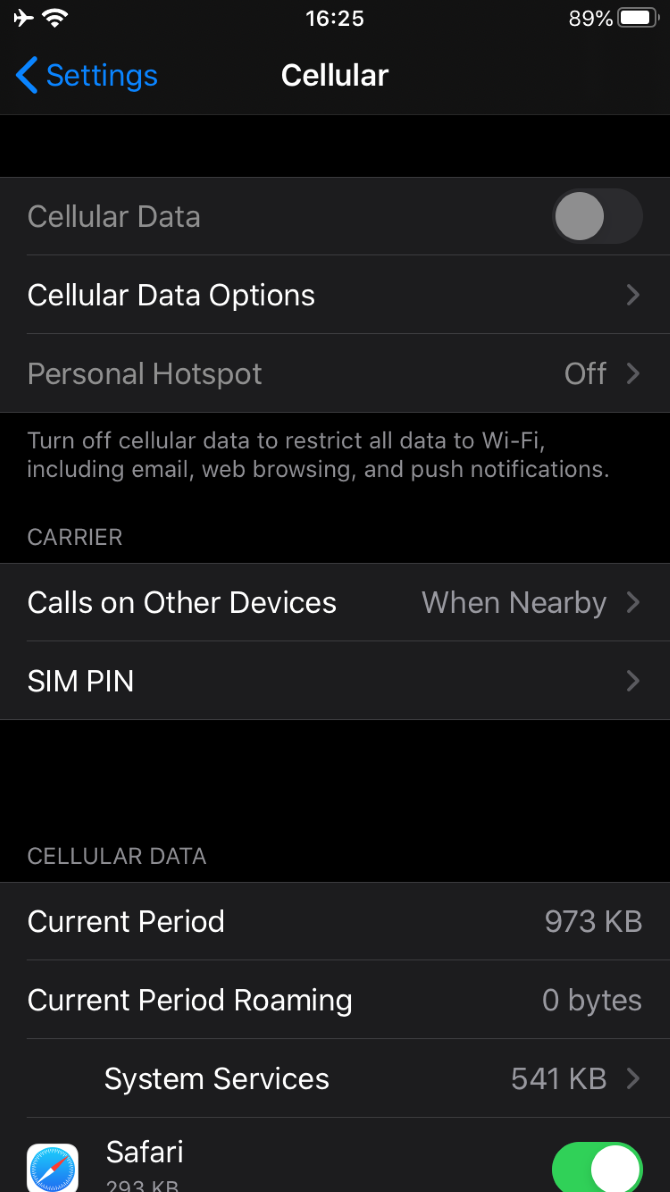
4. Disable Data Saver/Low Data Mode
Both Android and iOS contain modes designed to reduce your data usage. These are handy if you have a limited amount of data, but can also make it seem like your service connection is slow. Try disabling these modes and see if everything feels faster.
On Android, head to Settings > Network & internet > Data Saver. If you have an iPhone, you’ll find a comparable setting called Low Data Mode under Settings > Cellular > Cellular Data Options.
If you’re worried about how much data you use, make sure you turn these back on after a bit. You should be able to tell if this setting is making your mobile data slower or not.
5. Disconnect From Your VPN
VPNs provide anonymity and privacy, but they can also slow down your speeds when using remote servers. Thus, if your phone is connected to a VPN, try disconnecting and try again.
Chances are, you’ll notice an immediate improvement as soon as you disconnect. If that does fix the problem, you can improve your VPN’s speed when you reconnect to it.
Not using a VPN yet? You should be! We highly recommend ExpressVPN because it’s effective and reputable, but if you find it too expensive, CyberGhost is a good value-conscious option.
6. Check for Network Outages
Though mobile carriers love to tout their reliability, outages happen all the time. These outages often account for reduced speeds or even lost connections. If you’re still experiencing slow mobile data at this point, it’s a good idea to check for outages with your carrier before calling in.
If you can connect to Wi-Fi, it’s easy to do some investigating. Try checking a website such as Downdetector. Quite often, if your issue is widespread, other people will have already reported it.
You can also hop onto social media. Twitter is a good place to research connection issues because people will often tweet about their connection problems. If you contact your mobile carrier’s support Twitter account, you’re likely to get a response quickly.
This also lets you do something else while you wait, instead of wasting time on hold.
7. Reset Your Phone’s Network Settings
Resetting your network settings, like restarting your phone, often fixes a slow mobile data connection. The problem is that doing so also resets your Wi-Fi access points and Bluetooth devices. This isn’t the end of the world, but you will have to reconnect to saved Wi-Fi networks and re-pair your Bluetooth devices later.
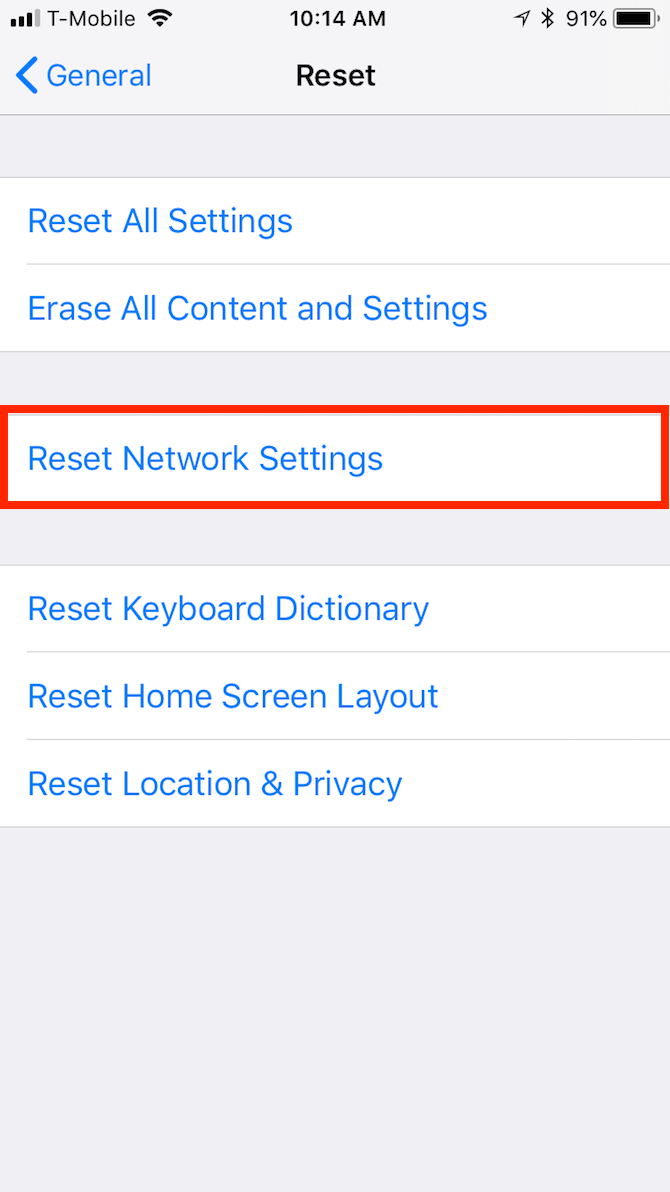
To reset network settings on an iPhone, open Settings > General > Reset > Reset Network Settings. The phone will prompt you for your passcode if you have one, then it will restart.
On an Android phone, you’ll find the reset network settings option at Settings > System > Advanced > Reset options > Reset Wi-Fi, mobile & Bluetooth. This may be in a different location depending on your phone manufacturer. Try searching for it in the Settings search bar if you can’t find it.
Resetting the network settings on an Android phone usually does not require you to restart the device.
8. Pull and Insert Your SIM Card Again
Finally, you can try to pull and reinsert your SIM card. This can clear up any underlying issues affecting your phone’s connection to your carrier.
Where your SIM card is located varies from device to device. On iPhones, the SIM card slot is always located on the right edge of the phone, below the side button. On Android devices, it can be on the side, top, bottom, or even behind the back cover if your phone has a removable battery.
The SIM sits in a small tray that will pop out. You can pull some SIM trays with your fingernail. Others may require you to use a small tool, usually provided in the phone box. If you don’t have this handy, you can bend a paper clip or use the back of an earring.
When pulling your SIM card, you should ideally power the phone off first. It’s not a huge deal, but will prevent any potential damage. Also, make sure you pull your SIM while sitting at a table or flat surface, since it’s tiny and easy to lose.
If pulling the SIM card doesn’t work, you can try replacing it. This will require going into one of your carrier’s store locations, so you should call first if your issue still isn’t resolved at this point. Your carrier may send you a new SIM anyway.
Keep in mind that if you have an older phone, you may not be able to access the fastest mobile data standards. See our comparison of 4G LTE and 5G for what to expect.
When All Else Fails, Call Tech Support
Remember, you probably have a mobile data cap ranging from a few to several dozen gigabytes. If you go over that cap, your mobile carrier will usually slow your connection (in lieu of expensive overages). Even those on so-called unlimited plans may experience throttling or “deprioritization” during times of network congestion after they hit a certain limit.
Keep this in mind when you experience slow service. If you’ve used up your allotment, you may have to wait until your bill cycle resets or purchase additional high-speed data.
If none of these steps fix your slow data, then it’s time to call tech support. The technician may have you repeat some of these steps. You might be inclined to refuse because you’re already done them, but it’s the representative’s job to go through a list of troubleshooting steps to see what works and what doesn’t.
Hopefully, it doesn’t come to that. If it does, the issue could something on your provider’s end that you can’t fix.
The chances are that you have a favorite browser for a reason. Maybe it integrates well with the services you use, or perhaps it has exclusive features you can’t get anywhere else.
If you enjoy playing PC games, you might be interested to know that Opera now offers a web browser designed specifically for gamers. Its name is Opera GX, and these are the Opera GX features all gamers will love.
1. Built-In Resource Controls
Everyone knows that Google Chrome likes to use plenty of RAM and CPU. When you have a game open, you don’t want to waste any resources that could otherwise power what you’re playing. However, you often need to keep your browser open to access a guide, video chat with friends, or similar.
That’s why Opera GX offers GX Control. This feature lets you limit how much RAM, network bandwidth, and CPU the browser can use. Whether you’re gaming on an underpowered system and want to squeeze the most out of your resources, or just want your browser to stay out of the way as much as possible, this is a welcome addition.
To access it, click the GX Control icon on the left sidebar, which looks like a speedometer. Once it’s open, you can keep an eye on current resource usage and add limits as needed.
If you don’t see this icon, you’ll need to click the three-dot Menu button at the bottom of the left sidebar and make sure GX Control is checked. Opera GX lets you customize this sidebar however you like, so you may need to enable other options discussed in this list using the same method.
2. Twitch Integration
If you’re a fan of Twitch, you’ll love that Opera GX makes it easy to follow your favorites right from the browser sidebar. Simply log in with your Twitch account, and you can see who’s live and get notifications when someone starts streaming.
It’s a small perk, but one that keeps you from having to open the Twitch site constantly. Having it to the side as you work on something else makes it more convenient, too.
To use it, just click the Twitch logo in the sidebar and sign in to your account.
3. Messenger Apps in Your Sidebar
If you chat with friends via Facebook Messenger, WhatsApp, or Telegram, you can also access these in the Opera GX sidebar. Simply enable them through the menu as discussed earlier, then sign into your accounts.
Once you open any of these sidebar apps, take a look at the top bar for a few handy features. Click Pin to keep the chat window open all the time, alongside whatever you’re viewing in the browser. You can use the three-dot Menu button at the top to mute the messenger service, too.
You probably use Discord to communicate with your gaming friends, but if you know of any stragglers on other services, the integration lets you keep them all together. Combined with resource limiting, you can use everything in one place and prevent any one app from taking more than it needs.
4. Stay Informed With GX Corner
Keeping track of video game releases, news, and discounts can be tough. That’s why Opera GX includes the GX Corner page, which bundles all of this information together in one easy place.
After clicking it on the sidebar (the icon is a game controller), you’ll see a load of information. There’s a release calendar at the top with upcoming titles, plus a list of games that have been making headlines lately. Below this, you’ll find deals on PC games, followed by news stories from the worlds of gaming, technology, and related topics.
At the top of the page, you can select a platform (such as Windows, Xbox, or Switch) to only see games for that system. You can also hide some systems or entire sections using the Gear icon in the top-right.
5. A Slick Look and Customization Options
Compared to the pretty spartan look of most browsers, Opera GX is designed to appeal to gamers. Its icons look futuristic, and even the menus have a sleek air to them. If you prioritize aesthetics, this is definitely a plus.
Speaking of which, if you want your browser to match the custom lighting theme on your PC, Opera GX gives you the option to do this. Click the Easy setup button in the top-right of the browser, which looks like a set of sliders, to take a look.
Here you can choose a color theme for the browser, pick from a set of space-inspired wallpapers, change the animation style for menus, and more. If you’d like to set up even more customization, click the Settings gear in the left sidebar to access all of the browser settings.
Some parts of the settings menu will look familiar if you’ve used Google Chrome, and even more familiar if you’ve used the main Opera browser (more on that shortly).
6. Video Pop-Out Controls
Opera GX lets you pop out YouTube and Twitch videos, so you can watch them while doing something else. To use this feature, simply open a video on either platform and mouse around the top of the video player. You’ll see an icon slide out from the top.
Clicking this will pop out the video in a new window, which you can drag around and keep open even when browsing other tabs. Drag it from either edge to resize, and click the X in the top-right corner to close it when you’re done.
In the future, Opera GX also plans to offer a “video over game” feature. This will let you watch video walkthroughs, tutorials, streams, or any other content while playing your game. When you get stuck, this is a convenient way to get some help without having to switch back and forth between windows over and over.
7. Plus Everything Else Opera Offers
At its core, Opera GX is the mainline Opera browser, just with extra gaming-focused features. If you’ve never used it before, you might not know about the best Opera features that are waiting to be discovered inside.
For instance, Opera has a basic built-in VPN to help protect your privacy. You can also use its mouse gestures to get around quickly with a flick of your wrist. And Opera is compatible with Chrome extensions, so you can bring all of your favorites over from the Chrome Web Store.
If you’ve been searching for a better browser, these features might make Opera your new favorite for all functions—gaming and non-gaming alike.
Opera GX: The Best Web Browser for Gamers
Opera is already a great browser, and Opera GX adds some excellent tools gamers will appreciate. Give it a try and see if it’s the right choice for your gaming PC.
At the time of writing, Opera GX is still in early access. Because it’s still actively being developed, the team behind it wants to hear feedback about how it works so far. If you like what you’ve seen here, why not give Opera GX a try and make your voice heard. By doing so, you could end up making the final product even better.
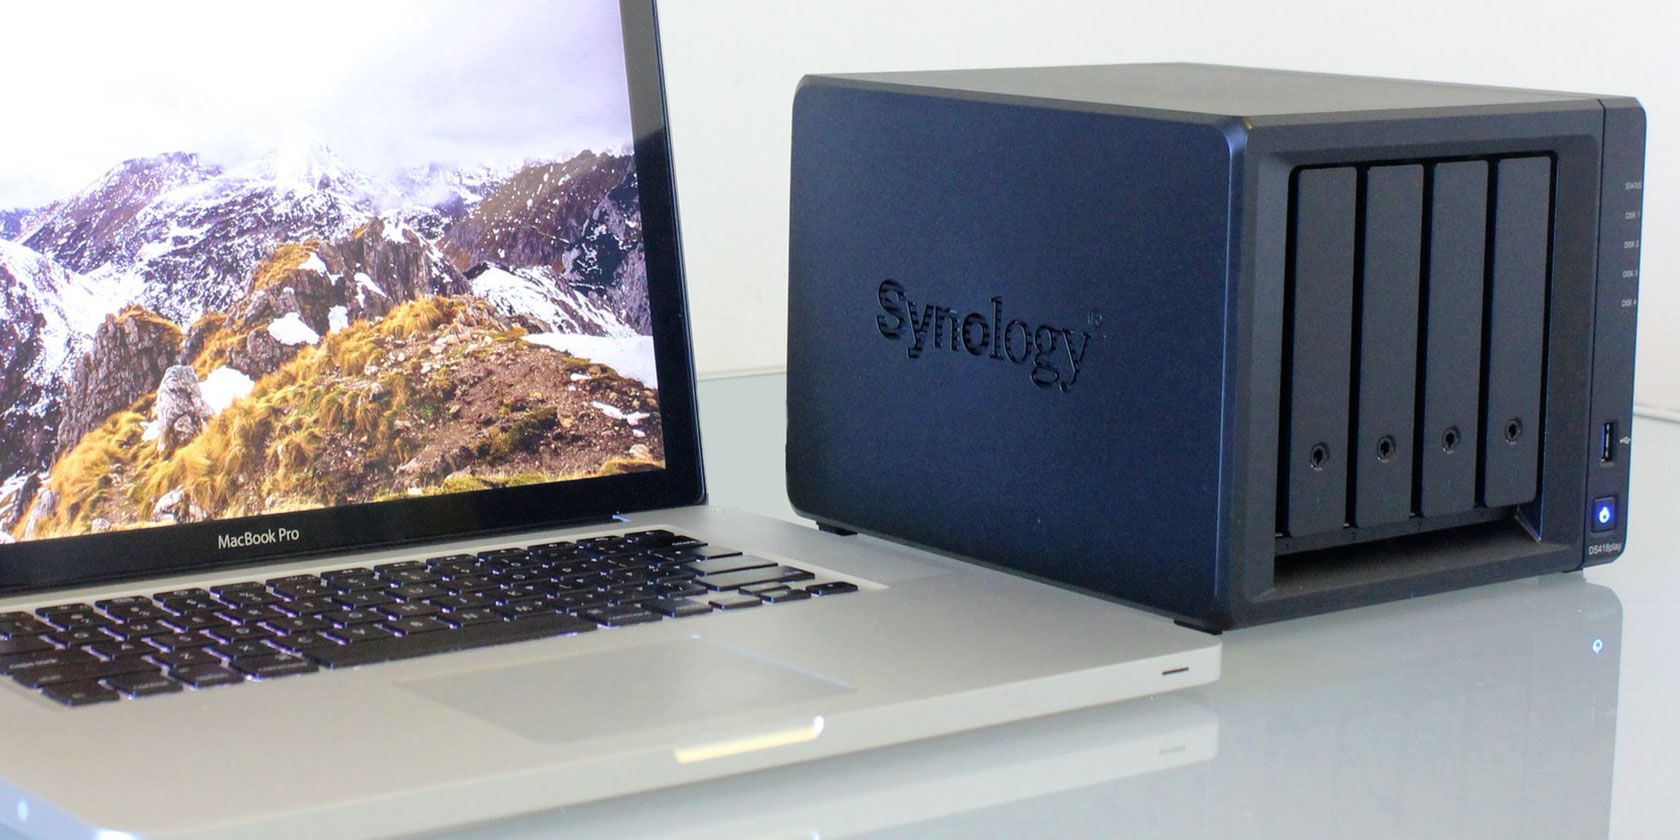
Network-attached storage (NAS) drives are becoming increasingly popular. Some meet the needs of business users; others are ideal for home users.
NAS drives are a top solution for several use cases. For example, if you want to make your media files available to all the devices on your local network, have a centralized storage location for all your backups, or access your files remotely, a NAS drive should on your shopping list.
So, which are the best NAS hard drives that you can buy today? Keep reading to learn more.
What Is a NAS Drive?
NAS drives come in two forms—ones that have a storage disk built-in, and ones where you can add your own drives.
The advantage of buying a NAS drive with empty slots is clear: you can upgrade the size of your storage over time as your needs change. On the downside, buying both a drive and separate disks means a higher up-front cost.
Also, keep your eyes open for the newer quad-level cell and penta-level cell drives hitting the shops in the near-future. They’ll increase storage while driving down the price.
If money (and space) is no object, go out and buy the Synology NAS DiskStation DS1819+. The unit is aimed at power users. It comes with 4GB of RAM (expandable to 32GB) and eight drive bays. If needed, the maximum capacity can hit 60TB. And with Synology’s expansion unit, that figures jump to a massive 180TB.
The huge capacity of the Synology NAS DiskStation DS1819+ means its highly suitable for freelancers and home workers who do a lot of work with video and high-quality images. Furthermore, more drive bays mean you have more RAID alternatives available to you. RAID refers to the way your NAS drive’s storage is configured for backups and data loss.
The Synology NAS DiskStation DS218j offers excellent features at comparatively low prices. The unit is ideal for anyone who wants to keep a few home backups or media files.
Under the hood, there’s a dual-core CPU, a 113Mb/s read and write speed, a hardware encryption engine, and apps for Windows, Android, and iOS. It’s a diskless drive, so you’ll need to pick up your own drives for the two available slots.
Because they can both store and stream your media, lots of people want to use a NAS drive for Plex, Kodi, Emby, and other similar apps. Those people should check out another Synology model—the Synology NAS DiskStation DS718+.
Most notably, it supports both H.265 and H.264 and can transcode 4K video on-the-fly. As many Plex users will know, transcoding 4K video on a low power device can lead to excessive buffering, so this is a vital feature.
The Synology NAS DiskStation DS718+ has a quad-core processor, AES hardware encryption, read speeds of 336Mb/s, and write speeds of 185Mb/s.
As we mentioned at the start, many of the best NAS drives require you to buy the disks separately. With the WD My Cloud Personal NAS Drive, that’s not the case; the disks are built into the unit.
Five different sizes are available: 2TB, 3TB, 4TB, 6TB, and 8TB. Prices start at under $300 for the cheapest 2TB version. Although, the 8TB model will set you back several hundred.
The drive has an ethernet port and support for USB 3.0. It is plug-and-play-friendly. For anyone who wants to the benefits of a NAS drive without the associated setup hassle, the WD My Cloud Personal NAS drives are a smart pick.
5. Best Alternative Budget NAS Drive: QNAP TS-231P
When it comes to home NAS drives, QNAP is one of Synology’s largest competitions. The company’s QNAP TS-231P model is a worthy alternative to the Synology NAS DiskStation DS218j for anyone who wants a reliable entry-level device.
It has two drive bays, 1GB of RAM, three USB ports, two GbE LAN ports, and AES 256-bit drive encryption. Streamers will be happy to learn that the unit also supports Chromecast and AirPlay. An ARM Cortex-A15 dual-core processor powers the unit.
If you buy a diskless NAS drive, you’re going to need to purchase your own SSD to slot into it. For a long time, the market-leading drives for home NAS solutions have been the WD Red NAS Hard Drive. They have WD’s NASware 3.0 technology. It has been purpose-built by the company to improve reliability and performance when used with NAS drives.
Available sizes start at 750GB and run right through to 14TB. Depending on the model you choose, you will be able to select either a 2.5-inch or a 3.5-inch drive, and a cache size of 16MB, 64MB, 256MB, or 512MB.
If you’re still looking for alternative NAS hard drives, check out the Seagate IronWolf NAS Internal Hard Drive. It comes in 15 different capacities, ranging from 240GB on the low-end to 16TB at the top end.
For data hoarders, the extra 2TB of storage on the top model could be a deal-breaker when compared to the WD Red NAS Hard Drive. The cache size goes up to 256MB, depending on which version you buy. Some versions also come with data recovery tools, too.
The Best NAS Hard Drives for Your Setup
As you’ll have noticed, Synology drives dominate the slots on our list of the best NAS drives. That’s for a good reason; the company’s flexible operating system and easy-to-use app platform help to make the best home NAS systems out there.
You just need to decide which of the (many, many) Synology NAS drives best suits your needs. If you’re still unsure on the benefits of NAS devices, check out how to use your old Mac as a NAS drive or server.
If you’re planning a trip for business or pleasure, you likely have a budget. And with the prices of airfare alone, it can cost a bundle just to fly one state over. If you can save a few bucks on your next getaway, wouldn’t you do it?
Google Flights is one way to make affordable travel plans. You can find flights and hotels at reasonable prices. Plus, the site offers price alerts, ways to discover new locations, lists of activates in your destination, and much more.
Here are some helpful ways to plan your trip and save some cash with Google Flights.
1. Look at Google Flights Packages
If there’s one thing that can help make planning a trip that much easier, it’s a travel package. These handy combo deals give you one price that includes airfare and hotel accommodations. So not only can you get a decent discount on both but plan them together without searching for them separately.
The Google Flights Packages section shows the top destinations from your location. Alternatively, if you have a certain spot in mind, you can pop the destination, travel dates, and the number of people who will travel with you at the top.
Pick Your Hotel
Once you receive your package results, you’ll get details on hotels first. You can browse through the list that displays the star rating and a brief description or refer to the map for accommodations based on price and location. You’ll see costs for the entire package, per person, and in total.
Click to select an option and you’ll be directed to more package information on Google.com. This is where you can see full details for the hotel and find the right flight.
Find the Right Flight
You might see a Cheaper Dates area which is ideal if you have flexible travel dates. And you can use the Compare Rates section to find affordable airfare and convenient flight times for your budget and schedule.
Once you choose your departing and returning flights, you’ll select your hotel room preferences, and continue to book your package.
2. Browse Inexpensive Hotel Options
Maybe you don’t need a package deal for your trip. You might already have transportation and just need a reasonably priced hotel.
Click the Hotels button on the left of the Google Flights page and you’re on your way to affordable accommodations.
You’ll see popular destinations with some great hotel rates. But if you have a particular city in mind, enter it at the top with your travel dates and number of guests.
When you land on the results page, you can adjust filters at the top for guest ratings, amenities, and brands. You’ll also see that handy map again on the right side with hotels plotted by price.
Select a hotel for full details including available rooms and rates along with booking sites and their prices.
These Google Flights hotel searching features make finding accommodations within your budget a breeze.
3. Scout for Affordable Airfare
If what you need for your next trip isn’t the accommodations and only the airfare, then Google Flights is an excellent resource.
Click Flights on the left and enter your departing and returning airports with your travel dates. You can also include the number of passengers and the requested class if you like.
You’ll see results for your departing flights first with prices, stops, and travel times. You’ll also see a nifty section that shows you if prices are low for your trip and you can click View price history for details on the rate changes.
This gives you a nice way to see if it’s a good time to buy those airline tickets or if you should wait. Plus, you can enable the toggle toward the top for Track prices. This will set up Google Flight alerts so when the rates change, up or down, you’ll get an email.
If you decide to book your flight, click to pick the departing and then the returning flight. You can easily continue through to booking. But if you simply want to keep track of price changes for the exact flights you pick, use the Google Flight price tracker we just mentioned.
By enabling Track prices for flights you’ve already chosen, you can keep an eye on airfare changes via email without having to check yourself.
4. Check Out Google Flights Explore
If we still haven’t hit the nail on the head for what you need for your next trip, Google Flights can still help. Maybe what you have is the budget, but just aren’t sure where to spend it. The Google Flights Explore area of the website is the perfect place to find a fun destination.
Click the Explore button on the left side and discover a new spot. You’ll see some suggestions like New York, Walt Disney World Resort, and the Florida Keys. You can check out one of these options or pop some possible thoughts into the search box.
Click Travel Guide at the top and find out the types of activities there are, scan hotel and airfare rates, and see the best months to visit.
Say you’ve been thinking of a trip to Chicago but aren’t sure if there’s enough for your family to enjoy or if you can even afford it. Enter “Chicago” into the search box and you’ll get all of these details and more.
You’ll see photos, things to do, suggested day plans, prices for packages, flights, and hotels, when to visit, travel videos, and nearby places to explore.
The Google Flights Explore section helps you find the ideal location for your trip as well as one that you can afford.
5. View Potential Trips on Google Flights
One more helpful spot on the Google Flights site is Trips. This area is convenient for pulling in travel confirmation emails you receive to your Gmail account. But you can also use this section for planning.
Based on your activity on Google Flights, you’ll see Potential Trips with an option to continue planning any one of them. If you click that Continue Planning link, you’ll get a nice summary of the options you viewed or picked for that trip.
So if you’re deciding between two different locations, with a simple click of each one, you can find out if the airfare has gone up or down. Then, view those flight options once more and continue exploring things to do while you’re there.
Let Google Flights Help Plan Your Trip
Hopefully, these Google Flights tips for planning your trip and saving money doing it will come in handy. And remember, Google also has real-time flight data to help you keep track of your own flights or those for people visiting you.
Updating your Mac takes long enough as it is. But that ordeal becomes even more time-consuming when the update fails and an error message says “macOS could not be installed on your computer.”
Don’t lose hope. Most of the time, you can fix this error using the troubleshooting steps below. It shouldn’t take long to work your way through them. We’ll even explain how to avoid these kinds of macOS errors in the future.
Why macOS Couldn’t Be Installed on Your Computer
There are a lot of different reasons a macOS installation might fail. Hopefully, the error message told you exactly what the problem is. That way, you know where to target your troubleshooting efforts.
Some of the most common reasons macOS can’t complete the installation include:
Not enough free storage on your Mac
Corruptions in the macOS installer file
Problems with your Mac’s startup disk
Incompatible hardware
Whatever the cause of your macOS installation error, it’s usually easy to fix for yourself. Follow the tips below to sort out the issue.
Before Troubleshooting Your macOS Installation Error
If your macOS installation couldn’t be completed, you might find yourself stuck in a loop where the installer reopens every time you restart your computer. Follow these quick steps to break out of that loop and protect your data before troubleshooting the error.
Step 1. Boot Up Your Mac in Safe Mode
Safe Mode stops various programs from launching upon startup, including the macOS installer. Booting your Mac in Safe Mode breaks you out of any startup loops and stops troublesome programs from running in the background.
To boot into Safe Mode, restart your Mac and hold down the Shift key while it powers on. Release the key when you see the Apple logo or hear a startup sound. It should say Safe Boot in the menu bar on the login screen.
Step 2. Create a New Backup Using Time Machine
It’s always important to back up your Mac before installing a major macOS update. These updates edit the core files in your operating system, so if something goes wrong you might need to completely erase your Mac to fix it.
Connect an external drive and use Time Machine to back up your Mac. Time Machine is the simplest way to protect all your data in incremental backups. These allow you to restore files from particular dates instead of keeping only the latest version of everything.
Step 3. Check Your Mac’s Compatibility in the App Store
Before getting started with our troubleshooting tips, take a moment to make sure the latest version of macOS is compatible with your Mac.
Open the App Store on your Mac and search for the version of macOS you want to install (for example, “macOS Catalina”). Click that app to view its details in the App Store and scroll down to the Information section.
Beneath Compatibility, the App Store tells you whether that software Works on this Mac or not. If it isn’t compatible, you can’t install that macOS version upgrade. It might be the first of many signs that it’s time to replace your Mac.
What to Do When the macOS Installation Couldn’t Be Completed
Now that you’ve backed up your Mac and made sure it’s compatible with the latest version of macOS, it’s time to try fixing your installation error with the troubleshooting tips below.
Since there are so many potential causes to this macOS error, any one of these suggestions might fix the problem. We’ll start with the quickest and easiest tips to save you as much time as possible.
1. Restart Your Mac and Retry the Installation
Sometimes, all you need to do to fix macOS errors is to restart your Mac and try again. Open the Apple menu at the top-left of your screen and select Restart from the dropdown menu to do so.
If your Mac is unresponsive, press and hold the Power button to force a shutdown. Don’t do this while the installation is in progress, though, since doing so can corrupt the files in your operating system.
2. Set Your Mac to the Correct Date and Time
It’s possible that the date or time on your Mac is wrong. When this is the case, it can lead to problems connecting with Apple’s servers, which might be the reason there was an error installing macOS.
Open the System Preferences and go to Date & Time to correct it. Click the Padlock and enter your administrator password, then choose to Set date and time automatically.
3. Create Enough Free Space for macOS to Install
A typical macOS installer takes up around 4-5GB of space on your Mac. But to complete a macOS installation, your computer actually needs about 20GB of free storage.
This is because the macOS installer needs extra space to unpack files and folders. Without that additional free space, the installer has no room to work and can’t complete the installation on your Mac.
Open the Apple menu and go to About This Mac > Storage to view the amount free space on your Mac. Click Manage Storage to see what’s using the most space and then follow our tips to free up more storage on your Mac.
4. Download a New Copy of the macOS Installer
The macOS installer on your Mac may have become corrupt somehow. It’s a good idea to move that installer to the Trash and download a new one to replace it.
We suggest you download your macOS installer directly from Apple’s support website. This way, you get the full combo installer, rather than the smaller version available through System Preferences or the App Store.
5. Reset the PRAM and NVRAM
The PRAM and NVRAM store various settings and preferences on your Mac, such as your screen brightness, sound volume, and display resolution. Errors with your PRAM or NVRAM might explain why macOS couldn’t be installed on your computer.
Fortunately, it’s easy to reset these settings without erasing any of your personal data. To do so, restart your Mac and hold Option + Cmd + P + R while it powers on.
Keep holding all those keys until you see a second Apple logo or hear a second startup sound, at which point the reset is complete.
6. Run First Aid on Your Startup Disk
Still seeing that the macOS installation couldn’t be completed? There might be disk permission or fragmentation errors on your startup disk. It’s easy to fix most of these kinds of errors using the Disk Utility app, which comes pre-installed on macOS.
Open Disk Utility from the Utilities folder in Applications. Select your Mac’s startup disk in the sidebar—usually called “Macintosh HD”—then click First Aid. When you Run First Aid, Disk Utility scans your disk for errors and repairs whatever it can.
7. Use Recovery Mode to Reinstall macOS
If macOS still won’t install properly, you might need to reinstall the whole operating system instead. You can do this using Recovery Mode on your Mac.
Restart your Mac and hold Option + Cmd + R while it powers on. Release the keys when you see an Apple logo or hear a startup sound, at which point a macOS Utilities window appears. Click Reinstall macOS to install the latest version of macOS.
This might take a while, since your Mac needs to download the new software first.
8. Erase Your Mac and Restore From a Backup
The last troubleshooting solution for any software-related problem is to erase your startup disk and reinstall macOS from scratch. With a new version of macOS on your computer, you can then restore all your data from a Time Machine backup.
If you don’t back up your Mac before you erase the startup disk, you will lose all your data: photos, music, files, and everything else.
Use These Mac Utilities to Avoid Future macOS Errors
As you’ve seen, there are several reasons an error message might say macOS could not be installed on your computer. We’ve shown you how to troubleshoot these problems, but you have a better chance avoiding them if you keep your Mac in tip-top shape all the time.
Lots of free apps claim to help you do this. They offer to free up more storage or remove malware, but you shouldn’t be too quick to trust them. Take a look at our list of the best free Mac utilities that you can trust. Use them to find and resolve future issues before they ever become a problem.
The real story of Rosa Parks -- and why we need to confront myths about black history | David Ikard
Black history taught in US schools is often watered-down, riddled with inaccuracies and stripped of its context and rich, full-bodied historical figures. Equipped with the real story of Rosa Parks, professor David Ikard highlights how making the realities of race more benign and digestible harms us all -- and emphasizes the power and importance of historical accuracy.
When siblings Labinot and Mimoza Bytyqi fled the war in Kosovo in 1999, arriving as refugees on the West Coast of the US, they would have had no idea they’d go on to launch a technology company together.
But as adults, the pair set up attacking the $6.7 billion telepresence and video communication category which hasn’t evolved much since the older business systems form Cisco and Polycom. By integrating their Solaborate device with Smart TVs, the entrepreneurs have come up with a drastically cheaper device and platform.
Solaborate has now closed a $10 million Series A funding round from EPOS and Demant Group. EPOS is a newly established company under the healthcare tech company Demant Group in Denmark which makes high-end audio solutions designed for enterprise and gaming. The funding will be used to accelerate the development of Solaborate’s new product line of all-in-one HELLO devices and its cloud communication platform.
After two successful Kickstarter campaigns, Solaborate will now work with EPOS to combine compute, microphones, speakers and Smart TVs with their technology to create products fully-owned by and branded under EPOS. These will include Solaborate’s patented auto echo-cancellation delay.
Labinot Bytyqi, founder and CE) said: “We believe that privacy is a fundamental human right and that’s why we engineered HELLO devices with video and audio built-in hack-proof privacy controls and end-to-end encryption for everyone’s protection and peace of mind.”
A HELLO device require only two cables – HDMI and power – and then turns any TV into a voice-controlled open cross-platform communication and collaboration device supporting video conferencing platforms such as Microsoft Teams, Google Hangouts Meet, Zoom, Skype, Cisco WebEx, Facebook Messenger, WeChat, BlueJeans, Fuze, Unify, and several more.
The partnership will focus on video collaboration to deliver integrated audio/video solutions to the platforms of EPOS’ current strategic partners such as Microsoft.
They are pushing at an open door. The video conferencing market is predicted to grow from an estimated $1.8bn to more than $2.8bn by 2022, according to some studies.
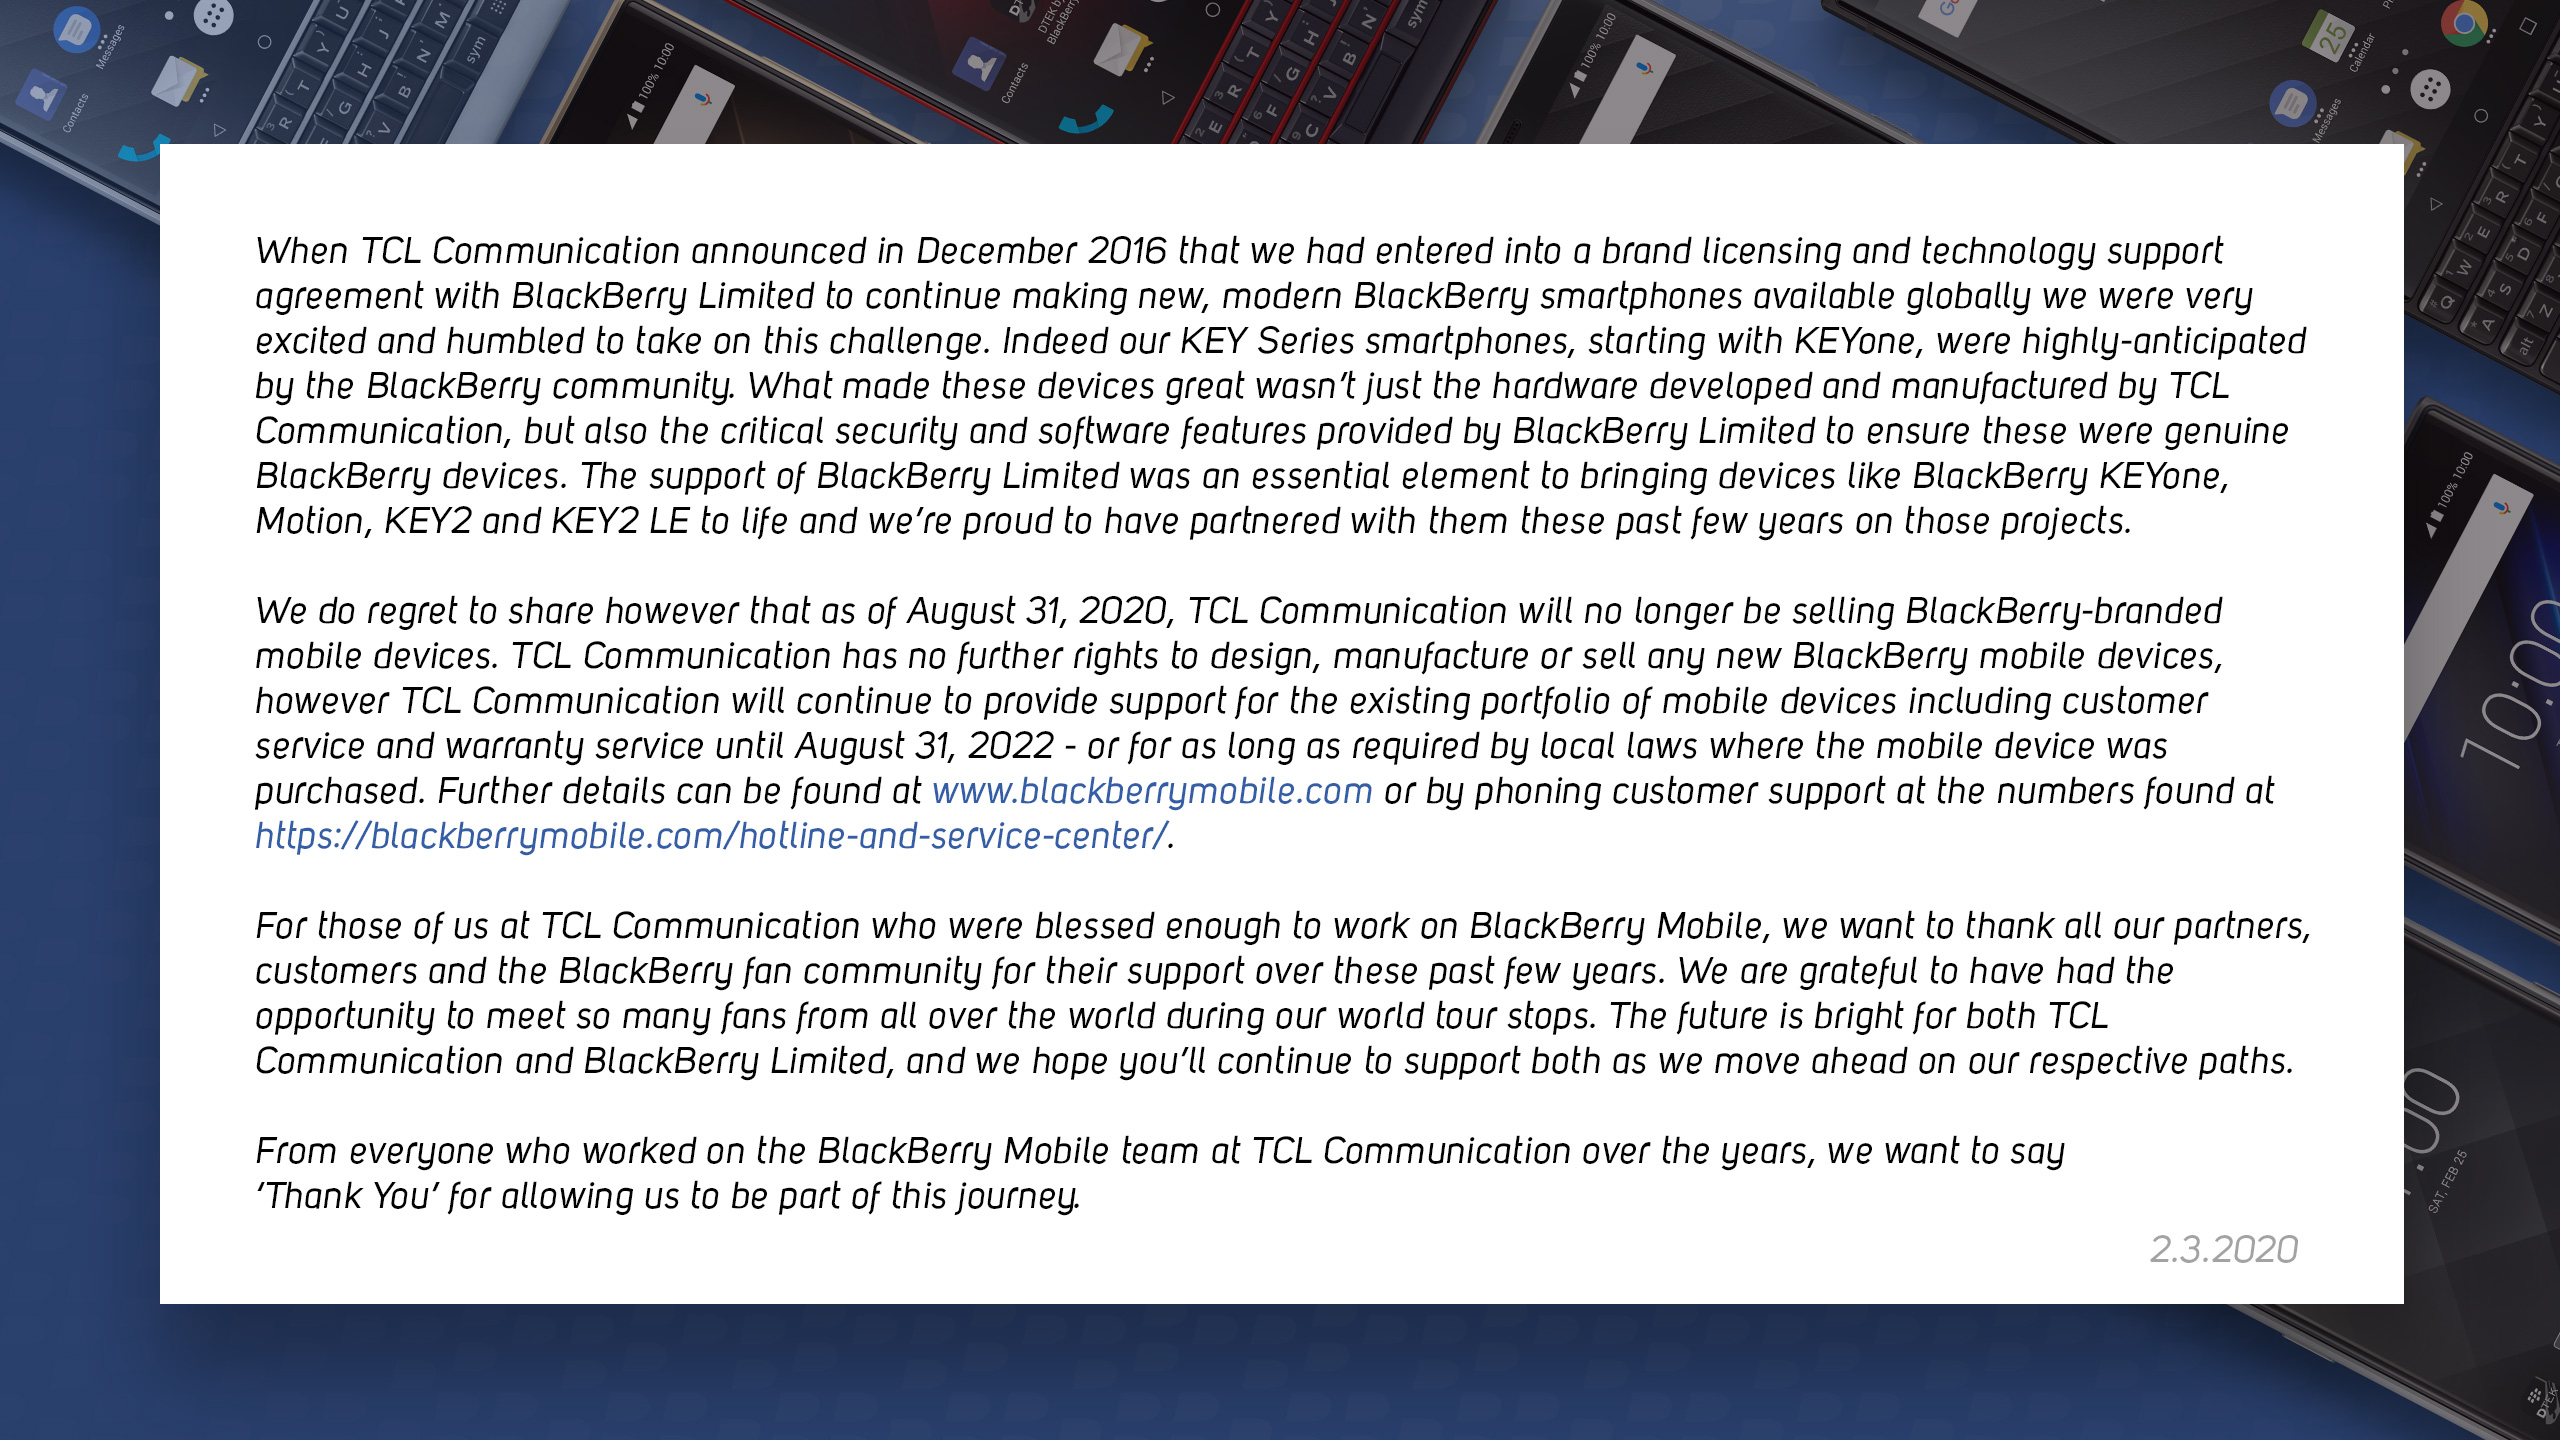
Big changes ahead for BlackBerry and TCL at a time when the smartphone market continues to see slowing growth. The two announced today that they would end their four-year brand licensing and tech support partnership in August 2020, with TCL ceasing to make new models of BlackBerry handsets after then, but continuing to support models that are already in the market for two years after, until August 31, 2022.
“We…regret to share… that as of August 31, 2020, TCL Communication will no longer be selling BlackBerry-branded mobile devices,” says the note, posted BlackBerry’s Twitter account. “TCL has no further rights to design, manufacturers or sell any new BlackBerry mobile devices.”
The company has yet to follow up with any more details about what this means for new BlackBerry handsets after that point. (We have asked directly but have not heard back. People asking on Twitter are also not getting any responses.)
The announcement caps off what has been a tough four years for the two companies.
BlackBerry, making devices using its own operating system, was once a market leader and trailblazer in the world of smartphones, with its small, full-qwerty keyboard gaining a loyal following among professional users, “prosumers” and other early adopters. That popularity lead to the Canada-founded company controlling some 50% of the smartphone market in the US and some 20% globally at its peak.
That was, however, before the rise of the touchscreen. After the launch of Apple’s iPhone and a slew of Android-powered handsets, Research In Motion (as the company was called then) gradually saw its share start to decline as it failed to produce compelling enough handsets to fit changing tastes.
RIM/BlackBerry appeared to be ready to leave the smartphone market altogether to focus instead on security, enterprise services and systems for other kinds of “hardware” like connected cars, until TCL came along.
TCL’s announcement in December of 2016 that it would take over making handsets, with BlackBerry to provide security and apps, but not the operating system, which would be Android — not unlike the partnership that another once-huge but now ageing handset brand, Nokia, struck up with HMD, just months before that, to make smartphones built on Android — looked like a new lease of life for BB.
But the change may have been too little, too late. The last few years have seen a general slowing down of smartphone growth, in large part due to market penetration in many countries: meaning, it’s much harder to shift devices than it used to be. And on top of that, there have been an army of new handset makers out of Asia, and also building on Android, that are dominating sales, led by Huawei but also including the likes of Xiaomi and Oppo, making the sales funnel even more challenging.
The end result has been that TCL and BlackBerry have struggled to break through with significant sales — falling instead into the large, and largely fragmented, “other” category in smartphone market share reports.
More recently, TCL has been wading into the market with its own-branded devices alongside its efforts with BlackBerry and Alcatel (another legacy mobile handset brand that TCL resuscitated), and so the writing was, perhaps, already on the touchscreen, so to speak.
We’ve reached out to BlackBerry to find out if it can tell us any more on its plans for handsets going forward, of if this is really it. BlackBerry has inked some licensing partnerships in specific markets, such as this handset deal in Indonesia, so there may be yet more to come.
As it has done in previous election years, Apple today has added special coverage of the 2020 US presidential election to its Apple News app. The coverage includes curated news, information, and data related to the election from ABC News, CBS News, CNN, FiveThirtyEight, Fox News, NBC News, ProPublica, Reuters, The Los Angeles Times, The New York Times, The Wall Street Journal, The Washington Post, TIME, USA Today and others.
The Apple News editorial team has also put together a series of curated guides, special features and other resources for readers from both sides of the political spectrum, Apple says. And the app will be updated with election information throughout the year and will track major election moments, including the debates, Super Tuesday, Democratic and Republican conventions, election night, and the 2021 presidential inauguration in real-time.
Apple had announced in December it was working in close partnership with ABC News on 2020 presidential election coverage within the Apple News app, which it said would begin on Feb. 7, 2020, with a live stream of the Democratic primary debate. It also said it would feature ABC News videos, live streams, and FiveThirtyEight polling data, infographics, and analysis during key moments of the 2020 election. It wasn’t clear at the time if Apple was working exclusively with ABC for this year’s election coverage, but today’s announcement indicates it is not.
Apple confirms today that ABC’s coverage will begin on Feb. 7, as promised, with live-streaming video, starting with the debate, plus FiveThirtyEight’s analysis, and real-time updates from various outlets.
The Feb. 7 debate will also be live-streamed through the Apple TV app, available for iPhone, iPad, iPod touch, Mac, Apple TV, Amazon Fire TV, Roku, and select Samsung and LG smart TVs.
In the Apple News app starting today, users will be able to track real-time election results from the Associated Press for each state primary, giving county-by-county results, a national map tracking candidate wins by state, and a delegate tracker that shows candidates’ progress toward securing the nomination.
As before, Apple News offers a guide to each presidential candidate, which includes their biography, experience, notable moments and quotes, and their current position on key issues. These guides will also include photos, videos, and links to recent media coverage.
In addition, the Apple News team has put together dedicated guides to important topics and issues, including foreign affairs, income inequality, trade, immigration, education, health care, and others, as well as a news literacy guide that help readers identify misinformation online. This guide, developed in partnership with the News Literacy Project, will provide tips about how to seek out accurate and reliable information.
Apple has been developing guides to U.S. elections for several years now. The company began to push its own election coverage after the 2016 election controversies that saw large tech companies, including Google, Twitter and Facebook, facing congressional inquiries and investigations regarding the Russian interference with elections that took place across their networks. Since then, Apple News rolled out its own guide to the U.S. midterms, followed by a real-time election results hub on November 6, 2018. It also added a guide to the 2020 Democratic candidates and debates.
To access the new 2020 election coverage available via the Today tab in Apple News in the U.S., users will need to update to iOS 13.3, iPadOS 13.3 or macOS 10.15.2.
Many of the companies spending big bucks on today’s big game have already released their ads (or teasers for those ads) on YouTube. So if you’re curious about what how tech companies will be promoting themselves tonight, this is the roundup for you.
Some of these ads come from tech giants like Amazon and Facebook, who have hired big stars to promote their products. Meanwhile, Dashlane found a fun way to remind viewers of the nightmare of life without a password manager, while Squarespace enlisted Winona Ryder to build a website on the platform.
The Super Bowl also provides an opportunity for automotive companies like Hyundai to put new technology front-and-center in their marketing, and for SodaStream to take viewers into space. And while voice assistants don’t seem to be as big a theme as they were last year, at least we’re getting a killer robot, courtesy of Pringles and “Ricky and Morty.”
You can watch the ads in alphabetical order below. And I’ll update this post as more ads become available online.


