
Windows is well known for its dazzling array of odd errors and malfunctions appearing out of seemingly nowhere designed to drive you up-the-wall and around-the-bend. The best part of all? You never know when something is going to happen. In many cases, you’ll have no idea what introduced the problem to your system.
Windows 10 has a plethora of well-documented issues, and has pushed many users to the brink of insanity. Luckily, those people who manage to step back into the real world come clutching their fixes, and we’ll share some of those golden-nuggets with you.
1. Check Your Sound Settings
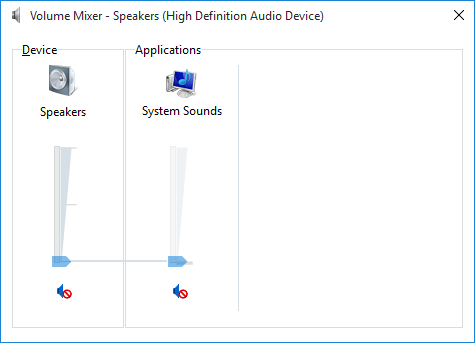
Now, before you say “But Gavin, I’ve done that,” have you really done that? It can be the most obvious things we overlook. Without insulting your computing ability, make sure to check you haven’t accidentally muted Windows 10—it’s easily done.
At the same time, check your:
- Cables
- Plugs
- Speaker connections
- Headphone connections
- Any other audio connections
If Windows 10 still has no sound, read on.
2. Roll Back or Reinstall Audio Drivers
Drivers have always had an unhappy knack of creating issues. Windows 10 is no different. As Windows 10 takes control of driver updates, sometimes your system ends up with the wrong driver configuration.
In the early days of Windows 10 (especially following the upgrade cycle from Windows 7, 8, and 8.1) driver updates made a lot of users unhappy. Microsoft has vastly improved the driver update process since that time and manufacturers are now deep into the Windows 10 ecosystem.
As such, new drivers are configured for Windows 10, rather than trying to make an old Windows 7, 8, or 8.1 driver fit.
Windows 10 gives us a few options to fight an irksome driver. First, we can try to simply roll it back to the last good configuration. Right-click the Start button, select Device Manager, and right-click your sound driver, select Properties, and browse to the Driver tab. Press the Roll Back Driver option if available, and Windows 10 will begin the process.
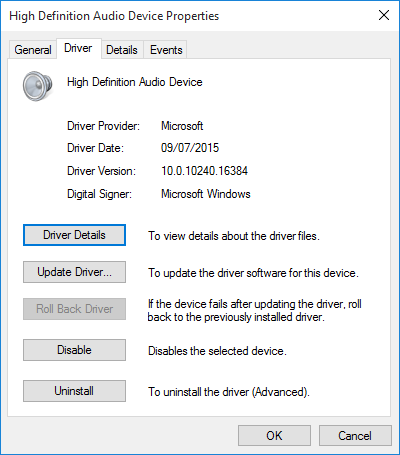
If like the above image you have no option to roll the driver back, you’ll need to either Update or Reinstall the driver. As we’re dealing with audio driver issues, go for a reinstall. This will remove the offending driver during the process, and give your system a nice clean one instead.
Before proceeding with the uninstall, ensure you have the new manufacturer version of the driver. You’ll be able to download them directly from the hardware issuer’s website, or in some cases, via a third-party supplier.
In the same Properties tab you should note the final option: Uninstall. Click this, and you’ll meet the Confirm Device Uninstall window. Depending on the driver issuer, this window may also contain an option to Delete the driver software for this device. If this is the case, check the box and press OK.
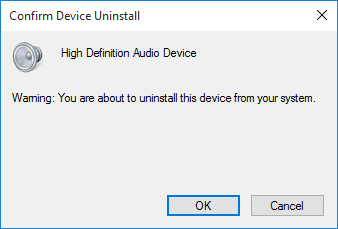
Once you wipe the drivers, restart your system, and install the new driver.
We have previously written about how you can better manage Windows 10 updates and generally run the rule over the at times unruly Windows 10 automatic update system.
3. Update IDT High Definition Audio CODEC
Some systems may encounter issues with their IDT High Definition Audio CODEC. This can be fixed with a manual driver update which allows us to choose the sound driver we wish to use.
Right-click the Start menu and select Device Manager. Expand the Sound, video games and controllers section. If you spot IDT High Definition Audio CODEC, right-click and select Update Driver Software. In the next panel, select Browse my computer for driver software, followed by Let me pick from a list of device drivers on my computer. This allows us to select from any drivers pre-installed on our system.
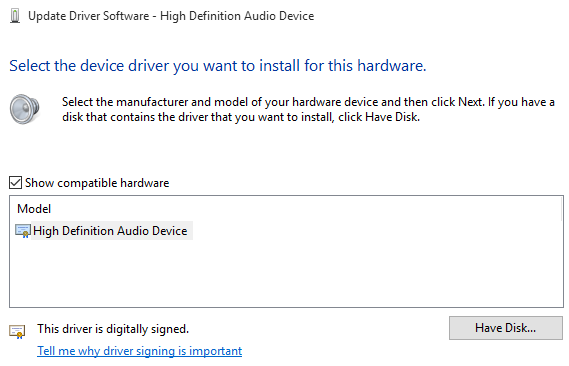
Under Model, select High Definition Audio Device, followed by Next, followed by Yes. You may need to restart your system for the changes to take effect.
4. Fix Realtek Audio
Realtek drives pop-up all-to frequently in forum posts discussing audio issue. I’ve not experienced issues with Realtek drivers personally, but it does seem to be a common Windows 10 audio issue. There are a couple of fixes for Realtek audio problems below.
Refresh Wi-Fi Drivers
One fix focused on disabling Realtek WLAN drivers, uninstalling, and reinstalling the latest version—even if you already have the latest version installed.
First, head over to the Realtek website and download the latest applicable version for your system. Right-click the Start menu and select Device Manager, and browse to your Realtek Wireless LAN drivers. Right-click and Uninstall. Now head to the file you downloaded, extract the folder, browse to setup.exe, and follow the instructions. You’ll need to reboot your system following the installation.
Disable Front Panel Jack
This fix could be very system specific, but it certainly fixed one system, and it could fix yours, too.
Reddit user Tiflotin fixed a persistent Realtek audio issue by disabling front jack detection from within the Realtek HD Audio Manager itself. The linked thread includes screenshots, in case you need further guidance. If you’re already pulling your hair out, this could be worth a try!
5. Disable Audio Enhancements
Next up are Windows 10 Audio Enhancements. Audio Enhancements are inbuilt Microsoft and third-party packages designed to make sure your systems specific audio hardware works perfectly. Except for when it doesn’t. These very “enhancements” could be causing your Windows 10 audio issue. Luckily, they’re simple to turn off.
In the Start menu search box type Sound, and click on the Sound Control Panel option. In the new box that opens, right-click the default device, and select Properties. Click the Enhancements tab, and make sure to check the box labeled Disable all enhancements, and Apply. (This is how you switch between default audio devices.) Issue with multiple devices? Repeat the process for each listed.
6. Restart Audio Services
Windows doesn’t always play ball, and sometimes it’s all behind the scenes. Audio services can sometimes miraculously disable themselves, but we can use them to give your audio a jump start.
In the Start menu search box, type Services and press Enter. Scroll down to Windows Audio. If the service has been stopped for any reason, your system audio will not function correctly. Restart it by double-clicking and selecting Start. While you are here, double-check the service start-up type. Audio services should be set to Automatic by default. If it is anything different—Automatic (delayed start), Manual or Disabled—change it back.
Here are three more ways you can put the Windows Services menu to good use.
7. Try the Audio Troubleshooter
You can also use the built-in audio troubleshooter, allowing Windows 10 to identify and fix its own issues. If you’ve used the inbuilt Microsoft troubleshooters before, you know they don’t always catch everything, but it can be worth a shot.
Head to Control Panel > Troubleshooting > Troubleshoot audio playback, and follow the instructions.
Can You Hear Me Now?
We’ve covered some of the most common Windows 10 audio afflictions, and hopefully you can hear the wonderful world in stereo once again.
While not a definitive fix for every issue, Windows 10 seems to really like you using the inbuilt High Definition Audio Drivers, and huge amount of fixes I’ve read through involve updating, uninstalling, reinstalling, and rolling this driver back, so this should form a focus for your fix.
Read the full article: No Sound in Windows 10? 7 Tips to Fix Audio Issues
Read Full Article
No comments:
Post a Comment