Mission impossible: a new executive at LG is charged with fixing the company’s long-time loss-making smartphone division following a leadership change.
Hwang Jeong-hwan took the job as president of LG Mobile Communications last October, and this week he LG announced that he will be replaced by Brian Kwon, who is head of LG’s hugely profitable home entertainment business, from December 1.
“Mr. Kwon played a critical role in transforming LG’s TV, audio and PC business into category leaders and his knowledge and experience in the global marketplace will be instrumental in continuing LG’s mobile operations turnaround,” LG wrote in an announcement.
The company said Jeong-hwan had “successfully bolstered the operation’s quality assurance and product development efficiency.”
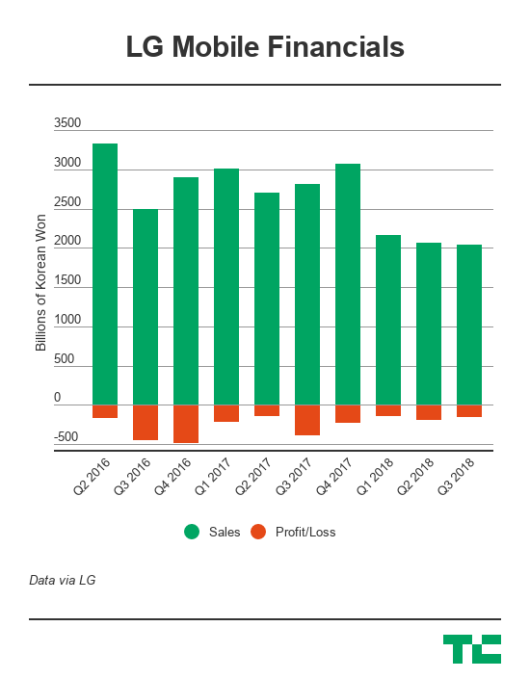
Those are interesting words, none of them mention the crisis that has seen LG’s mobile business continue to post big losses. This year to date, it lost the wider company some $410 million, including a $130.5 million net loss in the last quarter. In contrast, Kwon’s unit was the standout performer of the quarter, generating total sales of 3.71 trillion RKW ($3.31 billion) and a 325.1 billion KRW ($289.9 million) profit
That burn rate was cut during Hwang Jeong-hwan’s tenure, but it seems like there’s still much work to be done. Kwon — who LG describes as a “turnaround expert” — will combine his new role at the mobile business with his existing position as president of LG’s Home Entertainment Company. Hwang Jeong-hwan will move on to lead the company’s “Convergence Business Development Office.”
LG has also shuffled at the top of the tree. CEO Jo Seong-jin will “focus more on strategy and planning for the future” with president and CFO David Jung taking over a number of day-to-day responsibilities. LG has also restructured its vehicle component and business services divisions.
Where can you ask Jeremy Irons, Jake Gyllenhaal, Bryan Cranston, and Kate Winslet to whisper in your ear? Amazon’s Audible is the world’s largest seller of audiobooks. Is that making you think twice about cancelling your Audible subscription? Even then, let’s see how to cancel an Audible subscription in a few easy steps.
If you are an audiobook lover, then”Is Audible worth it?” is a legitimate question. You also might have your own genuine reason to cancel your Audible account. Is it any of the ones below?
Reasons for Cancelling an Audible Subscription
Audible has a lot of pros for audiobook lovers. But there could be a few personal negatives for you too. One of them might be your main reason.
The Audible monthly subscription is too high for the single monthly credit.
You dislike Audible’s recommendation system as it does not surface the titles you need.
The reason for using the app has changed: For instance, you drove a lot earlier and now you don’t.
You comprehend more when you read rather than listen.
Your reason might not be on the above shortlist, but Audible makes it easy to cancel a subscription in a few clicks.
How to Cancel an Audible Subscription
With your reason decided, you can set out to cancel your Audible subscription. We will look at the simple step-by-step process first and then get into a few more guidelines that you should be aware of.
Log into the Audible desktop site. You cannot cancel a subscription from the Audible phone or tablet app.
Click on the dropdown arrow next to your name and select Account Details.
Click Cancel membership at the bottom of the “View membership details” section.
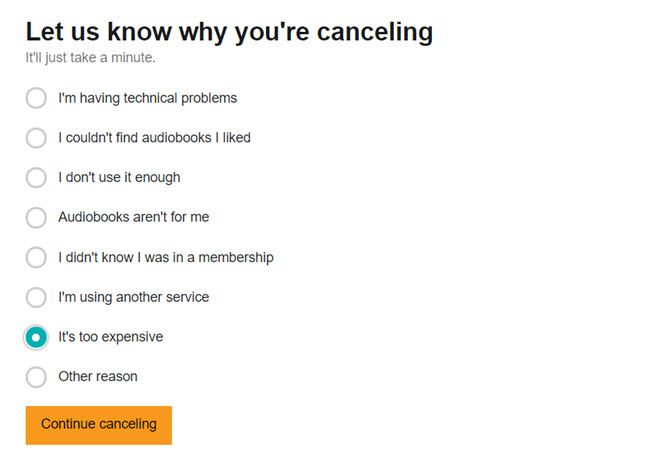
In the next screen, Audible asks you for a feedback on the reasons for the cancellation. Explain your reasons and click the Cancel Membership button.
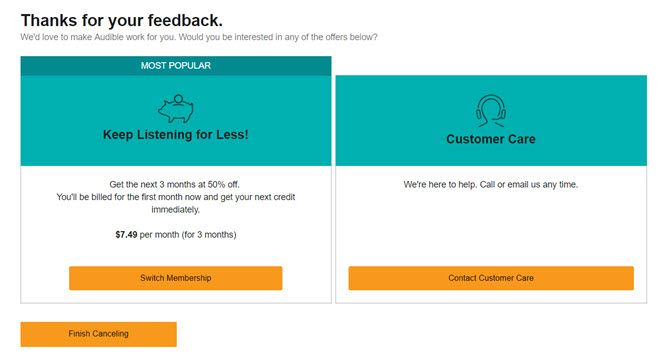
Depending on your location and reasons for cancellation, Amazon might offer you an alternative. For instance, it might suggest a pre-paid membership plan instead of a recurring plan. It can also offer you a “special” plan in an effort to indude you to stay on. Continue the cancellation steps if you are not interested in the service.
Sign again into Amazon Audible to confirm your cancellation. After you cancel, an automated email will be sent to you as proof of your cancellation.
Before you hit the orange cancel button, read through these points. Amazon also highlights them on its Help page.
You can cancel the monthly recurring plan only. Prepaid plans cannot be cancelled as they will just expire.
Cancel your membership from the desktop site. Audible does not allow you to cancel any plans from the mobile apps. But you can use the desktop versions in Chrome and Safari to access the site and go through the process.
Unused credits are also cancelled with the subscription. Make sure to use them before you cancel. You cannot transfer them to anyone else.
Keep listening to your audiobook collection. You retain the use of your old audiobook library and can download them again.
Cancel before the next billing cycle.Manage all your online subscriptions and cancel it before the next payment cycle starts. Also, cancel your subscription if you are in the trial period if you do not want to be billed when the trial ends.
You can still purchase Audible books. But you won’t be able to take advantage of special discounts, deals, and special Audible features like an audiobook exchange or returns.
5 Alternatives to Canceling Your Audible Account
The one-month Audible trial period with your choice of books is the ideal first step to see if it’s for you. But let’s say you have waded in and now are unsure about your commitment to the service. One of the most common reasons is lack of time.
You can give it one more shot before you take the nuclear option with a few suggested steps.
Switchover to a lower priced plan. Tailor your subscription to your listening habits. Audible offers several membership plans and the option to switch plans anytime. Click the Switch Membership button located below “Your Membership” section.
Take a hiatus. Some marketplaces (like U.S and U.K) will allow you to put your membership on hold. But only if you have a monthly recurring plan. Also, an account can be on hold only once every 12 months. This hold can be anywhere between one to three months. You won’t be charged a membership fee, but you will also not receive any new credits or free access to audio shows.
Try it with a special offer. As I explained before, Audible can sometimes offer you a special package when you go through the cancellation steps. It can be an incentive to build an audiobook listening habit for another three months at a good discount. After all, a good motivational audiobook can even change your life in little ways.
Use an Audible Promotional Code. Promotional codes can help you to reduce the membership fees and help extend your association with the service. Search for Amazon promotional codes.
Maybe, it’s time to cut the cord. Maybe, you haven’t had the good luck to cobble together a few hours for an audiobook. But sometimes the cancellation process itself is so daunting with that difficult to find button. The good news is that Amazon makes it easy to let go. Though, it does make a last-ditch attempt to hold on to you. And it does use a simple blue “text” button instead of a flaring red one!
If it’s not the issue of membership cost with you, then look into some of these Audible insider tips. They might help you maximize the credits you have lying around before you jump out.
Google Maps has quietly rolled out a new feature aimed at helping users discover places others have recommended: it now supports hashtags in reviews. For example, if you’re reviewing a restaurant that would make an excellent #datenight spot, you can simply add the appropriate hashtag. Or if the business is #familyfriendly or #wheelchairaccessible, you can note those sorts of things, too.
Google suggests that users add up to five hashtags per review, and place them at the end of the review to make the text easier to read.
The company confirmed to TechCrunch support for hashtags rolled out globally just over a week ago on Android devices. So far, it had only been announced to members of Google Maps’ Local Guides program — the program that rewards its members for sharing their reviews, photos and knowledge about businesses and other places they visit.
Guides were told they can go back and add hashtags to their old reviews, as well as include them on new ones.
In addition to helping people find restaurants by cuisine or dietary needs (e.g. #vegetarian), hashtags can also highlight local attractions as #goodforselfies or a great place for #sunsetviews, Google suggested. The tags can note the accessibility features offered, too — like if there’s a wheelchair ramp or an audio menu available.
But unlike on Instagram and other social apps, the hashtags in reviews need to be specific to be useful. Google says that general terms like #love or #food won’t be helpful.
The feature on its own may seem like a minor, if handy, addition to Google Maps. However, it arrives at a time when Google Maps has been getting upgraded to better challenge Facebook’s Pages platform.
For example, Maps in October added a new “follow” feature, which allows users to track businesses in order to hear about their news, sales, deals, events and more. This month, Google rolled out a revamped My Business app so business owners could easily update their Maps profile page with new content — including the news they wanted to share with followers. They also can use the app to view and respond to reviews and messages.
With the addition of hashtags in reviews, Google Maps could become a better discovery platform for businesses and other places, and possibly even a social recommendations platform. Google Guides were told to use the hashtag #LetsGuide to point users to their own personal recommendations of favorite places. To what extent they’ll adopt that tag, of course, still remains to be seen.
To use the new hashtags feature, you just tap the blue link when you see one listed in a review to be taken to a list of the other nearby places that have the same tag, Google says. The company didn’t say when the feature would make its way to iOS or the web.
It’s that time of year when various publications decide their “…” of the year. And in the case of dictionaries it’s the word of the year. Dictionary.com has decided that its word of the year for 2018 is “misinformation”. Which, ironically, isn’t misinformation.
When Disinformation Becomes Misinformation
Misinformation is a word that, according to Dictionary.com, has been around since the 1500s. However, its use has spread in recent years thanks to the spread of misinformation being disseminated via biased news sources and social media users.
Dictionary.com defines misinformation as “false information that is spread, regardless of whether there is intent to mislead.” Which separates it from disinformation, which is described as “deliberately misleading or biased information”.
While disinformation is the source of a lot of issues we’re now seeing in society, misinformation is making things worse. And this is mainly because social media users share things without checking the veracity of the information first.
This blind spreading of misinformation has had some real-life consequences. Elections have been influenced by people believing what they read. People’s health has been affected by scare stories. And individuals have been targeted over rumors started online.
This is why Dictionary.com has chosen misinformation as its word of the year. And why we all, each and every one of us, needs to do better in this area. It doesn’t take long to check facts before reposting, retweeting, or sharing something you want to be true.
How to Stop the Spread of Misinformation
Dictionary.com’s runners-up include “representation,” as in the representation of ethnic minorities, “self-made,” as in Kendal Jenner being a self-made billionaire, and “backlash,” as in the celebrity of the day experiencing a backlash over something they said.
In terms of misinformation it’s up to us to plot its downfall. Which unfortunately requires a little homework. First, teach yourself how to spot fake news. Next, bookmark these unbiased fact-checking websites. And finally, learn to trust your instincts!
Google Maps is rapidly evolving into a bigger and (potentially) better platform than it has been previously. And the latest feature Google is adding to the Maps mix is hashtags. Yes, Google Maps will soon be awash with hashtags, for better or worse.
Hashtags Finally Arrive on Google Maps
You can now add hashtags to your reviews of businesses. So, for example, if you’re reviewing a restaurant you can add #datenight or #familyfriendly. You could also add #wheelchairaccessible to help make Google Maps more wheelchair friendly.
Google Maps’ Local Guides are already actively using hashtags in their reviews. Google suggests people use up to five hashtags per review, and place them at the end of the review rather than make a review harder to read by placing them throughout.
Google rolled out hashtags to Maps quietly. According to TechCrunch, the ability to add or view hashtags is only currently available on Android devices. There’s no word yet when it will be added to the iOS version of Google Maps.
Google is going to make so much money on local sponsored hashtag campaigns. Dayyyymn. How much would your restaurant pay to sponsor #datenight? https://t.co/YYJez1QO9w
Hashtags provide an at-a-glance shorthand for what to expect from a business. So this should make it easier to search for the perfect restaurant, bar, club, attraction, etc. However, this is reliant on people using hashtags responsibly. Which isn’t guaranteed.
Google Maps Is Becoming a Social Network
In recent months Google has added a slew of new features to Maps. To the point which Google Maps is starting to feel a little bloated. The days when Google Maps was primarily used to help us all get from A-to-B are over, and I’m not sure that’s a good thing.
A dead or stuck pixel on a TFT, OLED, or LCD screen is incredibly annoying. You can’t help but stare at it for days on end, wondering how long a repair or exchange might take. All that grieve over something as unimportant, yet highly irritating as a “dead” pixel that might be easy to fix.
Before you run the item back to the store though, try whether you can fix the dead pixel yourself! This, if done carefully, will not hamper your warranty and might save you a lot of time and worries. So let’s see how you can possibly fix that dead pixel your screen.
Test New Screens for Stuck or Dead Pixels
Yes, you should test any new LCD, OLED, or TFT screen for dead or stuck pixels. You can simply run your monitor through a palette of basic colors, as well as black and white in full-screen mode. We’ll show you tools to do that below.
Is It a Stuck or Dead Pixel?
So what if you spot an odd pixel? Is what you’re seeing just a stuck pixel or is it, in fact, a dead pixel?
A stuck pixel will appear in any of the colors that its three sub-pixels can form, i.e. red, green, or blue. In a dead pixel, all sub-pixels are permanently off, which will make the pixel appear black. The cause could be a broken transistor. In rare cases, however, even a black pixel may just be stuck.
So if you’re seeing a colored or white pixel, you might be able to fix it. And if you see a black pixel, chances are low, but there is still hope.
Let’s turn to the methods to fix a stuck pixel.
How to Fix Stuck or Dead Pixels
Unfortunately, you can’t fix a dead pixel. You can, however, fix a stuck pixel. And as I explained above, it’s hard to tell the two apart. Either way, these are the methods you can try:
First, identify dead or stuck pixels by viewing your monitor in different color palettes.
To fix a stuck or dead-looking pixel, use a third-party tool to flash the pixel with multiple colors. We recommend UDPixel (Windows) or LCD (online).
Finally, you can try a manual method that involves rubbing the stuck pixel with a damp cloth or a pointy, but soft item, like the rubber/eraser at the end of a pencil.
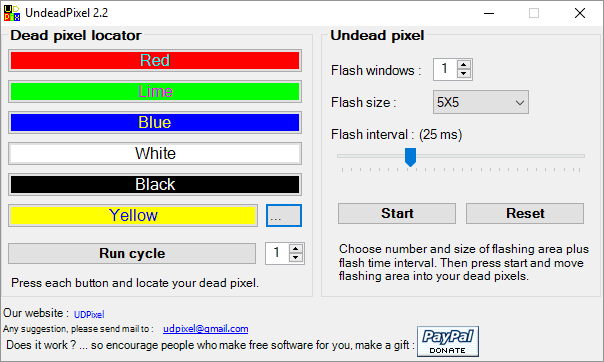
UDPixel, also known as UndeadPixel, is a Windows tool. It can help you identify and fix pixels using a single tool. The program requires the Microsoft .NET Framework. If you’re not on Windows or don’t want to install any software, scroll down for the online tools below.
With the Dead pixel locator on the left, you can easily detect any screen irregularity that may have escaped your vision until now.
Should you spot a suspicious pixel, switch to the Undead pixel side of things, create sufficient amounts of flash windows (one per stuck pixel) and hit Start. You can drag the tiny flashing windows to where you found odd pixels. Let them run for a while and eventually change the Flash interval.
LCD is an online tool that lets you find and eventually fix stuck pixels. It packs many options into a single tiny window, but once you have an overview it’s easy to use.
Note: This website requires Flash. If you’re on Chrome, click the Get Adobe Flash Player button and when Chrome asks you to Run Flash, click Allow.
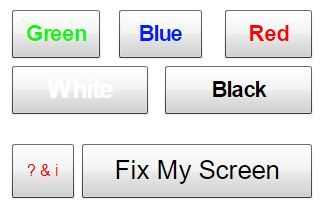
To test your screen, go through all of the colors—green, blue, and red — and check our screen. Additionally, you should check white and black. Press the ? & i button for background information.
Should you discover a stuck pixel, click the Fix My Screen button and let the color flashing graphic run for a minute or two.
By triggering each pixel’s different sub-pixels, the graphic may massage a stuck pixel back into life.
The online tool Dead Pixel Buddy can help you run a quick dead pixel test, but it can’t fix an affected pixel.
Dead Pixel Buddy offers 12 colorful tiles to test for dead or stuck pixels. Click one of the tiles to fill the entire browser window with the respective color. Press F11 to go full screen, then cycle through the colors using the left and right arrow keys. When you’ve tested all 12 colors, press F11 again to leave full-screen mode.
If you do find a stuck or dead pixel, use UDPixel (above) or JScreenFix (below); those are tools that can fix a stuck pixel.
This is a very thorough test not only meant to identify bad pixels but also powerful enough to test the quality of your monitor.
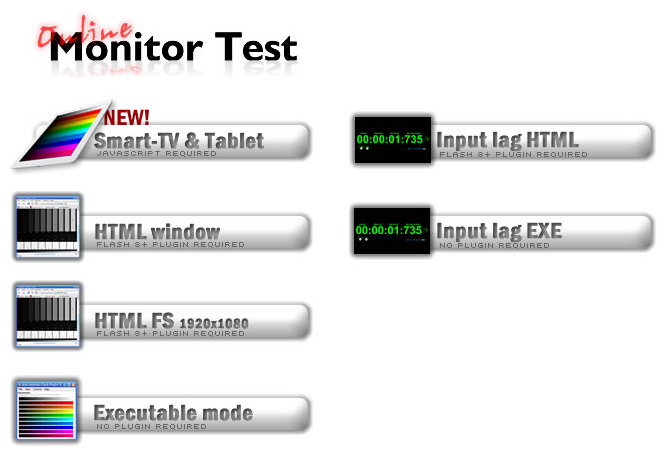
You can choose between three different modes to test your screen. This tool either requires flash (online version) or you can install it in the executable mode.
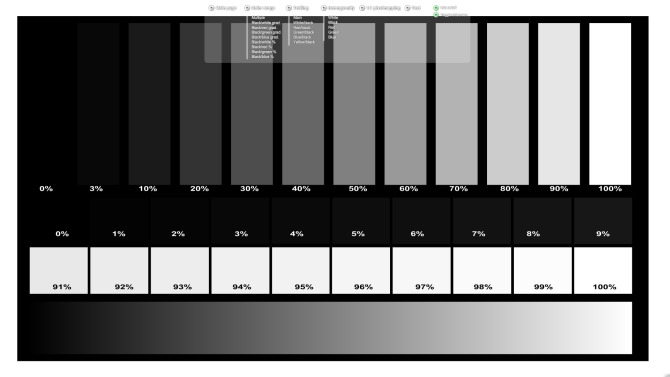
What you will need to just test for stuck pixels is the HTML window. Again, you’ll need to allow Chrome to run Flash. Toggle full-screen by hitting F11. Here is what you should see:
Move the mouse to the top of the test window and a menu will appear. There is an info window that you can turn off with a button in the top right corner of the menu. Then click on the Homogenuity test point and move through the three colors as well as black and white.
Fingers crossed you won’t discover anything out of the ordinary. In the unfortunate case that you do, you may find the following online tool helpful.
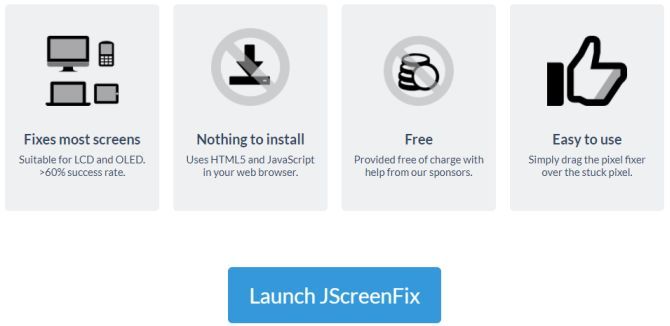
JScreenFix won’t help you find a stuck pixel, but it can help you fix it. Just press the Launch JScreenFix button at the bottom of the page.
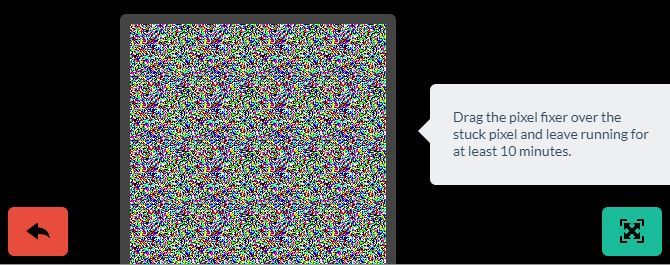
The tool will load a black browser window with a square of flashing pixels. Press the green button in the bottom right to go full-screen. Drag the flashing square to where you found the stuck pixel and leave it there for at least 10 minutes.
Manually Fix Stuck Pixels
Should none of these tools resolve your stuck or dead pixel issue, here is one last chance. You can combine any of the tools and the magic power of your own hands. There is a very good description of all available techniques on wikiHow. Another great step by step guide can be found on Instructables.
But let’s go through one technique real quick:
Turn off your monitor.
Get yourself a damp cloth, so that you won’t scratch the screen.
Apply pressure to the area where the stuck pixel is. Try not to put pressure anywhere else, as this may trigger the creation of more stuck pixels.
While applying pressure, turn on your computer and screen.
Remove pressure and the stuck pixel should be gone.
This works because, in a stuck pixel, the liquid in one or more of its sub-pixels has not spread equally. When the backlight of your screen turns on, different amounts of the liquid pass through the pixel, to create the different colors.
All Pixels Report to the Screen
Should all of these approaches fail to fix your dead pixel warrior, at least you’ll now know it’s not simple to fix and the screen may indeed need to be replaced.
Nordic dramas have a unique feel about them. The dark settings and stories, slow-building plots, and shocking conclusions are chilling in more ways that one. The cold of the austere landscapes seeps into your bones as deeply held secrets come to light. The veneer of normalcy is torn away to reveal sinister truths hiding beneath everyday life.
For fans of Nordic noir, nothing else will do.
Which is why we have collected the best Nordic dramas, both foreign language hits and those inspired by them, that you can stream on Netflix and Amazon Prime right now. So grab a blanket, turn off the lights, and settle down with one of these great movies or TV shows.
1. The Dragon Tattoo Trilogy
The Girl with the Dragon Tattoo introduced much of the world to Nordic noir. The books and movies in the series chilled audiences with their dark sets, moody characters, and shocking violence. The first series of movies, filmed in Swedish, is considered by many to be the best by far.
If you aren’t already familiar with the story, here’s the short version: a journalist hires a young hacker to help him solve an old murder. The murder (as is always the case in Nordic crime dramas) is much more complicated than he expects, and he’s soon drawn into multiple webs of deceit. And the hacker, Lisbeth Salander, has her own disturbing world to navigate.
Set over a period of six days, this Norwegian thriller follows an uncompromising journalist who uncovers some dark evidence about his own brother. He goes to print with it, but soon finds himself entangled in a mystery that takes over his life.
Mammon goes into the world of politics and banking, exposing the corruption that bubbles on the surface, which is all suitably cliche. However, there’s plenty of surprises along the way to keep things engaging. Everyone here seems to have dark secrets and it’s only a matter of time before they’re exposed.
Bouncing between scenic locales like Oslo and Bergen, and supported by some outstanding performances, Mammon shows that the Norwegians are more than capable of producing gripping drama.
British TV has produced a slew of great Nordic-style shows over the past few years, and Fortitude is one of them. A murder shocks a small, remote Norwegian town near the Arctic Circle, and, of course, everything starts unraveling after that.
Stanley Tucci, Michael Gambon, Christopher Eccleston, Richard Dormer, Sofie Gråbøl, and Dennis Quaid provide all-star backing to this show, but even the minor characters are well-crafted.
If you’re looking for a slow-burning, suspenseful trip into the deep Arctic snows, you can’t go wrong with Fortitude. There are two seasons available on Amazon Prime, and there are rumors of a potential third season in the works.
This mini-series is only four episodes long, making it immensely easy to wolf down. Iceland is a wonderful country, and its landscapes can make for the perfect stark backdrops. The Lava Field uses them to great effect.
Helgi Marvin is a detective, played excellently by Björn Hlynur Haraldsson, who comes to investigate a suicide of a wealthy man in the Snæfellsnes Peninsula. Of course, things aren’t going to be exactly as they seem. This suicide may actually be murder.
As Marvin investigates the case, his own personal life begins to overshadow the investigation. Secrets best kept that way begin to escape and our troubled lead must decide whether to overlook the crime in order to protect his family.
In Tin Star, Tim Roth plays a police detective called Jim Worth who has moved, with his wife and children, from London to a small Canadian town to try and escape his violent past. However, it isn’t long before everything he’s trying to flee comes catching up: murder, deceit and twists are all around the corner and ready to make their mark.
The remote, desolate locations bring that wonderful Nordic vibe, as do the mysteries that untangle through the episodes. While Jim is battling his own demons, an oil company has invaded the town and his daughter falls for a troublesome youth. Try as he might, Jim can’t escape the bloodshed.
When Bordertown first aired in its native Finland, over a fifth of the country’s population watched it. It’s no surprise: the story is captivating, it’s beautifully shot, and it’s very skillfully led by Ville Virtanen as quirky, Sherlock-like detective Kari Sorjonen.
Sorjonen is working for the National Bureau of Investigation in Finland when his wife only just survives cancer. Hoping for a more peaceful life, the family uproot to near the Russian border. However, things don’t go according to plan, as he uncovers sex trafficking, drug trading, and more shadiness.
The murders uncovered are all connected to one another, but also to Sorjonen’s family. So much for the quiet he wanted. But it’s all the better for the creepy, claustrophobic thrills that we get to enjoy.
Iceland may be known for its remarkably low murder rate (less than two per year, on average), but it’s a perfect setting for a Nordic noir murder mystery. A limbless, headless corpse appears in the harbor, and a storm ensures that no one can leave the small Icelandic town. It’s up to the three-person police department to solve the crime.
Trapped was made especially poignant because it paralleled one of the few real murder mysteries in Icelandic history, as recounted by The New York Times. If you like hearing about real-life crimes, check out these true crime podcasts.
The conflicted and jaded detective, bleak backdrops, and horrible secrets held by seemingly mundane people make this a shining example of Nordic drama. The first season is available now on Amazon Prime.
Another example of the best of British crime dramas, Broadchurch is an exquisitely paced, intricately plotted exploration of a small-town murder. David Tennant is, as usual, on cracking form, and both Olivia Colman and Jodie Whittaker contribute phenomenal performances.
While the murder of a boy is the primary plot driver, there’s much more to this show. Viewers will see what suspicion, attention, grief, and rebuilding do to the town and its residents.
The show is highly awarded, with Colman receiving Best Actress at the 2014 BAFTA awards. The dreary British backdrop—punctuated with gorgeous architecture and seaside vistas—are a perfect setting for this gripping story.
Scandinavian noir is full of the darkness hiding behind the façade of everyday life. But there are glimpses of light, too. You just have to dig through the bodies to find them.
These movies and TV shows are great examples of Nordic drama, and all can be streamed on Netflix or Amazon Prime as soon as you finish reading this article.
When you want to take a screenshot on your Mac, you have both native and third-party tools to choose from. Let’s see how to make the best of those and explore some useful tricks along the way.
How to Take Screenshots on Mac With Keyboard Shortcuts
macOS has a few default keyboard shortcuts to help you capture the screen instantly. We’ll go through them one by one, as which one to use depends on what exactly you want to take a screenshot of.
(Having trouble? Ensure that you haven’t disabled these shortcuts under System Preferences > Keyboard > Shortcuts > Screenshots.)
Capture the Entire Screen
For this, you need the shortcut Cmd + Shift + 3. It takes a snapshot of the entire screen and saves it to the desktop as a PNG image.
Want to copy the screenshot to the clipboard instead of saving it automatically? Add the Control key to the keyboard shortcut—hit Control + Cmd + Shift + 3.
Capture a Part of the Screen
You’ll need to hit Cmd + Shift + 4 if you want to snap a specific portion of the screen. This shortcut turns the cursor into a crosshair; you can then click and drag it across the part of the screen you want to capture.
While making the selection, hold down the Shift key if you want to limit your adjustments to either the X or Y axis. If you’d like to resize your selection proportionally from the center, hold down the Option key. If you want to move the selection, hold down Space instead.
(Changed your mind about taking the screenshot? No problem. Hit the Escape key to cancel the action.)
Once you’re satisfied with the selection, release the mouse. The screenshot then saves to the desktop as a PNG file. As above, if you want to copy the captured image to the clipboard instead of saving it, you’ll need to tweak the shortcut a bit. Modify the shortcut to Control + Cmd + Shift + 4 to copy.
Capture an Application Window
Want to take a screenshot of the active window? First hit Cmd + Shift + 4. Then hit Space, and you’ll see the crosshair turn into a camera.
The active window appears highlighted, and if you click the camera, you get a screenshot of the window. Before clicking, you can also choose to move the focus of the camera to a different window.
If you want to take a timed screenshot, you’ll need to open your Mac’s built-in screenshot utility. We’ll discuss it in the next section.
How to Take Screenshots on Mac With the Screenshot App
Under Applications > Utilities, you’ll find your Mac’s stock screen capture app, aptly named Screenshot. You can also bring up this app with the shortcut Cmd + Shift + 5.
(If you’re on a pre-Mojave Mac, look for the Grab app instead of Screenshot in the Utilities folder.)
With Screenshot, Apple has simplified the whole screen capture process. The app is useful if you prefer a more point-and-click approach over keyboard shortcuts.
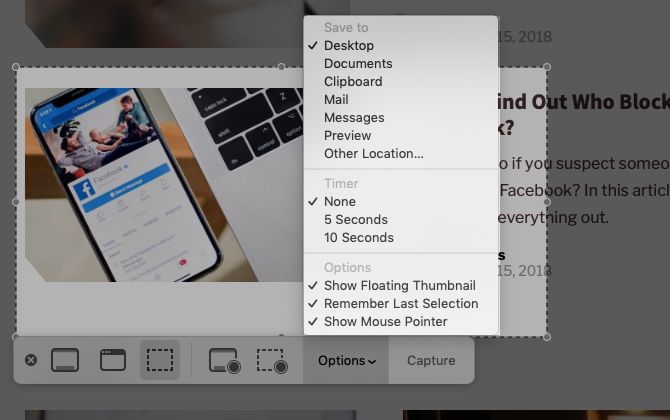
Screenshot’s toolbar has three buttons that make screen capture quick and painless: Capture Entire Screen, Capture Selected Window, and Capture Selected Portion. (The app also has a couple of buttons for screen recording.)
For timed selections, click on the Options button in the toolbar. You’ll find the timer options in the menu that shows up.
After you take a screenshot, you’ll see a tiny thumbnail of it at the bottom-right of the screen. It leads to a special window with tools for editing and annotating your screenshots. They let you add text, sketches, shapes, and even your signature to a screenshot. This Markup utility is one of the best new features of macOS Mojave.
If you want to turn off the thumbnail feature, uncheck the Show Floating Thumbnail item in the Options menu from the screenshot toolbar.
Configuring Screenshot Settings on Mac
You might want to, say, change the default screenshot format or change where screenshots get saved. In such cases, you’ll need to execute a command from the Terminal app. Let’s take a look at three of the most handy commands.
We have appended each command with a second one that’s needed to cement the changes. It reads:
killall SystemUIServer
To Change the Default Screenshot Format
You can save screenshots to other formats like JPG, BMP, and PDF. You’ll need to replace [file type] in the command below with the relevant three-letter format name.
defaults write com.apple.screencapture type [file type] && killall SystemUIServer
To Change Where Screenshots Get Saved
In macOS Mojave, you can change the default destination folder directly from the Screenshot app. To do this, click on the Options button in the screenshot toolbar and select a folder of your choice under the Save To section of the consequent menu.
On a non-Mojave Mac, you’ll have to rely on this Terminal command:
Replace [path] with the new Finder save location that reads something like this:
/Users/[Username]/Pictures/Screenshots
You can either type the pathname into Terminal, or drag and drop the relevant folder into Terminal to paste its pathname. Alternatively, you can also copy the pathname and then paste it into Terminal.
You’ll find the Copy as Pathname command in the destination folder’s right-click context menu. However, the command appears only when you hold down the Option key while right-clicking.
To Change the Default File Name for Screenshots
If you want to replace the default prefix (Screen Shot) in screenshot names with a different keyword, try this command:
defaults write com.apple.screencapture name [file name] && killall SystemUIServer
Be sure to replace [file name] in the command with the new keyword before execution.
The Preview app on your Mac also allows you to take screenshots. It’s just one of the essential macOS Preview tricks you’ll want to know about.
The advantage of using Preview for screenshots is that you can specify a different file format and save location with each new capture. Of course, you can also instantly edit the screenshot in Preview before saving it.
You’ll find the screenshot tools in Preview under File > Take Screenshot. Unfortunately, a timed screenshot option is missing here.
The Best Screenshot Apps for macOS
Want advanced features that aren’t included in one of the native screen capture tools? Try one of the three third-party tools below.
1. Monosnap
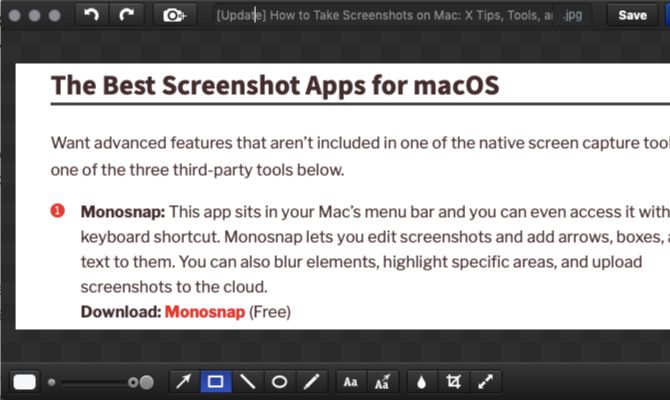
This app sits in your Mac’s menu bar and you can access it with a keyboard shortcut. Monosnap lets you edit screenshots and add arrows, boxes, and text to them. You can also blur elements, highlight specific areas, and upload screenshots to the cloud. Monosnap made it to our list of the top Mac menu bar apps.
Get Snappy if your work involves collaborating on screenshots or “snaps” often. You can not only edit and annotate screenshots as usual, but also share them with ease. The sharing options include a password-protection feature and a self-destruct timer.
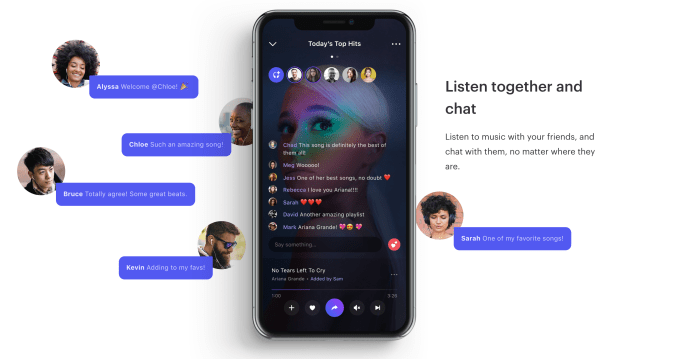
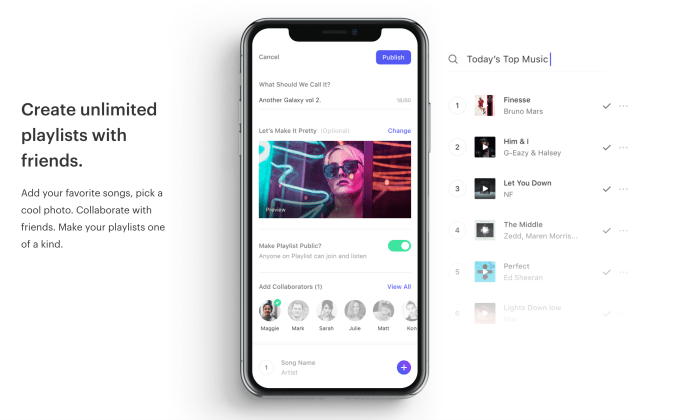
A new app called Playlist aims to make music a more social experience than what’s offered today by the major music platforms like Apple Music, Pandora or Spotify, for example. In Playlist, you can find others who share your musical tastes and join group chats where you listen to playlists together in real time. You can collaborate on playlists, too.
The app, backed by investment from Stanford’s StartX fund, was founded by Karen Katz and Steve Petersen, both Stanford engineers and serial entrepreneurs. Katz previously co-founded AdSpace Networks and another social music platform, Jam Music. She also was a founding executive team member at Photobucket, and founded a company called Project Playlist, which was like a Google search for music back in the Myspace era.
Peterson, meanwhile, has 35 patents and more than a decade of experience in digital music. In the early 2000s he created the software architecture and ran the team at PortalPlayer Inc., which powered the iPod’s music player and was later sold to Nvidia for $357 million. Afterwards, he was CTO at Concert Technology, a technology incubator and intellectual property company with a focus on mobile, social and digital music services.
“The world has gone social, but music has been largely left behind. That’s a real gap,” explains Katz, as to why the founders wanted to build Playlist in the first place.
“Ever since we started listening to music from our mobile phones, it’s become an isolated experience. And music is the number one thing we do on our phones,” she says.
The idea they came up with was to unite music and messaging by synchronizing streams, so people could listen to songs together at the same time and chat while they do so.
During last year’s beta testing period, Playlist (which was listed under a different name on the App Store), saw a huge number of engagements as a result of its real-time nature.
“Outofthegate, we saw10timestheengagementofPandora.Peoplehave,onaverage,60interactionsperhour — likechats,likes,follows,joins,adds andcreates,” Katz says.
Under the hood, the app uses a lot of technology beyond just its synchronized streaming. It also leverages machine learning for its social recommendations, as well as collaborative playlists, large-scale group chat, and behavior-based music programming, and has “Music Match” algorithms to help you find people who listen to the same sort of things you do.
The social aspects of the app involves a following/follower model, and presents playlists from the people you follow in your home feed, much like a music-focused version of Instagram. A separate Discover section lets you find more people to follow or join in other popular listening and chat sessions.
At launch, the app has a catalog of more than 45 million songs and has a music license for the U.S. It plans to monetize through advertising.
The core idea here — real-time music listening and chat — is interesting. It’s like a Turntable.fm for the Instagram age. But the app sometimes overcomplicates things, it seems. For example, importing a playlist from another music app involves switching over to that app, finding the playlist and copying its sharing URL, then switching back to Playlist to paste it in a pop-up box. It then offers a way for you to add your own custom photo to the playlist, which feels a little unnecessary as the default is album art.
Another odd choice is that it’s difficult to figure out how to leave a group chat once you’ve joined. You can mute the playlist that’s streaming or you can minimize the player, but the option to “leave” is tucked away under another menu, making it harder to find.
The player interface also offers a heart, a plus (+), a share button, a mute button and a skip button all on the bottom row. It’s… well… it’s a lot.
But Katz says that the design choices they’ve made here are based on extensive user testing and feedback. Plus, the app’s younger users — often high schoolers, and not much older than 21 — are the ones demanding all the buttons and options.
It’s hard to argue with the results. The beta app acquired more than 500,000 users during last year’s test period, and those users are being switched over to the now publicly available Playlist app, which has some 80K installs as of last week, according to Sensor Tower data.
The company also plans to leverage the assets it acquired from the old Project Playlist, which includes some 30 million emails, 21 million Facebook IDs and 14 million Twitter IDs. A “Throwback Thursday” marketing campaign will reach out to those users to offer them a way to listen to their old playlists.
The startup has raised $5 million in funding (convertible notes) from Stanford StartX Fund, Garage Technology Ventures, Miramar Ventures, IT-Farm, Dixon Doll (DCM founder), Stanford Farmers & Angels, Zapis Capital and Amino Capital.
The Palo Alto-based company is a team of six full-time.
At Facebook, where he was the first-ever director of platform, they called him Bling. At YouTube the following year, they still called him Bling. At Google in 2010, they continued to call him Bling. Even at Khosla Ventures, where Ben Ling has been a general partner for the past five years, the nickname stuck.
It was only natural that Bling Capital would be the name of his debut venture capital fund, a $60 million seed-stage vehicle backed by Marissa Mayer, Nellie and Max Levchin, Yelp CEO Jeremy Stoppelman and Quora CEO Adam D’Angelo.
We first spotted Bling Capital’s $60 million filing two months back; this week, TechCrunch sat down with Ling, who will officially depart from Khosla next month, to learn more about his investment strategy and why he’s venturing off on his own.
Bling Capital founder Ben Ling
Ling joined Khosla in 2013 to invest in consumer technology, internet, mobile, marketplace, SaaS and consumer health. In his tenure as a general partner and angel investor, he deployed capital to nine “unicorns,” including Lyft, Palantir, Square, Instacart and Zenefits. But he wanted the freedom to invest at a more rapid clip.
“Going out on my own allows me to be more agile; a sole GP can act a lot more quickly and speed matters a lot in seed,” Ling said. “And I love early-stage and product because I think there is a void in the marketplace — there’s a lot of money in seed but there’s not a lot of product builders in seed.”
Ling will invest between $750,000 and $1 million in one to two U.S. companies per month in exchange for 10 percent equity.
The firm is in the process of closing two funds: a $60 million flagship vehicle that will invest in consumer tech, internet and mobile, marketplace, data, fintech, SaaS and automation startups, and a $30 million opportunities fund, per an SEC filing, reserved for follow-on investments.
“It’s pretty much the things that a Google, a Facebook or an Amazon would be interested in,” Ling said, referring to where the fund will invest. “What’s it’s not is crypto, or rockets or enterprise, but it’s pretty much everything else when we think about the world of the internet.”
Given Ling’s experience, the fund will have a particular focus on product. Ling is the sole general partner of Bling, but he’s recruited a team of roughly 60 experts to work with his portfolio company executives as part of what Ling has dubbed his Product Council. That includes the heads of product at Square, Instagram, Twitter, YouTube, Google, Nextdoor and Uber, who also are all investors in the fund.
Members of the Product Council will be available to consult with founders and may become advisors, investors or board members, if it’s a good match.
Posted by Anelia Angelova, Research Scientist, Robotics at Google
Perceiving the depth of a scene is an important task for an autonomous robot — the ability to accurately estimate how far from the robot objects are, is crucial for obstacle avoidance, safe planning and navigation. While depth can be obtained (and learned) from sensor data, such as LIDAR, it is also possible to learn it in an unsupervised manner from a monocular camera only, relying on the motion of the robot and the resulting different views of the scene. In doing so, the “ego-motion” (the motion of the robot/camera between two frames) is also learned, which provides localization of the robot itself. While this approach has a long history — coming from the structure-from-motion and multi-view geometry paradigms — new learning based techniques, more specifically for unsupervised learning of depth and ego-motion by using deep neural networks, have advanced the state of the art, including work by Zhou et al., and our own prior research which aligns 3D point clouds of the scene during training.
Despite these efforts, learning to predict scene depth and ego-motion remains an ongoing challenge, specifically when handling highly dynamic scenes and estimating proper depth of moving objects. Because previous research efforts for unsupervised monocular learning do not model moving objects, it can result in consistent misestimation of objects’ depth, often resulting in mapping their depth to infinity.
In “Depth Prediction Without the Sensors: Leveraging Structure for Unsupervised Learning from Monocular Videos”, to appear in AAAI 2019, we propose a novel approach which is able to model moving objects and produces high quality depth estimation results. Our approach is able to recover the correct depth for moving objects compared to previous methods for unsupervised learning from monocular videos. In our paper, we also propose a seamless online refinement technique that can further improve quality and be applied for transfer across datasets. Furthermore, to encourage even more advanced approaches of onboard robotics learning, we have open sourced the code in TensorFlow.
Previous work (middle row) has not been able to correctly estimate depth of moving objects mapping them to infinity (dark blue regions in the heatmap). Our approach (right) provides much better depth estimates.
Structure
A key idea in our approach is to introduce structure into the learning framework. That is, instead of relying on a neural network to learn depth directly, we treat the monocular scene as 3D, composed of moving objects, including the robot itself. The respective motions are modeled as independent transformations — rotations and translations — in the scene, which is then used to model the 3D geometry and estimate all the objects’ motions. Additionally, knowing which objects may potentially move (e.g., cars, people, bicycles, etc.) helps us learn separate motion vectors for them even if they may be static. By decomposing the scene into 3D and individual objects, better depth and ego-motion in the scene is learned, especially on very dynamic scenes.
We tested this method on both KITTI and Cityscapes urban driving datasets, and found that it outperforms state-of-the-art approaches, and is approaching in quality methods which used stereo pair videos as training supervision. Importantly, we are able to recover correctly the depth of a car moving at the same speed as the ego-motion vehicle. This has been challenging previously — in this case, the moving vehicle appears (in a monocular input) as static, exhibiting the same behavior as the static horizon, resulting in an inferred infinite depth. While stereo inputs can solve that ambiguity, our approach is the first one that is able to correctly infer that from a monocular input.
Previous work with monocular inputs were not able to extract moving objects and incorrectly map them to infinity.
Furthermore, since objects are treated individually in our method, the algorithm is able to provide for the motion vectors for each individual object, i.e. which is an estimate of where it is heading:
Example depth results for a dynamic scene together with estimates of the motion vectors of the individual objects (rotation angles are estimated too, but for simplicity are not shown).
In addition to these results, this research provides motivation for further exploring what an unsupervised learning approach can achieve, as monocular inputs are cheaper and easier to deploy than stereo or LIDAR sensors. As can be seen in the figures below, in both the KITTI and Cityscapes datasets, the supervision sensor (be it stereo or LIDAR) is missing values and may occasionally be misaligned with the camera input, which happens due to time delay.
Depth prediction from monocular video input on the KITTI dataset, middle row, compared to ground truth depth from a Lidar sensor; the latter does not cover the full scene and has missing and noisy values. Ground truth depth is not used during training.
Depth prediction on the Cityscapes dataset. Left to right: image, baseline, our method and ground truth provided by stereo. Note the missing values in the stereo ground truth. Also note that our algorithm is able to achieve these results without any ground truth depth supervision.
Ego-motion
Our results also provide the best among the state-of-the-art estimates in ego-motion, which is crucial for autonomous robots, as it provides localization of the robots while moving in the environment. The video below shows results from our method that visualizes the speed and turning angle, obtained from the inferred ego-motion. While the outputs of both depth and ego-motion are valid up to a scalar, we can see that it is able to estimate its relative speed when slowing down and stopping.
Depth and ego-motion prediction. Follow the speed and the turning angle indicator to see the estimates when the car is taking a turn or stopping for a red light.
Transfer Across Domains
An important characteristic of a learning algorithm is its adaptability when moved to an unknown environment. In this work we further introduce an online refinement approach which continues to learn online while collecting new data. Below are examples of improvement of the estimated depth quality, after training on Cityscapes and online refinement on KITTI.
Online refinement when training on the Cityscapes Data and testing on KITTI. The images show depth prediction of the trained model, and of the trained model with online refinement. Depth prediction with online refinement better outlines the objects in the scene.
We further tested on a notably different dataset and setting, i.e. on an indoor dataset collected by the Fetch robot, while the training is done on the outdoor urban driving Cityscapes dataset. As to be expected, there is a large discrepancy between these datasets. Despite this, we observe that the online learning technique is able to obtain better depth estimates than the baseline.
Results of online adaptation when transferring the learning model from Cityscapes (an outdoors dataset collected from a moving car) to a dataset collected indoors by the Fetch robot. The bottom row shows improved depth after applying online refinement.
In summary, this work addresses unsupervised learning of depth and ego-motion from a monocular camera, and tackles the problem in highly dynamic scenes. It achieves high quality depth and ego-motion results and with quality comparable to stereo and sets forward the idea of incorporating structure in the learning process. More notably, our proposed combination of unsupervised learning of depth and ego-motion from monocular video only and online adaptation demonstrates a powerful concept, because not only can it learn in unsupervised manner from simple video, but it can also be transferred easily to other datasets.
Acknowledgements This research was conducted by Vincent Casser, Soeren Pirk, Reza Mahjourian and Anelia Angelova. We would like to thank Ayzaan Wahid for his help with data collection and Martin Wicke and Vincent Vanhoucke for their support and encouragement.
Roughly one year after WhatsApp co-founder Brian Acton made his highly publicized exit from Facebook, another executive and early employee of the messaging platform is doing the same. Neeraj Arora, WhatsApp’s chief business officer, announced today that he would be “taking some time off to recharge and spend time with family.”
Facebook acquired WhatsApp for $19 billion in 2014 and pledged to allow the messaging giant to continue to operate independently under Acton and co-founder Jan Koum, who served as its chief executive officer until abruptly quitting over privacy and data concerns in April. Arora, who joined WhatsApp in 2011 from Google, was rumored to be the frontrunner to replace Koum as CEO. With him out the door, it’s unclear who will be tapped to lead WhatsApp.
In today’s announcement, Arora said he was “deeply indebted” to both Acton and Koum, “who entrusted me to be their business companion for so many years.”
Facebook subsidiaries WhatsApp and Instagram are both in periods of flux following the exits of their original founders, which are believed to be caused by quarrels with the social media giant’s CEO Mark Zuckerberg.
In what was one of the largest tech stories of 2018, Instagram co-founders Kevin Systrom and Mike Kriegerannounced they were leaving Facebook years after the company acquired their photo-sharing app for $1 billion. They shared the news in September, just a few months after Koum stepped down from WhatsApp.
According to The New York Times, Zuckerberg, over the course of the last year, had begun to assert more and more control over Instagram, upsetting its leaders.
Koum, for his part, reportedly wrote in a since-removed WhatsApp blog post that Zuckerberg and Facebook no longer had respect for privacy: “These days companies know literally everything about you, your friends, your interests, and they use it all to sell ads. At every company that sells ads, a significant portion of their engineering team spends they day tuning data mining, writing better code to collect your personal data… remember, when advertising is involved, you the user are the product.”
According to TechCrunch’s Josh Constine, Koum was unhappy “about how Facebook would monetize his app and the impact of that on privacy.” Both Acton and Koum departed Facebook before they fully vested from the multi-billion acquisition, meaning the pair chose to lose hundreds of millions of dollars over continued employment at Facebook.
Arora’s exit is further evidence that Facebook has entered a new era, one in which the company’s acquisition strategy may be in serious danger of long-term damage.