
Looking to transfer files between two different Apple devices? Find out how to turn on AirDrop for your iPhone or Mac to send photos, documents, locations, websites, and more to anyone you want.
If you’ve never used AirDrop before, it’s the quickest and easiest way to transfer files from one Apple device to another. Here’s all you need to know to start using it.
How Does AirDrop Work?
AirDrop uses a combination of Wi-Fi and Bluetooth to create a wireless connection between two devices. You can use this connection to transfer files of almost any size at lightning-fast speeds.
What’s more, every file you transfer is fully encrypted. So you don’t need to worry about your privacy, even when using AirDrop on a public network. You can send files to anyone within Wi-Fi and Bluetooth range (usually around 30 feet) and it doesn’t even matter if you have them as a contact or not.
In the next two sections, we’ll explain how to use AirDrop on a Mac and on an iPhone.
How to Use AirDrop on a Mac

AirDrop works with every Mac released after 2012 (excluding the 2012 Mac Pro), as long as it’s running OS X Yosemite or later. To check these details for your Mac, open the Apple menu at the top-left and select About This Mac.
If your Mac is compatible—most of them are—follow the steps below to turn on AirDrop and start transferring files to other Macs or iPhones.
How to Turn On AirDrop on a Mac
First, make sure both Wi-Fi and Bluetooth are turned on. This must be the case for your Mac as well as the device you want to AirDrop files to.
To turn on Wi-Fi, click the Wi-Fi icon in the menu bar and connect to a network. For Bluetooth, go to System Preferences > Bluetooth and click Turn Bluetooth On.

You also need to make sure your Mac is visible to anyone who wants to AirDrop files. To do this, open a new Finder window and select AirDrop from the sidebar. If you can’t see it, select Go > AirDrop from the menu bar instead.
At the bottom of the AirDrop window, open the dropdown menu where it says Allow me to be discovered by: and choose Contacts Only or Everyone.

Even if you choose Everyone, no one can AirDrop files to your Mac without your permission first.
How to Transfer Files From a Mac Using the Share Button
The quickest way to AirDrop files from your Mac is to look for a Share button in your current app. Most apps let you choose AirDrop as a method to share files. Thus, you should be able to transfer what you’re working on without changing apps.

After selecting AirDrop from the Share menu, a window appears with every other Mac or iPhone you can transfer files to. Sometimes it takes a moment for other devices to appear, so be patient.

If the device you want to AirDrop files to doesn’t show up, make sure AirDrop is turned on for that device as well as your own.
How to Transfer Files From a Mac Using Finder
If there isn’t a Share button in your current app—or if it doesn’t give AirDrop as a sharing option—you can use Finder to transfer files over AirDrop instead.
Open a Finder window and click AirDrop in the sidebar, or select Go > AirDrop from the menu bar. After a moment, you should see the people or devices available for you to AirDrop files to.

Open a second Finder window and navigate to the file you want to transfer. Now drag and drop it onto the device you want to send it to in the AirDrop window.
How to Receive AirDrop Files on a Mac
When you AirDrop files to someone, they get the chance to accept or decline them before the transfer starts. Similarly, if someone else AirDrops a file to your Mac, you need to click Accept in the notification that appears.

You should see this notification appear in the top-right corner of your Mac. After clicking Accept, you can choose where to save the file. If you didn’t see this option and you’re wondering where AirDrop files go on your Mac, take a look in the Downloads folder.
If someone is trying to AirDrop a file to your Mac but can’t find you, make sure you’ve turned on AirDrop first.
How to Use AirDrop on an iPhone
You can use Airdrop on any iPhone, iPad, or iPod touch running iOS 7 or later. The method for each device is exactly the same.
To use AirDrop on your iPhone, you first need to turn off Personal Hotspot. Go to Settings > Personal Hotspot and turn off the option to Allow Others to Join.
How to Turn On AirDrop on an iPhone
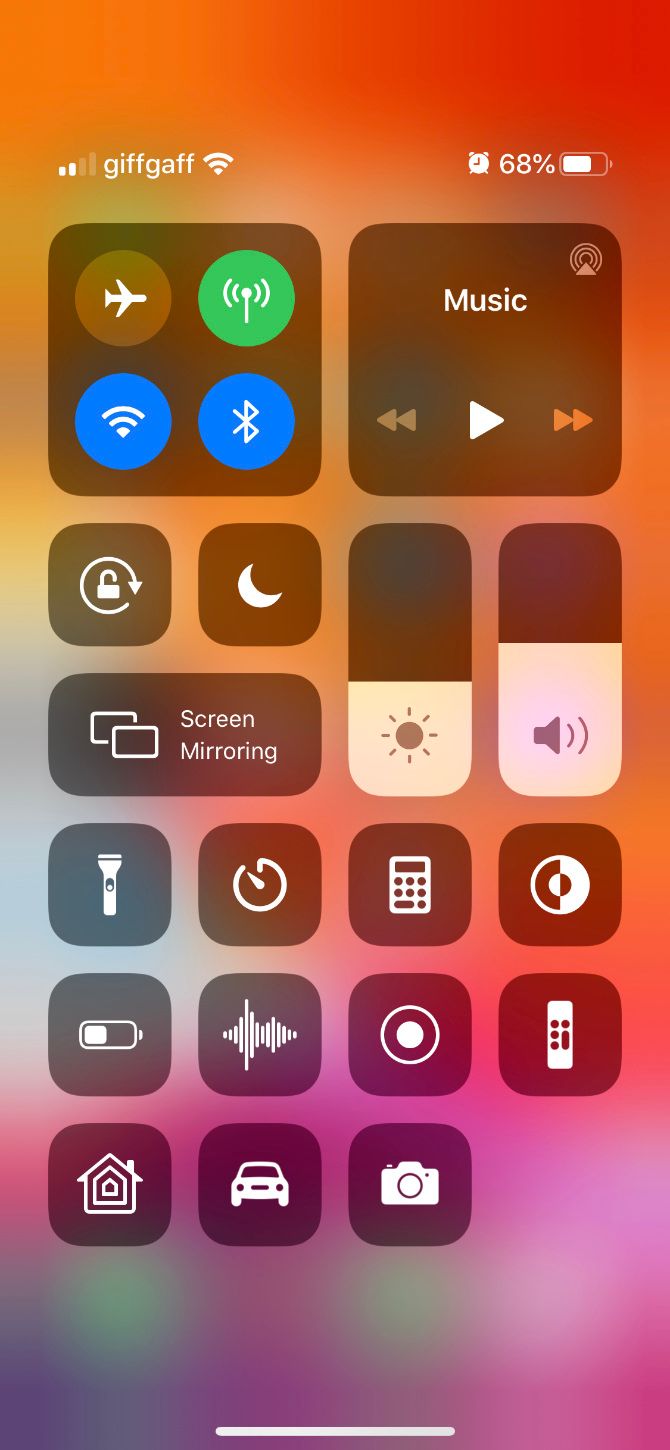
Just like with a Mac, you need to turn on Wi-Fi and Bluetooth to use AirDrop on your iPhone. The same goes for the device you want to transfer files to.
Swipe down from the top-right corner to open Control Center (or swipe up from the bottom on iPhone 8 and earlier), then tap the Wi-Fi and Bluetooth icons to turn them on.
To choose who can find you using AirDrop, press and hold on the network settings in the top-left section of Control Center to reveal more options. Then tap AirDrop and choose Contacts Only or Everyone.
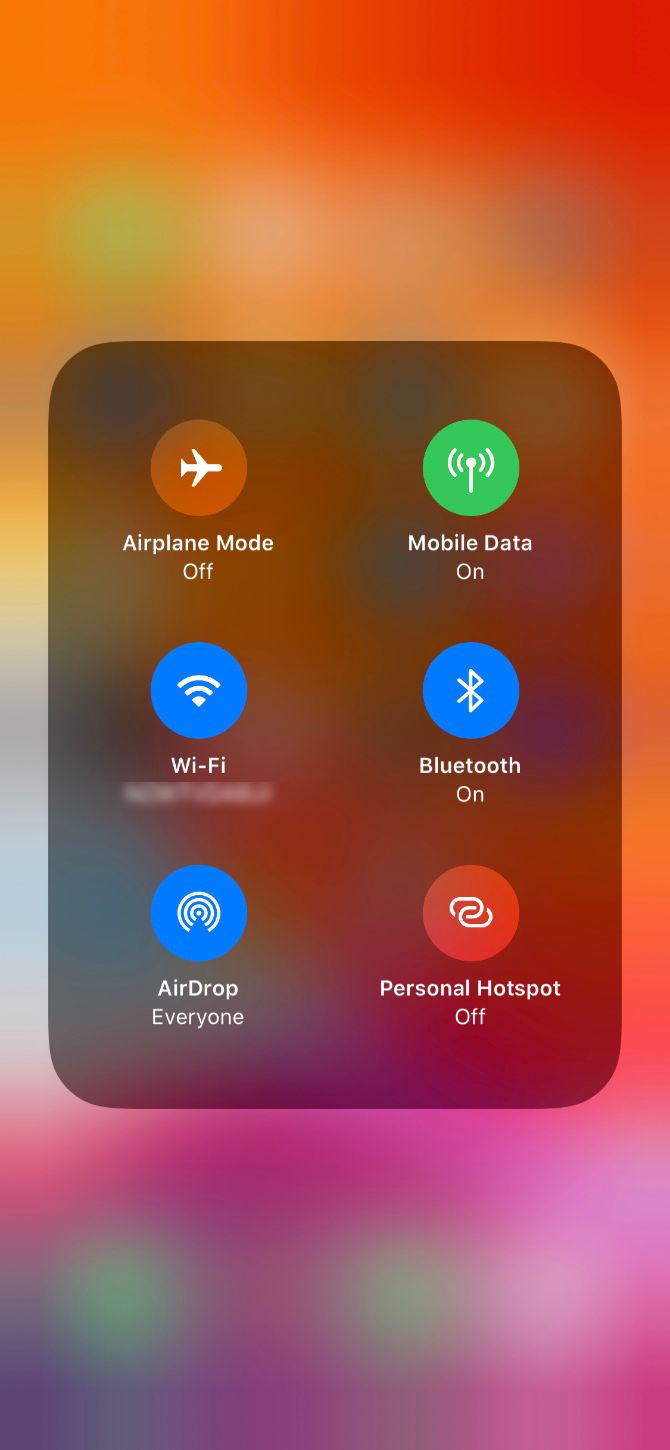
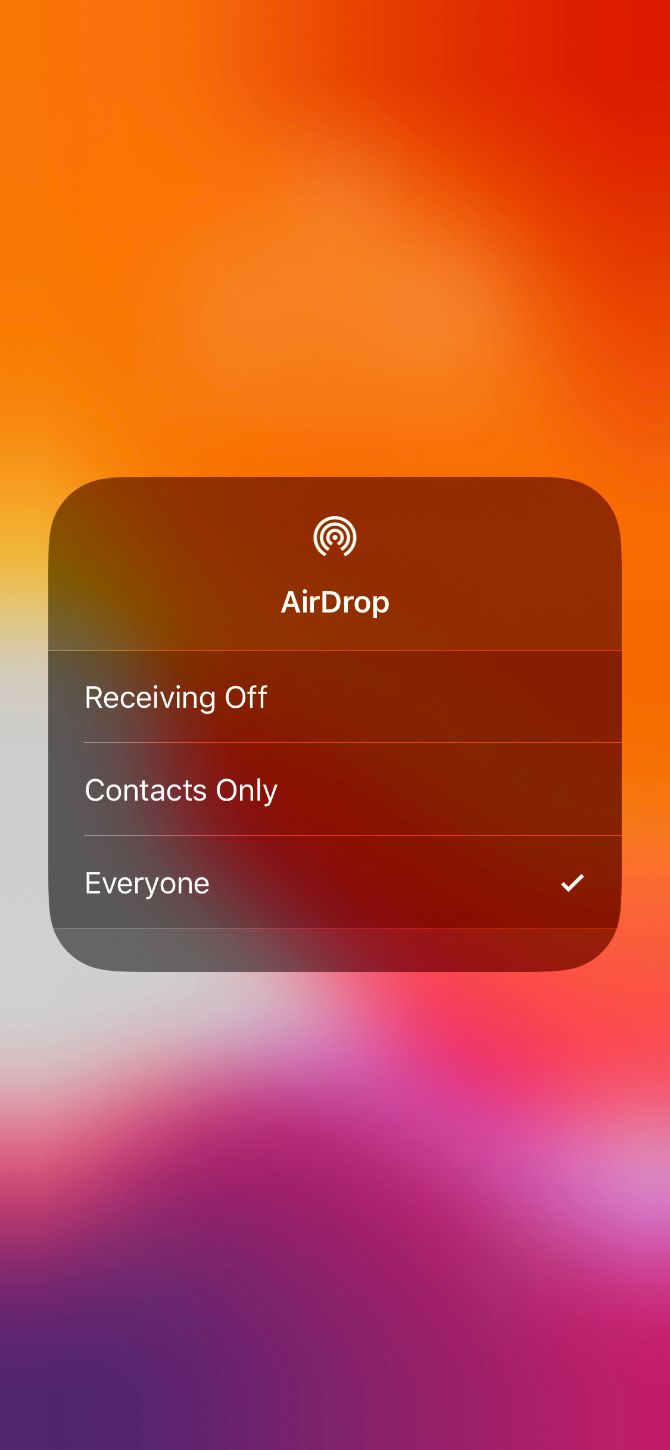
Selecting Everyone is still safe, since you need to accept transfers before anyone can AirDrop files to your iPhone. However, you might want to choose Contacts Only to avoid NSFW AirDrop attempts while you’re out and about.
How to Transfer Files From an iPhone
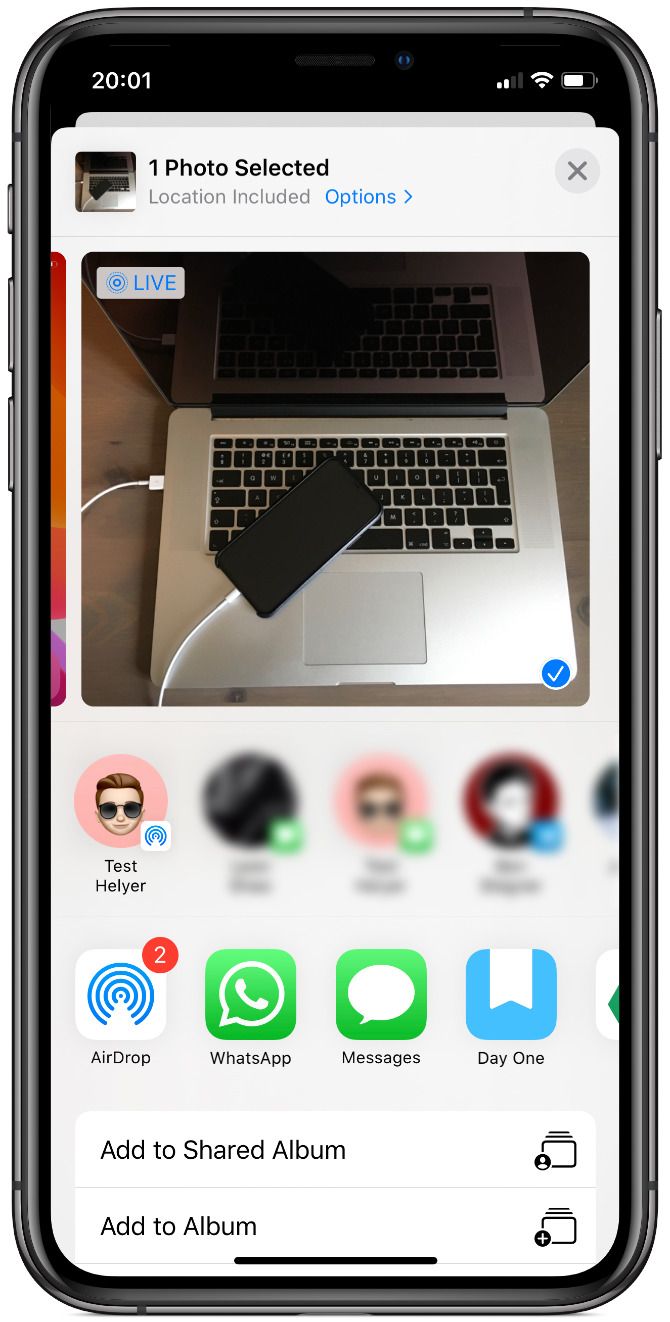
The only way to Airdrop files from your iPhone is using the Share button inside a particular app. It doesn’t matter if you want to use AirDrop to transfer files to a Mac or to another iPhone—the method is the same.
Open the photo, website, note, or whatever document you want to send using AirDrop and look for a Share icon in the app. After you hit Share, you should see AirDrop appear in the second row of the Share Sheet.

Tap AirDrop and wait for other devices to appear. Then simply tap the person, iPhone, or Mac you want to AirDrop that file to and the transfer should begin.
If you want to transfer a file or a document, follow this same process using the Files app. You may need to tap and hold on a particular file to reveal the Share button.
How to Receive AirDrop Files on an iPhone
If someone else tries to send you a file, you should see an AirDrop notification appear on your iPhone. This notification usually shows a preview of the file and gives you the option to accept or decline the transfer. If your device is locked, you should find the notification on the lock screen instead.

When you tap Accept, AirDrop asks which app to open the file with on your iPhone. Exactly where that AirDrop file goes depends on what kind of file it is. For example, a photo should save to your Photos app, while a note should save to the Notes app.
If you can’t find a particular AirDrop file, take a look in the Files app.
Troubleshooting AirDrop Problems
If you’re having trouble finding your intended recipient in AirDrop, make sure they’ve turned AirDrop on from their own device. You should also ensure both devices are powered on, unlocked, and in range of one another.
If you’re still having problems, try our AirDrop troubleshooting steps.
Transfer Files Between All Your Devices
By now, you should be acquainted with the speed of transferring files via AirDrop. It’s easy to turn on and use AirDrop from an iPhone or a Mac, but it won’t be long until you need to transfer files to other devices as well.
That’s no problem. There are plenty of options for transferring files from your iPhone to an Android device, or from your Mac to a Windows PC. Take a look at the fastest file transfer methods to use between any devices to get started.
Read the full article: How to Turn On AirDrop on Your Mac and iPhone to Share Files
Read Full Article
No comments:
Post a Comment