
You don’t have to rely on iBooks Author to create ebooks on your Mac. There’s a simpler solution waiting for you.
The Export to EPUB feature in Apple’s Pages can set you up with interactive ebooks ready for viewing in iBooks and other EPUB readers. Here’s a step-by-step tutorial on how to create an ebook in Pages on Mac.
Step 1: Decide Between Fixed and Flexible Layouts
Here’s the first question you need to ask yourself before you create an ebook in Pages:
Do you want the ebook layout to rearrange itself depending on the size and orientation of devices? Or do you want your ebook layout to stay the same regardless of device size and orientation?
If you want a flexible ebook layout, you’re looking for what Apple calls a Reflowable EPUB as the finished product. Otherwise, it’s the Fixed layout EPUB for you.
You’ll need to stick with a portrait book template if you want a Reflowable EPUB. That’s because landscape templates don’t support this export format. If you’re going for a fixed layout, either orientation works.
Ensure that you choose the correct format when you set up the document, because you can’t switch to a different type of template when you’re exporting it.
Ideally, you should pick the Reflowable layout for a text-heavy book or a word processing document. In the case of a book loaded with images or one with multiple columns, you’re dealing with a page layout document. And it’s best to export that as a Fixed layout EPUB.
If you plan to convert the EPUB to Kindle’s MOBI format, go with the Reflowable layout for exporting as that is likely to give you better results overall.
Step 2: Set Up a Template
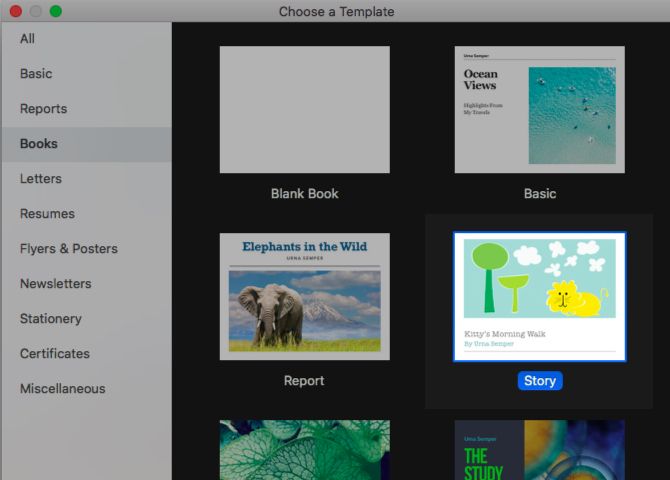
You can create an ebook from a blank document or from any of the free Pages templates available in the template chooser that pops up when you open the app.
But it helps to start out with one of the templates designed specifically for ebooks. You’ll find these listed under Books in the template chooser. (Already started with a basic blank document and want to switch to a new template? You can bring up the template chooser anytime with the keyboard shortcut Option + Cmd + N.)
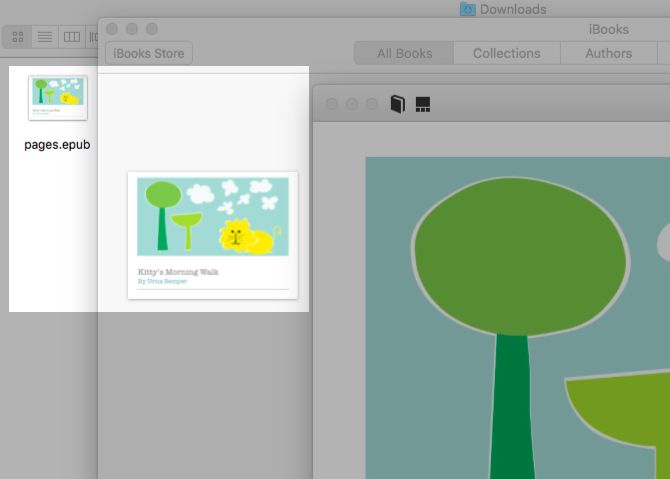
For this tutorial, let’s go with a Fixed layout and a landscape ebook template. We’ve chosen the Story template from Books > Books—Landscape in the template chooser. It’s a page layout document.
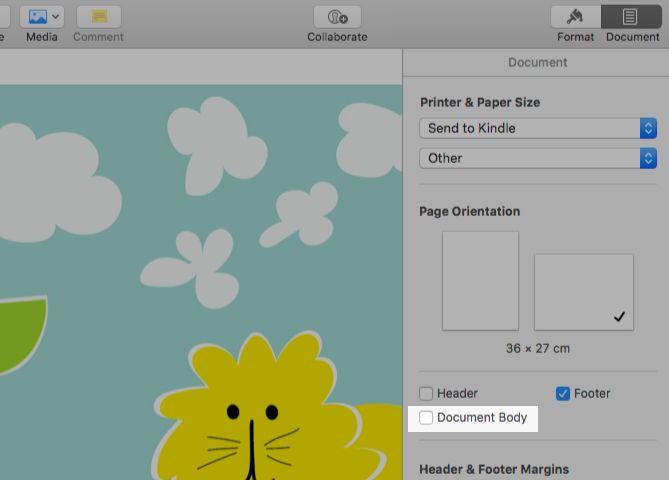
To confirm, open the Document inspector. Under the Document tab, the checkbox for Document Body appears unselected. That’s the indicator to look for. If you had a word processing document open, the Document Body box would appear selected.
Step 3: Add Text and Media
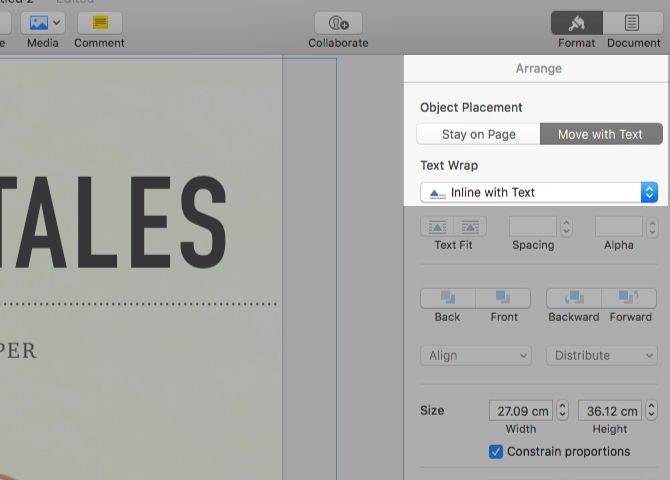
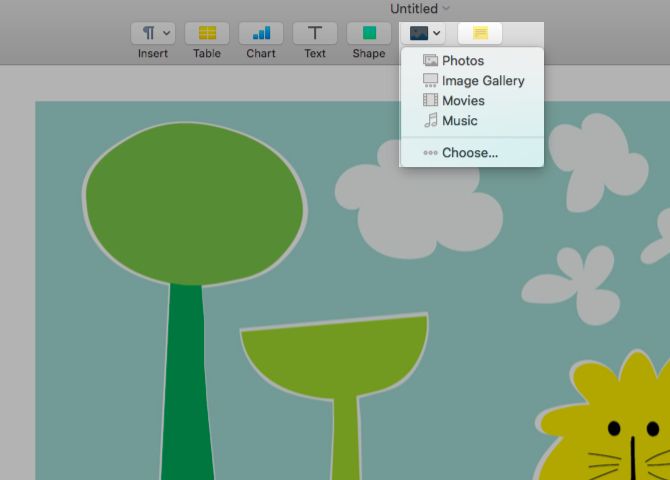
Now it’s time to add content to your ebook. You can insert text, images, videos, tables, charts, and shapes using the appropriate toolbar buttons. As we’re creating a Fixed layout EPUB, we don’t have to worry about wrapping text. Thus images, shapes, and other objects will always appear inline.
That’s a concern only when you’re creating a Reflowable EPUB. And in that case, to ensure that an object stays inline, first select it and open the Arrange tab of the Format inspector. Next, switch to the Move with Text tab under Object Placement and select Inline with Text from the Text Wrap dropdown menu.
Note: Keep in mind that if you insert images greater than 4MP, Pages resizes them to 4MP during export.
If you’re comfortable with the drawing tools that are now a part of the iWork suite, you might also want to add drawings to your ebook.
Since we’re going for a Fixed layout EPUB, we don’t have to worry about losing elements like page numbers, tab stops, and master objects when we export.
Are you creating a Reflowable EPUB? You’ll need to scan Apple’s Fixed layout feature list to know which elements might be missing from the exported file.
But regardless of the layout you choose to begin with, you’ll lose certain items like comments, shadows, and smart fields during the export to EPUB.
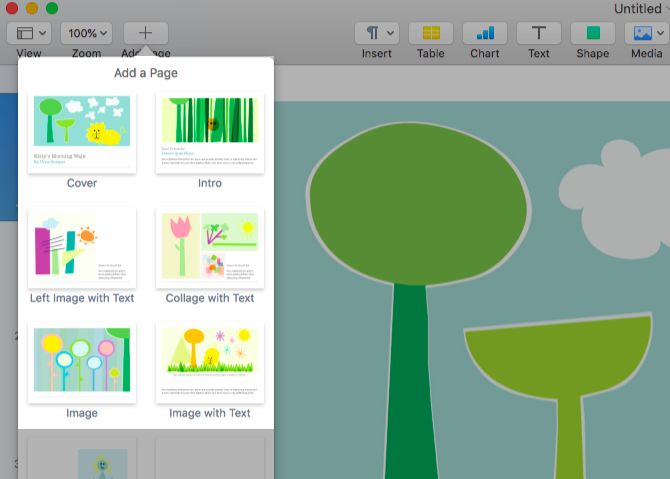
How to Insert New Pages
Every time you want to add a new page to your ebook, you’ll need to click on the Add Page toolbar button. This process is where page layout templates differ from word processing ones.
In word processing templates, adding pages equals inserting a blank page after the cursor location. You don’t actually need to do this. The app inserts new pages as you continue to type. In other words, you get a new page when you reach the bottom of the current one and hit the Enter key.
But in page layout templates such as ours, you start out with a set of master pages with varying content layouts. (There’s a blank master page too.) And when you click on the Add Page button to insert a new page, you have to select one of these master pages to duplicate.
Step 4: Insert a Table of Contents
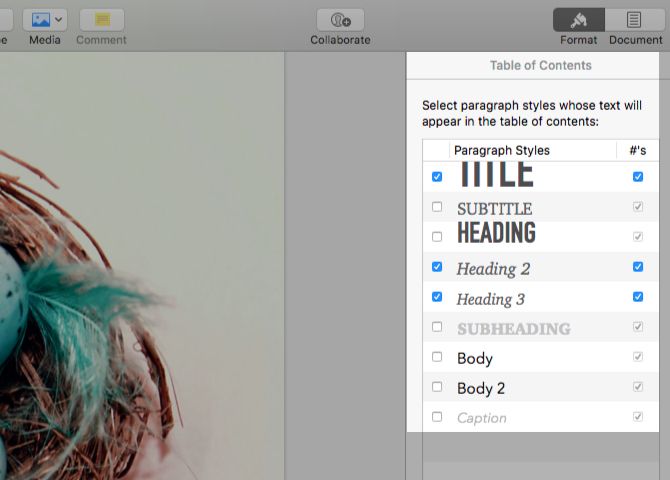
Pages generates a Table of Contents (ToC) for you based on the paragraph styles in your document (see our advanced iWork guide for more on that).
If you would like to set up a custom ToC, you can, but only in a word processing document. Click on Insert > Table of Contents > Document to set up the ToC.
Now, with the ToC selected, switch to the Format inspector pane. Here you can enable/disable paragraph styles depending on whether you want the corresponding text to show up in the table of contents.
We can’t create a ToC for our sample book. This is because it’s a page layout document, which doesn’t support the ToC feature.
Step 5: Export Your Book as an EPUB
No, we haven’t forgotten about adding a cover for your ebook. We’ll get to that now.
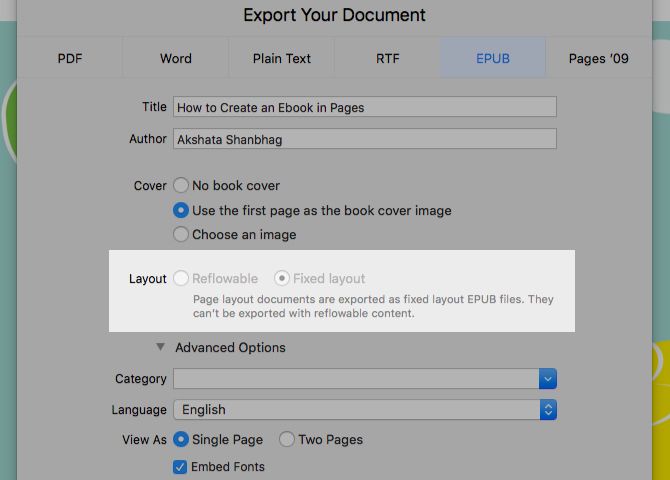
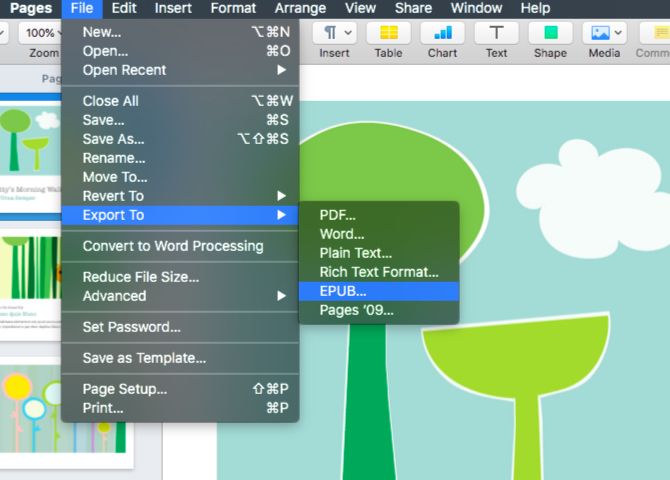
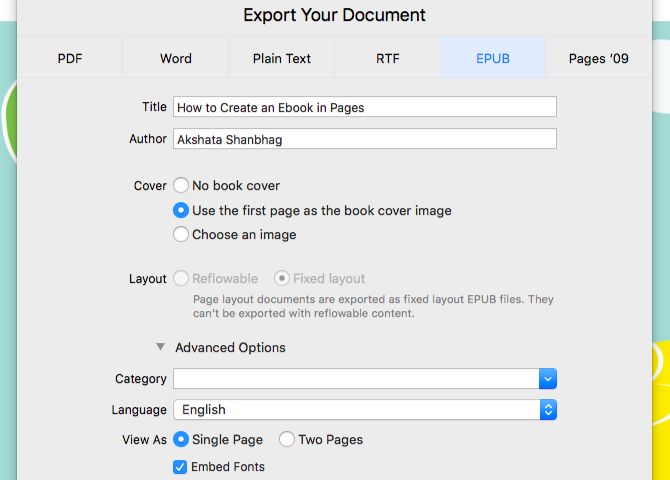
You’ll find the book cover option when you proceed to export your document as an EPUB. To do that, click on File > Export To > EPUB. Here, the Export Your Document dialog box comes up. Let’s enter a title and author name for our sample book.
The radio button for switching layouts is disabled because we’ve started out with a landscape template. That automatically renders a Fixed layout EPUB.
For the book cover, we’ll stick with the default setting: Use the first page as the book cover image. You can add a custom image as your book cover with the Choose an image radio button. Pages uses this image as the book’s thumbnail in iBooks and in file explorer applications.
From the expandable Advanced Options section, you can pick a category and a language for your ebook.
Let’s leave the Embed Fonts checkbox selected to ensure that the reader’s ebook viewer displays the same fonts that we’ve chosen. After we hit the Next button, we get to pick a name and storage location for our exported EPUB. Now with one click of the Export button, our ebook is ready!
Note: If you open your Pages document from your iPhone/iPad or iCloud.com, you can also export it to EPUB from there.
Now, we’ll keep our ebook to ourselves, but you can share your ebook or even put it up for sale on iBooks with an iTunes Connect account.
Note: iBooks Author is not going away. And while you can import EPUB files into iBooks Author for editing, you can’t open IBOOKS and IBA files in Pages.
When Is Your Ebook Hitting the iBooks Store?
For creating ebooks, Pages isn’t as advanced as iBooks Author, but it’s no slouch either. If you’re familiar with the basics of iWork and want to create beautiful digital books the easy way, why not create an ebook with Pages?
And remember, ebooks are not the only impressive documents you can create with Pages on your Mac!
Read the full article: How to Create an Ebook in Pages on Mac: 5 Easy Steps
Read Full Article
No comments:
Post a Comment