Do you love Civilization games? Are you sad when it’s time to save your game and logoff for the day? Then why not take this epic game with you!
If you have an Android device or an iPhone/iPad, there are several ways to carry a game of Civ around in your pocket. In this article we look at five ways you can play games from Sid Meier’s Civilization series on your smartphone or tablet.
Why Civilization?
In 1991, I accidentally bought the original Civilization for my Amiga. I say “accidentally” because I’d intended to buy Sim City after playing it on my uncle’s PC several months earlier. Somehow, I found myself reading the box and walking, somnambulist-like, to the counter and paying. It was as if I was remotely hypnotized by Sid Meier himself.
Ever since then, I’ve been addicted to the game. I love Civ so much, that I like to take it with me everywhere I go.
For a time, there was only one way to play Civilization on mobile. These days, however, Civ fans are spoiled for choice.
1. Play Civilization VI on iPhone and iPad
Civilization VI was originally launched for desktop computers in 2016. A few months later, in December 2017, the same game was released on iOS.
Compatible with iOS 11 running on iPhone 7 or 7 Plus, iPhone 8 or 8 Plus, iPhone X, iPad Air 2, iPad 2017, or any iPad Pro, Civilization VI is indistinguishable from the desktop version.
Featuring a choice of 20 historical leaders and dynamic diplomacy, this version of the game even includes a local multiplayer mode. To entice you further, Civilization VI for iPhone and iPad is free to install. It comes with a 60-turn trial, which is more than enough to help you decide if the game is worth paying for via an in-app purchase.
You can only appreciate the convenience of having Civ in your pocket once you’ve experienced it for yourself. It certainly makes waiting in line for the bus far more interesting.
2. Play Civilization Revolution 2 on Android and iOS
Sadly, while Civilization VI is available on iOS, it isn’t yet an option for Android. This may not surprise you. After all, there was a time, pre-2014, when there were no Sid Meier games available for Android. Given that tabletop versions of Civilization were available, this seemed slightly odd.
However, there is one official Civilization option available for Android users: Civilization Revolution 2.
As fun to play as the desktop original, Civilization Revolution 2 has all the elements that Civ fans love. You’ll find the tech tree and barbarians, and rival leaders with distinct personalities. Meanwhile, cities are easy to manage via your mobile display.
If you’re familiar with the desktop versions of Civilization, you’ll probably know that maps can be random, or generated. The game also offers scenarios, and all of these features are included with Civilization Revolution 2. It even includes a scenario generator.
So, you could start from 4,000 B.C. with your civilization, or play a game set in an endless war. You could set up a colony on a new world, or one overrun by barbarians. With so many options for a unique game available, you could be playing Civilization Revolution 2 on your phone for a long time to come.
While there is no way of transferring your current Civilization Revolution 2 game to the desktop incarnation, it remains an engaging gaming experience.
As fun as the game is, it may seem jarring for those looking for a more visually authentic mobile experience. In short, Civilization Revolution 2 continues the console-esque, cartoony graphics of its predecessor. So, what can you do if you’re looking for a more traditional Civilization experience on your smartphone or tablet?
Download: Civilization Revolution 2 for Android ($9.99) | iOS ($8.99)
3. Play FreeCiv on Android
Perhaps the most accessible Civilization option for Android users is FreeCiv.
Using an isometric view similar to early versions of Civilization, FreeCiv offers virtually all of the game’s concepts and marries them with great graphics. I haven’t played this version of the game long enough to know if the Fundamentalist government type is the best to play with in the later stages. But with a choice of game rules based on Civilization or Civilization II, FreeCiv has much to recommend.
Mindful of the size of some displays, the developers have made some of the buttons quite chunky. This can prove distracting at first, but FreeCiv for Android soon redeems itself. On balance it probably plays better on a tablet than on a smartphone, so try playing FreeCiv on both to see which you prefer.
FreeCiv is available for Windows and Linux desktop devices, too. If you want to sync games across devices, check out the Dropbox-based service at www.civsync.com.
4. Play World of Empires for Android and iOS
Beginning life as a Civilization clone called “MyCiv,” World of Empires is a free alternative to Civ that really looks the part. While aping the graphic style of later Civ games (specifically Civilization V and VI), World of Empires is surprisingly playable.
Bundling a map editor, multiplayer, chat, 26 distinct civilizations, network saves, and an optional pay-what-you-want model, World of Empires offers an impressive gaming experience.
It feels enough like civilization to make you want to play more, while being different enough to keep you interested.
Can’t run Civilization VI on your iOS device? Don’t like Civilization Revolution 2 or FreeCiv on Android? Then World of Empires is your best option.
Download: World of Empires for Android (Free) | iOS (Free)
5. Use DosBox and Emulators
If the retro-joy of FreeCiv doesn’t fulfil your Civilization pangs, you always have the option of emulation.
Android users might install DosBox Turbo and then find a ROM of Civilization or Civilization II. (At the time of writing, DOSBox options for iOS are limited.)
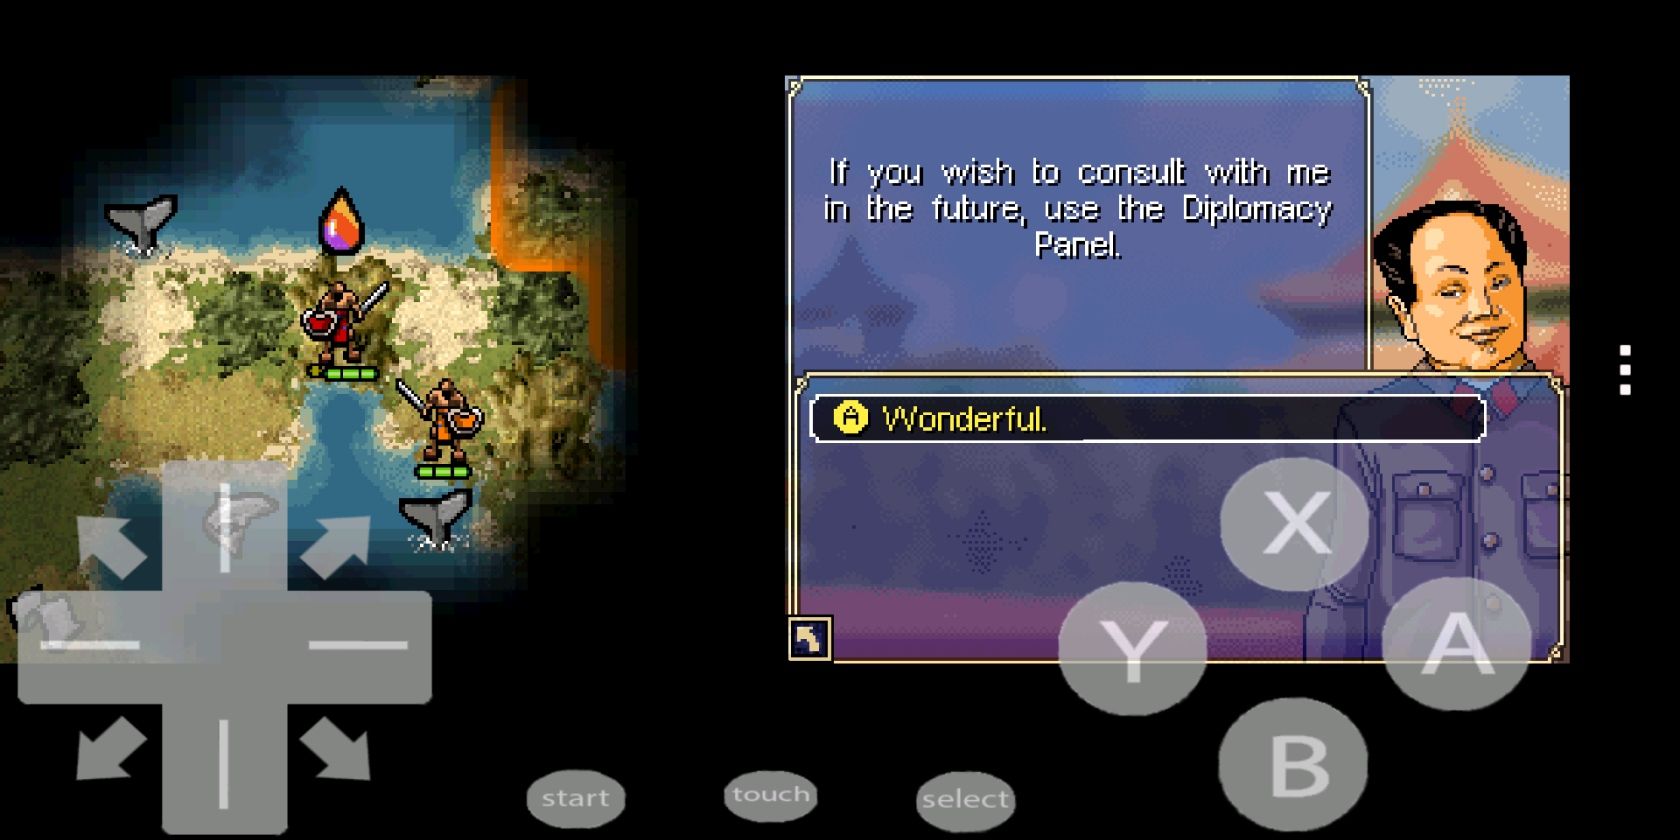
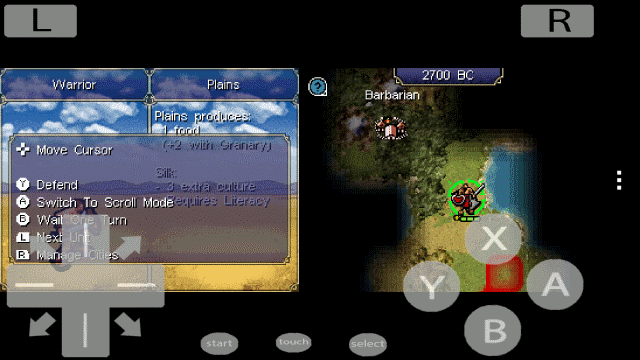
Meanwhile, if you prefer to play the original Civilization Revolution try a Nintendo DS emulator (such as Android’s free nds4droid). These will enable you to play the Nintendo DS version of Civilization Revolution.
This is a good option, and the game plays as well as it does on other mobile platforms. As you can see from the screenshot, however, it lacks the polish of a standard mobile game. This is thanks to the overlaid interface and dual-screen setup.
Remember, however, that when using emulators, you cannot legally use a ROM unless you own the original version on its original disk.
What’s the Best Civilization Game for Mobile?
Back when Android and iOS had no Civilization games available, Civ-like games were the only option. Initially, even this selection was modest, but over the years more have been released.
There are now a handful of ways to play Civilization on your smartphone, and it’s up to you to decide which is best. Feel free to let us know in the comments below.
Civilization’s appeal lies in the 4X dynamic: explore, expand, exploit, and exterminate. Do you want to learn more? Then read our guide to every version of Civilization released so far.
Take a scanned image (or take a snap using a mobile camera) and presto—OCR software converts those images to text. It’s the speed of artificial intelligence at work.
Optical character recognition (OCR) software convert pictures to text. OCR software analyze a document and compare it with fonts stored in their database and/or by noting features typical to characters. Some OCR software also put it through a spell checker to “guess” unrecognized words. 100% accuracy is difficult to achieve, but a close approximation is what most software strive for.
OCR software can be productivity shortcuts for students, researchers, and office workers. So let’s play with a few more and find the best OCR software for your needs.
1. OCR Using Microsoft OneNote
Microsoft OneNote has advanced OCR functionality which works on both pictures and handwritten notes.
Drag a scan or a saved picture into OneNote. You can also use OneNote to clip part of the screen or an image into OneNote.
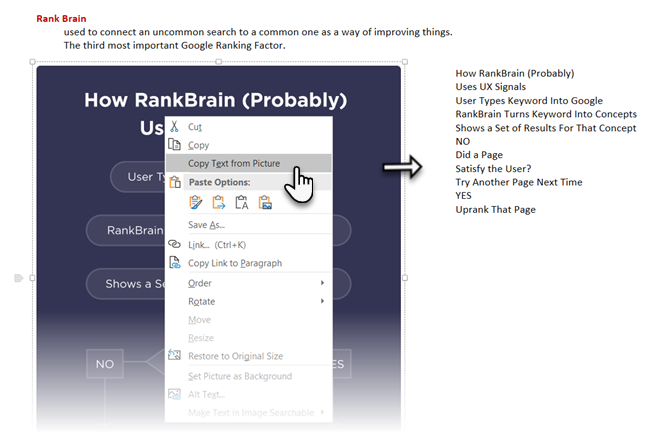
Right click on the inserted picture and select Copy Text from Picture. The copied optically recognized text goes into the clipboard and you can now paste it back into OneNote or into any program like Word or Notepad.
OneNote can also extract text from a multi-page printout with one click. Insert a multiple page printout in OneNote and then right-click on the currently selected page.
Click Copy Text from this Page of the Printout to grab text from this selected page only.
Click Copy Text from All the Pages of the Printout to copy text from all the pages in one shot as you can see below.
Do note that the accuracy of the OCR depends on the quality of the photo too. That’s why optically recognizing handwriting is still a bit fuzzy for OneNote and other OCR software in the market. That said, it is one of the key features in OneNote you should use at every opportunity.
Want to know how OneNote compares against a paid OCR software? Read our comparison of OneNote and OmniPage.
2. SimpleOCR
The difficulty I was having with handwriting recognition using MS tools, could have found a solution in SimpleOCR. But the software offers handwriting recognition only as a 14 day free trial. Machine print recognition though does not have any restrictions.
The software looks outdated as it hasn’t been updated since version 3.1, but you can still try it out for its simplicity.
Set it up to read directly from a scanner or by adding a page (JPG, TIFF, BMP formats).
SimpleOCR offers some control over the conversion through text selection, image selection and text ignore features.
Conversion to text takes the process into a validation stage; a user can correct discrepancies in the converted text using an in-built spell-checker.
The converted file can be saved to a DOC or TXT format.
SimpleOCR was fine with normal text, but its handling of multi-column layouts was a disappointment. In my opinion, the conversion accuracy of the Microsoft tools was considerably better than SimpleOCR.
Photo Scan is a free Windows 10 OCR app you can download from the Microsoft Store. Created by Define Studios, the app is ad-supported but that does not mar the experience. The app is an OCR scanner and a QR code reader rolled into one.
Point the app to an image or a file printout. You can also use your PC’s web cam to give it an image to look at. The recognized text is displayed in an adjacent window.
The text to speech feature is a highlight. Click the speaker icon and the app will read aloud what it just scanned.
It’s not great with handwritten text, but printed text recognition was adequate. When everything is done, you can save the OCR text in multiple formats like Text, HTML, Rich Text, XML, Log format etc.
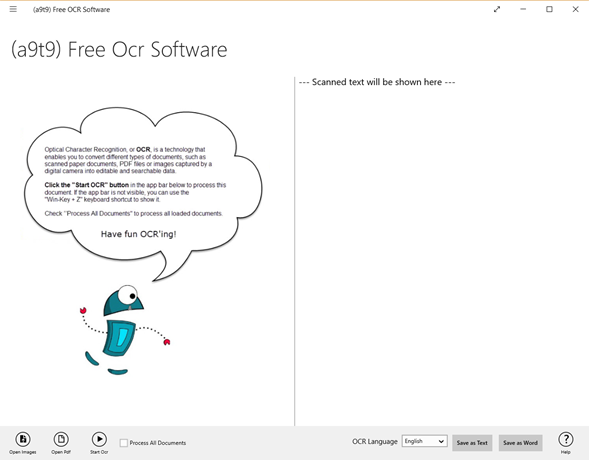
(a9t9) supports 21 languages for parsing your images and PDF to text. The app is also free to use, and the ad support can be removed with an in-app purchase. Like most free OCR programs, it is idea for printed documents and not handwritten text.
Capture2Text is a free OCR software for Windows 10 that gives you keyboard shortcuts to quickly OCR anything on the screen. It also does not require any installation.
Use the default keyboard shortcut WinKey + Q to activate the OCR process. You can then use the mouse to select the portion you want to capture. Hit Enter and then selection will be optically recognized. The captured and converted text will appear in a popup and will also be copied to the clipboard.
Capture2Text uses Google’s OCR engine and supports 100+ languages. It uses Google Translate to convert the captured text to other languages. Look inside the Settings to tweak the different options provided by the software.
Easy Screen OCR isn’t free. But I mention it here because it is fast and convenient. You can also use it freely for up to 20 times without any subscription. The software works from the system tray or the taskbar. Right-click on Easy Screen OCR icon and select Capture from the menu. Take a screenshot of any image, website, video, document, or anything else on the screen by dragging the mouse cursor.
Easy Screen OCR then displays a dialog with three tabs. The screenshot tab gives you a preview of the captured text. Click the OCR button to read the text from the image. The optically converted text can now be copied from the Text tab of the dialog.
You can set the recognition languages for the OCR in the software’s Preferences. More than 100 languages are supported as the software uses Google’s OCR engine.
If you are away from your own computer, then try the OCR powers of Google Drive. Google Docs has an in-built OCR program that can recognize text in JPEG, PNG, GIF, and PDF files. But all files should be 2 MB or less and text should be 10 pixels or higher. Google Drive can also auto-detect the language in the scanned files, though accuracy with non-Latin characters might not be great.
Log into your Google Drive account.
Click on New > File Upload. Alternatively, you can also click on My Drive > Upload Files.
Browse to the file on your PC that you want to convert from PDF or image to text. Click the Open button to upload the file.
The document is now in your Google Drive. Right-click on the document and click on Open with > Google Docs.
Google converts your PDF or image file to text with OCR and opens it in a new Google document. The text is editable and you can correct the parts where the OCR failed to read it right.
You can download the finetuned documents in the multiple formats Google Drive supports. Choose from File > Download as menu.
The Free OCR Software You Can Pick
Though the free tools were adequate with printed text, they failed with normal cursive handwritten text. My personal preference for offhand OCR use leans towards Microsoft OneNote because you can make it a part of your note-taking workflow. Photo Scan is a Windows Store universal app, and it supports line breaks with the range of document formats you can save to.
Do you have a vast library of TV shows, movies, and music saved locally? If so then you probably need an efficient way to manage all your content. Alternatively, you might be looking for legal ways to access on-demand video and live television. Perhaps you even want to cast the media to different screens around your home.
If these scenarios describe your situation, you have two choices from a software perspective: Plex or Kodi. We have previously explained how to set up and use Plex, but this guide will focus on how to use its great rival, Kodi.
Read on to learn how to install the Kodi software, how to navigate through the initial setup, and how to load repos and add-ons.
What Is Kodi and How Do You Use It?
Kodi is best described as a home theater app. It began life back in 2002 as the Xbox Media Player, and quickly evolved into the Xbox Media Center (XBMC). It finally transformed into Kodi in 2014.
Arguably, Kodi’s most significant selling point is that it is open-source. Because it’s open-source, a vast community of programmers and developers has built up around the app. If you’re a skilled coder, you can even make changes to the source code yourself.
The community is responsible for all the good stuff the app offers. Without your input, Kodi is an entirely underwhelming shell and provides nothing beyond the interface.
Let’s stress that again because Kodi newbies often overlook it: if you don’t have any locally saved media, and you don’t have any interest in learning how to use repos and add-ons, you don’t need Kodi. No media is included in the app.
Lastly, be aware that Kodi’s customizability comes at a cost. It requires a lot of user input to make the app run the way you want it to, and it necessitates more effort to keep everything working as time goes by. If you want a plug-and-play app, Plex might be a better choice.
How to Set Up Kodi
Kodi is available on Windows, macOS, Linux, Android (mobile and TV), iOS, and Raspberry Pi.
If you’re running the app on a desktop machine or Android, you just need to grab the app from either the website or the associated app store. Windows users can also use the Windows Store version, while Android can download the APK file and sideload the app. Sideloading will make it more difficult to update the app, however, so we recommend using the Play Store method.
If you want to install Kodi on iOS, the situation is a lot more complicated.
Kodi is not available in the Apple App Store. Instead, you need to compile an app using XCode. To get started, you need iOS 10.9 or higher, a copy of Kodi’s DEB file, XCode 7 or higher, an iOS app signer, and an Apple ID.
The process is quite complex and not suitable for beginners. Given its complexity, it is beyond the scope of this guide. But don’t worry, we’ve explained how to install Kodi on iOS if you need help.
It’s also possible to install Kodi on iOS by using Cydia on a jailbroken device, but many users don’t want to risk voiding their warranty. However, if you have an older iOS gadget that you’re willing to take a few risks with, it’s certainly the easier approach.
For the other platforms, just get the installation file and follow the on-screen instructions. You will have Kodi running on your device in minutes.
Hopefully, you’re now looking at Kodi’s main interface. But there’s no content there, no setup wizard, and no hint of how to use add-ons and repos.
We’re going to explain everything, but let’s get some basics out of the way first.
On the left-hand side of your screen, you will see shortcuts for all the different media classes. They are Movies, TV shows, Music, Music videos, TV, Radio, Add-ons, Pictures, Videos, Games, and Weather. If you’re not planning to use all the shortcuts, you can remove some by heading to Settings > Skin settings > Main menu items and sliding the appropriate toggles into the Off position.
Controlling Kodi
As you use Kodi more, you will probably find it’s easier to navigate through the app using your keyboard rather than your mouse.
There are more than 100 different keyboard shortcuts you can use. Some even perform different functions depending on what’s on the screen. For example, Page Down will skip to the previous queued video (or previous chapter) if you’re watching a video but will decrease the rating of a song if you’re listening to audio.
Nonetheless, there are some important keyboard shortcuts that all users should know about. Here are some of the most common:
F9 or –: Volume Down
F10 or +: Volume Up
Spacebar or P: Play / Pause
X: Stop
F: Fast Forward
R: Rewind
Leftarrow: Jump back 30 seconds
Rightarrow: Jump forward 30 seconds
I: Show information about the currently playing video
T: Turn subtitles on or off
Note: You can use a keymap editor add-on to change which keys perform which function. Advanced users can also change the shortcuts by editing the userdata file.
Adding Your Media to Kodi
If you’re just starting your Kodi journey, there are probably three forms of media that your keen to add to the app as soon as possible: videos, music, and photos.
We’re going to look at each one individually.
Adding Videos to Kodi
Kodi is a supremely powerful app which skilled users can force to perform all manner of tricks. However, for the vast majority of users, the principal reason for installing the software is to watch videos.
If you want to maximize the enjoyment of watching videos on Kodi, there is an exact process you need to follow.
Prepare Your Video Files
Preparing your video files is crucial because Kodi uses scrappers to search for the appropriate metadata for your videos. Metadata includes artwork, synopses, show/movie descriptions, season numbers, episode numbers, cast lists, directors, and a whole lot more.
This data isn’t essential to being able to watch your videos through Kodi, but it’s the only way to build your library into a vibrant and dynamic list.
So, if you’re naming a TV show, place the files in the following folder structure:
/Show Name/Season XX/ (for example, Friends/Season 05)
For single episodes, name each file as sXXeYY, and for multiple episodes, name the file as sXXeYY-eYY. For example, S05E02.
Specials should be put into the following folder structure:
/Show Name/Specials/
Movie files can either be saved as standalone files or each saved in their own sub-folder. Use the following structure for the movie file itself:
[Movie Name] (Year) (for example, The Hurt Locker (2008))
Therefore, the folder tree should look like either Movies/ The Hurt Locker (2008).mp4 or Movies/The Hurt Locker (2008)/The Hurt Locker (2008).mp4.
If your content is a disorganized mess, you could try using FileBot. It’s a TV show and movie renamer; it’ll scan online databases and do all the hard work on your behalf. However, FileBot does cost $19.99.
Note: You should keep your movie and TV shows in separate folder trees.
Add Your Videos
Now it’s time to add your video files into Kodi.
To begin, select Videos from the menu on the left-hand side of Kodi’s homescreen. On the next screen, choose Files. Finally, click on Add videos.
Now you need to add the video source. “Source” is a word you will come across frequently while using Kodi. It can refer to many different things. In this case, it just means you need to select the folder on your hard drive when you have saved your video files.
You can give your source a name. Typically, you should name it Movies, TV Shows, Home Videos, or something else that’s similarly descriptive.
Now you need to tell Kodi what type of videos are in the source folder. It will allow Kodi to scan the correct online database for metadata. It uses TheTVDB for TV-based metadata and TheMovieDB for film information.
On the final screen, you can set some additional options. They include how frequently Kodi will scan the folder for new content and some movie naming conventions. When you’re ready, hit OK and Kodi will start importing your content. If you have hundreds of TV episodes and movies to watch on Kodi, the process might take a long time.
Repeat the above steps for each type of video content you want to add.
Adding Music to Kodi
Once your video collection is up and running, it’s time to turn your attention to your music library.
Prepare Your Music Files
Like with video files, if you want Kodi to find the metadata relating to your music, you need to prepare your music collection before you can add it.
Kodi uses the open-source MusicBrainz database for music tagging. The database includes more than 1.2 million artists, 1.8 million albums, and 17.5 million songs.
Luckily, MusicBrainz provides a free desktop app that can automatically tag all the music on your behalf. You can download it for free on Windows, Mac, and Linux.
If MusicBrainz cannot correctly tag your music, you can do it yourself. The file tree of your music needs to follow the Artist > Album > Song structure. For example, Michael Jackson > Thriller > Billie Jean.
Correctly tagging all your music is a painstaking process. But when you’ve finally finished, you’re ready to add your music collection into the Kodi app.
Adding music to your library is a two-part process. Firstly, you need to scan your collection so Kodi can import it. Secondly, you need to scrape your library for additional information. You must finish the first step before you can move on.
To start the scanning process, you need to tell Kodi where your music collection is saved on your hard drive. Go to the Kodi home screen and click on Music in the menu on the left-hand side of the screen. On the next screen, go to Files > Add music. Click on Browse and choose the folder when your music is located.
Now give your music collection a name. If you’re going to import multiple collections, choose something recognizable.
On the next screen, Kodi will ask whether you want to add your media source to the library. Click on Yes and the app will start scanning.
Again, if you have an extensive collection, this process could take a while.
Next, it’s time to scrape your collection for additional information. The additional data comes in many forms: it could include artist style, the formation date of a band, the theme of an album, or even the date and location where the artist died.
To scrape more information, start by clicking on Music on the Kodi home screen. On the next screen choose Artists. Right-click on any artist name to pull up the context menu and select Query info for all artists to start the scrape.
The scraping process could take many hours to finish. It will cover about 300 artists per hour. When it’s complete, you should run it for a second time to make sure any “server busy” responses are fixed.
Adding Photos to Kodi
You will be pleased to learn that adding photos and pictures to Kodi requires much less preparation and time than adding music or video files.
To add a folder of photos, select Pictures from the menu on the left-hand side of the Kodi home screen. On the next screen, choose Add pictures.
A new window will pop up. Click on Browse and point to the folder which contains the images you want to add. When you’re ready, click on OK.
Kodi offers a few features to make viewing pictures more enjoyable. They include a slideshow, a randomizer, and zoom.
Using Kodi Add-Ons and Repos
The other big part of using Kodi is the vast catalog of repos and add-ons. They enable you to access on-demand services as well as some live TV on Kodi and live news on Kodi. You can also find add-ons for non-video content such as weather tickers, context menus, skins, and even mini-programs.
When you’re installing add-ons and repos, please ensure the content you’re watching is legal in your area. Kodi has developed an unfortunate reputation as being a haven for pirates and copyright thieves over the last few years. Authorities in both North America and Europe are starting to put end users in their crosshairs.
A repo (or repository) is a library of add-ons. The add-ons themselves are what allow you to access and watch content. You need to add a repo before you can install an add-on.
Kodi offers an official repo, but you can also find many third-party repos from people who create their own add-ons. The Kodi repo is included in the app automatically.
Sadly, given the recent clampdown on Kodi by the authorities, many once-popular repos have disappeared for good. It’s no longer possible to direct you to “must-have” repos because the situation is so fluid. We can, however, explain how to add repos.
Using the Official Kodi Repo
The official Kodi repo contains loads of add-ons, and many users won’t even need to consider using third-party repos. Available add-ons include BBC iPlayer, Pluto TV, Crackle, SoundCloud, Arte TV, Bravo, BT Sport, and the Disney Channel. Most importantly, all of the add-ons in the official repo are entirely legal.
To browse the official repo from within the Kodi app, select Add-ons from the left-hand side of the Kodi home screen. On the next screen, click on Download (again, on the left-hand side of the screen).
You will now see a list of add-on categories. You can click on any of them to see what’s available. In the image below, you can see the list of video add-ons.
To install an add-on, click on the name of the item in question and choose Install. Once the process is finished, you can launch the add-on from the relevant section of the Kodi home screen.
Before you can install a third-party repo, you will need to do some research online. You cannot simply browse a list of repos from within Kodi.
When you’ve located a repo you want, download its ZIP file onto your hard drive.
Now, head to your Kodi app and navigate to Settings > System > Add-ons. Mark the checkbox next to Unknown Sources.
To install the ZIP file, follow the step-by-step instructions below:
Click on Add-ons on the Kodi home screen.
In the top left-hand corner, click on the box icon.
A new screen will pop up. Select Install from ZIP file.
Use the browser window to point Kodi at the ZIP file.
Highlight the ZIP file you want to install and click on OK.
Installing an Add-On From a Third-Party Repo
The add-ons from any third-party repos will be mixed together if you go to Add-ons > Download > [Category]. However, it’s possible only to see add-ons from a particular repo. It makes it much easier to find add-ons you want to install.
To see add-ons from a specific repo, go to the Kodi home screen and click on Add-ons. Next, in the top left-hand corner, click on the box icon.
A new list of options will pop up. Click on Install from repo, and finally, click on the name of the repo you want to browse. To install an add-on, click on its name and choose Install.
Troubleshooting Kodi
As with any app, things can occasionally go wrong.
Excessive Buffering
You can’t do much about buffering on live TV you’re streaming, but buffering issues on locally saved media and on-demand video are quite straightforward to cure.
Usually, the cache causes the issue. Specifically, the amount of memory the cache can use. You can change the cache settings by tweaking the Advanced Settings file.
A Black and White Screen When Playing Video on Windows
DirectX is often responsible. Either you don’t have it installed, or you’re running a very old version. Grab the latest copy of the software from the Microsoft website.
Audio Delay Issues on Android
The Android version of Kodi is notorious for audio sync issues. If updating your app does not help, you can adjust the delay manually by going to Audio Options > Audio offset while a video is playing.
Other Solutions
No matter what issue you encounter, there are some tried-and-tested steps you can take that frequently make the problem go away.
Updates: Always make sure both the Kodi app and any add-ons you’re using are running the latest version.
Delete recently installed repos and add-ons: Sometimes the code in add-ons can interfere with other add-ons or the Kodi app itself.
Have You Got Kodi Working?
This guide should be enough to get everyone up and running on the Kodi app. To recap, we’ve covered the essential parts of the app, including the initial setup, adding your videos, music, and photos, and installing add-ons and repos.
With tons of information besieging your brain every second, it’s hard to stay focused on just one task. This is especially the case when other opportunities are tempting, more fun, and promise instant gratification.
You have dozens of ways to fight these temptations, including meditation and time management techniques. Another great way to ward them off is with software tools. Check out these six Mac apps that will help you beat distractions.
1. Focus
Have you ever found yourself browsing drone accessories on Amazon when you don’t even have a drone? This always seems to happen when you have a report due in two hours.
It’s hard to resist procrastination when there’s a legion of social media sites, messengers, and online stores just waiting to steal your attention. Focus for Mac is a digital slap on the wrist, blocking these time-wasters so you can concentrate.
Focus blocks all social media platforms and a bunch of other websites for 10-minute time slots. You can set your own schedules, remove links from the list, add your own, and add distracting apps. Focus will prevent the apps from launching, and will replace the websites with inspirational quotes that essentially say “get back to work, you slacker.”
Even if you’re trying to work on one task at a time, you likely have several windows open on your Mac. These include your browser, your music app, the Mail app, maybe Messages… And with a big display, these numerous windows are always in sight, overwhelming and distracting you.
HazeOver helps you focus on whatever you’re doing at the moment by highlighting your active window and dimming all the rest. You can adjust the color and intensity of the dimmed background to ease the load on your eyes when you’re working at night. Plus, you can set the app to focus on the active screen when you’re using multiple monitors.
Whether you write for a living, for college, or for self-expression, it can be an uphill battle. And when you’re struggling to put your thoughts on paper, your brain starts looking for sweet escape elsewhere—like in those 18 browser tabs begging you to click on them.
Focused takes all distractions out of the way, leaving you with a blank sheet of paper and hardly any settings. You format your writing with Markdown syntax, so not even toggles and controls will steal your attention. And when you’re done, it’s easy to export your work as an RTF, PDF, or HTML file.
It’s hard to stay on task for two hours straight, but 25 minutes doesn’t sound so bad.
A popular technique for working without distractions is breaking your workflow into 25-minute slots, with short breaks after each and a longer break after four sessions. It’s known as the Pomodoro Technique, and it originally used a low-tech physical timer.
Now, of course, there’s an app for that. Be Focused is a timer that opens in your menu bar. All you need to do is enter the name of your task and hit a button. The timer will let you know when it’s time to take a break, then remind you when you should go back to work. You can set the duration and number of your intervals and breaks. At the end of the day, you’ll see a list of tasks you’ve worked on.
The free version covers the basics, but there’s also a Pro version that syncs with your iOS devices and doesn’t have ads.
Download:Be Focused (Free, $5 premium version available)
5. Noizio
If you’re anything like me, you’re easily distracted by noise. Unfortunately, silence isn’t always an option. So next time that guy from sales starts talking sports right by your desk, just open Noizio and tune him out.
Noizio is a simple app packed with ambient sounds you can play in the background. From chirping birds to calming rain, it has all kinds of relaxing noises to get you in the zone. You can even play a few at a time, adjusting the volume for each sound individually.
And when you end up with a mix you particularly like—say, Kitten Purr with a dash of Campfire—you can give it a name and save it for later.
None of the apps above seem to help? It’s time to bring out the big guns.
Like Focus, the free version of Cold Turkey can block distracting websites, but its Pro version goes even further. It allows you to block specific URLs, Google searches, and even (gasp!) the entire internet. Moreover, if you need to get some work done that doesn’t involve your Mac, you can lock yourself out of it for a set period of time.
Cold Turkey comes with a whole range of tools for staying more focused. These include a block scheduler, daily allowance for websites, your usage statistics, and a password to protect your settings.
Download:Cold Turkey (Free, premium version available)
Bonus Tip: Create a Separate User Account in Chrome
You’ve blocked every time-wasting site you could think of, dimmed unneeded windows, and it’s finally time to nail that report. You open a new browser tab with every intention of going to Google Sheets, and… Oh look, there’s that article you bookmarked for later!
Here’s a bonus tactic for your battle against distractions: if your job involves using a browser, create custom Chrome profiles for work and for play. That way you can have a separate profile with work-only bookmarks, search history, and browsing history. And all the travel deal websites, YouTube comedy channels, and other time killers will stay in your personal profile.
More Tips for a Distraction-Free Mac
Now that you’ve geared up your Mac for distraction-free work, take a closer look at macOS itself. Macs come with features you may not even know of, and many of them are effective for cutting down distractions. With these simple macOS tweaks that help you stay focused, you’ll make better use of your time and your Mac.
Norway is the first country to celebrate Mother’s Day on the second Sunday in February. While Indonesia celebrates Mother’s Day on 22 December every year. In most of the world, however, including the United States, Mother’s Day falls on the second Sunday in May.
We’ll assume you’re buying your mom a card and a gift, and maybe taking her out for dinner. If you want to give your mom a Mother’s Day to remember, why not send her one of these Mother’s Day Spotify playlists as well? They’re packed full of songs for moms.
The obvious place to start our list is with Spotify’s own Mother’s Day Love playlist. As the name suggests, it has been curated with the aim of providing the perfect backdrop to the day itself.
Many of the songs on the playlist are loosely connected to the theme of motherhood, with tracks like “Superwoman” by Alica Keys, “A Song for Mama” by Boyz II Men, “Somebody’s Hero” by Jamie O’Neal, and “The Mother” by Brandi Carlile..
In total, the playlist has 29 songs and lasts for 1 hour, 54 mins.
Yes, we know that strictly this playlist is for listening to at weddings, but it’s a great playlist for Mother’s Day too. As you’d expect, they are all songs that underscore the special mother-son bond. Make sure you’ve got a pack of tissues handy!
Meritage Entertainment is the creator. It has opted to include music like Elton John’s “Your Song,” Celine Dion’s “Because You Loved Me,” and Rod Stewart’s “Forever Young”.
It’s quite a short playlist—just 21 songs—but it’s a good’un. It’ll last for 1 hour, 28 mins.
Are you heading out for a big family lunch on Mother’s Day? If you are, you’re going to need something to sing along to on the way there.
Spotify has created this awesome Mother-Daughter Car Ride playlist which fits the bill perfectly. It’s packed with upbeat pop songs that are ideal for belting out at untold volumes.
Artists in the list include Whitney Houston, Katy Perry, Sixpence None the Richer, and The Bangles. Female vocalists dominate, but there are some male singers in there as well.
How I Met Your Mother was a TV ratings hit for almost a decade after it first went on air in 2005. For those who aren’t aware, the series followed a group of friends in New York City as the chief character—Ted Mosby—regales the story to his kids about how he met their mother.
The romantic comedy is filled with emotional moments, and this playlist includes all the music that’s playing during those iconic scenes.
Who knows—it might even make your dad relive the story of how he met your mother (if you even want to know!).
The list of songs includes tracks such as Nada Surf’s “Inside of Love”, “I Do, I Do” by Charlie Mars, and “You Don’t Know Me” by Michael Bublé. There are 44 songs in total.
What about taking your mom on a journey back to when you were a little kid? For lots of moms, that can only mean one thing—lots and lots of Disney movies.
If you’re the type of kid who forced your mother to rewatch Toy Story dozens of times, this official Disney Hits playlist will transport her back in time in an instant.
With 67 songs on the playlist, all the hits from many of Disney greatest stories are included. You can listen to music from The Lion King, Dumbo, The Little Mermaid, Aladdin, Beauty and the Beast, Pocahontas, and more.
Just promise us that you’ll do your mom a favor and not listen to it on repeat!
Spotify’s other big in-house Mother’s Day playlist is called Love for Mother’s Day. It’s not as popular as Mother’s Day Love (5,000 followers vs. 17,000 followers), but it’s more varied, has more songs (51 vs. 29), and is longer (3 hours, 17 mins in total).
Instead of trying to force in titles that have a vague connection to being a mother, the Love for Mother’s Day appears to be more focused on good music that’s popular among Spotify’s userbase of mothers.
The tunes are generally slower and more melodic. Example artists include Matthew West, Amy Grant, Leona Lewis, and Carrie Underwood.
Probably the most common gift on Mother’s Day is a bedazzling bouquet of flowers. Coincidently, flowers tend to bloom in the spring, which is also the season in which Mother’s Day falls in most of the world.
That all means that Spotify’s Acoustic Spring playlist is another perfect soundtrack for Mother’s Day. It’s calm and tranquil, includes acoustic versions of some well-known songs, and the playlist’s artwork is a flower bouquet. What more could you want? This is the playlist you should fire up while taking your mom some breakfast in bed.
Artists on the 59-song playlist include Blanco White, Nick Mulvey, Mipso, and Tom West.
After dinner, it’s time to unwind with a bit of fun, and what better playlist to accompany that downtime that an ensemble of girl power anthems for your mom to rock out to?
Unlike the other Mother’s Day music that we have introduced you to, this playlist leans more towards modern tracks. There are artists like Lady Gaga, Meghan Trainor, Pink, Carly Rae Jepsen, The Pussycat Dolls, and Ellie Goulding. Which makes it perfect for younger mothers.
There are 30 songs in total, and the playlist lasts for almost two hours. Which should be more than enough time for everyone to lose their voices.
Other Ways to Celebrate Mother’s Day
These Mother’s Day Spotify playlists should help to make sure you’ve got the soundtrack to Mother’s Day nailed down. But music is just one part of the equation of creating the perfect Mother’s Day for your mom.
The FCC has proposed to deny an application from China Mobile, a state-owned telecom, to provide interconnect and mobile services here in the U.S., citing security concerns. It’s another setback to the country’s attempts to take part in key portions of American telecommunications.
China Mobile was essentially asking to put call and data interconnection infrastructure here in the U.S.; It would have come into play when U.S. providers needed to connect to Chinese ones. Right now the infrastructure is generally in China, an FCC spokesperson explained on a press call.
In a draft order that will be made public tomorrow and voted on in May, FCC Chairman Ajit Pai moves to deny the application, which has been pending since 2011. Such applications by foreign-owned entities to build and maintain critical infrastructure like this in the U.S. have to pass through the Executive, which only last year issued word that it advised against the deal.
In the last few months, the teams at the FCC have reviewed the record and came to the conclusion that, as Chairman Ajit Pai put it:
It is clear that China Mobile’s application to provide telecommunications services in our country raises substantial and serious national security and law enforcement risks. Therefore, I do not believe that approving it would be in the public interest.
National security issues are of course inevitable whenever a foreign-owned company wants to be involved with major infrastructure work in the U.S., and often this can be taken care of with a mitigation agreement. This would be something like an official understanding between the relevant parties that, for instance, law enforcement in the U.S. would have access to data handled by the, say, German-owned equipment, and German authorities would alert U.S. about stuff it finds, that sort of thing.
But that presupposes a level of basic trust that’s absent in the case of a company owned (indirectly but fully) by the Chinese government, the FCC representative explained. It’s a similar objection to that leveled at Huawei, which given its close ties to the Chinese government, the feds have indicated they won’t be contracting with the company for infrastructure work going forward.
The denial of China Mobile’s application on these grounds is apparently without precedent, Pai wrote in a separate note: “Notably, this is the first time the Executive Branch has ever recommended that the FCC deny an application due to national security concerns.”
It’s likely to further strain relations between our two countries, though the news likely comes as no surprise to China Mobile, which probably gave up hope some time around the third or fourth year its application was stuck in a bureaucratic black hole.
The draft order will be published tomorrow, and will contain the evidence and reasoning behind the proposal. It will be voted on at the FCC open meeting on May 9.
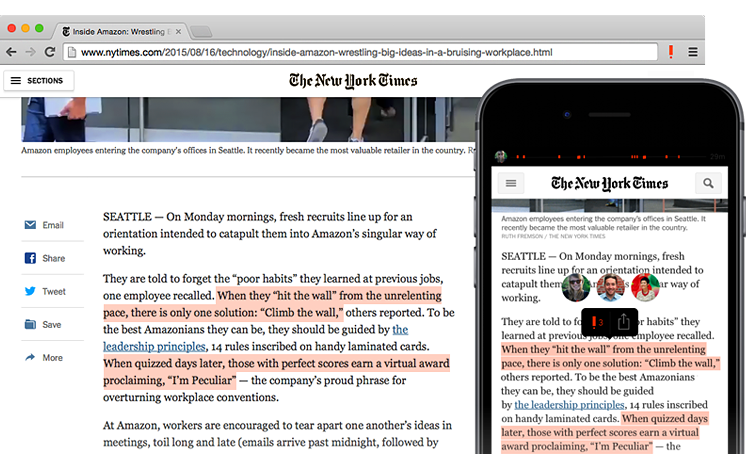
Quotes from articles are much more eye-catching than links on Twitter, so the social giant is scooping up the team behind highlight sharing app Highly. This talent could help Twitter build its own version of Highly or develop other ways to excerpt the best content from websites and get it into the timeline.
Twitter confirmed to TechCrunch that the deal was an acquihire, and a spokesperson provided this statement: “We are excited to welcome the Highly team to Twitter. Their expertise will accelerate our product and design thinking around making Twitter more conversational.” We’ve asked about what data portability options Highly will offer.
Highly will shut down its iOS and Slack app on April 26th, though it promises that “No highlights will be harmed”. It’s also making its paid “Crowd Control” for private highlight sharing plus Highly For Teams free in the meantime.
“Social highlights can make sharing stories online feel personal, efficient and alive — like retelling a story to a friend, over coffee. They give people shared context and spark meaningful conversations” the Highly team writes.
Quotes can make the difference between someone breezing past a link they don’t want to leave Twitter to explore, and getting a peek at what’s smart about an article so they know if it’s worth diving deeper. Many people use OneShot to generate Twitter-formatted screenshots of posts. But Highly lets you just rub your finger over text to turn it into an image with a link back to the article for easy tweeting. You could also search an archive of your past highlights, and follow curators who spot the best quotes. Its browser extensions and native app let you highlight from wherever your read.
“Sharing highlights, not headlines — sharing thinking instead of lazily linking — helps spark the kind of convrsation that leaves participants and observers alike a bit better off than they started. We’d like to see more of this” the Highly teams writes. That’s why it’s joining Twitter to work on improving conversation health. Founded in 2014, Highly had raised a seed round in 2017.
Quotes from articles are much more eye-catching than links on Twitter, so the social giant is scooping up the team behind highlight sharing app Highly. This talent could help Twitter build its own version of Highly or develop other ways to excerpt the best content from websites and get it into the timeline.
Twitter confirmed to TechCrunch that the deal was an acquihire, and a spokesperson provided this statement: “We are excited to welcome the Highly team to Twitter. Their expertise will accelerate our product and design thinking around making Twitter more conversational.” We’ve asked about what data portability options Highly will offer.
Highly will shut down its iOS and Slack app on April 26th, though it promises that “No highlights will be harmed”. It’s also making its paid “Crowd Control” for private highlight sharing plus Highly For Teams free in the meantime.
“Social highlights can make sharing stories online feel personal, efficient and alive — like retelling a story to a friend, over coffee. They give people shared context and spark meaningful conversations” the Highly team writes.
Quotes can make the difference between someone breezing past a link they don’t want to leave Twitter to explore, and getting a peek at what’s smart about an article so they know if it’s worth diving deeper. Many people use OneShot to generate Twitter-formatted screenshots of posts. But Highly lets you just rub your finger over text to turn it into an image with a link back to the article for easy tweeting. You could also search an archive of your past highlights, and follow curators who spot the best quotes. Its browser extensions and native app let you highlight from wherever your read.
“Sharing highlights, not headlines — sharing thinking instead of lazily linking — helps spark the kind of convrsation that leaves participants and observers alike a bit better off than they started. We’d like to see more of this” the Highly teams writes. That’s why it’s joining Twitter to work on improving conversation health. Founded in 2014, Highly had raised a seed round in 2017.
Posted by Andrew Poon, Senior Software Engineer and Dhyanesh Narayanan, Product Manager, Google AI Perception
Deep neural networks (DNNs) have demonstrated remarkable effectiveness in solving hard problems of practical relevance such as image classification, text recognition and speech transcription. However, designing a suitable DNN architecture for a given problem continues to be a challenging task. Given the large search space of possible architectures, designing a network from scratch for your specific application can be prohibitively expensive in terms of computational resources and time. Approaches such as Neural Architecture Search and AdaNet use machine learning to search the design space in order to find improved architectures. An alternative is to take an existing architecture for a similar problem and, in one shot, optimize it for the task at hand.
Here we describe MorphNet, a sophisticated technique for neural network model refinement, which takes the latter approach. Originally presented in our paper, “MorphNet: Fast & Simple Resource-Constrained Structure Learning of Deep Networks”, MorphNet takes an existing neural network as input and produces a new neural network that is smaller, faster, and yields better performance tailored to a new problem. We've applied the technique to Google-scale problems to design production-serving networks that are both smaller and more accurate, and now we have open sourced the TensorFlow implementation of MorphNet to the community so that you can use it to make your models more efficient.
How it Works
MorphNet optimizes a neural network through a cycle of shrinking and expanding phases. In the shrinking phase, MorphNet identifies inefficient neurons and prunes them from the network by applying a sparsifying regularizer such that the total loss function of the network includes a cost for each neuron. However, rather than applying a uniform cost per neuron, MorphNet calculates a neuron cost with respect to the targeted resource. As training progresses, the optimizer is aware of the resource cost when calculating gradients, and thus learns which neurons are resource-efficient and which can be removed.
As an example, consider how MorphNet calculates the computation cost (e.g., FLOPs) of a neural network. For simplicity, let's think of a neural network layer represented as a matrix multiplication. In this case, the layer has 2 inputs (xn), 6 weights (a,b,...,f), and 3 outputs (yn; neurons). Using the standard textbook method of multiplying rows and columns, you can work out that evaluating this layer requires 6 multiplications.
Computation cost of neurons.
MorphNet calculates this as the product of input count and output count. Note that although the example on the left shows weight sparsity where two of the weights are 0, we still need to perform all the multiplications to evaluate this layer. However, the middle example shows structured sparsity, where all the weights in the row for neuron yn are 0. MorphNet recognizes that the new output count for this layer is 2, and the number of multiplications for this layer dropped from 6 to 4. Using this idea, MorphNet can determine the incremental cost of every neuron in the network to produce a more efficient model (right) where neuron y3 has been removed.
In the expanding phase, we use a width multiplier to uniformly expand all layer sizes. For example, if we expand by 50%, then an inefficient layer that started with 100 neurons and shrank to 10 would only expand back to 15, while an important layer that only shrank to 80 neurons might expand to 120 and have more resources with which to work. The net effect is re-allocation of computational resources from less efficient parts of the network to parts of the network where they might be more useful.
One could halt MorphNet after the shrinking phase to simply cut back the network to meet a tighter resource budget. This results in a more efficient network in terms of the targeted cost, but can sometimes yield a degradation in accuracy. Alternatively, the user could also complete the expansion phase, which would match the original target resource cost but with improved accuracy. We'll cover an example of this full implementation later.
Why MorphNet?
There are four key value propositions offered by MorphNet:
Targeted Regularization: The approach that MorphNet takes towards regularization is more intentional than other sparsifying regularizers. In particular, the MorphNet approach to induce better sparsification is targeted at the reduction of a particular resource (such as FLOPs per inference or model size). This enables better control of the network structures induced by MorphNet, which can be markedly different depending on the application domain and associated constraints. For example, the left panel of the figure below presents a baseline network with the commonly used ResNet-101 architecture trained on JFT. The structures generated by MorphNet when targeting FLOPs (center, with 40% fewer FLOPs) or model size (right, with 43% fewer weights) are dramatically different. When optimizing for computation cost, higher-resolution neurons in the lower layers of the network tend to be pruned more than lower-resolution neurons in the upper layers. When targeting smaller model size, the pruning tradeoff is the opposite.
Targeted Regularization by MorphNet. Rectangle width is proportional to the number of channels in the layer. The purple bar at the bottom is the input layer. Left: Baseline network used as input to MorphNet. Center: Output applying FLOP regularizer. Right: Output applying size regularizer.
MorphNet stands out as one of the few solutions available that can target a particular parameter for optimization. This enables it to target parameters for a specific implementation. For example, one could target latency as a first-order optimization parameter in a principled manner by incorporating device-specific compute-time and memory-time.
Topology Morphing: As MorphNet learns the number of neurons per layer, the algorithm could encounter a special case of sparsifying all the neurons in a layer. When a layer has 0 neurons, this effectively changes the topology of the network by cutting the affected branch from the network. For example, in the case of a ResNet architecture, MorphNet might keep the skip-connection but remove the residual block as shown below (left). For Inception-style architectures, MorphNet might remove entire parallel towers as shown on the right.
Left: MorphNet can remove residual connections in ResNet-style networks. Right: It can also remove parallel towers in Inception-style networks.
Scalability: MorphNet learns the new structure in a single training run and is a great approach when your training budget is limited. MorphNet can also be applied directly to expensive networks and datasets. For example, in the comparison above, MorphNet was applied directly to ResNet-101, which was originally trained on JFT at a cost of 100s of GPU-months.
Portability: MorphNet produces networks that are "portable" in the sense that they are intended to be retrained from scratch and the weights are not tied to the architecture learning procedure. You don't have to worry about copying checkpoints or following special training recipes. Simply train your new network as you normally would!
Morphing Networks
As a demonstration, we applied MorphNet to Inception V2 trained on ImageNet by targeting FLOPs (see below). The baseline approach is to use a width multiplier to trade off accuracy and FLOPs by uniformly scaling down the number of outputs for each convolution (red). The MorphNet approach targets FLOPs directly and produces a better trade-off curve when shrinking the model (blue). In this case, FLOP cost is reduced 11% to 15% with the same accuracy as compared to the baseline.
MorphNet applied to Inception V2 on ImageNet. Applying the flop regularizer alone (blue) improves the performance relative to baseline (red) by 11-15%. A full cycle, including both the regularizer and width multiplier, yields an increase in accuracy for the same cost (“x1”; purple), with continued improvement from a second cycle (“x2”; cyan).
At this point, you could choose one of the MorphNet networks to meet a smaller FLOP budget. Alternatively, you could complete the cycle by expanding the network back to the original FLOP cost to achieve better accuracy for the same cost (purple). Repeating the MorphNet shrink/expand cycle again results in another accuracy increase (cyan), leading to a total accuracy gain of 1.1%.
Conclusion
We’ve applied MorphNet to several production-scale image processing models at Google. Using MorphNet resulted in significant reduction in model-size/FLOPs with little to no loss in quality. We invite you to try MorphNet—the open source TensorFlow implementation can be found here, and you can also read the MorphNet paper for more details.
Acknowledgements This project is a joint effort of the core team including: Elad Eban, Ariel Gordon, Max Moroz, Yair Movshovitz-Attias, and Andrew Poon. We also extend a special thanks to our collaborators, residents and interns: Shraman Ray Chaudhuri, Bo Chen, Edward Choi, Jesse Dodge, Yonatan Geifman, Hernan Moraldo, Ofir Nachum, Hao Wu, and Tien-Ju Yang for their contributions to this project.
Thomas Kurian, the newly-minted CEO of Google Cloud, used the company’s Cloud Next conference last week to lay out his vision for the future of Google’s cloud computing platform. That vision involves, in part, a hiring spree to give businesses that want to work with Google more people to talk to and get help from. Unsurprisingly, Kurian is also looking to put his stamp on the executive team, too, and today announced that former SAP executive Robert Enslin is joining Google Cloud as its new President of Global Customer Operations.
Enslin’s hire is another clear signal that Kurian is focused on enterprise customers. Enslin, after all, is a veteran of the enterprise business, with 27 years at SAP, where he served on the company’s executive board until he announced his resignation from the company earlier this month. After leading various parts of SAP, including as president of its cloud product portfolio, president of SAP North America and CEO of SAP Japan, Enslin announced that he had “a few more aspirations to fulfill.” Those aspirations, we now know, include helping Google Cloud expand its lineup of enterprise customers.
“Rob brings great international experience to his role having worked in South Africa, Europe, Asia and the United States—this global perspective will be invaluable as we expand Google Cloud into established industries and growth markets around the world,” Kurian writes in today’s announcement.
For the last two years, Google Cloud already had a President of Global Customer Operations, though, in the form of Paul-Henri Ferrand, a former Dell exec who was brought on by Google Cloud’s former CEO Diane Greene. Kurian says that Ferrand “has decided to take on a new challenge within Google.”