13 April 2019

How to Design the Perfect Cover Letter Using Canva


design-cover-letter

When you’re searching for a job there are few things more time-consuming than creating a cover letter. It’s crucial to craft a well-written cover letter that can stand out from the crowd.

But how do you make your cover letter look beautiful? How can you avoid the human resources slushpile? In this article we show you how to create the perfect cover letter using Canva.

Step 1: Where Should You Use a Cover Letter?

Create a Cover Letter With Canva Where You Should Use One

The first thing to keep in mind is that the job market is changing.

When you’re applying for a job online, large companies will usually have you fill out a form where your cover letter is limited to plain text.

Sometimes you’ll need to send your resume via email, and when you do it’s best to put your letter in the body of the email.

In both of these cases, a cover letter is not necessary. But when you drop off a resume in person or a company allows you to attach a PDF, that’s where a good design works well.

To create a cover letter using Canva, log into your account. Under “What would you like to design?” type in “cover letter”.

Pick the option Letterhead or Letter. For this tutorial I’m going to choose Letterhead.

Step 2: Find a Template Style

Create a Cover Letter With Canva Your Personal Workspace

Once you’re in your workspace you’ll see a blank page and a list of letterhead templates. If you’ve read our tutorial detailing how to find the perfect resume on Canva, you’ll be familiar with this step.

In that tutorial we created a resume for a woman who was applying to a modern baking company. Let’s say we want to create a cover letter that matches her resume.

To do this, click the Personal Letterhead option. In there you will find the templates best suited for this purpose.

Create a Cover Letter With Canva Personal Letterhead

Once there, start browsing.

The design we’ve picked looks nothing like the modern bakery resume, but it does have potential because of its line elements and simple layout. Let’s go with that.

There’s a lot of text on a cover letter, and some of it can be really small.

Right now I’m zoomed out to see my entire page, but what if that’s too small a size to work with?

To zoom in, click on the zoom tool in the bottom right-hand corner of your workspace. Choose the size that works for you.

Step 3: Change the Background

Create a Cover Letter With Canva Change Background Color

Next, we’re going to change the background color of the cover letter.

Make sure you have the entire document selected. Click on the color swatch icon in the top left-hand corner of your screen. Your swatches panel will pop up.

Choose your new color.

Step 4: Change the Color of Your Elements

Create a Cover Letter With Canva Change Element Color

After you change your background, we’ll need to fix the visual elements of this cover letter to make them match the resume.

The first element we’re going to tackle is the line at the top of the page. The line matches our overall design, but it’s the wrong color.

To change it, click on the element, then click your swatches panel.

For this line we’re going to pick a bright blue.

Create a Cover Letter With Canva Color Picker

That bright blue is pretty close to the color we want, but not exactly.

To fix this, click the + sign in the color swatch panel. This will bring up the color picker, where you can adjust the blue as needed.

Create a Cover Letter With Canva Add Color to New Element

Once you’ve decided, Canva will add the color to your panel.

After that, you can click on another element, then click on the color swatch. The new blue will be applied to it.

Step 5: Change Your Header Text

Create a Cover Letter With Canva Change Header Font

After you adjust the visual elements on your page, it’s time to fix the text.

As mentioned, there’s a lot of text, and the first thing we’re going to focus on is the “header”. It contains your name, address, and contact details.

Canva automatically puts placeholder text in each section, so you need to click on the title—in this case “James Morrison Elementary School”—and erase the words in the text box.

Next, type in your name. For this tutorial we’re going with “Jill Smith”.

Then, choose the same font that you used in the modern bakery resume, so both names match. Pick a size for the font and a color.

Click on the address section beneath your name. Erase the placeholder, and put your own address instead.

Step 6: Change Your Subheading Text

Create a Cover Letter With Canva Change Subheading Text

After you change your header you’ll need to change your subheading.

This is where you’ll address the letter to someone else, along with the reason you are sending it. It’s a good idea to include the job posting number and title for reference.

Make sure the text box is active so you can edit it. Erase the placeholder text, put in your own, then go to the top left-hand corner of your workspace.

Use the dropdown menus to change your font, size, and color.

Create a Cover Letter With Canva Change Title Case

In our modern bakery resume our subheadings were all-caps, but in this template the subheadings aren’t. How do you fix this without typing it all over again?

Simply click on the Uppercase icon at the top of your screen, seen here highlighted in red.

When you click on it Canva automatically changes the text to all-caps. To change it back, click on Uppercase again.

Step 7: Add a New Subheading

Create a Cover Letter With Canva Add a New Subheading

You’ve already got a subheading, but what if you want part of that subheading with one style and the rest of it with another? You’ll need another box.

Delete the text that you want in a different style from your first box. In this case, that text is “Job Posting # and Description”.

Next, click Text > Add a subheading on the left-hand side of your screen. Canva will add a subheading for you, but it will need some adjustment.

Create a Cover Letter With Canva Change Subheading Alignment

To align this text with the other subheading, click the Alignment button, seen here in red.

When you click on it, it will cycle through the different types of alignments—just keep clicking until you find the right one for your document.

Create a Cover Letter With Canva Change Subheading Size

Next, change your placeholder text to “Job Posting # and Description”.

Go to the top left-hand corner of your workspace and change the font, size, and color. Follow the same steps as before.

Step 8: Deleting a Text Box

Create a Cover Letter With Canva Delete Text Box

What if you want to delete a text box that isn’t required for your cover letter? Again, very easy.

Just click on the text box you want to get rid of, then go to the trash can icon in the top right-hand corner of your screen.

Clicking on it will delete the box.

Step 9: Grouping Elements

Create a Cover Letter With Canva Click and Drag to Group

We’ve talked about grouping elements in our tutorial detailing how to create a resume from scratch using Canva.

The short-and-easy version: grouping elements is useful if you need to keep them aligned and move them around the page.

Create a Cover Letter With Canva Group Elements

To group elements, click and drag over the individual items so the blue bounding box shows up.

Next, click Group in the top right-hand corner of your workspace. Voila. You’re finished.

Step 10: Add a Shape

Create a Cover Letter With Canva Add a Shape

We’re nearing the end of this tutorial, and as you’re doing your final checks you might decide that you want to add another shape for interest.

For this tutorial, let’s say we want to add a circle to the end of the line at the top of the page. There was a pattern like that in the modern bakery resume, and we want to mimic it.

To do this, click Elements > Shapes > Circle. Once you do, you’ll see a large circle pop up on your template.

Create a Cover Letter With Canva Change Shape Size

Click and drag the circle to the appropriate spot on your page. Resize it by clicking on one of the corners of the bounding box, to make it smaller.

To change its color, click on the color swatch icon in the top left-hand corner of your screen.

Step 11: Change Your Body Text

Create a Cover Letter With Canva Check Your Work so Far

Now that we’ve fixed the visual elements on the cover letter, it’s time to zoom out and take a look at it.

I personally think this design is pretty good. It matches the look and feel of the modern bakery resume, and it conveys a sense of approachability through its use of bright colors.

Create a Cover Letter With Canva Delete Body Text

All that’s left is to add the body text. This is where the “meat” of your cover letter will go—the part where you talk about yourself and what you do.

To write your body text, click and erase the placeholder, then begin typing.

Step 12: Give Your Cover Letter a Meaningful Name

Create a Cover Letter With Canva Give Your Document a Name

Now that your cover letter is complete, change the name of the template to something meaningful. This way you’ll be able to find it again under Home > Your Designs on Canva.

Job Hunts Don’t Last Forever

Cover letters are tough to write and just one part of the larger picture, but with Canva to help you can put your best foot forward and increase your chances of landing that job.

Are you looking for more direction on where to search for jobs? Then check out our list of job search engines you should try to help you make an informed decision.

Read the full article: How to Design the Perfect Cover Letter Using Canva


Read Full Article

HQ Trivia replaces Quiz Daddy Scott Rogowsky


Quiz Khalifa aka Host Malone aka Trap Trebek aka HQ Trivia’s Scott Rogowsky has been pushed out of the live mobile gaming startup. The two split due to disagreements about Rogowsky attempting to take a second full-time job hosting sports streaming service DAZN’s baseball show ChangeUp while moving to only hosting HQ on weekends, TMZ first reported. HQ wanted someone committed to their show.

Now HQ co-founder and CEO Rus Yusupov confirms to TechCrunch that Rogowsky will no longer host HQ Trivia. He tells me that the company ran a SurveyMonkey survey of its top players and they voted that former guest host Matt Richards rated higher than Rogowsky. Yusupov says HQ is excited to have Richards as its new prime time host. It’s also putting out offers to more celebrity guests to host for a few shows, a few weeks, or even a whole season of one of its time slots.

The departure could still shake HQ’s brand since Rogowsky had become the defacto face of the company. But he was also prone to talking a lot on the air and promoting himself, sometimes in ways that felt distracting from the game. Rogowsky has also been using HQ’s brand to further his standup comedy career, splashing its logo on advertising for his shows like this one below at a casino where “The centerpiece is a live trivia competition”, he told WPTV5.

TechCrunch had predicted that Rogowsky might depart if he wasn’t properly compensated with equity in HQ Trivia that would only vest and earn him money if he stuck around. The damage to HQ could worsen if he’s scooped up by Facebook, Snapchat, or another tech company to build out their own live video gaming shows.

HQ Trivia provided this statement on Rogowsky’s exit:

“We continue to build an incredible company at HQ Trivia, from drawing hundreds of thousands of players to the platform daily, to increasing the size of the prize, to attracting strong talent. We’ve come a long way since Scott Rogowsky’s first trivia game and we’re grateful for everything he’s done for the platform. This is a team that creates products for talent to really shine—we’re just getting started at HQ Trivia, and as he makes his next move, wanted to take a minute to thank him for being part of our journey.”

Yusupov tells me he’s excited about exploring new hosts, noting that Richards in a person of color who brings more diversity to HQ’s lineup. Richards is a standup comic who has appeared on CBS’ 2 Broke Girls, Nickelodeon’s School of Rock and was a voice-over host for game show Trivial Takedown on FUSE. Yusupov says the team feels jazzed about the new creative opportunities beyond Rogowsky, though the CEO says he appreciates all that its former host contributed.

Richards will have the tall task of trying to revive HQ’s popularity. It climbed the app store charts to become the #3 top game and #6 overall app in January 2018, and peaked at 2.38 million concurrent players in March 2018. But it’s been on a steady decline since, falling to the #585 overall app in August, and it dropped out of the top #1500 last month according to App Annie.

Exhaustion with the game format, so many winners splitting jackpots to just a few dollars per victor, and laggy streams have all driven away players. The introduction of a new Wheel Of Fortune-style HQ Words game in August hasn’t stopped the decline. And the tragic death of HQ co-founder and former CEO Colin Kroll may have impeded efforts to turn things around. There’s a ton of pressure on the company after it raised $23 million, including a $15 million round at a $100 million valuation.

Even if HQ Trivia fades from the zeitgeist, it and Rogowsky will have inspired a new wave of innovation in what it means to play with our phones.


Read Full Article

This little translator gadget could be a traveling reporter’s best friend


If you’re lucky enough to get travel abroad, you know it’s getting easier and easier to use our phones and other gadgets to translate for us. So why not do so in a way that makes sense to you? This little gadget seeking funds on Kickstarter looks right up my alley, offering quick transcription and recording — plus music playback, like an iPod Shuffle with superpowers.

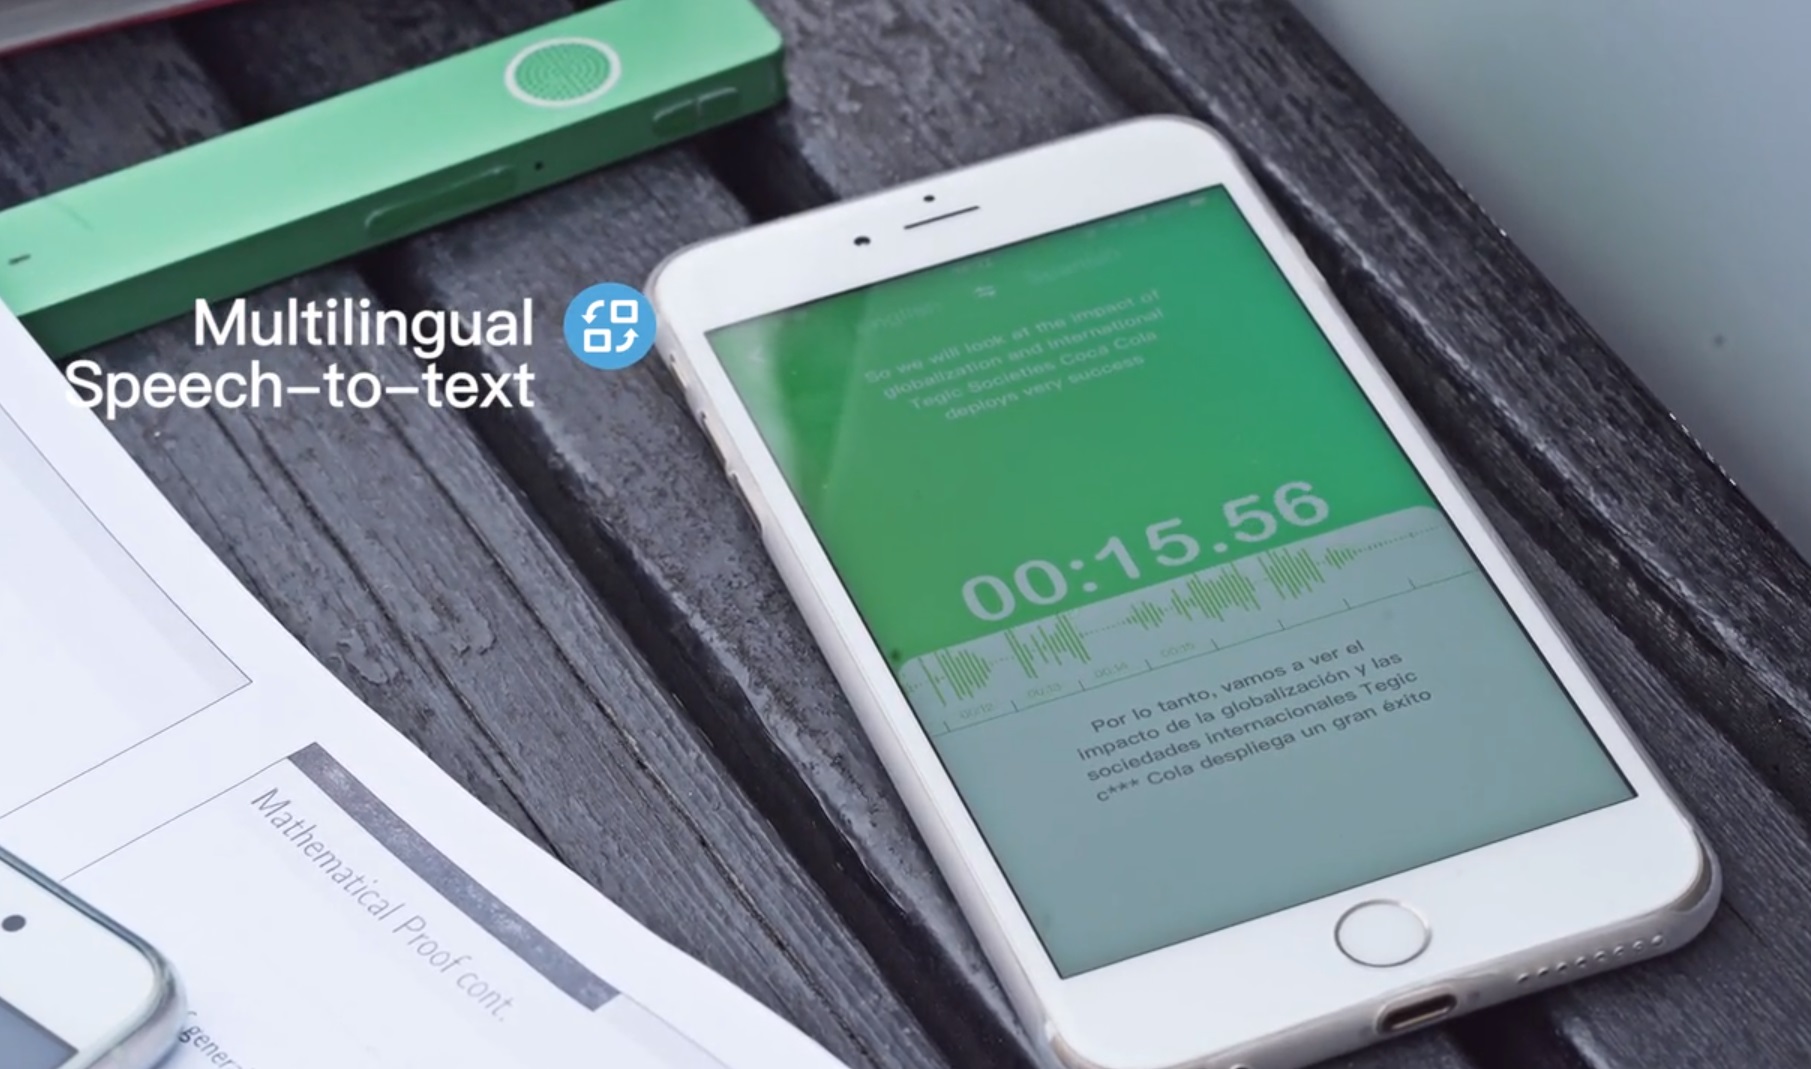
The ONE Mini is really not that complex of a device — a couple microphones and a wireless board in tasteful packaging — but that combination allows for a lot of useful stuff to happen both offline and with its companion app.

You activate the device, and it starts recording and both translating and transcribing the audio via a cloud service as it goes (or later, if you choose). That right there is already super useful for a reporter like me — although you can always put your phone on the table during an interview, this is more discreet and of course a short-turnaround translation is useful as well.

Recordings are kept on the phone (no on-board memory, alas) and there’s an option for a cloud service, but that probably won’t be necessary considering the compact size of these audio files. If you’re paranoid about security this probably isn’t your jam, but for everyday stuff it should be just fine.

If you want to translate a conversation with someone whose language you don’t speak, you pick two of the 12 built-in languages in the app and then either pass the gadget back and forth or let it sit between you while you talk. The transcript will show on the phone and the ONE Mini can bleat out the translation in its little robotic voice.

Right now translation online only works, but I asked and offline is in the plans for certain language pairs that have reliable two-way edge models, probably Mandarin-English and Korean-Japanese.

It has a headphone jack, too, which lets it act as a wireless playback device for the recordings or for your music, or to take calls using the nice onboard mics. It’s lightweight and has a little clip, so it’s probably better than connecting directly to your phone in many cases.

There’s also a 24/7 interpreter line that charges two bucks a minute that I probably wouldn’t use. I think I would feel weird about it. But in an emergency it could be pretty helpful to have a panic button that sends you directly to a person who speaks both the languages you’ve selected.

I have to say, normally I wouldn’t highlight a random crowdfunded gadget, but I happen to have met the creator of this one, Wells Tu, at one of our events and trust him and his team to actually deliver. The previous product he worked on was a pair of translating wireless earbuds that worked surprisingly well, so this isn’t their first time shipping a product in this category — that makes a lot of difference for a hardware startup. You can see it in action here:

He pointed out in an email to me that obviously wireless headphones are hot right now, but the translation functions aren’t good and battery life is short. This adds a lot of utility in a small package.

Right now you can score a ONE Mini for $79, which seems reasonable to me. They’ve already passed their goal and are planning on shipping in June, so it shouldn’t be a long wait.


Read Full Article

12 April 2019

Election Commentary


Election Commentary

Juul launches a pilot program that tracks how Juul devices get in the hands of minors


Juul Labs is today launching a pilot for its new Track & Trace program, which is meant to use data to identify exactly how Juul devices wind up in the hands of minors.

Juul vaporizers all have a serial number down at the bottom, by the Juul logo. However, it wasn’t until recently that Juul had the capability to track those serial numbers through every step of the process, from manufacture to distribution to retail to sale.

With Track & Trace, Juul is calling upon parents, teachers and law enforcement officials to come to the Juul Report web portal when they confiscate a device from a minor and input the serial number. Each time a device is input in the Track & Trace system, Juul will open an investigation to understand how that minor wound up with that device.

In some cases, it may be an issue with a certain retail store knowingly selling to minors. In others, it may be a case of social sourcing, where someone over 21 years of age buys several devices and pods to then sell to minors.

Juul will then take next steps in investigating, such as talking to a store manager about the issue. It may also enhance its secret shopper program around a certain store or distributor where it sees there may be a spike in sale/distribution to youth to identify the source of the problem. To be clear, Track & Trace only tracks and traces the devices themselves, and does not use personal data about customers. It’s also worth noting that Juul Labs has increased

Juul isn’t yet widely publicizing Track & Trace (thus, the “Pilot” status), but it is focusing on Houston as a testing ground with banner ads targeted at older individuals (parents, teachers, etc.) pointing them to the portal. Of note: the ad campaign is geofenced to never be shown in or around a school, hopefully keeping the program a secret from young people illegally using Juul.

The company wants to learn more about how people use the portal and test the program in action before widening the campaign around Track & Trace. That said, the Report portal is not limited to Houston residents — anyone who confiscates a Juul can report it through the portal and trigger an investigation.

“It’s important to note that the pilot is an opportunity for us to learn how the technology is working and optimize the technology,” said Chief Administrative Officer Ashley Gould. “It’s not just at the retailer level. It’s a whole process through the supply chain to track that device and find out if everyone who is supposed to be scanning it is scanning it, and the software that we’ve created to track that serial number through the supply chain to the retail store is working. The only way we’re going to know that is when someone puts in the serial number and we see if we have all the data we need to track it.”

According to Juul, every device in production will be trackable in the next few weeks. In other words, Juul vapes that are years old are likely not fully traceable in the program, but those purchased more recently should work with the system.

Juul has been under scrutiny from the FDA and a collection of Republican Senators due to the device’s rise in popularity among young people. Outgoing FDA Commissioner Scott Gottlieb has called it “an epidemic” and enforced further restrictions on sales of e-cig products.

Juul has also made its own effort, removing non-tobacco and non-menthol flavored pods from all physical retail stores, enhancing their own purchasing system online to ensure online buyers are 21+ and not buying in bulk, going after counterfeits and copycats posing as Juul products, and exiting its Facebook and Instagram accounts.

But Juul Labs also committed to build technology-based solutions to prevent youth use of the product. Cofounder and CPO James Monsees told TechCrunch at Disrupt SF that the company is working on Bluetooth products that would essentially make the Juul device as smart as an iPhone or Android device, which could certainly help lock out folks under 21.

However, the Track & Trace program is the first real technological step taken by the e-cig company. And it’s been an expensive one. The company has spent more than $30 million to update its packaging, adjust printing standards, changing manufacturing equipment, and integrate the data and logistics software systems.

For now, Track & Trace is only applicable to Juul vaporizers, but it wouldn’t be shocking to learn that the company was working on a similar program for its Juul Pods. 


Read Full Article

LumApps raises $24M Series B for its ‘social intranet’


LumApps, the “social intranet” for the enterprise, has closed $24 million in Series B funding. The round is led by previous backer IdInvest, and will be used to scale LumApps’ global sales and marketing and accelerate product development.

Founded in Paris in 2012 — and now also with offices in London, Tokyo, San Francisco and New York — LumApps has developed a social web-styled intranet for enterprises to let company employees better connect and collaborate.

The solution integrates with both G Suite, Microsoft Office 365 and Microsoft SharePoint, and is accessible via mobile. Overall, it is designed to serve as a central hub for personalized content, social communications, work tools and enterprise applications.

“We launched LumApps Social Intranet solution in 2015, after our historical customer Veolia asked us to create a platform based on their needs,” LumApps founder and CEO Sébastien Ricard tells me. “We quickly realized there was a massive demand for modern intranets from all companies, to transform internal communications and the employee experience.”

That’s because, he says, communication within an enterprise is challenging, spread across disparate tools such as email, live chat and social networks — solutions that are typically disconnected and siloed. This is especially true in large enterprises, where finding information and reaching the right people can be very difficult.

“Our dream was to enable access to useful information in one click, from one place and for everyone. Just that simple. We wanted to build… a solution that bridged [an] intranet and social network, with the latest new technologies. A place that users will love.”

At its core, Ricard says LumApps goes further than just solving common business challenges, including fostering a collaborative workplace where employees are more engaged and more productive. “Every large company is building their digital workplace, and it’s critical that they have a central intranet that houses all employee communications, news, memos, applications, etc. from the corporate team but also from peers.”

That mission appears to be working, evidenced by today’s Series B funding and a customer base that spans enterprises small and large. Companies using LumApps include Veolia, Valeo, Air Liquide, Colgate-Palmolive, The Economist, Schibsted, EA and Logitech. The intranet software has on-boarded more than 4 million users globally.

Adds Ricard: “As a French entrepreneur, it has always been a dream to build such a global success,” says Ricard. “We encountered highs and lows, especially in 2016 when we started in the U.S. and lived our first year of setbacks. Why? All we had was our product and we didn’t yet understand the culture and market specifics. It took time to hire American talent to structure everything and build a solid base… Now we have a team of 150-plus people worldwide with a special focus on the U.S.”


Read Full Article

The chat feature may soon return to Facebook’s mobile app


Facebook upset millions upon millions of users five years ago when it removed chat from its core mobile app and forced them to download Messenger to communicate privately with friends. Now it looks like it might be able to restore the option inside the Facebook app.

That’s according to a discovery from researcher Jane Manchun Wong, who discovered an unreleased feature that brings limited chat features back into the core social networking app. Wong’s finding suggests that, at this point, calling, photo sharing and reactions won’t be supported inside the Facebook app chat feature, but it remains to be seen if that is simply because it is currently in development.

It is unclear whether the feature will ship to users at all as this is a test. Messenger, which has more than 1.3 billion monthly users, will likely stick, but this change would give users other options for chatting with friends.

We’ve contacted Facebook for comment, although we’re yet to hear back from the company. We’ll update this story with any comment that the company does share.

As you’d expect, the discovery has been greeted with cheers from many users who were disgruntled when Facebook yanked chat from the app all those years ago. I can’t help but wonder, however, if there are more people today who are content with using Messenger to chat without the entire Facebook service bolted on. Given all of Facebook’s missteps over the past year or two, consumer opinion of the social network has never been lower, which raises the appeal of using it to connect with friends but without engaging its advertising or news feed.

Wong’s finding comes barely a month after Facebook CEO Mark Zuckerberg sketched out a plan to pivot the company’s main focus to groups and private conversation rather than its previously public forum approach. That means messaging is about to become its crucial social graph, so why not bring it back to the core Facebook app? We’ll have to wait and see, but the evidence certainly shows Facebook is weighing the merits of such a move.


Read Full Article

Apple’s iOS will now confirm you meant to subscribe to that app


Apple has added another step to prevent users from accidentally signing up for an iOS app’s subscription – or, from being tricked into it by a scammy app not playing by the rules. The company recently rolled out a subscription confirmation dialog box that pops up as one final step to ensure you meant to opt in to the subscription being offered.

The change to iOS was first spotted by app developer David Barnard on Twitter and reported by Apple news site 9to5Mac.

The new confirmation box is a welcome addition, considering how many users were accidentally subscribing – particularly those with Touch ID-based phones who were trying to exit to the Home screen. Instead, they were giving the app permission to sign them up by placing their finger on the Home button, which triggered the Touch ID authentication process.

The update also arrives following several changes Apple has made to subscriptions in recent months to address problems around scammy subscriptions.

A good number of developers – especially those in the Utility category – were using sneaky tricks to tap into the subscription craze to bank thousands and even millions of dollars per year. Some apps would intentionally confuse users with their design, or make promises of “free trials” that converted in only a few days, or used other misleading tactics to get users to subscribe.

This left many consumers feeling they had been duped into paying, and a host of angry App Store reviews followed. The scams could have had a broader impact on the subscription economy, if Apple had allowed them to go unchecked, as consumers would have become wary of ever signing up for anything, as a result.

That would have been a problem, given how subscriptions have become a big business for the App Store. According to one forecast, they are poised to grow to $75.7 billion by 2022, in fact.

However, Apple has since begun to crack down on bad actors while also making subscriptions easier to manage by iOS users.

In January, it rolled out new developer guidelines to more clearly spell out what is and is not allowed; and in February it updated iOS to reduce the number of steps it took to get to your subscriptions, so you could more quickly and easily cancel them.

Now, the new dialog box will ensure that users understand they’re opting in to a paid subscription, with a message that reads:

“Confirm Subscription. The subscription will continue unless canceled in Settings at least one day before a subscription period ends.” 

Apple didn’t formally announce the change, but it appears to have rolled out sometime in the last week, reports say.


Read Full Article

How to Uninstall Programs on Windows 10 the Fast Way


windows-uninstall-programs

How do you remove programs on Windows 10? In one sense, the answer is straightforward; in another, it’s perhaps more multi-faceted than you might realize.

Of course, you can delete Windows 10 programs using the operating system’s built-in tools—but sometimes those tools aren’t powerful enough. In addition to the native tools, there are “automagic” program removal options, malware removal apps, and more.

Confused? Let’s take a closer look at how to remove Windows programs and apps quickly.

How to Uninstall Programs on Windows 10

We’ll begin with a quick overview of the built-in ways to uninstall programs on Windows.

Puzzlingly, there are two different ways to achieve the same goal. You can either use the Settings app or the Control Panel.

How to Uninstall Programs on Windows 10 Using the Settings App

windows 10 remove apps list settings app

The Settings app approach is the newer of the two methods.

Microsoft said way back in 2015 that the company intended to phase out the Control Panel entirely, but given its long-standing tight integration with the operating system, it’s proving to be quite a challenge to unravel it all.

Nonetheless, if you want to be on safe ground, this is the more sensible method to become familiar.

To begin, open up the Settings app, go to Apps > Apps and Features, and scroll down the to the Apps and Features section.

You will see a list of all your apps, including their size and the date on which you installed them. You can use the filters and the top of the list to sort the items in the most useful way.

To delete an app, highlight the software in question and click on Uninstall.

Note: If you’re not sure where to start, check out our list of Windows 10 apps you should install right now.

How to Uninstall Programs on Windows 10 Using the Control Panel

windows 10 remove apps control panel

If you’re a traditionalist, you might prefer to use the Control Panel to delete programs on Windows 10.

It’s also smart to use the Control Panel if you want a bit more insight into the app you are removing. In addition to the information listed in the Settings app, you can also easily see the version number and app publisher.

The Control Panel is no longer accessible by right-clicking on the Start menu, so you’ll need to search for it in Cortana to find it. Once the Control Panel is open, navigate to Programs and Features to see a list of all the programs on your computer.

Highlight an app and click Uninstall at the top of the window to remove it from your system.

Third-Party Tools to Remove Programs on Windows 10

Several third-party tools can remove apps on Windows 10. Here are some of the best:

1. Revo Uninstaller

Curiously, the native uninstaller tool in Windows 10 isn’t actually that good. It has a nasty habit of leaving behind registry entries, system files, and other unneeded junk. The only way to get rid of it is to go through all the old directories manually.

For a more powerful way to delete apps on Windows 10, check out Revo Uninstaller. There’s a free and a pro version. The free version doesn’t let you uninstall entire apps but does allow you to scan and remove any leftover files and folders from previously-deleted programs.

The pro version adds support for entire app removal but will set you back $25. There’s a 30-day free trial available in case you want to try before you buy.

2. CCleaner

CCleaner’s reputation has taken something of a battering in recent times—it’s easy to make the case that the app is now adware.

However, the underlying tools are still as good as ever. If you need an app that can remove a program on Windows 10 in a flash, CCleaner could be the answer.

To use CCleaner to remove a Windows app, fire up the software and go to Tools > Uninstall. You will see a list of all the apps on your system. Choose the app you want to remove and hit Uninstall to begin the process.

3. IObit

systemcare pro iobit app

The final third-party uninstaller we recommend is IObit. The company makes several optimization apps, but we are specifically interested in Advanced SystemCare 12.

Much like the free version of Revo Uninstaller, it can remove old app remnants from your system. That includes invalid registry entries, orphaned folders, malware, and other junk files.

The pro version of the app, which costs $20, offers deeper registry cleaning and the ability to speed up your web connection.

Remove Malware Programs on Windows 10

Some programs—especially malware—might be resistant to the usual methods of app removal. In those cases, you need to turn to a dedicated anti-malware tool.

There are lots of great antivirus suites, but we particularly like Kaspersky Security.

Kaspersky Security offers two plans: Kaspersky Free and Kaspersky Paid. MakeUseOf readers can enjoy an exclusive discount if they sign up for one of the paid plans.

Un-Installable Windows 10 Apps

Lastly, a note about the Windows 10 apps that cannot be uninstalled. That includes programs such as Alarm and Clock, Calculator, Groove Music, and People.

Some third-party apps will let you uninstall these apps, but it’s actually possible to achieve this from within Windows without any external help; you need to use PowerShell.

To launch PowerShell, right-click on the Start menu and select Windows PowerShell (Admin).

When you’re ready to uninstall programs, type Get-AppxPackage *[app name]* | Remove-AppxPackage and press Enter.

Note: There is a strong possibility that the apps will reappear next time Windows updates itself.

Take Control of Uninstalling Programs on Windows 10

The various ways to uninstall programs on Windows 10 that we’ve listed in this article should cover you for just about every eventuality. If we’ve missed any methods, make sure you let us know in the comments below.

And if you would like to learn about more cool Windows 10 tricks, make sure you check out our articles on how to fix slow boot times in Windows and our tips on how to speed up Windows 10.

Read the full article: How to Uninstall Programs on Windows 10 the Fast Way


Read Full Article

How to Build Your Perfect Mac on Apple’s Website


perfect-mac-apple

The next time you walk into an Apple Store, ready to look down the line of MacBooks and iMacs and pick one out like a perp in a lineup, keep in mind that your options go far beyond what’s out on the show floor.

Here’s how you can use Apple’s website to design your own custom Mac, including some tips on what you should prioritize.

Go Beyond the Basics

In-store and on the website, Apple has a bunch of pre-set Mac models. As you might expect, more expensive models come with additional features. For example, the entry-level 13-inch Macbook Pro does not come with a Touch Bar, but some of the mid-level and all the high-end models do.

Some options, however, come in too many different flavors for each to have only one set model. Once you hit Select for the model that comes closest to what you want, you’ll see a bunch of potential upgrades that you can take advantage of.

Macbook Pro Custom Options

Keep in mind that in stores, only the base models are immediately available. You can get a custom order shipped to an Apple Store for pickup, but you’ll have to wait for delivery. This usually takes about a week or so.

Let’s examine the three most important aspects you can customize on your Mac.

Processors

The processor is the brain of the computer. There are two important considerations when it comes to choosing the right one for you.

CPU Speed

The first factor to consider is the processor’s speed. To get a sense of this, you have to take into account its clock speed, which is measured in gigahertz (GHz). You also have to check what generation of chip it is, and whether it is an i5 or an i7.

In general, the more GHz and the later the generation, the faster the chip. Additionally, i7 chips are faster than i5. CPU speed matters most for heavy-duty tasks like rendering video, so consider an upgrade here if you do that often.

Dual-Core or Quad-Core (or More!)

You also want to look at how many cores you might need. Each individual processor core can perform its own task, so multiple cores means that you can run many tasks at once without experiencing a loss of speed. More cores are great if you need to multi-task, particularly if you work with graphics or video.

The most tricked-out iMac Pro comes with an 18-core processor, which is definitely overkill. But you might consider upgrading to at least a quad-core for general use.

Memory

The next customizable item is memory, also referred to as RAM. Every time you open up a program on your Mac, the data in that program takes up space in your memory. Therefore, the more memory you have, the more programs you can have open at once without slowing your machine down.

Once your machine has used up all your memory, it starts running programs from what’s called Virtual Memory. This exists on your hard drive. Back in the days when hard drives were relatively slow spinning disks, this could lead to a huge slowdown. Now, however, all Mac notebooks come standard with SSDs, which are much faster, and the slowdown isn’t as noticeable. However, even SSDs are still slower than RAM.

Thus, if you’re the kind of person who has a hundred open browser tabs at once, you might consider upgrading your memory to at least 16GB. If you only use your Mac for light tasks like browsing and email, 8GB should be fine.

Disk Space and Type

Finally, you should look at upgrading your storage space. The standard Mac notebooks come with drives that range from 128GB to 512GB. The upgrades, however, go as high as 4TB. All of these drives are SSDs.

On the iMac side, the standard models all come with at least 1TB hard disk drives (HDDS, not SSDs). You can upgrade them with SSDs or with higher-storage Fusion drives. A Fusion drive combines the speed of an SSD with the high capacity of an HDD.

SSD stands for Solid State Drive. They are smaller than traditional desktop hard drives and much faster. Due to the lack of moving parts, they’re also much less likely to break down than a spinning disk drive. The trade-off is that they are more expensive, especially at higher capacities.

Usually, that trade-off is worth it, as is splurging for a higher capacity. Having an SSD in your system improves speed across the board.

Graphics Cards

Customize Macbook Graphics

Most entry and mid-level Macs come with integrated graphics cards. Apple builds the graphics card right into the logic board, and it works seamlessly with the processor. They work fine for light use, but aren’t suitable for heavy-duty graphics work like gaming.

More expensive Macs come with dedicated graphics cards, which are separate components with their own processors and dedicated memory. These Macs allow you to customize your graphics cards to a certain extent.

If you do any graphics-related work like graphic design or film, or if you are a gamer, a dedicated graphics card will perform much better than an integrated one. The only person who really needs to max out their graphics card is someone who renders 3D graphics a lot, like a video game designer or animator.

If you are such a person, but you’re still on a budget, you want a card with the most memory you can get.

Which Upgrades Should You Prioritize?

If you’re on a budget and you can only afford one upgrade, you have a decision to make. In the past, you could upgrade certain components on a Mac after purchase, particularly the hard drive or the RAM. But those days are essentially gone. You have to go into your Mac purchase knowing what you want to splurge on.

If there’s one aspect that almost everyone runs into an issue with eventually, it’s disk space. Most of the entry and mid-level Macs only come with 256GB, so you should avoid getting a Mac with minimum storage if you can. You’ll thank yourself later.

Our Favorite Customizations

Here are a couple under-the-radar custom options to get you started.

  • iMacs are the only Macs whose standard models still come with a spinning hard drive inside. Upgrade to an SSD to increase disk speed and greatly decrease your chances of hard drive failure. Keep in mind that a 1TB SSD upgrade can add a hefty $700 to the price tag. If you don’t need that much space, a 256GB drive is much more reasonable.
  • The new Mac mini has an optional upgrade to turn its Ethernet ports from 1 Gigabit to 10 Gigabit for $100, which makes it a viable (and affordable) server alternative.

Save Money While Getting the Mac You Want

Buy your Mac at the right time of year to take advantage of every deal you possibly can. Combine those deals with your ideal customizations to get the Mac you want at a better price.

Read the full article: How to Build Your Perfect Mac on Apple’s Website


Read Full Article