Few mobile devices offer you better photo quality than the iPhone. From its high-pixel resolution to the ease of syncing photos across all Apple products, Apple’s smartphone cameras are usually the number-one choice for capturing images.
Unfortunately—because it’s so easy to take good pictures—that also means you’ll end up with a lot of them. If you have thousands of pictures and you’re running out of space, here’s how to organize photos on your iPhone using several different methods.
Before You Begin: Some General Space-Saving Tips

While we’re definitely going to break down the specific ways that you can organize your photos, we also wanted to give you a few space-saving tips to start:
- Always review your photos. It’s easy to take a few photos and forget about them, but those “few photos” can add up. To avoid a future backlog, get into the habit of looking over your photos after you’ve shot them. Quickly decide on which ones to delete.
- Don’t keep near-duplicate photos. Taking a bunch of photos back-to-back is a good way to give yourself a lot of options, but if the photos are nearly identical, you don’t need all of them. Get in the habit of deleting redundant copies to reduce photo storage clutter.
- Optimize your iPhone storage. On your iPhone under Settings > Photos, you’ll see an option called iCloud Photos. If you turn this setting on, your phone will automatically upload and store your full-sized photos in your iCloud account.
Now that you know about the different ways you can save some space, let’s talk about organizing your images in more detail.
1. How to Organize Photos on Your iPhone by Date
Every time you take a picture, a small piece of metadata is attached to that image. Part of this data is the date of capture, which allows you to search and organize your photos by date.
To organize iPhone photos by the date taken:
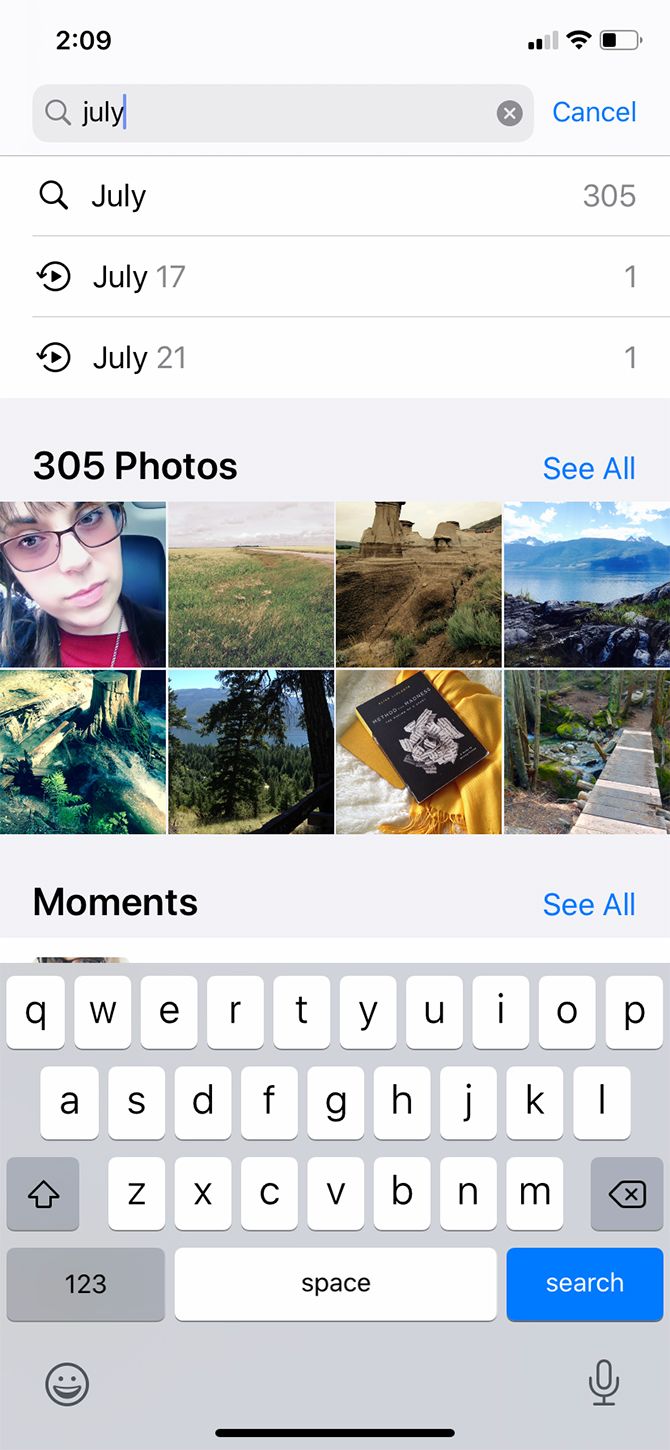
- Open the default Photos app and tap on the Search icon.
- In the search bar, type in a month or event. In this case, I chose “July.”
- When you type “July,” your phone will pull up all the photos that you took in that month. From there, you can narrow down your selection further.
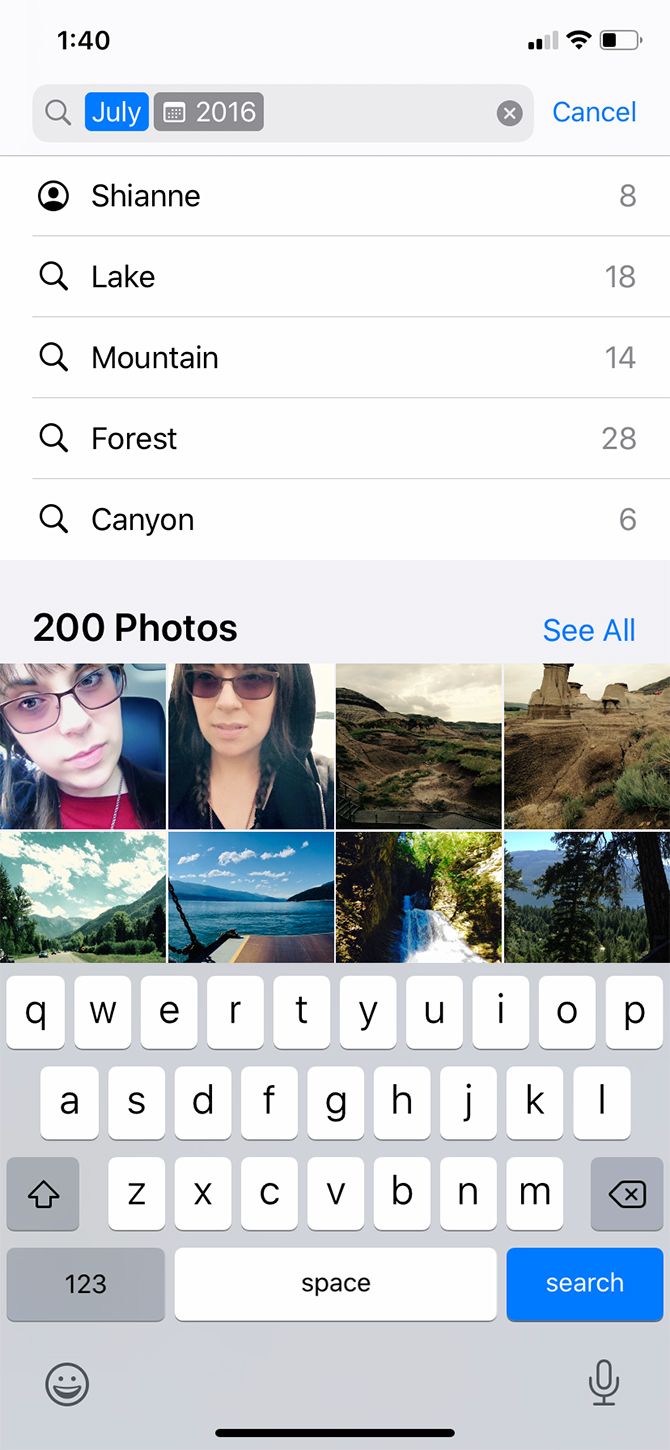
- For instance, you might search for all the photos you took in July of 2016.
Another great feature about searching and organizing your photos by date is that the iPhone recognizes the content inside those pictures.
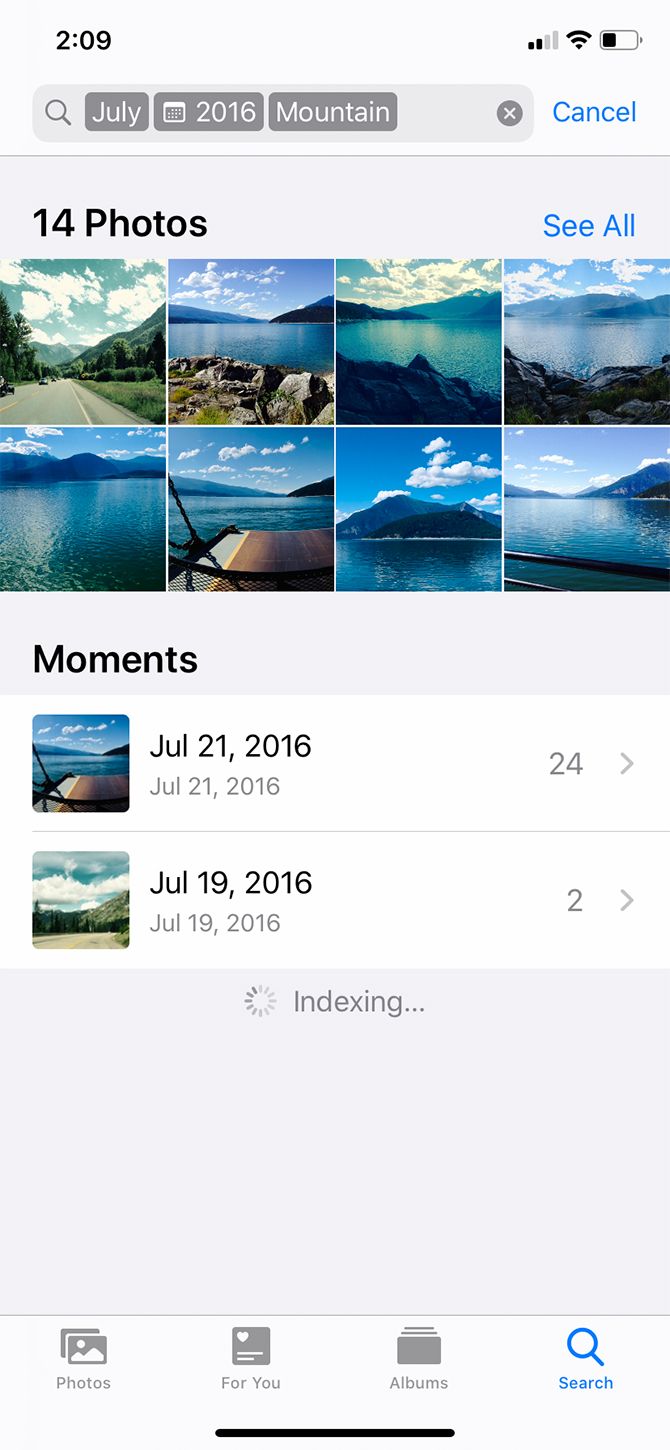
For example, I can narrow my search results again by using the tag “mountain.” This will pull up all the pictures of mountains that you took during July 2016.
2. How to Organize Photos on Your iPhone by Name
The next best way to organize photos on your iPhone is by name. This is a really handy method to find pictures of you or your friends.
Modern iPhones contain facial-recognition software. When you upload a picture, your phone will automatically detect and recognize different faces. It will then designate each of these unique faces as a “person.” Using this, Photos will group pictures of that person together, regardless of date or event.
However, organizing your photos by name requires a bit of setup. Here’s how to do it:
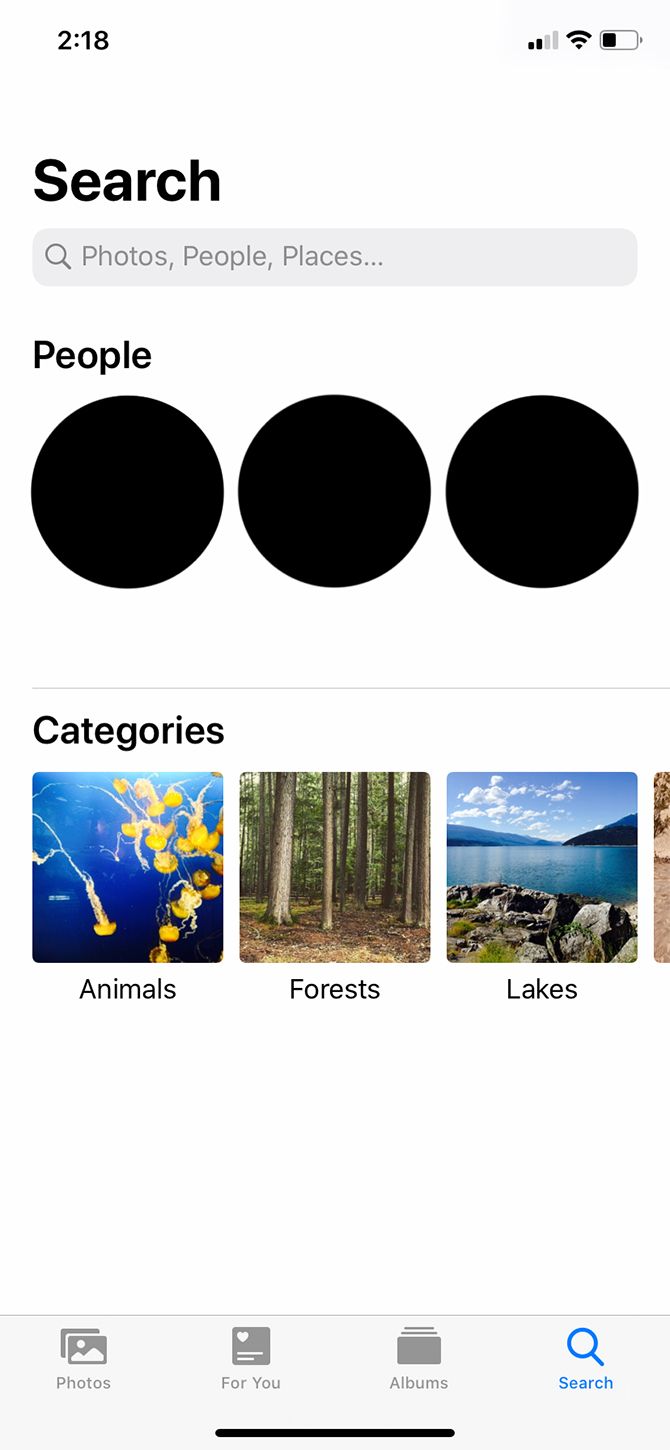
- First, go into the Photos app and tap Search.
- Under People, you’ll see a bunch of circles with faces in them. Select one of those faces and you’ll see a directory of all the pictures that contain that person.
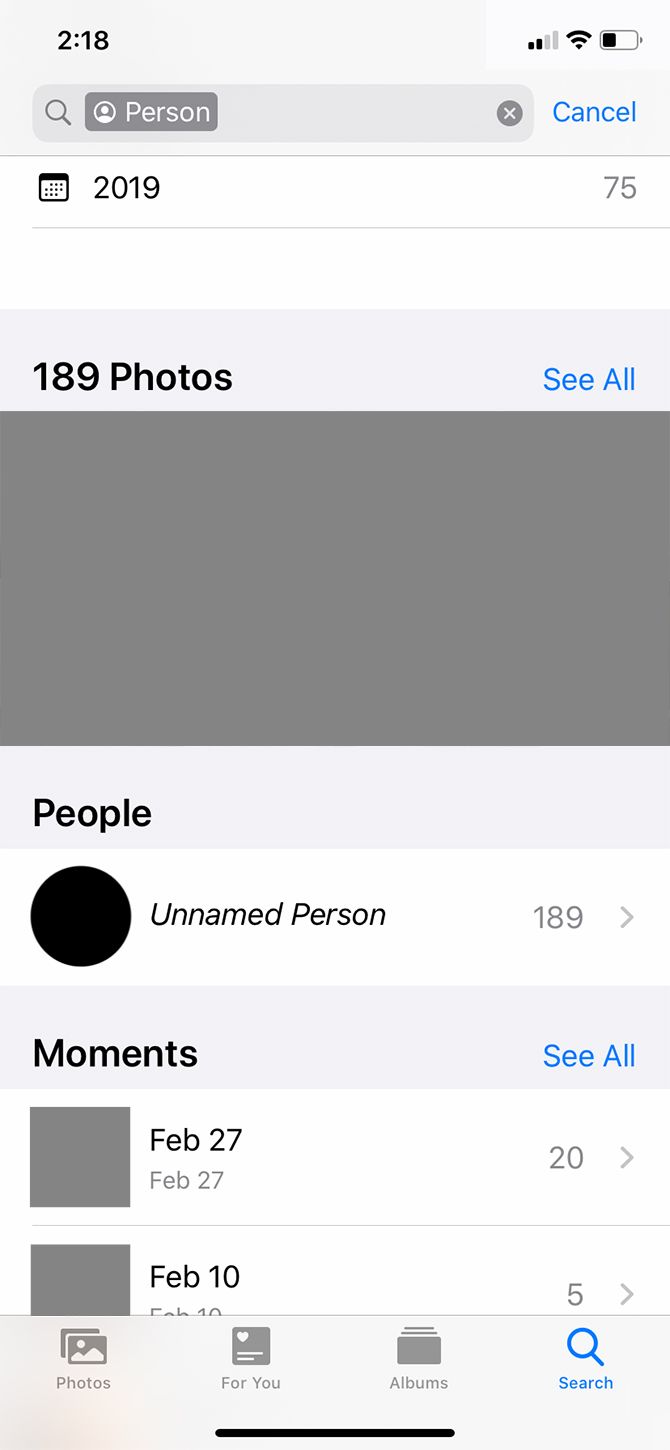
- You might also see a line that says Unnamed Person next to that person’s circle.
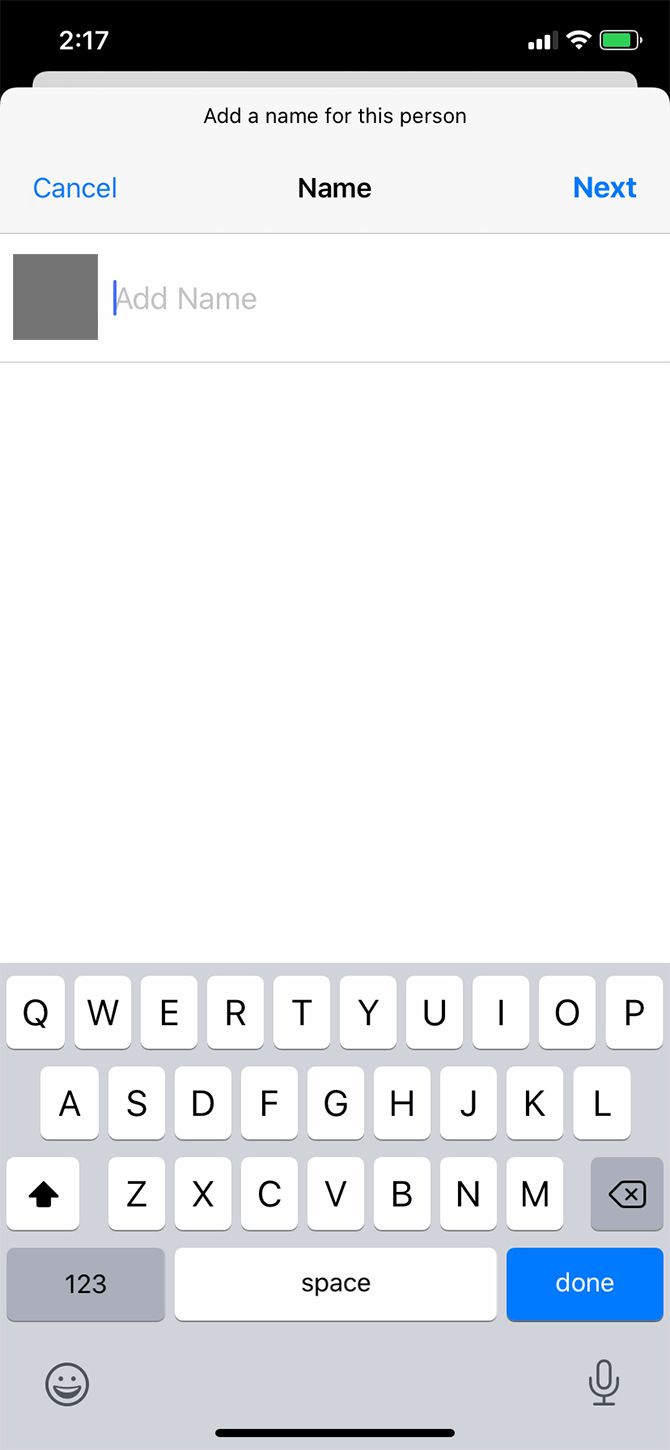
- To name them, tap on Unnamed Person > Add Name. Type their name in. Then tap Next > Done.
After you name that person, all photos with their face will automatically be tagged and searchable by their name.
If you go into the Albums section of the Photos app, you’ll also see that your device automatically creates an album for this person under People & Places.
3. How to Organize Photos on Your iPhone by Location
Another really great way to organize your iPhone photos is by location. Like the previous organization method, however, this one requires some work to get ready.
When you take a picture with your iPhone, the picture’s metadata automatically records the location of your photo—so long as you have Location Services turned on for your camera.
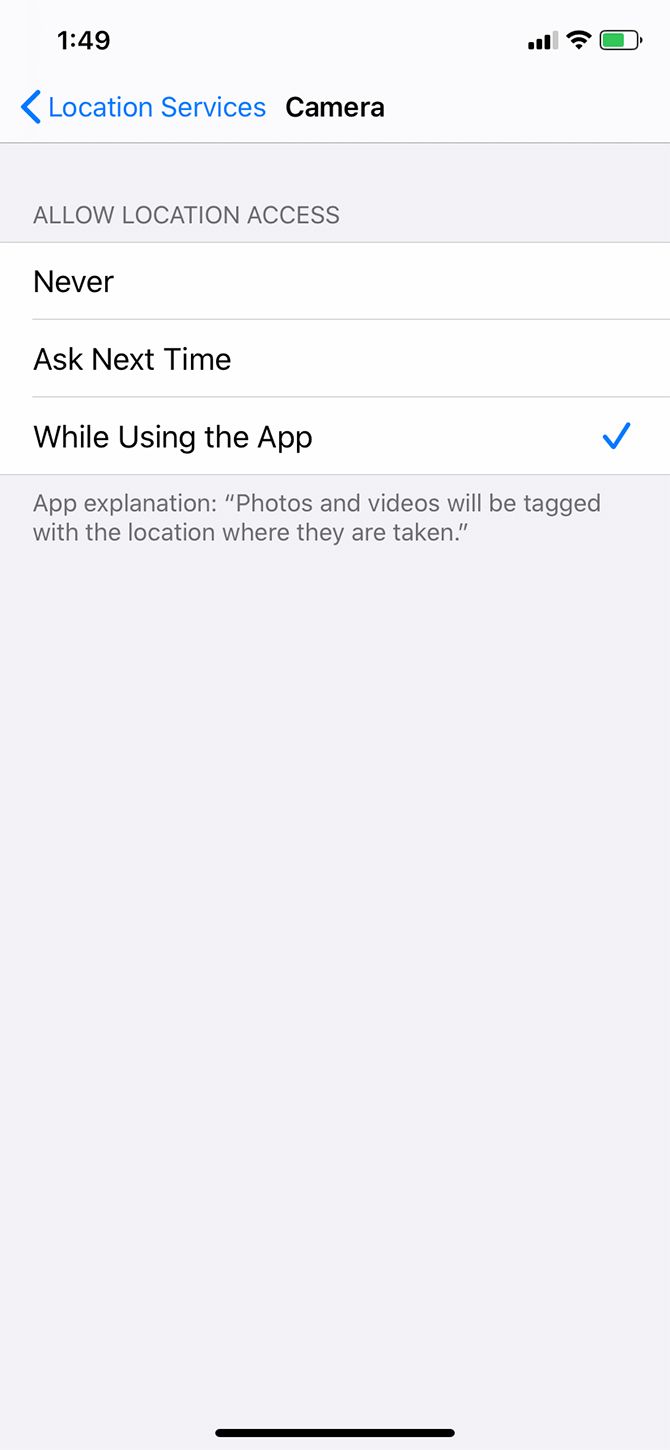
To turn on Location Services:
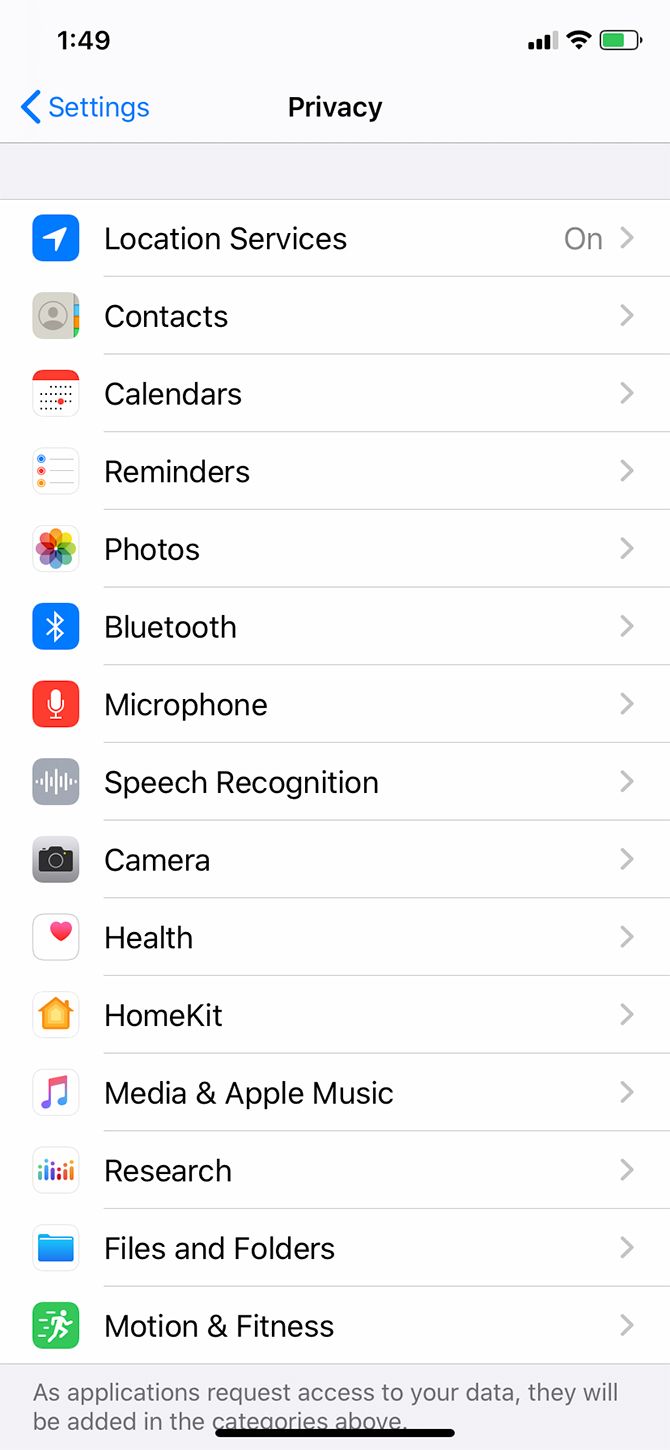
- Open the Settings app.
- Scroll down to Privacy.
- Choose Location Services > Camera.
- Once you’re on Camera, tap Allow Location Access While Using the App.
Now that this setting is turned on, your iPhone will automatically geotag new images. It will then sort these location-based photos into a pre-made album.
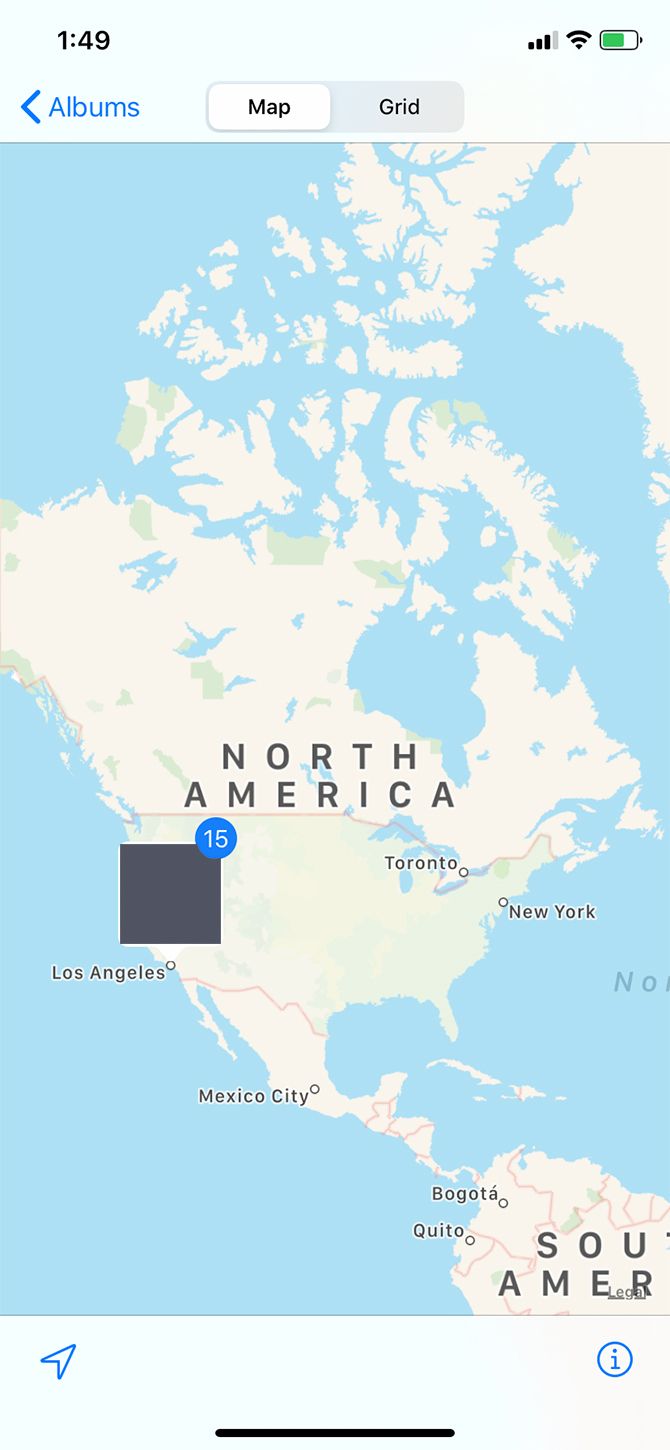
To view your pictures:
- Go to the Photos app.
- Under Albums > People & Places, tap on Places.
- On the map, tap on the thumbnail of the place that you want to view. You’ll see all the pictures from that location.
4. How to Organize Photos on Your iPhone Into Albums
Now let’s say you want to organize your photos into albums. This is the most straightforward method that people use to arrange their pictures, as it’s a good way to group photos that span multiple locations, dates, people, or events.
Basically, manual albums are good for anything that your iPhone can’t automatically sort on its own.
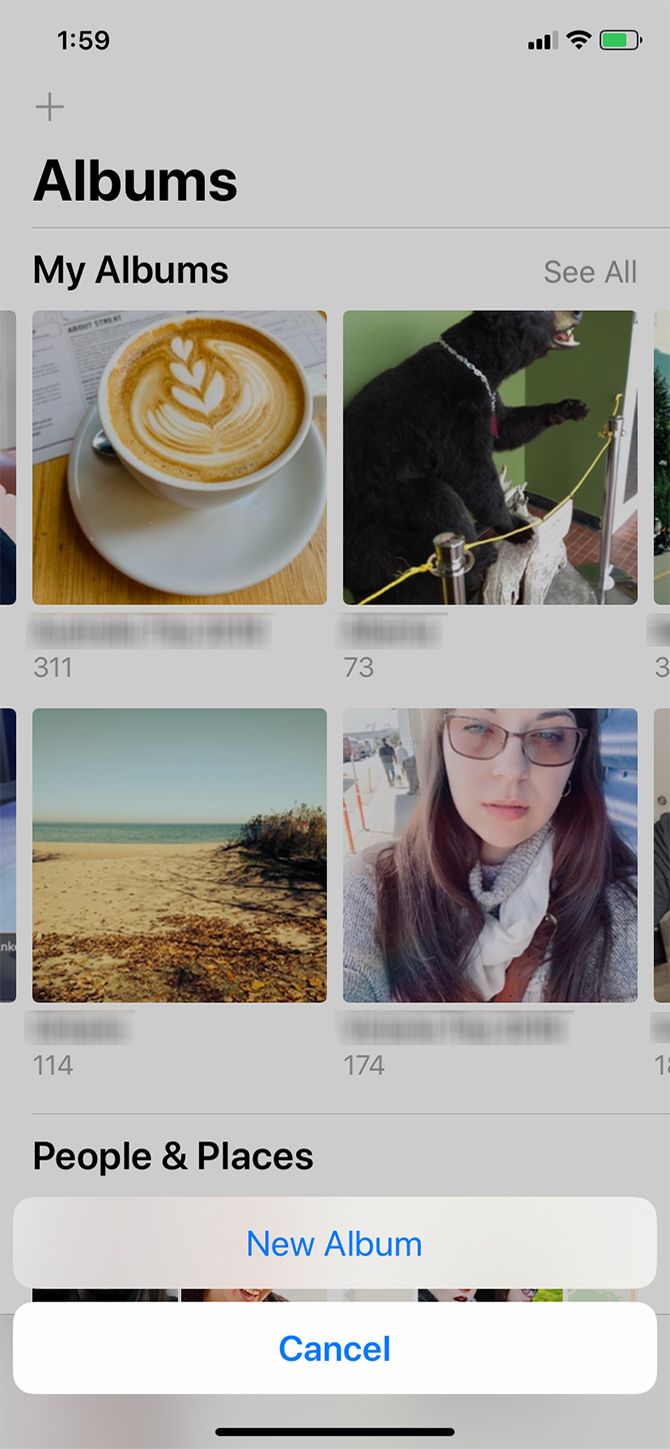
To create a new photo album:
- Launch the Photos app and tap on Albums.
- In the top-left corner of the screen, tap on the Plus (+) sign.
- Choose New Album.
- Once you tap New Album, you’ll be prompted to name the album. After you name it, choose Save.
- Once the album is named, you can begin adding photos.
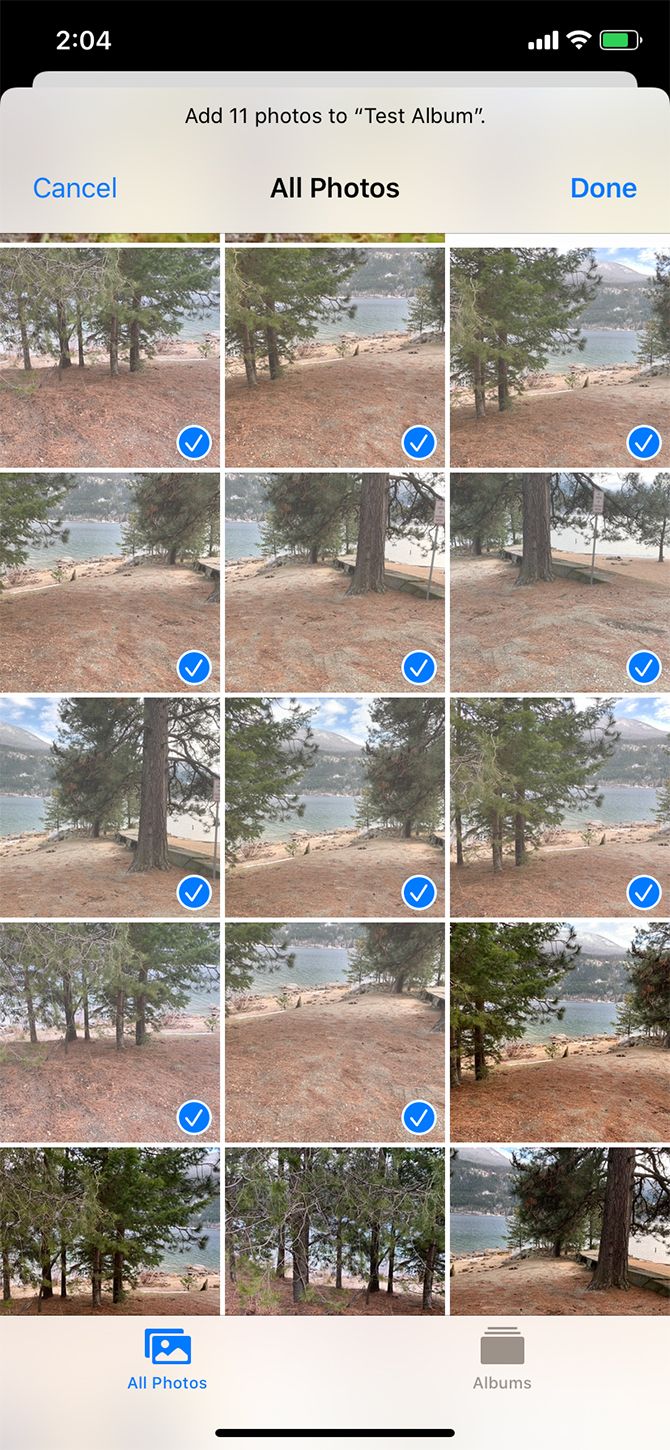
If there are photos on your phone that you forgot to add to the album:
- Go to your Albums section. Tap on Recents or My Photo Stream.
- Tap Select in the top-right corner.
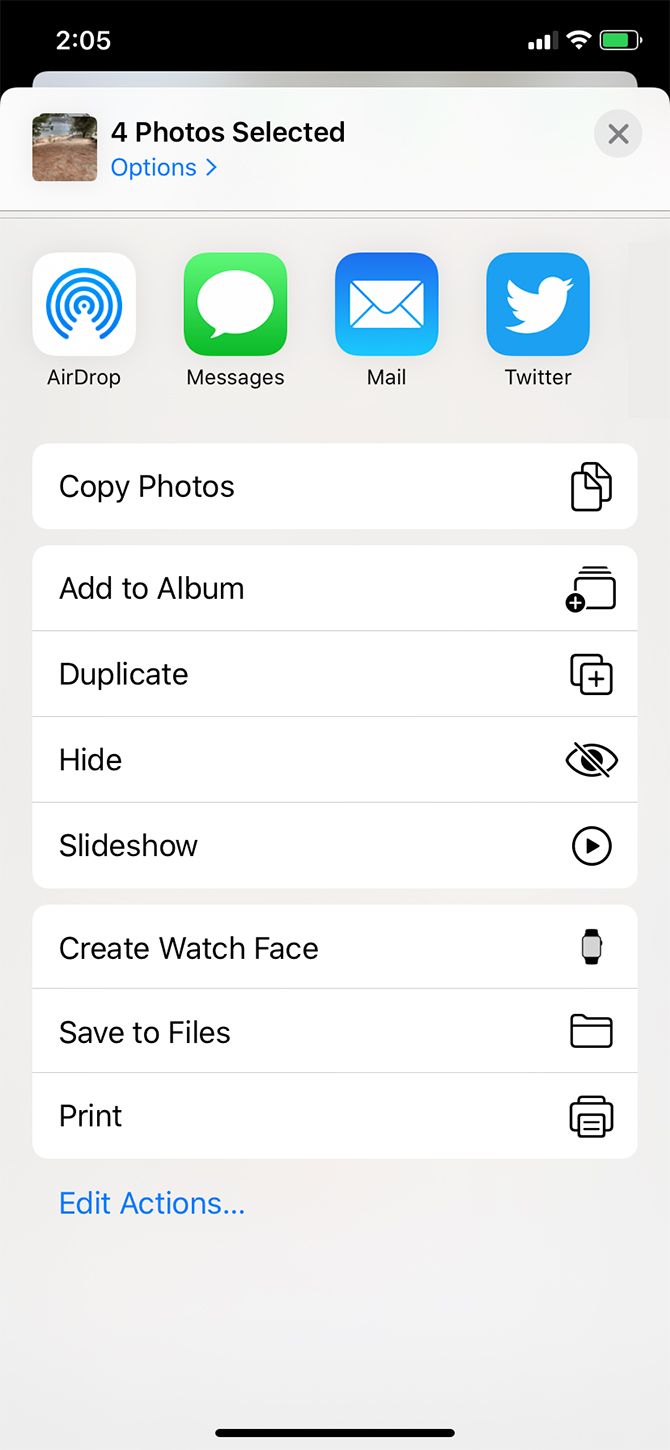
- Select the photos that you want to add.
- Tap on the upward-facing arrow, located in the bottom-left corner of your screen.
- Select Add to Album. Choose the album you want to add these photos to.
From here on—whenever you need to find photos from a multi-day event—you should be able to go into your Photos app and view the appropriate album.
5. How to Organize Your iPhone Photos on Your Computer

There is yet another way that you can organize your iPhone photos: through your iMac or MacBook computer.
If you have the latest version of macOS installed on your computer, you should have a built-in utilities app called Photos. This app corresponds with your iPhone’s Photos app.
When you upload pictures from your iPhone to your computer, the app should work in a very similar manner. Once again:
- The Photos app allows you to sort through your photos by People, Places, and date.
- You can tag people’s faces to organize their photos by name.
To learn more about this app, check out our starter tips for managing your Mac photo library.
Better Organize Photos on Your iPhone
With a couple quick tips and tricks, you’ll be well on your way to organizing photos on your iPhone. Like Google Photos, Apple’s built-in Photos app is an incredibly powerful tool, and one you should take advantage of.
There is another way you should organize and clean up space on your iPhone: deleting duplicate images. Here’s how to delete duplicate photos on your iPhone using free or nearly free apps.
Read the full article: How to Organize Your Photos on iPhone
Read Full Article
No comments:
Post a Comment