You don’t need to buy a Chromebook to enjoy the features of Google’s desktop operating system (OS). In fact, all you need is a working computer and a USB Drive.
Google doesn’t officially offer a way to try it out, but developers have figured out ways for you to experiment with the open-source OS. This method works whether you are running Windows, macOS, or Linux. And no, you won’t be overwriting your existing OS.
Here’s what you need to know.
Running Chrome OS From a USB Drive
We will create a bootable USB drive, loaded with the Chromium OS disk image. But you will need a few things before you start.
- A working computer with a USB port
- A USB drive with at least 4 GB capacity
- Download: 7-Zip for Windows (Free) | Keka for macOS (Free) | p7zip for Linux (Free)
- Download: Etcher for Windows | macOS | Linux (Free)
Note: The USB drive will be completely erased in the installation process. If you have any valuable data on the drive, please save it elsewhere.
1. Download the Latest Chromium OS image

Google doesn’t have an official Chromium OS build that you can download. The best alternative source is Arnold The Bat.
Download: The latest Chromium OS daily build
2. Extract the Zipped Image

You will now have a 7-Zip file on your hard drive. Extract this file using one of the 7-Zip apps mentioned above.
3. Format the USB Drive

Plug the USB drive into a port and format it as FAT32. The process is simplest on Windows, but macOS and Linux aren’t difficult either.
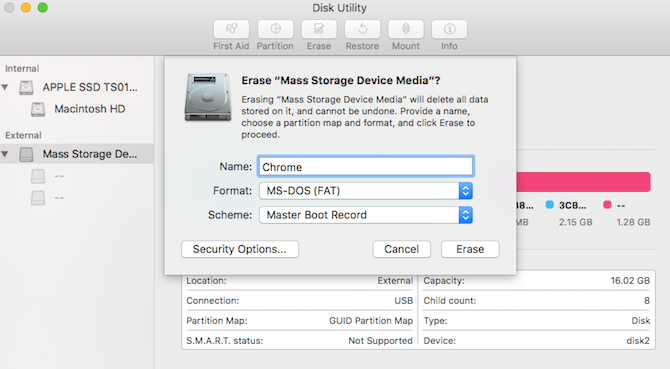
For macOS users, the built-in Disk Utility can format it as FAT32. If you see it labeled as “MS-DOS FAT” instead, don’t worry, it’s the same thing.
If the Windows or Mac methods are confusing or overwhelming for you, then you can also use the SD Association’s official card Formatter app.
Download: SD Card Formatter for Windows | macOS (Free)
For Linux users, we recommend using GParted for a quick format.
Download: GParted for Linux (Free)
For added comfort, when asked to name the new drive, give it the name “Chrome.”
4. Run Etcher and Install the Image

By now, you should have a fully formatted USB drive, named “Chrome”, plugged into one port of the computer (as shown in step three). You will also have an unzipped image file of the latest Chromium OS (as shown in steps one and two). And you have Etcher installed on your computer. Start Etcher.
- Click Select Image and browse to where the Chromium OS image file is. Add it in Etcher.
- Click Select Drive and choose the Chrome USB Drive you have created.
- Click Flash to begin the process of installing the image and validating the installation.
Etcher validates the burning process i.e. once it’s done creating the image on the USB drive, it will verify that everything is right. Make sure you wait till it says 100%. Once Etcher finishes, this will be a bootable USB drive with Chromium OS.
5. Reboot Your Computer and Enter Boot Options
“Boot” is the process of choosing the OS. Every computer lets you select which drive it should boot the OS from, whether it’s a hard drive, a USB drive, or even a DVD drive. You need to enter Boot and choose the USB drive you just created.
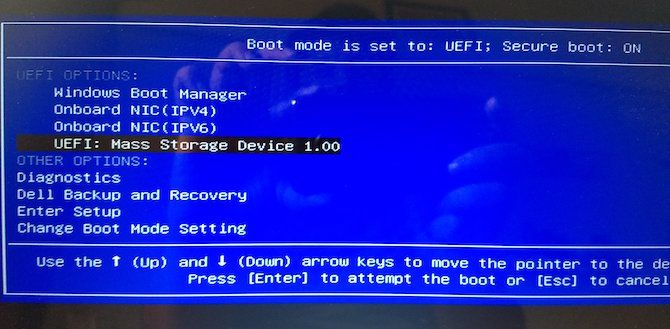
For a Windows or Linux PC: Different computers have different BIOS settings. Usually, the Boot Options menu has the keyboard shortcut F5, F8, or F12.
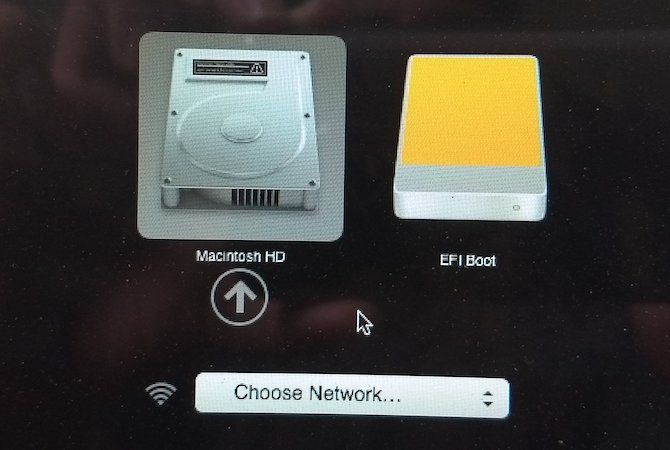
For a Mac: As soon the Mac shuts down and restarts, press and hold the Option key. You will be doing this while it’s a black screen, but that’s okay. Keep holding it till you see the boot menu, which lets you choose between a Macintosh hard drive or the USB drive you have plugged in (usually denoted as “EFI”).
6. Boot Into Chrome OS

Choose the USB drive in the boot menu, hit enter, and the computer will boot from the drive. You are now experiencing all the glory of Chrome OS, without affecting your main hard drive and OS.
You will have to setup Chrome OS the first time you use it, ideally with your existing Google account. Don’t worry, this setup is only during the first time you boot up. Whenever you run it in the future, it will go directly to the login screen.
Turn a PC or Laptop Into Chrome OS
Now that you have Chrome OS running on a USB drive, take it for a spin. You’ll be surprised by how similar it is to full-fledged desktop operating systems like Windows, macOS, and Linux. You can even install several Linux programs and some Windows software too.
If you like what you see and are ready to switch to Chrome OS, you don’t need to buy new hardware. You can turn any PC or laptop into a Chromebox or Chromebook with an easy-to-use software called CloudReady. The installation procedure is actually simpler than the above method.
Read the full article: How to Run Chrome OS From a USB Drive
Read Full Article
No comments:
Post a Comment