Windows 10 is great for touch screens, especially thanks to the special touch-designed apps part of the Windows Ink Workspace. But is your touchscreen not working? Sometimes it can break for seemingly no reason, so we’re here to show you how to fix your touchscreen in Windows 10.
The majority of the problems are caused by driver incompatibility. This is even more likely if the touchscreen has stopped working between your upgrade from a previous operating system to Windows 10. We’ll cover this, along with many other troubleshooting tips.
1. Run Troubleshooting
The Windows troubleshooting tool could be the quick and easy fix to any problem with your touchscreen.
Do a system search for troubleshooting and select the relevant result. In the new window, click View all from the left-hand menu. From the list that appears, click Hardware and Devices.
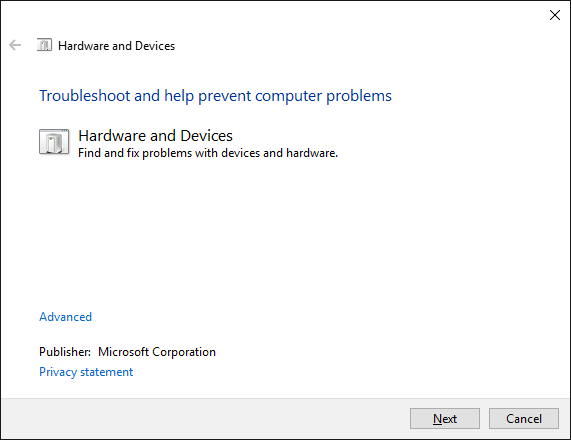
Click Next and run the wizard through. The tool will automatically detect issues and then repair them. However, it’s by no means comprehensive and you may need to carry on reading.
2. Calibrate the Touchscreen
When your touchscreen is slow to respond or records your touch gestures inaccurately, a re-calibration might be all it takes to bring it up to speed. Here’s how to perform a touchscreen calibration.
Do a system search for calibrate and select Calibrate the screen for pen or touch. A new window will open containing tablet PC settings.
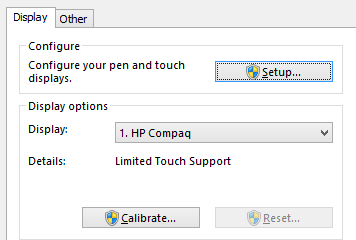
On the Display tab, use the Setup… and the Calibrate… buttons in turn to see if this resolves the issue.
3. Disable and Re-enable the Touchscreen
The closest fix to rebooting the entire computer, which should have been your very first step, is turning the touchscreen off and back on.
Press CTRL + X and select Device Manager. Double click on Human Interface Devices to open the dropdown. Right click the listing for HID-compliant touch screen and select Disable. You’ll be asked to confirm this, so click Yes.
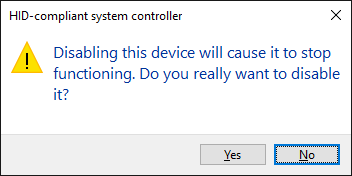
You now need right click the listing again, but this time select Enable. This is one of the simplest solutions, but it doesn’t always work. In fact, you may find that the issue still continues after a system restart. If that’s the case, please read on.
4. Change Power Management Settings
Windows 10 will do its best to converse power, but sometimes the settings can be overzealous and turn off your touchscreen after a period of activity.
While the touchscreen should automatically enable itself again when it detects input, this isn’t always the case. As such, you can disable the power saving of your touchscreen to see if this fixes the problem.
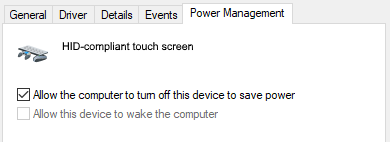
To begin, press Windows key + X and click Device Manager. Next, double click on Human Interface Devices, then double click the listing for HID-compliant touch screen.
This will open a new window. Switch to the Power Management tab. Untick Allow the computer to turn off this device to save power. Click OK, then restart your system.
5. Update the Drivers
A driver is a piece of software that helps your hardware. For example, your touchscreen communicates with your computer’s processor. Thus touchscreen malfunctions could be due to a faulty driver.
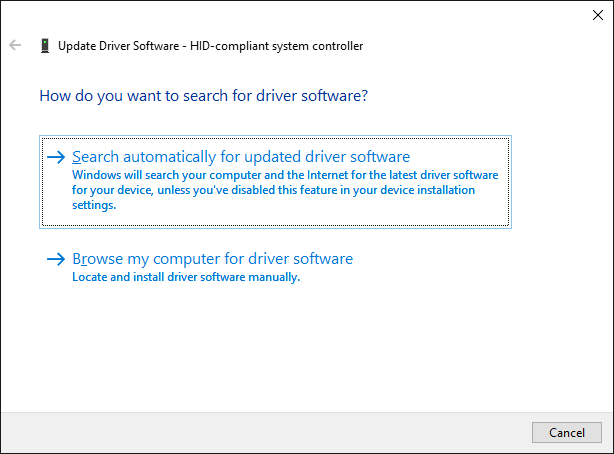
Following on from the instructions above, with Device Manager still open, right click the HID-compliant touch screen and select Update Driver Software….
You’ll want to Search automatically for updated driver software. This will scan Microsoft’s database for any updates available for your touchscreen device. Follow the wizard through as necessary, then restart and see if your problem is resolved.
If not, you should try going directly to the manufacturer’s website, look for their drivers page, select your device number, and download the latest driver.
With this driver downloaded, you may be able to extract it and install it automatically. However, you can select Update Driver Software… again, but this time click Browse my computer for driver software. Use Browse… to locate it, then follow the wizard through.
For more information on updating drivers, check out our guide on how to find and replace outdated drivers.
6. Rollback the Drivers
In Windows 10, the Windows Update also updates your hardware drivers. Unfortunately, not all driver versions work equally well. If it’s actually driver updates that are causing the problems, you should try rolling back to the default.
For this, again in Device Manager, right click the HID-compliant touch screen and then select Properties. Then switch to the Driver tab and select Roll Back Driver.
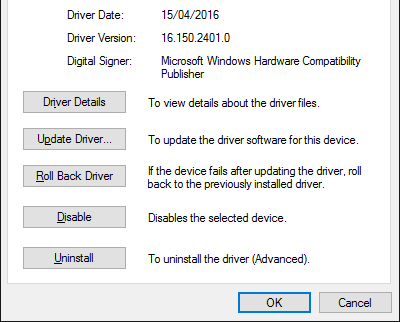
You know that there’s a specific older driver version that will work but aren’t able to get to it through a rollback. Within the Driver tab select Uninstall instead and then follow the method outlined in step four above.
Windows 10 has automatic updates and you might find that the system keeps pushing the latest drivers onto you—which may very well be the ones causing the problem. For details on how to overcome this, check out our guide on how to take back control over driver updates.
7. Uninstall Recent Programs
For whatever reason, some programs cause touchscreen problems. If your touchscreen has only recently broken, you should uninstall any recently added programs.
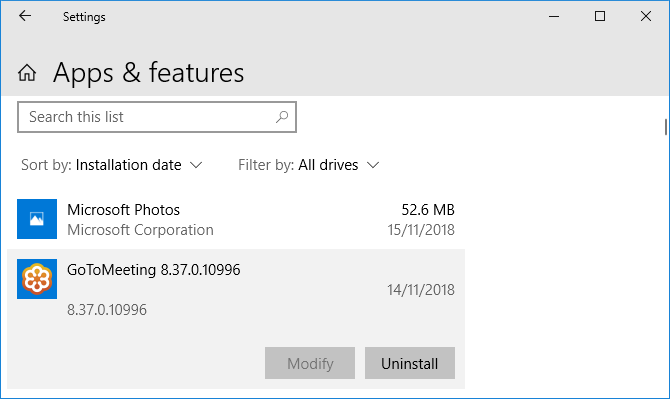
To do this, press Windows key + I to open Settings. Click Apps. Use the Sort by dropdown and select Installation date.
Look for the date when the touchscreen problem started. Working up, click each app in turn and Uninstall it. Restart your computer each time and see if it fixes the touchscreen.
8. Move to Another Room
This one sounds weird but bear with me. Other nearby electronic devices can interfere with the touchscreen. It could be caused by something you’ve got plugged into the same power bank or because you’ve got lots of computers in close proximity.
It’s simple to diagnose this, though. Take your touchscreen device somewhere else and try it. If it works, electromagnetic interference is the culprit.
To resolve, go back to the original room and turn off everything else. Then turn them back on one by one to see what causes the problem. If none of them seems to be at fault, check nearby areas for powerful equipment that could be the cause.
9. Contact the Manufacturer
Have you tried all of these tips and your touchscreen is still broken? If so, you should probably contact your system manufacturer to get them to investigate.
It’s likely that the problem is a hardware fault, rather than a system one, and they will have the expertise to fix it. You may find that you’re still covered by warranty, depending on what caused the damage.
Touch Problems Resolved
Hopefully, our advice above has resolved any problems that you were having with your touchscreen.
For related touch content, if you’re having problems with your tablet’s screen, check out our guide on how to resolve your tablet’s touchscreen issues. Or if your touchscreen is now working great, check our guide to essential touchscreen gestures to make the most of it.
Read the full article: How to Fix Your Touchscreen in Windows 10
Read Full Article
No comments:
Post a Comment