
GIMP is a very powerful image editing tool that offers lots of different ways to remove the background of an image. But which is the right one to use, and how do they work?
In this guide we’ll take a look at six tweaks to help you get started. They’ll enable you to take a picture and make the background transparent, to erase the background so you can blend it with other images, and much more. Please make sure you update to GIMP 2.10 before you begin.
1. Make the Background Transparent in GIMP

When you open a flat image in GIMP it doesn’t support transparency by default. If you want to make the background transparent, there are two simple tricks to enable it to happen.
- Right click on the layer in the Layers dock and select Add Alpha Channel, or go to Layer > Transparency > Add Alpha Channel.
- Alternatively, duplicate the background layer by pressing Shift + Ctrl + D on Windows or Linux, or Shift + Cmd + D on Mac. Now delete the original background layer.
In either case you can now make a selection then hit delete to make the selected area transparent.
We’ll now take a look at the various ways GIMP lets you select the background to make it transparent.
2. Change Background With Foreground Select Tool
When your image has reasonably clear separation between the foreground and background, GIMP has an excellent tool that enables you to select one or the other. It’s called the Foreground Select Tool, and you can use it to remove the background in GIMP then slot in a new one.
With Foreground Select, you simply highlight the area which contains the foreground object and GIMP takes care of the rest.
Open your image, right click on the layer, and select Add Alpha Channel.
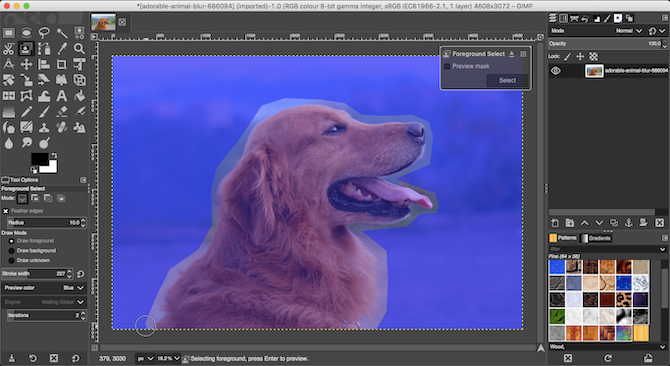
Pick the Foreground Select Tool. Draw a rough outline around the foreground object. You can trace a single line, or click to add a series of connected points. You don’t need to get too close, but the closer the better. Hit Enter when done.
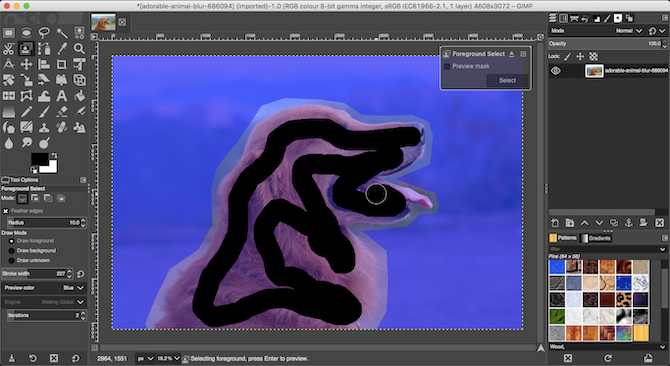
GIMP now selects the brush tool for the next step. Set an appropriate brush size for your image, then paint over the foreground object in a single line. Don’t color it all in, just make a line that crosses over all the image’s different colors and tones. Then hit Enter again.
After a few seconds, GIMP will analyze the image and create a selection containing only the background. Fine-tune the selection by picking the Free Select Tool. Set the Mode to Add to the Current Selection or Subtract from the Current Selection, then draw round the areas you need to add or remove.
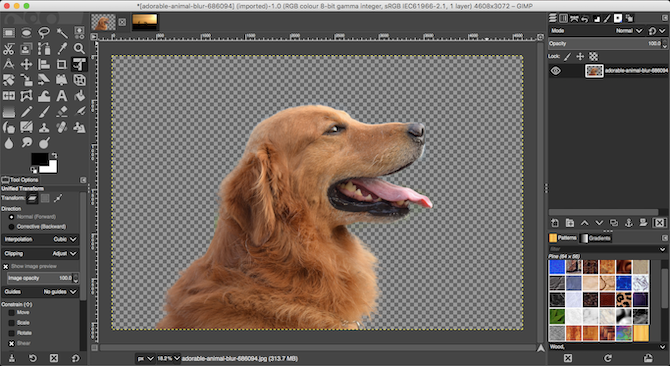
Press Ctrl + I or Cmd + I to invert the selection so that the foreground is now selected. Hit Delete and you’ll remove the background.
Paste in your new background on a new layer, and position it beneath your original image to complete the job.
3. More Tools to Delete the Background in GIMP
GIMP has three other tools you can use to select and then delete the background of an image. Which you should use depends on how well separated the foreground and background are, or whether you’re using one of these graphics tablets with a pen, or a mouse.
Fuzzy Select
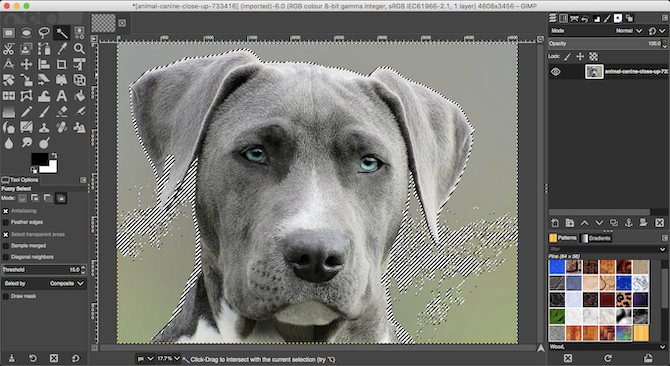
This tool selects connected parts of an image containing the same color.
- Simply click on the area of the image you want to select, and GIMP will do the rest.
- Set the Threshold to a higher value to include a greater range of similar colors in your selection, or lower to be more precise.
This tools works well where an image has large areas of flat color. It’s better for icons and logos than photos.
Scissors Select
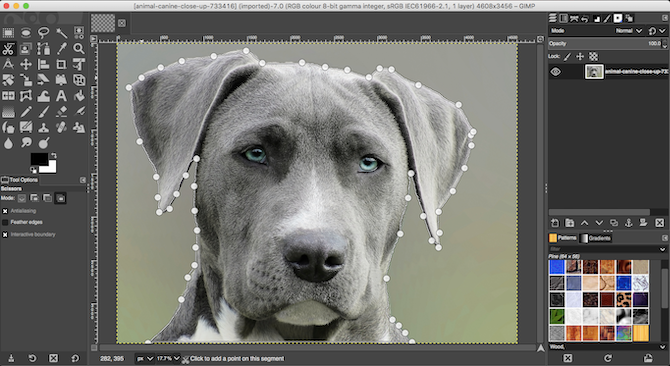
The Scissors Select Tool enables you to semi-automatically select and isolate the foreground object, so that you can then erase the background.
- Add an Alpha Channel to the image.
- Pick the Scissors Select Tool. Then, in Tool Options, select Interactive boundary.
- Click and release on the edge of the foreground object you want to select. This drops an anchor point onto the image.
- Move the cursor a little way along the edge of the object, then click and hold. A line will appear, connected to the previous anchor point, showing the edge of your selection. If this line tightly follows the edge of the object you’re trying to cut out, release the mouse button to create a new anchor point.
- If the line deviates from the edge of your object, drag backwards or sideways until it lines up properly. Shorter gaps between the anchor points usually work better.
- Now repeat until you’ve selected the entire object. Hit Enter to complete the selection.
- Finally, press Ctrl + I or Cmd + I to select the background, then hit Delete.
Pen Tool
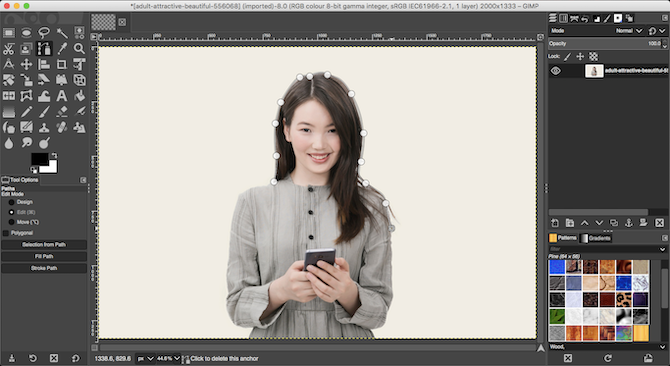
Like Scissors Select, the Pen Tool also allows you to make a selection by drawing a line between a series of anchor points. However, this time the line does not magnetically attach to the object you’re selecting.
- Add an Alpha Channel to your image.
- Select the Pen Tool and click on the edge of the object you want to select. This places the first anchor point.
- Now move the cursor a little way along the edge of the object and click again to drop a new anchor point. Click and release to connect to the previous anchor point with a straight line; click and drag to connect with a curved line. The direction in which you drag will determine the depth and angle of the curve.
- Repeat this until you’ve selected the whole foreground object. When you’re finished, hit Enter.
- Press Ctrl + I or Cmd + I to invert the selection, then hit Delete to remove the background.
No matter which tool you use, it’s usually easier to create your selection from whichever is the smaller of the foreground or background, so there’s less work to do.
4. Remove a White Background in GIMP
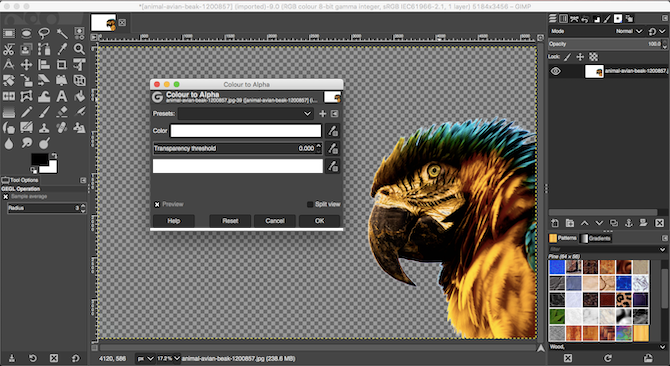
GIMP has a specialist tool that enables you to remove a white background. It’s particularly good for graphics elements like logos and icons, where the background is a flat, solid white.
- With your image open, go to Layer > Transparency > Add Alpha Channel.
- Select Colors > Color to Alpha. This will open a new dialog box.
- Click the dropper icon next to Color, then click the white background in your image. This will make the white area transparent, and may be enough.
- To fine tune the selection, select the dropper next to Transparency Threshold then click the darkest area of the background you’d like to remove. You can use this to pick up areas of slight shadow, such as in portrait photos.
- Select the dropper next to Opacity Threshold then click the lightest area of the foreground object. This will ensure you don’t accidentally remove parts of the foreground.
- Click OK to finish.
5. Change the Background Color in GIMP
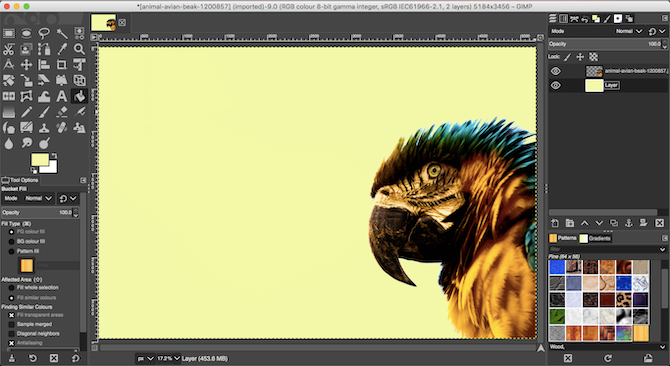
To change the background color in GIMP, use the same process we’ve explained to remove a white background.
Now add one extra step.
Create a new layer, and use the Bucket Fill Tool to fill it with the color you need. In the Layers dock, drag the new layer below the original one to set it as the background.
6. Erase the Background in GIMP With Masks
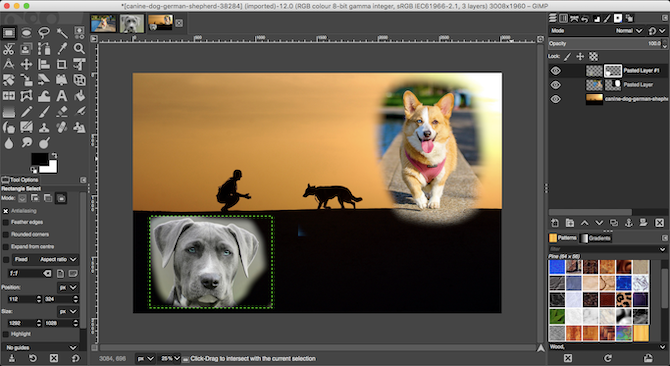
Finally, if you’re blending multiple images together, you may need to erase the background of one of the top layers in order to reveal what’s underneath. You can do this very quickly using Masks.
- Open your two images on separate layers in the same file.
- Select the top layer and click the Masks button at the bottom of the Layers dock. Click Add to add the mask.
- Select the Brush tool and set the color to black.
- Now start painting onto the top layer. Where you paint black, the top layer will be erased and the bottom layer will become visible.
- If you make a mistake, change the brush color to white. Now paint over the black areas of the mask and that will make the top layer visible once again.
More GIMP Tips and Tricks
Being able to remove the background from an image is one of the most important things to master. If you have recently switched from Photoshop to GIMP, it’s especially important as the techniques are different in Photoshop.
Once you’ve got your head around these tweaks, there’s a whole lot more for you to learn, too. Take a look at our guide to using GIMP for photo editing, where you’ll master everything from color correction to removing unwanted objects from your shots.
Read the full article: 6 GIMP Background Tweaks and Tips to Customize Your Images
Read Full Article
No comments:
Post a Comment