
Windows users have a few different options when it comes to creating customized keyboard layouts.
You could use the ever-popular Portable Keyboard Layout software. It’s open source and lets you keep different keyboard layouts on a USB stick so you can easily use them on any machine. Of course, Windows also offers a native way to jump between different keyboard layouts.
You can also try using keyboard remapping software. There are lots of free options available, but one of the most overlooked apps is the official Microsoft Keyboard Layout Creator.
How to Create a Custom Keyboard Layout on Windows
Before we start, a word of warning: the Microsoft Keyboard Layout Creator app is nearly a decade old. It still works perfectly and runs on Windows 10, but occasionally you might encounter a bug.
Firstly, you need to download and install the app from the Microsoft Download Center. When it’s installed, follow the instructions below to create your own keyboard layout:
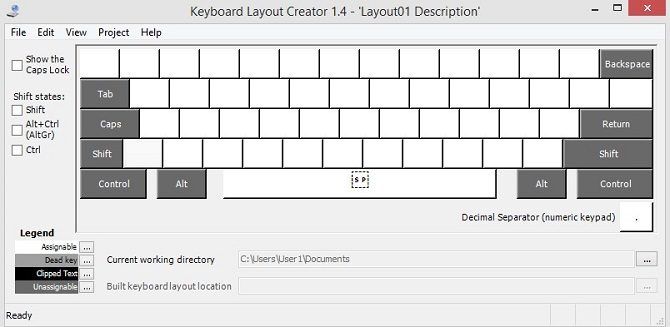
- Open the Microsoft Keyboard Layout Creator app.
- Head to File > Load Existing Keyboard.
- Pick the layout you want to customize. You should make sure you pick the layout that matches your current keyboard setup, for example, QWERTY (U.S.).
- Go to File > Save Source File As so you have a backup before you start making changes.
- Set your new keyboard’s parameters in Project > Properties. You can pick a language and give the keyboard a name and description.
- Click on a key and follow the on-screen prompt to remap it to a character of your choosing.
If you want to add hotkeys for accented letters or other obscure characters that you frequently use, the easiest way is to program them to Ctrl + Alt + [Number]. You cannot overwrite existing shortcuts like Ctrl + S (Save) or Ctrl + A (Select All).
Check out our article about useful Windows shortcuts if you’d like to learn more.
Image Credit: Ai825/Depositphotos
Read the full article: How to Create a Custom Keyboard Layout on Windows
Read Full Article
No comments:
Post a Comment