
Running apps as an administrator in Windows gives them extra privileges. It lets them edit the registry, change system files, and access other folders that are usually restricted.
Sometimes, you need to run a program in administrator mode every time you use it. For example, my music management software needs to run in administrator mode so it can automatically organize my files in real-time.
If you have any apps you use every day that also require admin privileges, you will know how annoying it can be to continually right-click on the shortcut or EXE and select Run as Administrator.
Thankfully, there’s a way to make apps run in admin mode automatically. You’ll just need to agree to the popup UAC warning every time you launch them.
How to Always Run Apps as Administrator
To make apps open in administrator mode every time you open them, follow the step-by-step instructions below.
- Open the Start menu.
- In the All Apps list, scroll down and find the app you want to change.
- Right-click on the app’s name and go to More > Open file location.
- File Explorer will open. Again, right-click on the app’s name.
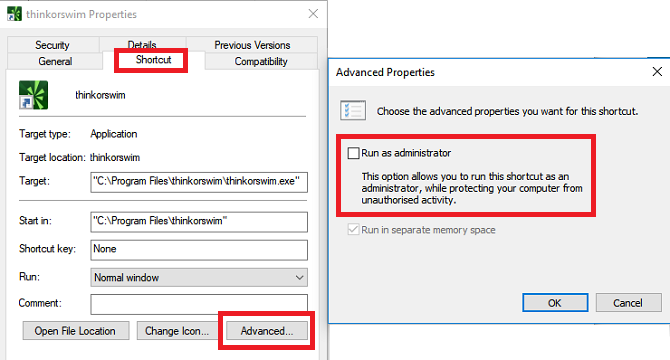
- Click on Properties and select the Shortcut tab.
- Select Advanced.
- Finally, mark the checkbox next to Run as administrator.
- Click on OK to save your changes.
Now your app will open in administrator mode every time you run it. If you want to remove automatic admin rights at any point in the future, re-follow the steps above and unmark the checkbox in Step 7.
For more information about administrator mode on Windows 10, check out our introductory guide to User Account Control.
Read the full article: How to Always Run Apps as Administrator on Windows
Read Full Article
No comments:
Post a Comment