
You can use your Mac to diagnose your network problems. Even better, it’s possible to improve wireless performance throughout your house, for all your devices, with a simple free tool.
You don’t have to be a network engineer in order to create a solid network. Whether you’re using an old free router or a pricey new mesh router system, you can speed everything up by fine-tuning your network to your surroundings.
Since macOS comes with everything you need, you don’t even have to install additional software.
Your Mac’s Hidden Network Tool
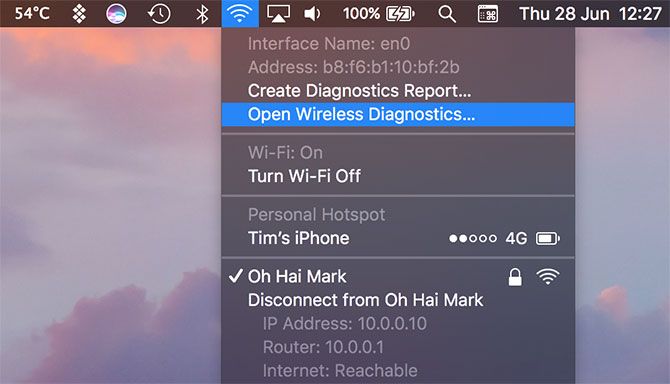
Today we’ll use the Wireless Diagnostics app to analyze and improve wireless performance. You can access it by searching with Spotlight or looking in Applications > Utilities. Another way is to hold Option while you click on the Wi-Fi icon in the menu bar, then choose Open Wireless Diagnostics.
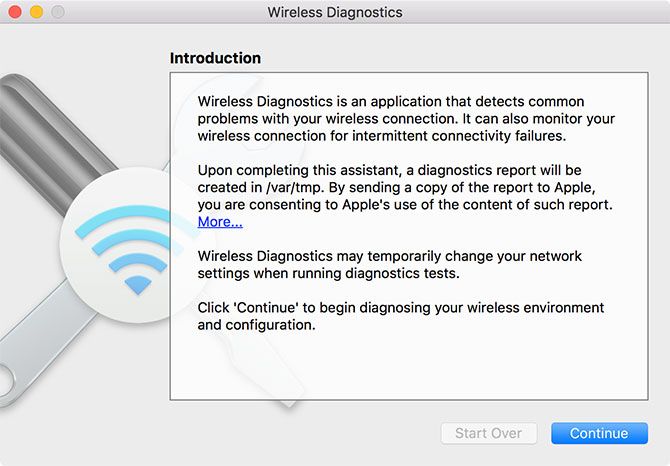
You’ll first see an assistant for diagnosing Wi-Fi issues. This assistant can be useful when experiencing network problems like frequent dropouts, but we won’t use it today. Instead, take a look at the menu bar options at the top of the screen, specifically under the Window menu.
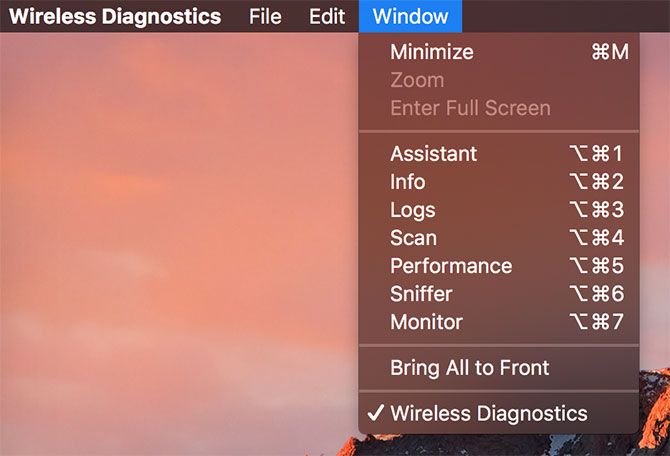
These are the many tools built into Apple’s Wireless Diagnostics utility. They’re all related to your local wireless network, and have no bearing on internet speed, connectivity, or external IP address.
Today we’re interested in the Performance and Scan windows, but it’s worth mentioning the others quickly:
- Assistant is the helper that you see when you first launch the utility.
- Info provides a long list of network information, including security, channel, and transfer rate.
- Logs allows you to enable background logging of network traffic, which is saved in a LOG file in the /var/tmp directory.
- Sniffer lets you capture Wi-Fi traffic transmitted on a specific channel, ideal for diagnosing issues that you can consistently reproduce.
- Monitor places an overlay on your screen with basic but handy information, which helps you diagnose issues while performing other tasks.
Optimize Wi-Fi Channel to Reduce Congestion
Optimizing your network channel is probably the single best way to improve wireless performance, save for standing right next to your router all day. The idea is to use a different channel than your nearest neighbors to cut down on congestion and channel overlap.
If your router is old, you’re probably using a 2.4GHz band. Newer routers come with dual-band radios, offering both 2.4GHz and 5GHz bands. Generally speaking, 2.4GHz offers better obstacle penetration, whereas 5GHz offers greater speeds and less channel overlap.
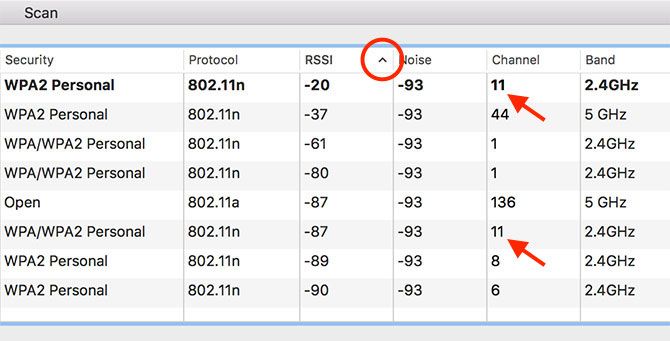
Open Wireless Diagnostics and head to Window > Scan, or use Option + Cmd + 4. Hit Scan Now to perform a scan of all nearby wireless networks. Once complete you’ll see all nearby competing access points, including any hidden ones that don’t normally show up.
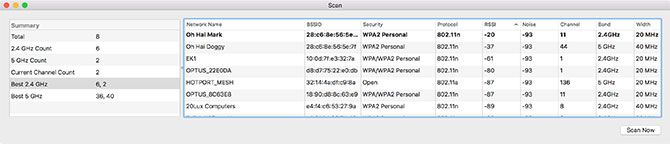
Note: The scan reveals a lot of information. Be aware that you may need to scroll the window horizontally, or drag and resize the window, in order to see it.
Arrange the scan results by signal strength by clicking on RSSI to sort by ascending. Your own router (in bold) should now be at the top of the list. If you have a dual-band router, you’ll see both bands represented as separate networks.
Optimize the 2.4GHz Band
The 2.4GHz band only has a few “good” channels that aren’t subject to overlapping: 1, 6, and 11. It’s highly likely that all the 2.4GHz network devices in the area are using one of these three. The key is to make sure your nearest neighbors are using different channels from yours.
Take a look at the 2.4GHz network nearest to your own, which is the item below yours in the list. Note its channel, and cross-reference it with your own. If you’re in a particularly congested area, observe what your other neighbors are using.
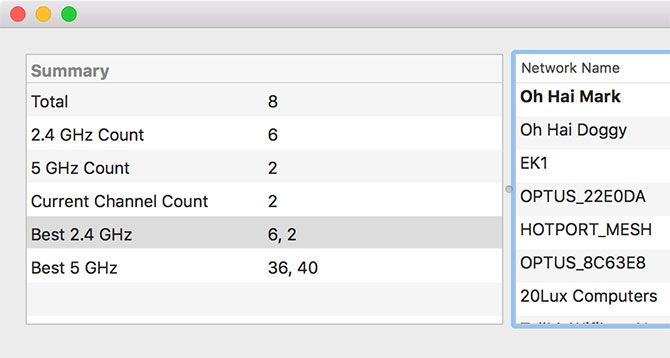
Pick a channel from 1, 6, and 11 that your neighbors are using the least. Take a look at the “Best” suggested 2.4GHz channel under the Scan window for a second opinion.
Optimize the 5GHz Band
The 5GHz band is much easier, since the channels do not overlap. In this instance you can sort through nearby neighbor networks at your own pace, or you can simply consult the “Best” 5GHz channel recommendation provided by the Scan window on the left.
Improve Wi-Fi Quality by Monitoring Signal-to-Noise
Make sure Wireless Diagnostics is running, then head to the menu bar at the top of the screen and click Window > Performance. You can also use the keyboard shortcut Option + Cmd + 5.
This reveals three graphs, which will populate with data as you leave the window open. The top graph refers to the network transfer rate—or how fast data reaches you from the router, and vice versa. The second is the overall quality of your connection, which is the signal-to-noise ratio over time.
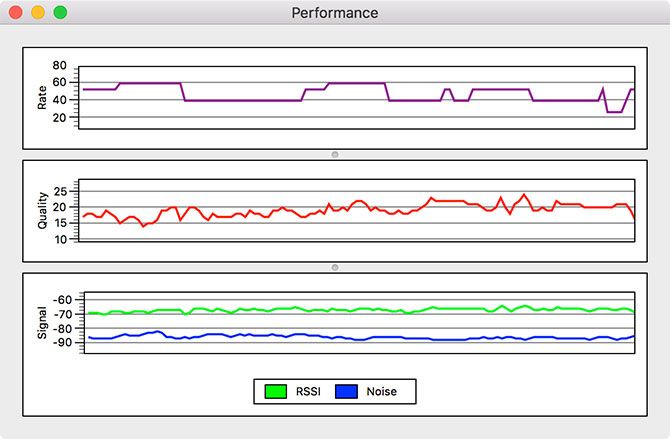
Finally the third, and the one we’re most interested in, shows your signal strength (green) to noise (blue). Ideally, you want a large gap between the two. If your signal is too low, and the noise is too high, this will cause slow network speeds and complete dropouts.
Assuming you’re using a MacBook, move around your house and take note of how the signal and noise graphs interact. You can use this tool to isolate signal dead zones in your house, as well as sources of interference. Observe how the signal and noise changes as I move closer to my access point:
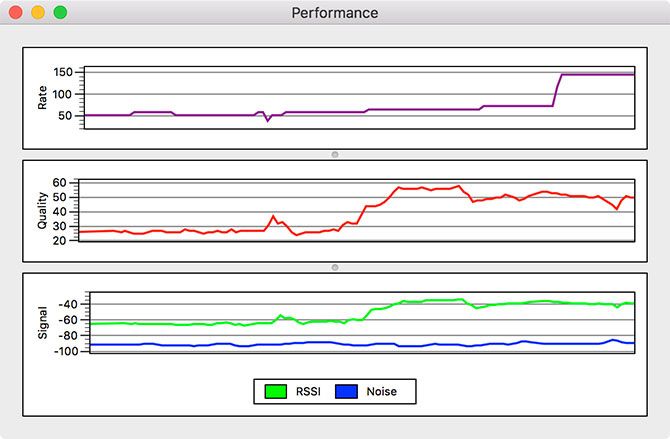
If you’re setting up a mesh router system, this can help you establish the best locations for you network hubs. If you’re using a regular router, it can help you to better position your network equipment for more even coverage. You can also isolate areas that may benefit from a Wi-Fi range extender.
Try making adjustments to the position of your wireless access point to better serve your needs. This might mean repositioning your router to better serve the kitchen and office, rather than your bedroom or living room. It may also help you decide whether a range extender or upgrading to a superior mesh Wi-Fi network is actually worth it.
Sometimes the Best Tools Are Free
A myriad of Wi-Fi analyzer tools are available for macOS, but you don’t really need them. The best way to improve your wireless connection is to improve your network equipment. A powerful modern router or multi-part mesh Wi-Fi network will provide far more relief from network issues than a few Mac apps.
The more devices you have connected to your router, the more interference and problems you are likely to have. Home routers are not designed to deal with lots of devices. They get hot, they crash, and much of the time they only last a few years before they need replacing.
You can diagnose and fix slow Wi-Fi issues, but you’ll never match the speed and reliability of a wired Ethernet connection. That’s just the trade-off we have to live with for the convenience of fast internet anywhere.
Read the full article: How to Analyze and Improve Your Wi-Fi Network With Your Mac
Read Full Article
No comments:
Post a Comment