If you’re working from home and need to get remote access to a Windows 10 computer from your Mac, we have good news: it’s easy.
Microsoft offers a free tool to do the job. It lets you use your Windows apps, access files, or do anything else on Windows directly from your MacBook or other macOS machine.
Read on to learn how to set up your Mac with the Remote Desktop app to connect to Windows 10.
Step 1: Set Up Remote Desktop on Windows 10
Microsoft Remote Desktop requires Windows 10 Pro or Enterprise, or Windows Server. The software runs on Microsoft’s proprietary RDP protocol, which isn’t available on the standard Windows 10 Home Edition. If you need to connect to a PC running Home, one of the best remote access tools will help you out.
The first steps to set up Remote Desktop for Mac occur on your Windows computer.
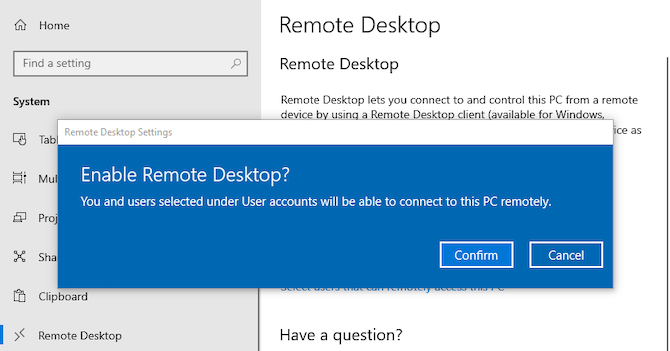
On your Windows 10 machine, open the Start menu and go to Settings > System > Remote Desktop. Set Enable Remote Desktop to On, and click Confirm when prompted.
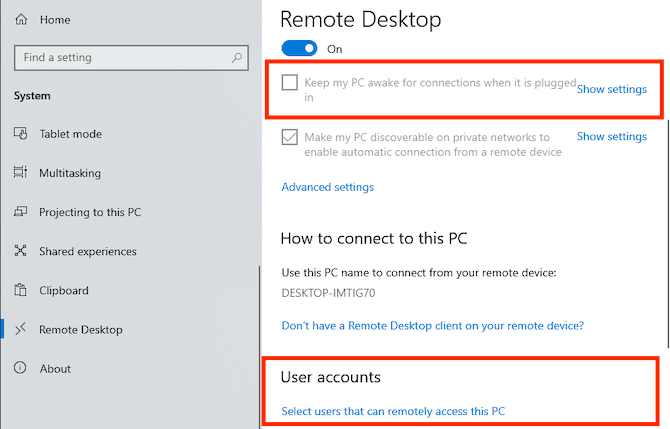
Your PC needs to be on and awake for you to connect remotely. You might therefore want to activate the Keep my PC awake option. To do this, click Show settings alongside it and set Sleep to Never. You should probably only do this if you need constant remote access to the computer. If you don’t, then allowing it to sleep is wise.
Next, scroll down to User accounts. By default, the account you’re logged into will automatically have remote access permissions. To allow other users to log in remotely, click Select users to add their usernames.
Get Your PC Name and IP Address
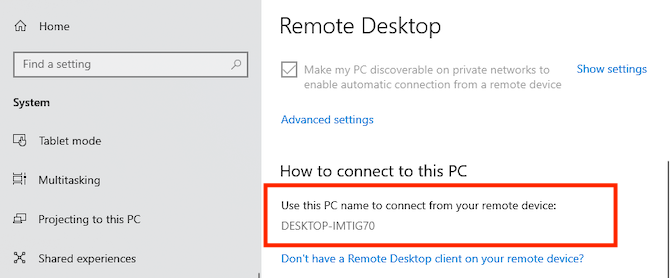
Finally, you need to grab a couple of pieces of info before you switch over to your Mac. On the same Remote Desktop menu, under How to connect to this PC, make a note of your PC name.
If the current name is generic and you’d like to make it something that’s easier to remember, switch to the About tab and click Rename this PC.
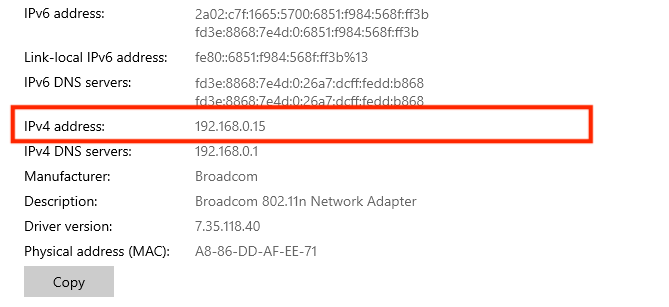
Next, you need to find your computer’s IP address on your network. Go to Settings > Network & Internet. Select Wi-Fi (or Ethernet if you using a wired connection), then click on the network you’re connected to.
This opens the network connection properties screen. Scroll to the bottom of the page and locate the IPv4 address in the list. Make a note of this number.
Step 2: Install Microsoft Remote Desktop for Mac
Now it’s time to set up remote access to Windows 10 from your Mac. First, install Microsoft Remote Desktop, available free in the Mac App Store. Microsoft also offers versions of the app for iOS and Android.
The instructions for those platforms are the same as the ones we use here.
Download: Microsoft Remote Desktop for Mac | iOS | Android (Free)
Step 3: Add Your PC to Microsoft Remote Desktop
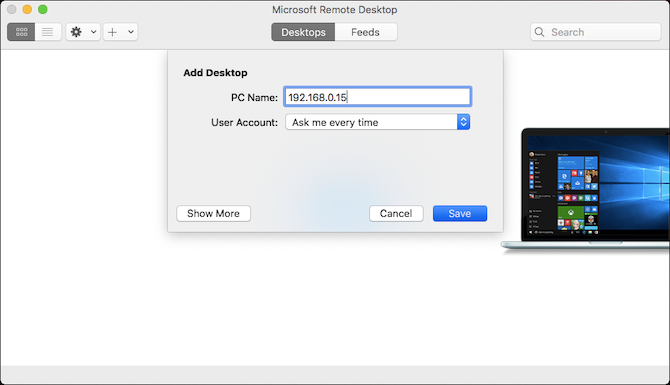
After installing it, launch the Remote Desktop client on your Mac. Click Add Desktop to begin.
In the dialog box that opens, type in the PC Name that you checked earlier. If you find that you’re unable to connect with this name, use the IP address you made note of instead.
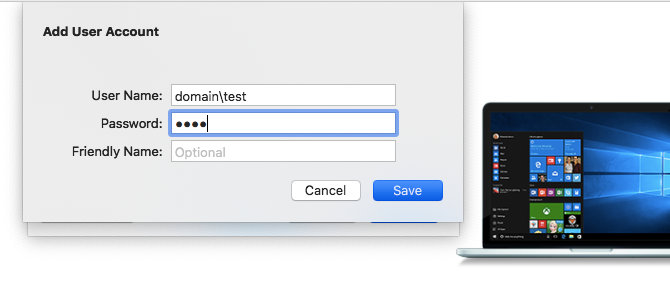
By default, User Account is set to Ask me every time. This means it will prompt you for a username and password each time you connect. If you don’t want this, click the dropdown list and select Add account.
Add your username in the format domain\[username]. You can add your password as well if you want to use automatic login. Leave it blank and you’ll get a prompt to enter it each time.
That’s all you need to do to set up a connection. Click Save and you can connect. However, you might want to adjust a few other settings before you go any further.
Step 4: Configure Your Remote Connection
Click Show More to change your settings. Here, you’re able to configure how your remote connection works:
- In the General tab, add a Friendly Name to make a computer recognizable if you’ve got more than one connection set up.
- Under the Display tab, click Fit session to window if you aren’t planning on using the remote connection in full screen mode. Also, set Optimize for Retina Displays if you’re working on a high-res monitor.
- In the Sound tab, choose which computer should play sound (if either), and whether you want to be able to use your Mac’s microphone.
However, the most important option is Local Resources.
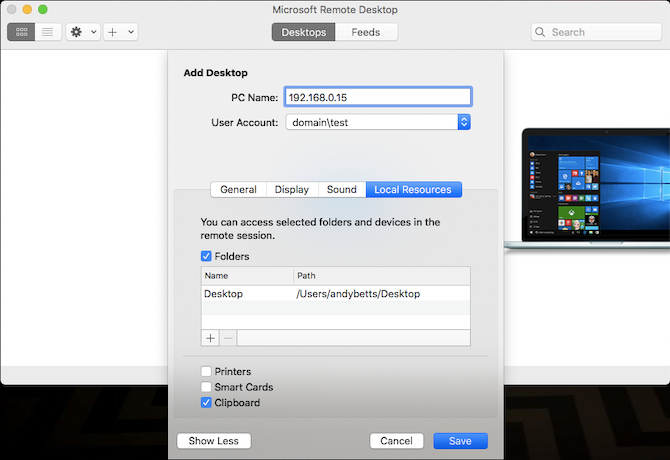
This allows you to make certain folders on your Mac accessible within your remote Windows session. You can access these folders through the Windows File Explorer, where you’ll find them under This PC. You can work with files stored on your Mac in a Windows app, or copy files between the machines.

It’s all contained within the remote session, however. Sharing a folder in this way does not make the folder accessible on the physical Windows computer.
Click Save to finish setting up your connection.
Step 5: Connect to Windows 10 From Your Mac
You’re now ready to connect. Your PC must be turned on, awake, and connected to the same network as your Mac.
The Remote Desktop app will list your computer, with a thumbnail preview, under Saved Desktops. Double-click it to connect.
If you didn’t change the settings, you’ll need to enter your username and/or password now. Remember, the username must be in the format domain\[username]. Click OK.
Security Warning
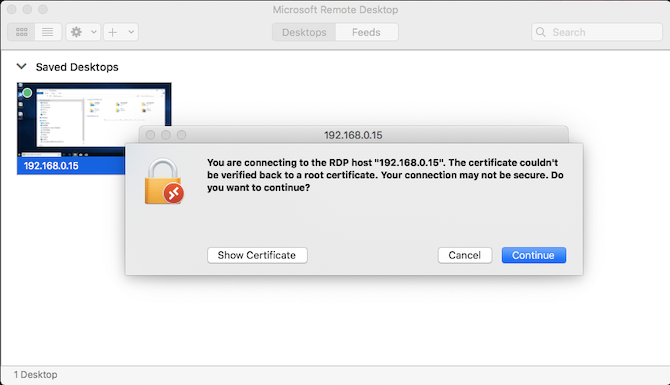
When you make an RDP connection from Mac to Windows, you’ll see a security warning relating to an unverified certificate. If you’re at home, or working on a small business network, you can click Continue and ignore the message. If you’re on a large network with public access, be wary about doing this.
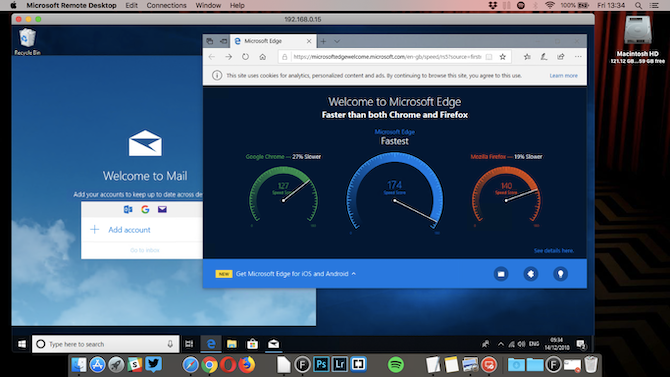
Once You’re Connected
When your Mac establishes the remote desktop connection, your Windows PC will lock and switch to the login screen. If anyone tries to use the PC, your remote session will end. You can’t have two people using the same computer at once.
Using Windows on Your Mac

Unless you changed the setting, your remote desktop session opens in full screen. To use it in a window instead, move your mouse pointer to the top of the screen and click the green window button at the top-left.
Using Windows through Remote Desktop is pretty much the same as using it on a dedicated computer.
One of the few changes—and a possible point of confusion—is that the app maps the keyboard shortcuts for cut, copy, and paste to the ones used in macOS, using the Command key. However, some other shortcuts continue to use the Control key as they do in Windows.
You can launch apps, work on files, or even play games if you want to. There may be a little lag during heavy use, but most of the time it’s fast and responsive.
You can’t drag and drop files between Mac and Windows. They share the clipboard by default, though, so you can copy and paste between them instead.
For a greater level of file sharing, set up a shared folder using the Local Resources setting, as outlined above.
Disconnecting and Deleting Your Desktop
To disconnect and end the session, simply close the Remote Desktop window on your Mac. You can edit your settings at any time by hovering your mouse over the thumbnail in Saved Desktop and clicking the Pen icon.
To delete a desktop, right-click on it and select Delete.
Remotely Access Your Computer From Anywhere
Microsoft Remote Desktop is an easy way to get remote access to Windows 10 from a Mac. But what if you need to do it the other way around, or perhaps need to bring a Linux computer or a Chromebook into the mix?
The quickest solution here is to set up Chrome Remote Desktop, Google’s remote access tool that runs on any desktop computer with Chrome installed. We’ve also shown how to remote access your Mac from any platform.
Read the full article: Microsoft Remote Desktop: How to Access Windows From Your Mac
Read Full Article
No comments:
Post a Comment