
Having problems updating your iPhone or iPad to the latest version of iOS or iPadOS? There are a few reasons why you could be facing these issues. Don’t be disheartened, though—there’s almost certainly a solution to the problem.
Let’s look at some fixes that will help you get the latest software running on your device properly. Here’s how to fix your iPhone or iPad when it won’t let you update iOS or iPadOS.
Preliminary Tips to Fix iPhone Update Issues
Before you dive into advanced troubleshooting, it’s a good idea to check a few basics first. Don’t forget to run through these simple troubleshooting steps when your iPhone won’t update.
1. Charge Your iPhone or iPad
Your device won’t let you upgrade if you don’t have enough battery power. This is to prevent your device from turning off in the middle of an update, which can cause catastrophic damage to your phone.
Make sure you plug in your device and have plenty of charge before updating. It’s a good idea to leave it on the charger while the process runs, too.
2. Make Sure You’re Eligible to Update

Unfortunately, Apple eventually drops support for older devices, so not all iPhone and iPad models can update to the latest iOS iteration. To make sure your device can get the latest release of Apple’s mobile operating system, scroll down to the bottom of Apple’s iOS info page or iPadOS info page and look for your model.
3. Give It Some Time
When you try to update to the latest version of iOS as soon as it comes out, you might run into trouble. Apple’s servers go under heavy load when thousands of people are trying to update at once.
If you receive an error when trying to update to the latest version of iOS, try waiting for a while. You might have better luck later when the update servers aren’t under such a strain.
4. Force-Restart Your Device

A one-off bug can prevent you from updating your iPhone. Restarting your phone will refresh its processes and hopefully clear up any temporary glitches. Follow our guide to restarting your iPhone to learn the steps for your specific device.
Once you’ve done this successfully, you’ll see your screen turn black. Afterwards, an Apple logo will appear, and you’ll be greeted by your lock screen. Your device is now fully refreshed, so you can go ahead and try to update again.
5. Free Up Space
A lack of device storage a common culprit for a faulty update process. Luckily, modern versions of iOS help you free up space easily. Here’s how:
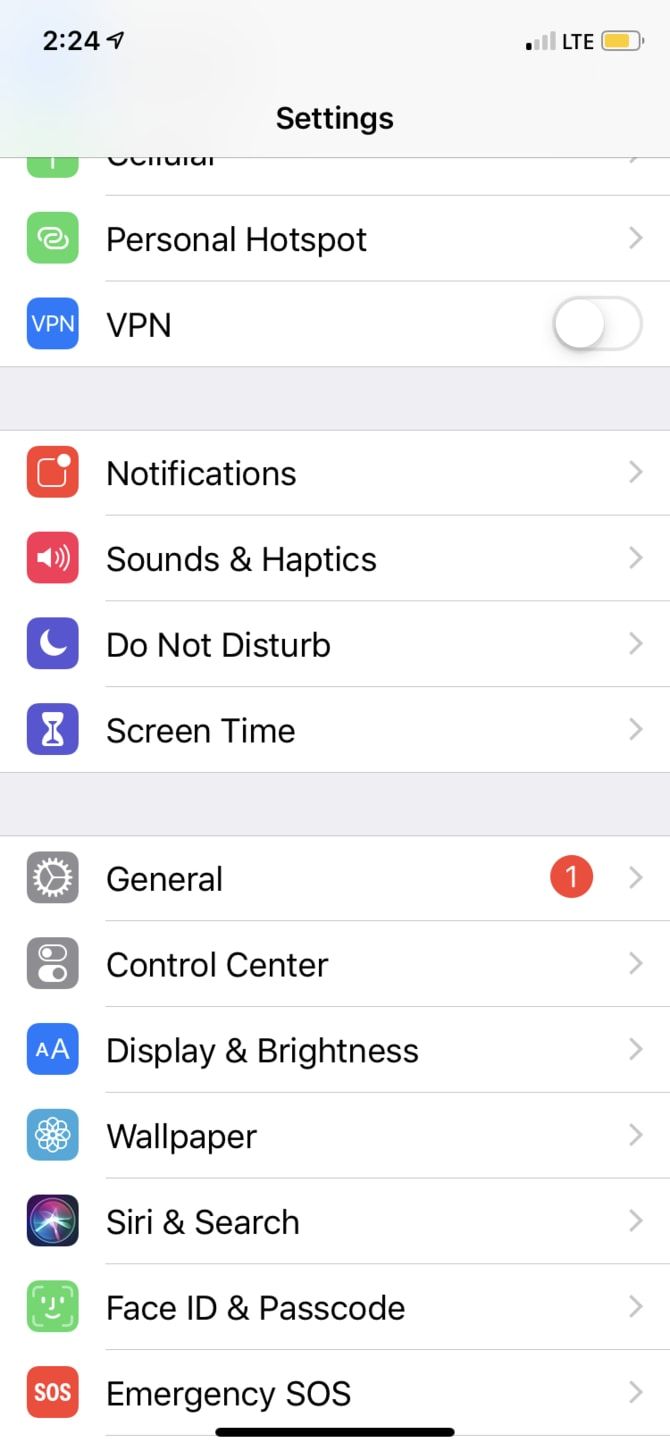
- Open Settings.
- Scroll down and tap General.
- Tap iPhone Storage.
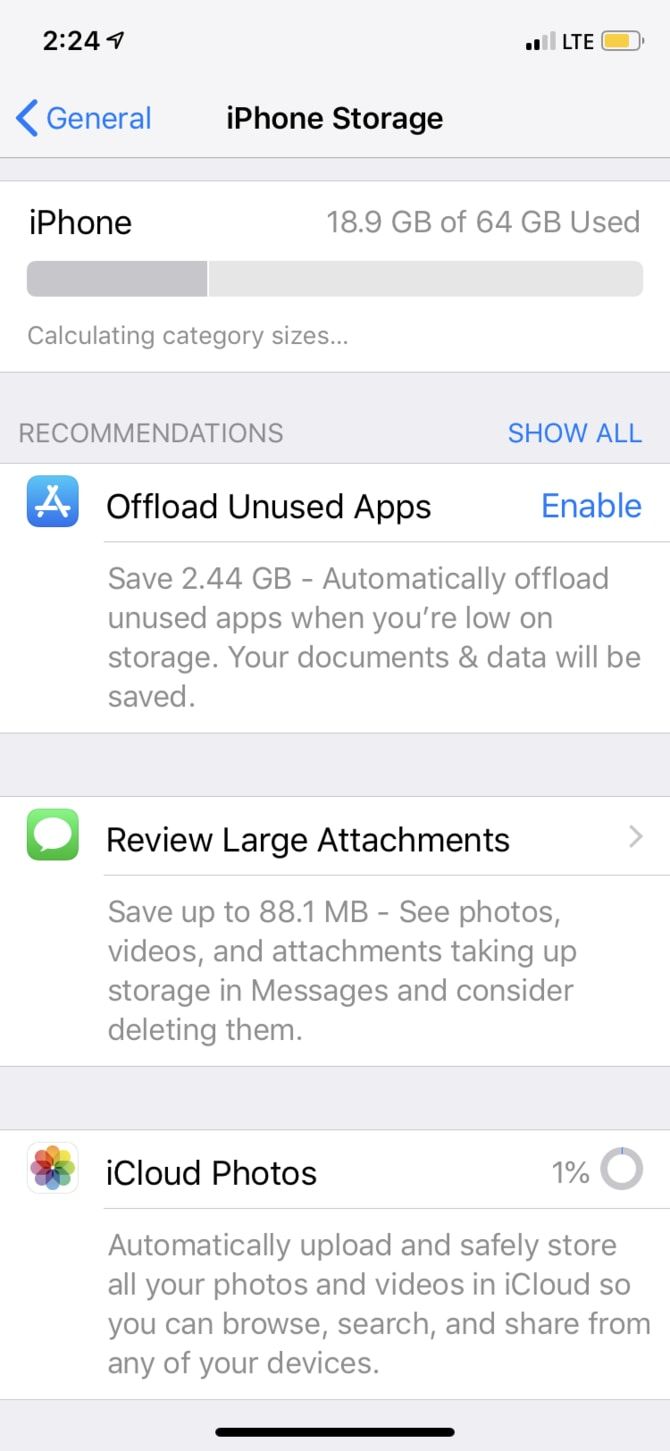
In this menu, you’ll see how much storage you have. Depending on what’s taking up space, your phone will provides a few recommendations, including:
- Offload Unused Apps
- Review Large Attachments
- iCloud Photos
- Auto-Delete Old Conversations
Offload Unused Apps deletes any apps that you rarely use. This won’t delete any of your personal data, though; only the app data itself will be deleted.
Review Large Attachments lets you see the largest photos and videos inside of Messages so you can delete them. This is often an easy way to gain a big chunk of storage, to give your iPhone a bit more room for the update.
iCloud Photos allows you to back up all your photos to iCloud. After doing this, you’re free to delete as many images as you want from your device. However, if you decide to do this, you’ll only be able to access your photos via an internet connection later on.
Auto-Delete Old Conversations has your phone clear out messages and attachments that were sent years ago in order to save space.
Once you’ve freed up some space, try the update again. Follow our ways to free up space on your iPhone if you need to clear more.
6. Force Update via iTunes

While most people are used to updating iOS right on their device nowadays, you can still run the update through your computer.
On Windows or macOS Mojave and earlier, you can update your iPhone through iTunes by following these steps:
- On Windows, download iTunes for Windows if you don’t have it already.
- Connect your iPhone or iPad to your computer with its charging cable.
- Open iTunes.
- Sync your iOS device.
- Click Check for update.
- Click Download.
- Once the download is finished, select Update.
Since Apple retired iTunes in macOS Catalina, you’ll need to do this through Finder instead. Connect your device to your Mac, open Finder, and click the device name on the left sidebar. This will bring you to a panel similar to the old iTunes interface, where you can follow the steps above.
After doing this, the update will install onto your device. If you have trouble, see what to do when your iPhone won’t connect to your computer.
7. Reset Your Wi-Fi Settings

If you can’t update through iTunes either, the next step is to take a look at your Wi-Fi connection. A slow or unreliable Wi-Fi connection means you may not be able to update properly.
Make sure you’re connected to a strong Wi-Fi network when you try to update. It’s worth restarting your router if you haven’t done so in a while. You might also try connecting to another network and seeing if you have the same issue there.
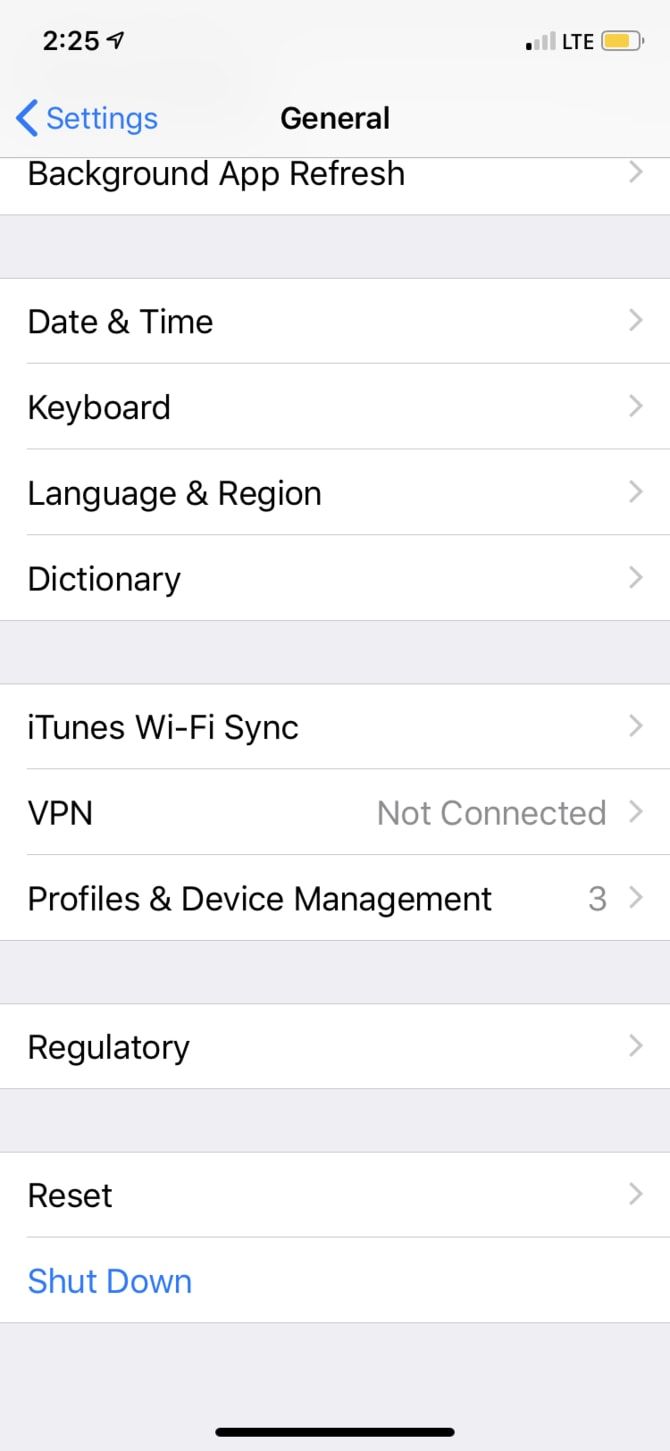
If you can’t update on any Wi-Fi network, you can reset your device’s network settings to start fresh. Note that this will clear out all network preferences you’ve saved, so you’ll need to reconnect to all previously saved Wi-Fi networks again. This will also reset any VPN configurations you use.
To reset network settings on your iPhone or iPad:
- Open Settings.
- Tap on General.
- Scroll down to Reset.
- Select Reset network settings.
- Enter your passcode and confirm you want to do this.
8. Factory Reset Your Device
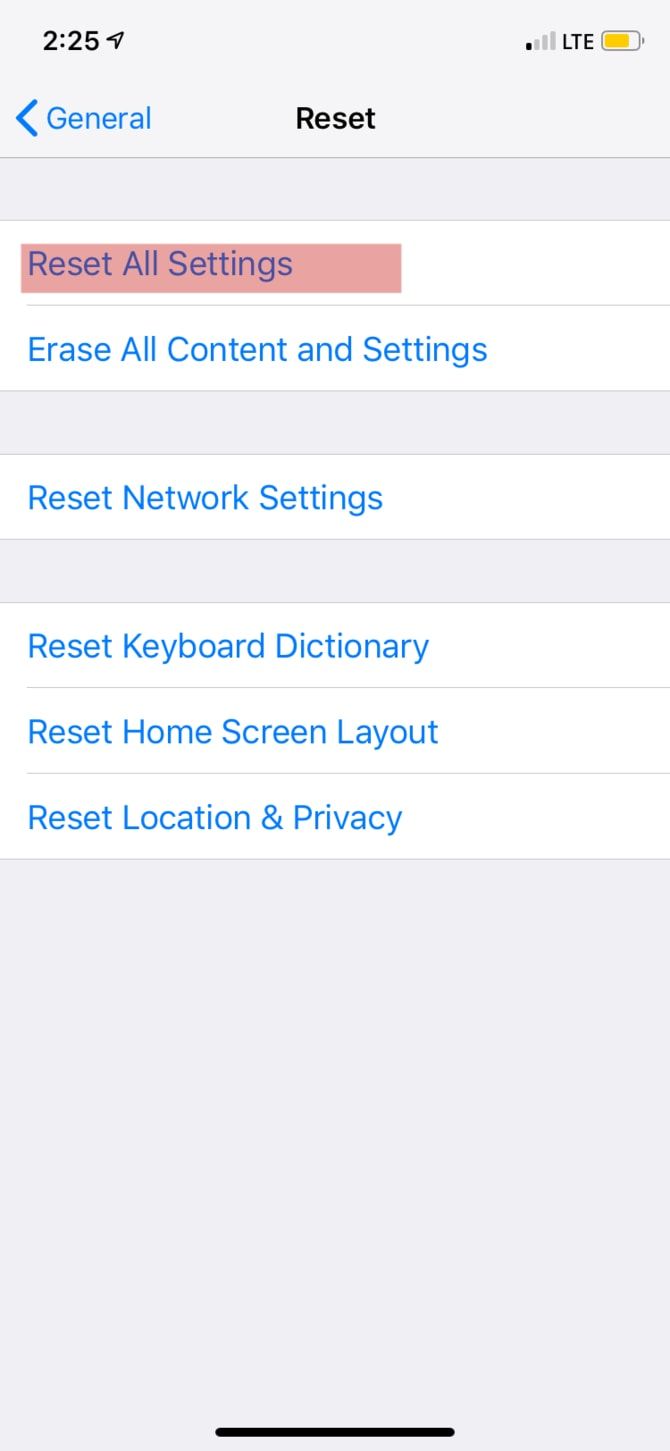
If none of the above has fixed your problem, you should consider completely wiping your device. In the Reset menu mentioned above, you can either reset all settings on your device, or perform a factory reset to erase everything.
Resetting your settings probably won’t fix an update issue, but it’s worth a try if nothing else has worked:
- Launch Settings.
- Open General.
- Tap Reset.
- Select Reset all settings.
- Confirm with your passcode.
All your settings are now reset. Try to update again. If it works, you’ll need to put all your settings (including app preferences, display options, and similar) back as they were.
Failing that, you can go the more extreme route and reset your device to factory defaults. Keep in mind this will erase all the data on your iPhone or iPad. Make sure you’ve backed up your iPhone before proceeding so you don’t lose any information.
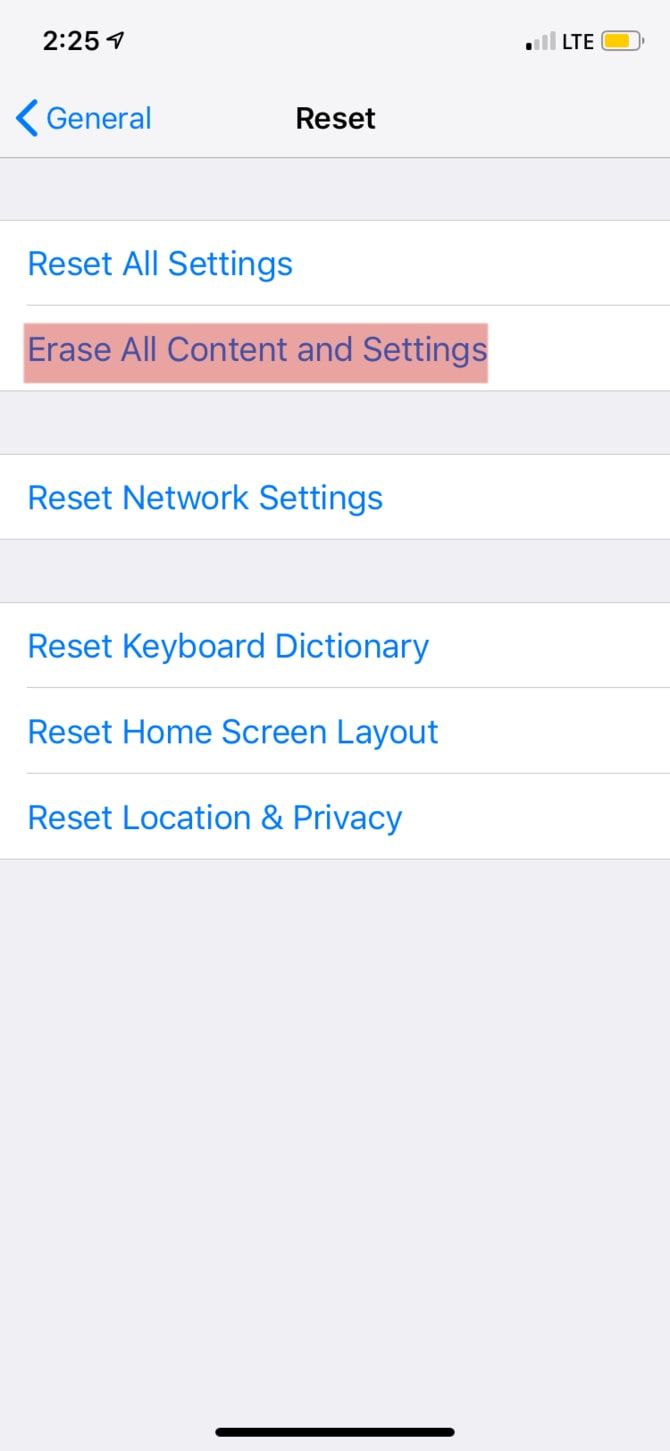
Here’s how to factory reset your device:
- Open Settings.
- Tap General.
- Tap Reset.
- Select Erase All Content and Settings.
- Confirm with your passcode.
Your device will now revert back to its factory state. Because everything is fresh again you’ll hopefully be able to update without issue. You can restore your iPhone backup when you set up your phone after the reset.
iPhone Updating Troubles: Fixed!
It’s frustrating when your phone won’t let you update. Hopefully, one of these fixes solved your problem and you can now enjoy the latest version of iOS.
Speaking of which, after you’re finished updating, check out the best features you should try in iOS 13.
Read the full article: Can’t Update Your iPhone or iPad? 8 Ways to Fix It
Read Full Article
No comments:
Post a Comment