Canva is an amazing design website that helps you create everything from postcards to resumes using a collection of pre-made templates.
It’s perfect for people who are running short on time and need a quick design, or for people who don’t have design experience but still want to create something nice.
However, if you’re using Canva and you want to create a poster for an event, how do you go about it? Here’s how to make a flyer in Canva suitable for any occasion.
Step 1: Find the Right Template

The first thing you want to do to make a flyer is log into Canva. Or, if you haven’t already signed up for an account, do that first and then log in.
After you’ve signed up and logged in, you’ll see a homepage that is very similar to the screenshot above. Under Create a design, you’ll see a list of templates that are the most commonly used.
You can also search for a template under What would you like to design?
Fortunately, Flyer is one of of the most popular designs on the website. All you have to do is click on its icon, seen here highlighted in red. No searching is necessary.

Once you open the Flyer template, you’ll be taken to a blank page. Along the left side you’ll see templates divided by the purpose they’re best suited for.
We’ve talked about these categories before in our tutorial on how to find the perfect resume using Canva. If you want to learn more about this step, we recommend reading that article.
Step 2: What Is Your Event About?

The type of event you’re holding will influence your design. It will also influence the Canva template that is best suited for it.
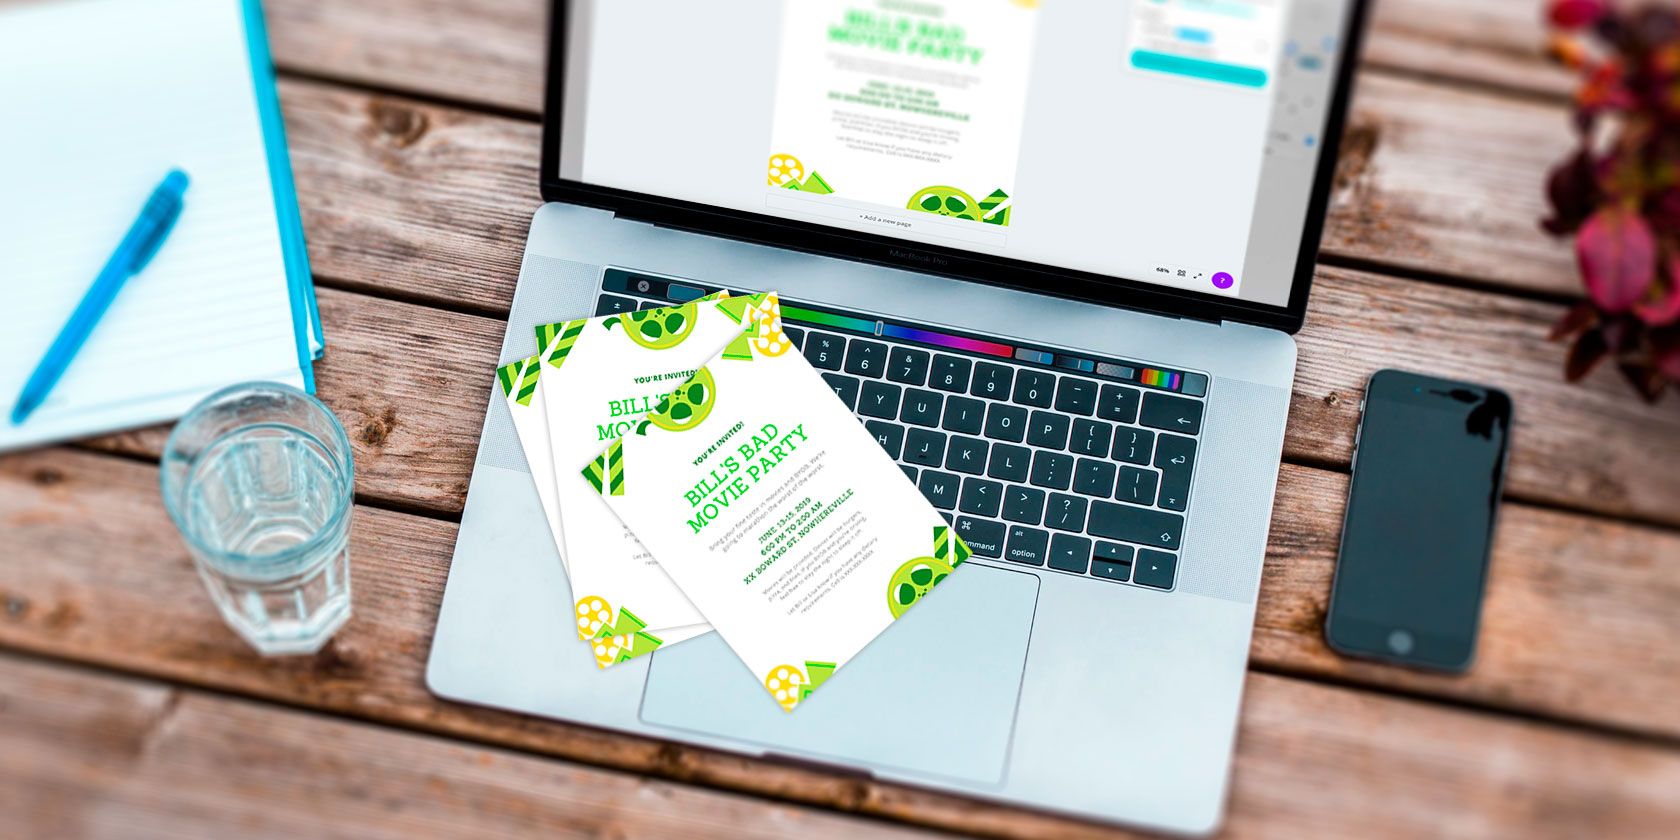
For this tutorial, let’s suppose we’re designing a flyer for an upcoming birthday party. The birthday recipient’s name is Bill, and the theme of Bill’s party is “bad movies”.
Because our event is film-related, I went to the Event Flyer section and found a template that looks like it has to do with movies. This particular template is a free design that I can modify, so let’s choose that.
Step 3: Change Your Flyer Text

The next thing you’ll want to do after you pick your template is input the information for your event. For posters I like to input the text first, because the information about my event will affect the rest of my design and how it’s laid out.
To change the text, simply click on each individual section so the text bounding box is highlighted. Erase the placeholder information and input your own.
You can change the style of font, color, size, and spacing by using the control panel in the top left-hand corner of your screen.
To learn more about this step, check out our tutorial on how to create a resume from scratch using Canva.
Step 4: Change the Color of Your Elements

Now that you’ve fixed your text, it’s time to adjust the visual elements on your page. It’s important to note that the steps we’ll be using here can be used on any sort of visual element in any of the other templates, regardless of the element’s shape.
To modify the elements, click on one. Its bounding box will pop up in faint gray lines, and you can see which one we’re referencing here by the additional red highlight around it.
In the top left-hand corner of your workspace, you’ll see a new set of tools—Color, Crop, and Flip.
Let’s change the color.

To change the color, click on one of the color boxes that corresponds with the color that you see in the element. In this case, I clicked on the medium blue.
When you click on the individual color swatch, your Color panel will show up. You can pick a default color from there.
Since this party is about bad movies and off-green colors can convey a feeling of “queasiness”, let’s go with a lime green shade to get across that effect.

If you don’t like any of the default colors that are currently available, you can also pick a custom color.
To pick a custom color, click on the + button in your Color panel, highlighted here in red. It will bring up your color picker and you can add a custom color from there.
Repeat this step until all your elements have been adjusted to your preference.
Step 5: Text Color

Now that you’ve changed the color of the elements you might have a better idea about the overall mood or tone you’re going for in your flyer.
If you haven’t changed the color of your text yet, or if you don’t like the colors you picked before, you can simply click on each individual text box to fix it. Then click the Text color option seen here at the top of the screen.
There is no need to highlight the text to change its color, by the way. Just make sure you have the entire text box active—not the cursor to type new text. Canva will read the box as one unit and change all of the text accordingly.
Step 6: Move Your Elements

Lastly, you might decide that you don’t like your visual elements in their current position. Maybe it just looks too uniform, or there are too many pictures and you want to switch things up.
To move your elements, click on the element you want to adjust. Then click and drag it across the page to the position you want.
If you want to get rid of the element entirely, select it so that the bounding box appears. Then hit delete on your keyboard.

If you accidentally delete an element, or decide that you don’t like the look of your poster once it’s gone, this is an easy fix.
Just go to the top left-hand corner of your workspace. Along your blue navigation bar you’ll see one (or two) curved arrows, depending on the steps you’ve taken so far in your document.
The left-facing arrow is the undo button. The right-facing arrow is the redo button.
Click on the undo button to get to a previous stage in your design.
Step 7: Export Your Design for Print

Now that your flyer is complete, do one final check to make sure everything is spelled correctly and all the elements are where they should be.
After you’re done, click on the downwards-facing arrow in the top right-hand corner of your screen. When you do, Canva will show you a couple different options for downloadable file types, along with the ability to add crop marks and bleed.
You can also check out the option to order prints with Canva directly.
PDF Print is recommended for print files. Once PDF Print is selected, click on the blue Download button. It will prepare your template.

While the file is being prepared, a screen will pop up that says Preparing your design…
During this stage, you have the chance to cancel your download. If everything’s good, however, just let it run and it will prompt you to save the file to your device once it’s finished.
Et voila! You’re done.
You Can Do a Lot More With Canva
Creating a flyer takes a lot less work than a resume or cover letter. And if you’re planning a party with your friends, there’s also a chance to do something really fun with the design. By following the tutorial above you should now know how to make a flyer using Canva.
Are you looking for guidance on what else you can use Canva for? Here are some of the things you can create using Canva.
Read the full article: How to Make a Flyer for Any Occasion Using Canva
Read Full Article
No comments:
Post a Comment