By default, Adobe Illustrator saves files in the AI format. This is ideal for when you’re working on projects, or for saving a master copy of your work.
But when the times comes to print or share the finished product, post it online, or import it into other programs, you will need to save it into a different format.
Adobe Illustrator gives you lots of options for this. The right one to choose depends on how you want to use your resulting image. Let’s take a look at the best formats to use and how to use them.
Saving Artboards in Adobe Illustrator
Before we look at how to save files in specific formats, it’s important to know how Illustrator handles artboards, and how to save artboards as separate files.
Artboards are like different pages within an Illustrator file. They can be combined into a single image, but you can also save them out separately.
Most of the ways to save Illustrator files let you choose how you want to handle artboards, and this affects what your final, exported image will look like. In most cases, you choose what to do through an option in the Export screen.
Here’s what you should do:
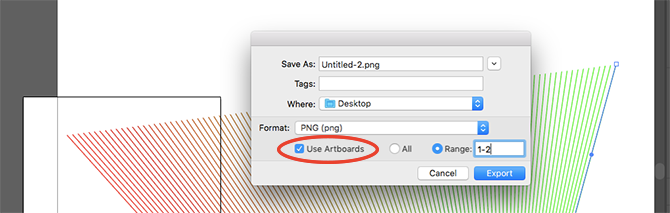
- If you want to save multiple artboards as separate files, check the Use Artboards box. Then select either All to save all the artboards, or enter a Range (such as 2-4) to specify which artboards to save.
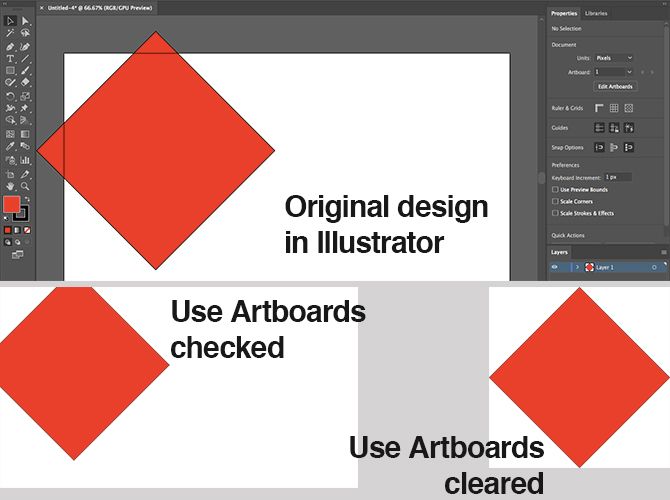
- When you have objects placed outside of an artboard (like if it’s overlapping the edge), check the Use Artboards box. This will ensure that your final image only contains what’s inside the artboard, and that the rest is cropped out.
- If all your artwork is within the artboard, and you only have one of them, clear the Use Artboards box. This will produce an image that is cropped to the bounds of the objects within in, with all white space removed. This is especially handy for outputting square or rectangular shaped objects.
Saving High Resolution JPEGs in Adobe Illustrator
For an illustration, infographic, or anything that needs to be printed like a business card, the best option is to output it as a high resolution JPEG.
Ideally, you should design your artwork at roughly the size at which you want to output it. Although Illustrator images can be resized without any loss of quality, you’ll find that the sizing between objects—and especially the kerning in text—needs to be tighter at larger sizes than smaller sizes.
If you haven’t previously worked in this way, create a new document, paste in your artwork and tweak it to taste. You’re now ready to save your high res JPEG.
- Go to File > Export > Export As. Type in a file name and set Format to JPEG.
- Set how you want to save your artboards, then hit Export to continue.
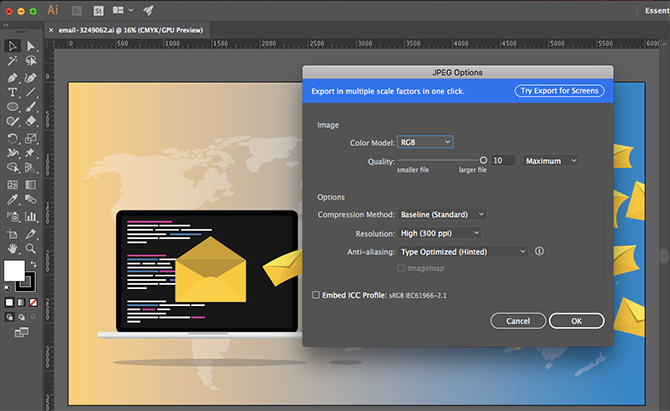
- In the JPEG Options screen change the Color Model if you need to, and choose a quality.
- Under Options, set the output resolution. Screen (72dpi) will produce a file the same size as your original document and should be okay for web use. Choose High (300dpi) for a high res image. This will be good enough for printing.
- Click OK to save the file.
Saving Adobe Illustrator Files as PNG
When you need to save an image like a logo or icon for use on the web, especially if it has a transparent background, then you might want to save it as a PNG file.
In order to support standard and high resolution displays you should export your file at different sizes. You can do this automatically.
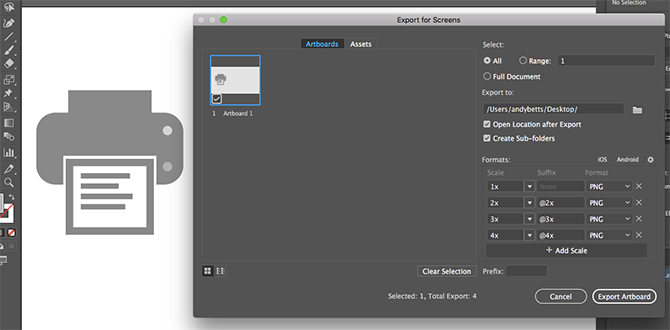
- Go to File > Export > Export for Screens.
- Select the Artboards tab. If there’s more than one artboard in your image, choose the ones you want to output.
- Under Formats, set Format to PNG and Scale to 1x.
- Click Add Scale. This will create the settings for a second image, so set the Scale option to a new relative size. 3x, for example, will output an image three times taller and wider than the original.
- Add more sizes if you need them.
- Click Export Artboard to save your images.
Saving Adobe Illustrator Files as SVG
A better, more modern way to export graphics like icons and logos for the web is by using the SVG format. Short for Scalable Vector Graphics, SVG is actually an XML-based markup language.
While you can output files that you can link to in your web page, you can also save the image as a piece of code that you can paste directly into your HTML file. You can then edit this using CSS. It’s a very efficient way of adding effects and animations to your images.
There are other benefits: the images are lightweight, and because they’re vectors you can resize them easily. There’s no need to output multiple sized images for different screen resolutions.
There are a couple of ways to create an SVG. Using Save As creates a larger file for working on. To create a final image you can use in your projects use the Export option.
- Go to File > Export > Export As.
- Set the Format to SVG and click Export.
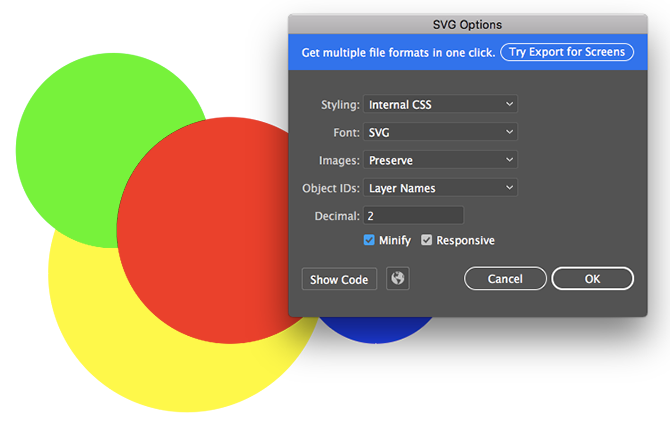
- Set Styling to Internal CSS. This places all the styling information in a <style> block that can be easily changed with CSS.
- For Font choose SVG to keep the text selectable. Only choose Outlines if you’re using an obscure, custom font. Leave Images on Preserve.
- Make sure Minify and Responsive are both checked for maximum performance and compatibility.
- Now click Show Code to open the code in a text editor. You can copy and paste this into your HTML file. Or click OK to output the image as an SVG file.
Saving Artboards as PDFs in Adobe Illustrator
The simplest way to save an Illustrator file as a PDF is through the Save As option. However, if you are using more than one artboard this will combine them all into a multi-page PDF.
There’s a simple trick to save artboards as separate PDF files:
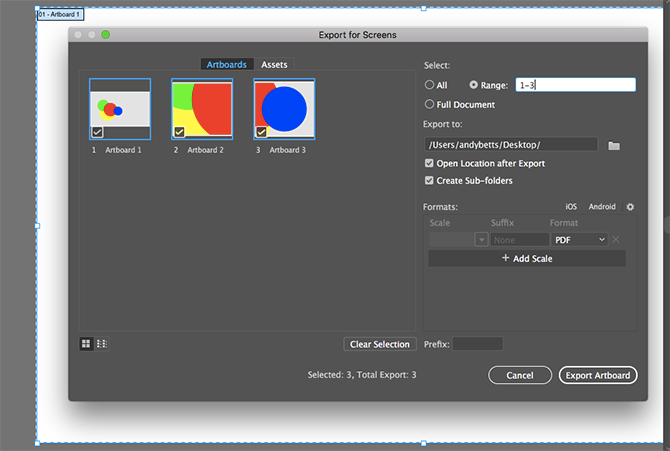
- Go to Export > Save for Screens.
- In the dialog box that opens, click the Artboards tab and select those that you want to save.
- In the right hand column set Format to PDF, then hit Export Artboards. It may take a few seconds to output large or complex files.
- When done your files will, by default, saved in their own separate sub-folder.
Saving Objects From an Adobe Illustrator Image
Sometimes you might need to save or export only selected objects from a larger piece of art. For instance, if you have designed a logo you may want to save the text or the symbol in its own individual file.
You can do this by turning the objects into Assets.
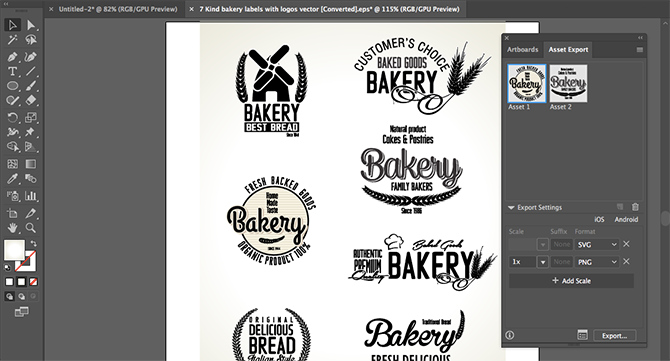
- Go to Window > Asset Export.
- Choose the Selection Tool from the Toolbar, or hit V on your keyboard. Now drag the objects you want to save onto the Asset Export panel.
- Now select the Asset. Hold Ctrl or Cmd to select more than one.
- Under Export Settings choose a Format. You can select PNG, Jpeg, SVG, or PDF.
- If you’re saving as a PNG or Jpeg you can export at multiple sizes. Set Scale to 1x, then click Add Scale and the set Scale to, for example, 2x. You can also use this option to export the asset in different formats.
- Click Export and choose a location to save your new files.
How to Use Adobe Illustrator Files in Other Apps
There are other options, too, that allow you to use your Illustrator file in other programs. Photoshop can open AI files directly, but only as a flat, uneditable image. Use the Export As option instead to save the file in the PSD format. This retains all the separate layers when you open it in Photoshop.
You can use AI files in other Adobe apps and products like InDesign, where it won’t be editable but will keep things like its transparent background.
For most non-Adobe apps, you will most likely need to save the file in the SVG format (using the Save As command this time). Check out our guide to opening AI files without Adobe Illustrator for more details.
Read the full article: How to Save Adobe Illustrator Files in Other Formats: JPEG, PNG, SVG, Etc.
Read Full Article
No comments:
Post a Comment