Are you concerned about RAM usage on your computer? Seeing messages that your computer is low on memory? Don’t fear—we’re here to help.
Let’s take a look at some practical steps to free up RAM on your PC. You’ll be back to a smooth experience in no time.
What Is RAM?
Before we dive into RAM usage tips, we should briefly describe what RAM does in case you’re not familiar.
RAM stands for Random Access Memory. It’s a short-term storage that holds programs currently running on your computer.
The more RAM that’s in your machine, the more programs you can run at once without negatively affecting performance. When your computer runs low on RAM, it uses a part of the hard drive called the page file that acts as “pretend RAM.” This is much slower than actual RAM, which is why you notice slowdowns.
Because RAM is volatile, you’ll lose its contents when your computer shuts off. Anything you want to keep must save to a hard drive or other permanent storage.
Check out our quick guide to RAM for more background info.
1. Restart Your PC
This is a tip you’re probably familiar with, but it’s popular for a reason.
Restarting your PC will also clear memory and reset all running programs. While this obviously won’t increase your total RAM, it will clean up processes running in the background that could be eating up RAM.
You should restart your computer regularly to keep it from getting bogged down, especially if you use it all the time.
2. Check RAM Usage
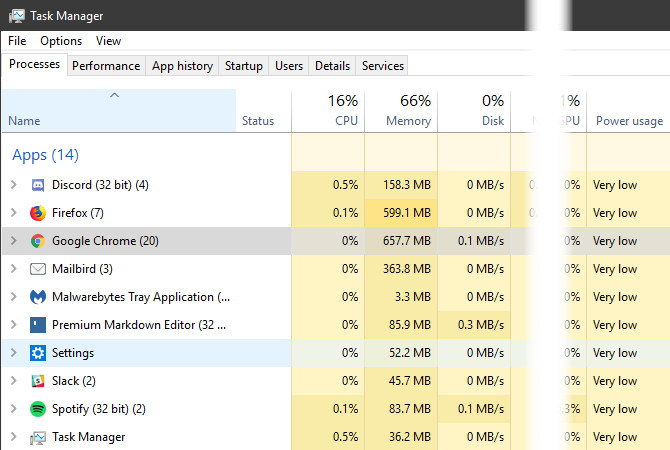
You don’t have to guess what’s using your RAM; Windows provides tools to show you. To get started, open the Task Manager by searching for it in the Start Menu, or use the Ctrl + Shift + Esc shortcut.
Click More details to expand to the full utility if needed. Then on the Processes tab, click the Memory header to sort from most to least RAM usage. Keep the apps you see here in mind, as we’ll discuss more on them later.
For more information, switch to the Performance tab. On the Memory section, you’ll see a chart of your RAM usage over time. Click Open Resource Monitor at the bottom and you can get more information.
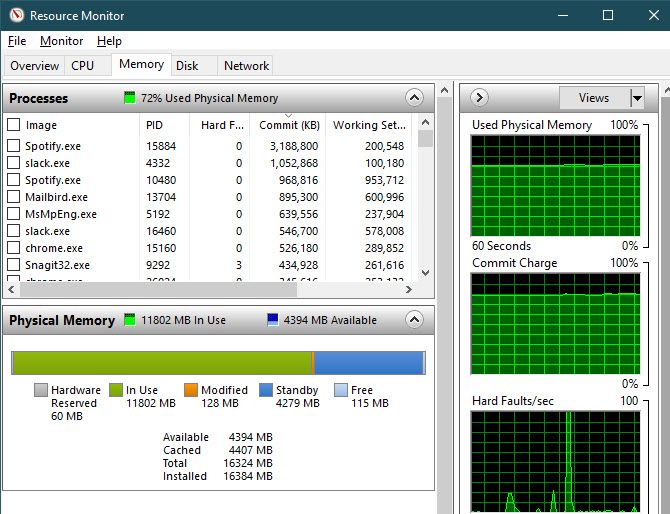
The chart at the bottom will show you how much RAM you have free. Sort by Commit (KB) on the top list to see which programs use the most RAM. If you suspect you have a deep problem based on what you see here, see the complete guide to troubleshooting memory leaks.
3. Uninstall or Disable Software
Now that you’ve seen what apps use the most RAM on your system, think about whether you really use them.
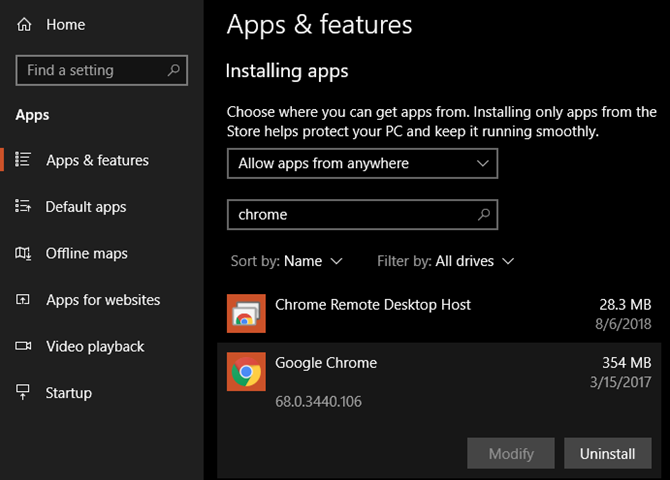
Apps you haven’t opened in months are just wasting resources on your computer, so you should remove them. Do so by navigating to Settings > Apps and clicking Uninstall on any app you want to remove.
If you don’t want to uninstall an app because you use it sometimes, you can instead prevent it from running at startup. Many apps set themselves to automatically run every time you log in, which is inefficient if you rarely use them.
Take a look at our guide to startup programs for help.
4. Use Lighter Apps and Manage Programs

What if you really need to cut down on RAM usage, but the apps hogging RAM are necessary to your workflow? You can work with this in two ways.
First, try using lighter app alternatives when you can. If your computer struggles when you have Photoshop open, try using a smaller app like Paint.NET for minor edits. Only use Photoshop when you’re fully dedicated to working on a project.
Second, pay closer attention to the programs you have open. Close any software that you’re not actively working with. Bookmark open browser tabs that you want to read later, then close them to free up RAM. Keeping a tighter leash on what’s open will help free up RAM.
Google Chrome is in its own category here, as it’s notorious for gobbling RAM. See how to control Chrome’s memory usage for tips.
5. Scan for Malware
It’s worth checking for malware on your PC. Rogue software stealing resources will obviously suck up your available RAM.
We recommend running a scan with Malwarebytes. Hopefully it won’t find anything, but at least you can rule out the possibility.
6. Adjust Virtual Memory
We mentioned the paging file earlier. If you see error messages that your system is low on virtual memory, you can increase this and hopefully keep performance stable.
To do so, search for the Control Panel on the Start Menu to open it. Switch the Category view in the top-right to Small icons (if needed) and choose System. On the left side, click Advanced system settings, which will open a new window.
Here, on the Advanced tab, click Settings under Performance. Switch to the Advanced tab once again and click the Change button.
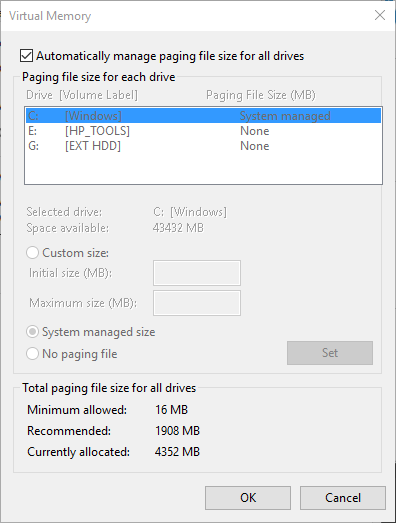
Now you’ll see the paging file size for your main drive. In most cases, you can leave the Automatically manage box checked and let Windows take care of it. However, to resolve problems, you may need to uncheck this and set the Initial size and Maximum size to higher values.
See our guide to virtual memory for more help.
7. Try ReadyBoost
If your computer still has an older mechanical hard disk drive (HDD) in it, you can try a lesser-known Windows feature called ReadyBoost to increase RAM. This allows you to plug in a flash drive or SD card that Windows effectively treats as extra RAM.
While it sounds great, this feature offers limited use today. If your computer has an SSD, ReadyBoost won’t do anything. This is because an SSD is faster than a flash drive.
Plus, since computers have more RAM installed by default now, you won’t see as much gain from ReadyBoost as you would on an anemic system from a decade ago. The “pretend RAM” from ReadyBoost doesn’t offer the same performance gains as actually adding more RAM.
8. Install More RAM
If you’re really low on RAM or want to run more programs at once, there’s really no way around it: you need to add some more RAM to your machine. While it’s not cheap, adding RAM will grant much-improved performance if your computer hasn’t had much until now.
On a desktop, this is a pretty simple upgrade. But due to the confined space on a laptop, it may be difficult or even impossible. You’ll also need to make sure you buy RAM that’s compatible with your system. So ask yourself some important questions before making any upgrade, and decide how much RAM you need.
What About RAM Cleaners?
You’ve likely seen RAM cleaning utilities that promise to help you boost your RAM in various ways. While these sound great, we recommend avoiding them.
Have a look at our coverage of CleanMem, one such app, for the reasons why. In summary, RAM boosters are placebos at best, as they “free up” RAM by taking it from programs that probably need it.
Memory management is a complex computing issue. The developers of Windows, who are experts in their field, have a much better grasp on how to do this than some random developer who publishes a RAM cleaner.
RAM Is Important, But Don’t Neglect Other Upgrades
We’ve taken a look at several ways to manage the RAM on your computer. Ultimately, adding more physical RAM to your machine is the best solution for RAM-related issues. Walking through the above steps will help you decide if this is necessary, though.
Amongst all this talk of RAM, don’t forget that other PC upgrades are important too. Find out what upgrades will improve your computer’s performance the most.
Read the full article: 8 Ways to Clear Memory and Increase RAM on Your Windows Computer
Read Full Article
No comments:
Post a Comment