
Activating Do Not Disturb mode is not the only tweak that can save you from distractions while working on your Mac. You can make a few other changes to help yourself focus on the task at hand if single-tasking is your goal.
We recommend starting off with the five tweaks outlined below. Feel free to pick the ones that will work for you and don’t worry about the rest.
1. Enable Single Application Mode
Going full-screen or maximizing the active window will hide the distracting apps behind it. Instead of doing that, you can hide all apps except the current one with the keyboard shortcut Option + Cmd + H. If you want to minimize all windows of the active app, try the shortcut Option + Cmd + M.
But wouldn’t it be painless if you could minimize all but the current app window automatically? You can do that, too, with the single application mode built into macOS.
To enable this mode, open the Terminal app, paste in the following bit of code, and hit Enter:
defaults write com.apple.dock single-app -bool true; killall Dock
(To reverse the change, use the same code above, but replace true with false in the snippet.)
Now try switching apps. You’ll see that the app you switch to is the only app visible.
To try fading out the windows in the background instead of hiding them, try a dimmer app like HazeOver ($4). Install Hocus Focus (Free) if you want to hide only inactive app windows.
Speaking of hiding, you can hide pretty much anything on your Mac (not just apps and windows) for a cleaner, less distracting interface.
2. Switch to Grayscale Mode
Overlaying your screen with a blanket of gray can take all the fun out of using your Mac, unless you actually like the new retro look.
Dampening the impact of all the colorful elements on the screen might be just what you need to keep your focus completely on your work. You can achieve this with a switch to your Mac’s grayscale mode via System Preferences > Accessibility > Display. There, all you need to do is select the Use grayscale checkbox.
3. Enable Parental Controls
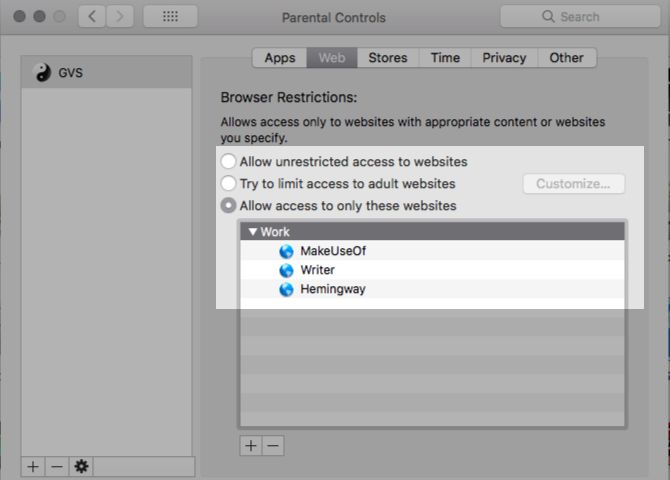
You don’t have to be a parent to take advantage of your Mac’s Parental Controls feature. It can help you filter out distracting websites like Facebook, limit screen time, and restrict access to non-work apps.
To enable Parental Controls, first visit System Preferences > Parental Controls. Next, select the user account you want to restrict and click on the Enable Parental Controls button that appears on the right.
You’ll then see a bunch of tabs with various settings to control macOS behavior for the selected account. The settings are easy to understand and you’ll have no trouble tweaking them to set up the perfect work environment.
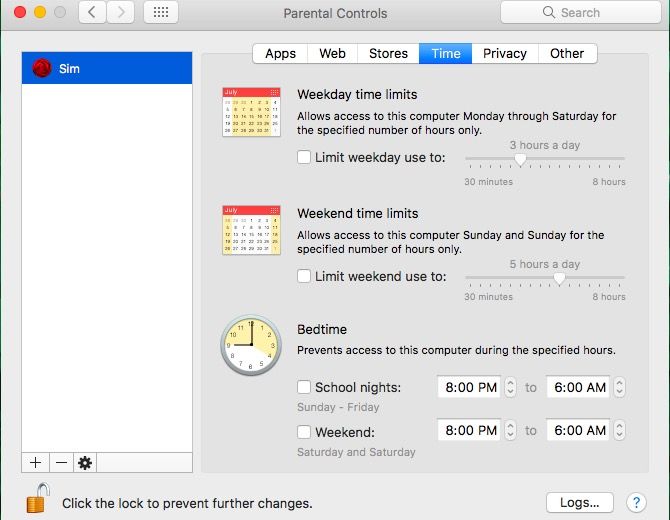
Parental Controls work only with a non-administrative user account. We recommend creating a dedicated Standard account that you can switch to for work.
Don’t want to fiddle with Parental Controls? You can still block websites and desktop apps from your primary account with Focus ($20), which comes with a free trial. The app sits in the menu bar and lets you trigger app and website blocking with a couple of clicks. Focus also includes a Pomodoro timer and inspiring quotes, among other features.
4. Use Safari Reader Everywhere
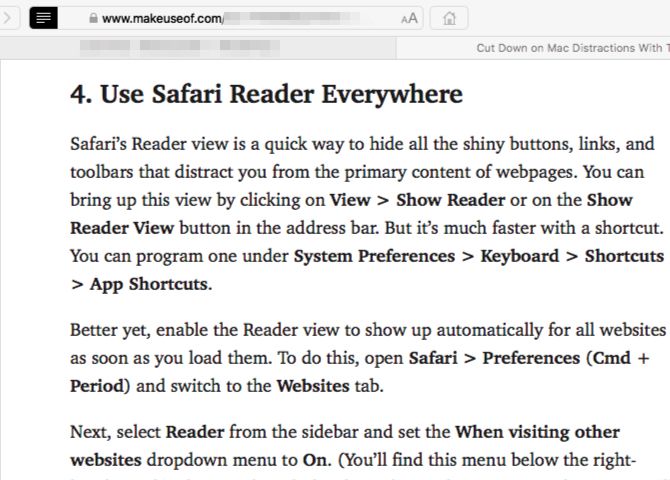
Safari’s Reader view is a quick way to hide all the shiny buttons, links, and toolbars that distract you from the primary content of web pages. You can bring up this view by clicking on View > Show Reader or on the Show Reader View button in the address bar. But it’s much faster with a shortcut. You can program one under System Preferences > Keyboard > Shortcuts > App Shortcuts.
Better yet, enable the Reader view to show up automatically for all websites as soon as you load them. To do this, open Safari > Preferences (Cmd + Comma) and switch to the Websites tab.
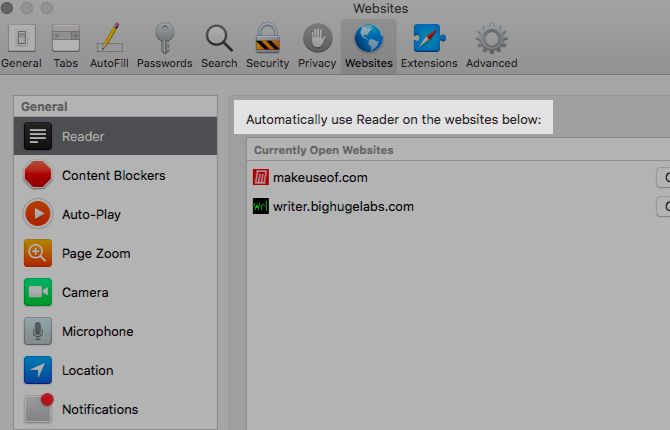
Next, select Reader from the sidebar and set the When visiting other websites dropdown menu to On. (You’ll find this menu below the right-hand panel.)
This tweak excludes the websites that are currently open. You’ll have to enable Reader on them using their respective dropdown menu from the same settings section as above.
5. Create a “Panic Button” App to Quit All Apps at Once
Remember those extensions that let you hide all your browser tabs in a single click? It would be nice to have a similar panic button to get rid of everything on your Mac’s screen and start from scratch. Thankfully, you can create one yourself with Automator.
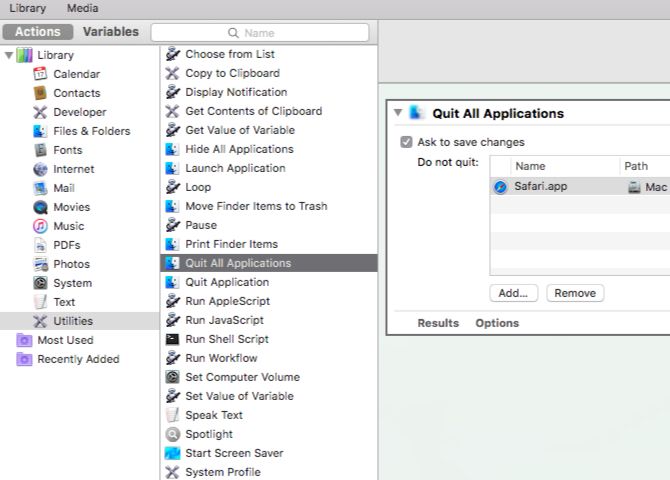
Open the Automator app and click on the New Document button within the Finder dialog that shows up. Now, select Application as your document type.
Next, from the Actions library in the sidebar, click on Utilities. From the corresponding list of actions, drag Quit All Applications to the blank right-hand panel, which is the workflow editor.
Here, you’ll see a Do not quit option where you can list specific applications that you want your new app to leave alone. Use the Add button to add them one by one.
(When you use Automator in future, you’ll get a prompt to save changes in apps where you might lose unsaved work. The Ask to save changes checkbox in the workflow editor takes care of this.)
Click on File > Save to save the app to a location of your choice. Once you have saved the app, drag its icon out to the Dock. Click on the icon whenever you want to sit down to work and start with a clean screen.
Tune Out the Noise
Self-discipline is the best productivity hack there is and no amount of device hacking can replace it. But the latter can certainly keep digital temptations out of your way. Discover it for yourself with the macOS tweaks that we have listed above.
And while you’re at it, how about setting up your Mac for a minimalist experience to reduce distractions further?
Read the full article: 5 Simple macOS Tweaks to Help You Stay Focused
Read Full Article
No comments:
Post a Comment